Werbung
Verfügbare Sprachen
Verfügbare Sprachen
EIBENSTOCK
Vakuum Technik
Originalbetriebsanleitung........................2 - 10
D
Original Instructions.............................11 - 19
GB
Notice originale.....................................20 - 28
F
Oorspronkelijke gebruiksaanwijzing.....29 - 37
NL
Dokumentacja techniczno-ruchowa.....38 - 46
PL
Istruzioni originali..................................47 - 56
IT
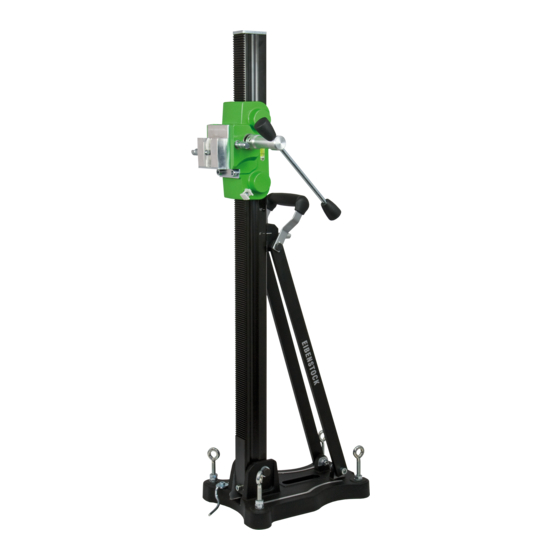
Diamantbohrständer / Diamond Drill Rig / Support de
perceuse
diamentowej /Supporto a colonna per carotaggio
Diamant Boorinstallatie / Statyw wiertnicy
BST 182 V/S
Werbung
Inhaltsverzeichnis

Verwandte Anleitungen für Eibenstock BST 182 V/S


Inhaltszusammenfassung für Eibenstock BST 182 V/S
- Seite 1 Original Instructions…….......11 - 19 Notice originale........20 - 28 Oorspronkelijke gebruiksaanwijzing…..29 - 37 Dokumentacja techniczno-ruchowa…..38 - 46 Istruzioni originali........47 - 56 Diamantbohrständer / Diamond Drill Rig / Support de perceuse Diamant Boorinstallatie / Statyw wiertnicy diamentowej /Supporto a colonna per carotaggio BST 182 V/S...
- Seite 3 DEUTSCH Wichtige Sicherheitshinweise Warnzeichen Warnung vor allgemeiner Gefahr Warnung vor gefährlicher elektrischer Spannung Warnung vor heißer Oberfläche Maschine, Bohrkrone und Bohrständer sind schwer – Vorsicht Quetschgefahr Reiß- bzw. Schneidgefahr Zu Ihrem Schutz sollten Sie folgende Schutzmaßnahmen treffen Gehörschutz benutzen Augenschutz benutzen Schutzhelm benutzen Schutzhandschuhe benutzen Schutzschuhe benutzen...
- Seite 4 Lieferumfang Diamantbohrständer mit Vorschubhebel, Innensechskantschlüssel und Bedienungsanleitung im Karton. Bestimmungsgemäßer Gebrauch Der Diamantbohrständer BST 182 V/S ist für Diamantkernbohrgeräte mit Befestigung mittels Schnellspannprisma (z.B.: ETN 162/3 oder EBM 182/3) konzipiert. Der maximale Bohrdurchmesser darf 202 mm nicht überschreiten! Bei Bohrungen nach oben ist generell eine Wasserauffangvorrichtung zu verwenden.
- Seite 5 Einsatz Überprüfen Sie nach jeder Neueinstellung den festen Sitz der Schrauben, damit sicher mit dem Bohrständer gearbeitet werden kann. Anbringung des Vorschubhebels Klick ■ Bringen Sie den Vorschubhebel (1) in Abhängigkeit von der auszuführenden Arbeit links oder rechts am Schlitten (2) an. ■...
- Seite 6 Ist das nicht der Fall, kann diese Art der Anbringung nicht verwendet werden. Für die Vakuum-Anbringung benötigen Sie eine Vakuumpumpe, den Vakuumschlauch sowie das Vakuumset BST 182 V/S (siehe Abb.). Diese sind auf Anfrage erhältlich. Montage Vakuumset:...
- Seite 7 Beachten Sie bitte, dass die Nivellierschrauben so eingestellt sind, dass sie nicht aus der Unterseite des Bohrständerfußes herausragen, da sonst das Vakuum beeinflusst wird und der Ständer sich vom Untergrund lösen kann. Achten Sie bei der Vakuumbefestigung auf ein ausreichend hohes Vakuum (min. –...
- Seite 8 Befestigung der Kernbohrmaschine Tragen Sie Schutzhandschuhe! Vorsicht beim Einsetzen der Maschine, Quetschgefahr! Montage der Kernbohrmaschine Der Maschinenhalter hat eine spezielle Schnellspannaufnahme für die Maschine Dabei wird Prisma Getriebegehäuse Maschine Schwalbenschwanzaufnahme des Maschinenhalters von oben eingesetzt und durch den seitlichen Feststeller mit Hilfe des Drehkreuzes fest verspannt. Fahren Maschinenhalter Bohrständers so weit nach oben, bis dieser in...
- Seite 9 Bohren Bohren Sie am Anfang sehr langsam, da die Krone nur mit einem Bruchteil ihrer Schnittfläche ins Material greift. Wenn Sie zu schnell oder mit einem zu hohen Druck bohren kann die Krone verlaufen. Schräg bohren Entfernen Sie die Schraube (1), welche die Säule bei 90°...
- Seite 10 Pflege und Wartung Halten Sie den Ständer immer sauber, insbesondere die Bohrsäule mit der Verzahnung und den 4 Gleitkugeln im Maschinenhalter. Um die Leichtgängigkeit der Ritzelwelle zu gewährleisten ist diese etwas zu ölen. Für den einwandfreien Betrieb des Bohrständers müssen die Gleitkugeln des Maschinenhalters spielfrei an der Bohrsäule entlang gleiten.
-
Seite 11: Konformitätserklärung
Schäden, die durch Material- oder Herstellfehler entstanden sind, werden unentgeltlich durch Reparatur oder Ersatzlieferung beseitigt. Beanstandungen können nur anerkannt werden, wenn das Gerät unzerlegt an den Lieferer oder eine Eibenstock-Vertragswerkstatt gesandt wird. Konformitätserklärung Es ist erforderlich, dass die in diesem Bohrständer betriebene Maschine ( z.B.: ETN 162/3 oder EBM 182/3) -
Seite 12: Important Instructions
ENGLISH Important Instructions Warning symbols: Warning: general precaution Warning: dangerous voltage Warning: hot surface Tool, drill bit and rig are heavy – Caution: risk of squashing Danger of tearing or cutting During work you should wear goggles, ear protectors, protective gloves, and sturdy work clothes! Wear ear protection Wear safety goggles... - Seite 13 Application for indented purpose The diamond drill rig BST 182 V/S is made for diamond core drills with a special quick connection fixture (e.g.: ETN 162/3 or EBM 182/3). The max. drilling diameter must not exceed 202 mm.
- Seite 14 After each readjustment always check that the screws are tightly fixed so that safe operating of the drill rig is possible. Mounting the turnstile Klick ■ Mount the turnstile (1) on the right or left side of the carriage (2) depending on the work to be performed.
- Seite 15 If this is not the case, this kind of mounting can’t be used. For the vacuum mounting you need a vacuum pump, a vacuum hoses (see illustration) and the vacuum set BST 182 V/S (see fig.). These items are available on request. Fitting the vacuum set: Position the coupling plate of the vacuum set on the drill rig base as shown.
- Seite 16 Please ensure that the levelling screw is adjusted so that it does not protrude from the bottom of the base, since otherwise the vacuum will be affected and the rig may come loose from the mounting surface. When connecting the vacuum onto a sufficiently powerful vacuum (min. – 0.8 bar).
- Seite 17 Fixing the core drill motor Wear protective gloves! Caution! When mounting the machine, risk of squashing. Mounting the core drill machine The machine holder has a special quick connection fixture for the machine Thereby the prism on the gear box of the machine will be insert from above in the dovetail fixture of the machine holder and braced firmly by the clamp screw on the side by means of the turnstile.
- Seite 18 Drilling At the beginning, drill very slowly, since the drill bit does only starts cutting with a fraction of the cut surface in the material. If you drill too fast or with too much pressure, the drill bit could get jammed. Angled drilling Remove the screw (1), which locks the pillar at 90°.
-
Seite 19: Troubleshooting
Care and maintenance Always keep the drill rig clean, especially the column with the toothing and the 4 sliding balls in the machine holder. In order to allow the free movement of the pinion shaft, it should be slightly lubricated. In order to achieve a good performance of the drill rig, the 4 sliding balls in the machine holder have to move along the column without slackness. - Seite 20 Complaints will be accepted only if the tool is returned in non-dismantled condition to the manufacturer or an authorized Eibenstock service centre. Declaration of conformity It is necessary that the machine (e.g.: ETN 162/3 or EBM 182/3) used in this drill rig comply with the requirements which are described in the specifications of the drill rig (f.
-
Seite 21: Instruction D'utilisation
FRANÇAIS Instruction d’utilisation Symboles d’avertissement Attention : Règles de sécurité Attention : Tension dangereuse Attention : Surface chaude L’outil, la couronne et le support sont lourds Attention : Risque d’écrasement Danger de déchirure ou de coupure Pour votre protection quelques mesures de sécurité doivent être prises : Utilisez un protecteur anti-bruit Utilisez des lunettes de protection Utilisez un casque... - Seite 22 Support de carottage avec manette, clé hexagonale, et instruction d’utilisation dans le carton. Utilisation prescrite Cet appareil de forage diamant BST 182 V/S est conçu pour des mèches à couronne annulaire avec diamants avec un porte-outil à changement rapide spécial (par ex.: ETN 162/3 ou EBM 182/3).
- Seite 23 Opérations Vérifiez après chaque utilisation que les vis soient fixées correctement pour une utilisation en toute sécurité. Montage de la manette Klick ■ Montez la manette (1) au chariot (2) du coté gauche ou du coté droit en fonction du travail à exécuter ■...
- Seite 24 être appliqué. Pour la fixation à vide vous avez besoin d’une pompe à vide ainsi d’une flexible résistant au vide et du kit de mise sous vide BST 182 V/S (voir photo). Cet accessoire est disponible sur demande.
- Seite 25 Veuillez vous assurer que la vis de nivelage est ajustée de sorte qu’elle ne dépasse pas du bas de la base, au cas contraire la mise sous vide sera compromise et l’installation pourrait se détacher de la surface de montage. Lorsque vous branchez une pompe à...
- Seite 26 Fixation de la carotteuse Portez des gants de protection ! Attention ! Lors du montage de la machine, il existe un risque d'écrasement. Montage du trépan carottier Le support de la machine a un porte-outil à changement rapide spécial pour la machine.
- Seite 27 Perçage Au début, percez très doucement, car le foret ne commence à couper qu'une fraction de la surface coupée dans le matériau. Si vous percez trop vite ou avec trop de pression, le foret pourrait se bloquer. Perçage oblique: Retirez la vis (1), qui maintient le pilier à 90°. Desserrez le boulon de montage latéral (2) sur la plaque de base.
- Seite 28 Soin et entretien Gardez toujours l'appareil de forage propre, en particulier la colonne dentée et les 4 billes coulissantes dans le support de la machine. Afin de permettre le mouvement libre de l'arbre-pinion, il doit être légèrement graissé. Afin d'obtenir une bonne performance de l'appareil de forage, les 4 billes coulissantes dans le support de la machine doivent se déplacer le long de la colonne sans jeu.
- Seite 29 éliminés gratuitement par la réparation ou une livraison de remplacement. Les réclamations ne peuvent être acceptées que lorsque l’appareil est envoyé non démontée au fournisseur ou au service de Eibenstock. Certificat de Conformité Il est nécessaire que la machine (par ex. : ETN 162/3 or EBM 182/3) utilisée dans cet appareil de forage respecte les exigences décrites dans les spécifications de...
- Seite 30 NEDERLANDS Belangrijke richtlijnen Waarschuwingssymbolen Opgelet: Veiligheidsregels Opgelet: Gevaarlijk voltage Opgelet: Heet oppervlak Het gereedschap, de kernboor en de steun zijn zwaar Opgelet: Risico op verpletterd worden Gevaar op scheurwonden en snijwonden Draag tijdens uw werk een veiligheidsbril, oorbescherming, beschermende handschoenen en stevige werkkleding! Draag een geluidwerende helm Draag een veiligheidsbril Draag een veiligheidshelm...
- Seite 31 Rubberen dichting ED 202 voor WR 202 3586K Onderdrukpomp VP04 09204 Onderdrukslang 35855 Vacuümset BST 182 V/S 3585F Leveringsomvang Diamant boorinstallatie, basispakking, draaihendel en gebruiksaanwijzingen in een kartonnen doos. Toepassing voor Bestemd Doeleinde De diamant boorinstallatie BST 182 VS is ontwikkeld voor diamantkern boorkoppen met een speciale snelwisseling bevestiging (b.v.: ETN 162/3 or EBM...
- Seite 32 Gebruik Controleer na elke herafstelling altijd of de schroeven stevig zijn aangedraaid om een zo veilig mogelijk gebruik van de boorinstallatie te garanderen. Het draaihendel monteren Klick ■ Monteer het draaihendel (1) op de rechter –of linkerzijde van het drager (2) aan de hand van het te verrichten werk.
- Seite 33 Als dit niet het geval is, kan dit montagetype niet worden gebruikt. U hebt voor de onderdrukmontage een onderdrukpomp, en onderdrukslang nodig, sowie das Vakuumset BST 182 V/S (zie afbeelding). Deze onderdelen zijn op verzoek verkrijgbaar. De vacuümset monteren: Positioneer de montageplaat van de vacuümset op de boor zoals getoond in...
- Seite 34 Zorg ervoor dat de stelschroef zodanig wordt ingesteld dat deze niet uitsteekt aan de onderkant van de voet; dit om te voorkomen dat het vacuüm wordt beïnvloed en de installatie los kan komen van de montageplaat. Bij het aansluiten van het vacuüm op een voldoende krachtig vacuüm (min. – 0,8 bar), controleren of de afdichtringen niet zijn vesleten.
- Seite 35 De Kernboormotor bevestigen Draag werkhandschoenen! Opgelet! Uw handen lopen tijdens montage van de machine het risico verpletterd te raken. De kernboormachine monteren De machinehouder heeft een snelbevestiging voor de machine. Hierbij wordt de prisma op de versnellingsbak van de machine van boven in de zwaluwstaartbevestiging van de machinehouder gestoken en vastgezet met een laterale klemhendel.
- Seite 36 Boren Boor in het begin zeer traag, omdat de boorkop slechts begint te boren met een kleine fractie van het geboorde oppervlak in het materiaal. Als u te snel of met teveel druk boort, kan de boorkop klem komen te zitten. Hellend boren Verwijder de schroef (1) die de pillaar op 90°...
-
Seite 37: Probleemoplossing
Zorg en Onderhoud Houd de boorinstallatie altijd schoon, voornamelijk de getande kolom en de 4 schuiflagers in de machinehouder.U dient de pignonas ietwat te smeren zodat het vrij kan bewegen. De 4 schuiflagers in de machinehouder moeten zonder speling langs de kolom schuiven om een goede prestatie van de boorinstallatie te garanderen. - Seite 38 Klachten kunnen alleen ingewilligd worden, als het apparaat, zonder gedemonteerd te zijn geweest, naar de leverancier of naar een Eibenstock-werkplaats gezonden wordt. Verklaring van Conformiteit De machine (d.w.z. ETN 162/3 P or EBM 182/3) gebruikt in deze boorinstallatie moet voldoen aan de vereisten beschreven in de specificaties van de boorinstallatie (d.w.z.
- Seite 39 Po polsku Ważne wskazówki bezpieczeństwa Ostrzeżenia przed ogólnym zagrożeniem Ostrzeżenie przed niebezpiecznym napięciem elektrycznym Ostrzeżenie przed gorącymi częściami maszyn Maszyna, wiertło i statyw są ciężkie, zachować ostrożność, zagrożenie zgniecenia Ryzyko rozdarcia, przecięcia Dla Waszej ochrony używać następujących środków ochrony osobistej: Założyć...
- Seite 40 Statyw wiertnicy rdzeniowej z pokrętłem krzyżowym posuwu, klucz imbusowy i dokumentacja techniczno-ruchowa w kartonie. Zastosowanie zgodne z przeznaczeniem Statyw wiertnicy diamentowej BST 182 V/S jest przeznaczony do zamocowania silnika przy pomocy pryzmatu do szybkiego montażu (np. ETN 162/3 lub EBM 182/3).
- Seite 41 Użycie pokrętła posuwu Po każdej nowej instalacji sprawdzić prawidłowość montażu połączeń śrubowych, dla bezpiecznej pracy statywu. Mocowanie pokrętła posuwu. W zależności od wykonywanej pracy nałożyć pokrętło posuwu (1) z lewej lub prawej strony na sanki prowadzące (2). Sprawdzić czy pokrętło (1) zostało prawidłowo osadzone Zamocowanie statywu...
- Seite 42 Nałożyć statyw. Wsunąć podkładkę (E) i nakrętkę skrzydełkową (F) na śrubę szybkiego mocowania (D). Zakręcić nakrętkę (F) kluczem SW 27. Przed i po zakręceniu nakrętki (F) należy odpowiednio dopasowywać 4 śruby nastawcze do podłoża. Bezwarunkowo sprawdzić, czy statyw jest mocno zamocowany. Mocowanie na podłodze przez próżnię...
- Seite 43 Połączyć statyw z pompą próżniową za pomocą węża próżniowego. Ustawić statyw w prawidłowej pozycji, otworzyć zawór kulowy na płytce połączeniowej i włączyć pompę próżniową. Pompa próżniowa musi stale włączona podczas całego procesu wiercenia i ustawiona, można było obserwować manometr. Sprawdzić czy statyw jest mocno zamocowany zanim rozpocznie się wiercenie! Do demontażu mocowania próżniowego, zamknąć...
- Seite 44 Zamocowanie silnika wiertnicy Zachować ostrożność przy użyciu maszyny, zagrożenie zgnieceniem! Zakładać rękawice ochronne! Montaż silnika Sanki prowadzące mają specjalne szybkie mocowanie dla silnika. Pryzmat na przekładni silnika zostaje wstawiony od góry do mocowania na jaskółczy ogon w sankach i unieruchomiony bocznym ustalaczem, przy użyciu pokrętła posuwu. Przejechać...
- Seite 45 Wiercenie Na początku wiercić powoli, ponieważ wiertło z ułamkową ilością swojej powierzchni tnącej dotyka materiału. Jeśli zrobicie Państwo to za szybko lub z za dużym naciskiem, wiertło może zboczyć z obranego kierunku. Wiercenie skośne Odkręcić śrubę (1), która utrzymuje kolumnę w położeniu 90 °...
- Seite 46 Dogląd i konserwacja Zawsze utrzymywać w czystości statyw a szczególnie kolumnę z listwą zębatą i 4 ślizgi kulowe na sankach. Dla zapewnienia łatwego poruszania się wałka zębnika, naoliwić go. Elementy ślizgowe sanek muszą poruszać się po kolumnie bez luzów. Uwaga! Po 10 wierceniach należy skontrolować czy na skutek wibracji podczas pracy, ślizgi nie poluzowały się.
- Seite 47 Uszkodzenia, które są brakiem materiałowym lub błędem producenta, zostaną usunięte przez naprawę lub zastępczą dostawę. Roszczenia klienta mogą być uznane, jeśli urządzenie w stanie nierozłożonym dotarło do dostawcy lub autoryzowanego warsztatu Eibenstock. Deklaracja zgodności Jest wymagane, że współpracujące z tym statywem silniki (np. ETN 162/3 lub EBM 182/3 odpowiadają...
- Seite 48 ITALIANO Importanti istruzioni di sicurezza Le istruzioni di sicurezza sono segnalate nel manuale anche da simboli esplicativi Rischio di pericolo generale Rischio per pericolo voltaggio Rischio per superfici calde Rischio di escoriazioni o tagli Durante il lavoro indossate occhiali di protezione, una protezione acustica, guanti protettivi e indumenti di lavoro robusti! Indossare una protezione acustica Portare occhiali di protezione...
- Seite 49 Fissaggio del motore Attacco rapido Adattamento al suolo 4 viti di posizionamento / 2 bolle di livellamento Accessori disponibli Articolo Codice Art. Ruote per telaio (BST 182 V/S) 3582B000 Set fissaggio (calcestruzzo/pietra) 35721000 Set fissaggio (muratura) 35724000 Tassello di ricambio 35722000...
- Seite 50 Quando si lavora sui soffitti deve essere utilizzato un anello raccoglitore acqua. In caso di mal utilizzo o installazione il produttore non si assume le responsabilità di affidabilità. Utilizzo Dopo ogni riaggiustamento verificare sempre che le viti siano fissate saldamente per poter lavorare in sicurezza Montaggio del tornello Klick ...
- Seite 51 Se questo non è il caso, questo tipo di fissaggio non può essere usato. Per il montaggio a vuoto è necessaria una pompa per vuoto, un tubo per vuoto e il set di aspirazione BST 182 V/S (vedere la figura). Questi articoli sono disponibili su richiesta.
- Seite 52 La piastra di accoppiamento è fissata alla base della perforatrice dal basso con l'aiuto del bullone e della rondella M8X30.Controllare che la piastra di accoppiamento sia sicura. Posizionare la guarnizione in gommapiuma sul fondo della base. Assicurarsi che la vite di livellamento sia regolata in modo che non sporga dal fondo della base, poiché...
- Seite 53 Attenzione! È importante che la piattaforma di perforazione sia saldamente collegata alla superficie. Se non fissato correttamente, si possono causare lesioni all'operatore o danni all'unità di perforazione. Movimenti incontrollati durante la perforazione fanno sì che la punta del foretto colpisca la superficie da perforare che potrebbe portare a una scheggiatura dei segmenti.
- Seite 54 Operatività Per utilizzare lo strumento in modo sicuro, si prega di osservare le seguenti note: Dettagli dell'area di lavoro Mantenere l'area di lavoro libera da tutto ciò che potrebbe ostacolare le operazioni. Fornire un'illuminazione adeguata dell'area di lavoro. ...
- Seite 55 Carotaggio ad acqua Se si sta raffreddando la punta con acqua, si consiglia di utilizzare un anello di raccolta dell'acqua. Questo sarà montato con un dispositivo di chiusura a scatto sulle viti della piastra di base e garantisce una perforazione pulita. Principalmente per perforazioni aeree o laterali.
- Seite 56 Allentare il controdado sulla vite a brugola con una chiave a bocca SW 17 Regolare le viti a brugola e la posizione delle sfere scorrevoli sulla colonna mediante una chiave esagonale SW 8. Stringere nuovamente il controdado e verificare se il carrello si muove facilmente sulla colonna In caso di malfunzionamento In caso di guasto spegnete la macchina e staccatela dalla...
- Seite 57 Le contestazioni si possono riconoscere solo se la macchina viene inviata non smontata al fornitore o ad un’officina convenzionata con Eibenstock Dichiarazione di conformità E’ necessario che la macchina (ad es.ETN 162/3 O EBM 182/3) sia usata sul supporto per carotaggio in ottemperanza alle indicazioni descritte sul manuale (ad es diametro di carotaggio, fissaggio del motore).
- Seite 58 Notizen / Notes / Notes / Notitie / Noter / Notatki / Заметки...
- Seite 59 Notizen / Notes / Notes / Notitie / Noter / Notatki / Заметки...
- Seite 60 Ihr Fachhändler Your Distributor Votre marchand spécialisé Uw distributeur Wasz sprzedawca Vakuum Technik GmbH Am Steinbächel 3 08309 Eibenstock...