Inhaltsverzeichnis
Werbung
Verfügbare Sprachen
Verfügbare Sprachen
Quicklinks
Helios Ventilatoren
MONTAGE- UND BETRIEBSVORSCHRIFT
INSTALLATION AND OPERATING INSTRUCTIONS
NOTICE DE MONTAGE ET D'ENTRETIEN
Wetterschutzdach
Weather protection cover
Toiture pare-pluie
AIR1-AAD NH EL+WW
AIR1-AAD KR KW+DX
für AIR1 Lüftungsgeräte
for AIR1 ventilation units
pour les centrales AIR1
DE
EN
FR
Werbung
Inhaltsverzeichnis

Verwandte Anleitungen für Helios AIR1-AAD NH EL+WW


Inhaltszusammenfassung für Helios AIR1-AAD NH EL+WW
- Seite 1 Helios Ventilatoren MONTAGE- UND BETRIEBSVORSCHRIFT INSTALLATION AND OPERATING INSTRUCTIONS NOTICE DE MONTAGE ET D’ENTRETIEN Wetterschutzdach Weather protection cover Toiture pare-pluie AIR1-AAD NH EL+WW AIR1-AAD KR KW+DX für AIR1 Lüftungsgeräte for AIR1 ventilation units pour les centrales AIR1...
-
Seite 2: Garantieansprüche - Haftungsausschluss
Wenn die nachfolgenden Ausführungen nicht beachtet werden, entfällt die Gewährleistung. Gleiches gilt für Haftungs- ansprüche an den Hersteller. Der Gebrauch von Zubehörteilen, die nicht von Helios empfohlen oder angeboten werden, ist nicht statthaft. Even tuell auftretende Schäden unterliegen nicht der Gewährleistung. -
Seite 3: Inhaltsverzeichnis
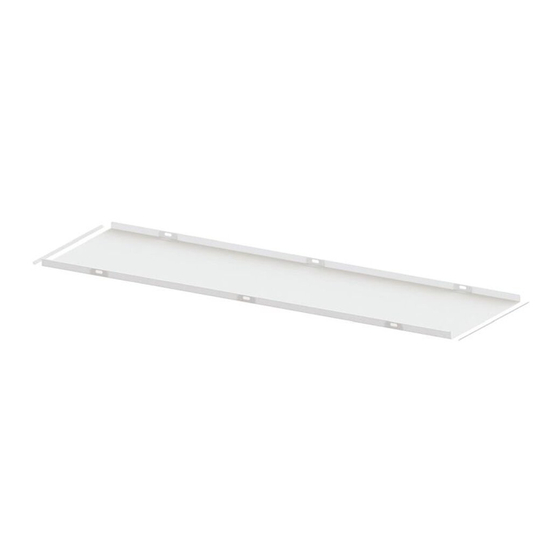
Montage- und Betriebsvorschrift Wetterschutzdach AIR1-AAD NH EL+WW / KR KW+DX – Wetterschutzdach AIR1-AAD NH EL+WW (RH 5000-15000) Abb.2 Type AIR1-AAD NH EL+WW RH 5000 AIR1-AAD NH EL+WW RH 6000 1032 Maß (mm) AIR1-AAD NH EL+WW RH 8000 1102 Art.-Nr. Type... - Seite 4 Montage- und Betriebsvorschrift Wetterschutzdach AIR1-AAD NH EL+WW / KR KW+DX 2. Dichtband auf der markierten Seite des Wetterschutzdachs anbringen (Profil beachten!), s. Abb. 4. Abb.4 ✓ 3. Die Kante des Wetterschutzdachs wie folgt mit den Seiten des externen Kühl- oder Heizregisters ausrichten (das aufgetragene Dichtband muss in Richtung Lüftungsgerät ausgerichtet sein), s.
-
Seite 5: Instandhaltung Und Wartung
Montage- und Betriebsvorschrift Wetterschutzdach AIR1-AAD NH EL+WW / KR KW+DX Abb.7 6. Die Modulverbinder an Gerät und externes Register montieren und die Schrauben anziehen, s. Abb. 8. Abb.8 7. Das Wetterschutzdach über die Blechhalter an das AIR1-Lüftungsgerät und/oder ggfs. an das Wetterschutzdach eines zweiten externen Registers montieren, s. -
Seite 6: Warranty Claims - Exclusion Of Liability
If the preceding instructions are not observed, all warranty claims shall be excluded. This also applies for liability claims against the manufacturer. The use of accessories, which are not recommended or offered by Helios, is not permitted. Any possible damages are not covered by the warranty. -
Seite 7: Air1-Aad Kr Kw+Dx Rh 5000
Installation and Operating Instructions Weather protection cover AIR1-AAD NH EL+WW / KR KW+DX – Weather protection cover AIR1-AAD NH EL+WW (RH 5000-15000) Fig.2 Type AIR1-AAD NH EL+WW RH 5000 AIR1-AAD NH EL+WW RH 6000 1032 Maß (mm) AIR1-AAD NH EL+WW RH 8000 1102 Art.-Nr. - Seite 8 Installation and Operating Instructions Weather protection cover AIR1-AAD NH EL+WW / KR KW+DX 2. Apply sealing tape to the marked side of the weather protection cover (note profile!), see Fig. 4. Fig.4 ✓ 3. Align the edge of the weather protection cover with the side of the external cooling or heating register as follows (the applied sealing tape must be aligned in the direction of the ventilation unit), see Fig.
-
Seite 9: Service And Maintenance
Installation and Operating Instructions Weather protection cover AIR1-AAD NH EL+WW / KR KW+DX Fig.7 6. Mount the module connector to the unit and external register and tighten the screws, see Fig. 8. Fig.8 7. Mount the weather protection cover to the AIR1 ventilation unit using the holder and/or to the weather protection cover of a second external register if necessary, see Fig. - Seite 10 Si les consignes figurant dans cette notice ne sont pas correctement respectées, la garantie s’annule. Il en est de même pour toute implication de responsabilité du fabricant. L’utilisation d’accessoires non conseillés ou proposés par Helios n’est pas permise. Les dégâts causés par cette mau- vaise utilisation ne sont pas couverts par la garantie.
- Seite 11 Notice de montage et d’utilisation Toiture pare-pluie AIR1-AAD NH EL+WW / KR KW+DX – Toiture pare-pluie AIR1-AAD NH EL+WW (RH 5000-15000) Fig. 2 Type AIR1-AAD NH EL+WW RH 5000 AIR1-AAD NH EL+WW RH 6000 1 032 Maß (mm) AIR1-AAD NH EL+WW RH 8000 1 102 Art.-Nr.
- Seite 12 Notice de montage et d’utilisation Toiture pare-pluie AIR1-AAD NH EL+WW / KR KW+DX 2. Placer du ruban isolant sur le côté indiqué de la toiture pare-pluie en faisant attention au profilé (voir fig. 4). Fig. 4 ✓ 3. Aligner le bord de la toiture pare-pluie avec les côtés de la batterie de refroidissement ou de chauffe externe comme indiqué...
-
Seite 13: Maintenance Et Entretien
Notice de montage et d’utilisation Toiture pare-pluie AIR1-AAD NH EL+WW / KR KW+DX Fig. 7 6. Monter les pièces d’assemblage du module sur la centrale et la batterie externe et serrer les vis (voir fig. 8). Fig. 8 7. À l’aide des supports en tôle, monter la toiture pare-pluie sur la centrale et/ou la toiture pare-pluie d’une éventuelle deuxième batterie externe (voir fig. - Seite 14 Notice de montage et d’utilisation Toiture pare-pluie AIR1-AAD NH EL+WW / KR KW+DX...
- Seite 15 Notice de montage et d’utilisation Toiture pare-pluie AIR1-AAD NH EL+WW / KR KW+DX...
- Seite 16 HELIOS Ventilatoren GmbH + Co KG · Lupfenstraße 8 · 78056 VS-Schwenningen HELIOS Ventilateurs · Le Carré des Aviateurs · 157 avenue Charles Floquet · 93155 Le Blanc Mesnil Cedex CH HELIOS Ventilatoren AG · Tannstrasse 4 · 8112 Otelfingen GB HELIOS Ventilation Systems Ltd.