Klarstein Grind & Brew Handbuch
Inhaltsverzeichnis
Verfügbare Sprachen
Verfügbare Sprachen
Quicklinks
Kapitel
Inhaltsverzeichnis
Fehlerbehebung

Verwandte Anleitungen für Klarstein Grind & Brew


Inhaltszusammenfassung für Klarstein Grind & Brew
- Seite 1 Grind & Brew Kaffeemaschine Coffee Machine Cafetera Cafetière Caffettiera 10035491...
-
Seite 3: Inhaltsverzeichnis
Sehr geehrter Kunde, wir gratulieren Ihnen zum Erwerb Ihres Gerätes. Lesen Sie die folgenden Hinweise sorgfältig durch und befolgen Sie diese, um möglichen Schäden vorzubeugen. Für Schäden, die durch Missachtung der Hinweise und unsachgemäßen Gebrauch entstehen, übernehmen wir keine Haftung. Scannen Sie den folgenden QR-Code, um Zugriff auf die aktuellste Bedienungsanleitung und weitere Informationen rund um das Produkt zu erhalten. -
Seite 4: Sicherheitshinweise
SICHERHEITSHINWEISE • Lesen Sie sich alle Hinweise durch und bewahren Sie die Anleitung zum Nachschlagen gut auf. • Das Gerät ist nicht für den kommerziellen Gebrauch, sondern nur für den Gebrauch im Haushalt und in ähnlichen Umgebungen vorgesehen. • Benutzen Sie das Gerät nur in Innenräumen und halten Sie es fern von Wärmequellen, direktem Sonnenlicht, Feuchtigkeit und scharfen Kanten. - Seite 5 • Stellen Sie das Gerät auf eine feste, ebene Oberfl äche, von der es nicht herunterfallen kann. • Stellen Sie das Gerät nicht in die Nähe von Gas- oder Elektroherden oder anderen Wärmequellen. • Befüllen Sie den Wassertank nur mit kaltem Wasser. •...
-
Seite 6: Geräteübersicht Und Bedienfeld
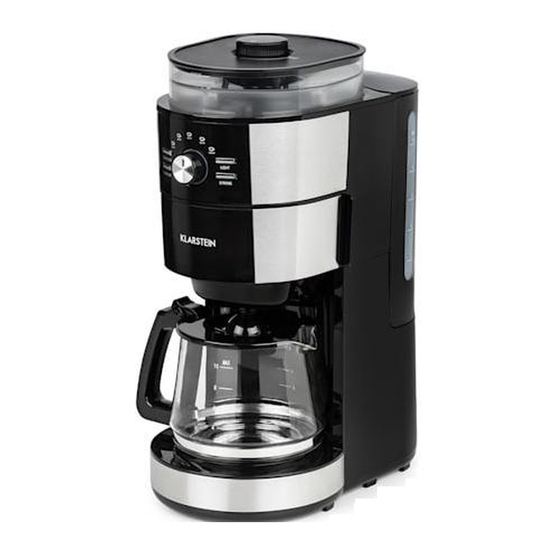
GERÄTEÜBERSICHT UND BEDIENFELD Abdeckung Bohnenbehälter Kaffeelöffel Mahlgradregler Bohnenbehälter Belüftungsöffnung Trichterabdeckung Wassertankabdeckung Trichter Wassertank Anti-Tropf-Ventil Wasserstandsanzeige Trichterhalter Tassen-Regler Lichtbalken Glaskaraffe START/STOP Warmhalteplatte GRIND OFF (Mahlen AUS) LIGHT (Leicht) STRONG (Stark) -
Seite 7: Inbetriebnahme
INBETRIEBNAHME Vor der ersten Verwendung Stellen Sie sicher, dass das gesamte Zubehör vollständig ist und das das Gerät nicht beschädigt ist. Befüllen Sie den Wassertank bis zur Maximalanzeige mit Wasser und lassen Sie das Gerät mehrfach mit Wasser Aufbrühen, ohne Kaffeepulver hinzuzufügen. Schütten Sie das Wasser anschließend weg. - Seite 8 4. Stellen Sie die Glaskaraffe folgendermaßen auf die Warmhalteplatte: Richten Sie den Ausguss der Glaskaraffe zunächst mit dem Anti-Tropf-Ventil aus. Drücken Sie die Glaskaraffe anschließend horizontal nach vorne, so dass die Mitte der Glaskaraffe mit dem Anti-Tropf Ventil auf einer Höhe ist. Die Glaskaraffe muss unbedingt richtig positioniert werden.
-
Seite 9: Kaffee Mit Kaffeebohnen Aufbrühen
Hinweis: Wenn Sie den Kaffee ausgießen sollte der Neigungswinkel nicht mehr als 45 Grad von der vertikalen Position betragen. Gießen Sie den Kaffee langsam aus. Andernfalls kann es vorkommen, dass der Kaffee aus dem Deckel und aus dem Kaffeeausguss austritt, wodurch Verbrennungsgefahr besteht. KAFFEE MIT KAFFEEBOHNEN AUFBRÜHEN 1. - Seite 10 6. Wählen Sie die gewünschte Kaffeeausgabemenge am Tassenknopf aus. Passen Sie anschließend den Mahlgrad des Kaffees am Mahlgradregler an (siehe Abbildung 1 und Abbildung 2). Drücken Sie anschließend einmal auf die Taste START/ STOP. Das Gerät startet den Betrieb und die Kaffeebohnen werden gemahlen, die Leuchtanzeige „START/STOP“...
- Seite 11 9. Entnehmen Sie nach dem Beenden des Brühvorgangs die Glaskaraffe aus dem Gerät, um den Kaffee zu servieren. Um einen optimalen Kaffeegeschmack zu erhalten, servieren Sie den Kaffee direkt nach dem Aufbrühen. Hinweis: Die Kaffeemenge entspricht nicht der verwendeten Kaffeemenge, da etwas Wasser vom Kaffeepulver absorbiert wird.
- Seite 12 5. Stecken Sie den Netzstecker des Geräts in die Steckdose. Alle Leuchtanzeigen blinken einmal auf. Die Leuchtanzeigen „START/STOP“ und „LIGHT“ leuchten anschließend permanent auf, während die anderen Leuchtanzeigen erlöschen. 6. Wählen Sie die gewünschte Kaffeeausgabemenge am Tassenknopf aus. Passen Sie anschließend den Mahlgrad des Kaffees am Mahlgradregler an (siehe Abbildung 1 und Abbildung 2).
-
Seite 13: Tipps Für Die Kaffeezubereitung
Hinweis: Wenn Sie den Kaffee ausgießen sollte der Neigungswinkel nicht mehr als 45 Grad von der vertikalen Position betragen. Gießen Sie den Kaffee langsam aus. Andernfalls kann es vorkommen, dass der Kaffee aus dem Deckel und aus dem Kaffeeausguss austritt, wodurch Verbrennungsgefahr besteht. TIPPS FÜR DIE KAFFEEZUBEREITUNG •... -
Seite 14: Entkalken
ENTKALKEN Damit Ihre Kaffeemaschine weiterhin effizient funktioniert, sollten Sie diese, in Abhängigkeit von der Wasserqualität in Ihrem Gebiet und der Benutzungshäufigkeit, regelmäßig von den vom Wasser hinterlassenen Kalkablagerungen reinigen. Wir empfehlen, Kalkablagerungen wie folgt zu entfernen: 1. Füllen Sie den Wassertank mit Wasser und Entkalker bis zu dem auf dem Wassertank angegebenen maximalen Füllstand (das Verhältnis von Wasser zu Entkalker ist 4:1. -
Seite 15: Fehlerbehebung
FEHLERBEHEBUNG Problem Mögliche Ursache Lösungsansatz Kaffee läuft über. Gemahlener Kaffee Reinigen Sie den blockiert den Auslass Filterhalter. unten am Filterhalter. Der gemahlene Kaffee ist Verwenden Sie gröber zu fein gemahlen. gemahlenen Kaffee. Das Gerät läuft nicht. Der Stecker ist lose. Stecken Sie den Stecker fest in die Steckdose.