PCE Instruments PCE-CT 65 Bedienungsanleitung

Verwandte Anleitungen für PCE Instruments PCE-CT 65


Inhaltszusammenfassung für PCE Instruments PCE-CT 65
- Seite 1 Bedienungsanleitung User Manual PCE-CT 65 Schichtdickenmessgerät | Coating Thickness Tester Version 1.0 Version 1.0 Letzte Änderung / last change: 5 September 2016 © PCE Instruments...
-
Seite 2: Inhaltsverzeichnis
Einheiten 5.2.2 Hintergrundbeleuchtung 5.2.3 Automatisches Ausschalten 5.2.4 Kontrast einstellen 5.2.5 Systemversionsnummer Daten 5.3.1 Daten ansehen 5.3.2 Daten löschen Software Kalibrierung Nullpunktkalibrierung für eisenhaltige oder nicht-eisenhaltige Metalle Nullpunkte eisenhaltig (Fe) / nicht-eisenhaltig (No-Fe) löschen Instandhaltung Fehlersuche/-behebung Garantie Entsorgung © PCE Instruments... - Seite 3 Automatic shutdown 5.2.4 Adjust the contrast 5.2.5 Serial number Data 5.3.1 Read out data 5.3.2 Delete data Software Calibration Zero calibration for ferrous (Fe) and non-ferrous (No-Fe) metals Delete Fe or No-Fe zero points Maintenance Troubleshooting Warranty Disposal © PCE Instruments...
-
Seite 4: Sicherheitsinformationen
Vielen Dank, dass Sie sich für den Kauf eines Schichtdickenmessgeräts von PCE Instruments entschieden haben. Sicherheitsinformationen Bitte lesen Sie dieses Benutzer-Handbuch sorgfältig und vollständig, bevor Sie das Gerät zum ersten Mal in Betrieb nehmen. Die Benutzung des Gerätes darf nur durch sorgfältig geschultes Personal erfolgen. -
Seite 5: Spezifikationen
Lieferumfang 1 x Schichtdickenmessgerät PCE-CT-65 5 x Folien zum Kalibrieren 1 x Kalibrierstandard Aluminium 1 x Kalibrierstandard Eisen 1 x Software CD-ROM 2 x 1,5 V AAA Batterie 1 x USB-Kabel 1 x Bedienungsanleitung 1 x Tragekoffer © PCE Instruments... -
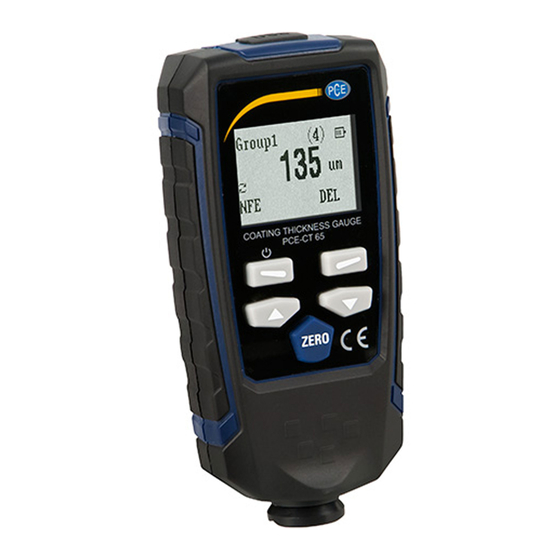
Seite 6: Systembeschreibung
Systembeschreibung Gerät LC Display „Auswahl“ / „Power“-Taste „Auf“-Taste „Löschen“-Taste „Zurück“-Taste „Ab“-Taste Batteriefachabdeckung © PCE Instruments... -
Seite 7: Display
Kalibrierbereich für Eisenmetalle und nicht-eisenhaltige Metalle „Zurück“-Taste Drücken Sie die Taste, um zurück zu gehen oder den letzten gemessenen Wert zu löschen. „Ab“-Taste Drücken Sie die Taste, um den Cursor nach unten zu bewegen und um den Betriebsmodus zu wechseln. © PCE Instruments... -
Seite 8: Vorbereitung
Danach ist das Untermenü „Working Mode“ direkt markiert. Drücken Sie die „Auswahl“-Taste erneut. Drücken Sie die „Auf“- oder „Ab“-Taste, um einen Betriebsmodus auszuwählen. Drücken Sie die „Auswahl“-Taste, um den entsprechenden Betriebsmodus zu aktivieren. Drücken Sie die „Zurück“-Taste. © PCE Instruments... -
Seite 9: Auswahl Des Messmodus (Sensor)
Drücken Sie die „Auswahl“-Taste, um die Einstellung zu öffnen. Drücken Sie die „Auf“- / „Ab“-Taste, um die Option zu ändern. Drücken Sie die „Auswahl“-Taste, um die Auswahl zu bestätigen. Drücken Sie die „Zurück“-Taste zwei Mal, um in den Messmodus zurückzukehren. © PCE Instruments... -
Seite 10: Kontrast Einstellen
Taste die letzten Daten löschen. Alle Daten löschen: Öffnen Sie das Ansichts-Menü (measure view). Sie können alle Daten und Statistiken löschen. Gruppendaten: Öffnen Sie das Gruppenansichts-Menü (working mode). Sie können diese Gruppendaten löschen, indem Sie die „Zurück“-Taste drücken. © PCE Instruments... -
Seite 11: Software
Beachten Sie bitte, dass das Messgerät bei der Analyse eingeschaltet sein muss. Falls es sich automatisch abschalten sollte, wird das Gerät automatisch vom Computer getrennt und eine Messwertübertragung ist nicht mehr möglich. Falls eine längere Messdatenauswertung stattfinden soll, wird empfohlen, die automatische Abschaltung des Geräts in den Einstellungen zu deaktivieren. © PCE Instruments... -
Seite 12: Kalibrierung
Drücken Sie die „Zurück“-Taste, um zurück zu kehren. Instandhaltung Fehlersuche/-behebung Die folgenden Fehlermeldungen helfen Ihnen, Fehler zu identifizieren und zu eliminieren. Err1: Fe Sensorfehler Err2: No-Fe Sensorfehler Err3: Beide Sensoren sind fehlerhaft Err4: Fe Sensorfehler Err5: No-Fe Sensorfehler © PCE Instruments... -
Seite 13: Garantie
Zur Umsetzung der ElektroG (Rücknahme und Entsorgung von Elektro- und Elektronikaltgeräten) nehmen wir unsere Geräte zurück. Sie werden entweder bei uns wiederverwertet oder über ein Recyclingunternehmen nach gesetzlicher Vorgabe entsorgt. Alternativ können Sie Ihre Altgeräte auch an dafür vorgesehenen Sammelstellen abgeben. WEEE-Reg.-Nr.DE69278128 © PCE Instruments...