Herunterladen Inhalt Inhalt Diese Seite drucken

Werbung

Verfügbare Sprachen
  • DE

Verfügbare Sprachen

  • DEUTSCH, seite 22
YL3000
Instrucciones de montaje y utilización
Instructions for assembly and use
Instructions de montage et utilisation
Montage und gebrauchsanleitung
Instruções de montagem e utilização
Istruzioni di montaggio e uso
Montage-en gebruiksinstrukties
1

Werbung

Inhaltsverzeichnis
loading

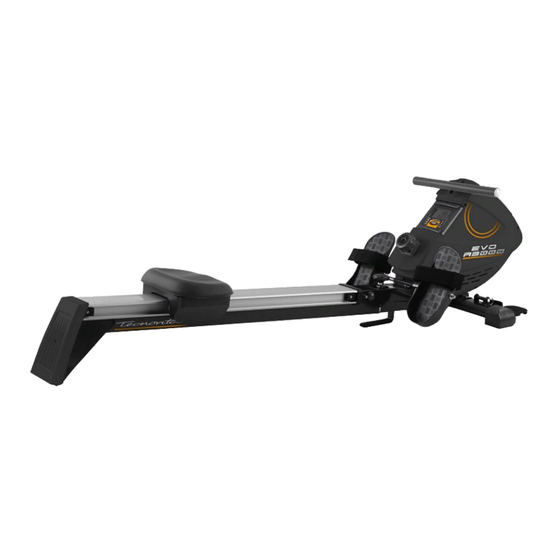
Inhaltszusammenfassung für Tecnovita EVO R3000

  • Seite 1 YL3000 Instrucciones de montaje y utilización Instructions for assembly and use Instructions de montage et utilisation Montage und gebrauchsanleitung Instruções de montagem e utilização Istruzioni di montaggio e uso Montage-en gebruiksinstrukties...
  • Seite 2 Fig.0 Fig.1...
  • Seite 3 Fig.2 Fig.3 Fig.4 Fig.5 Fig.6 Fig.7 Fig.8 Fig.9...
  • Seite 4 Fig.10 Fig.11 Fig.12...
  • Seite 5 Fig.13 Fig.14 Fig.15 Fig.16...
  • Seite 6 Fig.17...
  • Seite 7 Fig.18...
  • Seite 8 Fig.19 Fig.20 Fig.21 Fig.22...
  • Seite 9 Fig.23 Fig.24...
  • Seite 10: Instrucciones De Seguridad

    Español INSTRUCCIONES DE de estos y que puede llevarles a situaciones y conductas que pueden SEGURIDAD.- resultar peligrosas. Antes de comenzar cualquier programa Esta unidad no ha de utilizarse en de ejercicio, consulte a su médico. Se ningún caso como juguete. recomienda realización 7 Su unidad sólo puede ser usada por...
  • Seite 11: Instrucciones De Montaje

    Realice cada estiramiento Llave de allen de 5 mm aproximadamente durante Llave de allen de 6 mm segundos, no fuerce los músculos. Si Llave de tubo combinada siente dolor, PARE. Llave de tubo mixta con destornillador estrella. Guarde estas instrucciones. Muy importante: 1.
  • Seite 12 4.-MONTAJE DEL SOPORTE introdúzcalo por el agujero inferior de la estructura (39) y déjelo centrado TRASERO.- con la estructura, como le indica en la Posicione el soporte en la parte Fig.(17 paso 2). superior del carril. A continuación coja los tubos de Introduzca los tornillos (14) con las apoyo de pedales (34) e introduzca arandelas...
  • Seite 13 A continuación acerque los soportes mando de tensión (89), en sentido de de pie (52), e introduzca los pasado- agujas reloj (+), hasta res (51), como se muestra en la conseguir que el esfuerzo de su Fig.(19 paso soltados ejercicio es el ideal para usted. Para anteriormente.
  • Seite 14: Safety Instructions

    English SAFETY INSTRUCTIONS.- accidents. Under no circumstances should this appliance be used as a toy. Consult your doctor before starting 7 Your unit can only be used by one any exercise program. It is advisable person at a time. undergo complete physical 8 Use suitable clothing and footwear.
  • Seite 15 1. ASSEMBLY INSTRUCTIONS.- 2. FITTING THE STABILISER Take the unit out of its box and make BARS.- sure that all of the pieces are there: Bring the front stabiliser bar with wheels (50) to the main body (39) The assistance of a second person positioning the wheels at the front of is recommended when assembling the unit, Fig.2, insert screws (46), fit...
  • Seite 16: Fitting The Protective Cover

    5. FITTING COVER THE REAR the shaft (58), Fig.(18 step 3) and then do the same with the right-hand SUPPORT.- footrest (30). Take the trim cover (2) for the rear Take the flat washers (16), the spring support and use screw (101) to attach washers (15) and the nuts (31) and it Fig.13.
  • Seite 17 11 EXERTION SETTINGS.- make it easier to move it into a chosen position, by lifting the rear of the unit To provide an even level of exertion up slightly and pushing it, as shown in during exercise, this appliance is Fig.24.
  • Seite 18: Consignes De Sécurité

    Français CONSIGNES DE SÉCURITÉ.- n’est pas un jouet. 7 Cette machine ne peut être utilisée Avant de commencer tout exercice, que par une personne à la fois. demandez l’avis de votre médecin. Il 8 L’utilisateur de la machine doit porter est conseillé...
  • Seite 19: Montage

    Chaque étirement doit durer environ 30 Remarque très importante. Ne pas couper l’agrafe de sécurité du Secondes. Ne pas forcer les muscles. En cas de douleur, ARRÊTEZ l’exercice. caoutchouc avant d’avoir complètement terminé le montage Conservez cette notice. de la machine. 1 MONTAGE.- 2.
  • Seite 20: Montage Des Repose- Pieds

    placée dans le bas de la glissière en 3). Prendre les rondelles plates (16), aluminium et vérifier que le cordon en les rondelles à ressorts (15) et les caoutchouc est bien parallèle Fig.12. écrous (31) et visser solidement en Prendre l’extrémité du cordon en utilisant les deux clés, Fig.(17 points 4 caoutchouc (97) et fixez-le avec la tige et 5).
  • Seite 21 ATTENTION. - réduire la résistance du, tournez le Remarque très importante: Avant bouton de tension (89) dans le sens d’effectuer mouvement contraire à celui des aiguilles d’une quelconque avec la manette de la montre (-). machine, COUPER D’ABORD 12 DÉPLACEMENT & L’AGRAFE DE SÉCURITÉ, montrée dans les figures 20 et 21.
  • Seite 22: Sicherheitshinweise

    Deutsch SICHERHEITSHINWEISE.- oder im Freien. 6 Eltern bzw. Aufsichtspflichtige von Bevor einem Kindern sollten deren natürliche Neugier Trainingsprogramme beginnen, berücksichtigen, die u.U. gefährliche konsultieren Sie bitte Ihren Arzt. Wir Situationen und Verhaltensweisen mit empfehlen dabei eine komplette sich bringen kann. Dieses Gerät darf Untersuchung.
  • Seite 23 (32) Abstandsrohre Fußstütze. (33) Flache Unterlegscheibe 22x13 (34) Stützrohre Fußstütze. (46) Allenschraube M-10x52. (47) Flache Unterlegscheibe M10. (55) Schraubenabdeckung. (88) Flache Unterlegscheibe 32x13. Inbusschlüssel 5mm. Inbusschlüssel 6 mm. Führen Sie jeder dieser Streckübungen Kombi-Steckschlüssel ca. 30 Sekunden lang durch, ohne Steckschlüssel Kreuzschlitzs- jedoch die Muskeln zu überlasten.
  • Seite 24 Heben Sie die Aluminiumführung, die Setzen vorher gelösten Sie gerade angebaut haben wie in Sicherheitsriegel auf und schrauben Fig.9 gezeigt an. Führen Sie den Sie den Knauf (87) zusammen mit der Riegel (37) wie in Fig.10 gezeigt ein. Unterlegscheibe (88) im Uhrzeigersinn an Fig.16.
  • Seite 25: Zusammenklappen Des Geräts

    Nach der Montage der Fußstützen 11 REGULIEREN DES verbinden Sie die Fußriemen (29) mit WIDERSTANDS der Fußstütze, wie in Abbildung (18- Für Steuerung eines Schritt 4) dargestellt. gleichmäßigen Widerstands während Ihres Trainings verfügt dieses Gerät 9 MONTAGE DER über einen Spannungsregler (89), FUSSHALTERUNGEN FÜR befindet und mehrere Positionen zur VERTIKALE ZUGÜBUNGEN.-...
  • Seite 26: Instruções De Segurança

    Português INSTRUÇÕES DE em conta ua natureza curiosa, que poderá levá-las situações SEGURANÇA.- comportamentos podem Antes de começar qualquer programa perigosos. Este aparelho nunca de exercício, consulte o seu médico. deverá utilizar-se como um brinquedo. Recomendamos a realização de um 7 A sua unidade só...
  • Seite 27 Realize cada estiramento aproximada- (88) Arandela plana Ext.32; Int.13. mente durante 30 segundos; não Chave de allen de 5 mm force os músculos. Se sentir dor, Chave de allen de 6 mm. PARE. Chave de tubo combinada. Chave tubo mista Guarde estas instruções.
  • Seite 28 Introduza os parafusos (14) com as dos tubos por cada lado do eixo (35), arandelas (16) Fig.11 aperte como é indicado na Fig.(17 paso 3). fortemente. Depois, pegue nas arandelas planas Posicione o cordão de acordo com a chaves, aperte com força, Fig.(17 marca situada na parte inferior do passos 4 e 5) .
  • Seite 29 ATENÇÃO.- sentido dos ponteiros do relógio (+), até Muito importante: Antes conseguir que o esforço do seu começar qualquer movimiento com exercício seja o ideal para si. Para o puxador da máquina, CORTE O diminuir a resistência, rode o comando GRAMPO SEGURANÇA, de tensão (89), no sentido contrário ao...
  • Seite 30: Istruzioni Di Sicurezza

    Italiano ISTRUZIONI DI SICUREZZA.- pericolose. Questo apparecchio non si deve usare in nessun caso come Prima cominciare qualsiasi un giocattolo. programma d’ allenamento, chieda 7 Il suo apparecchio solo può essere consulenza medica. Si consiglia di usato da una persona allo stesso realizzare un controllo fisico completo.
  • Seite 31: Istruzioni Di Montaggio

    Realizzi ogni stiramento più o meno Chiavi a tubo combinate. durante 30 secondi, non sforzi i Chiave a tubo mista con cacciavite a muscoli. Se sente dolore, si FERMI. stella. Conservi queste istruzioni. Molto importante. tagliare grappetta 1. ISTRUZIONI DI MONTAGGIO.- sicurezza di gomma fino a quando Togliere l’unità...
  • Seite 32: Montaggio Dei Poggiapiedi

    Inserire le viti (14) con le rondelle (16) l'ausilio delle due chiavi stringere fino in Fig.11 e stringere fino in fondo. fondo, Fig.(17 passi 4 e 5). Allineare la corda verso il lato del MONTAGGIO DEI marchio che si trova sulla parte inferiore della slitta di alluminio e POGGIAPIEDI.- verificare che la corda di gomma è...
  • Seite 33: Spostamento Ed Immagazzinaggio

    10 SISTEMA A PIEGATURA 12 SPOSTAMENTO ED DELLA VOSTRA UNITÀ.- IMMAGAZZINAGGIO.- Per piegare la vostra unità, Fig.22, L’ apparecchio è munito di ruote (49- seguire i seguenti passi: 56) che rendono più semplice il suo Allentare totalmente senso spostamento. Le ruote che si trovano antiorario il pomello (88) e togliere il nella parte...
  • Seite 34: Veiligheidsaanwijzingen

    Nederlands VEILIGHEIDSAANWIJZINGEN dat dit tot gevaarlijke situaties en gedrag kan leiden. Dit apparaat mag Raadpleeg uw geneesheer alvorens u onder geen beding als speelgoed oefe ningenprogramma gebruikt worden. begint. Het wordt aangeraden om een 7 Dit apparaat kan slechts door één volledig onderzoek te laten doen.
  • Seite 35 Hou elke strechting ongeveer een 30 Combinatiesteeksleutel seconden aan, forceer uw spieren Steeksleutel met kruiskopschroevedraaier niet. Als u pijn voelt, STOP dan. Zeer belangrijk. Bewaar deze instructies. Snijd de veiligheidssluiting op het rubber niet door totdat het toestel 1. MONTAGE INSTRUCTIES.- volledig gemonteerd is.
  • Seite 36 Positioneer het snoer op de markering sluitringen (16), de veerringen (15) en onderaan de aluminium stang en de moeren (31) en maak alles goed vast controleer of het rubbersnoer parallel met behulp van twee moersleutels, is, Fig.12. Fig.(17 stap 4 & 5). Pak het uiteinde van het rubbersnoer 8 VOETSTEUNEN (97) en houd het in het gemarkeerde...
  • Seite 37 10 UW TOESTEL VOUWEN.- 12 VERPLAATSING EN Als u uw toestel wilt opvouwen, OPBERGEN.- Fig.22, doet u het volgende: Dit apparaat is uitgerust met wieltjes (49-56) verplaatsen 1.- Draai de knop (88) helemaal los vergemakkelijkt. twee wieltjes door hem tegen de klok in te draaien bevinden zich aan de voorkant van het verwijder borgpin,...
  • Seite 38 ESPAÑOL TÉCNICA DEL REMO .- ATAQUE .- FINAL - Brazos parcialmente estirados - El tirador del remo se coloca a la - Piernas recogidas contra el cuerpo altura del pecho. - Cuerpo ligeramente hacia delante - Piernas parcialmente estiradas. - Cuerpo ligeramente inclinado hacia atrás.
  • Seite 39 ENGLISH ROWING TECHNIQUE .- ATTACK .- END - Arms partially stretched - The rowing bar is brought to chest - Legs brought up against the body level - Body leaning slightly forward - Legs partially straightened out - Body leaning slightly backward .- BEGIN THE ACTION .- RECOVERY - Arms stretched fully out...
  • Seite 40 FRANÇAIS TECHNIQUE DU RAMEUR . ATTAQUE . FIN - Bras partiellement etires - La corde du rameur est placee au - Jambes repliees contre le corps niveau de la poitrine - Corps legerement en avant. - Jambes partiellement etirees - Corps legerement incline arriere...
  • Seite 41 DEUTSCH RUDERTECHNIK .ANGRIFF . ENDE - Die Arme teilweise gestreckt. - Die Beine gegen den Korper - Die Zugvorrichtung des Ruders angezogen wird auf Brusthohe gebracht - Den Korper leicht nach vorn - Die Beine sind teilwelse gestreckt gebeugt. - Der Korper ist leicht nach hinten geneigt .
  • Seite 42 PORTUGUES TECNICA DO REMO .- ATAQUE .- FINAL - Os braços deverao estar parcialment esticados - O puxador do remo devera ser - As pemas deverao estar colocado na zona do peito recolhidas de encontro ao corpo - As pernas deverao estar - O corpo devera estar ligeiramente...
  • Seite 43 ITALIANO TECNICA DELLA VOGATA .- ATTACCO .- FINE DELLESERCIZIO - Braccia parcialmente tese - Maniglia del vogatore allaltezza - Gambe flesse verso it corpo del petto - Corpo leggermente in avanti - Gambe parcialmente inclinato allindietro INIZIO DELLESERCIZIO .- RECUPERO - Braccia tese - Iniziare movimento...
  • Seite 44 NEDERLANDS TECHNIEK VAN HET ROEIEN voorbij de knieen zijn .- AANZET .- EINDE - Armen gedeeltelijk gestrekt - Benen gebogen tegen het lichaam - De riem op borsthoogte - Lichaam licht naar voren - Benen gedeeltelijk gestrekt - Lichaam licht naar achteren heliend...
  • Seite 45 YL3000...
  • Seite 46 Para pedido de repuesto: Indicar el código de la pieza y la cantidad To order replacement parts: State the part code and Quantity Pour toute commande pièces détachées: Indiquer le code de la pièce et la quantité Bestellung von Ersatzteilen: Bitte angeben Teil-code und Menge Para encomenda de peça de recambio: Indicar o código da peça ea quantidade Per ordinare pezzi di ricambio: Indicare il codice del pezzo e la quantità...
  • Seite 47 Left pedal Pedal izquierdo R307057 Pedal axle Eje pedal R307058 Magnet Spring Muelle del sensor R307063 Computer Monitor YL3000066 Meter bracket Carcaza monitor R307067 Left chain cover Tapa derecha YL3000069 Spring rope Muelle cuerda R307079 Handle bar foam Goma manillar R307081 Handle bar end cap Tapón goma manillar...
  • Seite 48 Por medio de la presente Exercycle S.L. declara que este producto Español cumple con los requisitos esenciales y cualesquiera otras disposiciones aplicables o exigibles de la Directiva 2004/108/CE. Hereby, Exercycle S.L, declares that this product is in compliance with English the essential requirements and other relevant provisions of Directive 2004/108/EC.
  • Seite 49 BH FITNESS SPAIN BH FITNESS PORTUGAL BH GERMANY GmbH EXERCYCLE,S.L. MAQUINASPORT, APARELHOS Grasstrasse 13 (Manufacturer) DE DESPORTO, S.A. 45356 ESSEN P.O.BOX 195 Rua do Caminho Branco Lote 8, GERMANY 01080 VITORIA (SPAIN) ZI Oiã 3770-068 Oiã Tel.: +34 945 29 02 58 Oliveira do Bairro (PORTUGAL) Tel: +49 2015 997018 Fax: +34 945 29 00 49...

Diese Anleitung auch für:

Yl3000

Inhaltsverzeichnis