Herunterladen Inhalt Inhalt Diese Seite drucken
Inhaltsverzeichnis

Werbung

Verfügbare Sprachen
  • DE

Verfügbare Sprachen

  • DEUTSCH, seite 35
LCD Monitor
LCD Farbmonitor
Moniteur LCD
Monitor LCD
Monitor LCD
LL-151-3D
OPERATION MANUAL
BEDIENUNGSANLEITUNG
MODE D'EMPLOI
MANUALE D'USO
MANUAL DE FUNCIONAMIENTO
Downloaded from
www.Manualslib.com
manuals search engine

Werbung

Inhaltsverzeichnis
loading

Inhaltszusammenfassung für Sharp LL-151-3D

  • Seite 1 LCD Monitor LCD Farbmonitor Moniteur LCD Monitor LCD Monitor LCD LL-151-3D OPERATION MANUAL BEDIENUNGSANLEITUNG MODE D'EMPLOI MANUALE D'USO MANUAL DE FUNCIONAMIENTO Downloaded from www.Manualslib.com manuals search engine...
  • Seite 2: Inhaltsverzeichnis

    Table of Contents/Inhaltsverzeichnis/Table des matières/Indice/Índice Notice for Users in the USA ............3 Notice for Users in Europe .
  • Seite 3: Notice For Users In The Usa

    ® ® * As an NERGY Partner, SHARP has determined that this product meets the NERGY guidelines for energy efficiency. This product utilizes tin-lead solder, and fluorescent lamp containing a small amount of mercury. Disposal of these materials may be regulated due to environmental considerations. For disposal or recycling information, please contact your local authorities or the Electronics Industries Alliance: www.eiae.org...
  • Seite 4: Notice For Users In Europe

    Notice for Users in Europe This equipment complies with the requirements of Directives 89/336/EEC and 73/23/EEC as amended by 93/68/EEC. Dieses Gerät entspricht den Anforderungen der EG-Richtlinien 89/336/EWG und 73/23/EWG mit Änderung 93/68/EWG. Ce matériel répond aux exigences contenues dans les directives 89/336/CEE et 73/23/CEE modifiées par la directive 93/68/CEE.
  • Seite 5: Notice For Users In The Uk

    "WARNING: THIS APPARATUS MUST BE EARTHED." Notice for Users in Australia Service Inquiries Please contact your dealer for service if required or contact Sharp Corporation of Australia on 1 300 13 50 22 for referral to your nearest Sharp authorized Service Center. Downloaded from www.Manualslib.com...
  • Seite 6 Downloaded from www.Manualslib.com manuals search engine...
  • Seite 7: English

    How to install SHARP Stereo Display ........
  • Seite 8: Tips And Safety Precautions

    - Never rub or tap the monitor with hard objects. likelihood of high temperature, as this may lead - Please understand that SHARP Corporation to generation of excessive heat and outbreak of bears no responsibility for errors made during fire.
  • Seite 9 - You are advised to retain the carton in case the monitor needs to be transported. broken or malfunctioning. Refer the servicing to - Sharp Corporation holds authorship rights to the the service representative. - Do not try to open the AC adapter.
  • Seite 10: Product Description

    Product description 11 12 1. MENU button ......This button is used to pop-up, select and close the OSD (On Screen Display) Menu. button ........This button is used to select menu options when the OSD Menu is displayed. buttons ......When the OSD Menu is displayed: These buttons are used to select an option or adjust the value of the selected option.
  • Seite 11: Angle Adjustment, Height Adjustment

    Angle adjustment, height adjustment CAUTION! Height adjustment Adjust to an easy to view height. - Be sure to hold both sides of the monitor when adjusting the viewing angle. The LCD panel used in this monitor is made of glass. Pressure approx.
  • Seite 12: Connecting The Monitor And Turning The Monitor On And Off

    Connecting the monitor and turning the monitor on and off CAUTION! 3. Refit the cover. Be careful not to pinch the cable. - When connecting, ensure that both the monitor and computer are switched off. - Be careful not to over bend the cable or add extension cords as this could lead to a malfunction.
  • Seite 13: Connecting The Monitor To A Computer

    Connecting the monitor and turning the monitor on and off Analog connection Connecting the monitor to a computer Connect the supplied analog signal cable to the analog RGB output terminal of the computer. Digital connection Connect the supplied digital signal cable to the digital RGB output terminal of the computer.
  • Seite 14: Connection Of Headphones (Commercially Available)

    Connecting the monitor and turning the monitor on and off Connect the supplied audio cable Connecting the monitor to a power When the supplied audio cable is connected to the source audio output terminal of the computer, the sound of the connected computer is output from the monitor speakers.
  • Seite 15: Turning The Power On

    Connecting the monitor and turning the monitor on and off Turning the power on Turning the power off 1. Press the monitor's power button. 1. Turn the computer off. 2. Turn on the computer. 2. Press the monitor's power button. The power LED will disappear.
  • Seite 16: Adjusting The Screen Display And Speaker Volume

    Adjusting the screen display and speaker volume For digital signal Adjustment lock function The monitor can generally be used without By disabling the control buttons (i.e. setting the adjustment. If necessary perform manual lock) any attempted changes to adjusted values adjustment.
  • Seite 17: Adjusting The Screen Display

    Adjusting the screen display Adjusting the screen automatically Automatic screen adjustment 1. Press the MENU button. (When using an analog signal) The ADJUSTMENT Menu will be displayed. Options in the ADJUSTMENT Menu can be adjusted automatically (CLOCK, PHASE, H-POS, V-POS). Notes: - When setting up this monitor for the first time or 1 0 2 4 x 7 6 8...
  • Seite 18: Manual Screen Adjustment

    Adjusting the screen display ADJUSTMENT Menu Manual screen adjustment When the monitor is used with a digital connection, this menu adjustment is not necessary. 1. Display an image that makes the entire screen light. (p.17) AUTO 2. Display the OSD Menu by pressing the MENU When [AUTO] is selected with the button, the button.
  • Seite 19 Adjusting the screen display GAIN CONTROL Menu WHITE BALANCE Menu When the monitor is used with a digital connection, this menu adjustment is not COOL ... Color tone bluer than standard necessary. • ..Color tone slightly bluer than standard STD ..
  • Seite 20 Adjusting the screen display MODE SELECT Menu Note: - Depending on the resolution of the input signal, even if menu options can be selected, the display may not change. OSD H-POSITION (OSD horizontal position) The position of the OSD Menu can be moved to the left and right.
  • Seite 21: Preparation For 3D Display

    Be sure to confirm the operating environment of your software. Notes: - SHARP 3D Technology was originally developed by SHARP to provide a 3D display on a computer screen. USB cable - If your eyesight greatly differs between the right...
  • Seite 22: Supplied Software

    Operation in other language versions is not Install the following software from the supplied guaranteed. CD-ROM as necessary after installing the SHARP Stereo Display. This software calculates attribute values to display an image taken with a stereo camera on the Note: screen of this monitor.
  • Seite 23: Displaying 3D Images

    Notices on displaying 3D images - Set the screen resolution to 1024 x 768. It is unable to display 3D image with other For software supporting SHARP 3D Technology setting. When you display a 3D image with 3D display- ready software, the display mode is automatically - Be sure to connect the USB cable while the monitor and computer are turned off.
  • Seite 24: Monitor Care

    Use a soft dry cloth to lightly wipe away any grime nearest SHARP authorized Service Center. from the cabinet and control panel. If they are very dirty, apply neutral detergent to a...
  • Seite 25 2D mode. (This is not a malfunction.) The mode cannot be switched to 3D mode by pressing the 3D button. - Does the current software support SHARP 3D Technology? If you are using software that does not support SHARP 3D Technology, refer to the operation manual of the software.
  • Seite 26: Specifications

    Specifications Product specifications Power supply Model name 100-240 VAC, 50/60 Hz (Uses special AC adapter, type NL-A56J of Sharp Corporation) LL-151-3D Temperature of operating environment LCD display 5-35°C 38 cm measured diagonally TFT 3D LCD module Power consumption Resolution (max.)
  • Seite 27 Dimensions Note: (Units: mm) - As a part of our policy of continuous improvement, SHARP reserves the right to make design and specification changes for product improvement without prior notice. The performance specification figures indicated are nominal values of production units. There may be some deviations from these values in individual units.
  • Seite 28 Specifications Relevant signal timings (analog) Relevant signal timings (digital) Screen resolution Hsync Vsync Screen resolution Hsync Vsync frequency frequency VESA VESA US text US text - Recommended resolution is 1024 x 768. Power - All are compliant only with non-interlaced. Macintosh - A computer with an output terminal conforming to series...
  • Seite 29 Specifications The DVI-I input connector pin Power management (DVI-I connector with 29 pins) The monitor is based on the VESA DPMS and the DVI DMPM standards. To activate the power management function, the video card and the computer used with it must also conform to these standards.
  • Seite 30: Installing Set-Up Information And The Icc Profile (For Windows)

    Installing set-up information and the ICC profile (For Windows) Depending on the type of computer or OS, you For Windows 98 may need to install the monitor set-up information Installing monitor set-up information into on your system. If so, follow the steps below to Windows 98, and setting the monitor's ICC profile install the monitor set-up information.
  • Seite 31 Installing set-up information and the ICC profile (For Windows) For Windows 2000 For Windows Me Installing monitor set-up information into Installing monitor set-up information into Windows Windows 2000, and setting the monitor's ICC Me, and setting the monitor's ICC profile as a profile as a predetermined value.
  • Seite 32 Installing set-up information and the ICC profile (For Windows) For Windows XP Installing the ICC profile Installing the monitor's ICC profile. (If the set-up Installing monitor set-up information into Windows information has already been installed, so too has XP, and setting the monitor's ICC profile as a the profile, and there is no need to install it.) predetermined value.
  • Seite 33: Information About The Colorsync Profile (For Macos)

    Information about the ColorSync profile (For MacOS) About the ColorSync profile ColorSync is Apple Computer's color management system and enables color reproduction characteristics to be realized when used with a compatible application. A ColorSync profile describes the color characteristics of the LCD monitor.
  • Seite 34: Instructions For Attaching A Vesa-Compliant Arm

    Instructions for attaching a VESA-compliant arm An arm or stand based on the VESA standard Notes: (commercially available) can be attached to the - The stand is specially made for use with this monitor. Procurement of the arm or stand is at the monitor.
  • Seite 35: Deutsch

    Installation von SHARP Stereo Display ........
  • Seite 36: Tipp Und Sicherheitsvorkehrungen

    Gegenständen abgerieben oder berührt werden. - Stellen Sie den Monitor nicht an Stellen auf, die - Wir bitten um Ihr Verständnis, dass Sharp direkter Sonneneinstrahlung ausgesetzt sind, Corporation über die gesetzlich anerkannte und nicht in der Nähe von Heizungen oder an Leistungshaftung hinaus keine Haftung für...
  • Seite 37 - Bewahren Sie den Karton für einen eventuellen - Stecken Sie den Netzadapter aus, wenn Sie ihn Transport des Monitors auf. längere Zeit nicht benutzen. - Sharp Corporation besitzt Urheberrechte am - Stellen Sie keine Gegenstände auf dem Utility-Programm. Eine Reproduktion ist ohne Netzadapter ab.
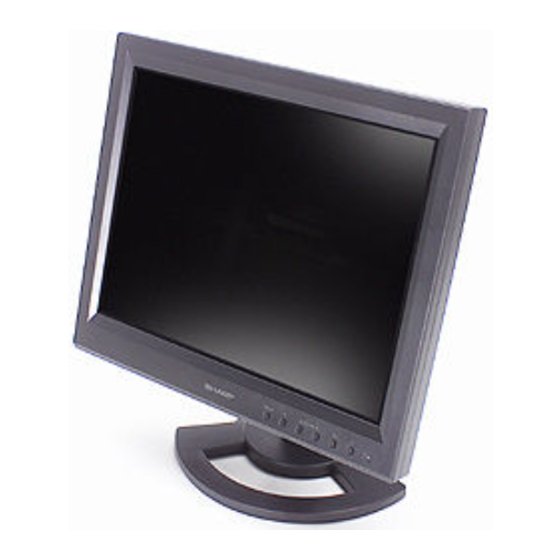
  • Seite 38: Produktbeschreibung

    Produktbeschreibung 11 12 1. Taste MENU ......Mit dieser Taste öffnen, wählen und schließen Sie das OSD (On Screen Display) -Menü. 2. Taste ........Mit dieser Taste wählen Sie die Menüoptionen aus, wenn das OSD- Menü angezeigt wird. 3. Tasten .......
  • Seite 39: Winkeleinstellung, Höheneinstellung

    Winkeleinstellung, Höheneinstellung ACHTUNG! Höheneinstellung Auf eine angenehme Betrachtungshöhe - Achten Sie darauf, den Monitor beim Einstellen einstellen. des Sichtwinkels immer an beiden Seiten zu halten. Das in diesem Monitor verwendete LCD- Panel besteht aus Glas. Durch Druck mit der Ca. 60 mm Hand auf das LCD-Panel können Schäden hervorgerufen werden.
  • Seite 40: Anschließen Des Monitors Und Ein- Und Ausschalten Des Monitors

    Anschließen des Monitors und Ein- und Ausschalten des Monitors ACHTUNG! 3. Die Abdeckung wieder anbringen. Vorsichtig vorgehen, damit die Kabel nicht - Bevor Sie den Monitor anschließen, müssen Sie eingeklemmt werden. den Monitor und den Computer ausschalten. - Achten Sie darauf, dass Sie das Kabel nicht überdehnen, und schließen Sie kein Verlängerungskabel an, da dies Funktionsstörungen hervorrufen kann.
  • Seite 41: Verbinden Des Monitors Mit Einem Computer

    Anschließen des Monitors und Ein- und Ausschalten des Monitors Analoger Anschluss Verbinden des Monitors mit einem Schließen Sie das als Zubehör mitgelieferte Computer Analogsignalkabel am analogen RGB- Ausgangsanschluss des Computers an. Digitaler Anschluss Schließen Sie das als Zubehör mitgelieferte Digitalsignalkabel an den digitalen RGB- Ausgangsanschluss des Computers an.
  • Seite 42: Anschluss Von Kopfhörern (Im Handel Erhältlich)

    Anschließen des Monitors und Ein- und Ausschalten des Monitors Schließen Sie das zusätzliche Audiokabel an Anschließen des Monitors an eine Wenn das zusätzliche Audiokabel am Stromquelle Audioausgangsanschluss des Computers angeschlossen wird, wird der Ton des angeschlossenen Computers über die Monitor- ACHTUNG! Lautsprecher wiedergegeben.
  • Seite 43: Einschalten Des Monitors

    Anschließen des Monitors und Ein- und Ausschalten des Monitors Einschalten des Monitors Ausschalten des Monitors 1. Drücken Sie den Netzschalter am Monitor. 1. Schalten Sie den Computer aus. 2. Schalten Sie den Computer ein. 2. Drücken Sie den Netzschalter am Monitor. Die Betriebs-LED erlischt.
  • Seite 44: Einstellen Der Bildschirmanzeige Und Der Lautsprecher-Lautstärke

    Einstellen der Bildschirmanzeige und der Lautsprecher-Lautstärke Digitalsignal Einstellungssperrfunktion Der Monitor kann in der Regel ohne Einstellung Wenn Sie die Steuertasten deaktivieren (d. h. die Sperre verwendet werden. Führen Sie bei Bedarf eine setzen), können keine Werte eingestellt werden. manuelle Einstellung durch. (S.46) 1.
  • Seite 45: Einstellen Der Bildschirmanzeige

    Einstellen der Bildschirmanzeige Automatisches Einstellen des Bildschirms Automatische Bildschirmeinstellung 1. Drücken Sie die Taste MENU. (bei Verwendung eines Analogsignals) Das Menü ADJUSTMENT wird angezeigt. Die Optionen im Menü ADJUSTMENT können automatisch eingestellt werden (CLOCK, PHASE, H-POS, V-POS). 1 2 8 1 2 8 Hinweise: - Wenn Sie den Monitor zum ersten Mal einrichten...
  • Seite 46: Manuelle Bildschirmeinstellung

    Einstellen der Bildschirmanzeige Menü ADJUSTMENT Manuelle Bildschirmeinstellung Wenn der Monitor mit einer digitalen Verbindung verwendet wird, ist dise Menüeinstellung nicht 1. Zeigen Sie zunächst ein Bild an, das den nötig. gesamten Bildschirm sehr hell erscheinen lässt. (S.45) AUTO 2. Rufen Sie das OSD-Menü durch Drücken der Wenn [AUTO] mit der Taste gewählt ist, werden Taste MENU ab.
  • Seite 47 Einstellen der Bildschirmanzeige Menü GAIN CONTROL Menü WHITE BALANCE Wenn der Monitor mit einer digitalen Verbindung verwendet wird, ist dise Menüeinstellung nicht COOL ... Farbton mit stärkerem Blaustich als nötig. normal • ..Farbton mit leicht stärkerem Blaustich AUTO als normal Wenn [AUTO] mit der Taste gewählt ist, werden STD ..
  • Seite 48 Einstellen der Bildschirmanzeige Menü MODE SELECT Hinweis: - Abhängig von der Auflösung des Eingangssignals ändert sich die Anzeige eventuell selbst dann nicht, wenn die Menüoptionen ausgewählt werden können. OSD H-POSITION (OSD horizontale Position) Die Position der OSD-Menü kann nach links und rechts verschoben werden.
  • Seite 49: Vorbereitung Für 3D-Display

    - Befolgen Sie immer die Installations- und Verbindungsverfahren wie in [ReadmeE.txt.] Betriebsumgebung für das 3D-Display beschrieben. Andernfalls kann die Installation - Die Funktion der Software, die SHARP 3D misslingen. Technology unterstützt, ist nur bei Windows XP (englische Version) garantiert. Funktion in anderen Sprachversionen oder Betriebssystemen kann nicht garantiert werden.
  • Seite 50: Mitgelieferte Software

    3. Folgen Sie den auf dem Bildschirm gezeigten Anweisungen zum Fertigstellen des Verfahrens. Verwendung Unter Bezug auf die Angaben in [SHARP SmartStereo Photo Editor User Guide] oder [SHARP SmartStereo Slide Show User Manual] klicken Sie auf die Schaltfläche [Start] und wählen Sie [SHARP SmartStereo Photo Editor] unter [All Programs].
  • Seite 51: Anzeige Von 3D-Bildern

    - Stellen Sie die Bildschirmauflösung auf und 3D-Modus 1024 x 768 ein. Es ist unmöglich, 3D-Bilder mit einer anderen Für Software, die SHARP 3D Technology Einstellung anzuzeigen. unterstützt - Stellen Sie sicher, dass das USB-Kabel bei Wenn Sie ein 3D-Bild mit einer 3D-Display-...
  • Seite 52: Pflege Des Monitors

    Monitor im Stromsparmodus ist (die Falls sich die Störung hiermit nicht beheben lässt, Betriebs-LED leuchtet orangefarben auf). wenden Sie sich an das Geschäft, in dem Sie den Monitor gekauft haben, oder an die nächstgelegene autorisierte Sharp- Kundendienstzentrale. Downloaded from www.Manualslib.com manuals search engine...
  • Seite 53 Das 3D-Bild im Display erscheint verschwommen und verdoppelt. - Bestätigen Sie, ob 3D-Display-kompatible Software läuft. - Für Software, die SHARP 3D Technology unterstützt - Drücken Sie die Taste 3D, um auf 3D-Modus zu schalten (die Betriebs-LED wechselt auf Blau um).
  • Seite 54: Technische Daten

    Mitte nach rechts. LL-151-3D Stromversorgung LCD-Anzeige 100 - 240 VAC, 50/60 Hz (verwendet speziellen TFT 3D LCD-Modus mit 38 cm Netzadapter, Typ NL-A56J von Sharp Bildschirmdiagonale Corporation) Auflösung (max.) Umgebungstemperatur XGA 1024 x 768 Pixel 5 - 35 °C (Nur im 2D-Modus.
  • Seite 55 Technische Daten Abmessungen (Einheiten: mm) Hinweis: - Bedingt durch fortlaufende technische Verbesserungen behält sich SHARP das Recht vor, das Design und die Spezifikationen ohne vorherige Ankündigung ändern zu können. Die angegebenen Leistungswerte stellen die Nennwerte einer in Serienherstellung produzierten Einheit dar. Geringe Abweichungen bei einzelnen Geräten sind möglich.
  • Seite 56 Technische Daten Relevante Signaltakte (digital) Relevante Signaltakte (analog) Bildschirmauflösung Bildschirmauflösung Hsync Vsync Punktfrequenz Hsync Vsync Punktfrequenz VESA VESA US-Text US-Text - Die empfohlene Auflösung ist 1024 x 768. Power - Alle nur mit Non-Interlace. Macintosh- Serie - Ein Computer mit einem Ausgangsanschluss gemäß...
  • Seite 57 Technische Daten Pinbelegung des DVI-I-Eingangssteckers Power Management (29-poliger DVI-I-Stecker) Der Monitor basiert auf den Standards VESA DPMS und DVI DMPM. Zum Aktivieren der Energiesparfunktion müssen die Videokarte und der verwendete Computer ebenfalls diesen Normen entsprechen. DPMS: Display Power Management Signalling DPMS- Bild- Leistungs- H-sync V-sync...
  • Seite 58: Installieren Der Setup-Informationen Und Des Icc-Profils (Für Windows)

    Installieren der Setup-Informationen und des ICC-Profils (Für Windows) Je nach dem verwendeten Computer oder Für Windows 98 Betriebssystem muss die Installation der Monitor- Installieren der Monitor-Setup-Informationen unter Setup-Informationen usw. eventuell über den Windows 98 und Festlegen des Monitor-ICC- Computer erfolgen. Führen Sie in diesem Fall die Profils als vorbestimmter Wert.
  • Seite 59 Installieren der Setup-Informationen und des ICC-Profils (Für Windows) Für Windows 2000 Für Windows Me Installieren der Monitor-Setup-Informationen unter Installieren der Monitor-Setup-Informationen unter Windows Me und Festlegen des Monitor-ICC- Windows 2000 und Festlegen des Monitor-ICC- Profils als vorbestimmter Wert. Die in den Profils als vorbestimmter Wert.
  • Seite 60 Installieren der Setup-Informationen und des ICC-Profils (Für Windows) Für Windows XP Installieren des ICC-Profils Installieren des Monitor-ICC-Profils. (Wenn die Installieren der Monitor-Setup-Informationen unter Setup-Informationen bereits installiert wurden, ist Windows XP und Festlegen des Monitor-ICC- auch das Profil bereits installiert. Es braucht dann Profils als vorbestimmter Wert.
  • Seite 61: Informationen Zum Profil Colorsync (Für Macos)

    Informationen zum Profil ColorSync (Für MacOS) Informationen zum Profil ColorSync ColorSync ist das Farbverwaltungssystem von Apple Computers. Mit dieser Funktion erkennt das System die Farbwiedergabeeigenschaften bei Verwendung mit einer kompatiblen Anwendung. Ein ColorSync-Profil beschreibt die Farbeigenschaften des LCD-Monitors. Hinweise: - Das ColorSync-Profil dieses Monitors kann zusammen mit MacOS 8.5 oder höher eingesetzt werden.
  • Seite 62: Anweisungen Zum Anbringen Eines Vesa-Kompatiblen Monitorarms

    Anweisungen zum Anbringen eines VESA-kompatiblen Monitorarms Ein Arm oder Fuß basierend auf dem VESA- Hinweise: Standard (im Handel erhältlich) kann am Monitor - Der Fuß ist nur für diesen Monitor bestimmt. angebracht werden. Der Arm oder Fuß muss vom Wenn Sie den Fuß entfernt haben, versuchen Kunden gesondert erworben werden.
  • Seite 63: Français

    Comment installer SHARP Stereo Display ........
  • Seite 64: Conseils Et Mesures De Sécurité

    à des dégagements excessifs de chaleur des objets durs. et conduire à un début d'incendie. - Il faut savoir que la Sharp Corporation décline - Lors du transport du moniteur, le saisir toute responsabilité en cas d'erreur survenue fermement à la fois par l'écran et par le support.
  • Seite 65 être transporté. - Ne placer aucun objet sur l'adaptateur secteur. - Sharp Corporation détient les droits d'auteur de - Ne pas utiliser l'adaptateur secteur à l'extérieur. Utility program. Ne pas le reproduire sans - Ne pas essayer de réparer l'adaptateur secteur autorisation préalable.
  • Seite 66: Description Du Produit

    Description du produit 11 12 1. Bouton MENU ......Ce bouton est utilisé pour faire apparaître, sélectionner et refermer le menu OSD (On Screen Display). 2. Bouton ......... Ce bouton est utilisé pour sélectionné les options du menu lorsque le menu OSD est affiché...
  • Seite 67: Réglage De L'inclinaison Et De La Hauteur

    Réglage de l'inclinaison et de la hauteur ATTENTION ! Réglage de la hauteur Trouver la hauteur idéale pour bien voir. - Assurez vous de bien saisir les deux bords du moniteur lorsque vous réglez l'angle de vue. Le panneau LCD de cet appareil est en verre. approx.
  • Seite 68: Raccordement, Activation Et Désactivation Du Moniteur

    Raccordement, activation et désactivation du moniteur ATTENTION ! 3. Remettre le cache en place. Attention de ne pas coincer le câble. - Lors du raccordement, s'assurer que l'alimentation tant du moniteur que de l'ordinateur est désactivée. - Ne pas courber le câble de manière excessive ni y ajouter de rallonge car cela peut provoquer un dysfonctionnement.
  • Seite 69: Raccordement Du Moniteur À Un Ordinateur

    Raccordement, activation et désactivation du moniteur Connexion analogique Raccordement du moniteur à un Raccorder le câble de signal analogique fourni à ordinateur la borne de sortie analogique RVB de l'ordinateur. Connexion numérique Raccorder le câble de signal numérique (fourni en accessoire) à...
  • Seite 70: Raccordement D'un Casque Audio (En Vente Dans Le Commerce)

    Raccordement, activation et désactivation du moniteur Connecter le câble audio fourni Raccordement du moniteur à une Quand le câble audio fourni est connecté à la source d'alimentation borne de sortie audio de l'ordinateur, le son de l'ordinateur connecté est sorti par les haut- parleurs du moniteur.
  • Seite 71: Activation De L'alimentation

    Raccordement, activation et désactivation du moniteur Activation de l'alimentation Désactivation de l'alimentation 1. Appuyer sur le bouton d'alimentation du 1. Mettre l'ordinateur hors tension. moniteur. 2. Appuyer sur le bouton d'alimentation du 2. Mettre l'ordinateur sous tension. moniteur. La diode d'alimentation s'éteind. Appuyer sur le bouton Mettre l'ordinateur d'alimentation.
  • Seite 72: Réglage De L'affichage Du Moniteur Et Du Volume Des Haut-Parleurs

    Réglage de l'affichage du moniteur et du volume des haut-parleurs Pour le signal numérique Fonction de verrouillage des réglages Le moniteur peut généralement être utilisé sans En désactivant les boutons de commande (c'est-à- réglage. Effectuer au besoin un réglage manuel. dire en les verrouillant), toute tentative de (p.74) modification des valeurs sera vaine.
  • Seite 73: Réglage De L'affichage Du Moniteur

    Réglage de l'affichage du moniteur Remarque : Réglage automatique de l'écran - Si le mode d'affichage de l'ordinateur utilisé est (avec un signal analogique) réglé sur 65K couleurs, il est possible de voir différents niveaux de couleurs dans chaque mire de couleurs ou il se peut que l'échelle de gris ait Les options CLOCK, PHASE, H-POS, V-POS du l'air colorée.
  • Seite 74: Réglage Manuel De L'écran

    Réglage de l'affichage du moniteur Menu ADJUSTMENT (AJUST) Réglage manuel de l'écran Quand le moniteur est utilisé avec une connexion numérique, ce réglage de menu n'est pas 1. D'abord afficher une image qui rend la totalité nécessaire. de l'écran du moniteur très lumineuse. (p.73) 2.
  • Seite 75 Réglage de l'affichage du moniteur Menu GAIN CONTROL Menu WHITE BALANCE (CTRL. LUMINOSIT) (EQUILIBRE DU BLANC) Quand le moniteur est utilisé avec une connexion numérique, ce réglage de menu n'est pas COOL ... Nuance de couleur plus bleutée que la nécessaire.
  • Seite 76 Réglage de l'affichage du moniteur Menu MODE SELECT (MODE SÉLECTION) Remarque : - En fonction de la résolution du signal d'entrée, même si les options peuvent être sélectionnées, l'affichage ne peut pas être modifié. OSD H-POSITION (positionnement horizontal OSD) Le positionnement du menu OSD peut être modifié vers la gauche et vers la droite.
  • Seite 77: Préparation Pour L'affichage 3D

    Conditions pour l'affichage des images 3D [English] du CD-ROM fourni. Logiciel applicable pour l'affichage des images 3D - Logiciel qui supporte SHARP 3D Technology Remarques : - Autre logiciel qui supporte l'affichage 3D - S'assurer de suivre les procédures d'installation et de connexion décrites dans [ReadmeE.txt].
  • Seite 78: Logiciel Fourni

    3. Suivre les instructions affichées sur l'écran pour terminer la procédure. Ce logiciel supporte SHARP 3D Technology. Il fait la conversion des images, prises par un appareil Comment l'utiliser photo numérique, etc., utilisant un adaptateur de Se référer à...
  • Seite 79: Affichage Des Images 3D

    - Régler la résolution de l'écran à 1024 x 768. 2D et 3D Il est impossible d'afficher une image 3D avec un autre réglage. Pour le logiciel supportant SHARP 3D - S'assurer de connecter le câble USB après avoir Technology mis hors tension le moniteur et l'ordinateur. Puis,...
  • Seite 80: Entretien Du Moniteur

    Si après cela, il ne fonctionne toujours pas Châssis et panneau de commande correctement, contacter le magasin où il a été Utiliser un chiffon doux et sec pour éliminer la acheté ou votre réparateur agréé Sharp le plus poussière du châssis et du panneau de proche. commande.
  • Seite 81 Le mode ne peut pas être commuté en mode 3D en appuyant sur le bouton 3D. - Est ce que le logiciel courant supporte SHARP 3D Technology? Si vous utilisez un logiciel qui ne supporte pas SHARP 3D Technology, référez vous au mode d'emploi du logiciel.
  • Seite 82: Caractéristiques Techniques

    Rotation du moniteur Nom du modèle Environ. 45° du centre vers la gauche et environ. 45° du centre vers la droite. LL-151-3D Alimentation Moniteur LCD CA100 - 240 V, 50/60 Hz (Emploi d'un Module TFT 3D LCD de 38 cm de diagonale adaptateur secteur spécial, type NL-A56J de...
  • Seite 83 Caractéristiques techniques Dimensions (Unités : mm) Remarque : - SHARP se réserve le droit d'apporter des modifications à la présentation et aux caractéristiques des appareils à fin d'amélioration. Les valeurs indiquées dans ce document sont les valeurs nominales des appareils de série mais de légères différences peuvent être constatées d'un appareil à...
  • Seite 84 Caractéristiques techniques Fréquences des signaux (analogique) Fréquences des signaux (numérique) Bande Bande Résolution de l'écran Résolution de l'écran Hsync Vsync Hsync Vsync passante passante VESA VESA Saisie de texte US Saisie de texte US - La résolution recommandée est 1024 x 768. Série - Toutes les fréquences sont non entrelacées.
  • Seite 85 Caractéristiques techniques La broche du connecteur d'entrée DVI-I Gestion de l'alimentation (Connecteur DVI-I à 29 broches) Le moniteur est basé sur les normes VESA DPMS et DVI DMPM. Pour activer la fonction de gestion de l'alimentation du moniteur, la carte vidéo et l'ordinateur utilisés doivent aussi être conformes à...
  • Seite 86: Installation Des Fichiers Relatifs Au Paramétrage Du Moniteur Et Au Profil Icc (Pour Windows)

    Installation des fichiers relatifs au paramétrage du moniteur et au profil ICC (Pour Windows) En fonction du type d'ordinateur ou du système Pour Windows 98 d'exploitation, il peut parfois s'avérer nécessaire Installation des fichiers relatifs au paramétrage du d'installer des fichiers relatifs au paramétrage du moniteur sous Windows 98, et au réglage du profil moniteur.
  • Seite 87 Installation des fichiers relatifs au paramétrage du moniteur et au profil ICC (Pour Windows) Pour Windows 2000 Pour Windows Me Installation des fichiers relatifs au paramétrage du Installation des fichiers relatifs au paramétrage du moniteur sous Windows 2000, et au réglage du moniteur sous Windows Me, et au réglage du profil ICC du moniteur en tant que valeur par profil ICC du moniteur en tant que valeur par...
  • Seite 88 Installation des fichiers relatifs au paramétrage du moniteur et au profil ICC (Pour Windows) Pour Windows XP Installation du profil ICC Installation du profil ICC du moniteur. (Si le ficher Installation des fichiers relatifs au paramétrage du relatif au paramétrage a déjà été installé, alors le moniteur sous Windows XP, et au réglage du profil profil l'a été...
  • Seite 89: Informations Sur Le Profil Colorsync (Pour Macos)

    Informations sur le profil ColorSync (Pour MacOS) A propos du profil ColorSync ColorSync est le système de gestion des couleurs de Apple Computer et il permet de réaliser les caractéristiques de l'affichage de couleurs lors d'une utilisation avec une application compatible. Un profil ColorSync décrit les caractéristiques de couleur du moniteur LCD.
  • Seite 90: Instructions Relatives À L'installation D'un Bras Conforme Vesa

    Instructions relatives à l'installation d'un bras conforme VESA Un bras ou un support conforme à la norme VESA Remarques : (en vente dans le commerce) peut être fixé au - Le support a été spécialement conçu pour être moniteur. L'acquisition du bras ou du support est utilisé...
  • Seite 91: Italiano

    Come installare il SHARP Stereo Display ........
  • Seite 92: Suggerimenti E Precauzioni Per La Sicurezza

    - Per favore abbiate comprensione per il fatto che sia la parte del display che quella di supporto. la Sharp Corporation non si assume nessuna Se si solleva il monitor afferrandolo solo dalla responsabilità per errori fatti nell'uso da parte parte del display, la parte che fa da supporto del cliente o di terzi, né...
  • Seite 93 - La Sharp Corporation è proprietaria dei diritti - Non collocate nessun oggetto sull'adattatore d'autore per i programmi delle utilità. Non riproducetelo senza averne il permesso.
  • Seite 94: Descrizione Del Prodotto

    Descrizione del prodotto 11 12 1. Tasto MENU ......Questo tasto si usa per visualizzare, selezionare e chiudere il menu OSD (On Screen Display). 2. Tasto ........Questo tasto si usa per selezionare delle opzioni di menu, quando il menu OSD è visualizzato. 3.
  • Seite 95: Regolazione Dell'angolazione, Regolazione Dell'altezza

    Regolazione dell'angolazione, regolazione dell'altezza ATTENZIONE! Regolazione dell'altezza Regolare su un'altezza comoda per la vista. - Assicurarsi di tenere entrambi i lati del monitor quando si regola l'angolo di visione. Il schermo LCD usato in questo monitor è fatto di vetro. circa.
  • Seite 96: Collegamento Del Monitor Ed Accensione E Spegnimento Del Monitor

    Collegamento del monitor ed accensione e spegnimento del monitor ATTENZIONE! 3. Reinserire il coperchio. Fare attenzione a che il cavo non resti - Quando eseguite i collegamenti, assicuratevi incastrato. che sia il monitor che il computer siano spenti. - Fate attenzione a non piegare eccessivamente il cavo oppure nell'aggiungere dei cavi di prolunga, in quanto ciò...
  • Seite 97: Collegamento Del Monitor Ad Un Computer

    Collegamento del monitor ed accensione e spegnimento del monitor Collegamento analogico Collegamento del monitor ad un computer Collegare il cavo accessorio del segnale analogico al terminale di uscita RGB analogica Collegamento digitale del computer. Collegare il cavo accessorio del segnale digitale al terminale di uscita RGB digitale del computer.
  • Seite 98: Collegamento Delle Cuffie (Da Acquistare In Commercio)

    Collegamento del monitor ed accensione e spegnimento del monitor Collegare il cavo audio, accessorio Collegamento del monitor ad una Quando il cavo audio, accessorio, è collegato al sorgente di alimentazione elettrica terminale di uscita audio del computer, il suono del computer collegato viene ascoltato dagli altoparlanti del monitor.
  • Seite 99: Accensione

    Collegamento del monitor ed accensione e spegnimento del monitor Accensione Spegnimento 1. Premere il tasto di alimentazione del monitor. 1. Spegnete il computer. 2. Accendete il computer. 2. Premete il tasto di alimentazione del monitor. Il LED di alimentazione si spegnerà. Premete il tasto di Accendete il alimentazione.
  • Seite 100: Regolazione Della Visualizzazione Sullo Schermo E Volume Dell'altoparlante

    Regolazione della visualizzazione sullo schermo e volume dell'altoparlante Per il segnale digitale Funzione del blocco di regolazioni Di solito si può utilizzare il monitor senza Disattivando i tasti di controllo (cioè settando il regolarlo. Se necessario, eseguite la regolazione blocco) si impedirà ogni tentativo di cambiare i manuale.
  • Seite 101: Regolazione Della Visualizzazione Sullo Schermo

    Regolazione della visualizzazione sullo schermo Regolazione automatica dello schermo Regolazione automatica dello schermo 1. Premete il tasto MENU. (quando si usa un segnale analogico) Il menu ADJUSTMENT verrà visualizzato. Le opzioni nel menu ADJUSTMENT si possono regolare automaticamente (CLOCK, PHASE (FASE), H-POS, V-POS).
  • Seite 102: Regolazione Manuale Dello Schermo

    Regolazione della visualizzazione sullo schermo Menu ADJUSTMENT (REGOL) Regolazione manuale dello schermo Quando il monitor è usato con un collegamento digitale, questa impostazione del menu non è 1. Prima di tutto visualizzate un'immagine che necessaria. rende chiaro l'intero schermo. (p.101) 2.
  • Seite 103 Regolazione della visualizzazione sullo schermo Menu GAIN CONTROL (CTRL. GUADAGNO) Menu WHITE BALANCE Quando il monitor è usato con un collegamento (BILANCIAMENTO DEL BIANCO) digitale, questa impostazione del menu non è necessaria. COOL (freddo) ..tonalità del colore più tendente al blu rispetto allo AUTO standard Quando [AUTO] viene selezionato con il tasto...
  • Seite 104 Regolazione della visualizzazione sullo schermo Menu MODE SELECT (SELEZ. MODO) Nota: - A seconda della risoluzione del segnale di input, anche se si possono selezionare delle opzioni di menu, il display potrebbe non cambiare. OSD H-POSITION (posizione orizzontale dell'OSD) La posizione del menu OSD può essere spostata verso sinistra e verso destra.
  • Seite 105: Preparazione Per Il Display 3D

    Nel modo 3D, la barriera di parallasse divide la Per visualizzare del immagini 3D con questo luce in modo che gli occhi di destra e di sinistra di monitor usando il software che supporta SHARP un osservatore ricevano luci differenti. Di 3D Technology, dovete installare il seguente conseguenza, l'osservatore può...
  • Seite 106: Software Fornito

    Nota: fotografica stereo sullo schermo di questo monitor. - Se si desidera installare il seguente software, installare SHARP Stereo Display in primo luogo. Come installare 1. Caricare il CD-ROM fornito nel drive del CD- SHARP Smart Stereo Photo Editor ROM del computer.
  • Seite 107: Visualizzazione Delle Immagini 3D

    Avvisi sulla visualizzazione delle immagini 3D - Impostare la risoluzione dello schermo a 1024 x 768. Per il software che supporta SHARP 3D Technology Non è possibile visualizzare le immagini 3D con Quando visualizzate un'immagine 3D con un software "ready" di display 3D, il modo di display è...
  • Seite 108: Cura Del Monitor

    ATTENZIONE! Centro del Servizio Tecnico Assistenza Clienti - Non usate mai dei solventi, della benzina, della Sharp più vicino a voi. dell'alcol, del detersivo per vetri, ecc. in quando - Nel periodo iniziale del loro uso, a causa delle ciò può dare luogo a cambiamenti di colore o di caratteristiche dei tubi fluorescenti, lo schermo forma.
  • Seite 109 L'immagine 3D sul display sembra sfocata e raddoppiata. - Confermare se il software compatibile del display 3D sta funzionando. - Per il software che supporta SHARP 3D Technology - Premere il tasto 3D per passare al modo 3D (il LED di alimentazione cambia al colore blu).
  • Seite 110: Specifiche

    LL-151-3D Alimentazione Display LCD 100-240 V C.A., 50/60 Hz (Utilizza l'adattatore Modulo TFT 3D LCD di 38 cm misurato CA speciale, tipo NL-A56J della Sharp diagonalmente Corporation) Risoluzione (max.) Temperatura dell'ambiente operativo XGA 1024 x 768 pixel (Solo nel modo 2D.
  • Seite 111 Specifiche Dimensioni (Unità: mm) Nota: - Per facilitare una politica di miglioramenti continui, la SHARP si riseva il diritto di cambiare il disegno e le caratteristische per perfezionamenti senza preavviso. Le caratteristiche di prestazioni numericamente indicate sono valori nominali delle unità di produzione.
  • Seite 112 Specifiche Sincronizzazioni rilevanti del segnale Sincronizzazioni rilevanti del segnale (analogico) (digitale) Sincronismo Sincronismo Frequenza Sincronismo Sincronismo Frequenza Risoluzione dello schermo Risoluzione dello schermo orizzontale v e r t i c a l e punti orizzontale verticale punti VESA VESA Testo US Testo US - La risoluzione consigliata è...
  • Seite 113 Specifiche Pin del connettore di ingresso DVI-I Gestione dell'energia (Connettore DVI-I con 29 pin) Il monitor è basato sulle norme VESA DPMS e DVI DMPM. Per attivare la funzione di gestione energetica, è necessario che anche la scheda video e il computer utilizzato siano conformi a queste norme.
  • Seite 114: Installazione Delle Informazioni Di Setup E Del Profilo Icc (Per Windows)

    Installazione delle informazioni di setup e del profilo ICC (Per Windows) A seconda del computer oppure del sistema Per Windows 98 operativo può essere necessario usare il Installazione delle informazioni di setup del computer per eseguire l'installazione delle monitor in Windows 98, e impostazione del profilo informazioni di setup del monitor, ecc.
  • Seite 115 Installazione delle informazioni di setup e del profilo ICC (Per Windows) Per Windows 2000 Per Windows Me Installazione delle informazioni di setup del Installazione delle informazioni di setup del monitor in Windows 2000, e impostazione del monitor in Windows Me, e impostazione del profilo profilo ICC del monitor come valore ICC del monitor come valore predeterminato.
  • Seite 116 Installazione delle informazioni di setup e del profilo ICC (Per Windows) Per Windows XP Installazione del profilo ICC Installazione del profilo ICC del monitor. (Se le Installazione delle informazioni di setup del informazioni di setup sono già installate, lo è monitor in Windows XP, e impostazione del profilo anche il profilo e non occorre installarlo.) ICC del monitor come valore predeterminato.
  • Seite 117: Informazioni Sul Profilo Colorsync (Per Macos)

    Informazioni sul profilo ColorSync (Per MacOS) Il profilo ColorSync ColorSync è il sistema di gestione dei colori della Apple Computer e consente di realizzare la riproduzione dei colori, quando lo si usa con un'applicazione compatibile. Un profilo ColorSync descrive le caratteristiche cromatiche del monitor LCD.
  • Seite 118: Istruzioni Per Collegare Un Braccio Compatibile Vesa

    Istruzioni per collegare un braccio compatibile VESA E' possibile collegare al monitor un braccio 4. Rimuovete le quattro viti e rimuovete quindi il oppure un supporto basati sullo standard VESA supporto dal monitor. (da acquistare in commercio). L'acquisto del braccio oppure del supporto è a discrezione del cliente.
  • Seite 119: Español

    Cómo instalar SHARP Stereo Display ........
  • Seite 120: Sugerencias Y Precauciones De Seguridad

    - Cuando transporte el monitor, sujételo duros. firmemente por las secciones de la pantalla y - Sharp Corporation no asume responsabilidad del pedestal. Si el monitor se levanta tomándolo alguna por las faltas cometidas durante el uso solamente por la pantalla, el pedestal podrá...
  • Seite 121 - No coloque ningún objeto sobre el adaptador de - Sharp Corporation es titular de los derechos de autor del programa de utilidades. No lo - No utilice el adaptador de CA en una toma al reproduzca sin previa autorización.
  • Seite 122: Descripción Del Producto

    Descripción del producto 11 12 1. Botón MENU ......Este botón se utiliza para ampliar, seleccionar y cerrar el menú OSD (On Screen Display). 2. Botón ........Este botón se utiliza para seleccionar opciones de menú cuando se visualiza el menú OSD. 3.
  • Seite 123: Ajuste De Ángulo Y Ajuste De Altura

    Ajuste de ángulo y ajuste de altura ¡PRECAUCIÓN! Ajuste de altura Ajuste una altura adecuada para ver la imagen - Asegúrese de sostener ambos lados del monitor con comodidad. al ajustar el ángulo de visión. El panel LCD que se utiliza en este monitor es de vidrio. Si presiona el panel LCD con las manos podría approx.
  • Seite 124: Conexión Del Monitor Y Encendido/Apagado Del Mismo

    Conexión del monitor y encendido/ apagado del mismo ¡PRECAUCIÓN! 3. Vuelva a colocar la cubierta. Tenga cuidado de no pellizcar los cables. - Antes de realizar la conexión, asegúrese de que tanto el monitor como el ordenador están apagados. - Tenga cuidado de no doblar excesivamente el cable ni utilizar cables de prolongación ya que ello podría llevar a un funcionamiento anómalo.
  • Seite 125: Conexión Del Monitor A Un Ordenador

    Conexión del monitor y encendido/apagado del mismo Conexión analógica Conexión del monitor a un ordenador Conecte el cable de señal analógica accesoria en el borne de salida RGB analógica del ordenador. Conexión digital Conecte el cable de señal digital accesoria en el borne de salida RGB digital del ordenador.
  • Seite 126: Conexión De Auriculares (De Venta En El Comercio)

    Conexión del monitor y encendido/apagado del mismo Conecte el cable de audio suministrado Conexión del monitor a una toma de Cuando el cable de audio suministrado se corriente conecte al borne de salida de audio del ordenador, el sonido del ordenador conectado saldrá...
  • Seite 127: Encendido

    Conexión del monitor y encendido/apagado del mismo Encendido Apagado 1. Pulse el botón de encendido/apagado del 1. Apague el ordenador. monitor. 2. Pulse el botón de encendido/apagado del 2. Encienda el ordenador. monitor. El LED indicador de conexión se apagará. Pulse el botón de Encienda el encendido/apagado.
  • Seite 128: Ajuste De La Pantalla Y Volumen Del Altavoz

    Ajuste de la pantalla y volumen del altavoz Para la señal digital Función de bloqueo de ajuste Normalmente no es necesario ajustar el monitor Si deshabilita los botones de control (es decir, antes de utilizarlo. En caso necesario, realice un activa el bloqueo) no podrá...
  • Seite 129: Ajuste De La Pantalla

    Ajuste de la pantalla Ajuste automático de la pantalla Ajuste de pantalla automático 1. Pulse el botón MENU. (cuando se utiliza una señal analógica) Aparecerá el menú ADJUSTMENT. Las opciones del Menú ADJUSTMENT (CLOCK, PHASE, H-POS, V-POS) se pueden ajustar automáticamente.
  • Seite 130: Ajuste De Pantalla Manual

    Ajuste de la pantalla Menú ADJUSTMENT Ajuste de pantalla manual Cuando se utiliza el monitor con una conexión digital, no es necesario este ajuste de menú. 1. En primer lugar aparece una imagen que pone toda la pantalla muy clara. (p.129) AUTO 2.
  • Seite 131 Ajuste de la pantalla Menú GAIN CONTROL Menú WHITE BALANCE Cuando se utiliza el monitor con una conexión digital, no es necesario este ajuste de menú. COOL ... Tonalidad más azul que la estándar • ..Tonalidad ligeramente más azul que la AUTO estándar STD ..
  • Seite 132 Ajuste de la pantalla Menú MODE SELECT Nota: - Según sea la resolución de la señal de entrada, la pantalla puede no cambiar incluso si pueden seleccionarse las opciones del menú. OSD H-POSITION (posición horizontal OSD) La posición del menú OSD puede moverse hacia la izquierda y hacia la derecha.
  • Seite 133: Preparación Para La Pantalla Tridimensional

    En el modo tridimensional, la barrera parallax SHARP 3D Technology, debe instalar el siguiente divide la luz de tal forma que los ojos derecho e software en su ordenador y conectar el ordenador izquierdo recibien diferentes luces.
  • Seite 134: Software Entregado

    Sistema operativo aceptado: Windows XP (versión inglesa) Es necesario instalar el siguiente software del CD- No podemos garantizar la operación de versiones ROM entregado después de instalar el SHARP en otros idiomas. Stereo Display. Este software calcula valores de atributos para ver Nota: una imagen tomada con una cámara estéreo en la...
  • Seite 135: Mostrando Imágenes Tridimensionales

    Para el software que acepta la tecnología No puede mostrar una imagen tridimensional con otros ajustes. tridimensional de SHARP - Asegúrese de conectar el cable USB cuando el Cuando aparezca una imagen tridimensional con monitor y el ordenador están desconectados.
  • Seite 136: Conservación Del Monitor

    Caja y sector del panel de control en contacto con su proveedor o con el servicio Utilice un paño suave y seco para limpiar, sin autorizado de asistencia técnica de Sharp más apretar demasiado, la caja y el panel de control. cercano.
  • Seite 137 (No se trata de una anomalía.) El modo no puede cambiar al modo tridimensional pulsando el botón 3D. - ¿El software en uso acepta SHARP 3D Technology? Si está utilizando un software que no acepte SHARP 3D Technology, refiérase al manual de funcionamiento del software.
  • Seite 138: Especificaciones

    LL-151-3D Suministro eléctrico Display LCD CA100-240 V, 50/60 Hz (Utiliza un adaptador de Módulo LCD tridimensional TFT con medición CA especial, de tipo NL-A56J de Sharp diagonal de 38 cm Corporation) Resolución (máx.) Temperatura ambiental XGA 1024 x 768 pixels (Sólo en el modo bidimensional.
  • Seite 139 Nota: : mm) - Como parte de la política de mejoras continuas, SHARP se reserva el derecho de realizar cambios en el diseño y especificaciones para la mejora del producto sin previo aviso. Las figuras indicadas que especifican el rendimiento son valores nominales de los aparatos de producción.
  • Seite 140 Especificaciones Sincronizaciones de las señales Sincronizaciones de las señales correspondientes (analógica) correspondientes (digital) Resolución de la pantalla Resolución de la pantalla Hsync Vsync Frecuencia Hsync Vsync Frecuencia VESA VESA US text US text - La resolución recomendada es de 1024 x 768. Series - Todos son compatibles únicamente con «non- Power...
  • Seite 141 Especificaciones Contactos del conector de entrada DVI-I Gestión de energía (Conector DVI-I de 29 contactos) El monitor está basado en los estándares VESA DPMS y DVI DMPM. Para activar la función de administrador de electricidad, la placa de video y el ordenador utilizado con ésta deben ajustarse a estos estándares.
  • Seite 142: Instalación De La Información De Configuración Y Del Perfil Icc (Para Windows)

    Instalación de la información de configuración y del perfil ICC (Para Windows) Según sea el tipo de ordenador o de sistema Para Windows 98 operativo, puede que sea necesario utilizar el Instalación de la información de configuración del ordenador para llevar a cabo la instalación de la monitor en Windows 98 y configuración del perfil información de configuración del monitor, etc.
  • Seite 143 Instalación de la información de configuración y del perfil ICC (Para Windows) Para Windows 2000 Para Windows Me Instalación de la información de configuración del Instalación de la información de configuración del monitor en Windows 2000 y configuración del monitor en Windows Me y configuración del perfil perfil ICC del monitor como valor predeterminado.
  • Seite 144 Instalación de la información de configuración y del perfil ICC (Para Windows) Para Windows XP Instalación del perfil ICC Instalación del perfil ICC del monitor. (Si ya ha Instalación de la información de configuración del instalado la información de configuración, se monitor en Windows XP y configuración del perfil habrá...
  • Seite 145: Información Acerca Del Perfil Colorsync (Para Macos)

    Información acerca del perfil ColorSync (Para MacOS) Acerca del perfil ColorSync ColorSync es el sistema de gestión del color de Apple Computer y permite obtener características de reproducción cromática cuando se utiliza con una aplicación compatible. Un perfil ColorSync describe las características crsomáticas del monitor LCD.
  • Seite 146: Instrucciones Para Acoplar Un Brazo De Compatibilidad Vesa

    Instrucciones para acoplar un brazo de compatibilidad VESA Puede acoplar al monitor un brazo o un pedestal Notas: (de venta en el comercio) conforme al estándar - El pedestal se ha diseñado específicamente VESA. La adquisición del brazo o el pedestal para este monitor.
  • Seite 147 Downloaded from www.Manualslib.com manuals search engine...
  • Seite 148 SHARP CORPORATION Printed in Japan Gedruckt in Japan Imprimé au Japon Stampato in Giappone Impreso en Japón DSC2 TINSM1060MPZZ (2) Downloaded from www.Manualslib.com manuals search engine...

Inhaltsverzeichnis