
Verwandte Anleitungen für sylvac S_Dial WORK


Inhaltszusammenfassung für sylvac S_Dial WORK
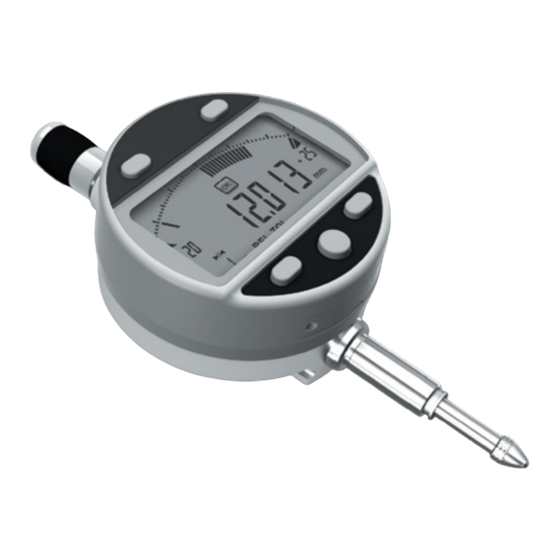
- Seite 1 DIAL GAUGE COMPARATEUR MESSUHR INSTRUCTIONS MODE D’EMPLOI COMPARATORE BEDIENUNGSANLEITUNG MANUALE D’USO COMPARADOR MODO DE EMPLEO...
-
Seite 2: Einbau Und Austausch Von Batterie (Oder Netzkabel)
No. 0 No. 0 (0,4x2,5mm) Installing and replacing the battery (or Power cable) Mise en place et remplacement de la batterie (ou câble Power) Einbau und Austausch von Batterie (oder Netzkabel) Installazione e sostituzione della batteria (o del cavo di alimentazione) Colocación y sustitución de la batería (o cable Power) Battery / batterie / batterie / batteria / bateria : lithium 3V, type CR2032... - Seite 3 (4x) M2 L 3.5mm Diagram for rear fixings Schéma de fixation arrière Schema für die Befestigung hinten Schema di fissaggio posteriore Esquema de fijación posterior...
- Seite 4 thou MINMAX PRESET µm thou MINMAX PRESET µm...
- Seite 5 Description 1. MODE button 19. Analogue scale (chap. 8) 2. SET button 20. Lower limit exceeded 3. “ Favourite ” button 21. Upper limit exceeded button 22. Tolerance indicators button 23. Analogue scale lower limit (chap. 8) Ø8 or 3/8” 24.
- Seite 6 1 . Operating features of the instrument The instrument has two operating modes: basic functions (direct access) and advanced functions. In addition to MODE the configuration functions, available access to the MIN, MAX and DELTA (TIR) mode, or display of tolerances (see chaps.
- Seite 7 3. Basic functions Each short press on gives direct access to the basic functions : MODE MODE - Normal mode : Zero reset 0.000 - Min (Max) mode : Diameter calibration on the measured min (max) value MODE ..Units selection (mm or Inch) Inch Unit MODE...
- Seite 8 4. Advanced functions Prolonged pressure (>2s) on gives access to the advanced functions. Then, each short press on accesses MODE MODE the required function : MODE MIN, MAX measurement, DELTA (TIR) (see ModE dELtA chap. 5 MINMAX MODE IntE 2 points measurement (Dynamic preset) (see chapter 11) MODE ModE...
- Seite 9 0.01 0.001 Auto ..continuation ..continuation MODE MODE +0.001 -0.001 MODE MODE Automatic switch-off mode Mult Auto +01.0000 MAn = de-activated, Auto = active (after 20 min.) MODE MODE Keypad lock, Only the DATA and CLR functions of the favorite On Off rESEt key remains actives.
- Seite 10 6. Inputting (or modifying) tolerance limits The tolerance limits are defined by introducing lower and upper intervals, compared to the nominal rating. Two methods are available : 6.1 Using the TOL mode ..... Input the nominal value (see chap. 7) .....
- Seite 11 6.2 Use of the buttons It is also possible to enter or modify the nominal value or the tolerance limits by prolongedly pressing (>2s) the a n d / button : Enter the Enter the Enter the nominal rating lower interval upper interval MODE MODE...
- Seite 12 7 Entering a numeric value To enter or modify a numeric value (Preset, nominal ratings, tolerance intervals or multiplication factor), you can proceed in two ways : 7.1 Increases / decrases the current value : Decreases the current value Increases the current value Note: - the scanning speed increases with a long press on the button - save the value with one of the three lower buttons thou...
- Seite 13 8. Scale the analog display The user may change the analogue display’s scale value by shortly pressing 8.1 Centring function of the analogue scale When the tolerance limits are asymmetric with respect to the nominal ratings, it is possible to realign them to the analogue scale, by a short simultaneous press on + 0.025 Example : 12.000...
- Seite 14 9. Favourite key The «favourite» key gives direct access to a predefined function, and can be configured according to the needs of the user. In order to assign a function to the «favourite» key, give a prolonged press on , and then select the required function : Zero Data...
- Seite 15 10. 2 points mode (Dynamic adjustment of the Preset) This mode allow the diameter measurement with a CBG (Cylinder bore gage). It is indicated with the sign PRE. Proceed as follows : 10.1 Calibration of the instrument - Enter a Preset value corresponding to the actual size of the standard (see chap. 3) - Enable the IntE Function.
- Seite 16 11. Switching off The dial gauge goes automatically into stand-by if not used for 20 minutes, unless Auto OFF mode has been turned off (see Chap. 4, advanced functions) 123.456 Stand-by mode can be forced by a prolonged press (> 2 sec) on >2s In stand-by mode, the value of the origin is retained by the sensor (SIS mode), and the instrument automatically restarts with any movement of the measurement probe, RS command or press a button.
- Seite 17 13. Personalising the instrument Access to the functions of your instrument can be personalised, for more information see manufacturer’s website (requires you to connect your instrument via a Proximity or Power RS / USB cable). Possibilities: - De-activate or active the required functions - Modify access to the advanced functions (direct access) 14.
- Seite 18 15. List of the main commands Selection and configuration Interrogation CHA+ / CHA- Change measurement direction CHA? Measurement sense? FCT0 ...9...A...F Assign «favourite» function FCT? «favourite» function active? MM / IN Change measurement unit UNI? Measurement unit active? KEY0 / KEY1 Lock / unlock keypad KEY? Keypad locked?
-
Seite 19: Specifications
Analogue scale capacity : min ±5 µm - max ±25 mm / min ± 0.25 thou - max ± 1.25 IN Measurement system : Sylvac inductive system (patented) Power : 1 x 3V lithium battery, type CR2032, 220mAh Average battery life : 8’000 hours... - Seite 20 thou MINMAX PRESET µm thou MINMAX PRESET µm...
- Seite 21 Description 1. Bouton MODE 19. Echelle analogique (chap. 8) 2. Bouton SET 20. Dépassement de la limite inférieur 3. Bouton “ Favoris ” 21. Dépassement de la limite supérieur 4. Bouton 22. Indicateur des tolérances 5. Bouton 23. Limite inférieur échelle analogique (chap. 8) Ø8 ou 3/8”...
- Seite 22 1. Les fonctionnalités de l’instrument L’instrument possède 2 modes de travail : fonctions de base (avec accès direct) et fonctions avancées. MODE En plus des fonctions de configuration, vous pouvez accéder au mode MIN, MAX et DELTA (TIR), ou à l’affi- chage des Tolérances.
- Seite 23 3. Fonctions de base Chaque pression courte sur permet un accès direct aux fonctions de base : MODE MODE - Mode normal : Mise à zéro 0.000 - Mode min (max) : Calibration du diamètre sur la valeur min (max) mesurée MODE ..
- Seite 24 4. Fonctions avancées Une pression longue (>2s) sur permet d’accéder aux fonctions avancées. Puis, chaque pression courte sur MODE MODE accède à la fonction souhaitée : MODE ModE dELtA Mesure du MINIMUM, MAXIMUM et DELTA (TIR) (voir chap. 5) MINMAX MODE IntE Mesure 2 points (preset dynamique)
- Seite 25 0.01 0.001 Auto ..suite MODE MODE +0.001 -0.001 MODE Mode d’extinction automatique MODE Mult Auto +01.0000 MAn = désactivé, Auto = actif (après 20 min.) Blocage du clavier Seules les fonctions DATA et CLR de la MODE MODE touche favori restent actives (pour désactiver le blocage du On Off rESEt clavier, presser SET pendant 5 s.)
- Seite 26 6. Introduction (ou modification) des limites de tolérances Les limites de tolérances sont définies en introduisant l’écart inférieur et supérieur, par rapport à la cote nominale. Deux méthodes sont possibles : 6.1 Utilisation du mode TOL ..... Introduire la valeur nominale (voir chap.
- Seite 27 6.2 Utilisation des boutons Il est également possible d’introduire ou de modifier indépendamment la valeur nominale ou les écarts inférieur et supérieur, par une pression longue (>2s) sur et/ou Introduire la cote Introduire l’écart Introduire l’écart nominale inférieure supérieure MODE MODE MODE (voir chap.
- Seite 28 7 Introduction d’une valeur numérique Pour introduire ou modifier une valeur numérique (Preset, cote nominale, écarts de tolérances ou facteur de multiplication), on peut procéder selon deux méthodes : 7.1 Incrément / décrément de la valeur actuelle: Décrémente la valeur actuelle Incrémente la valeur actuelle Note: - la vitesse de balayage augmente lors d’une pression prolongée du bouton - sauver la valeur avec l’un des trois boutons inférieurs...
- Seite 29 8. Echelle de l’affichage analogique Une pression courte sur , permet de modifier la valeur d’échelon de l’affichage analogique. 8.1 Fonction de centrage de l’échelle analogique Lorsque les limites de tolérances sont asymétriques par rapport à la cote nominale, il est possible de les recentrer sur l’échelle analogique, par une pression courte simultanée sur + 0.025 Exemple : 12.000...
- Seite 30 9. Touche favori La touche «favori» permet l’accès direct à une fonction prédéfinie et peut être configurée selon les besoins de l’utilisateur. Pour attribuer une fonction à la touche «favori», effectuer une pression longue (>2s) sur , puis sélectionner la fonction souhaitée : Mise à...
- Seite 31 10. Mesure 2 points (Ajustage dynamique du Preset) Ce mode permet la mesure de diamètres à l’aide d’un CBG (Cylinder bore gage, jauge de mesure de diamètres inté- rieurs). Il est indiqué par le signe PRE. Procéder comme suit : 10.1 Etalonnage de l’instrument - Introduire une valeur de Preset correspondant à...
- Seite 32 11. Extinction Le comparateur se met automatiquement en stand-by après 20 minutes de non utilisation, sauf si le mode Auto OFF est désactivé (voir chap.4 fonctions avancées) 123.456 Vous pouvez forcer le mode stand-by, par pression longue (>2s) sur >2s En mode stand-by, la valeur d’origine est conservée par le capteur (mode SIS), et l’instrument redémarre automatique- ment par un mouvement de la touche de mesure ainsi que par commande RS, ou par pression sur un bouton.
- Seite 33 13. Personnalisation de l’instrument Il est possible de personnaliser l’accès aux fonctions de votre instrument, pour plus d’information voir site-web du fabricant (nécessite une connexion de votre instrument, via un câble Proximity ou Power RS / USB). Possibilités : - Désactiver ou activer les fonctions souhaitées - Modifier l’accès aux fonctions avancées ( mise en accès direct) 14.
- Seite 34 15. Liste des commandes principales Sélection et configuration Interrogation CHA+ / CHA- Changement direction de mesure CHA? Sens de mesure? FCT0 ...9...A...F Attribution fonction «favori» FCT? Fonction «favori» active? MM / IN Changement unité de mesure UNI? Unité de mesure active? KEY0 / KEY1 Active / désactive le blocage clavier KEY?
-
Seite 35: Spécifications
Capacité échelle analogique min ±5 µm - max ±25 mm / min ± 0.25 thou - max ± 1.25 IN Système de mesure : Sylvac inductive system (breveté) Alimentation : 1 batterie lithium 3V, type CR2032, capacité 220mAh Autonomie moyenne : 8’000 heures... - Seite 36 thou MINMAX PRESET µm thou MINMAX PRESET µm...
- Seite 37 Beschreibung 1. MODE-Taste 19. Strichskala (Kap. 8) 2. SET-Taste 20. Unterer Grenzwert unterschritten 3. Favoriten-Taste 21. Oberer Grenzwert überschritten Taste 22. Toleranzanzeiger Taste 23. Unterer Grenzwert Strichskala (Kap. 8) Ø8 oder 3/8” 24. Oberer Grenzwert Strichskala (Kap. 8) 6. Einspannschaft 25.
-
Seite 38: Funktionalitäten Des Instruments
1. Funktionalitäten des Instruments: Das Instrument verfügt über zwei Betriebsarten: Basisfunktionen (mit direktem Zugang) und fortgeschrittene MODE Funktionen. Neben den Konfigurationsfunktionen hat man Zugriff auf die Modi MIN, MAX und DELTA (TIR), oder auf die Toleranzanzeige. (siehe Kap. 3 und 4). Mit der Taste „Favoriten“... - Seite 39 3. Grundfunktionen Jede kurze Betätigung von ermöglicht einen direkten Zugriff auf die Grundfunktionen : MODE MODE - Normalmodus : Nullen 0.000 - Min- (Max-)Modus : Kalibrierung des Durchmessers auf gemessenen Min- (Max-)Wert MODE ..Wahl der Einheit (mm oder Inch) Inch Unit MODE...
- Seite 40 4. Fortgeschrittene Funktionen Eine lange Betätigung (>2s) von ermöglicht es, auf die fortgeschrittenen Funktionen zuzugreifen. MODE Anschließend führt jede kurze Betätigung von zur gewünschten Funktion : MODE MODE Messen von MINIMUM, MAXIMUM, DELTA ModE dELtA (TIR) (siehe Kap. 5) MINMAX MODE IntE 2 Punkte Modus (Dynamische Preset)
- Seite 41 0.01 0.001 Auto ..Fortsetzung MODE MODE +0.001 -0.001 MODE MODE Automatischer Ausschaltmodus Mult Auto +01.0000 MAn = deaktiviert, Auto = aktiv (nach 20 Min.) MODE MODE Tastatursperre. Nur die DATA und CLR FUnktions des On Off rESEt Favoriten-Taste bleibt aktiv MODE MODE Mult...
- Seite 42 6. Eingeben (oder Ändern) von Toleranzgrenzen Toleranzgrenzen werden durch die Eingabe von oberen und unteren Abweichungen gegenüber dem Nominalwert festge- legt. Dies kann auf zwei Arten erfolgen : 6.1 Verwendung des Modus TOL ..... Den Nominalwert eingeben (siehe Kap. 7) .....
- Seite 43 6.2 Verwendung der Tasten Nominalwert oder Toleranzgrenzen können auch durch langes Drücken (>2s) der Tasten und/oder eingegeben oder geändert werden: Nominalwert Untere Abweichung Obere Abweichung eingeben eingeben eingeben MODE MODE MODE (siehe Kap. 7) (siehe Kap. 7) (siehe Kap. 7) Messen mit Innen- / Aussentoleranzen - Beim Messen von Innenmassen können die Zeiger (rot und gelb) gekreuzt werden, indem die Eingabereihenfolge der Toleranzabweichungen (obere Abweichung <...
- Seite 44 7 Eingabe von Ziffernwerten Zum Eingeben oder Ändern eines Ziffernwerts (Preset, Nominalwert, Toleranzabweichung oder Multiplikationsfaktor) bes- tehen zwei Möglichkeiten : 7.1 Schrittweiss Erhöhung / Reduktion des aktuellen Werts : Reduziert den aktuellen Wert Erhöht den aktuellen Wert Hinweis : - Längerer Druck auf die Taste erhöht die Suchgeschwindigkeit - Gewünschten Wert mit einer der drei unteren Tasten speichern thou MINMAX PRESET...
-
Seite 45: Zentrierfunktion Bei Strichskala
8. Strichskala Ein kurzer Druck auf oder ändert den Teilungswert der Strichskala. 8.1 Zentrierfunktion bei Strichskala Asymmetrische Toleranzgrenzen gegenüber dem Nominalwert lassen sich bei der Strichskala durch gleichzeitigen kurzes Betätigen der Tasten zentrieren. + 0.025 Beispiel : 12.000 + 0.020 +0.020 +0.025 +0.020... - Seite 46 9. Favoriten-Taste Die „Favoriten-Taste“ ermöglicht den direkten Zugriff auf eine zuvor bestimmte Funktion und kann entsprechend der Bedürf- nisse des Nutzers konfiguriert werden. Um der „Favoriten-Taste“ eine Funktion zuzuordnen, muss man lange auf drücken und dann die gewünschte Funktion wählen : Nullen Datenübertra- Nor-Min-Max-...
- Seite 47 10. 2 Punkte Mode (Dynamische Anpassung der Preset) Dieser Modus ermöglicht die Messung von Durchmessern mit einem CBG (Cylinder bore Gage, Messgerät Innendurchmes- ser). Es wird durch das Vorzeichen PRE angezeigt. Gehen Sie wie folgt: 10.1 Kalibrieren des Geräts - Preset-Wert gemäss effektivem Messwert des Standards eingeben (siehe Kap. 3). - Aktivieren IntE Funktion.
- Seite 48 11. Ausschalten Die Messuhr stellt sich nach 20 Minuten Nichtgebrauch automatisch auf Stand-By, außer wenn die Betriebsart Auto OFF deaktiviert ist (siehe Kap. 4, fortgeschrittene Funktionen). 123.456 Stand-By-Funktion durch langes Betätigen (>2s) von erzwingen. >2s Im Stand-By-Modus wird der Referenzwert vom Sensor (SIS Modus) beibehalten und das Instrument startet automatisch mit einer Bewegung des Messeinsatzes sowie über RS, oder eine Taste drücken .
-
Seite 49: Personalisierung Des Instruments
13. Personalisierung des Instruments Es ist möglich, den Zugriff auf die Funktionen Ihres Instruments mit Hilfe der kostenlosen Software zu personalisieren. Weitere Informationen finden Sie auf der Webseite des Herstellers (erfordert den Anschluss Ihres Instruments mit einem Proximity-Kabel oder RS / USB Power). Möglichkeiten: - die Deaktivierung oder Aktivierung der erwünschten Funktionen - die Änderung des Zugriffs auf die fortgeschrittenen Funktionen (Schaffung eines direkten Zugriffs) - Seite 50 15. Liste der wesentlichen Steuerbefehle Auswahl un Konfiguration Abfragen CHA+ / CHA- Wechsel der Messrichtung CHA? Messrichtung? FCT0 ...9...A...F Zuordnung der Funktion „Favorit“ FCT? Funktion „Favorit“ aktiv? MM / IN Wechsel der Masseinheit UNI? Masseinheit aktiv KEY0 / KEY1 Aktiviert / Deaktiviert die Tastatursperre KEY? Tastatursperre? PRE [+/-]xxx.xxx...
-
Seite 51: Technische Daten
Messspanne Strichskala : min ±5 µm - max ±25 mm / min ± 0.25 thou - max ± 1.25 IN Messsystem : Sylvac inductive system (patentiert) Versorgung : 1 x 3 V Lithiumbatterie, Typ CR2032, Kapazität 220 mAh Durchschnittliche Autonomie : 8.000 Stunden... - Seite 52 thou MINMAX PRESET µm thou MINMAX PRESET µm...
- Seite 53 Description 1. Pulsante Modalità 19. Scala analogica (cap. 8) 2. Pulsante Impostazione 20. Superamento del limite inferiore 3. Pulsante « Preferiti » 21. Superamento del limite superiore 4. Pulsante 22. Indicatori di tolleranze 5. Pulsante 23. Limite superiore scala analogica (cap. 8) Ø8 o 3/8”...
-
Seite 54: Funzionalità Dello Strumento
1. Funzionalità dello strumento Lo strumento dispone di 2 modalità operative: funzioni base (con accesso diretto) e funzioni avanzate. Oltre MODE alle funzioni di configurazione, si ha accesso alla modalità MIN, MAX e DELTA (TIR), o alla visualizzazione delle tolleranze. (consultare i capitoli 3 e 4) Il tasto «preferito»... - Seite 55 3. Funzione di base Ogni breve pressione su permette l’accesso diretto alle funzioni base : MODE MODE - Modalità normale : Azzeramento 0.000 - Modalità min (max) : Calibratura del diametro in base al valore min (max) misurato MODE ..Selezione dell’unità (mm o Inch) Inch Unit MODE...
- Seite 56 4. Funzioni avanzate Una pressione lunga (>2s) su permette di accedere alle funzioni avanzate. MODE Successivamente, ogni breve pressione su accede alla funzione desiderata : MODE MODE Misura del MINIMUM, MAXIMUM,DELTA ModE dELtA (TIR) (consultare il capitolo 5) MINMAX MODE IntE Modalità...
- Seite 57 0.01 0.001 Auto ..Segue MODE MODE +0.001 -0.001 MODE Modalità di spegnimento automatico MODE Mult Auto +01.0000 MAn = disattiva, Auto = attiva (dopo 20 min.) MODE Blocco tastiera. Solo funzioni DATA e CLR del tasto preferito MODE On Off rESEt rimane attivo ( per disattivare il blocco tastiera, premere SET per 5 s.)
- Seite 58 6. Introduzione (o modifica) dei limiti di tolleranza I limiti di tolleranza si stabiliscono introducendo lo scarto inferiore e lo scarto superiore rispetto al livello nominale. Vi sono due metodi : 6.1 Utilizzo della modalità TOL ..... Inserire il valore nominale (consultare il capitolo 7) .....
- Seite 59 6.2 Utilizzo dei tasti È possibile anche introdurre o modificare il valore nominale o i limiti di tolleranza esercitando una pressione prolungata (>2s) sui tasti Introdurre il Introdurre lo Introdurre lo livello nominale scarto inferiore scarto superiore MODE MODE MODE (consultare il capitolo 7) (consultare il capitolo 7) (consultare il capitolo 7)
- Seite 60 7 Introduzione di un valore numerico Per introdurre o modificare un valore numerico (Preset, livello nominale, scarto di tolleranza o fattore di moltiplicazione) si può procedere secondo due metodi : 7.1 Incremento / decremento del valore attuale : Ridurre il valore attuale Aumentare il valore attuale Nota: - la velocità...
- Seite 61 8. Scala del display analogico Una pressione breve su permette di modificare i valori dell’intervallo del display analogico. 8.1 Funzione per centrare la scala analogica Se i limiti di tolleranza sono asimmetrici rispetto al livello nominale, è possibile centrarli sulla scala analogica esercitando una pressione breve e simultanea su + 0.025 Esempio : 12.000...
- Seite 62 9. Tasto preferito Il tasto «preferito» permette di accedere direttamente a una funzione predefinita e può essere configurato secondo le esigenze dell’utente. Per assegnare una funzione al tasto «preferito», applicare una pressione lunga su , quindi selezionare la funzione desiderata Azzeramento Invio dati Nor-Min-Max-...
- Seite 63 10. Misura 2 punti (La regolazione dinamica del Preset) Questa modalità permette di misurare diametri con CBG (Cylinder bore gage, calibro diametro interno). E ‘indicato dal segno PRE. Procedere come segue: 10.1 Calibratura dello strumento - Introdurre un valore di Preset corrispondente alla dimensione effettiva del campione (consultare il capitolo 3) - Abilita funzione IntE.
- Seite 64 11. Spegnimento Il comparatore va automaticamente in stand-by dopo 20 minuti di inattività, tranne se la modalità Auto OFF è disattivata (consultare il capitolo 4 funzioni avanzate) 123.456 È possibile forzare la modalità stand-by, con una pressione lunga (>2s) su >2s In modalità...
- Seite 65 13. Personalizzazione dello strumento È possibile personalizzare l’accesso alle funzioni dello strumento mediante il software gratuito, il sito web del produttore (lo strumento deve essere connesso, con un cavo PROXIMITY o di alimentazione RS / USB). Possibilità: - Disattivare o attivare le funzioni desiderate - Modificare l’accesso alle funzioni avanzate (messa in accesso diretto) 14.
- Seite 66 15. Elenco dei comandi principali Selezione e configurazione Interrogazione CHA+ / CHA- Modifica direzione di misura CHA? Senso di misura? FCT0 ...9...A...F Assegnazione funzione «preferito» FCT? Funzione «preferito» attiva? MM / IN Modifica unità di misura UNI? Unità di misura attiva? KEY0 / KEY1 Attiva / disattiva il blocco tastiera KEY?
- Seite 67 Capacità scala analogica : min ±5 µm - max ±25 mm / min ± 0.25 thou - max ± 1.25 IN Sistema di misura : Sistema Sylvac induttivo (brevettato) Alimentation : 1 batteria al litio 3 V, tipo CR2032, capacità 220 mAh Autonomia media : 8.000 ore...
- Seite 68 thou MINMAX PRESET µm thou MINMAX PRESET µm...
- Seite 69 Description 1. Botón Modo 19. Escala analógica (cap. 8) 2. Botón Configuración 20. Superación del límite inferior 3. Botón « Favoritos » 21. Superación del límite superior 4. Botón 22. Indicadores de tolerancia 5. Botón 23. Límite inferior de la escala analógica (cap. 8) Ø8 o 3/8”...
- Seite 70 1. Funcionalidades del equipo El equipo dispone de 2 modos de trabajo: funciones básicas (con acceso directo) y funciones avanzadas. MODE Además de las funciones de configuración hay acceso en modo MIN, MAX y DELTA (TIR), o en visualización de tolerancias. (ver cap. 3 y 4) La tecla «favorito»...
- Seite 71 3. Funciones básicas Cada pulsación breve sobre permite acceder directamente a las funciones básicas : MODE MODE - Modo normal : Puesta a cero 0.000 - Modo mín (máx) : Calibración del diámetro con res- pecto al valor mín. (máx.) medido MODE ..
- Seite 72 4. Funciones avanzadas Al pulsar prolongadamente (>2 seg) sobre accederá a las funciones avanzadas. Pulsando brevemente en MODE MODE accederá à la función deseada : MODE Medición del MÍNIMO, MÁXIMO ModE dELtA DELTA (TIR) (ver cap. 5) MINMAX MODE IntE Modo 2 puntos (Preset dinámico) (consulte el capítulo 11) MODE...
- Seite 73 0.01 0.001 Auto ..continuación MODE MODE +0.001 -0.001 MODE MODE Mult Auto Modo de apagado automático +01.0000 MAn = desactivado, Auto = activo (tras 20 min.) MODE MODE Bloqueo del teclado. Solo funciones de datos y CLR del On Off rESEt botón favorito queda activa MODE...
- Seite 74 6. Introducción (o modificación) de los límites de tolerancia Los límites de tolerancia se definen introduciendo el desfase inferior y superior con respecto a la cota nominal. Pueden emplearse dos métodos: 6.1 Utilización del modo TOL ..... Introduzca el valor nominal (ver cap.
- Seite 75 6.2 Utilización de los botones También se puede introducir o modificar el valor nominal o los límites de tolerancia mediante una pulsación prolongada (>2seg) de Introduzca la Introduzca el Introduzca el cota nominal desfase inferior desfase superior MODE MODE MODE (ver cap.
- Seite 76 7 Introducción de un valor numérico Para introducir o modificar un valor numérico (Preset, cota nominal, desfases de tolerancia o factor de multiplicación), pueden emplearse dos métodos : 7.1 Incremento/decremento del valor actual : Decrece el valor actual Incrementa el valor actual Nota : - la velocidad de barrido de los valores aumenta si el botón se mantiene pulsado de forma prolongada - guardar el valor con uno de los tres botones inferiores...
- Seite 77 8. Escala de la visualización analógica Una pulsación breve de permite modificar el valor del escalón de la visualización analógica. 8.1 Función de centrado de la escala analógica Si los límites de tolerancia son asimétricos con respecto a la cota nominal, pueden recentrarse en la escala analógica mediante una pulsación breve y simultánea de + 0.025 Ejemplo :...
- Seite 78 9. Tecla favorito Con la tecla «favorito» se accede directamente a una función predefinida y puede configurarse según las necesidades del usuario. Para atribuir una función a la tecla «favorito» pulse prolongadamente sobre y seleccione la función deseada : Puesta a cero Envío de Nor-Min-Max- 0.01 - 0.001...
- Seite 79 10. Medición de 2 puntos (Ajuste dinámico del preset) Este modo permite la medición de diámetros con un CBG (Cylinder bore gage, medir diámetros internos de calibre). Se indica por el PRE signo. Proceda de la siguiente manera: 10.1 Calibrado del instrumento - Introduzca un valor de Preset correspondiente a la dimensión efectiva del patrón (ver cap.
- Seite 80 11. Apagado El comparador hibernará automáticamente tras 20 minutos de inactividad salvo que el modo Auto OFF esté desactivado (ver Cap. 4, Funciones avanzadas) Es posible forzar el modo de hibernación pulsando prolongadamente (> 2 seg) 123.456 sobre >2s En modo hibernación el sensor conserva el valor original (modo SIS) y el equipo se reanuda automáticamente por un movimiento de la tecla de medición por control RS, o pulse un botón.
- Seite 81 13. Personalización del equipo Es posible personalizar el acceso a las funciones de su equipo con el programa gratuito para más información, véase el sitio web del fabricante (requiere conexión de su equipo con cable Proximity o Power RS / USB). Esta aplicación permite: - Desactivar o activar las funciones deseadas - Modificar el acceso a las funciones avanzadas (acceso directo)
- Seite 82 15. Lista de comandos principales Selección y configuración Pregunta CHA+ / CHA- Cambio de dirección de medición CHA? ¿Sentido de medición? FCT0 ...9...A...F Atribución de función «favorito» FCT? ¿Función «favorito» activada? MM / IN Cambio de unidad de medida UNI? ¿Unidad de medida activada? KEY0 / KEY1 Activa / desactiva el bloqueo de teclado...
- Seite 83 Capacidad de la escala analógica : min ±5 µm - max ±25 mm / min ± 0.25 thou - max ± 1.25 IN Sistema de medida : Sylvac inductive system (patentado) Alimentación : 1 batería litio 3V, tipo CR2032, capacidad 220mAh Autonomía media :...
- Seite 84 Note :..
-
Seite 86: Certificate Of Conformity
CERTIFICATE OF CONFORMITY We certify that this instrument has been manufactured in accordance with our Quality Standard and tested with reference to masters of certified traceability by the National Office of Metrology. CERTIFICAT DE CONFORMITE Nous certifions que cet instrument a été fabriqué et contrôlé selon nos normes de qualité et en référence avec des étalons dont la traçabilité... - Seite 87 Calibration certificate Because we make our instruments in batches, you may find that the date on your calibration certificate is not current. Please be assured that your instruments are certified at point of production and then held in stock in our warehouse in accordance with our Quality Management System ISO 9001.
- Seite 88 Changes without prior notice Sous réserve de toute modification Änderungen vorbehalten Soggetto a modifica senza preavviso Reservados los derechos de modificación sin previo aviso Edition : 2016.09 / 681.289.05...