Herunterladen Inhalt Inhalt Diese Seite drucken
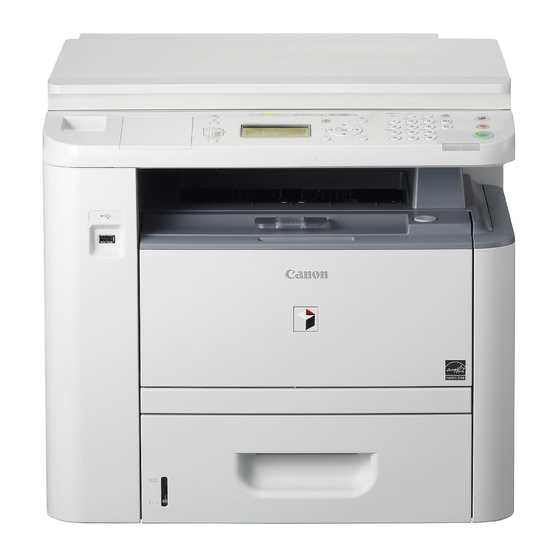
Canon imageRUNNER 1133 Bedienungsanleitung
Vorschau ausblenden Andere Handbücher für imageRUNNER 1133:
Inhaltsverzeichnis

Werbung

Verfügbare Sprachen
  • DE

Verfügbare Sprachen

  • DEUTSCH, seite 55
uniFLOW Login Device Client Guide
Please read this guide before operating this product.
After you finish reading this guide, store it in a safe place for future reference.
Lisez ce guide avant d'utiliser ce produit.
Après avoir pris connaissance de son contenu, conservez-le dans un endroit sûr pour pouvoir le
consulter en cas de besoin.
Bitte lesen Sie dieses Handbuch, bevor Sie mit dem Produkt arbeiten.
Nachdem Sie das Handbuch gelesen haben, bewahren Sie es zum Nachschlagen an einem sicheren Ort auf.
Leggere questa guida prima di iniziare ad utilizzare il prodotto.
Terminata la lettura, conservare la guida in un luogo sicuro per eventuali consultazioni.
Por favor, lea esta guía antes de usar este producto.
Después de leer esta guía, guárdela en un lugar seguro para posteriores consultas.

Werbung

Inhaltsverzeichnis
loading

Inhaltszusammenfassung für Canon imageRUNNER 1133

  • Seite 1 uniFLOW Login Device Client Guide uniFLOW Login Device Client Guide Please read this guide before operating this product. After you finish reading this guide, store it in a safe place for future reference. Lisez ce guide avant d’utiliser ce produit. Après avoir pris connaissance de son contenu, conservez-le dans un endroit sûr pour pouvoir le consulter en cas de besoin.
  • Seite 2 imageRUNNER 1133/1133A/1133iF uniFLOW Login Device Client Guide...
  • Seite 3 Adobe Systems Incorporated website. Considerable effort has been made to ensure that this manual is free of inaccuracies and omissions. However, as we are constantly improving our products, if you need an exact specification, please contact Canon.
  • Seite 4: Inhaltsverzeichnis

    Contents Preface ............EN-iv How to Use This Manual .
  • Seite 5: Preface

    Preface Thank you for purchasing the Canon imageRUNNER 1133/1133A/1133iF. Please read this manual thoroughly before operating the machine to familiarize yourself with its capabilities, and to make the most of its many functions. After reading this manual, store it in a safe place for future reference.
  • Seite 6: Displays Used In This Manual

    Displays Used in This Manual Screen shots used in this manual may differ from actual displays depending on the machine configuration. Trademarks ® uniFLOW and MiCard are registered trademarks of NT-ware Systemprogrammierung GmbH. Other product and company names herein may be the trademarks of their respective owners.
  • Seite 7: Legal Notices

    Disclaimers The information in this document is subject to change without notice. CANON INC. MAKES NO WARRANTY OF ANY KIND WITH REGARD TO THIS MATERIAL, EITHER EXPRESS OR IMPLIED, EXCEPT AS PROVIDED HEREIN, INCLUDING WITHOUT LIMITATION, THEREOF, WARRANTIES AS TO MARKETABILITY, MERCHANTABILITY, FITNESS FOR A PARTICULAR PURPOSE OR USE OR NON-INFRINGEMENT.
  • Seite 8: Managing The Machine With The Uniflow Integration

    Managing the Machine with the uniFLOW Integration This section provides the overview of the uniFLOW integration. The uniFLOW server, a server in which the uniFLOW software is installed, detects the machine in a network and activates the uniFLOW integration in the machine. The uniFLOW server authenticates users logging in at the machine and provides the machine with setting information.
  • Seite 9: What You Can Do With The Uniflow Integration

    What You Can Do with the uniFLOW Integration Equipped in the machine are the functions activated by the uniFLOW server. The major functions are as follows: uniFLOW Server-based Authentication Modes and Log-in Methods You can manage the machine by limiting its use only to the users who are registered in the uniFLOW server.
  • Seite 10: System Environment

    Activation and Settings of the uniFLOW Integration The overview of the activation and settings of the uniFLOW integration is provided below. System Environment To activate the uniFLOW integration, the machine must be connected to the uniFLOW server (a server in which the uniFLOW software is installed) over a network.
  • Seite 11: Log-In Methods By The Uniflow Integration

    Log-in Methods by the uniFLOW Integration The uniFLOW integration provides the following log-in methods: NOTE • For instructions on how to log in to the machine as the System Manager, see "Operating the Machine As the System Manager," on p. EN-6. •...
  • Seite 12 Settings of Department ID Management for the uniFLOW Integration Before you use the uniFLOW integration, be sure to set the Department ID Management setting as indicated on the table below. Authentication Mode Log-in Method (See Required Settings of the Department (See p.
  • Seite 13 Operating the Machine As the System Manager The System Manager log-in procedure varies depending on the applied authentication mode provided by the uniFLOW integration. See the table below. NOTE The System Manager can set or change the System Settings and other settings accessible only to the System Manager.
  • Seite 14 Resetting the IP Address of the Machine If the message <Cannot connect to the server. Contact the system manager.> persists on the display after the machine is turned ON, the IP address of the machine may not be properly set. Resume communications between the machine and the uniFLOW server by resetting the IP address of the machine as described below.
  • Seite 15: Logging In To The Machine

    Logging in to the Machine This section describes the operation procedures for the log-in methods provided by the uniFLOW integration. NOTE When the optional MiCard Reader is attached to the machine, you can log in and log out by holding your ID card over the MiCard Reader, regardless of the applied log-in method (except when the department ID and PIN is applied as the log-in method).
  • Seite 16 If a screen prompting you to select a cost Select Cost Center center appears, select the appropriate cost center using [ ] or [ ]. Canon • Select a cost center in the lower or Group 1 upper level by using <To Sub Cost <Log In>...
  • Seite 17 • <To Sub Cost Center>: Use to move to Select Cost Center the cost centers in the lower level. • <To Parent Cost Center>: Use to move Canon to the cost centers in the upper level. Group 1 • <Search>: Use to search for cost <To Sub Cost Center>...
  • Seite 18 ❑ If a screen prompting you to select a cost Select Cost Center center appears, select the appropriate Canon cost center using [ ] or [ ]. • Select a cost center in the lower or Group 1 upper level by using <To Sub Cost <Log In>...
  • Seite 19 ❑ If a screen prompting you to select a cost Select Cost Center center appears, select the appropriate Canon cost center using [ ] or [ ]. • Select a cost center in the lower or Group 1 upper level by using <To Sub Cost <Log In>...
  • Seite 20 Entering a Department ID and PIN Enter your Department ID and PIN to log in when the screen shown in step 1 is displayed. IMPORTANT This log-in method is available only when "Authentication to the Machine" (p. EN-3) is applied as the authentication mode. NOTE To log in to the machine, you must have a valid department ID and PIN (if set) registered.
  • Seite 21 If a screen prompting you to select a cost Select Cost Center center appears, select the appropriate cost center using [ ] or [ ]. Canon • Select a cost center in the lower or Group 1 upper level by using <To Sub Cost <Log In>...
  • Seite 22: Keeping Documents Unprinted Until Logging-In (Login And Document Release)

    Keeping Documents Unprinted Until Logging-In (Login and Document Release) You can keep your documents unprinted until you log in to the machine or the Login and Document Release function. Your documents are printed out only when you log in at the machine. This means you can securely collect confidential documents and eliminate the problem of forgotten printouts in the machine's output tray.
  • Seite 23 If a screen prompting you to select a cost Select Cost Center center appears, select the appropriate cost center using [ ] or [ ]. Canon • Select a cost center in the lower or Group 1 upper level by using <To Sub Cost <Log In>...
  • Seite 24 ● If set to display My Print Jobs: ❑ Select the job you want to print using [ ] My Print Jobs or [ ] and press [OK]. <Update> Repeat this procedure to select all jobs you want to print, and press [ ]. <Print All>...
  • Seite 25: To Log In To The Login And Document Release Function

    If a screen prompting you to select a cost Select Cost Center center appears, select the appropriate cost center using [ ] or [ ]. Canon • Select a cost center in the lower or Group 1 upper level by using <To Sub Cost <Log In>...
  • Seite 26 Print the document. ● If set to display cost: ❑ Select <Yes> using [ ] or [ ] and Print 2 job(s)? press [OK]. Total Cost: NOTE $2.00 The total cost for the job(s) may be <No> displayed depending on the setting. <Yes>...
  • Seite 27 EN-20 Keeping Documents Unprinted Until Logging-In (Login and Document Release)
  • Seite 28 imageRUNNER 1133/1133A/1133iF Guide d’uniFLOW Login Device Client...
  • Seite 29 Un soin particulier a été apporté à la rédaction de ce guide afin d’éviter les inexactitudes ou omissions. Toutefois, du fait de notre souci constant d’amélioration de nos produits, il est possible d’obtenir des spécifications techniques précises auprès de la société Canon.
  • Seite 30 Table des matières Préface ............FR-iv Présentation du guide .
  • Seite 31: Préface

    Préface Nous vous remercions d’avoir porté votre choix sur l’imprimante Canon imageRUNNER 1133/1133A/1133iF. Nous vous invitons à lire attentivement ce guide avant toute utilisation afin de tirer le meilleur parti des fonctionnalités de l’imprimante. Nous vous conseillons également de conserver ce guide afin de pouvoir le consulter en cas de besoin.
  • Seite 32: Affichages Utilisées Dans Ce Guide

    Affichages utilisées dans ce guide Selon la configuration de votre machine, il est possible que les captures d’écran figurant dans ce guide ne reflètent pas tout à fait la réalité. Marques ® uniFLOW et MiCard sont des marques déposées de NT-ware Systemprogrammierung GmbH.
  • Seite 33: Mentions Légales

    électronique ou mécanique, notamment par photocopie ou enregistrement, ou par tout système de stockage ou d’extraction d’informations, sans le consentement écrit préalable de la société Canon Inc. Limites de responsabilité Les informations contenues dans ce document peuvent être modifiées sans avis préalable.
  • Seite 34: Gestion De L'imprimante Avec L'intégration Uniflow

    Gestion de l’imprimante avec l’intégration uniFLOW Cette section présente l’intégration uniFLOW. Le serveur uniFLOW, c’est-à-dire le serveur sur lequel le logiciel uniFLOW est installé, détecte l’imprimante sur le réseau et active l’intégration uniFLOW dans l’imprimante. Le serveur uniFLOW authentifie les utilisateurs qui se connectent à l’imprimante et indique les réglages à...
  • Seite 35: Intérêts De L'intégration Uniflow

    Intérêts de l’intégration uniFLOW Les fonctions intégrées à la machine sont activées par le serveur uniFLOW. Voici les principales fonctions disponibles : Modes d’authentification serveur uniFLOW et méthodes de connexion Vous pouvez gérer l’imprimante en restreignant son usage aux utilisateurs enregistrés sur le serveur uniFLOW.
  • Seite 36: Activation Et Réglages De L'intégration Uniflow

    ■ Affichage des coûts liés aux tâches de la fonction de connexion et de publication de documents à l’écran : Il est possible de régler l’imprimante de manière à afficher les coûts générés par la tâche sur l’afficheur lorsqu’un utilisateur recourt à la fonction de connexion et de publication de documents de l’imprimante.
  • Seite 37: Authentification Par La Fonction De Connexion Et De Publication De Documents

    Authentification par la fonction de connexion et de publication de documents Les utilisateurs sont invités à se connecter à la fonction de connexion et de publication de documents. Dans ce cas, les utilisateurs peuvent utiliser les fonctions de l’imprimante, comme les fonctions Copie ou Lecture, sans s’y connecter.
  • Seite 38: Configuration De La Gestion Des Numéros De Service En Vue De L'intégration Uniflow

    Configuration de la gestion des numéros de service en vue de l’intégration uniFLOW Avant de pouvoir utiliser l’intégration uniFLOW, veillez à paramétrer la gestion des numéros de services comme indiqué dans le tableau suivant. Mode d’authentification Méthode de Réglages requis de la gestion des (Voir p.
  • Seite 39: Utilisation De L'imprimante Comme Administrateur Système

    Utilisation de l’imprimante comme administrateur système La procédure de connexion comme administrateur système varie selon le mode d’authentification appliqué lors de l’intégration uniFLOW. Pour plus d’informations, consultez le tableau ci-dessous. REMARQUE L’administrateur système peut définir ou modifier les réglages système et d’autres réglages auxquels lui seul peut accéder.
  • Seite 40: Redéfinition De L'adresse Ip De L'imprimante

    Redéfinition de l’adresse IP de l’imprimante Si le message <Connexion au serveur impossible. Contacter admin. système.> reste affiché après la mise sous tension de l’imprimante, il est possible que l’adresse IP de cette dernière ne soit pas correctement définie. Rétablissez les communications entre l’imprimante et le serveur uniFLOW en redéfinissant l’adresse IP de l’imprimante comme décrit par la suite.
  • Seite 41: Connexion À L'imprimante

    Connexion à l’imprimante Cette section décrit les procédures à suivre pour les différentes méthodes de connexion proposées par l’intégration uniFLOW. REMARQUE Lorsque le module MiCard Reader en option est relié à l’imprimante, vous pouvez vous connecter et vous déconnecter en plaçant votre carte d’identité au-dessus du module MiCard Reader, quelle que soit la méthode de connexion appliquée (sauf lorsque vous sélectionnez la méthode de connexion via le numéro de service et le code PIN).
  • Seite 42: Mode De Saisie

    ❑ Si l’écran vous invitant à spécifier un Sélect. centre coûts centre de coûts apparaît, sélectionnez le Canon centre de coûts qui convient à l’aide des touches [ ] ou [ ]. Groupe 1 • Sélectionnez un centre de coûts dans <Se connecter>...
  • Seite 43: Saisie D'un Code Pin

    [OK]. • <Vers centre de coûts inférieur> : Sélect. centre coûts utilisez cette option pour accéder aux Canon centres de coûts du niveau inférieur. • <Vers centre de coûts parent> : utilisez Groupe 1 cette option pour accéder aux centres <Vers centre de coût...
  • Seite 44 ❑ Si l’écran vous invitant à spécifier un Sélect. centre coûts centre de coûts apparaît, sélectionnez le Canon centre de coûts qui convient à l’aide des touches [ ] ou [ ]. Groupe 1 • Sélectionnez un centre de coûts dans <Se connecter>...
  • Seite 45: Utilisation De La Carte D'identité

    ❑ Si l’écran vous invitant à spécifier un Sélect. centre coûts centre de coûts apparaît, sélectionnez le Canon centre de coûts qui convient à l’aide des touches [ ] ou [ ]. Groupe 1 • Sélectionnez un centre de coûts dans <Se connecter>...
  • Seite 46: Saisie D'un Numéro De Service Et D'un Code Pin

    Saisie d’un numéro de service et d’un code PIN Saisissez un numéro de service et un code PIN pour vous connecter lorsque l’écran illustré à l’étape 1 apparaît. IMPORTANT Cette méthode de connexion est disponible uniquement lorsque l’utilisateur sélectionne « Authentification au niveau de l’imprimante » (p. FR-3) comme mode d’authentification.
  • Seite 47 ❑ Si l’écran vous invitant à spécifier un Sélect. centre coûts centre de coûts apparaît, sélectionnez le Canon centre de coûts qui convient à l’aide des touches [ ] ou [ ]. Groupe 1 • Sélectionnez un centre de coûts dans <Se connecter>...
  • Seite 48: Suspension De L'impression De Documents Sans Connexion (Fonction De Connexion Et De Publication De Documents)

    Suspension de l’impression de documents sans connexion (fonction de connexion et de publication de documents) Il est possible de différer l’impression des documents tant que vous n’êtes pas connecté à l’imprimante ou à la fonction de connexion et de publication de documents.
  • Seite 49 ❑ Si l’écran vous invitant à spécifier un Sélect. centre coûts centre de coûts apparaît, sélectionnez le Canon centre de coûts qui convient à l’aide des touches [ ] ou [ ]. Groupe 1 • Sélectionnez un centre de coûts dans <Se connecter>...
  • Seite 50 L’écran <Statut tch Copie/Impr.> Statut tch Copie/Impr. s’affiche. 13:30PM Impression 13:30PM En attente Pour afficher les détails du statut de la tâche d’impression ou annuler la tâche d’impression, sélectionnez la tâche de votre choix à l’aide de la touche [ ] ou [ ], puis appuyez sur [OK].
  • Seite 51: Pour Se Connecter À La Fonction De Connexion Et De Publication De Documents

    Pour se connecter à la fonction de connexion et de publication de documents : Si un écran de veille comme celui de la fonction Copie s’affiche au lieu de l’écran de connexion lorsque vous allumez l’imprimante ou quittez le mode Veille, connectez-vous à...
  • Seite 52 ❑ Si l’écran vous invitant à spécifier un Sélect. centre coûts centre de coûts apparaît, sélectionnez le Canon centre de coûts qui convient à l’aide des touches [ ] ou [ ]. Groupe 1 • Sélectionnez un centre de coûts dans <Se connecter>...
  • Seite 53 ● Si configuré pour afficher Mes tâches impression : ❑ Sélectionnez la tâche que vous Mes tâches impression souhaitez imprimer à l'aide de [ ] ou <Mettre à jour> [ ] et appuyez sur [OK]. Répétez cette procédure pour <Imprimer tout> sélectionner toutes les tâches que vous Canon01.pdf 2013/0 souhaitez imprimer et appuyez sur [ ].
  • Seite 54 imageRUNNER 1133/1133A/1133iF Handbuch zum uniFLOW Login Device Client...
  • Seite 55 Reader nicht auf Ihrem System installiert ist, laden Sie die Software bitte von der Website von Adobe Systems Incorporated herunter. Bei der Erstellung dieser Handbücher und Anleitungen wurden größte Anstrengungen unternommen, um Ungenauigkeiten und Auslassungen zu vermeiden. Außerdem kann es aufgrund von Produktverbesserungen zu Abweichungen kommen. Bitte kontaktieren Sie Canon, falls Sie genaue Spezifikationen benötigen.
  • Seite 56 Inhalt Vorwort ............DE-iv Verwendung dieses Handbuchs.
  • Seite 57: Vorwort

    Vorwort Vielen Dank, dass Sie sich für den Canon imageRUNNER 1133/1133A/1133iF entschieden haben. Bevor Sie mit dem System arbeiten, lesen Sie dieses Handbuch bitte sorgfältig. So informieren Sie sich über den optimalen Einsatz der Funktionen für Ihre speziellen Anforderungen. Bewahren Sie das Handbuch dann immer als Nachschlagewerk in der Nähe des Systems auf.
  • Seite 58: Anzeigen In Diesem Handbuch

    Anzeigen in diesem Handbuch Je nach Systemkonfiguration können die in diesem Handbuch verwendeten Screenshots von den tatsächlichen Anzeigen abweichen. Marken ® uniFLOW und MiCard sind eingetragene Markenzeichen der NT-ware Systemprogrammierung GmbH. Andere Firmen- oder Produktnamen, die in diesem Handbuch verwendet werden und nicht in dieser Liste erwähnt sind, können Warenzeichen der entsprechenden Firmen sein.
  • Seite 59: Rechtliche Hinweise

    Copyright 2013 Canon Inc. Alle Rechte vorbehalten. Kein Teil dieser Veröffentlichung darf ohne die vorherige schriftliche Genehmigung von Canon Inc. in irgendeiner Form oder auf irgendeine Weise, elektronisch oder mechanisch, einschließlich Fotokopien und Aufzeichnungen, oder durch ein Informationsspeicher- oder Abfragesystem reproduziert oder übertragen werden.
  • Seite 60: Verwalten Des Systems Mit Der Uniflow-Integration

    Verwalten des Systems mit der uniFLOW-Integration Dieser Abschnitt bietet einen Überblick über die uniFLOW-Integration. Der uniFLOW-Server, ein Server, auf dem die uniFLOW-Software installiert ist, erkennt das System in einem Netzwerk und aktiviert die uniFLOW-Integration beim System. Der uniFLOW-Server authentifiziert die Anwender, die sich beim System anmelden, und gibt die Einstellungsinformationen an das System weiter.
  • Seite 61: So Können Sie Die Uniflow-Integration Nutzen

    So können Sie die uniFLOW-Integration nutzen Das System ist mit den Funktionen ausgestattet, die durch den uniFLOW-Server aktiviert wurden. Dies sind die Hauptfunktionen: Serverbasierte uniFLOW-Authentifizierungsmodi und Login-Verfahren Sie können das System verwalten, indem Sie die Verwendung auf die Anwender beschränken, die im uniFLOW-Server gespeichert sind. Es gibt zwei Optionen für den Authentifizierungsmodus: Authentifizierung beim System oder bei der Login- und Dokumentfreigabefunktion mit verschiedenen Login-Verfahren wie z.
  • Seite 62: Aktivierung Und Einstellungen Der Uniflow-Integration

    ■ Anzeigen der Kosten für Login- und Dokumentfreigabeaufträge auf dem Bildschirm: Sie können das System so einstellen, dass die berechneten Kosten für den Auftrag auf dem Display angezeigt werden, wenn der Anwender die Login- und Dokumentfreigabefunktion beim System nutzt. Weitere Informationen zu den Kostenstellen finden Sie in der Dokumentation im Lieferumfang der uniFLOW-Software.
  • Seite 63: Login-Verfahren Über Die Uniflow-Integration

    Authentifizierung bei der Login- und Dokumentfreigabefunktion Die Anwender werden aufgefordert, sich bei der Login- und Dokumentfreigabefunktion anzumelden. Dies bedeutet, dass die Anwender die Funktionen des Systems, wie die Kopieren- oder Scan-Funktionen, nutzen können, ohne sich beim System anzumelden. Stattdessen müssen sich die Anwender nur authentifizieren, wenn sie die Login- und Dokumentfreigabefunktion nutzen.
  • Seite 64: Einstellung Der Verwaltung Per Abteilungs-Id Für Die Uniflow-Integration

    Einstellung der Verwaltung per Abteilungs-ID für die uniFLOW-Integration Bevor Sie die uniFLOW-Integration nutzen, müssen Sie die Einstellungen für die Verwaltung per Abteilungs-ID vornehmen, wie in der Tabelle unten aufgeführt. Authentifizierungsverfahren Login-Verfahren Erforderliche Einstellungen für die (Siehe S. DE-3) (Siehe S. DE-4) Verwaltung per Abteilungs-ID beim System Anwender ID und...
  • Seite 65: Betreiben Des Systems Als Systemmanager

    Betreiben des Systems als Systemmanager Der Login-Vorgang für den Systemmanager variiert abhängig von den durch die uniFLOW-Integration verwendeten Authentifizierungsmodi. Siehe Tabelle unten. HINWEIS Der Systemmanager kann die Systemeinstellungen und andere Einstellungen, auf die nur der Systemmanager zugreifen kann, festlegen oder ändern. Authentifizierungsverfahren Login-Verfahren als Systemmanager (S.
  • Seite 66: Zurücksetzen Der Ip-Adresse Des Systems

    Zurücksetzen der IP-Adresse des Systems Wenn die Meldung <Verbind. zum Server nicht möglich. Systemmanager benachricht.> auf dem Display verbleibt, nach dem das System auf EIN gesetzt wurde, wurde die IP-Adresse des Systems eventuell nicht korrekt angegeben. Nehmen Sie die Kommunikation zwischen dem System und dem uniFLOW-Server wieder auf, indem Sie die IP-Adresse des Systems wie unten beschrieben zurücksetzen.
  • Seite 67: Eingeben Von Anwender Id Und Passwort

    Anmelden beim System Dieser Abschnitt beschreibt die Bedienschritte für die Login-Verfahren, die durch die uniFLOW-Integration bereitgestellt werden. HINWEIS Wenn der optionale MiCard Reader am System angebracht ist, können Sie sich an-/ abmelden, indem Sie Ihre ID-Karte über den MiCard Reader halten, unabhängig von dem verwendeten Login-Verfahren (außer wenn die Abteilungs-ID und PIN als Login-Verfahren verwendet werden).
  • Seite 68 Fehlermeldung angezeigt. ❑ Wenn ein Bildschirm angezeigt wird, in Kostenstelle wählen dem Sie zur Auswahl einer Kostenstelle Canon aufgefordert werden, wählen Sie mit [ ], [ ] die entsprechende Kostenstelle. Gruppe 1 • Wählen Sie eine Kostenstelle als Neben- <Login>...
  • Seite 69: Eingeben Eines Pin-Codes

    Verwenden Sie [ ] oder [ ], um die gewünschte Suchoption auszuwählen, und betätigen Sie [OK]. • <An Nebenkostenstelle>: Wird Kostenstelle wählen verwendet, um die Kostenstellen in die Canon untere Ebene zu verschieben. • <An Hauptkostenstelle>: Wird Gruppe 1 verwendet, um die Kostenstellen in die <An Nebenkostenstell...
  • Seite 70 • Wenn der eingegebene PIN-Code falsch ist, wird eine Fehlermeldung angezeigt. ❑ Wenn ein Bildschirm angezeigt wird, in Kostenstelle wählen dem Sie zur Auswahl einer Kostenstelle Canon aufgefordert werden, wählen Sie mit [ ], [ ] die entsprechende Kostenstelle. Gruppe 1 • Wählen Sie eine Kostenstelle als <Login>...
  • Seite 71: Verwenden Der Id-Karte

    Vorgang wd. ausloggen. ❑ Wenn ein Bildschirm angezeigt wird, in Kostenstelle wählen dem Sie zur Auswahl einer Kostenstelle Canon aufgefordert werden, wählen Sie mit [ ], [ ] die entsprechende Kostenstelle. Gruppe 1 • Wählen Sie eine Kostenstelle als <Login>...
  • Seite 72: Eingeben Von Abteilungs-Id Und Pin

    Eingeben von Abteilungs-ID und PIN Geben Sie Ihre Abteilungs-ID und PIN ein, um sich anzumelden, wenn der in Schritt 1 dargestellte Bildschirm angezeigt wird. WICHTIG Das Login-Verfahren ist nur verfügbar, wenn „Authentifizierung beim System“ (S. DE-3) als Authentifizierungsverfahren verwendet wird. HINWEIS Um sich beim System anzumelden, benötigen Sie eine gültige Abteilungs-ID und PIN (falls eingestellt), die entsprechend gespeichert sein müssen.
  • Seite 73 • Wenn die eingegebene Abteilungs-ID/PIN falsch ist, wird eine Fehlermeldung angezeigt. ❑ Wenn ein Bildschirm angezeigt wird, in Kostenstelle wählen dem Sie zur Auswahl einer Kostenstelle Canon aufgefordert werden, wählen Sie mit [ ], [ ] die entsprechende Kostenstelle. Gruppe 1 • Wählen Sie eine Kostenstelle als <Login>...
  • Seite 74: Login Und Dokumentfreigabe

    Ausdrucken von Dokumenten bei der Anmeldung (Login und Dokumentfreigabe) Sie können Ihre Dokumente so lange unausgedruckt lassen, bis Sie sich beim System oder der Login- und Dokumentfreigabefunktion anmelden. Ihre Dokumente werden nur ausgedruckt, wenn Sie sich beim System anmelden. Dies bedeutet, dass Sie vertrauliche Dokumente sicher sammeln können und keine vergessenen Ausdrucke im Ausgabefach des Systems verbleiben.
  • Seite 75 ❑ Wenn ein Bildschirm angezeigt wird, in Kostenstelle wählen dem Sie zur Auswahl einer Kostenstelle Canon aufgefordert werden, wählen Sie mit [ ], [ ] die entsprechende Kostenstelle. Gruppe 1 • Wählen Sie eine Kostenstelle als <Login> Neben- oder Hauptkostenstelle aus, <An Nebenkostenstel...
  • Seite 76 Der Bildschirm <Stat. Kop./Druckauftr.> Stat. Kop./Druckauftr. wird angezeigt. 13:30PM Drucken 13:30PM Warten Um die Details zum Druckauftragsstatus anzuzeigen oder den Druckauftrag abzubrechen, wählen Sie den gewünschten Druckauftrag über [ ] oder [ ] aus und betätigen Sie [OK]. Wählen Sie auf dem Bildschirm <Details>...
  • Seite 77: So Melden Sie Sich Bei Der Login- Und Dokumentfreigabefunktion An

    Betätigen Sie [ ] (An-/Abmelden), um sich beim System abzumelden, wenn der Druckvorgang abgeschlossen ist. HINWEIS Sie können Sie sich auch am System anmelden, indem Sie Ihre ID-Karte über den optionalen MiCard Reader halten (außer wenn die Abteilungs-ID und PIN als Login-Verfahren verwendet werden).
  • Seite 78 ❑ Wenn ein Bildschirm angezeigt wird, in Kostenstelle wählen dem Sie zur Auswahl einer Kostenstelle Canon aufgefordert werden, wählen Sie mit [ ], [ ] die entsprechende Kostenstelle. Gruppe 1 • Wählen Sie eine Kostenstelle als <Login> Neben- oder Hauptkostenstelle aus, <An Nebenkostenstel...
  • Seite 79 ● Wenn die Einstellung so vorgenommen wurde, dass Meine Druckaufträge angezeigt werden: ❑ Wählen Sie mit [ ] oder [ ] den Auftrag Meine Druckaufträge aus, den Sie drucken möchten, und <Aktualisieren> drücken Sie [OK]. Wiederholen Sie diese Vorgehensweise, <Alles drucken> um alle Aufträge auszuwählen, die Sie Canon01.pdf 2013/0 drucken möchten, und drücken Sie [ ].
  • Seite 80 imageRUNNER 1133/1133A/1133iF Guida di uniFLOW Login Device Client...
  • Seite 81 Per la stesura del presente manuale è stato fatto uno sforzo considerevole per evitare imprecisioni o omissioni. Tuttavia, poiché i prodotti sono in continua evoluzione, si consiglia di rivolgersi a Canon nel caso in cui fossero necessarie informazioni specifiche sul prodotto.
  • Seite 82 Indice Prefazione........... . . IT-iv Come utilizzare il presente manuale .
  • Seite 83: Prefazione

    Prefazione Vi ringraziamo per aver acquistato Canon imageRUNNER 1133/1133A/1133iF. Leggere attentamente il manuale prima di utilizzare la macchina, in modo da imparare a conoscere bene l’apparecchiatura e poterne sfruttare al meglio le molteplici funzioni. Terminata la lettura, conservare il manuale per eventuali consultazioni future.
  • Seite 84: Schermate Utilizzate Nel Manuale

    Schermate utilizzate nel manuale Le schermate utilizzate nel manuale possono differire da quelle effettive in base alla configurazione dell’apparecchiatura. Marchi di fabbrica ® uniFLOW e MiCard sono marchi di fabbrica registrati di NT-ware Systemprogrammierung GmbH. Gli altri nomi di prodotto e di azienda indicati nel manuale possono essere marchi di fabbrica dei rispettivi proprietari.
  • Seite 85: Note Legali

    Declino di responsabilità Le informazioni contenute in questo documento sono soggette a modifiche senza preavviso. CANON, INC. NON FORNISCE GARANZIE DI ALCUN TIPO, ESPLICITE O IMPLICITE, IN MERITO AL PRESENTE DOCUMENTO, AD ECCEZIONE DI QUANTO ESPRESSAMENTE INDICATO NEL DOCUMENTO STESSO, INCLUSE, SENZA LIMITAZIONI, GARANZIE DI COMMERCIABILITÀ, IDONEITÀ...
  • Seite 86: Gestione Della Macchina Con Integrazione In Uniflow

    Gestione della macchina con integrazione in uniFLOW La presente sezione fornisce una panoramica dell’integrazione in uniFLOW. Il server uniFLOW, un server su cui è stato installato il software uniFLOW, rileva la macchina all’interno di una rete e attiva l’integrazione in uniFLOW della macchina. Il server uniFLOW autentica l’accesso degli utenti alla macchina e fornisce alla macchina informazioni sulle impostazioni.
  • Seite 87: Azioni Possibili Grazie All'integrazione In Uniflow

    Azioni possibili grazie all’integrazione in uniFLOW La macchina dispone delle funzioni attivate dal server uniFLOW. Le funzioni principali sono le seguenti: Modi di autenticazione e metodi di accesso basati sul server uniFLOW È possibile gestire la macchina limitando il suo utilizzo ai soli utenti registrati sul server uniFLOW.
  • Seite 88: Attivazione E Impostazioni Dell'integrazione In Uniflow

    ■ Visualizzazione del costo sulla schermata per i lavori eseguiti con la funzione Accesso e rilascio dei documenti: È possibile impostare la macchina in modo che visualizzi il costo calcolato per il lavoro sul display quando un utente utilizza la funzione Accesso e rilascio dei documenti sulla macchina.
  • Seite 89: Metodi Di Accesso Con L'integrazione In Uniflow

    Metodi di accesso con l’integrazione in uniFLOW L’integrazione in uniFLOW offre i seguenti metodi di accesso: NOTA • Per indicazioni su come accedere alla macchina come Gestore sistema, vedere “Funzionamento della macchina con accesso come Gestore sistema,” a p. IT-6. •...
  • Seite 90: Impostazioni Di Gestione Id Divisione Per L'integrazione In Uniflow

    Impostazioni di Gestione ID divisione per l’integrazione in uniFLOW Prima di utilizzare l’integrazione in uniFLOW, accertarsi che l’impostazione di Gestione ID divisione sia impostata come indicato nella tabella di seguito. Modo di autenticazione Metodo di accesso Impostazioni richieste per la (Vedere p.
  • Seite 91: Funzionamento Della Macchina Con Accesso Come Gestore Sistema

    Funzionamento della macchina con accesso come Gestore sistema La procedura di accesso del Gestore sistema varia a seconda del modo di autenticazione selezionato tra quelli offerti dall’integrazione in uniFLOW. Vedere la tabella sottostante. NOTA Il Gestore sistema può impostare o modificare le impostazioni di sistema e altre impostazioni accessibili solo al Gestore sistema.
  • Seite 92: Azzeramento Dell'indirizzo Ip Della Macchina

    Azzeramento dell’indirizzo IP della macchina. Se il messaggio <Connessione al server non riuscita. Contattare gestore sistema.> continua a essere visualizzato sul display dopo che la macchina è stata accesa, è possibile che l’indirizzo IP della macchina non sia impostato correttamente. Per ristabilire le comunicazioni tra la macchina e il server uniFLOW azzerando l’indirizzo IP della macchina, attenersi alla procedura indicata di seguito.
  • Seite 93: Effettuare L'accesso Alla Macchina

    Effettuare l’accesso alla macchina Questa sezione descrive le procedure a cui attenersi con i metodi di accesso messi a disposizione dall’integrazione in uniFLOW. NOTA Quando l’unità opzionale MiCard Reader è collegata alla macchina, è possibile effettuare l’accesso e la disconnessione posizionando il documento d’identità sopra l’unità...
  • Seite 94 ❑ Se viene visualizzata una schermata che Selez. Centro di costo richiede di selezionare un centro di Canon costo, selezionare il centro di costo appropriato utilizzando [ ] o [ ]. Gruppo 1 • Selezionare un centro di costo di livello <Accedi>...
  • Seite 95: Inserimento Di Un Codice Pin

    Utilizzare [ ] o [ ] per selezionare l’opzione di ricerca desiderata, quindi premere [OK]. • <A centro di costo secondario>: Selez. Centro di costo utilizzare per spostare i centri di costo Canon al livello inferiore. • <A centro di costo principale>: Gruppo 1 utilizzare per spostare i centri di costo <A centro di costo s...
  • Seite 96 ❑ Se viene visualizzata una schermata che Selez. Centro di costo richiede di selezionare un centro di Canon costo, selezionare il centro di costo appropriato utilizzando [ ] o [ ]. Gruppo 1 • Selezionare un centro di costo di livello <Accedi>...
  • Seite 97: Utilizzo Di Un Documento D'identità

    ❑ Se viene visualizzata una schermata che Selez. Centro di costo richiede di selezionare un centro di Canon costo, selezionare il centro di costo appropriato utilizzando [ ] o [ ]. Gruppo 1 • Selezionare un centro di costo di livello <Accedi>...
  • Seite 98: Inserimento Di Un Pin E Di Un Id Di Divisione

    Inserimento di un PIN e di un ID di divisione Quando viene visualizzata la schermata illustrata al punto 1, inserire il PIN e l’ID di divisione per effettuare l’accesso. IMPORTANTE Questo metodo di accesso è disponibile solo quando come modo di autenticazione è selezionato “Autenticazione per la macchina”...
  • Seite 99 ❑ Se viene visualizzata una schermata che Selez. Centro di costo richiede di selezionare un centro di Canon costo, selezionare il centro di costo appropriato utilizzando [ ] o [ ]. Gruppo 1 • Selezionare un centro di costo di livello <Accedi>...
  • Seite 100: Conservare I Documenti Senza Stamparli Finché Non Viene Effettuato L'accesso (Accesso E Rilascio Dei Documenti)

    Conservare i documenti senza stamparli finché non viene effettuato l’accesso (Accesso e rilascio dei documenti) È possibile conservare i documenti senza stamparli finché l’utente non effettua l’accesso alla macchina o alla funzione Accesso e rilascio dei documenti. I documenti vengono stampati solo dopo che l’utente ha effettuato l’accesso. Questo consente di gestire con la massima sicurezza documenti riservati, inoltre elimina il problema di documenti stampati e dimenticati nel vassoio d’uscita della macchina.
  • Seite 101 ❑ Se viene visualizzata una schermata che Selez. Centro di costo richiede di selezionare un centro di Canon costo, selezionare il centro di costo appropriato utilizzando [ ] o [ ]. Gruppo 1 • Selezionare un centro di costo di livello <Accedi>...
  • Seite 102 Viene visualizzata la schermata <Stato Stato lav. cop./stampa lav. cop./stampa>. 13:30PM In stampa 13:30PM In attesa Per visualizzare i dettagli sullo stato del lavoro di stampa o per annullare un lavoro di stampa, selezionare il lavoro desiderato utilizzando [ ] o [ ], quindi premere [OK].
  • Seite 103: Per Effettuare L'accesso Alla Funzione Accesso E Rilascio Dei Documenti

    ❑ Se viene visualizzata una schermata che Selez. Centro di costo richiede di selezionare un centro di Canon costo, selezionare il centro di costo appropriato utilizzando [ ] o [ ]. Gruppo 1 • Selezionare un centro di costo di livello <Accedi>...
  • Seite 104 Stampare il documento. ● Se è impostata la visualizzazione del costo: ❑ Selezionare <Sì> utilizzando [ ] o [ ], Stampa 2 lavoro/i? quindi premere [OK]. Costo totale: NOTA $2.00 A seconda dell’impostazione, è <No> possibile che sia visualizzato il costo <Sì>...
  • Seite 105 IT-20 Conservare i documenti senza stamparli finché non viene effettuato l’accesso (Accesso e rilascio dei documenti)
  • Seite 106 imageRUNNER 1133/1133A/1133iF Guía de uniFLOW Login Device Client...
  • Seite 107 Adobe Systems Incorporated. Se ha hecho un gran esfuerzo para evitar inexactitudes y omisiones en este manual. No obstante, debido al continuo perfeccionamiento de nuestros productos, consulte a Canon si necesita una especificación exacta.
  • Seite 108 Índice Prefacio............ES-iv Cómo utilizar este manual .
  • Seite 109: Prefacio

    Prefacio Gracias por adquirir la impresora Canon imageRUNNER 1133/1133A/1133iF. Antes de utilizar este producto, lea atentamente el manual para familiarizarse con sus características y aprovechar al máximo sus múltiples funciones. Después de leer este manual, guárdelo en un lugar seguro para futuras consultas.
  • Seite 110: Pantallas Utilizadas En Este Manual

    Pantallas utilizadas en este manual Las capturas de pantalla utilizadas en este manual pueden ser distintas a las pantallas reales, según la configuración del equipo. Marcas registradas ® uniFLOW y MiCard son marcas comerciales registradas de NT-ware Systemprogrammierung GmbH. El resto de nombres de productos y compañías aquí mencionados son marcas comerciales de sus respectivos propietarios.
  • Seite 111: Avisos Legales

    Aviso legal La información de este documento puede ser modificada sin previo aviso. CANON INC. NO OFRECE GARANTÍAS DE NINGÚN TIPO EN RELACIÓN CON ESTE MATERIAL, YA SEAN EXPRESAS O IMPLÍCITAS, EXCEPTO EN LA MEDIDA EN QUE SE DESCRIBE EN ESTE DOCUMENTO, INCLUIDAS, SIN LIMITACIÓN, LAS RESPECTIVAS GARANTÍAS DE PUBLICIDAD,...
  • Seite 112: Administrar El Equipo Con La Integración De Uniflow

    Administrar el equipo con la integración de uniFLOW Esta sección describe de manera general la integración de uniFLOW. El servidor de uniFLOW, un servidor en el que está instalado el software uniFLOW, detecta el equipo en una red y activa la integración de uniFLOW en el equipo. El servidor de uniFLOW autentica a los usuarios que inicien sesión en el equipo y proporciona al equipo información sobre opciones.
  • Seite 113: Funciones De La Integración De Uniflow

    Funciones de la integración de uniFLOW El equipo cuenta con las funciones activadas por el servidor de uniFLOW. Las funciones más importantes son: Métodos de inicio de sesión y modos de autenticación basada en servidor de uniFLOW Puede gestionar el equipo limitando su empleo solo a los usuarios que estén guardados en el servidor de uniFLOW.
  • Seite 114: Activación Y Opciones De La Integración De Uniflow

    ■ Mostrar el coste de los trabajos de inicio de sesión y publicación de documentos en la pantalla: Puede configurar el equipo para que muestre en la pantalla el coste calculado del trabajo cuando un usuario utilice la función de inicio de sesión y publicación de documentos en el equipo.
  • Seite 115: Autenticación Para La Función De Inicio De Sesión Y Publicación De Documentos

    Autenticación para la función de inicio de sesión y publicación de documentos Se pide a los usuarios que inicien sesión en la función de inicio de sesión y publicación de documentos. Esto significa que los usuarios pueden usar las funciones del equipo, como las funciones Copia o Lectura, sin iniciar sesión en el equipo.
  • Seite 116: Opciones De Gestión De Id De Departamentos Para La Integración De Uniflow

    Opciones de gestión de ID de departamentos para la integración de uniFLOW Antes de usar la integración de uniFLOW, asegúrese de establecer la opción de gestión de ID de departamentos tal como se indica en la siguiente tabla. Modo de autenticación Método de inicio de Opciones necesarias de la gestión (Consulte la pág.
  • Seite 117: Manejar El Equipo Como Administrador Del Sistema

    Manejar el equipo como administrador del sistema El procedimiento de inicio de sesión del administrador del sistema varía dependiendo del modo de autenticación aplicado facilitado por la integración de uniFLOW. Consulte la siguiente tabla. NOTA El administrador del sistema puede configurar o cambiar las opciones del sistema y otros ajustes a los que únicamente puede acceder el administrador del sistema.
  • Seite 118: Restablecimiento De La Dirección Ip Del Equipo

    Restablecimiento de la dirección IP del equipo Si el mensaje <Imposible conectar con el servidor. Contacte con el adm. del sistema.> no desaparece de la pantalla después de encender el equipo, es posible que la dirección IP del equipo no se haya establecido correctamente. Reanude las comunicaciones entre el equipo y el servidor de uniFLOW restableciendo la dirección IP del equipo tal como se describe a continuación.
  • Seite 119: Inicio De Sesión En El Equipo

    Inicio de sesión en el equipo Esta sección describe los procedimientos de las operaciones correspondientes a los métodos de inicio de sesión facilitados por la integración de uniFLOW. NOTA Cuando el MiCard Reader opcional está instalado en el equipo, puede iniciar y cerrar sesión pasando la tarjeta de ID sobre el MiCard Reader, independientemente del método de inicio de sesión aplicado (excepto cuando el ID de departamento y el PIN se aplican como método de inicio de sesión).
  • Seite 120 ❑ Si aparece una pantalla solicitándole Selecc. centro costes que seleccione el centro de costes, Canon seleccione el centro de costes adecuado usando [ ] o [ ]. Grupo 1 • Seleccione un centro de costes en el <Iniciar sesión>...
  • Seite 121: Introducción De Un Código Pin

    Utilice [ ] o [ ] para seleccionar la opción de búsqueda que desee y pulse [OK]. • <A centro de costes secundario>: Selecc. centro costes utilice esta opción para mover los Canon centros de costes al nivel inferior. • <A centro de costes principal>: utilice Grupo 1 esta opción para mover los centros de <A centro de costes...
  • Seite 122 • Si el código PIN que introdujo es incorrecto, aparecerá un mensaje de error. ❑ Si aparece una pantalla solicitándole Selecc. centro costes que seleccione el centro de costes, Canon seleccione el centro de costes adecuado usando [ ] o [ ]. Grupo 1 • Seleccione un centro de costes en el <Iniciar sesión>...
  • Seite 123: Uso De La Tarjeta De Id

    ❑ Si aparece una pantalla solicitándole Selecc. centro costes que seleccione el centro de costes, Canon seleccione el centro de costes adecuado usando [ ] o [ ]. Grupo 1 • Seleccione un centro de costes en el <Iniciar sesión>...
  • Seite 124: Introducción De Un Id De Departamento Y Un Pin

    Introducción de un ID de departamento y un PIN Introduzca su ID de departamento y PIN para iniciar sesión cuando aparezca la pantalla mostrada en el paso 1. IMPORTANTE Este método de inicio de sesión está disponible únicamente cuando se aplica “Autenticación para el equipo”...
  • Seite 125 ❑ Si aparece una pantalla solicitándole Selecc. centro costes que seleccione el centro de costes, Canon seleccione el centro de costes adecuado usando [ ] o [ ]. Grupo 1 • Seleccione un centro de costes en el <Iniciar sesión>...
  • Seite 126: No Imprimir Documentos Hasta Que Se Inicie Sesión (Función De Inicio De Sesión Y Publicación De Documentos)

    No imprimir documentos hasta que se inicie sesión (función de inicio de sesión y publicación de documentos) Puede evitar que se impriman sus documentos hasta que inicie sesión en el equipo o la función de inicio de sesión y publicación de documentos. Sus documentos sólo se imprimen cuando inicia sesión en el equipo.
  • Seite 127 ❑ Si aparece una pantalla solicitándole Selecc. centro costes que seleccione el centro de costes, Canon seleccione el centro de costes adecuado usando [ ] o [ ]. Grupo 1 • Seleccione un centro de costes en el <Iniciar sesión>...
  • Seite 128 ● Si está establecido para mostrar Mis trabajos Impresión: ❑ Seleccione el trabajo que desea imprimir Mis trabajos impres. utilizando [ ] o [ ] y pulse [OK]. <Actualizar> Repita este procedimiento para seleccionar todos los trabajos que desee <Imprimir todo> imprimir y pulse [ ].
  • Seite 129: Para Iniciar Sesión En La Función De Inicio De Sesión Y Publicación De Documentos

    Para iniciar sesión en la función de inicio de sesión y publicación de documentos: Si aparece una pantalla en espera como la de la función Copia en vez de una pantalla de inicio de sesión al encender el equipo o borrar el modo Suspendido, inicie sesión en la función de inicio de sesión y publicación de documentos siguiendo el procedimiento descrito a continuación.
  • Seite 130 ❑ Si aparece una pantalla solicitándole Selecc. centro costes que seleccione el centro de costes, Canon seleccione el centro de costes adecuado usando [ ] o [ ]. Grupo 1 • Seleccione un centro de costes en el <Iniciar sesión>...
  • Seite 131 ● Si está establecido para mostrar Mis trabajos Impresión: ❑ Seleccione el trabajo que desea imprimir Mis trabajos impres. utilizando [ ] o [ ] y pulse [OK]. <Actualizar> Repita este procedimiento para seleccionar todos los trabajos que desee <Imprimir todo> imprimir y pulse [ ].
  • Seite 132 6390 Dixie Road Mississauga, Ontario L5T 1P7, Canada CANON EUROPA N.V. Bovenkerkerweg 59, 1185 XB Amstelveen, The Netherlands (See http://www.canon-europe.com/ for details on your regional dealer) CANON LATIN AMERICA, INC. 703 Waterford Way Suite 400 Miami, Florida 33126 U.S.A. CANON AUSTRALIA PTY. LTD 1 Thomas Holt Drive, North Ryde, Sydney, N.S.W.

Diese Anleitung auch für:

Imagerunner 1133aImagerunner 1133if

Inhaltsverzeichnis