auna 10032295 Bedienungsanleitung
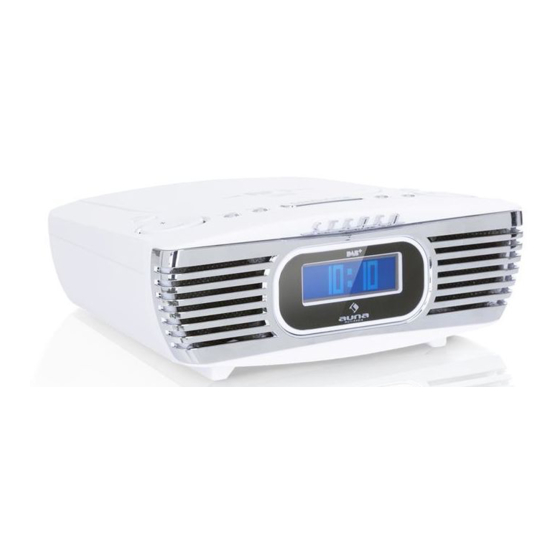
Dab+ radio
Inhaltsverzeichnis
Verfügbare Sprachen
Verfügbare Sprachen
Kapitel
Inhaltsverzeichnis

Verwandte Anleitungen für auna 10032295


Inhaltszusammenfassung für auna 10032295
-
Seite 3: Inhaltsverzeichnis
Gerät auf Werkseinstellungen zurücksetzen 10 Wiedergabe von CDs/ MP3-Discs 10 Laden über USB 13 Alarmeinstellung 14 AUX-IN 15 Kopfhörer anschließen 16 Spracheinstellung 16 Hinweise zur Entsorgung 17 Konformitätserklärung 18 TECHNISCHE DATEN Artikelnummer 10032295, 10032296 Stromversorgung 220-240 V ~ 50/60 Hz... -
Seite 4: Sicherheitshinweise
SICHERHEITSHINWEISE Allgemeine Hinweise • Blitzschlag - Wenn Sie das Gerät länger nicht benutzen oder es gewittert, ziehen Sie den Stecker aus der Steckdose oder trennen Sie das Gerät vom Antennenanschluss. Dadurch werden Schäden am Produkt durch Blitzschlag und Überspannung vermieden. •... - Seite 5 Besondere Hinweise • Kinder ab 8 Jahren, psychisch, sensorisch und körperlich eingeschränkte Menschen dürfen das Gerät nur benutzen, wenn sie vorher von einer für sie verantwortlichen Aufsichtsperson ausführlich mit den Funktionen und den Sicherheitsvorkehrungen vertraut gemacht wurden und die damit verbundenen Risiken verstehen. •...
-
Seite 6: Geräteübersicht
GERÄTEÜBERSICHT Antenne Ein-/Austaste Lautstärkeregler Alarmtaste Menü/ Sleep Snooze CD-Fach öffnen Funktionstaste Wiedergabe/ Pause / Suche 10 Nächster vorheriger Titel/ Sender Info/ Stopptaste 12 +10/ MEM/ Pre 13 Eingabe/ Wiedergabemodus/ FM-ST/ MONO 14 Lautsprecher 15 LCD-Bildschirm 16 Kopfhöreranschluss (3,5 mm) 17 DC-IN-Anschluss 18 USB-Ladeanschluss (5 V- 1 A) 19 AUX-IN-Anschluss (3,5... -
Seite 7: Inbetriebnahme
INBETRIEBNAHME Installation • Entpacken Sie alle Gerätebestandteile und entfernen Sie das Schutzmaterial. • Stecken Sie den Netzstecker des Geräts erst dann in die Steckdose, wenn Sie die Spannung Ihrer Steckdose mit der auf dem Typenschild des Geräts aufgeführten Spannung verglichen haben und alle Verbindungen hergestellt wurden. -
Seite 8: Radio Hören
RADIO HÖREN DAB-Radio (Digital Audio Broadcasting) Schalten Sie das Gerät durch Drücken der Taste Ein/Aus (2) an. 2. Wenn Sie das Gerät zum ersten Mal einschalten, startet das Gerät nach dem Einschalten automatisch den DAB-Sendersuchlauf. Der LCD-Bildschirm (15) zeigt „Suche“ an. Drücken Sie alternativ die Funktionstaste (8) zur Auswahl des DAB-Modus und drücken Sie für den automatischen Sendersuchlauf die Taste Suche (9). - Seite 9 Manuelle Sendereinstellung Schalten Sie das Gerät durch Drücken der Taste Ein/Aus (2) an und drücken Sie zur Auswahl des FM-Modus die Funktionstaste (8). 2. Stellen Sie den von Ihnen gewünschten Sender durch Drücken der Tasten oder ein. 3. Passen Sie die Lautstärke mit dem Lautstärkeregler (5) an. RDS (Radio Data Systems) Diese Einstellung ermöglicht es Ihnen, vom Radiosender zur Verfügung gestellte Informationen nach und nach auf dem LCD-Bildschirm (15), in der...
-
Seite 10: Gerät Auf Werkseinstellungen Zurücksetzen
FM-Stereo Empfang Drücken Sie mehrmals die Taste FM-ST/ MONO (13), um Sender in Mono oder Stereo zu empfangen. Insbesondere, wenn das Stereosignal schwach ist, empfiehlt es sich, einen Sender in Mono zu empfangen. Hinweis: Das Gerät verfügt über eine eingebaute Antenne (1). Fahren Sie die Antenne vollständig aus und richten Sie sie in einem geeigneten Winkel aus, um den bestmöglichen Empfang zu gewährleisten. - Seite 11 Stoppmodus Wenn die Stopptaste während des Wiedergabe-/ Pausemodus gedrückt wird, wird das Gerät die Musikwiedergabe unterbrechen. Nächster / Vorheriger Titel • Wenn Sie im Wiedergabemodus die Taste (2) drücken, wird der nächste Titel wiedergegeben und die Nummer des Titels wird auf dem LCD-Bildschirm (15) angezeigt.
- Seite 12 Programmieren der CD-Wiedergabe Bis zu 20 CD-Titel können in einer bestimmten Reihenfolge zur CD- Wiedergabe gespeichert werden. Drücken Sie vor der Verwendung die Taste Info/ Stopp (11). Stellen Sie den CD-Modus ein und stoppen Sie die Wiedergabe der CD. 2. Drücken Sie die Taste 10+/ MEM/ Pre (12) und auf dem Bildschirm erscheint „MEM“.
-
Seite 13: Laden Über Usb
LADEN ÜBER USB Dieses Gerät verfügt über einen 5 V/ 1 A Ladeanschluss für mobile Endgeräte wie Smartphones, Tablets etc. Verbinden Sie Ihr mobiles Endgerät über ein Ladekabel (nicht im Lieferumfang enthalten) mit dem USB-Anschluss (18) des Geräts. Solange das Endgerät verbunden ist, wird es aufgeladen. -
Seite 14: Alarmeinstellung
ALARMEINSTELLUNG Diese Funktion ermöglicht Ihnen das Einstellen einer Uhrzeit, zu welcher sich das Gerät automatisch im Summer-/ CD-/ FM- oder DAB-Modus einschaltet, um Sie aufzuwecken. Stellen Sie den Standby-Modus ein und drücken Sie einmal die Alarmtaste (4). 2. Der Bildschirm zeigt „Select Alarm 1/ 2“ an. Drücken Sie zur Auswahl der Alarmeinstellung von Alarm 1 oder 2 die Tasten oder (10). -
Seite 15: Aux-In
Schlummertaste (Snooze) Jedes Mal, wenn Sie die Taste Snooze (6) drücken, können Sie den Alarm für 9 Minuten stummschalten. Nach jedem Drücken dieser Taste blinkt das Symbol „AL“ auf dem LCD-Bildschirm (15). Automatisches Ausschalten (Sleep) Drücken Sie zum Aktivieren des automatischen Ausschaltens die Taste Sleep. -
Seite 16: Kopfhörer Anschließen
KOPFHÖRER ANSCHLIESSEN Der Anschluss Ihrer Kopfhörer am Kopfhöreranschluss (16) ermöglicht, dass nur Sie die Musik hören können. • Vermeiden Sie das Hören von Musik mit hoher Lautstärke, da Ihr gehör dadurch geschädigt werden könnte. • Reduzieren Sie die Lautstärke oder schalten Sie das Gerät aus, wenn Sie ein Piepen in den Ohren hören. -
Seite 17: Hinweise Zur Entsorgung
HINWEISE ZUR ENTSORGUNG Befindet sich die linke Abbildung (durchgestrichene Mülltonne auf Rädern) auf dem Produkt, gilt die Europäische Richtlinie 2012/19/EU. Diese Produkte dürfen nicht mit dem normalen Hausmüll entsorgt werden. Informieren Sie sich über die örtlichen Regelungen zur getrennten Sammlung elektrischer und elektronischer Gerätschaften. -
Seite 18: Konformitätserklärung
EU-Konformitätserklärung Wir, die CHAL-TEC GmbH Wallstraße 16 10179 Berlin erklären hiermit, dass der nachfolgend bezeichnete Funkanlagentyp: Auna Radio, 10032295, 10032296 allen folgenden einschlägigen Bestimmungen entspricht: RED-richtlinie 2014/53/EU LVD-Richtlinie 2014/35/EU RoHS-Richtlinie 2011/65/EU. Angewandte harmonisierte Normen: EN 62311:2008 EN 55014-1:2006 +A1:2009+ A2:2011...