Herunterladen Inhalt Inhalt Diese Seite drucken

Werbung

Verfügbare Sprachen
  • DE

Verfügbare Sprachen

  • DEUTSCH, seite 1

Werbung

Inhaltsverzeichnis
loading

Inhaltszusammenfassung für auna Splash

  • Seite 3: Inhaltsverzeichnis

    Sehr geehrter Kunde, wir gratulieren Ihnen zum Erwerb Ihres Gerätes. Lesen Sie die folgenden Hinweise sorgfältig durch und befolgen Sie diese, um möglichen Schäden vorzubeugen. Für Schäden, die durch Missachtung der Hinweise und unsachgemäßen Gebrauch entstehen, übernehmen wir keine Haftung. Scannen Sie den QR-Code, um Zugriff auf die aktuellste Bedienungsanleitung und weitere Informationen rund um das Produkt zu erhalten.
  • Seite 4: Technische Daten

    TECHNISCHE DATEN Artikelnummer 10037795, 10037796, 10037797 Stromversorgung 5 V⎓ (1 A) Anschluss über Netzadapter Lithium-Ionen-Akku (2000 mAh) (fest installiert) Akku CD-Player CD-DA / CD-R / CD-RW / MP3 / WMA Wiedergabe von MP3 und WMA Datein US-Eingang UKW-Radio Frequenzbereich 87,5 MHz–108 MHz Senderspeicher DAB-Radio Frequenzbereich...
  • Seite 5: Sicherheitshinweise

    SICHERHEITSHINWEISE Erklärung der Symbole auf dem Gerät CAUTION RISK OF ELECTRIC SHOCK DO NOT OPEN WARNUNG: GEFAHR EINES STROMSCHLAGS EINER PERSONENVERLETZUNG ZU VERRINGERN, DAS GEHÄUSE NICHT ÖFFNEN. KEINE FÜR DEN BENUTZER ZU WARTENDEN TEILE IM GERÄT. WENDEN SIE SICH IM FALLE EINER REPARATUR NUR AN QUALIFIZIERTES PERSONAL.
  • Seite 6 • Lesen, beachten und aufbewahren Sie diese Anweisungen - Alle Sicherheits- und Bedienungshinweise müssen vor der Verwendung dieses Produkts gelesen und zum späteren Nachschlagen aufbewahrt werden. Alle Warnhinweise auf dem Gerät und in den Anweisungen müssen beachtet werden. • Wird das Gerät nicht gemäß diesen Vorschriften installiert oder verwendet, kann dies die Sicherheit des Produkts beeinträchtigen und die Garantie ungültig machen.
  • Seite 7 Wenn das Gerät nicht ordnungsgemäß verwendet wird, kann Wasser in das Gerät eindringen und zu Bränden, Stromschlägen oder Fehlfunktionen führen. Beachten Sie die folgenden Sicherheitshinweise sorgfältig und verwenden Sie das Gerät richtig. IPX 4: Geschützt gegen Spritzwasser aus allen Richtungen. Flüssigkeiten, für die die Spezifikationen für die Wasserbeständigkeit gelten •...
  • Seite 8: Geräteübersicht
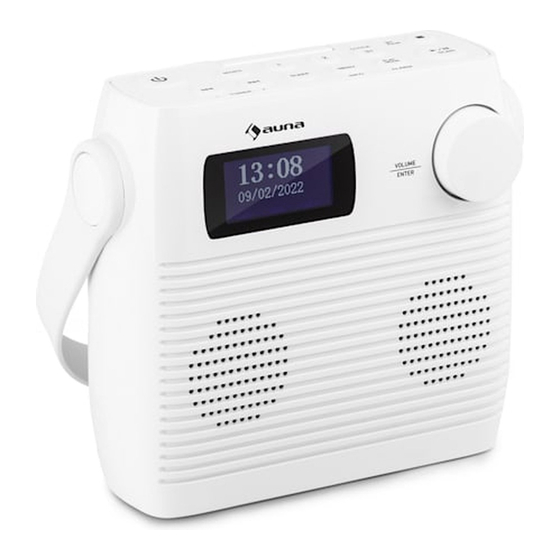
    GERÄTEÜBERSICHT...
  • Seite 9 Standby Taste CD/BT: vorheriger Titel oder eingestellte Zeit verringern/ vorheriger Sender SOURCE – Quelle CD/BT nächsten Titel überspringen TUNE+ Taste Speicherplatz 1 SLEEP – Automatisches Ausschalten Speicherplatz 2 MENU/INFO CLOCK/ 3+ - Uhrzeiteinstellung/ Speicherplätze 10 PLAY MODE/ ALARM – Wiedergabemodus/ Alarm 11 ⏯...
  • Seite 10: Erste Schritte

    ERSTE SCHRITTE 1. Verbinden Sie das im Lieferumfang enthaltene Typ-C-Kabel mit dem Typ-C-Anschluss. 2. Schließen Sie das andere Ende des Typ-C-Kabels mit einem USB- Netzadapter an eine Steckdose an. Sie können den Akku auch aufladen, indem Sie das Gerät mit dem USB-Anschluss eines Computers verbinden.
  • Seite 11: Cd Operation

    CD OPERATION Drücken Sie mehrfach die Taste SOURCE, bis auf dem Bildschirm „CD“ angezeigt wird. CD einlegen 1. Öffnen Sie die zunächst die CD-Fach-Sicherung und anschließend das CD-Fach. 2. Legen Sie die CD mit der Beschriftung nach oben in das CD-Fach ein. Achten Sie darauf, dass die CD auf die Mittelspindel gelegt wird.
  • Seite 12 Drücken und halten Sie die Tasten ⏮ oder ⏭ , um schnell vor- oder • zurückzuspulen. Wiedergabe wiederholen und Zufallswiedergabe 1. Drücken Sie während des Betriebsmodus die Taste PLAY MODE. Auf dem Bildschirm wird angezeigt. Der aktuelle CD-Titel wird in Dauerschleife wiederholt.
  • Seite 13: Usb

    1. An der Vorderseite des Geräts befindet sich ein USB-Anschluss. Drücken Sie, sobald ein USB-Stick angeschlossen wurde, mehrfach die Taste SOURCE, um den USB-Modus auszuwählen. 2. Auf dem Gerät wird automatisch die Anzahl der auf dem USB-Stick befindlichen Titel angezeigt. 3.
  • Seite 14: Dab-Radio/Bedienung

    DAB-RADIO/BEDIENUNG Vollständiger Sendersuchlauf 1. Drücken Sie, zum Aktivieren des automatischen Sendersuchlaufs, die Taste SCAN und der Bildschirm wird „Scanning…“ (Suche) und einen größer werdenden Balken anzeigen. 2. Alle gefundenen Sender werden automatisch eingespeichert. Zum Erkunden der gefunden Sender drücken Sie die Tasten ⏮ oder ⏭. Drücken Sie anschließend die Bestätigungstaste ENTER.
  • Seite 15 Softwareinformationen 1. Drücken Sie während des DAB-Modus die Taste MENU, um das Menü anzuzeigen. 2. Drücken Sie die Tasten ⏮ oder ⏭ zur Auswahl von „System“ und drücken Sie zum Bestätigen die Taste ENTER. 3. Drücken Sie die Taste ENTER der Fernbedienung, um die Softwareversion anzeigen zu lassen.
  • Seite 16 Speichervorgang bestätigt. Sender in der Speicherliste speichern 1. Wählen Sie den Radiosender aus, welchen Sie speichern möchten. ③ 2. Halten Sie die Taste + so lange gedrückt, bis die Speicherliste angezeigt wird. Wählen Sie mit dem Drehregler einen gewünschten Speicherplatz zwischen 3 und 20 aus. Bereits gespeicherte Sender können überschrieben werden..
  • Seite 17: Fm-Radio

    Signalfehler Zeigt die Signalfehlerrate an. Wenn die Zahl „0“ ist, bedeutet das, dass das empfangene Signal fehlerfrei ist und eine starke Signalstärke hat. Audio-Bit-Rate Der Bildschirm zeigt die empfangene Audio Bit Rate an. Zeit/ Datum Zeigt die aktuelle Zeit und das Datum, welche vom Sender zur Verfügung gestellt werden, an.
  • Seite 18: Audioeinstellungen

    Audioeinstellungen Dieses Gerät wird automatisch zwischen Stereo- und Monomodus hin- und her wechseln. Sie können dies umgehen, indem Sie den gewünschten Modus manuell einstellen. Dies kann vor allem bei schlechtem Signal sehr hilfreich sein. 1. Drücken Sie die Taste MENU und wählen Sie mit den Tasten ⏮ oder ⏭ „Audio setting“...
  • Seite 19: Alarm- Und Timereinstellung

    ALARM- UND TIMEREINSTELLUNG Automatische Uhrzeiteinstellung Die Uhrzeit kann automatisch aktualisiert werden, wenn Sie ein DAB+- Signal an Ihrem aktuellen Standort empfangen. Uhrzeiteinstellung 1. Drücken Sie die Taste CLOCK. Die Digitalanzeige blinkt auf dem Bildschirm auf. 2. Drücken Sie zur Einstellung der aktuellen Jahreszahl die Tasten ⏮ oder ⏭...
  • Seite 20 Taste ENTER. 6. Drücken Sie zur Auswahl von „Timer On“ die Taste ALARM. Der Wecker ist dann aktiv. ◷ 7. Im Standby-Modus wird das Symbol angezeigt, woraus hervorgeht, dass der Wecker aktiviert wurde. Täglichen Wecker deaktivieren Deaktivieren Sie den aktuellen Wecker durch mehrfaches Drücken der Taste ◷...
  • Seite 21: Bt-Bedienung

    3. Aktivieren Sie das externe BT-Gerät und wählen Sie den Suchmodus aus. 4. Splash wird in der BT-Geräteliste Ihres externen Geräts angezeigt werden. 5. Wählen Sie Splash aus und geben Sie, falls notwendig, das Passwort „0000“ ein. 6. Zum Deaktivieren der BT-Funktion, drücken Sie die Taste SOURCE, um in einen anderen Modus zu wechseln oder deaktivieren Sie die Funktion auf Ihrem externen BT-Gerät.
  • Seite 22: Hinweise Zur Entsorgung

    HINWEISE ZUR ENTSORGUNG Wenn es in Ihrem Land eine gesetzliche Regelung zur Entsorgung von elektrischen und elektronischen Geräten gibt, weist dieses Symbol auf dem Produkt oder auf der Verpackung darauf hin, dass dieses Produkt nicht im Hausmüll entsorgt werden darf. Stattdessen muss es zu einer Sammelstelle für das Recycling von elektrischen und elektronischen Geräten gebracht werden.
  • Seite 23 Dear Customer, Congratulations on purchasing this device. Please read the following instructions carefully and follow them to prevent possible damages. We assume no liability for damage caused by disregard of the instructions and improper use. Scan the QR code to get access to the latest user manual and more product information.
  • Seite 24: Technical Data

    TECHNICAL DATA Item number 10037795, 10037796, 10037797 Power supply 5 V⎓ (1 A) Main unit DC Lithium-ion rechargeable battery (2000 mAh) Built-in battery (DC) CD player CD-DA / CD-R / CD-RW / MP3 / WMA Playing MP3 and WMA files USB inpu FM radio Tuning range 87.5 MHz–108 MHz...
  • Seite 25: Safety Instructions

    SAFETY INSTRUCTIONS Explanation of the symbols on the appliance CAUTION RISK OF ELECTRIC SHOCK DO NOT OPEN WARNING: TO REDUCE THE RISK OF ELECTRIC SHOCK; DO NOT REMOVE THE COVER OR BACK. NO USER-SERVICEABLE PARTS INSIDE: REFER SERVICING TO QUALIFIED PERSONNEL.
  • Seite 26 • Read, heed and retain these instructions – All the safety and operating instructions should be read before this product is used and retained for future reference. All warnings on the appliance and in the operating instructions should be followed •...
  • Seite 27 To maintain water resistant performance Carefully note the precautions below to ensure proper use. • Do not splash water forcibly into the sound output holes. • Do not fall into the water, and do not use underwater. • Do not allow the this product to remain wet in a cold environment, as the water may freeze.
  • Seite 28: Product Description

    PRODUCT DESCRIPTION...
  • Seite 29 STANDBY button CD/BT SKIP PREVIOUS/TUNE- button SOURCE BUTTON CD/BT SKIP NEXT/TUNE+ button PRESET 1 button SLEEP button PRESET 2 button MENU/INFO button Clock set/ preset 3+ button 10 Play mode /alarm set buttoN CD/BLUETOOTH PLAY/PAUSE/DAB/FM SCAN BUTTON 12 CD STOP button/ BT PAIR BUTTON 13 LCD display 14 Volume control knob /snooze/enter button 15 Carrying handle...
  • Seite 30: Getting Started

    GETTING STARTED 1. Connect the Type-C cable to the Type-C port. 2. Connect the other end of the Type-C cable to a power outlet, using a USB power adapter. You can also charge the battery by connecting Type-C cable to a computer's USB port. The charging indicator shows the battery charging.
  • Seite 31: Cd Operation

    CD OPERATION Press the SOURCE button repeatedly on the unit Inserting a CD While the Secpress the fuselage, to remove the CD door-lock lever, opening the CD door, CD is set to the CD applied part with the printing aspect as forward.
  • Seite 32 playback. Repeat playback 1. During playback mode, press the PLAY MODE button will show on the display. The CD will play the current track repeatedly. 2. Press the PLAY MODE button twice, will show on the display. The CD will play all tracks repeatedly. 3.
  • Seite 33: Usb Operation

    USB OPERATION 1. There is an USB socket located at the front of the unit. When a USB device is connected to the unit, press the SOURCE button select USB mode. 2. The unit will automatically display the total number of tracks. 3.
  • Seite 34: Dab+ Operation

    DAB+ OPERATION Full scan 1. To activate auto scan, press the SCAN button and the display will show "Scanning …" and a progressing slide bar. 2. All the stations that have been found will be stored automatically. To explore and listen to the found stations, press the  or  buttons to select.
  • Seite 35 5. Press the MENU button to exit. Language selection In DAB or FM mode press the menu button, select with the ⏮ or ⏭ buttons or "SYSTEM" and press enter to confirm then select" language" and choose the desired language from English/Danish/Dutch/French/German/Polish/ Italian/Spanish.
  • Seite 36 To recall a preset when listening to DAB radio or FM radio 1. To tune to Presets 1 to 2, press the corresponding numbered button on the front panel. 2. To access presets 3 to 20 on the front panel press the 3+ button, turn the Select dial right or left to scroll through the list of presets, then push and release the Select dial to tune to the selected preset.
  • Seite 37: Fm Operation

    Time / Date This displays the current time and date provided automatically by the broadcaster. DLS (Dynamic Label Segment) Dynamic label segment is a scrolling message that the broadcaster may include with their transmissions. The message usually includes information, such as program me details etc. FM OPERATION To switch the unit to FM mode, press the SOURCE button repeatedly to select FM mode.
  • Seite 38 press the ENTER button to confirm. FM display modes Press the INFO button on the remote control, the display will switch through the display modes. • Radio text: The broadcaster can include a scrolling text that displays information about the current program. •...
  • Seite 39: Setting Alarms And Timers

    SETTING ALARMS AND TIMERS Auto clock setting The clock can be updated automatically if you can receive a DAB+ signal in your location. Clock setting 1. Press the CLOCK button .The data digits flash on the display. 2. Press the ⏮ or ⏭ buttons to adjust the year digits, and then press the CLOCK button to confirm.
  • Seite 40 Notes 1. If “Wake to CD of USB ”is selected but a CD of USB is not inserted, the alarm will default to the DAB automatically when the alarm wake time is reached. 2. For ‘Wake to Radio”, the system will default to the last FM radio station listened to before switching off.
  • Seite 41: Bt Operation

    3. Activate your Bluetooth device and select the search mode. 4. “Splash” will appear on your Bluetooth device list. 5. Select “Splash” and enter “0000” for the password if necessary. 6. To disconnect the Bluetooth function, press the SOURCE button to switch to another mode or disconnect the function from your Bluetooth device.
  • Seite 42: Disposal Considerations

    DISPOSAL CONSIDERATIONS If there is a legal regulation for the disposal of electrical and electronic devices in your country, this symbol on the product or on the packaging indicates that this product must not be disposed of with household waste. Instead, it must be taken to a collection point for the recycling of electrical and electronic equipment.
  • Seite 43 Cher client, chère cliente, Toutes nos félicitations pour l’acquisition de ce nouvel appareil. Lisez attentivement les indications suivantes et suivez-les pour éviter d'éventuels dommages. Nous ne saurions être tenus pour responsables des dommages dus au non-respect des consignes et à la mauvaise utilisation de l’appareil.
  • Seite 44: Fiche Technique

    FICHE TECHNIQUE Numéro d'article 10037795, 10037796, 10037797 Alimentation 5 V⎓(1 A) Connexion par adaptateur Batterie lithium-ion (2000 mAh) (non amovible) secteur Batterie CD-DA / CD-R / CD-RW / MP3 / WMA Lecteur CD Lecture de fichiers MP3 et WMA Entrée US Radio FM Plage de fréquence 87,5 –...
  • Seite 45: Consignes De Sécurité

    CONSIGNES DE SÉCURITÉ Explication des symboles sur l'appareil ATTENTION RISQUE DE CHOC ÉLECTRIQUE NE PAS OUVRIR MISE EN GARDE : POUR RÉDUIRE LE RISQUE DE CHOC ÉLECTRIQUE ET DE BLESSURE CORPORELLE, N'OUVREZ PAS LE BOÎTIER. L'APPAREIL NE CONTIENT AUCUNE PIÈCE RÉPARABLE PAR L'UTILISATEUR.
  • Seite 46 • Lorsque vous n''utilisez pas l'appareil pendant une longue période, éteignez-le. Débranchez la fiche de la prise. Débranchez toujours le câble secteur en tirant la fiche elle-même • Lisez, suivez et conservez ces instructions - Toutes les instructions de sécurité et d'utilisation doivent être lues avant d'utiliser ce produit et conservées pour référence ultérieure.
  • Seite 47 Remarques sur l'étanchéité de cet appareil Les spécifications d'étanchéité pour ce produit sont IPX4 basées sur la norme IEC 60529 « Niveau de protection contre la pénétration de l'eau (code IP) » qui indique le degré de protection contre la pénétration de l'eau. Ce produit ne peut pas être utilisé...
  • Seite 48: Aperçu De L'appareil

    APERÇU DE L'APPAREIL...
  • Seite 49 Touche de mise en veille CD/BT: Titre précédent ou diminuer le réglage de l'heure / station précédente SOURCE CD/BT sauter au titre suivant Touche TUNE+ Emplacement mémoire 1 SLEEP - Arrêt automatique Emplacement mémoire 2 Menu/Info CLOCK/ 3+ - Réglage de l'heure/ emplacements de mémoire 10 PLAY MODE/ ALARM - Mode de lecture/ Alarme 11 ⏯...
  • Seite 50: Premiers Pas

    PREMIERS PAS 1. Connectez le câble Type-C fourni au connecteur Type-C. 2. Connectez l'autre extrémité du câble de type C à une prise de courant avec un adaptateur d'alimentation USB. Vous pouvez également charger la batterie en connectant l'appareil au port USB d'un ordinateur. Le témoin de charge clignote pendant la charge de la batterie.
  • Seite 51: Fonctionnement Du Cd

    FONCTIONNEMENT DU CD Appuyez plusieurs fois sur la touche SOURCE jusqu'à ce que l'écran affiche « CD ». Insérer le CD 1. Ouvrez d'abord le fusible du compartiment CD, puis le compartiment CD. 2. Placez le CD avec la face imprimée vers le haut et la face brillante vers le bas dans le compartiment CD.
  • Seite 52 Répétition des pistes et lecture aléatoire 1. Appuyez sur la touche PLAY MODE en mode de fonctionnement. L'écran affiche . La piste actuelle du CD est répétée en boucle. 2. Appuyez à nouveau sur la touche PLAY MODE en mode de fonctionnement.
  • Seite 53: Usb

    1. Un port USB se trouve à l'avant de l'appareil. Après avoir branché une clé USB, appuyez plusieurs fois sur la touche SOURCE pour sélectionner le mode USB. 2. L'appareil affiche automatiquement le nombre de titres sur la clé USB. 3.
  • Seite 54: Radio Dab/Fonctionnement

    RADIO DAB/FONCTIONNEMENT Recherche complète de stations 1. Pour activer la recherche automatique des stations, appuyez sur la touche SCAN et l'écran affiche « Scanning...» (Recherche) et une barre croissante. 2. Toutes les stations trouvées sont automatiquement sauvegardées. Pour parcourir les stations trouvées, appuyez sur les touches ⏮ ou ⏭. Appuyez ensuite sur la touche de confirmation ENTER.
  • Seite 55 2. Appuyez sur ⏮ ou ⏭ pour sélectionner « System » et appuyez sur ENTER pour confirmer. 3. Appuyez sur la touche ENTER de la télécommande pour afficher la version du logiciel. 4. Pour quitter l'affichage, appuyez à nouveau sur la touche MENU. Choix de la langue En mode DAB ou FM, appuyez sur la touche MENU et sélectionnez «...
  • Seite 56 ③ 2. Maintenez la touche + jusqu'à ce que la liste des mémoires s'affiche. Utilisez la commande rotative pour sélectionner l'emplacement de mémoire souhaité entre 3 et 20. Les stations déjà enregistrées peuvent être écrasées... Pour écouter une station mémorisée 1.
  • Seite 57: Radio Fm

    Débit binaire audio L'écran affiche le débit binaire audio numérique reçu. Heure / Date Affiche l'heure et la date actuelles fournies par la station. DLS (Dynamic Label Segment) Le segment d'étiquette dynamique est un message textuel défilant qui peut être intégré à la transmission par la station. Ce message contient des informations ordinaires, telles que les détails sur l'émission.
  • Seite 58 mode souhaité. Cela peut être très utile, surtout lorsque le signal est faible. 1. Appuyez sur la touche MENU et utilisez les touches ⏮ ou ⏭ pour sélectionner « Audio settings » (Réglage audio). Appuyez sur la touche ENTER pour confirmer. 2.
  • Seite 59: Réglage De L'alarme Et De La Minuterie

    RÉGLAGE DE L'ALARME ET DE LA MINUTERIE Réglage automatique de l'heure L'heure peut être mise à jour automatiquement lorsque vous recevez un signal DAB+ à votre emplacement actuel. Réglage de l'heure 1. Appuyez sur la touche CLOCK. L'affichage numérique clignote à l'écran. 2.
  • Seite 60 Désactiver le réveil quotidien Désactivez le réveil en cours en appuyant plusieurs fois sur la touche ◷ ALARM. Le symbole disparaît de l'écran. Remarques 1. Si, par exemple, vous avez sélectionné « CD » comme source d'alarme et qu'aucun CD n'a été inséré, la source d'alarme passe automatiquement à «...
  • Seite 61: Fonctionnement Du Bt

    4. Splash sera affiché dans la liste des périphériques BT de votre périphérique externe. 5. Sélectionnez Splash et, si nécessaire, saisissez le mot de passe « 0000 ». 6. Pour désactiver la fonction BT, appuyez sur la touche SOURCE pour passer à...
  • Seite 62: Informations Sur Le Recyclage

    INFORMATIONS SUR LE RECYCLAGE Si la mise en rebut des appareils électriques et électroniques est réglementée dans votre pays, ce symbole sur le produit ou sur l'emballage indique qu'il ne doit pas être éliminé avec les ordures ménagères. Vous devez l'acheminer vers un point de collecte pour le recyclage des appareils électriques et électroniques.
  • Seite 63 Estimado cliente: Le felicitamos por la adquisición de este producto. Lea atentamente el siguiente manual y siga cuidadosamente las instrucciones de uso con el fin de evitar posibles daños. La empresa no se hace responsable por los daños causados por el incumplimiento de las instrucciones y el uso indebido.
  • Seite 64: Datos Técnicos

    DATOS TÉCNICOS Número del artículo 10037795, 10037796, 10037797 Suministro eléctrico 5 V⎓ (1 A) Conexión mediante adaptador Batería de iones de litio (2000 mAh) (instalada de red permanentemente) Batería CD-DA / CD-R / CD-RW / MP3 / WMA Reproductor de CD Reproducción de archivos MP3 y WMA Entrada US Radio FM...
  • Seite 65: Indicaciones De Seguridad

    INDICACIONES DE SEGURIDAD Explicación de los símbolos presentes en el aparato ATTENCIÓN: RIESGO DE DESCARGA ELÉCTRICA NO ABRIR ADVERTENCIA: PARA REDUCIR EL RIESGO DE UNA DESCARGA ELÉCTRICA Y DE LESIONES PERSONALES, NO ABRIR LA CARCASA. NO EXISTE NINGUNA PIEZA QUE EL USUARIO PUEDA REPARAR.
  • Seite 66 apáguelo. Desconecte el enchufe de la toma de corriente. Extraiga siempre el enchufe de la red por la propia clavija y nunca por el cable. • Lea, siga y conserve estas instrucciones - Todas las instrucciones de seguridad y funcionamiento deben leerse antes de utilizar este producto y conservarse para futuras consultas.
  • Seite 67 Notas sobre la impermeabilidad de esta unidad Las especificaciones de impermeabilidad de este producto son IPX4 según la norma IEC 60529 "Grados de protección contra la entrada de agua (código IP)", que especifica el grado de protección contra la entrada de agua.
  • Seite 68: Descripción General Del Aparato

    DESCRIPCIÓN GENERAL DEL APARATO...
  • Seite 69 Botón de espera CD/BT: Disminuir la pista anterior o fijar la hora/estación anterior SOURCE – fuente CD/BT salta la pista siguiente Botón TUNE+ Posición de memoria 1 SLEEP - Apagado automático Posición de memoria 2 MENU/INFO CLOCK/ 3+ - Ajuste de la hora/ posiciones de memoria 10 MODO DE REPRODUCCIÓN/ ALARMA - Modo de juego/ Alarma 11 ⏯...
  • Seite 70: Primeros Pasos

    PRIMEROS PASOS 1. Conecte el cable Type-C incluido en el volumen de suministro al conector Type-C. 2. Conecta el otro extremo del cable Type-C a una toma de corriente con un adaptador de corriente USB. También puedes cargar la batería conectando la unidad al puerto USB de un ordenador.
  • Seite 71: Operación Cd 10

    OPERACIÓN CD 10 Pulse el botón SOURCE repetidamente hasta que aparezca "CD" en la pantalla. Insertar CD 1. Primero abra el fusible del compartimento del CD y luego el compartimento del CD. 2. Introduzca un CD con la cara estampada hacia arriba dentro del compartimento.
  • Seite 72 Repetir una pista y reproducción aleatoria 1. Pulse el botón PLAY MODE durante el modo de funcionamiento. En pantalla aparece . La pista actual del CD se repite en un bucle continuo. 2. Pulse el botón PLAY MODE durante el modo de funcionamiento. En pantalla aparece .
  • Seite 73: Usb

    1. Hay un puerto USB en la parte delantera de la unidad. Una vez conectada la memoria USB, pulse repetidamente el botón SOURCE para seleccionar el modo USB. 2. La unidad muestra automáticamente el número de títulos de la memoria USB.
  • Seite 74: Radio Dab/Operación

    RADIO DAB/OPERACIÓN Exploración completa de canales 1. Para activar la búsqueda automática de canales, pulse el botón SCAN y la pantalla mostrará "Scanning..." (Búsqueda) y una barra creciente. 2. Todas las emisoras encontradas se almacenan automáticamente. Para explorar las estaciones encontradas, pulse las teclas ⏮ o ⏭. A continuación pulse la tecla ENTER.
  • Seite 75 Información sobre el software 1. Pulse el botón MENU del mando a distancia para mostrar el menú principal. 2. Pulse las teclas para seleccionar "System"⏮o ⏭, y para confirmar pulse la tecla ENTER 3. Pulse la tecla ENTER del mando a distancia para mostrar la versión del software.
  • Seite 76 Guardar las emisoras en la lista de la memoria 1. Seleccione la emisora de radio que desea guardar. ③+ 2. Mantenga pulsada la tecla hasta que aparezca la lista de emisorias guardadas. Utilice el mando giratorio para seleccionar una posición de memoria deseada entre 3 y 20.
  • Seite 77: Radio Fm

    Tasa de bits de audio La pantalla muestra la tasa de bits de audio digital. Hora/fecha Muestra la hora y la fecha actuales proporcionadas por el transmisor. DLS (segmento dinámico de etiquetas) El segmento de la etiqueta dinámica es un mensaje de texto desplazable que el emisor puede integrar en la transmisión.
  • Seite 78 "Audio Setting" (Ajuste de audio). Finalmente, pulse la tecla ENTER para confirmar. 2. Pulse las teclas ⏮ o ⏭ para seleccionar "Estéreo permitido" o "Mono forzado" y confirme su selección con la tecla ENTER. Nota: El asterisco en la esquina superior derecha de la pantalla indica la selección actual.
  • Seite 79: Configuración Del Temporizador Y Alarma

    CONFIGURACIÓN DEL TEMPORIZADOR Y ALARMA Ajuste automático de la hora La hora puede actualizarse automáticamente cuando recibas una señal DAB+ en tu ubicación actual. Ajuste de la hora 1. Pulse la tecla CLOCK. El indicador digital parpadea en la pantalla. 2.
  • Seite 80 activa. ◷ 7. En el modo Standby aparece el símbolo , que indica que el despertador se ha activado. Desactivar el despertador diario Desactive el despertador actual pulsando varias veces el botón ALARM. El ◷ símbolo desaparece de la pantalla. Notas 1.
  • Seite 81: Funcionamiento Bt

    3. Active su dispositivo BT y seleccione el modo de búsqueda. 4. Splash aparecerá en la lista de dispositivos BT de su dispositivo externo. 5. Seleccione Splash e introduzca, si fuera necesario, la contraseña "0000".
  • Seite 82: Indicaciones Sobre La Retirada Del Aparato

    INDICACIONES SOBRE LA RETIRADA DEL APARATO Si en su país existe una disposición legal relativa a la eliminación de aparatos eléctricos y electrónicos, este símbolo estampado en el producto o en el embalaje advierte de que no debe eliminarse como residuo doméstico. En lugar de ello, debe depositarse en un punto de recogida de reciclaje de aparatos eléctricos y electrónicos.
  • Seite 83 Gentile cliente, la ringraziamo per l'acquisto del dispositivo. La preghiamo di leggere attentamente le seguenti istruzioni per l’uso e di seguirle per evitare possibili danni. Non ci assumiamo alcuna responsabilità per danni scaturiti da una mancata osservanza delle avvertenze di sicurezza e da un uso improprio del dispositivo.
  • Seite 84: Dati Tecnici

    DATI TECNICI Numero articolo 10037795, 10037796, 10037797 Alimentazione 5 V⎓ (1 A) Connessione tramite adattatore Batteria agli ioni di litio (2000 mAh) Batteria (installazione permanente) CD-DA/CD-R/CD-RW/MP3/WMA Lettore CD Riproduzione di file MP3 e WMA Ingresso USB Radio FM Gamma di frequenza 87,5-108 MHz Memoria delle emittenti Radio DAB...
  • Seite 85: Avvertenze Di Sicurezza

    AVVERTENZE DI SICUREZZA Spiegazione dei simboli sul dispositivo ATTENZIONE RISCHIO DI SCOSSE ELETTRICHE NON APRIRE AVVERTENZA: PER RIDURRE IL RISCHIO DI SCOSSE ELETTRICHE E LESIONI A PERSONE, NON APRIRE L'ALLOGGIAMENTO. IL DISPOSITIVO NON CONTIENE COMPONENTI CHE NECESSITANO DI MANUTENZIONE DA PARTE DELL'UTENTE. PER EVENTUALI RIPARAZIONI, RIVOLGERSI ESCLUSIVAMENTE A PERSONALE QUALIFICATO.
  • Seite 86 saldamente. • Leggere, seguire e conservare questo manuale. Tutte le avvertenze di sicurezza e le informazioni sul funzionamento devono essere lette prima di usare questo prodotto e conservate per future consultazioni. È necessario rispettare tutte le avvertenze presenti sul dispositivo e nel manuale.
  • Seite 87 Note sull'impermeabilità di questo dispositivo Le specifiche di impermeabilità di questo prodotto sono conformi a IPX4 secondo la norma IEC 60529 "Gradi di protezione contro l'ingresso di acqua (codice IP)", che specifica il grado di protezione contro la penetrazione di acqua nel dispositivo.
  • Seite 88: Descrizione Del Dispositivo

    DESCRIZIONE DEL DISPOSITIVO...
  • Seite 89 Tasto standby CD/BT: Traccia precedente o riduzione del tempo impostato/emittente precedente +SOURCE - Fonte CD/BT: saltare la traccia successiva Tasto TUNE+ Posizione di salvataggio 1 SLEEP - Spegnimento automatico Posizione di salvataggio 2 MENU/INFO CLOCK/ 3+ - Impostazione dell'ora/Posizioni di salvataggio 10 PLAY MODE/ ALARM - Modalità...
  • Seite 90: Primi Passaggi

    PRIMI PASSAGGI 1. Collegare il cavo di tipo C in dotazione alla connessione corrispondente. 2. Collegare l'altra estremità del cavo di tipo C a un adattatore USB che viene poi inserito in una presa elettrica. È anche possibile caricare la batteria collegando il dispositivo alla porta USB di un computer. L'indicatore lampeggia mentre la batteria è...
  • Seite 91: Modalità Cd

    MODALITÀ CD Premere più volte SOURCE fino a quando sullo schermo appare "CD“. Inserire il CD 1. Aprire prima il blocco del vano CD e poi il vano. 2. Inserire il CD nel vano con il lato stampato verso l'alto. Assicurarsi che il CD sia posizionato sul perno centrale.
  • Seite 92 velocemente. Ripetizione e riproduzione casuale 1. Premere il tasto PLAY MODE in modalità di funzionamento. Sullo schermo appare . La traccia corrente del CD viene ripetuta in loop. 2. Premere di nuovo il tasto PLAY MODE durante la modalità di funzionamento.
  • Seite 93: Usb

    1. Sul lato anteriore del dispositivo si trova una connessione USB. Una volta collegata una chiavetta USB, premere ripetutamente il tasto SOURCE per selezionare la modalità USB. 2. Il dispositivo mostra automaticamente il numero di titoli sulla chiavetta USB. 3. Tutti i tasti di riproduzione sono gli stessi della modalità MP3/CD. Note •...
  • Seite 94: Radio Dab/Utilizzo

    RADIO DAB/UTILIZZO Ricerca emittenti completa 1. Per attivare la scansione automatica delle emittenti, premere il tasto SCAN e lo schermo mostrerà "Scanning..." (Ricerca) e una barra crescente. 2. Tutte le emittenti trovate vengono salvate automaticamente. Per scorrere tra le emittenti trovate, premete i tasti ⏮ o ⏭. Premere poi il tasto di conferma ENTER.
  • Seite 95 2. Premere ⏮ o ⏭ per selezionare "System" e premere ENTER per confermare. 3. Premere il tasto ENTER sul telecomando per visualizzare la versione del software. 4. Premere MENU per abbandonare la schermata. Selezione della lingua In modalità DAB o FM, premere il tasto MENU e selezionare "System" con i tasti ⏮...
  • Seite 96 salvataggio tra 3 e 20. Le emittenti che sono già state salvate possono essere sovrascritte. Accedere alle emittenti salvate 1. Per ascoltare le emittenti nella posizione di salvataggio 1 o 2, premere i ② ① tasti ③+ 2. Per accedere alle altre emittenti salvate, premere prima il tasto per aprire la lista.
  • Seite 97: Radio Fm

    Ora/Data Indica l'ora e la data attuali fornite dall'emittente. DLS (Dynamic Label Segment) Il segmento dell'etichetta dinamica è un messaggio di testo scorrevole che può essere integrato nella trasmissione dall'emittente. Questo messaggio contiene informazioni ordinarie, come i dettagli del programma. RADIO FM Premere più...
  • Seite 98 Nota: l'asterisco nell'angolo superiore destro dello schermo indica la selezione attuale. Modalità di visualizzazione FM Quando si preme il tasto INFO sul telecomando, lo schermo scorre tra le seguenti modalità di visualizzazione. • Testo radio: come nella radio DAB, l'emittente può mostrare informazioni sul programma sotto forma di testo scorrevole durante la trasmissione.
  • Seite 99: Impostazione Sveglia E Timer

    IMPOSTAZIONE SVEGLIA E TIMER Impostazione dell'ora automatica L'ora può essere aggiornata automaticamente quando si riceve un segnale DAB+ nella località attuale. Impostare l'ora 1. Premere il tasto CLOCK. L'indicazione digitale lampeggia sullo schermo. 2. Premere ⏮ o ⏭ per selezionare l'anno corrente e premere CLOCK per confermare.
  • Seite 100 Note 1. Se, per esempio, è stato selezionato "CD" come fonte audio della sveglia e non è stato inserito alcun CD, la fonte della sveglia passerà automaticamente a "DAB" non appena viene raggiunta l'ora impostata. 2. Se si sceglie "FM" come fonte audio della sveglia, verrà utilizzata l'ultima emittente FM ascoltata prima dello spegnimento.
  • Seite 101: Modalità Bt

    3. Attivare il dispositivo BT e selezionare la modalità di ricerca. 4. "Splash" comparirà nell'elenco dei dispositivi BT del dispositivo esterno. 5. Selezionare "Splash" e, se necessario, inserire la password "0000". 6. Per disattivare la funzione BT, premere SOURCE per passare a un'altra modalità...
  • Seite 102: Avviso Di Smaltimento

    AVVISO DI SMALTIMENTO Se nel vostro Paese sono vigenti regolamenti legislativi relativi allo smaltimento di dispositivi elettrici ed elettronici, questo simbolo sul prodotto o sull'imballaggio indica che non è consentito smaltire questo prodotto nei rifiuti casalinghi. Il dispositivo deve invece essere portato in un centro di raccolta per il riciclaggio di apparecchi elettrici ed elettronici.

Diese Anleitung auch für:

100377951003779610037797

Inhaltsverzeichnis