
Verwandte Anleitungen für Sharp KH-6I38FS00-EU


Inhaltszusammenfassung für Sharp KH-6I38FS00-EU
- Seite 1 Home Appliances KH-6I38FS00-EU KH-6I38CS00-EU Cooking Manual i Përdorimit AИнструкции за Употреба HNávod k Obsluze FBedienungsanleitung Handleiding User Manual...
- Seite 2 a Direttive, Decisioni e Regolamenti europei e ai requisiti elencati negli standard di riferimento. GB-Declaration of conformity We declare that our products meet the applicable European Directives, Decisions and Regulations and the requirements listed in the standards referenced. DE-Konformitätserklärung Wir erklären, dass unsere Produkte die geltenden europäischen Richtlinien, Entscheidungen und Regularien sowie die in den referenzierten Standards gelisteten...
- Seite 3 spomenutim standardima. referencia tartalmaknál. SR-Izjava o uskla enosti SL-Izjava o skladnosti Izjavljujemo da naši proizvodi zadovoljavaju primenljive evropske direktive, odluke i Zagotavljamo, da so naši izdelki skladni z propise, kao i zahteve navedene u nazna enim ustreznimi evropskimi direktivami, sklepi in standardima.
- Seite 4 être traité comme des déchets ménagers. Il doit plutôt être remis au point de ramassage concerné, se chargeant du recyclage du maté- riel électrique et électronique. En vous confor- mant à une procédure d’enlèvement correcte du produit, vous aiderez à prévenir tout effet nuisible à...
- Seite 5 de resíduos deste produto. Para informações mais detalhadas sobre a reciclagem deste produto, contacte as suas autoridades locais, centro de reciclagem ou a loja onde comprou o produto. NL: Het symbool op het product of de verpak- king geeft aan dat dit product niet mag worden behandeld als huishoudelijk afval.
- Seite 6 kasseras korrekt, hjälper du till att förhindra po- tentiella negativa konsekvenser för miljön och människors hälsa, som annars kunde orsakas av olämplig avfallshantering av denna produkt. För mer detaljerad information om återvinning koupili. av denna produkt, kontakta dina lokala myndig- heter, återvinningscenter eller butiken där du har köpt produkten.
- Seite 7 otpadom ovog proizvoda. Za detaljnije informacije o recikliranju ovog proizvoda, kupili proizvod. DA: Dette symbol på produktet eller embal- lagen betyder, at produktet ikke må behandles som husholdningsaffald. Det skal i stedet indleveres til et indsamlingssted for genbrug af elektrisk og elektronisk udstyr. Ved at sikre, at dette produkt bliver bortskaffet korrekt, hjælper du med til at forebygge eventuelle negative konsekvenser for miljøet og menneskers...
- Seite 8 AL: Simboli mbi produkt ose mbi paketimin e predat centrelor de colectare adecvate de reci- tij tregon se ky produkt nuk mund të trajtohet si mbeturinë shtëpiake. Në vend të kësaj ai do të dorëzohet pranë pikës përkatëse të grumbullimit për riciklimin e pajisjeve elektrike dhe elektronike.
- Seite 9 PL: Ten symbol umieszczony na produkcie produktu, pomagasz zapobiegac ewentualnych...
- Seite 10 PËRMBAJTJA: Udhëzime sigurie Përshkrimi i pajisjes Sipërfaqe gatimi dhe paneli i kontrollit të vatrave Funksionimi i pajisjes Fikja dhe ndezja e pajisjes Fikja dhe ndezja e zonave të gatimit Pushimi Smart Treguesi i nxehtësisë së mbetur0 Bllokuesi për fëmijët Funksioni i kohëmatësit Sinjalizues Funksioni Boost Ndezja e zonës lidhëse...
- Seite 11 PARALAJMËRIMET E SI- nuk duhet të luajnë GURISË me pajisjen. Pastrimi LEXONI ME KUJDES DHE PLOTËSI- dhe mirëmbajtja nuk SHT KËTO UDHËZIME PARA PËRDO- duhet të bëhet nga fë- RIMIT TË PAJISJES TUAJ mijët pa mbikëqyrje. RUAJENI ATË NË NJË VEND TË PËR- SHTATSHËM PËR REFERENCË...
- Seite 12 KUJDES: Rreziku i duhet të lihet të ftohet zjarrit: mos ruani arti- para mbylljes së ka- kuj në sipërfaqet e ga- pakut. timit. Pajisja është KUJDES: Nëse sipër- ndërtuar për tu vënë faqja është plasaritur, në punë me anë të një ore me zile të...
- Seite 13 dhe puna riparuese që kryhet nga Pajisja duhet të instalohet nga një teknikë të paautorizuar mund t'ju teknik i autorizuar dhe të vihet në përdorim. Prodhuesi nuk është përgjegjës për çdo dëm që mund në çdo lloj mënyre i rrezikshëm. të...
- Seite 14 janë shkaktuar nga vaji. Mbuloni tiganin ose fritezën me kapakun e që janë shkaktuar në këtë rast dhe Gjithmonë vendosni tiganin në qendër të zonës së gatimit dhe ktheni dorezat në një pozicion të si- gurt ë në mënyrë që ato nuk mund të...
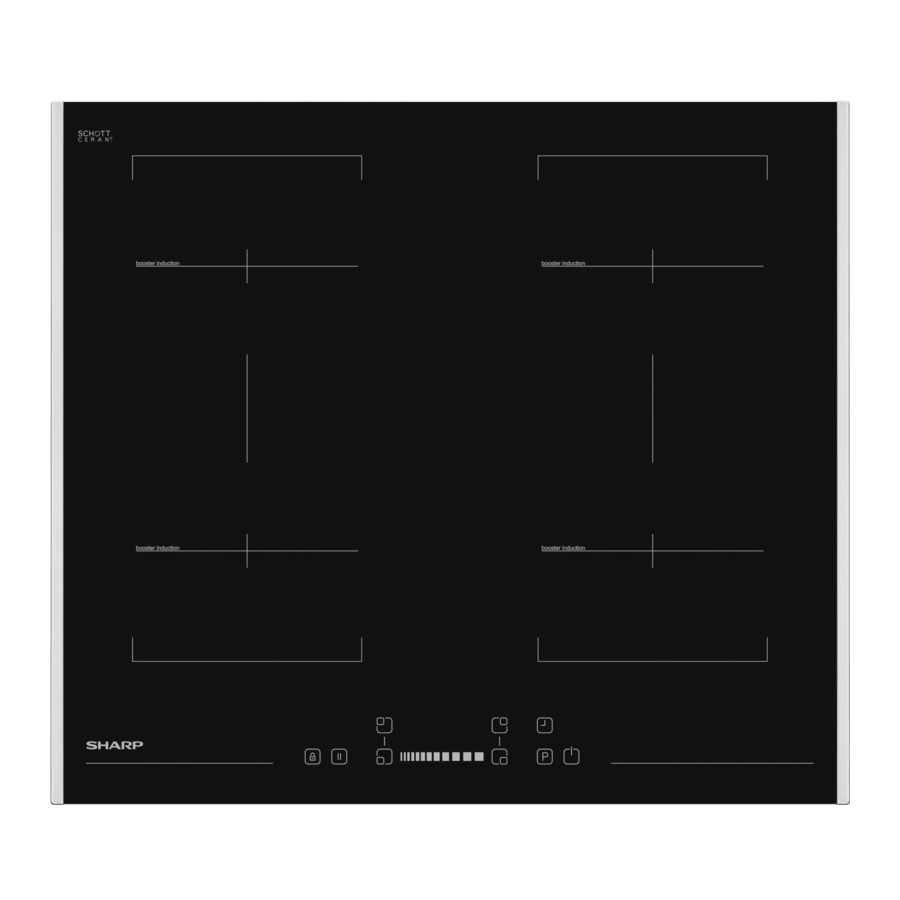
- Seite 15 PËRSHKRIMI I PLLAKËS I nderuar klient, Ju lutemi lexoni me kujdes udhëzuesin për përdorim para se të përdorni sobën dhe ruajeni atë për të ardhmen si referencë. Sipërfaqe gatimi për 4 vatra: Element ngrohjeje me induksion Paneli i kontrollit Shënim: Pamja vizuale e pllakës tuaj ndoshta është ndryshe nga modeli i treguar...
- Seite 16 Panel kontrolli për 4 vatra : 1-Treguesi i vatrës 7- Selektimi i vatrës majtas poshtë 2- Selektimi i vatrës majtas sipër 8- Butonat me rrëshqitje 3-Treguesi i kohëmatësit 9- Selektimi i vatrës djathtas poshtë 4- Kohëmatësi 10- Boost 5- Treguesi i bllokuesit tëçelësit 11- Ndezur/Fikur 6- Pushimi Smart...
-
Seite 17: Përdorimi I Pajisjes
Elementi është tani gati për të gatuar. PËRDORIMI I PAJISJES Për kohë më të shpejtë zierjeje, zgjidh- Përdorni zonat e gatimit me induksion ni nivelin e dëshiruar të gatimit dhe më me enë gatimi të përshtatshme. pas prekni butonin P për të aktivizuar funksionin Boost. - Seite 18 Siguria e funksionit të kjes: i ndezur. Për të çaktivizuar bllokuesin për kohe funksionimi maksimale të përcak- fëmijët, së pari aktivizoni pllakën. tuar nëse regjistrimi i ngrohjes nuk ësh- Njëkohësisht shtypni butonin me rrë- shqitje majtas dhe djathtas dhe pastaj e gatimit e shtyn pas kohën maksimale vini prapë...
- Seite 19 për të rritur/ ulur ekrani i kohëmatësit ndryshon tek kohën. Gama e rregullimit është mes 0 kohëmatësi që përfundon në vijim (në dhe 99 minuta. Nëse nuk ka asnjë vep- rast të programimit për më shumë se rim brenda 10 sekondave, kohëmatësi 1 zonë...
- Seite 20 Pushimi Smart kalohet fuqia maksimale dhe do të aktivizohet menaxhimi i integruar i Pushimi Smart, kur aktivizohet, energjisë. zvogëlon fuqinë e të gjitha vatrave që Reduktimi i nevojshëm i fuqisë është janë ndezur. treguar me pulsimin e ekranit të zonës Nëse ju më...
- Seite 21 UDHËZIME DHE KËSHILLA Kursim Energjie Enët e gatimit · Zonat e gatimit me induksion përshta- ten automatikisht me madhësinë e fun- · Përdorni enë gatimi me bazament të sheshtë, të trashë që janë të të njëjtit të caktuar. Megjithatë pjesa magnetike diametër si vatra.
- Seite 22 Këshilla për pastrim Siguria gjatë instalimit · Çdo sipërfaqe e varur duhet të jetë · Mos përdorni peceta gërryese, pastrues gërryes, pastrues aerosol të paktën 65 cm mbi sobë.. ose objekte të mprehta për të pastruar · Ventilatorët e zgjatur duhet të mon- sipërfaqet e vatrës.
- Seite 23 Separator Separator...
- Seite 24 Aplikoni shiritin e njëanshëm vetë-ngji- tës përgjatë gjithë cepit të ulët të sipërfaqes së gatimit përgjatë cepit të jashtëm të panelit të xhamit qeramik. Mos e tërhiqni për ta zgjatur. së punës në muret anësore të produk- tit.
- Seite 25 Realizimi i një lidhje elektrike është e vendosur në pjesën e pasme të vatrës. Hiqni kapakun e kutisë lidhëse të energjisë dhe instaloni kabllon, në Përpara se të bëni një lidhje, kontrollo- përputhje me diagramin e lidhjeve. ni që: Tensioni i rrymës elektrike është i njëjtë Furnizuesi me energji i furrës duhet të...
- Seite 26 KODI I DEFEKTIT Nëse ka ndonjë defekt, kodi i defektit do të shfaqet në ekranet e vatrave. E1 Ventilatori ftohës është jo aktiv, kontakto agjentët e shërbimit të auto- rizuar. E3 Kabllo furnizuese është e ulët duke prekur ,prisni derisa të zhduket “H”...
- Seite 37 ПРАВИЛНО НЕПРАВИЛНО ПРАВИЛНО НЕПРАВИЛНО...
- Seite 38 · B (mm) min. A (mm) T (mm) min. C (mm) H (mm) min. E (mm) C1 (mm) min. F (mm) C2 (mm) G (mm) D (mm) I (mm) J (mm)
- Seite 39 Separator Separator...
- Seite 43 OBSAH:...
- Seite 44 BEZPE NOSTN UPOZOR- Obe n bezpe nostn upozorn n...
- Seite 46 B hem pou it Upozorn n k instala i i t n a dr ba...
- Seite 48 POPIS DESK arn plo ha pro 4 plot nk : Poznámka...
- Seite 50 OBSLUHA SPOT EBI E pnut varn h z n: pnut v e h varn h z n: Zapnut spot ebi e: Ukazatel zb tkov ho tepla: pnut spot ebi e: Zapnut varn h z n: Funk e bezpe nostn ho v pnut :...
- Seite 51 3 - 4 Funk e asova e: 6 - 9 D tsk z mek: asova minutk (1 a 99 minut): Z mek tla tek...
- Seite 52 asova varn oblasti: (1 a Funk e Pos len : 99 minut): Zapnut z n p emost n Alarm: Vypnutí varné zóny...
- Seite 53 A TIP N dob h tr pauza SPRÁVNĚ ŠPATNĚ SPRÁVNĚ ŠPATNĚ...
- Seite 54 Energeti k sporn Tip k i t n P klad : INSTALA E SPOT EBI E 4 - 5 6 - 7...
- Seite 55 Bezpe nost instala e P ipevn n varn desk na pra- ovn desku B (mm) min. A (mm) T (mm) min. C (mm) H (mm) min. E (mm) C1 (mm) min. F (mm) C2 (mm) G (mm) D (mm) I (mm) J (mm)
- Seite 56 Separator Separator...
- Seite 57 Proveden elektri k ho zapojen...
- Seite 58 H BO E1 : E3 : E4 : E5 : E6 : E7 : E9 :...
- Seite 59 INHALT Sicherheitshinweise Gerätebeschreibung...
-
Seite 60: Sicherheitshinweise
SICHERHEITSHINWEISE Allgemeine Sicherheitshinwei-... -
Seite 62: Einbauhinweise
Einbauhinweise... - Seite 63 Während der Verwendung Während der Reinigung und Wartung...
-
Seite 64: Beschreibung Der Kochfläche
BESCHREIBUNG DER KOCHFLÄCHE Kochober äche f r 4 Kochzonen: Hinweis:... -
Seite 66: Benutzung Des Geräts
BENUTZUNG DES GERÄTS Ausschalten der Kochfelder: Schiebe- Anschalten des Geräts: Ausschalten aller Kochfelder: Abschalten des Geräts: Resthitze-Anzeige Einschalten der Kochfelder:... - Seite 67 Sicherheitsabschaltung: Tastensperre 1 - 2 6 - 9 Kindersicherung: Timer-Funktion: Minuten-Timer (1-99 Minuten):...
- Seite 68 Piepton: Kochzonen-Timer (1-99 Minuten): Boost-Funktion:...
- Seite 69 Intelligente Pause (Smart Pause) Anschalten der Kochfelder Ausschalten der Kochfelder:...
-
Seite 70: Tipps Und Tricks
TIPPS UND TRICKS Energiesparen Kochgeschirr Beispiele f r Kochzwecke nung 4 - 5 RICHTIG FALSCH 6 - 7 RICHTIG FALSCH... -
Seite 71: Reinigungshinweise
Reinigungshinweise Montage des Kochfelds in eine Arbeitsplatte B (mm) min. A (mm) INSTALLATION DES GERÄTS T (mm) min. C (mm) ACHTUNG! H (mm) min. E (mm) C1 (mm) min. F (mm) C2 (mm) G (mm) D (mm) I (mm) J (mm) Anlagensicherheit... - Seite 72 Separator Separator...
-
Seite 74: Herstellen Einer Elektrischen Verbindung
Herstellen einer elektrischen Verbindung... -
Seite 75: Fehlermeldungen
FEHLERMELDUNGEN... -
Seite 76: Inhaltsverzeichnis
INDHOLD: Sikkerhedsanvisninger Beskrivelse af apparatet Brug af apparatet Sådan tændes og slukkes apparatet Sådan tændes og slukkes kogezonerne Sikkerheds-slukkefunktion Børnesikring Boost-funktion Sådan tændes brokogezonen Specialtilberedningsfunktion Råd og tips Installation af apparatet Installationssikkerhed Montering af kogepladen i bordpladen... - Seite 77 SIKKERHEDSADVARSLER ikke udføres af børn LÆS DISSE INSTRUKTIONER OM- HYGGELIGT OG FULDSTÆNDIGT ADVARSEL: Appara- FØR ANVENDELSE AF APPARATET tet og dets tilgænge- OG LÆG DEM DEREFTER PÅ ET PRAKTISK STED SOM REFERENCE, undgå at berøre var- DENNE VEJLEDNING ER UDARBEJ- APPARAT HAR MÅSKE IKKE ALLE DE under 8 år skal holdes FUNKTIONER, SOM ER BESKREVET...
- Seite 78 tet for at undgå risiko- slibende rengørings- På induktionskoge- gøring af ovnlågens glas og andre over- kan resultere i brud på kogezonerne, da de glasset eller beskadi- Efter brug af indukti- onskogeplader skal re til rengøring af ap- ikke stole på kogeg- Vedligeholdelse reparation dæksel skal al spild...
-
Seite 79: Under Brug
påvirkninger fra sol, regn eller sne ninger er taget for at sikre din til at ridse glasset, da glasset kan Under brug Sørg for, at netledningen ikke er Læg ikke brændbare eller eksplo- netledningen er beskadiget, skal den udskiftes af producenten, Forlad ikke kogepladen under dennes servicetekniker eller en til- Installationsadvarsler... -
Seite 80: For At Opretholde Effektiviteten Og Sikkerhe- Den Af Apparatet Anbefaler
at apparatets stik er fjernet fra stik- kontakten eller hovedafbryderen Fjern ikke betjeningsknapperne, FOR AT OPRETHOLDE EFFEKTIVITETEN OG SIKKERHE- DEN AF APPARATET ANBEFALER VI ALTID AT BRUGE ORIGINALE RESERVEDELE OG ALTID AT TIL- KALDE VORES AUTORISEREDE SERVICETEKNIKERE, NÅR DER... - Seite 81 BESKRIVELSE AF KOGEPLADEN Kære kunde, Læs venligst instruktionerne i denne brugervejledning, før du bruger kogepladen, Kogeover ade til 4 varmelegemer: Kontrolpanel Bemærk...
- Seite 82 8- Skydeknapper 5- Tastaturlåseindikator...
-
Seite 83: Brug Af Apparatet
BRUG AF APPARATET skydeknapperne Ele- tryk derefter på P-tasten for at aktivere boost-funktionen for at opnå den hurtig- Når apparatet tændes, vil alle display- løbet går kogepladen i stand-by-tilstand Sådan slukkes kogezonerne: Vælg den kogezone, du ønsker at slukke ved at trykke på den tilsva- Sådan tændes apparatet: Tænd for kogepladen ved at trykke på... -
Seite 84: Børnesikring
Sikkerheds-slukfunktionen: tidigt, og tryk derefter på den venstre Alle kogezoner vil slukkes efter et fast- displayene, og kogepladen vil blive Tastaturlås tilbage til den oprindelige værdi for Tastaturlåsefunktionen bruges til at blo- kere og sætte kogepladen i en Sikker- Tænd derefter kogepladen ved at tryk- ke på... -
Seite 85: Boost-Funktion
Summer: Når kogepladen er i brug, bliver føl- Minuturet kan ændres eller afbrydes skydeknapper Når Vedblivende tryk på taster over en læn- Kogezone-timer (1.til.99 min): Boost-funktion: Når kogepladen er tændt, kan en peraturindstillingen, og aktivér til sidst Boost-funktionen kan aktiveres, hvis Disse angiver, for hvilken kogezone At aktivere Boost-funktionen kan brug bliver vist ved at det tilsvarende... -
Seite 86: Smart Pause
Smart pause tryk derefter på P-tasten for at aktivere boost-funktionen, for derved hurtigst at Sådan slukkes brozonen Tryk på ( trykke på den bageste venstre eller for- af den venstre skydeknap bringes ni- Tryk på (... -
Seite 87: Råd Og Tips
RÅD OG TIPS Energibesparelse Kogegrej · Induktionskogezoner tilpasser sig køkkengrejets bund op til en vis græn- jeret stål, støbejern og rustfrit stål (hvis Anbring altid gryder og pander på kogezonen, inden der tændes for anbringes p kogezonen, vil den ikke ·... -
Seite 88: Installation Af Apparatet
Tips om rengøring Installationssikkerhed · skarpe genstande til rengøring af · Du kan bruge en skraber til rengøring bagsiden af kogepladen, skal være af · Pas på ikke at ridse silikonelisterne langs kanterne af glaspladen, når du Montering af kogepladen i bordpladen ·... - Seite 89 Separator Separator...
- Seite 90 · Påfør den ensidige selvklæbende Monteringsbeslag til bordplade...
- Seite 91 Udfør tilslutning af el. Før du tilslutter kogepladen, skal du tjekke at: Der skal være let adgang til kontakten, Kablet til induktionskogepladen skal Et godkendt kabel skal tilsluttes fra forbrugerkontakten (sikringstavlen) og Stikkontakten skal afbryde både fasen indbygges i køkkenvæggen, oven over bordpladen og ved siden af kogepla- den, ikke over den i henhold til IEE-re-...
- Seite 92 FEJLKODER Hvis der opstår en fejl, vil det blive vist for kogepladen ved at trykke på Tænd for kogepladen igen ved at trykke på Sluk for kogepladen ved at trykke på at trykke på igen, skal du slukke for kogepladen ved at trykke på...
- Seite 93 CONTENTS: Safety instructions Appliance description. Cooking surface and control panel of heaters Operation of the appliance Switching the appliance on and off Switching the cooking-zones on and off Smart Pause Residual heat indicator. Safety switch off function Child Lock Timer function Buzzer Boost Function Switching the bridge zone on...
-
Seite 94: Safety Warnings
SAFETY WARNINGS maintenance shall not be done by children READ THESE INSTRUCTIONS CA- REFULLY AND COMPLETELY BEFO- without supervision. RE USING YOUR APPLIANCE, AND WARNING: The app- KEEP THEM IN A CONVENIENT PLA- CE FOR REFERENCE WHEN NECES- liance and its acces- SARY. - Seite 95 Do not use harsh ab- avoid the possibility of rasive cleaners electric shock. sharp metal scrapers For induction hobs, to clean the oven door metallic objects such glass and other sur- as knives, forks, spo- face since they can...
-
Seite 96: During Use
signed only for cooking food and is and disposed of immediately. intended for indoor domestic hou- Protect your appliance against sehold use only and should not be atmospheric effects. Do not expo- used for any other purpose or in se it to effects such as sun, rain, any other application, such as for snow etc. -
Seite 97: During Cleaning And Maintenance
position when it is not being used. During cleaning and main- tenance Always turn the appliance off befo- re operations such as cleaning or maintenance. You can do it after removing the plug for the applian- ce off or turning the main switches off. -
Seite 98: Description Of The Hob
DESCRIPTION OF THE HOB Dear Customer, Please read the instructions in this user guide before using the hob and keep them for future reference. Cooking Surface for 4 heaters: Induction heating element Control panel Note: The appearance of your hob maybe different than the model shown above... - Seite 99 Control Panel for 4 heaters: 1- Heater display 7- Lower left heater selection 2- Upper left heater selection 8- Sliding Buttons 3- Timer display 9- Lower right heater selection 4- Timer 10- Boost 5- Key lock indicator 11- On/Off 6- Smart Pause...
-
Seite 100: Operation Of The Appliance
OPERATION OF THE the heat level by touching the Sliding Buttons The element is APPLIANCE now ready to cook on. For quickest boil Use the induction cooking zones with times, select the desired cooking level suitable cookware. and then press the P key to activate the Boost function. -
Seite 101: Child Lock
Every cooking zone will be switched the hob on. Simultaneously press the right and the left of the slider button and then press left of slider button Every change in the cooking zone puts again. The "L" will disappear in the the maximum operation time back to display and the hob will be switched the initial value of the operating time... -
Seite 102: Boost Function
is no operation in 10 seconds, the When the timer has run down, a minute minder timer will be set and signal sounds and the timer display the blinking dot will disappear. After shows "00" statically, the assigned the timer is set, the time runs down cooking zone timer LED blinks. -
Seite 103: Smart Pause
Smart Pause corresponding cooking zone display. Blinking is active for 3 seconds and The Smart Pause, when activated, allows further adaptations of the reduces the power of all burners that settings before power reduction. have been switched on. If you then deactivate the Smart Switching the bridge zone on Pause, the heaters will automatically return to the previous level. -
Seite 104: Hints And Tips
HINTS AND TIPS Energy saving Cookware · Induction cooking zones adapt automatically to the size of the cookware bottom up to a certain cookware, that has the same diameter limit. However, the magnetic part of as the element. This will help reduce the cookware bottom must have a cooking times. -
Seite 105: Cleaning Tips
Cleaning tips Installation safety · Any overhanging surface should be · Do not use abrasive pads, corrosive cleaners, aerosol cleaners or sharp at least 65cm above the hob. objects to clean the surfaces of the hob. accordance with the manufacturer's ·... - Seite 106 Separator Separator...
- Seite 107 · Apply one-sided self-adhesive sealing tape supplied all the way round the lower glass edge of the cooking sur- face along the outer edge of the glass ceramic panel. Do not stretch it. · Screw the 4 worktop mounting brac- kets on the side walls of the product.
-
Seite 108: Making An Electrical Connection
Making an electrical connecti- located at the back of the hob. Remove the cover of the power connection box and install the cable, in accordance with the connection diagram. Before making a connection, check that: The power supply cable must be posi- The voltage power supply is the same tioned away from direct heat sources. - Seite 109 ERROR CODES If there is an error, error code will be showed at heater displays. E1 : The cooling Fan is disabled, call an authorized service agent. E3 : The power supply voltage is over the rated values, turn the hob off by touching ,wait until “H”...
- Seite 110 Service & Support Visit Our Website sharphomeappliances.com 52288042...