Inhaltsverzeichnis
Werbung
Verfügbare Sprachen
Verfügbare Sprachen
Quicklinks
Werbung
Kapitel
Inhaltsverzeichnis

Verwandte Anleitungen für Sirius S-DD11-L


Inhaltszusammenfassung für Sirius S-DD11-L
- Seite 1 ES I RU УСТАНОВКА, ИСПОЛЬЗОВАНИЕ И УХОД...
- Seite 3 Dit apparrat voldoet aan de Europese richtlijnen 2002/96/CE voor elektrische en elektronische afval (WEEE). S-DD11-L...
- Seite 4 Значок на приборе или на его упаковке означает, что прибор не относится к обычным бытовым отходам. Его необходимо отнести в специальный пункт сбора электрических и электронных приборов для вторичной переработки. Предусмотрите надлежащие меры при ликвидации этого прибора для того, чтобы избежать пагубного воздействия на окружающую...
-
Seite 5: All'attenzione Dell'utente
(impianti di riscaldamento centralizzati ecc:). esclusivamente da uno specialista autorizzato. Per lo scarico dell’aria da evacuare rispettare le Scollegare sempre la cappa prima di proce- prescrizioni delle autorità competenti. dere alle operazioni di pulizia o alla sua manu- tenzione. S-DD11-L... -
Seite 6: Inhaltsverzeichnis
INDICE DESCRIZIONE DELL’APPARECCHIO ....................6 COME INSTALLARE LA CAPPA ......................7 Smontaggio del filtro Antigrasso, montaggio del filtro carbone ............8 Connessione elettrica della cappa ....................9 COME FUNZIONA LA CAPPA ......................10 COME PULIRE LA CAPPA ........................12 ANOMALIE DI FUNZIONAMENTO ....................13 SERVIZIO DI ASSISTENZA POST VENDITA ..................13 S-D11-L... -
Seite 7: Descrizione Dell'apparecchio
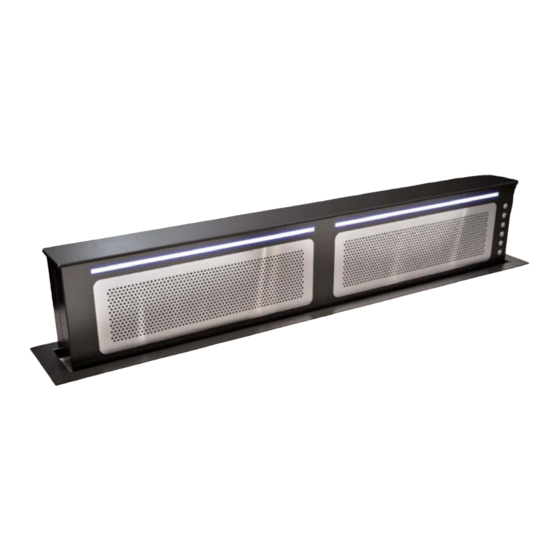
DESCRIZIONE DELL’APPARECCHIO S-DD11-L... -
Seite 8: Come Installare La Cappa
(Fig. 9) collegando i tre connettori 1142x100 mm per il modello da 120 cm e tori (Connettore 9 poli per controllo attuatore e 542x100 per il modello da 60 cm. Nel caso S-DD11-L... -
Seite 9: Smontaggio Del Filtro Antigrasso, Montaggio Del Filtro Carbone
In caso di impianto con scarico all’esterno, l’in- Dopo aver sostituito i filtri riposizionare il stallazione della valvola di non ritorno impedisce pannello inox anteriore, in caso contrario il l’entrata di vento e i ritorni d’aria. Downdraft non è abilitato. S-DD11-L... -
Seite 10: Connessione Elettrica Della Cappa
Al momento dell’installazione e delle operazio- ogni rischio. ni di manutenzione l’apparecchio deve essere scollegato dalla rete elettrica, i fusibili devono es- sere staccati o rimossi. Verificare che: • La potenza sia sufficiente • Le linee di aliment azione siano in buono stato. • Il diametro dei cavi sia conforme alle nor- me di installazione. S-DD11-L... -
Seite 11: Come Funziona La Cappa
La funzione viene interrotta premendo il tasto dalla 1° alla 4° velocità senza spostare il pan- abbinati soltanto con otori re oti o e co e “ON/OFF” o il tasto “LUCE”. nello aspirante. er la ersione con otore a bor o engono S-DD11-L... - Seite 12 S-DD11-L...
-
Seite 13: Come Pulire La Cappa
Filtro a carbone plastica del pannello stesso e stac- carlo dalla sua sede. Per inserire il filtro al carbone attivo eseguire l’operazione opposta. So- stituire il filtro al carbone usato in me- dia ogni sei mesi. S-DD11-L... -
Seite 14: Anomalie Di Funzionamento
Al momento della chiamata, riportare i riferimenti dell’apparecchio (Type Fig. 13a ed equip- ment Fig. 13b e data di fabbricazione Fig. 13c). Queste informazioni sono riportate nella targa dati tecnici e targa data posta nella parte infe- riore del downdraft. S-DD11-L... - Seite 15 Always disconnect the hood before carrying out cleaning or maintenance operations. • Ade uately ventilate the room when a coo er hoodand other appliances, powered by en- ergy other than electricity, are used simultane- ously, so that the hood does not suck any- combustion fumes. S-DD11-L...
- Seite 16 DESCRIPTION OF THE APPLIANCE ....................16 INSTALLING THE HOOD ........................17 Grease filter removal, mounting the activated charcoal filter ............18 Electrical connection of the hood ....................19 HOW THE COOKER HOOD WORKS ....................20 CLEANING THE HOOD ........................22 OPERATIONAL ANOMALIES ......................23 AFTER SALES SERVICE........................23 S-DD11-L...
-
Seite 17: Description Of The Appliance
DESCRIPTION OF THE APPLIANCE S-DD11-L... -
Seite 18: Installing The Hood
it the o n raft in the o ening b inserting 4. Put the Downdraft in the opening, inserting it 4. Put the Downdraft in the opening, inserting it 4. Put the Downdraft in the opening, inserting it 4. Put the Downdraft in the opening, inserting it INSTALLING THE INSTALLING THE INSTALLING THE... -
Seite 19: Grease Filter Removal, Mounting The Activated Charcoal Filter
f the o n raft is e ith e ternal 9. For external motors, connect the motor unit Filtering mode otor connect the otor nit cable to the cable to the relevant connector on the elec- In case fumes and vapour cannot be evacuated s eci c ter inal boar fo n on the lastic trical components box. -
Seite 20: Electrical Connection Of The Hood
residual current not exceeding 30mA. If the 12). The replacement of the charcoal filters has power cord is damaged, call the after-sales to be carried out accordingly to the effective use service to avoid any risk. of the Downdraft, and in any case at least once every 6 months. -
Seite 21: How The Cooker Hood Works
This increases the speed of the extractor mo- otors that as for internal otor ersions tor, from 1st to 4th speed, without moving the incl e a ti er e ice that s itches o n the extractor panel. S-DD11-L... - Seite 22 Security system: If there is an obstacle while the extractable unit is closing, the Downdraft stops closing and rises again thanks to a security system. WARNING This operation has to be carried out by a specialized technician. S-DD2-L FLUSH TOP S-DD11-L...
-
Seite 23: Cleaning The Hood
Active charcoal filter the panel itself, in order to disengage filter it from its seating. Follow these steps in reverse order to insert the active charcoal filter. Replace the used charcoal filter on an average of every six months. S-DD11-L... -
Seite 24: Operational Anomalies
When calling, please mention the appliance details (Type Fig. 13a and equipment Fig. 13b and production date Fig. 13c). This information is mentioned on the rating label and the production date one placed on the lower side of the downdraft. S-DD11-L... -
Seite 25: A L'attention De L'utilisateur
nergie a tres d’énergie différente de l’énergie électrique. A L’ATTENTION Ceci afin que la hotte n’aspire pas les gaz de DE L’UTILISATEUR combustion. • Il est interdit de flamber des mets ou de faire fonctionner des foyers à gaz sans récipients de L’appareil peut être installé en version filtrante ou cuisson, au dessous de la hotte (les flammes en version aspirante. - Seite 26 à graisse à charbon Montage et démontage des filtre cassette, montage et démontage des filtres charbon ....28 Raccordement de votre hotte ......................29 COMMENT FONCTIONNE VOTRE HOTTE ..................30 COMMENT NETTOYER VOTRE HOTTE ...................32 ANOMALIES DE FONCTIONNEMENT ....................33 SERVICE APRES-VENTE........................33 S-DD11-L...
-
Seite 27: Description De Votre Appareil
DESCRIPTION DE VOTRE APPAREIL S-DD11-L... -
Seite 28: Comment Installer Votre Hotte
nstaller le o n raft ans le tro rati COMMENT INSTALLER 4. Installer le downdraft dans le trou pratiqué, l intro isant ar le ha t en l’introduisant à partir du haut, comme in- VOTRE HOTTE diqué dans le (Fig. 2); i er le o n raft à... -
Seite 29: À Charbon
Pour cela, il faut installer des filtres à charbon. du groupe moteur sur le connecteur qui se 8. Positionner la boîte en métal avec ses com- Dans le cas d’une installation avec évacuation 9. En cas de moteur externe, brancher le câble L’air recyclé... -
Seite 30: Raccordement De Votre Hotte
Vérifiez que: • la puissance de l’installation est suffi- sante, • les li nes d’alimentation sont en bon état c bles est confor e a • le diamètre des fils est conforme aux règles d’installation. S-DD11-L... -
Seite 31: Comment Fonctionne Votre Hotte
Indique la saturation des filtres à travers l’al- • tique. n is ositif it la itesse si le bit air lumage de tous les témoins lumineux. ac ation asse les oir section ³ ote rs à istance S-DD11-L... - Seite 32 OFF » ou la touche « Allumage ». Sécurité anti-coincement: Si un obstacle empêche la fermeture du Downdraft, la fermeture s’interrompe et le Downdraft remonte. AVERTISSEMENT Cette installation doit être effectuée seule- ment par un technicien autorisé. S-DD2-L FLUSH TOP S-DD11-L...
-
Seite 33: Comment Nettoyer Votre Hotte
Pour introduire le filtre charbon actif à charbon actif, effectuer l’opération inverse. Le chargement du filtre à charbon se fait en fonction de son utilisation, au moins une fois tous les 6 mois. S-DD11-L... -
Seite 34: Anomalies De Fonctionnement
Au moment de l’appel, indiquez les références de l’appareil (modèle Fig. 13a, numéro de série Fig. 13b et date de fabrication Fig. 13c). Ces informations sont indiquées sur la plaque des données techniques qui se trouve sur la partie inférieure du Downdraft. S-DD11-L... - Seite 35 Para la descarga del aire extraí- cialista autorizado. Desconectar siempre la do, respete las indicaciones de las autoridades campana antes de proceder a las operacio- competentes. nes de limpieza o a su mantenimiento. S-DD11-L...
- Seite 36 ......................36 CÓMO INSTALAR LA CAMPANA .....................37 Desmontaje del filtro anti-grasa, montaje del filtro de carbón ............38 Conexiones eléctricas de la campana ....................39 CÓMO FUNCIONA LA CAMPANA ....................40 CÓMO LIMPIAR LA CAMPANA ......................42 DEFECTOS DE FUNCIONAMIENTO ....................43 SERVICIO POSTVENTA ........................43 S-DD11-L...
-
Seite 37: Descripción Del Aparato
DESCRIPCIÓN DEL APARATO S-DD11-L... -
Seite 38: Cómo Instalar La Campana
(Fig. 9) conectando las tres conexiones te para poder introducir el downdraft en el (conector de 9 polos para el control del ac- agujero realizado. S-DD11-L... -
Seite 39: Desmontaje Del Filtro Anti-Grasa, Montaje Del Filtro De Carbón
Versión filtrante cionador y control de seguridad, conector de 4 polos para el encendido del neón y co- En el caso en que no sea posible descargar los nector para los mandos) (Fig. 10). humos al exterior, se puede usar la campana en su versión filtrante. -
Seite 40: Conexiones Eléctricas De La Campana
Comprobar que: llamar a la asistencia postventa para evitar cualquier riesgo. Comprobar que: • La potencia sea suficiente • Los cables de alimentaci n estén en buen estado, • l di metro de los cables respete las nor- mas de instalación. S-DD11-L... -
Seite 41: Cómo Funciona La Campana
³ Aumenta la velocidad del motor extractor, nes enciona as en los otores re otos desde la 1a a la 4a velocidad sin desplazar el panel aspirante. S-DD11-L... - Seite 42 Seguridad antipinzamiento: En caso de que un obstáculo impida el cie- rre del downdraft, el cierre se interrumpe y el downdraft se vuelve a abrir. ADVERTENCIA Esta operación puede ser efectuada sólo por un técnico autorizado. S-DD2-L FLUSH TOP S-DD11-L...
-
Seite 43: Cómo Limpiar La Campana
Para aplicar el filtro de carbón activo efectuar la operación contraria. Sustituir el filtro de carbón usado como media cada seis meses. S-DD11-L... -
Seite 44: Defectos De Funcionamiento
Cuando llame, comunique las referencias del aparato (tipo Fig. 13a y equipo Fig. 13b y la fecha de fabricación Fig. 13c). Esta información aparece en la etiqueta de los datos técnicos y en la placa con la fecha de fabricación situada en la parte inferior del downdraft. S-DD11-L... - Seite 45 ALLGEMINE die Dunstabzugshaube gleichzeitig mit ande- ALLGEMEINE ren Geräten in Funktion ist, wobei die anderen HINWEISE Geräte durch andere Stromanschlüsse ver- sorgt werden sollten. Andernfalls besteht die Gefahr, dass die Dunstabzugshaube entzünd- bare Gase ansaugt. Dieses Gerät ist weder für die Filter- als für die • s ist verboten unter der Abzu shaube Le- Saugversion anpassbar.
- Seite 46 INHALT GERÄTEBESCHREIBUNG ........................46 INSTALLATION DER DUNSTABZUGSHAUBE ...................47 ............48 Stromanschluss der Dunstabzugshaube ..................49 FUNKTIONSWEISE DER DUNSTABZUGSHAUBE ................50 REINIGUNG DER DUNSTABZUGSHAUBE ..................52 UNREGELMÄSSIGKEITEN IN DER FUNKTIONSWEISE ..............53 KUNDENDIENST ..........................53 S-DD11-L...
-
Seite 47: Gerätebeschreibung
GERÄTEBESCHREIBUNG S-DD11-L... -
Seite 48: Installation Der Dunstabzugshaube
60cm herstellen und 1142x100mm für das tec erbin er anschlie en en o n raft in as a sgef hrte och ein Modell Größe 120cm herstellen. set en Für das Modell mit eingebautem Motor müs- S-DD11-L... - Seite 49 (9-polige Steckverbinder für die Stellglied- u. Filterversion (9-polige Steckverbinder für die Stellglied- u. Filterversion für die Neon-Einschaltung und Steckverbin- nach außen nicht möglich wäre, ist die Dunstab- Sicherheitsprüfung, 4-polige Steckverbinder Im Falle, dass der Rauch- und Dampfablass Sicherheitsprüfung, 4-polige Steckverbinder Im Falle, dass der Rauch- und Dampfablass der für die Schalttafel) (Abb.
-
Seite 50: S Romanschluss Der Dunstabzugshaube
S ROMANSCHLUSS DER WARNUNG DUNSTABZUGSHAUBE Der Elektroanschluss des Downdrafts muss von technischem Fachpersonal durchge- WARNUNG führt werden. Positionieren Sie das Metallgehäuse mit den Die Dunstabzugshaube darf nur an einem elektronischen Bauteilen in einem Abstand richtig eingebauten Netzanschluss ange- von mindestens 65 cm von der Gasherd- schlossen werden. -
Seite 51: Funktionsweise Der Dunstabzugshaube
Led. ehr als h betrieben er en sin Meldet die Sättigung der Filter durch das ³ • eine i er a sgestattet iehe ebra chsanlei Aufleuchten aller Leds. t ng terner otor S-DD11-L... - Seite 52 Funktion wird durch das Drücken der Taste „ON/OFF“ oder „Licht“ unterbrochen. Sicherheitsschalter: Behindert etwas die Schließung des Down- drafts, wird diese unterbrochen und der Downdraft öffnet sich wieder. WARNUNG Dieser Eingriff darf nur von einem Fachmann durchgeführt werden. S-DD2-L FLUSH TOP S-DD11-L...
-
Seite 53: Reinigung Der Dunstabzugshaube
Aktivkohlefilter Zum Einsetzen des Aktivkohlefilters ist der Vorgang in umgekehrter Rei- henfolge auszuführen. Um den Aktiv- kohlefilter einzusetzen führen Sie die Schritte in umgekehrter Weise aus. Tauschen Sie den Aktivkohlefilter un- gefähr alle sechs Monate aus. S-DD11-L... -
Seite 54: Unregelmässigkeiten In Der Funktionsweise
Bitte, die Eckdaten des Geräts immer angeben (Modell, Fig. 13a; Seriennummer, Fig. 13b; Her- stellungsdatum, Fig. 13c). Diese Hinweise finden Sie auf den zwei Typenschilder – technische Daten und Herstell atum - die sich auf der unteren Seite des Downdrafts befinden. S-DD11-L... - Seite 55 Ontkoppel de afzuigkap altijd van het elektri- oet or en res ecteer e oorschriften citeitsnet voor het reinigen of uitvoeren van an e laatseli e a toriteit onderhoud. S-DD11-L...
- Seite 56 BESCHRIJVING VAN HET APPARAAT ....................56 INSTALLEREN VAN DE AFZUIGKAP ....................57 Loshalen van het filter, monteren van het koolstoffilter ..............58 Elektrische aansluiting van de afzuigkap ..................59 WERKING VAN DE AFZUIGKAP .......................60 REINIGEN VAN DE AFZUIGKAP .......................62 EVENTUELE STORINGEN ........................63 SERVICEAFDELING .........................63 S-DD11-L...
-
Seite 57: Beschrijving Van Het Apparaat
BESCHRIJVING VAN HET APPARAAT S-DD11 L... -
Seite 58: Installeren Van De Afzuigkap
(Fig. 8) en installeer het bijge- aa in e achter ant an het oo bla 3. Maak aan de achterkant van de kookplaat leverde verbindingstuk. een rechthoe ige o ening an een rechthoekkige opening met de afmetin- gen 842x100mm voor het model van 90cm S-DD11-L... -
Seite 59: Loshalen Van Het Filter, Monteren Van Het Koolstoffilter
gen: de plug met 9 pinnen voor de besturing Als de dampen en de rook niet naar buiten kun- 8. Plaats de metalen box met de elektronische De installatie van de terugslagklep voorkomt dat van de starter en de beveiligingen, plug met nen worden afgevoerd, kunt u de filteruitvoering componenten op een gemakkelijk bereik- wind naar binnen kan komen en luchtterugslag. -
Seite 60: Elektrische Aansluiting Van De Afzuigkap
De elektrische verbinding moet uitge- voerd worden voordat het apparaat in het meu- bel wordt gebouwd. Controleer of: • het vermo en voldoende is, • de voedin s abels in oede conditie ver- keren, • de doorsnede van de abels overeen- komt met de installatienormen. S-DD11-L... -
Seite 61: Zo Werkt Uw Afzuigkap
U onderbreekt deze functie met de toets “ON/ OFF” of de toets “LICHT”. S-DD11-L... - Seite 62 Als er iets in de weg zit van de downdraft zo- dat deze niet naar beneden kan, wordt het zakken onderbroken en gaat de downdraft weer naar boven. WAARSCHUWING Laat deze handeling alleen over aan een er- kende monteur/elektricien. S-DD2-L FLUSH TOP S-DD11-L...
-
Seite 63: Reinigen Van De Afzuigkap
Actief koolstoffilter Om het filter weer te plaatsen voer de handeling in omgekeerde volgorde uit. Overigens hebben wij een onder- houdsabonnement voor het leveren van koolstoffilters op tijd en voor aan- trekkelijke tarieven; informeer naar de mogelijkheden. S-DD11-L... -
Seite 64: Eventuele Storingen
OPMERKING Als u contact opneemt, vermeldt u de gegevens van het apparaat (Type Fig. 13a en uitrusting Fig. 13b + bouwdatum Fig. 13c). Deze informatie staat op het serieplaatje en op het datumplaatje onderaan op de Downdraft. S-DD11-L... - Seite 65 приступать к какой-либо операции по чистке или уходу за прибором, необходимо отключить его от электросети. • Предусмотреть соответствующую вентиляцию помещения, если вытяжка используется одновременно с другими кухонными приборами,которые потребляют источники энергии, отличные от электричества (газовые плиты, печи,отапливаемые маслом, углем и т.д.) S-DD11-L...
- Seite 66 СОДЕРЖАНИЕ ОПИСАНИЕ ПРИБОРА ....................66 УСТАНОВКА ВЫТЯЖКИ...................67 Снятие жировых фильтров, установка угольных фильтров.......68 Электрическое подключение вытяжки..............69 РАБОТА ВЫТЯЖКИ ....................70 УХОД ЗА ВЫТЯЖКОЙ .....................72 ВОЗМОЖНЫЕ НЕИСПРАВНОСТИ................73 ПОСЛЕПРОДАЖНОЕ ОБСЛУЖИВАНИЕ..............73 ГАРАНТИЙНЫЕ ОБЯЗАТЕЛЬСТВА................74 S-DD11-L...
-
Seite 67: Описание Прибора
ОПИСАНИЕ ПРИБОРА Мотор на корпусе Удаленный мотор S-DD11-L... -
Seite 68: Установка Вытяжки
УСТАНОВКА Разместите вытяжку в сделанном отверстии, 4. Put the Downdraft in the opening, inserting it 4. Put the Downdraft in the opening, inserting it 4. Put the Downdraft in the opening, inserting it 4. Put the Downdraft in the opening, inserting it INSTALLING THE INSTALLING THE INSTALLING THE... -
Seite 69: Снятие Жировых Фильтров, Установка Угольных Фильтров
Если o n raft оснащен удаленным мотором Версия фильтрации: 9. s eci c cable to the r ter inal boar f n e т о нужно подсоединить кабель мотора к клеммной колодке, расположенной в Если нет возможности внешнего отвода воздуха, пластиковом... -
Seite 70: Электрическое Подключение Вытяжки
residual current not exceeding 30mA. If the 12). The replacement of the charcoal filters has power cord is damaged, call the after-sales to be carried out accordingly to the effective use service to avoid any risk. of the Downdraft, and in any case at least once every 6 months. -
Seite 71: Работа Вытяжки
переключается с 4-й на 2-ю скорость после 6 минут работы. Если прибор работает на 3-й скорости, он автоматически переключается на вторую скорость после 7 минут работы. Рабочие скорости также могут быть изменены во время работы. Энергопотребление прибора в режиме ожидания ниже 0,5 Вт. S-DD11-L... - Seite 72 Als er iets in de weg zit van de downdraft zo- dat deze niet naar beneden kan, wordt het zakken onderbroken en gaat de downdraft weer naar boven. WAARSCHUWING Laat deze handeling alleen over aan een er- kende monteur/elektricien. S-DD2-L FLUSH TOP S-DD11-L...
-
Seite 73: Уход За Вытяжкой
периодически производить замену угольного фильтра. Для того, чтобы вынуть угольный фильтр, сначала Активный угольный необходимо извлечь жировой фильтр, нажав на пластиковый фильтр язычок. Чтобы установить угольный фильтр, проделайте данную процедуру в обратном порядке. Рекомендована замена фильтров каждые 6 месяцев. S-DD11-L... -
Seite 74: Возможные Неисправности
• не сработало многополюсное отключающее устройство. ПОСЛЕПРОДАЖНОЕ ОБСЛУЖИВАНИЕ Техническое обслуживание вытяжки может производиться: • Вашим дилером; • Или специализированным авторизованным техником. ПРИМЕЧАНИЕ При обращении за технической помощью необходимо указать данные вытяжки (модель, тип, серийный номер)(рис. 13abc). Эта информация указана на информационной табличке прибора. S-DD11-L... -
Seite 75: Гарантийный Талон
предъявляйте их специалистам сервиса при обращении центрах вы можете получить на сайте за гарантийным обслуживанием. www.sirius-russia.ru в разделе "Сервис", а также Внимание! Бытовые приборы Sirius предназначены по телефону: 8-495-363-38-08. Для подтверждения исключительно для личных, семейных, домашних и иных гарантийного срока необходимо сохранять нужд, не... -
Seite 76: Гарантийные Обязательства
Подпись покупателя прочие механические повреждения, возникшие в процессе эксплуатации или транспортировки. В случае возникновения вопросов по гарантийному обслуживании и сервису, а также по иным вопросам, касаю щимся техники Sirius обращайтесь по электронной почте: service@sirius-russia.ru. При обращении обязательно сообщите модель, серийный номер... - Seite 77 S-DD11-L...
- Seite 78 IMMAGINI IMAGES IMAGES AFBEELDINGEN IMÁGENES BILDER S-DD11-L...
- Seite 79 2 mm S-DD11-L...
- Seite 80 S-D 11 L...
- Seite 81 10/09 90002103999 220 - 240V - 50 HZ ATTUATORE 12Vcc 68W EQUIPMENT TYPE FSEE S - 002 - EM_TC X22 - Q3 - X0 S-DD11-L...
- Seite 82 S-DD11-L...