Herunterladen Inhalt Inhalt Diese Seite drucken
Wiseup P9000 Benutzerhandbuch

Wiseup P9000 Benutzerhandbuch

1080p hd mini spy pen camera pocket camcorder

Werbung

Verfügbare Sprachen
  • DE

Verfügbare Sprachen

  • DEUTSCH, seite 7
I. Product Overview
1. Microphone
2. Power Button
3. Camera Lens
4. Camera Button
5. Reset Button
II. What's In the Box?
User Guide
Model Number: P9000
1 / 36
6.Yellow Indicator Light
7. Blue Indicator Light
8. Micro SD Card Slot
9. Mini USB Port

Werbung

Inhaltsverzeichnis
loading

Inhaltszusammenfassung für Wiseup P9000

  • Seite 1 User Guide Model Number: P9000 I. Product Overview 1. Microphone 6.Yellow Indicator Light 2. Power Button 7. Blue Indicator Light 3. Camera Lens 8. Micro SD Card Slot 4. Camera Button 9. Mini USB Port 5. Reset Button II. What’s In the Box?
  • Seite 2: Operation

    -1× Meeting Recorder Camera -1× USB/AV Cable III. Operation >> Before using, make sure that the camera is fully recharged. >> Please make sure the Micro SD card (4GB-32GB, format it for the first usage) is securely fitted into the camera’s SD card slot, or the camera will not work. A SDHC Class 10 Micro SD card is recommended.
  • Seite 3 3). Video Resolution: 1920×1080P Video Format: AVI 3.3 1080P VIDEO RECORDING 3.3.1 Power on the camera by pressing Power Button for two seconds. The blue and yellow indicator lights will be illuminated for five seconds. Then the yellow one will turn off, while the blue one will stay illuminated, indicating the camera has entered into standby mode automatically.
  • Seite 4 IV. Video/Image File Uploads 4.1 When the camera is powered off, remove the Micro SD card and insert it into a card reader. 4.2 Insert the card reader into a PC computer. 4.3 The Micro SD card will be recognized as a removable disk drive. 4.4 All the files can be accessed in the “DCIM”...
  • Seite 5 6.3 It will take 3 hours to obtain a full charge. 6.4 The blue indicator light will stay illuminated during the charging process. 6.5 When the camera is fully charged, the blue and yellow indicator lights will stay illuminated. VII. Charging and Recording Simultaneously 7.1 Insert a Micro SD card into the camera.
  • Seite 6 9.2 Select the camera video signal source on the TV or monitor. 9.3 Power on the camera and start recording video (See 3.2 or 3.3), then you can watch the camera’s live video on the TV or monitor during the video recording process. 9.4 You could experience other functions of this camera in the live view mode.
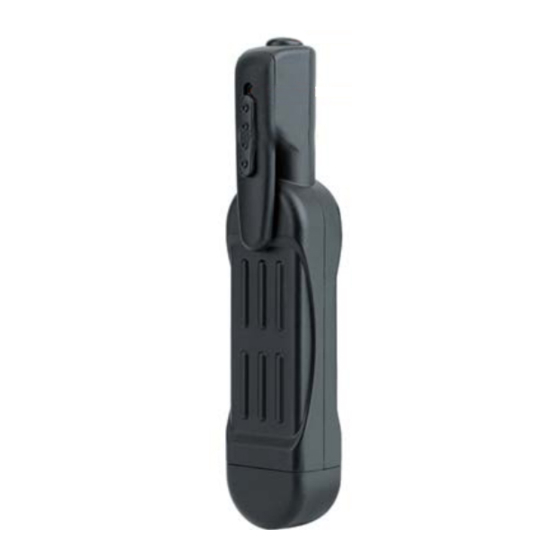
  • Seite 7 Benutzerhandbuch Modellnummer: P9000 I. Produktübersicht 1. Mikrofon 2. Einschaltknopf 3. Kameraobjektiv 4. Kamerataste 5. Reset-Taste 6. Gelbe Kontrollleuchte 7. Blaue Anzeigelampe 8. Micro SD-Kartensteckplatz 9. Mini-USB-Anschluss 7 / 36...
  • Seite 8: Betrieb

    II. Was ist in der Box? -1 × Meeting Recorder Kamera -1 × USB / AV-Kabel III. Betrieb >> Vergewissern Sie sich vor dem Gebrauch, dass die Kamera vollständig aufgeladen ist. >> Bitte stellen Sie sicher, dass die Micro-SD-Karte (4 GB-32 GB, formatieren Sie sie für die erste Verwendung) ist fest in den SD-Kartensteckplatz der Kamera eingesetzt, oder die Kamera funktioniert nicht.
  • Seite 9 3.2.3 Drücken Sie die Netztaste erneut, um die Videoaufnahme zu beenden. Die blaue Anzeigelampe leuchtet weiter und zeigt damit an, dass die Kamera wieder im Standby-Modus ist. [Anmerkungen]: 1). Eine Videodatei wird automatisch alle 5 Minuten generiert und gespeichert. 2). Die Kamera kann bei voller Aufladung 5,5 Stunden lang ununterbrochen Videos aufzeichnen.
  • Seite 10: Hochladen Von Video- / Bilddateien

    während die blaue weiterhin leuchtet, was darauf hinweist, dass die Kamera automatisch in den Standby-Modus geschaltet wurde. 3.5.2 Halten Sie die Kamerataste drei Sekunden lang gedrückt. Die blauen und gelben Anzeigelampen blinken zuerst viermal, dann leuchten sie fünf Sekunden lang und die gelbe Anzeigelampe erlischt und zeigt an, dass die SD-Kartenformatierung abgeschlossen ist.
  • Seite 11: Gleichzeitiges Laden Und Aufnehmen

    5.6. Trennen Sie die Kamera vom Computer und schalten Sie die Kamera ein. Das System aktualisiert das Programm automatisch. 5.7. Schalten Sie die Kamera aus und schließen Sie sie mit dem angeschlossenen USB-Kabel wieder an den Computer an. Die txt-Datei "TIMERSET" verschwindet und die Zeitstempeleinstellung wird aktualisiert.
  • Seite 12 Bedienung: Drücken Sie die Reset-Taste einmal, um die Kamera zurückzusetzen. Die blaue und gelbe Kontrollleuchte erlischt und die Kamera schaltet sich automatisch aus. IX. Live-Videoausgabe 9.1 Schließen Sie die Kamera mit dem folgenden AV-Kabel an ein Fernsehgerät oder einen Monitor an: 9.2 Wählen Sie die Kamera-Videosignalquelle am Fernsehgerät oder Monitor aus.
  • Seite 13: Présentation Du Produit

    Mode d'emploi Numéro du modèle: P9000 I. Présentation du produit 1. Microphone 2. Bouton d'alimentation 3. Objectif de la caméra 4. Bouton de l'appareil photo 5. Bouton de réinitialisation 6. Voyant lumineux jaune 7. Voyant lumineux bleu 8. Emplacement pour carte Micro SD 9.
  • Seite 14: Opération

    II. Qu'y a-t-il dans la boite? -1 × Caméra enregistreur de réunion -1 × câble USB / AV III. Opération >> Avant utilisation, assurez-vous que l'appareil photo est complètement rechargé. >> Veuillez vous assurer que la carte Micro SD (4 Go-32 Go, formatez-la pour la première utilisation) est correctement inséré...
  • Seite 15 [Remarques]: 1). Un fichier vidéo sera généré et enregistré automatiquement toutes les 5 minutes. 2). La caméra peut enregistrer de la vidéo en continu pendant 5,5 heures sur une charge complète. 3). Résolution vidéo: 1920 × 1080P Format vidéo: AVI 3.3 ENREGISTREMENT VIDÉO 1080P 3.3.1 Allumez la caméra en appuyant sur le bouton d'alimentation pendant deux secondes.
  • Seite 16: Réglage De L'heure Et De La Date

    IV. Téléchargement de fichiers vidéo / image 4.1 Lorsque l'appareil photo est hors tension, retirez la carte Micro SD et insérez-la dans un lecteur de carte. 4.2 Insérez le lecteur de carte dans un ordinateur PC. 4.3 La carte Micro SD sera reconnue comme un lecteur de disque amovible. 4.4 Tous les fichiers sont accessibles dans le dossier "DCIM".
  • Seite 17 6.3 Il faudra 3 heures pour obtenir une charge complète. 6.4 Le voyant bleu restera allumé pendant le processus de charge. 6.5 Lorsque l'appareil photo est complètement chargé, les voyants lumineux bleu et jaune restent allumés. VII. Chargement et enregistrement simultanés 7.1 Insérez une carte Micro SD dans la caméra.
  • Seite 18 9.2 Sélectionnez la source du signal vidéo de la caméra sur le téléviseur ou le moniteur. 9.3 Allumez la caméra et commencez à enregistrer la vidéo (voir 3.2 ou 3.3), puis vous pouvez regarder la vidéo en direct de la caméra sur le téléviseur ou le moniteur pendant le processus d'enregistrement vidéo.
  • Seite 19: Panoramica Del Prodotto

    Guida Utente Numero del Modello: P9000 I. Panoramica del prodotto 1. Microfono 2. Pulsante di accensione 3. Obiettivo della fotocamera 4. Pulsante fotocamera 5. Pulsante di ripristino 6. Indicatore luminoso giallo 7. Indicatore luminoso blu 8. Slot per scheda Micro SD 9.
  • Seite 20: Operazione

    II. Cosa c'è nella scatola? -1 × Videoregistratore per riunioni -1 × Cavo USB / AV III. Operazione >> Prima dell'uso, assicurarsi che la fotocamera sia completamente ricaricata. >> Assicurati che la scheda Micro SD (4 GB-32 GB, formattala per il primo utilizzo) sia inserito saldamente nello slot per scheda SD della fotocamera, altrimenti la fotocamera non funzionerà.
  • Seite 21 [Nota]: 1). Un file video verrà generato e salvato automaticamente ogni 5 minuti. 2). La fotocamera può registrare video ininterrottamente per 5,5 ore con una carica completa. 3). Risoluzione video: 1920 × 1080P Formato video: AVI 3.3 REGISTRAZIONE VIDEO 1080P 3.3.1 Accendere la fotocamera premendo il pulsante di accensione per due secondi.
  • Seite 22 IV. Caricamenti di file video / immagine 4.1 Quando la fotocamera è spenta, rimuovere la scheda Micro SD e inserirla in un lettore di schede. 4.2 Inserire il lettore di schede in un computer PC. 4.3 La scheda Micro SD verrà riconosciuta come unità disco rimovibile. 4.4 Tutti i file sono accessibili nella cartella "DCIM".
  • Seite 23: Carica E Registrazione Contemporaneamente

    6.3 Ci vorranno 3 ore per ottenere una carica completa. 6.4 La spia blu rimarrà accesa durante il processo di ricarica. 6.5 Quando la fotocamera è completamente carica, le spie blu e gialla rimarranno accese. VII. Carica e registrazione contemporaneamente 7.1 Inserire una scheda Micro SD nella fotocamera.
  • Seite 24 9.2 Selezionare la sorgente del segnale video della videocamera sul televisore o sul monitor. 9.3 Accendere la videocamera e iniziare a registrare video (vedere 3.2 o 3.3), quindi è possibile guardare il video in diretta della videocamera sulla TV o sul monitor durante il processo di registrazione video.
  • Seite 25: Descripción Del Producto

    Guía Usuario Número de modelo: P9000 I. Descripción del producto 1. Micrófono 2. Botón de encendido 3. lente de la cámara 4. Botón de cámara 5. Botón de reinicio 6. Luz indicadora amarilla 7. Luz indicadora azul 8. Ranura para tarjeta Micro SD...
  • Seite 26: Operación

    9. Mini puerto USB II ¿Qué hay en la caja? -1 × Cámara grabadora de reuniones -1 × cable USB / AV III. Operación >> Antes de usar, asegúrese de que la cámara esté completamente recargada. >> Asegúrese de que la tarjeta Micro SD (4GB-32GB, formatee para el primer uso) encajado de forma segura en la ranura para tarjeta SD de la cámara, o la cámara no funcionará.
  • Seite 27 3.2.3 Presione el botón de encendido una vez más para detener la grabación de video. La luz indicadora azul permanecerá iluminada, lo que indica que la cámara ha vuelto al modo de espera. [Notas]: 1) Se generará un archivo de video y se guardará cada 5 minutos automáticamente. 2) La cámara puede grabar video continuamente durante 5.5 horas con una carga completa.
  • Seite 28 mientras que el azul permanecerá iluminado, lo que indica que la cámara ha entrado en modo de espera automáticamente. 3.5.2 Mantenga presionado el botón de la cámara durante tres segundos. Las luces indicadoras azul y amarilla parpadearán cuatro veces primero, luego se iluminarán durante cinco segundos y la luz indicadora amarilla se apagará, indicando que se ha completado el formateo de la tarjeta SD.
  • Seite 29 5.7. Apague la cámara, luego conecte la cámara a la computadora nuevamente con el cable USB conectado, el archivo txt "TIMERSET" desaparecerá y la configuración de la marca de tiempo se actualizará. VI. Solo cargando 6.1 Retire la tarjeta Micro SD de la cámara. 6.2 Conecte la cámara a una computadora con el cable USB provisto.
  • Seite 30 Operación: Presione el botón de reinicio una vez para reiniciar la cámara. Las luces indicadoras azul y amarilla se apagarán y la cámara se apagará automáticamente. IX. Salida de video en vivo 9.1 Conecte la cámara a un televisor o monitor con el cable AV que se proporciona a continuación: 9.2 Seleccione la fuente de señal de video de la cámara en el televisor o monitor.
  • Seite 31 取扱説明書 モデル番号:P9000 I.製品の概要 1.マイク 2.電源ボタン 3.カメラレンズ 4.カメラボタン 5.リセットボタン 6.黄色のインジケータライト 7.青色のインジケータライト 31 / 36...
  • Seite 32 8.マイクロ SD カードスロット 9.ミニ USB ポート II 箱の中は何ですか? -1×ミーティングレコーダーカメラ -1×USB / AV ケーブル III 操作 >>使用する前に、カメラが完全に充電されていることを確認してください。 >> Micro SD カード(4GB-32GB、最初に使用するためにフォーマットする)が カメラの SD カードスロットにしっかりと取り付けられていない場合、カメラは動作しません。 SDHC Class 10 Micro SD カードが推奨されます。 注 : カードがカメラに装着されていない場合、または カードを読み取れない場合、青と黄色のインジケ Micro SD ータライトが 回点滅してから消灯します。カメラは自動的にシャットダウンします。 3.1 電源のオン/オフ 3.1.1 電源ボタンを 2 秒間押して、カメラの電源を入れます。青と黄色のインジケータライトが 5 秒間 点灯します。その後、黄色のボタンがオフになり、青色のボタンが点灯したままになり、カメラが自動...
  • Seite 33 3.2.2 電源ボタンを 1 回押して、1280×720P のビデオ解像度でビデオを録画します。青いインジケータ ライトが 3 回点滅してから消灯します。 3.2.3 電源ボタンをもう一度押して、ビデオの録画を停止します。青いインジケータライトは点灯した ままで、カメラがスタンバイモードに戻ったことを示します。 注 : )。ビデオファイルが自動的に生成され、 分ごとに保存されます。 )。カメラはフル充電で 時間連続してビ デオを録画できます。 )。ビデオ解像度: × ビデオ形式: 1920 1080P 3.3 1080P ビデオ録画 3.3.1 電源ボタンを 2 秒間押して、カメラの電源を入れます。青と黄色のインジケータライトが 5 秒間 点灯します。その後、黄色のボタンがオフになり、青色のボタンが点灯したままになり、カメラが自動 的にスタンバイモードに入ったことを示します。 3.3.2 電源ボタンを 3 秒間押し続けて、1920×1080P のビデオ解像度でビデオを録画します。黄色のイ ンジケータライトが 3 回点滅して消灯します。 3.3.3 ビデオの録画を停止するには、電源ボタンを...
  • Seite 34 3.5.1 電源ボタンを 2 秒間押して、カメラの電源を入れます。青と黄色のインジケータライトが 5 秒間 点灯します。その後、黄色のボタンがオフになり、青色のボタンが点灯したままになり、カメラが自動 的にスタンバイモードに入ったことを示します。 3.5.2 カメラボタンを 3 秒間押し続けます。青色と黄色のインジケータライトが最初に 4 回点滅し、そ の後 5 秒間点灯し、黄色のインジケータライトが消灯し、SD カードのフォーマットが完了したことを 示します。 3.5.3 青色のインジケータライトは点灯したままで、カメラがスタンバイモードに戻ったことを示しま す。 IV.ビデオ/画像ファイルのアップロード 4.1 カメラの電源がオフになったら、Micro SD カードを取り外してカードリーダーに挿入します。 4.2 PC にカードリーダーを挿入します。 4.3 Micro SD カードは、リムーバブルディスクドライブとして認識されます。 4.4「DCIM」フォルダー内のすべてのファイルにアクセスできます。 V. 時刻/日付スタンプの設定 5.1 コンピューターに「TIMERSET」という名前のテキストファイルを作成します。 5.2 現在の日付と時刻を正しい形式で「TIMERSET」ファイルに入力します。 年月日時時分秒...
  • Seite 35 5.5 リムーバブルディスクドライブフォルダーが表示されたら、txt ファイル「TIMERSET」をディスク ドライブにコピーします。 5.6 カメラをコンピューターから取り外し、カメラの電源を入れます。システムはプログラムを自動的 にアップグレードします。 5.7 カメラの電源をオフにし、USB ケーブルを接続した状態でカメラをコンピューターに再度接続する と、txt ファイル「TIMERSET」が消え、タイムスタンプ設定が更新されます。 VI. 充電のみ 6.1 カメラから Micro SD カードを取り外します。 6.2 付属の USB ケーブルを使用して、カメラを PC コンピューターに接続します。 6.3 完全に充電するには 3 時間かかります。 6.4 充電プロセス中、青いインジケータライトは点灯したままになります。 6.5 カメラが完全に充電されると、青と黄色のインジケータライトが点灯したままになります。 VII. 充電と録音を同時に 7.1 Micro SD カードをカメラに挿入します。 7.2 付属の USB ケーブルを使用して、カメラを PC コンピューターに接続します。 7.3 青いインジケータライトが...
  • Seite 36 VIII. リセット中 何らかの理由でカメラが応答しなくなったり、正常に動作しない場合、クイックリセットを行うとカメ ラが通常の動作に戻ります。 操作:リセットボタンを 1 回押して、カメラをリセットします。青と黄色のインジケータライトが消灯 し、カメラが自動的にシャットダウンします。 IX. ライブビデオ出力 9.1 以下の付属の AV ケーブルを使用して、カメラをテレビまたはモニターに接続します。 9.2 テレビまたはモニターでカメラのビデオ信号ソースを選択します。 9.3 カメラの電源を入れてビデオの録画を開始し(3.2 または 3.3 を参照)、ビデオ録画プロセス中にテ レビまたはモニターでカメラのライブビデオを見ることができます。 9.4 ライブビューモードでは、このカメラの他の機能を体験できます。 36 / 36...

Inhaltsverzeichnis