Bright Starts Sweet Spots & Ladybugs Bedienungsanleitung
Inhaltsverzeichnis
Quicklinks
DEUTSCH • ITALIANO • PORTUGUÊS • NEDERLAND • POLSKI • DANSK
IMPORTANT!
KEEP FOR FUTURE REFERENCE.
¡IMPORTANTE! CONSÉRVELAS
PARA REFERENCIA FUTURA.
IMPORTANT ! À CONSERVER
POUR CONSULTATION.
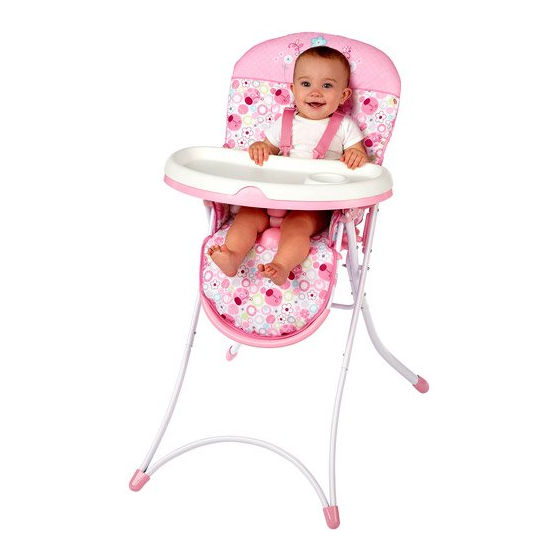
Sweet Spots & Ladybugs™
• Congratulations on your purchase of a new Bright Starts
Please read all instructions before assembly and use of the high chair.
• ¡Felicitaciones por haber comprado un nuevo producto de Bright Starts™ !
Lea todas las instrucciones antes de armar y usar la silla alta.
• Nous vous félicitons de votre achat d'un nouveau produit Bright Starts !
Lisez toutes les instructions avant l'assemblage et l'utilisation de la chaise
haute.
www.brightstarts.com
High Chair • Silla Alta • Chaise Haute
ENGLISH • ESPAÑOL • FRANÇAIS
product!
™
6973
1
29
Inhaltsverzeichnis

Verwandte Anleitungen für Bright Starts Sweet Spots & Ladybugs


Inhaltszusammenfassung für Bright Starts Sweet Spots & Ladybugs
- Seite 1 • ¡Felicitaciones por haber comprado un nuevo producto de Bright Starts™ ! Lea todas las instrucciones antes de armar y usar la silla alta. • Nous vous félicitons de votre achat d’un nouveau produit Bright Starts ! Lisez toutes les instructions avant l’assemblage et l’utilisation de la chaise haute.
-
Seite 2: Important Safety Instructions
IMPORTANT SAFETY INSTRUCTIONS WARNING TO PREVENT SERIOUS INJURY OR DEATH FROM FALLS OR SLIDING OUT: • Use the high chair only if the child meets ALL of the following conditions: – Can sit up by himself or herself (approximately six months of age) –... -
Seite 3: Importantes Consignes De Sécurité
• No use la silla alta a menos que todos los componentes estén correctamente colocados y ajustados. • SIEMPRE sujete al niño con el sistema de sujeción. La bandeja no ha sido diseñada para sostener al niño en la silla. •... - Seite 4 Parts • Partes • Pièces Parts List and Drawing • Lista de partes y dibujo • Liste des pièces et croquis Qty. Cant. Description Descripción Description N° Qté Front leg assembly Ensamblaje de pata Module pied avant delantera Rear legs Patas traseras Pieds arrière Seat frame...
- Seite 5 – 5 –...
- Seite 6 Seat Frame Assembly Ensamblaje del armazón del • asiento Assemblage du cadre du siège • Step 1 • Paso 1 • Étape 1 Locate the seat frame. Position the frame so that the seat back faces up. Attach the front leg assembly to the front of the seat frame, and lock into place. Ubique el armazón del asiento.
- Seite 7 Step 2 • Paso 2 • Étape 2 Locate the 2 rear legs. Attach each rear leg to the corresponding slot of the seat frame, ensuring that the legs lock into place and are pointed outward. Ubique las 2 patas traseras. Coloque cada pata trasera en la ranura correspondiente del armazón del asiento, asegurándose de que las patas encajen en su lugar y apunten hacia afuera.
- Seite 8 Step 3 • Paso 3 • Étape 3 Unfold the seat back and connect the seat back tube to the seat frame. The seat back tube is already located within the fabric pocket of the seat back. Extienda el respaldo del asiento y conecte el tubo del respaldo del asiento al armazón del asiento.
- Seite 9 Step 4 • Paso 4 • Étape 4 Stand the high chair upright. Unfold the assembled high chair by pulling up on the footrest and pushing back on the seat back. Lock the frame by pressing down on the armrests near the buttons until an audible click is heard.
- Seite 10 Step 5 • Paso 5 • Étape 5 Locate the hook and loop straps on each side of the fabric seat pad. Attach the hook and loop fabric tabs to the seat frame. Ubique las correas de sujeción a cada lado de la almohadilla del asiento de tela. Enganche las pestañas de sujeción de tela al armazón del asiento.
- Seite 11 Step 6 • Paso 6 • Étape 6 Locate the elastic loops on each side of the fabric seat pad below the arm. Attach each elastic loop to the inside of the arm rests. Ubique los lazos elásticos a cada lado de la almohadilla del asiento de tela debajo del brazo.
- Seite 12 Using the Seat Restraint • Utilización del sujetador del asiento • Utilisation des sangles de sécurité du siège • The Sweet Jubilee™ High Chair has a 5-point seat restraint for child safety. • La silla alta de Sweet Jubilee™ tiene un sistema de sujeción del asiento de 5 puntos para la seguridad del niño.
- Seite 13 Desserrer les sangles épaule et taille avant de les utiliser afin de pouvoir les fixer de manière adéquate au corps de l’enfant. Pour régler la sangle épaule à la taille de votre enfant : – Placer le bébé dans le siège. –...
- Seite 14 Step 3 • Paso 3 • Étape 3 Adjust the straps as needed so that the restraint fits snugly (but not too tightly). Ensure the seat restraint is secure by pulling it away from the child’s body. The buckles should remain fastened. Ajuste las correas según sea necesario, para que el sujetador se adapte cómodamente (pero sin que quede demasiado apretado).
- Seite 15 Using the Tray • Uso de la bandeja • Utilisation du plateau Step 1 • Paso 1 • Étape 1 Attach the tray to the high chair by grasping the pair of latches on the underside of the tray and pulling outward. Lower the tray into position or slide the tray into position over the front of arms.
- Seite 16 Step 2 • Paso 2 • Étape 2 Verify the tray is locked in place before use by gently pulling on the tray. Verifique que la bandeja esté trabada en su lugar antes de usar el producto, jalando de esta con cuidado. Vérifier que le plateau est bien verrouillé...
- Seite 17 Using the Recline Function • Utilización de la función de reclinación • Utilisation de la fonction d’inclinaison CAUTION Do not adjust the recline while child is in the seat. PRECAUCIÓN No ajuste la reclinación mientras el niño esté en el asiento. MISE EN GARDE Ne pas régler l’inclinaison alors que l’enfant se trouve dans le siège.
- Seite 18 Removing the Fabric Seat Pad For Cleaning • Retirar la almohadilla del asiento de tela para limpiarla • Retrait du coussin en tissu du siège pour le nettoyer Step 1 • Paso 1 • Étape 1 Remove each of the shoulder strap anchors by pulling them through the slots in the seat pad one at a time.
- Seite 19 Step 2 • Paso 2 • Étape 2 Locate the hook and loop straps on each side of the fabric seat pad. Unlatch the hook and loop fabric tabs from around the seat frame. Ubique las correas de sujeción a cada lado de la almohadilla del asiento de tela. Destrabe las pestañas de sujeción de la tela que se encuentran alrededor del armazón del asiento.
- Seite 20 Step 3 • Paso 3 • Étape 3 Locate the elastic loops on each side of the fabric seat pad below the arm. Detach each elastic loop from the inside of the arm rests. Ubique los lazos elásticos a cada lado de la almohadilla del asiento de tela debajo del brazo.
- Seite 21 Step 4 • Paso 4 • Étape 4 Locate the two metal tabs on the bottom of the fabric seat pad. Remove the metal waist strap anchors from the seat by first pulling them through the slot in the seat frame and then pulling them through the slot in the fabric seat pad.
- Seite 22 Step 5 • Paso 5 • Étape 5 Locate the three elastic loops on the bottom rear of the fabric seat pad. Unhook the elastic loops from the underside of the seat. Ubique los tres lazos elásticos en la parte inferior trasera de la almohadilla del asiento de tela.
- Seite 23 Step 7 • Paso 7 • Étape 7 Slide the fabric seat pad off the seat back allowing the shoulder belt and waist belt to be pulled through the hole in the fabric seat pad. The seat pad can now be fully removed from the high chair frame.
- Seite 24 Storage and Travel • Almacenamiento y transporte • Rangement et déplacements To fold the high chair for storage or travel: • Press the buttons on each side of the arm rests and lift up. Para plegar la silla alta para su almacenamiento o transporte: •...
- Seite 25 To unfold the high chair for use after storage or travel: Pull up on the footrest and push back on the seat back to unfold the frame. Then lock the frame by pressing down on the armrests near the buttons. Para extender la silla alta para su uso después de su almacenamiento o transporte: Jale hacia arriba el apoyapiés y empuje hacia atrás el respaldo del asiento para...
- Seite 26 Care and Cleaning • Cuidado y limpieza • Entretien et nettoyage Seat pad – Remove from frame. Fasten all hook-and-loop tabs. Machine wash in cold water, gentle cycle. Air dry flat. No bleach. Frame – Wipe metal frame with soft, clean cloth and mild soap. Tray/tray insert –...
- Seite 27 – 27 –...
-
Seite 28: Limited Warranty
Kids II Limited Warranty Kids II is committed to making innovative, high quality products for babies and children. We warrant this product to be free from defects in material and workmanship existing at the time of manufacture for a period of one year from the date of initial purchase (sales receipt is required for proof of purchase). - Seite 29 • Gratulujemy zakupu nowego produktu Bright Starts™! Przed zmontowaniem i korzystaniem z krzesełka do karmienia należy przeczytać wszystkie instrukcje. • Tillykke med dit køb af et nyt Bright Starts™ produkt! Læs hele vejledningen, inden højstolen samles og bruges. 6973...
-
Seite 30: Wichtige Sicherheitshinweise
WICHTIGE SICHERHEITSHINWEISE WARNUNG UM SCHWERE VERLETZUNGEN ODER TODESFÄLLE DURCH STÜRZE ODER HERAUSRUTSCHEN ZU VERHINDERN, SOLLTEN SIE FOLGENDES BEACHTEN: • Benutzen Sie den Hochstuhl nur dann, wenn das Kind ALLE folgenden Voraussetzungen erfüllt: – Es kann selbständig aufrecht sitzen (ca. sechs Monate alt) –... -
Seite 31: Importanti Istruzioni Di Sicurezza
IMPORTANTI ISTRUZIONI DI SICUREZZA AVVERTENZA PER EVITARE GRAVI LESIONI O MORTE A SEGUITO DI CADUTE O DI SCIVOLAMENTI: • Il seggiolone deve essere utilizzato solo quando il bambino soddisfi TUTTE le seguenti condizioni: – È in grado di stare seduto eretto senza aiuto (circa sei mesi di età) –... - Seite 32 INSTRUÇÕES IMPORTANTES DE SEGURANÇ AVISO PARA EVITAR FERIMENTOS GRAVES OU MORTE POR QUEDAS OU DESLIZAMENTOS PARA FORA: • Use o cadeirão apenas se a criança satisfizer TODAS as seguintes condições: – puder se sentar sozinha (aproximadamente seis meses de idade) –...
-
Seite 33: Belangrijke Veiligheidsvoorschriften
BELANGRIJKE VEILIGHEIDSVOORSCHRIFTEN WAARSCHUWING OM ERNSTIGE OF DODELIJKE ONGEVALLEN TE VOORKOMEN DOOR VALLEN OF ERUIT GLIJDEN: • Gebruik deze kinderstoel alleen als het kind aan AL de volgende voorwaarden voldoet: – het kind kan zelf zitten (bij ongeveer zes maanden oud) –... - Seite 34 WAŻNE INSTRUKCJE DOTYCZĄCE BEZPIECZ OSTRZEŻENIE ABY ZAPOBIEC POWAŻNYM OBRAŻENIOM LUB ŚMIERCI WSKUTEK UPADKU LUB WYŚLIZGNIĘCIA SIĘ: • Z krzesełka do karmienia można korzystać tylko wtedy, gdy dziecko spełnia WSZYSTKIE następujące warunki: – Samodzielnie siada (wiek około 6 miesięcy) – Waży mniej niż 22,5 kg. •...
- Seite 35 VIGTIG SIKKKERHEDSVEJLEDNING ADVARSEL FOR AT UNDGÅ ALVORLIGE PERSONSKADER ELLER DØDSFALD SOM FØLGE AF FALD ELLER UDGLIDNING: • Brug kun højstolen, hvis barnet opfylder ALLE disse betingelser: – Kan selv sidde oprejst (cirka seks måneder gammel) – Vejer mindre end 22,6 kg (50 pund) •...
- Seite 36 Teileliste und Abbildung • Elenco delle parti e disegno • Lista de peças e desenho • Lijst met onderdelen en tekening • Wykaz części i rysunek • En liste over dele og en tegning Menge Quan- Beschreibung Descrizione Descrição N.° tità...
- Seite 37 – 37 –...
- Seite 38 Zusammenbau des Sitzrahmens • Montaggio del telaio del seggiolino • Montagem da estrutura do assento • Montage van het stoeltjesframe • Montaż stelaża siedzenia • Samling af sæderamme Schritt 1 • Punto 1 • Etapa 1 • Stap 1 • Krok 1 • Trin 1 Nehmen Sie den Sitzrahmen zur Hand.
- Seite 39 Schritt 2 • Punto 2 • Etapa 2 • Stap 2 • Krok 2 • Trin 2 Nehmen Sie die beiden hinteren Stuhlbeine zur Hand. Bringen Sie die hinteren Stuhlbeine jeweils im entsprechenden Schlitz des Sitzrahmens an und stellen Sie sicher, dass die Stuhlbeine einrasten und nach außen zeigen.
- Seite 40 Schritt 3 • Punto 3 • Etapa 3 • Stap 3 • Krok 3 • Trin 3 Klappen Sie die Rückenlehne auseinander und verbinden Sie das Rückenlehnenrohr mit dem Sitzrahmen. Das Rückenlehnenrohr befindet sich bereits in der Stofftasche der Rückenlehne Aprire lo schienale del seggiolino e attaccare il tubo dello stesso al telaio del seggiolino.
- Seite 41 Schritt 4 • Punto 4 • Etapa 4 • Stap 4 • Krok 4 • Trin 4 Stellen Sie den Hochstuhl aufrecht hin. Klappen Sie den zusammengebauten Hochstuhl auseinander, indem Sie die Fußstütze nach oben ziehen und die Rückenlehne nach hinten drücken. Arretieren Sie den Rahmen, indem Sie die Armstützen im Bereich der Klick •...
- Seite 42 Schritt 5 • Punto 5 • Etapa 5 • Stap 5 • Krok 5 • Trin 5 Nach den Klettverschlüssen an jeder Seite des Stoffsitzpolsters suchen. Die Klettverschlüsse am Sitzrahmen anbringen. Individuare le bande a strappo poste su ciascun lato dell’imbottitura del seggiolino. Attaccare le bande a strappo in stoffa al telaio del seggiolino.
- Seite 43 Schritt 6 • Punto 6 • Etapa 6 • Stap 6 • Krok 6 • Trin 6 Nach den elastischen Schlaufen auf jeder Seite des Stoffsitzpolsters unterhalb des Arms suchen. Die elastischen Schlaufen jeweils an den Innenseiten der Armstützen anbringen. Individuare gli occhielli elastici su ciascun lato dell’imbottitura del seggiolino in stoffa sotto il braccio.
- Seite 44 Verwenden des Sitz-Gurtsystems • Uso delle cinghie di trattenuta del seggiolino • Uso da segurança do assento • Gebruik van de stoelgordel • Korzystanie z pasów zabezpieczających • Sådan bruges selen • Zur Sicherung des Kindes verfügt der Sweet Jubilee™-Hochstuhl über ein 5-Punkt-Gurtsystem. •...
- Seite 45 Prima dell’utilizzo, allentare le cinghie per le spalle e per la vita in modo che queste si adattino perfettamente al corpo del bambino. Per regolare l’altezza delle cinghie per le spalle in base all’altezza del bambino: – Mettere il bambino nel seggiolino. –...
- Seite 46 Schritt 2 • Punto 2 • Etapa 2 • Stap 2 • Krok 2 • Trin 2 Setzen Sie das Baby in den Sitz. Der untere Gurt sollte zwischen den Beinen des Kindes zu sehen sein. Führen Sie die Arme des Kindes unter den Schultergurten durch.
- Seite 47 Schritt 3 • Punto 3 • Etapa 3 • Stap 3 • Krok 3 • Trin 3 Passen Sie die Schultergurte nach Bedarf an, so dass das Sitz-Gurtsystem gut passt, aber nicht zu eng sitzt. Vergewissern Sie sich, dass das Sitz-Gurtsystem sicher sitzt, indem Sie es vom Körper des Kindes wegziehen.
- Seite 48 Verwenden der Ablage • Utilizzo del vassoio • Uso da bandeja • Het blad gebruiken • Korzystanie z tacki • Sådan bruges bakken Schritt 1 • Punto 1 • Etapa 1 • Stap 1 • Krok 1 • Trin 1 Befestigen Sie die Ablage am Hochstuhl, indem Sie die beiden Laschen an der Unterseite der Ablage ergreifen und nach außen ziehen.
- Seite 49 Przymocuj tackę do krzesełka, chwytając za znajdujące się na jej spodniej stronie zatrzaski i naciskając na nie w kierunku na zewnątrz. Opuść i umocuj tackę we właściwym miejscu lub też wsuń ją na odpowiednią odległość, przesuwając ją wzdłuż oparć na ręce. Zwolnij zatrzaski, upewniając się przy tym, że znalazły się one w jednej ze swoich dwóch możliwych pozycji.
-
Seite 50: Verwenden Der Einstellfunktion Für Die Liegeposition
Pas het blad aan de behoeften van het kind aan. Er zijn twee posities voor het blad. Pak de sluitingen en trek ze naar buiten. Schuif het blad naar het kind toe of er weg van, zoals u wilt. Laat de sluitingen los. Zorg dat het blad goed op zijn plaats vast zit, voordat u het gebruikt door voorzichtig aan het blad te trekken. - Seite 51 Einstellen der Liegeposition • Regolazione del reclinamento • Ajuste da reclinação • De leuning aanpassen • Regulacja położenia oparcia • Sådan justeres vippemekanismen Klick • Scatto “CLICK” Clique • Klik Klik• Klik Ziehen Sie die rechte und linke Lasche für die Liegeposition nach oben, um die Rückenlehne einzustellen.
- Seite 52 Herausnehmen des Stoffsitzpolsters zur Reinigung • Rimozione dell’imbottitura del seggiolino in stoffa per la pulizia • Remoção da almofada do assento de tecido para limpeza • Het stoelkussentje wegnemen om schoon te maken • Zdejmowanie pokrowca do czyszczenia • Sådan tages stofsædehynden af til rengøring Schritt 1 •...
- Seite 53 Tag begge skulderstropspænderne af ved at trække dem gennem sprækkerne i sædehynden et ad gangen. Gør spænderne flade, så de kan gå gennem sprækkerne uden at beskadige hynden. BEMÆRK: Det kan være lettere at fjerne spænderne ved at række op langs sædehyndens ryg.
- Seite 54 Schritt 3 • Punto 3 • Etapa 3 • Stap 3 • Krok 3 • Trin 3 Finden Sie die elastischen Schlaufen auf jeder Seite des Stoffsitzpolsters unterhalb des Arms. Lösen Sie die elastischen Schlaufen jeweils aus dem Inneren der Armstützen.
- Seite 55 Schritt 4 • Punto 4 • Etapa 4 • Stap 4 • Krok 4 • Trin 4 Finden Sie die beiden Metalllaschen an der Unterseite des Stoffsitzpolsters. Entfernen Sie die Metallverankerungen des Hüftgurts aus dem Sitz, indem Sie sie zunächst durch den Schlitz im Sitzrahmen und dann durch den Schlitz im Stoffsitzpolster ziehen.
- Seite 56 Schritt 5 • Punto 5 • Etapa 5 • Stap 5 • Krok 5 • Trin 5 Finden Sie die drei elastischen Schlaufen im hinteren unteren Bereich des Stoffsitzpolsters. Lösen Sie die elastischen Schlaufen an der Unterseite des Sitzes. Individuare i tre occhielli elastici sul retro della parte inferiore dell’imbottitura del seggiolino in stoffa.
- Seite 57 Znajdź sześć zapięć rzepowych, które znajdują w dolnej części podnóżka, od wewnętrznej strony pokrowca. Odepnij je. Przeciągnij zapięcia przez szczeliny w podnóżku. Find de seks velkrostropper ved fodstøtten på stofsædehyndens bagside. Løsn velkrostropperne fra fodstøtten. Træk stofstropperne gennem sprækkerne på fodstøtten.
- Seite 58 Schritt 8 • Punto 8 • Etapa 8 • Stap 8 • Krok 8 • Trin 8 Bringen Sie vor der nächsten Verwendung des Hochstuhls das Sitzpolster am Rahmen an, indem Sie die Schritte 1 bis 7 in umgekehrter Reihenfolge durchführen. Prima di utilizzare nuovamente il seggiolone, applicare l’imbottitura al telaio seguendo i punti da 1 a 7 in ordine inverso.
- Seite 59 Lagerung und Reisen • Conservazione e trasporto • Armazenamento e transporte • Opslag en vervoer • Przechowywanie i przewożenie • Opbevaring og transport Den Hochstuhl zur Lagerung oder für Reisen zusammenklappen: • Drücken Sie die Knöpfe an beiden Seiten der Armstützen und ziehen Sie diese nach oben. Per piegare il seggiolone per riporlo o in caso di viaggio: •...
- Seite 60 Den Hochstuhl nach Lagerung oder Reisen auseinanderklappen: Ziehen Sie an der Fußstütze nach oben und schieben Sie die Rückenlehne nach hinten, um den Rahmen auseinanderzuklappen. Arretieren Sie den Rahmen, indem Sie die Armstützen im Bereich der Knöpfe nach unten drücken. Per aprire il seggiolone e utilizzarlo dopo averlo riposto o dopo il viaggio: Per dispiegare il telaio, tirare il poggiapiedi verso l’alto e spingere lo schienale verso l’esterno.
- Seite 61 Pflege und Reinigung • Pulizia e manutenzione • Cuidados e limpeza • Onderhoud en reiniging • Pielęgnacja i czyszczenie • Pleje og rengøring Sitzpolster – Vom Rahmen abnehmen. Alle Klettverschlüsse schließen. Im Schongang mit kaltem Wasser in der Waschmaschine waschen. Zum Trocknen flach hinlegen.
- Seite 62 – 62 –...
-
Seite 63: Garantia Limitada
Kids II Eingeschränkte Garantie Kids II engagiert sich für die Herstellung innovativer, hochwertiger Produkte für Babys und Kinder. Wir garantieren, dass dieses Produkt zum Herstellungszeitpunkt keine Material- und Verarbeitungsmängel aufweist. Diese Garantie gilt für ein Jahr ab dem Tag des Neukaufs (die Verkaufsquittung ist als Kaufnachweis erforderlich). Wenn während der Laufzeit der beschränkten Garantie ein Mangel entdeckt wird, werden wir Ihr Produkt nach alleinigem Ermessen entweder gratis reparieren oder ersetzen. -
Seite 64: Begrænset Garanti
Ograniczona gwarancja Kids II Kids II dba o to, aby wytwarzać innowacyjne, wysokiej klasy produkty dla niemowląt i dzieci. Gwarantujemy, że produkt będzie pozbawiony wad materiału i wykonania istniejących w chwili wyprodukowania przez okres jednego roku od daty zakupu przez pierwszego użytkownika (wymagany jest dowód sprzedaży w postaci paragonu lub faktury).