Herunterladen Inhalt Inhalt Diese Seite drucken

ZyXEL P-335 Plus Schnellstartanleitung

Firewall router with usb print server

Werbung

Verfügbare Sprachen
  • DE

Verfügbare Sprachen

  • DEUTSCH, seite 16
P-335 Plus
Firewall Router with USB Print Server
Quick Start Guide
Table of Contents
Version 3.60
Edition 1
8/2006
ENGLISH
3
DEUTSCH
16
30
44
58
72
85

Werbung

Inhaltsverzeichnis
loading

Inhaltszusammenfassung für ZyXEL P-335 Plus

  • Seite 1: Inhaltsverzeichnis

    P-335 Plus Firewall Router with USB Print Server Quick Start Guide Version 3.60 Edition 1 8/2006 Table of Contents ENGLISH DEUTSCH ESPAÑOL FRANÇAIS ITALIANO SVENSKA 繁體中文...
  • Seite 3 The P-335 Plus is a broadband router and print server with a built-in four-port 10/100 Mbps switch. Use the USB port to share a USB v1.1 compliant printer with the computers connected to the P-335 Plus, so you don’t need to assign a dedicated computer as a print server or have a standalone print server device. These computers can also share Internet access via a broadband (cable/DSL) modem.
  • Seite 4: Hardware Connections

    LAN Connection Connect your computer to a "LAN" port using the included Ethernet cable. USB Connection Use a USB cable to connect a USB printer to this port. The P-335 Plus automatically detects the model of the USB printer. POWER Connection Use the included power adaptor to connect the POWER socket to an appropriate power source.
  • Seite 5 The PR Switch The P-335 Plus can work as a router with print server or a print server only. To configure the P-335 Plus’s operating mode, push the PR switch on the rear panel to either the P (Print server) or the R (Router) side.
  • Seite 6: Internet Access Setup

    STEP 1: System Information 1 This screen is optional. You can just click Next. • System Name is for identifying the P-335 Plus. You can enter your computer's "Computer Name". • If you leave the Domain Name blank, the domain name obtained by DHCP from the ISP is used.
  • Seite 7: Ethernet Connection

    B Select Get automatically from your ISP if your ISP did not assign you a fixed IP address. Skip to C. Select Use fixed IP address provided by your ISP to give the P-335 Plus a fixed, unique IP address. Go to B1 If you select Use fixed IP address provided by your ISP, enter a WAN IP address, WAN IP Subnet Mask and the neighboring device’s IP address given by your ISP.
  • Seite 8 ENGLISH...
  • Seite 9 C Select Get automatically from your ISP if your ISP did not assign you a fixed IP address. Skip to D. Select Use fixed IP address provided by your ISP to give the P-335 Plus a fixed, unique IP address. Go to C1 If you select Use fixed IP address provided by your ISP, enter a WAN IP address, WAN IP Subnet Mask and the neighboring device’s IP address given by your ISP.
  • Seite 10 ENGLISH...
  • Seite 11 F Select Get automatically from your ISP if your ISP did not assign you a fixed IP address. Skip to G. Select Use fixed IP address provided by your ISP to give the P-335 Plus a fixed, unique IP address. Go to F1 If you select Use fixed IP address provided by your ISP, enter a WAN IP address, WAN IP Subnet Mask and the neighboring device’s IP address given by your ISP.
  • Seite 12 ENGLISH...
  • Seite 13 Before you install the print server driver, make sure the USB printer and your computer are connected to the P-335 Plus and that both the P-335 Plus, your computer and the USB printer are turned on. 1 Insert the supplied CD into the CD-ROM driver on your computer.
  • Seite 14 D) If you still have problems, see Troubleshooting in the User’s Guide. 3 If you cannot print anything using the USB printer connected to the P-335 Plus, follow these steps. A) Make sure you install the print server driver on your computer; see section 4.
  • Seite 15 ENGLISH Viewing Your Product’s Certifications 1 Go to http://www.zyxel.com. 2 Select your product from the drop-down list box on the ZyXEL home page to go to that product's page. 3 Select the certification you wish to view from this page.
  • Seite 16: Übersicht

    Computer als Druckserver oder ein separates Druckservergerät verwenden müssen. Diese Computer können auch den Internetzugang über ein Breitbandmodem (Kabel/DSL) gemeinsam verwenden. Der P-335 Plus kann ebenfalls als ein Drucker-Server ohne die Routerfunktionen arbeiten und ermglicht auf diese Weise eine transparente Installation in Ihrem Netzwerk.
  • Seite 17: Anschließen Der Hardware

    Herstellen der LAN-Verbindung Schließen Sie Ihren Computer mit dem mitgelieferten Ethernet-Kabel an einen "LAN"-Anschluss an. USB-Anschluss Schließen Sie einen USB-Drucker mit einem USB-Kabel an diesen Anschluss an. Der P-335 Plus erkennt automatisch das Modell des USB-Druckers. Anschließen an das Stromnetz Verbinden Sie den Netzanschluss des Geräts (POWER) mit dem mitgelieferten Netzadapter mit einer...
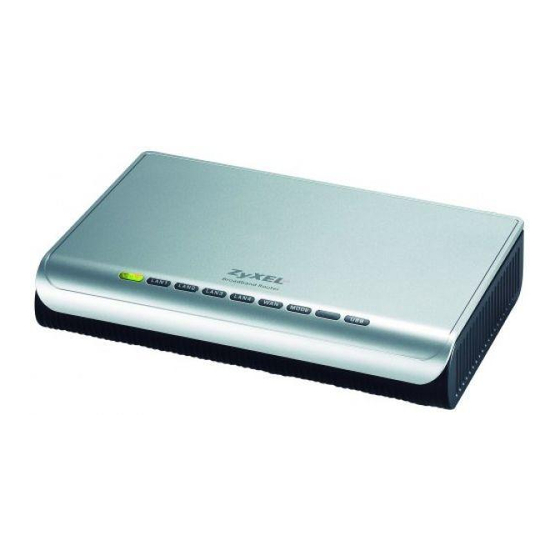
  • Seite 18: Die Led-Anzeigen

    Verbindungen bestehen. Der PR Schalter Der P-335 Plus kann als ein Router mit einem Drucker-Server oder nur als ein Drucker-Server arbeiten. Fr die Konfiguration des Betriebsmodus des P-335 Plus drcken Sie den PR Schalter an der Rckseite entweder auf P...
  • Seite 19 DEUTSCH 3 Auf dem Bildschirm erscheint das Fenster 5 Wenn Sie den P-335 Plus das erste Mal benutzen, Passwort. Geben Sie das Passwort ein ("1234" klicken Sie auf Go to Wizard setup (Zum ist das Standardpasswort) und klicken Sie auf Einrichtungsassistenten).
  • Seite 20: Einrichten Des Internetzugangs

    1 Dieses Fenster ist optional. Sie können einfach auf Next (Weiter) klicken. Der System Name (Systemname) wird für die Identifikation des P-335 Plus benötigt. Geben Sie den Namen des Computers "Computername" ein Wenn Sie das Feld Domain Name (Domainname) frei lassen, wird der Domainname verwendet, der vom DHCP des Internetdienstanbieters vorgege- ben ist.
  • Seite 21: Ethernet-Verbindung

    Wählen Sie Use fixed IP address provided by your ISP (Vom Internetdienstanbieter vorgegebene feste IP- Adresse verwenden), um dem P-335 Plus eine feste und eindeutige IP-Adresse zu geben. Gehen Sie zu B1. B1 Wenn Sie die Option Use fixed IP address provided by your ISP wählen, müssen Sie die WAN IP- Adresse, die WAN IP-Subnetz-Maske und die IP-Adresse des Standardgateway angeben, die der ISP mitgeteilt hat.
  • Seite 22 DEUTSCH...
  • Seite 23: Pppoe-Verbindung

    Wählen Sie Use fixed IP address provided by your ISP (Vom Internetdienstanbieter vorgegebene feste IP- Adresse verwenden), um dem P-335 Plus eine feste und eindeutige IP-Adresse zu geben. Gehen Sie zu C1. C1 Wenn Sie die Option Use fixed IP address provided by your ISP wählen, müssen Sie die WAN IP- Adresse, die WAN IP-Subnetz-Maske und die IP-Adresse des Standardgateway angeben, die der ISP mitgeteilt hat.
  • Seite 24 DEUTSCH...
  • Seite 25: Pptp-Verbindung

    C Wählen Sie Get automatically from your ISP (Automatisch vom Internetdienstanbieter laden), wenn Sie von Ihrem Internetdienstanbieter keine feste PPTP IP-Adresse zugewiesen bekommen haben. Oder wählen Sie Use fixed IP address (Feste IP-Adresse verwenden), um dem P-335 Plus eine feste und eideutige PPTP IP-Adresse sowie Subnet-Mask zuzuweisen.
  • Seite 26 DEUTSCH...
  • Seite 27: Einrichten Des Internetzugangs Fertig Stellen

    Der Druckservertreiber muss auf jedem Computer des Netzwerks installiert werden, der den Druckserver benutzen soll. Bevor Sie den Druckservertreiber installieren, müssen Sie sowohl den USB-Drucker als auch den Computer an den P-335 Plus anschließen und alle drei Geräte, den P-335 Plus, den Computer und den USB-Drucker einschalten.
  • Seite 28: Problembeseitigung

    D) Wenn das Problem weiterhin bestehen bleibt, lesen im Benutzerhandbuch unter Problembeseitigung nach. 3 Wenn der USB-Drucker, der an dem P-335 Plus angeschlossen ist, nichts druckt, führen Sie die folgenden Schritte aus. A) Prüfen Sie, ob der Druckservertreiber auf dem Computer installiert ist; siehe Abschnitt 4.
  • Seite 29: Schritte Zum Ansehen Der Produktzertifizierung(En)

    9 Schließen Sie das Fenster Netzwerkverbindungen. Schritte zum Ansehen der Produktzertifizierung(en) 1 Besuchen Sie http://www.zyxel.com. 2 Wählen Sie auf der ZyXEL-Homepage aus der Liste der Produkte Ihr Produkt aus. 3 Wählen Sie auf dieser die Zertifizierung aus, die Sie gerne angezeigt haben möchten.
  • Seite 30: Vista Previa

    ESPAÑOL Vista previa El P-335 Plus es un router de banda ancha y servidor de impresión con un switch incorporado de 10/100 Mbps de cuatro puertos. Utilice el puerto USB para compartir una impresora USB v1.1 compatible con los ordenadores conectados al P-335 Plus, así...
  • Seite 31 Conexión LAN Conecte su ordenador a un puerto "LAN" usando el cable Ethernet incluido. Conexión USB Utilice un cable USB para conectar una impresora USB en este puerto. El P-335 Plus detectará automáticamente el modelo de impresora USB. Conexión de ALIMENTACIÓN Utilice el adaptador de corriente incluido para conectar el zócalo POWER (ALIMENTACIÓN) a una...
  • Seite 32 El P-335 Plus puede funcionar como router con servidor de impresión sólo como servidor de impresión. Para configurar el modo de operación del P-335 Plus, presione el interruptor PR en el panel posterior hacia el lado P (servidor de impresión) o R (router).
  • Seite 33 3 Aparecerá la pantalla Password (Contraseña). 5 Haga clic en Go to Wizard setup (Asistente de Introduzca la contraseña ("1234" es la Configuración) para configurar su P-335 Plus por predeterminada) y haga clic en Login (Acceso). primera vez. 4 Cambie la contraseña en la pantalla siguiente y haga clic en Apply (Aplicar).
  • Seite 34 1 Esta pantalla es opcional. Puede hacer clic en Next (Siguiente). • System Name (Nombre del sistema) es para identificar el P-335 Plus. Puede introducir el "Computer Name" (Nombre de ordenador) de su ordenador. • Si deja el Domain Name (Nombre de dominio) en blanco, se utilizará...
  • Seite 35: Conexión Ethernet

    C Seleccione Factory Default (Predeterminado de fábrica) para utilizar la dirección MAC predeterminada asignada de fábrica. D Seleccione esta casilla para que P-335 Plus aplique la administración de ancho de banda. Haga clic en Apply (Aplicar) para guardar la configuración personalizada.
  • Seite 36 ESPAÑOL...
  • Seite 37 D Seleccione Factory Default (Predeterminado de fábrica) para utilizar la dirección MAC predeterminada asignada de fábrica. E Seleccione esta casilla para que P-335 Plus aplique la administración de ancho de banda. Haga clic en Apply (Aplicar) para guardar la configuración personalizada.
  • Seite 38 ESPAÑOL...
  • Seite 39 C Seleccione Get automatically from your ISP (Obtener automáticamente de su ISP) si su ISP no le asignó una dirección IP PPTP fija. O seleccione Use fixed IP address (Utilizar dirección IP fija) para dar al P-335 Plus una dirección IP PPTP única y fija y una máscara de subred.
  • Seite 40 ESPAÑOL...
  • Seite 41 Antes de instalar el controlador del servidor de impresión, compruebe que la impresora USB y su ordenador están conectados al P-335 Plus y que tanto el P-335 Plus, como su ordenador y la impresora USB están encendidos.
  • Seite 42: Solución De Problemas

    D) Si continúa teniendo problemas, consulte Solución de problemas en la Guía del usuario. 3 Si no puede imprimir nada con la impresora USB conectada al P-335 Plus, siga estos pasos. A) Asegúrese de haber instalado el controlador del servidor de impresión en su ordenador; ver sección 4.
  • Seite 43 Procedimiento para ver la(s) certificación(es) del producto 1 Vaya a http://www.zyxel.com. 2 Seleccione su producto de la lista desplegable en la página inicial de ZyXEL para ir a la página de ese producto. 3 Seleccione la certificación que desee visualizar en esta página.
  • Seite 44: Présentation

    FRANÇAIS Présentation Le P-335 Plus est un routeur large bande et un serveur d'imprimante avec un commutateur 10/100 Mbps à quatre ports intégré. Utilisez le port USB pour partager une imprimante compatible USB v1.1 avec les ordinateurs connectés au P-335 Plus, ainsi vous n'avez pas besoin d'assigner un ordinateur dédié comme serveur d'impression ou d'avoir un serveur d'impression périphérique séparé.
  • Seite 45 Connexion par réseau local Connectez votre ordinateur à un port "LAN" à l'aide du câble Ethernet fourni. Connexion USB Utilisez un câble USB pour connecter une imprimante USB à ce port. Le P-335 Plus détecte automatiquement le modèle d'imprimante USB. Connexion de l'alimentation Utilisez l’adaptateur d’alimentation fourni pour connecter à...
  • Seite 46 FRANÇAIS Le commutateur PR Le P-335 Plus peut fonctionner comme un routeur avec un serveur d’impression ou comme un serveur d’impression uniquement. Pour configurer le mode de fonctionnement du P-335 Plus, poussez sur le commutateur PR situé sur le panneau arrière vers le côté P (Serveur d'imprimante) ou R (Routeur).
  • Seite 47 3 La fenêtre Password (Mot de passe) s'affiche. 5 Cliquez sur Go to Wizard setup (Aller à l'assistant Entrez le mot de passe ("1234" est la valeur par de paramétrage) pour paramétrer votre P-335 Plus défaut) et cliquez sur Login (Connexion). pour la première fois.
  • Seite 48 1 Cet écran est optionnel. Cliquez simplement sur Next (Suivant). • System Name (Le nom du système) sert à identi- fier le P-335 Plus. Vous pouvez saisir le "Nom d'ordinateur" de votre ordinateur. • Si vous laissez Domain Name (le nom de domaine) vide, le nom de domaine obtenu par DHCP de l'ISP est utilisé.
  • Seite 49: Connexion Ethernet

    C Sélectionnez Factory Default (Par défaut d'usine) pour utiliser l'adresse MAC par défaut attribuée en usine. D Sélectionnez cette case à cocher pour faire en sorte que le P-335 Plus applique la gestion de bande passante. Cliquez sur Apply (Appliquer) pour enregistrer vos paramètres personnalisés.
  • Seite 50 FRANÇAIS...
  • Seite 51 D Sélectionnez Factory Default (Par défaut d'usine) pour utiliser l'adresse MAC par défaut attribuée en usine. E Sélectionnez cette case à cocher pour faire en sorte que le P-335 Plus applique la gestion de bande passante. Cliquez sur Apply (Appliquer) pour enregistrer vos paramètres personnalisés.
  • Seite 52 FRANÇAIS...
  • Seite 53 C Sélectionnez Get automatically from ISP (Obtenir automatiquement de l'ISP) si votre FAI ne vous a pas attribué une adresse PPTP IP fixe. Ou sélectionnez Use fixed IP address (Utiliser une adresse IP fixe) pour donne au P-335 Plus une adresse IP PPTP fixe et unique et un masque de sous-réseau.
  • Seite 54 FRANÇAIS...
  • Seite 55 Le pilote du serveur d'impression doit être installé sur chaque ordinateur de votre réseau qui utilisera le serveur d'impression. Avant d'installer le pilote de serveur d'impression, assurez-vous que l'imprimante USB et votre ordinateur sont connectés au P-335 Plus et que le P-335 Plus, votre ordinateur et l'imprimante USB sont tous allumés.
  • Seite 56 C) Si vous utilisez un nouveau compte Internet, contactez votre FAI pour confirmer l'activation du compte. D) Si vous avez toujours des problèmes, consultez Dépannage dans le Guide de l'Utilisateur. 3 Si vous ne pouvez rien imprimer en utilisant l'imprimante USB connectée au P-335 Plus, suivez les étapes suivantes.
  • Seite 57 Procédure pour Afficher la (les) certification(s) d'un produit 1 Allez à http://www.zyxel.com. 2 Sélectionnez votre produit dans la boîte de la liste déroulante dans la page d'accueil de ZyXEL pour aller à la page de ce produit. 3 Sélectionnez la certification que vous désirez consulter dans cette page.
  • Seite 58: Cenni Generali

    Cenni generali Il P-335 Plus è un router broadband e un server di stampa con uno switch 10/100 Mbps a quattro porte incorporato. Utilizzare la porta USB per condividere una stampante conforme USB v1.1 con i computer collegati a P-335 Plus, così...
  • Seite 59: Indicatori Led

    Collegamento LAN Collegare il computer alla porta "LAN" utilizzando un cavo Ethernet fornito a corredo. Collegamento USB Utilizzare un cavo USB per collegare una stampante USB a questa porta. P-335 Plus rileva automaticamente il modello della stampante USB. Collegamento POWER Utilizzare l'alimentatore incluso per collegare la presa POWER a una sorgente di alimentazione appropriata.
  • Seite 60 ITALIANO Selettore PR Il P-335 Plus può operare come router con server di stampa o solo come server di stampa. Per configurare la modalità operativa del P-335 Plus, impostare il selettore PR situato sul pannello posteriore su P (server di stampa) o su R (router).
  • Seite 61 ITALIANO Nota: Se non viene visualizzata la schermata di login, controllare le impostazioni di sicurezza del browser (vedere Risoluzione dei problemi per i dettagli) oppure verificare che il computer sia impostato per ricedere dinamicamente un indirizzo IP (vedere Impostare l'indirizzo IP del computer).
  • Seite 62 1 Questa schermata è opzionale. È unicamente possibile fare clic su Next (avanti). • System Name (nome di sistema) consente di indentificare il P-335 Plus. È possibile immettere il "Nome computer" del proprio PC. • Lasciando vuoto il campo Domain Name, viene utilizzato il nome di dominio ottenuto dal DHCP dell'ISP.
  • Seite 63: Collegamento Ethernet

    C Selezionare Factory Default (Predefinito di fabbrica) per utilizzare l'indirizzo MAC predefinito assegnato in fabbrica. D Selezionare questa casella di controllo per far sì che P-335 Plus applichi la gestione della larghezza di banda. Fare clic su Apply (Applica) per salvare le impostazioni personalizzate.
  • Seite 64 ITALIANO...
  • Seite 65 D Selezionare Factory Default (Predefinito di fabbrica) per utilizzare l'indirizzo MAC predefinito assegnato in fabbrica. E Selezionare questa casella di controllo per far sì che P-335 Plus applichi la gestione della larghezza di banda. Fare clic su Apply (Applica) per salvare le impostazioni personalizzate.
  • Seite 66 ITALIANO...
  • Seite 67 G Selezionare Factory Default (Predefinito di fabbrica) per utilizzare l'indirizzo MAC predefinito assegnato in fabbrica. H Selezionare questa casella di controllo per far sì che P-335 Plus applichi la gestione della larghezza di banda. Fare clic su Apply (Applica) per salvare le impostazioni personalizzate.
  • Seite 68 ITALIANO...
  • Seite 69 Prima di installare il driver del server di stampa, verificare che la stampante USB e il computer siano collegati al P-335 Plus e che entrambi i P-335 Plus, di computer e stampante USB, siano accesi. 1 Inserire il CD fornito in dotazione nell'unità CD-ROM del computer.
  • Seite 70: Risoluzione Dei Problemi

    Questa sezione spiega come configurare il computer per ricevere un indirizzo IP in Windows 2000, Windows NT e Windows XP. In questo modo ci si assicura che il computer possa comunicare con lo P-335 Plus. 1 In Windows XP, fare clic su Start, Pannello di controllo.
  • Seite 71 Procedura per visualizzare le certificazioni di un prodotto 1 Aprire la pagina http://www.zyxel.com. 2 Selezionare il prodotto dall'elenco di riepilogo a discesa nella Home Page di ZyXEL per passare alla pagina del prodotto in questione. 3 Selezionare da questa pagina la certificazione che si desidera visualizzare.
  • Seite 72: Svenska

    P-335 Plus är en bredbandsrouter och printserver med en inbyggd fyraportars 10/100 Mbps-switch. Använd USB- porten för att dela en USB v1.1-anpassad skrivare med datorerna som är anslutna till P-335 Plus, så att du inte behöver tilldela en dedikerad dator som printserver eller ha en fristående printserverenhet. Dessa datorer kan även dela Internet-åtkomst via ett bredbandsmodem (kabel/DSL).
  • Seite 73 LAN-anslutning Anslut datorn till en "LAN"-port med den medföljande Ethernet-sladden. USB-anslutning Använd en USB-sladd för att ansluta en USB-skrivare till denna port. P-335 Plus upptäcker automatiskt modell för USB-skrivaren. Strömanslutning Använd den medföljande strömadaptern för att ansluta uttaget POWER (ström) till en lämplig strömkälla.
  • Seite 74 SVENSKA PR-switch P-335 Plus kan fungera som en router med printserver eller enbart som en printserver. Du konfigurerar P-335 Plus användningsläge genom att trycka PR-omkopplaren på bakpanelen till antingen sidan med P (printserver) eller R (router). Note: Anslutningsguiden är endast tillgänglig då P-335 Plus befinner sig i router-läge.
  • Seite 75 1 Denna skärm är valfri. Du kan helt enkelt klicka på Next (nästa). • System Name (systemnamn) handlar om att iden- tifiera P-335 Plus. Du kan ange din dators "Com- puter Name" (datornamn). • Om du lämnar Domain Name (domännamn) tomt, används det domännamn som erhållits av DHCP...
  • Seite 76 C Select Factory Default (fabriksstandard) om du vill använda den fabrikstilldelade MAC-adressen. D Markera kryssrutan för att låta P-335 Plus applicera bandbreddshantering till trafik som går ut genom P-335 Plus:s WAN- eller LAN-port beroende på trafiktyp. Klicka på Apply (verkställ) för att spara dina ändringar.
  • Seite 77 SVENSKA...
  • Seite 78 D Select Factory Default (fabriksstandard) om du vill använda den fabrikstilldelade MAC-adressen. E Markera kryssrutan för att låta P-335 Plus applicera bandbreddshantering till trafik som går ut genom P-335 Plus:s WAN- eller LAN-port beroende på trafiktyp. Klicka på Apply (verkställ) för att spara dina ändringar.
  • Seite 79 SVENSKA...
  • Seite 80 C Välj Get automatically from your ISP (hämta automatiskt från ISP) om din ISP inte har tilldelat dig en fast PPTP IP-adress. Eller välj Use fixed IP address (använd fast IP-adress) för att ge P-335 Plus en fast, unik PPTP IP-adress och subnetmask.
  • Seite 81 SVENSKA...
  • Seite 82 4 Inställning av printserverdrivrutin Printserverdrivrutinen måste installeras på varje dator i ditt nätverk som ska använda printservern. Innan du installerar printserverdrivrutinen, kontrollera att USB-skrivaren och din dator är anslutna till P-335 Plus och att både P-335 Plus, din dator och USB-skrivaren är påslagna.
  • Seite 83: Ställa In Datorns Ip-Adress

    D) Om du fortfarande har problem, se Felsökning i bruksanvisningen. 3 Om du inte kan skriva ut något med USB-skrivaren som är ansluten till P-335 Plus, följ dessa steg. A) Se till att du installerar printserverdrivrutinen på din dator; se avsnitt 4.
  • Seite 84 9 Stäng skärmen Network Connections (nätverksanslutningar). Visa din produkts certifikat 1 Gå till http://www.zyxel.com. 2 Välj din produkt från rullgardinslistrutan på ZyXEL:s hemsida för att gå till denna produkts sida. 3 Välj det certifikat du vill titta på från denna sida.
  • Seite 85: 繁體中文

    繁體中文 概要 P-335 Plus 為一部寬頻路由器和列印伺服器,具有一個內建的 4- 連接埠 10/100 Mbps 交換器。使用 USB 埠 即可與連接至 P-335 Plus 的電腦分享符合 USB v1.1 介面標準的印表機,不需要配置一台專用電腦作為列印伺 服器,亦不需有獨立的列印伺服器裝置。這些電腦也可以透過寬頻 (cable/DSL) 數據機分享網際網路存取。 P- 335 Plus 也可作為一部沒有路由器功能的列印伺服器,容許您直接安裝在您的網路之中。 您應已經設定好一個網際網路的帳號,並取得以下的資訊。 表 1 網際網路帳號資訊 設備的廣域網路 IP 位址 ( 如有 ): ______________ DNS 伺服器 IP 位址 ( 如有 ): 主要 _____________, 次要 ______________ 連接型態...
  • Seite 86 繁體中文 1 硬體連接 初步設定作以下硬體連線。 廣域網路連接 用您的數據機所附的纜線將數據機連接到 「WAN」 埠。 區域網路連接 將您的電腦用所附的乙太網路電纜連接到一個 「LAN」埠。 USB 連接 使用 USB 纜線將 USB 印表機連接至此埠。 P-335 Plus 會自動偵測 USB 印表機的型號。 電源連接 用所附的電源轉換器將 「POWER」 插座連接到適當的電源。 請檢視上端面板的 LED。當您連接電源時, PWR LED 指示燈會閃爍,一旦裝置準備就緒便 會停止。 當相對的連接完成後 LAN 與 WAN LED 會點 亮。...
  • Seite 87 式,請按下後面板上的 PR 交換器至 P ( 列印伺服器 ) 或是 R ( 路由器 ) 側。 注意 : 只有當 P-335 Plus 處於路由器模式時,才可使用連線精靈。 列印伺服器模式的 P-335 Plus 並不支援 DHCP 伺服器。欲存取網頁設定介面,請確認您電腦 的 IP 位址與 P-335 Plus 在相同的子網路。當 P-335 Plus 處於列印伺服器模式,所有的 LAN 和 WAN 連接埠可作為集線器。 2 使用網頁設定工具...
  • Seite 88 7 點繼續進行到連線精靈。 3 網際網路接取設定 注意 : 將您的 ISP 所給予的網際網路接取資訊輸入每一個精靈畫面,然後點 繼續 ,或點 返回回到上 一個畫面。 如果點 返回,您會失去現在畫面上的所有資訊。 第一步:系統資訊 1 本畫面是非必要的。您可以直接點繼續。 • 系統名稱是用來識別本台 P-335 Plus。您可以輸入 您的電腦的 「電腦名稱」 。 • 如果讓 網域名稱 空白,網域名稱會以 DHCP 由 所用的 ISP 取得。 第二步:廣域網路 由下拉式清單方塊選取一個連線類型。與您的 ISP 確認所選的類型正確: 1 乙太網路...
  • Seite 89 B 如果您的 ISP 不配置固定 IP 位址,選擇自動由 ISP 取得 。跳到 C。 或 如要賦與 P-335 Plus 一個固定、唯一的 IP 位址,選擇 使用 ISP 提供的固定 IP 位址。 前往 B1。 B1 如果您選取 Use fixed IP address provided by your ISP ( 使用 ISP 提供的固定 IP 位址 ),請輸入...
  • Seite 90 C 如果您的 ISP 不配置固定 IP 位址,選擇自動由 ISP 取得 。跳到 D。 或 如要賦與 P-335 Plus 一個固定、唯一的 IP 位址,選擇 使用 ISP 提供的固定 IP 位址。 前往 C1。 C1 如果您選取 Use fixed IP address provided by your ISP ( 使用 ISP 提供的固定 IP 位址 ),請輸入...
  • Seite 91 繁體中文...
  • Seite 92 F 如果您的 ISP 不配置固定 IP 位址,選擇自動由 ISP 取得 。跳到 G。 或 如要賦與 P-335 Plus 一個固定、唯一的 IP 位址,選擇 使用 ISP 提供的固定 IP 位址。 前往 F1。 F1 如果您選取 使用 ISP 提供的固定 IP 位址,請輸入 WAN IP 位址、WAN IP 子網路遮罩以及 ISP 提供 的鄰近裝置 IP 位址。...
  • Seite 93 繁體中文...
  • Seite 94 示。 按一下 完成,完成精靈設定。 4 列印伺服器驅動程式安裝 列印伺服器驅動程式必須安裝在網路中會使用列印伺服器的每台電腦上。安裝列印伺服器驅動程式之前,請確認 USB 印表機和電腦都連接至 P-335 Plus,而且 P-335 Plus、電腦和 USB 印表機都已開啟。 1 將隨附光碟片置入電腦的 CD-ROM 光碟機。CD Autorun ( 光 碟自動執行 ) 畫面會自動出現。 2 選取 Network Print Server Setup ( 網路列印伺服器安裝 )。 3 選取 Setup Wizard for Windows NT/2000/XP (Windows NT/ 2000/XP 安裝精靈...
  • Seite 95 節 ) 如果指示燈的狀態仍然不同,請關閉裝置,等待數秒後再重新開啟。 B) 遵循第 3 節的步驟再進行一次。確認輸入的是正確資訊。例如,如果您的帳號有使用者名稱和密碼,請確 認輸入的資料正確。此外,如果不確定 ISP 使用何種加密方式,請聯絡您的 ISP。 C) 如果使用新的網際網路帳號,請聯絡 ISP 確認該帳號已啟動。 D) 如果仍有問題,請參閱 《使用手冊》的疑難排解。 P-335 Plus 的 USB 印表機進行列印,請遵循下列步驟。 3 如果無法使用連接至 A) 確認電腦上安裝了列印伺服器驅動程式;請參閱第 4 節。 B) 確認 USB 印表機電源開啟而且運作正常。 C) 檢查 USB 纜線的連接。 設定電腦的 IP 位址...

Inhaltsverzeichnis