Werbung
Quicklinks
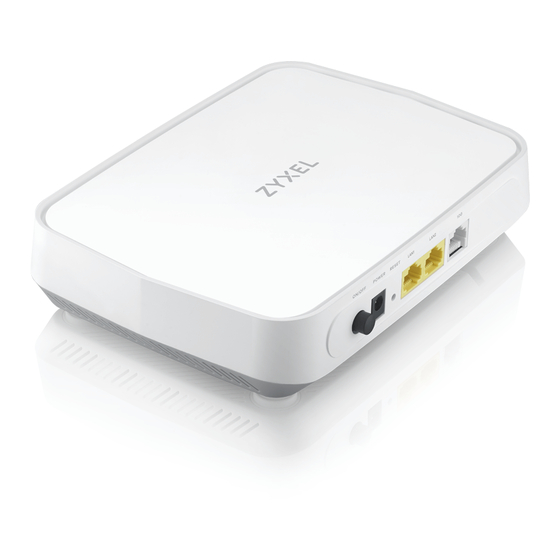
PM7320-B0
10G XGSPON/NGPON2 ONT
Quick Start Guide
ENGLISH | DEUTSCH | FRANÇAIS | ITALIANO | ESPAÑOL |
NEDERLANDS | SUOMI | 繁體中文
Step 1
Hardware Installation
1
3
Warning! To avoid possible eye injury, do NOT look into
POWER
ON
an operating fiber-optic module's connector.
POWER
RESET
POWER
5
1/2
2
4
10G
LAN or 10G
6
PC
PoE Switch
Package Contents
PM7320-B0
Power Adapter
Ethernet Cable
See the User's Guide at www.zyxel.com for more information,
including customer support and safety warnings.
EU Importer
Zyxel Communications A/S
Gladsaxevej 378, 2. th. 2860 Søborg, Denmark.
https://www.zyxel.com/dk/da/
US Importer
Zyxel Communications, Inc
1130 North Miller Street Anaheim, CA 92806-2001
https://www.zyxel.com/us/en/
Copyright © 2020 Zyxel Communications Corp. All Rights Reserved.
EN
1
(Optional) Remove the cover on the PON port.
Connect the fiber optic cable from your service provider's network to the PON port.
2
3
Carefully coil the fiber-optic cable from inside to outside. Make sure the cable goes
under the tabs to keep it in place. Do not exceed 2.5 meters of fiber optic cable with
an outer diameter of 3.0 mm.
(Optional) Put the PON port cover back.
4
5
Use the included power adapter to connect the power socket to a power outlet. Press
the ON/OFF button to turn on the PM7320-B0.
Connect a computer to a LAN port or 10G port using the yellow Ethernet cable.
6
DE
1
(Optional) Entfernen Sie die Abdeckung am PON Anschluss.
Schließen Sie das Glasfaserkabel von Ihrem Dienstanbieter an den PON Anschluss an.
2
Wickeln Sie das Glasfaserkabel vorsichtig von innen nach außen. Stellen Sie sicher, dass
3
das Kabel unter die Laschen geführt wird, und es dort gehalten wird. Überschreiten Sie
nicht 2,5 Meter Glasfaserkabel mit einem Außendurchmesser von 3,0 mm.
(Optional) Setzen Sie die Abdeckung des PON Anschlusses wieder ein.
4
Schließen Sie den mitgelieferten Netzadapter an den Netzanschluss und an eine Steck-
5
dose an. Drücken Sie auf die ON/OFF Taste, um den PM7320-B0 einzuschalten.
Schließen Sie einen Computer mit dem gelben Ethernet-Kabel an den LAN/10G-Port an.
6
FR
1
(Option) Retirez le couvercle du port PON.
2
Connectez le câble à fibre optique du réseau de votre fournisseur de services au port PON.
Enroulez soigneusement la fibre optique de l'intérieur vers l'extérieur. Assurez-vous que le
3
câble passe sous les languettes pour le maintenir en place.La longueur du câble à fibre
optique ne doit pas dépasser 2,5 mètres avec un diamètre extérieur de 3,0 mm.
(Option) Replacez le couvercle du port PON.
4
Utilisez l'adaptateur d'alimentation fourni pour connecter le périphérique à une prise
5
secteur. Appuyez sur le bouton ON / OFF pour allumer le PM7320-B0.
6
Connectez un ordinateur au port LAN/10G à l'aide du câble Ethernet jaune.
IT
1
(Opzionale) Rimuovere la copertura dalla porta PON.
2
Collegare il cavo in fibra ottica dalla rete del fornitore di servizi alla porta PON.
Avvolgere con attenzione il cavo della fibra ottica da dentro a fuori. Verificare che il cavo
3
sia tenuto fermo dalle linguette.Non superare i 2,5 metri di cavo di fibra ottica con diamet-
ro esterno di 3,0 mm.
(Opzionale) Rimettere a posto la copertura della porta PON.
4
Utilizzare l'alimentatore fornito a corredo per collegare la presa di alimentazione a una
5
presa della corrente. Premere il pulsante ON/OFF pre accedere l'PM7320-B0.
Collegare un computer alla porta LAN/10G mediante il cavo Ethernet Giallo.
6
ES
(Opcional) Retire la tapa del puerto PON.
1
2
Conecte el cable de fibra óptica de la red de su proveedor de servicios al puerto PON.
3
Enrolle con cuidado el cable de fibra óptica desde dentro hacia afuera. Asegúrese de que
el cable pase por debajo de las pestañas para mantenerlo en su lugar. La distancia del
cable de fibra óptica con un diámetro exterior de 3,0 mm no debe exceder de 2,5 metros.
4
(Opcional) Vuelva a colocar la tapa del puerto PON.
5
Utilice el adaptador de alimentación incluido para conectar el enchufe de alimentación a
una toma de corriente. Presione el botón ON/OFF para encender el PM7320-B0.
Conecte un equipo al puerto LAN/10G con el cable Ethernet amarillo.
6
NL
1
(Optioneel) Verwijder de hoes van de PON-poort.
Verbind de glasvezelkabel van het netwerk van je service provider met de PON-poort.
2
Rol de glasvezelkabel voorzichtig van binnen naar buiten. Zorg ervoor dat de kabel onder
3
de uitsteeksels gaat om hem op zijn plaats te houden. Gebruik geen glasvezelkabel langer
dan 2,5 met een buitendiameter can 3,0 mm.
4
(Optioneel) Plaats de hoes van de PON-poort terug.
Gebruik de bijgesloten stroomadapter om de router op een stopcontact aan te sluiten.
5
Druk op de ON/OFF-toets om de PM7320-B0 aan te schakelen.
Sluit een computer aan op de LAN/10G-poort met de gele Ethernetkabel.
6
FI
(Valinnainen) Poista suoja PON-portin päältä.
1
2
Liitä operaattorin valokuitukaapeli PON-porttiin.
3
Kelaa valokuitukaapeli varovasti sisältä ulospäin. Varmista, että kaapeli menee kielek-
keiden alle.Älä ylitä 2,5 metrin pituutta, jos valokuitukaapelin ulkohalkaisija on 3,0 mm.
(Valinnainen) Aseta PON-portin suoja takaisin paikalleen.
4
Yhdistä mukana toimitettu virtalähde pistorasiaan ja virtajohto modeemiin. Käynnistä
5
PM7320-B0 painamalla virtakytkin pohjaan (ON/OFF).
Kytke tietokone LAN/10G-porttiin keltaisella Ethernet-kaapelilla.
6
(選擇性)移除 PON 埠上的蓋子。
繁中
1
將光纖電纜從服務供應商的網路連接到 PON 埠。
2
小心將光纖纜線從內側繞到外側, 確定纜線穿過扣片下方,以固定位置。請使用外徑 3.0 公釐,
3
長度不超過 2.5 公尺的光纖纜線。
(選擇性)裝回 PON 埠的蓋子。
4
使用內附的電源變壓器,選用合適的插頭,並將其連接至電源插座。按下 ON/OFF 按鈕以開啟
5
PM7320-B0。
使用黃色的乙太網路線,將電腦連接到 LAN/10G 埠。
6
DoC
Quick Start
Declaration of
Guide
Conformity
Safety Warnings
Werbung

Verwandte Anleitungen für ZyXEL PM7320-B0


Inhaltszusammenfassung für ZyXEL PM7320-B0
- Seite 1 (Optional) Setzen Sie die Abdeckung des PON Anschlusses wieder ein. Schließen Sie den mitgelieferten Netzadapter an den Netzanschluss und an eine Steck- dose an. Drücken Sie auf die ON/OFF Taste, um den PM7320-B0 einzuschalten. Schließen Sie einen Computer mit dem gelben Ethernet-Kabel an den LAN/10G-Port an.
- Seite 2 Unit: mm Posizionare il PM7320-B0 in modo che i fori di montaggio a parete siano allineati con le viti (2-a). Far scorrere delicatamente il PM7320-B0 verso il basso per fissarlo in posizione (2-b). Perfore dos agujeros en la pared a una distancia de 134mm. Inserte los anclajes de los tornillos y los tornillos (no incluidos).