Klarstein Lausanne Handbuch
Vorschau ausblenden
Andere Handbücher für Lausanne:
- Bedienungsanleitung (9 Seiten) ,
- Bedienungsanleitung (68 Seiten) ,
- Bedienungsanleitung (90 Seiten)
Inhaltsverzeichnis
Verfügbare Sprachen
Verfügbare Sprachen
Quicklinks
Lausanne
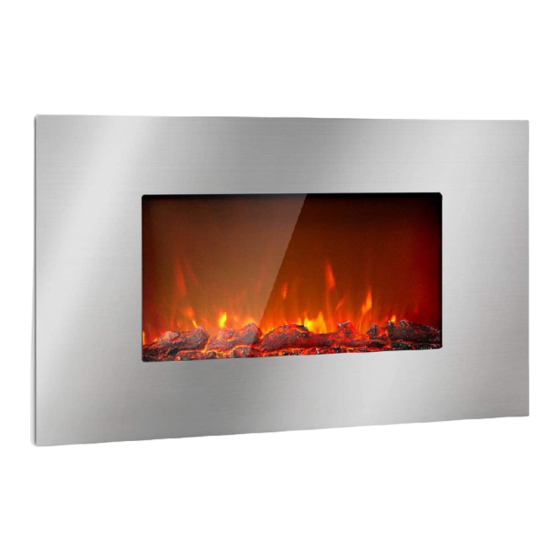
Elektrischer Kamin
Electric Fireplace
Chimenea eléctrica
Cheminée électrique
Camino elettrico
10034250 10034251
Hinweis: Das Gerät eignet sich nicht zur Nutzung
als primäre Heizquelle.
Note: The device is not suitable for use as a
primary heat source.
Remarque : l'appareil ne convient pas en tant que
source principale de chauffage.
Nota: il dispositivo non è idoneo ad essere
utilizzato come fonte di riscaldamento primaria.
Advertencia: el aparato no es apto para utilizar
como fuente de calefacción primaria.
Kapitel
Inhaltsverzeichnis

Verwandte Anleitungen für Klarstein Lausanne


Inhaltszusammenfassung für Klarstein Lausanne
- Seite 1 Lausanne Hinweis: Das Gerät eignet sich nicht zur Nutzung als primäre Heizquelle. Note: The device is not suitable for use as a Elektrischer Kamin primary heat source. Remarque : l‘appareil ne convient pas en tant que Electric Fireplace source principale de chauffage.
-
Seite 3: Inhaltsverzeichnis
Sehr geehrter Kunde, wir gratulieren Ihnen zum Erwerb Ihres Gerätes. Lesen Sie die folgenden Hinweise sorgfältig durch und befolgen Sie diese, um möglichen Schäden vorzubeugen. Für Schäden, die durch Missachtung der Hinweise und unsachgemäßen Gebrauch entstehen, übernehmen wir keine Haftung. Scannen Sie den folgenden QR-Code, um Zugriff auf die aktuellste Bedienungsanleitung und weitere Informationen rund um das Produkt zu erhalten. -
Seite 4: Produktdatenblatt
PRODUKTDATENBLATT Modellkennung(en) 10034250, 10034251 Angabe Symbol Wert Einheit Angabe Einheit Wärmeleistung Nur bei elektrischen Speicher-Einzelraumheizgeräten: Art der Regelung der Wärmezufuhr Nennwärmeleistung Manuelle Regelung der Wärmezufuhr mit k.A. integriertem Thermostat Mindestwärmeleistung Manuelle Regelung der Wärmezufuhr k.A. (Richtwert) mit Rückmeldung der Raum- und/oder Außentemperatur Maximale kontinuierliche Elektronische Regelung der Wärmezufuhr... -
Seite 5: Sicherheitshinweise
SICHERHEITSHINWEISE • Prüfen Sie vor der Benutzung die Spannung auf der Geräteplakette und schließen Sie das Gerät nur an Steckdosen an, die der Spannung des Geräts entsprechen. • Falls das Netzkabel beschädigt ist, lassen Sie es von einer ausgebildeten Fachkraft ersetzen. •... -
Seite 6: Installation
INSTALLATION Wählen Sie die Wand, an der Sie Ihre elektrische Heizung aufhängen möchten. Zeichne eine horizontale Linie mit einer Wasserwaage und markiere 3 Bohrungen für die Befestigungsschrauben. Die Löcher sind für die Montage des Kamins bestimmt und müssen eben sein, damit der Kamin ordnungsgemäß montiert und nivelliert werden kann. - Seite 7 Befestigen Sie die Montagehalterung mit den 3 Befestigungsschrauben an den Dübeln. Setzen Sie die Metallwinkel an der Rückseite des Kamins auf die Halterung. Achten Sie darauf, dass die Montagehalterung vollständig in die Metallwinkel an der Rückseite des Geräts eingerastet ist.
-
Seite 8: Displayanzeigen
DISPLAYANZEIGEN Ein/Aus Timer ein Heizen 1 Timer aus Heizen 2 Fenstererkennung Temperaturanzeige Helligkeit Wochentag Zeitanzeige Hinweis: Das Gerät schaltet sich automatisch aus, wenn die Temperatur plötzlich (durch Öffnen eines Fensters) um 5-10°C sinkt. In diesem Fall leuchtet die Anzeige Fenstererkennung (8) auf. -
Seite 9: Bedienfeld Und Tastenfunktionen
BEDIENFELD UND TASTENFUNKTIONEN Power: Drücken Sie diese Taste einmal. Das Gerät und die Flamme werden eingeschaltet und Sie können die folgenden Funktionen beliebig auswählen. Drücken Sie diese Taste erneut, um das Gerät auszuschalten. Zeit: Drücken Sie diese Taste und Flamme+ oder Flamme-, um die aktuelle Zeit (Wochentag, Stunde, Minute) einzustellen. -
Seite 10: Fernbedienung Und Tastenfunktionen
FERNBEDIENUNG UND TASTENFUNKTIONEN Power: Drücken Sie diese Taste einmal. Das Gerät und die Flamme werden eingeschaltet und Sie können die folgenden Funktionen beliebig auswählen. Drücken Sie diese Taste erneut, um das Gerät auszuschalten. Aktuellen Wochentag einstellen. Drücken Sie die DAY-Taste, um den aktuellen Wochentag einzustellen, bevor Sie die Einstellungen für die Woche eingeben. -
Seite 11: Reinigung Und Pflege
Drücken Sie die Taste, nach dem Sie WEEK gedrückt haben, um den Wochentimer einzuschalten (ON) oder auszuschalten (OFF). Drücken Sie die Taste, um die Helligkeit einzustellen. Heizung: Zwei Einstellungen. Drücken Sie die Taste einmal für eine niedrige Heizleistung. Drücken Sie die Taste zweimal für eine hohe Heizleistung. Drücken Sie die Taste erneut, um die Heizung auszuschalten. -
Seite 12: Hinweise Zur Entsorgung
HINWEISE ZUR ENTSORGUNG Befindet sich die linke Abbildung (durchgestrichene Mülltonne auf Rädern) auf dem Produkt, gilt die Europäische Richtlinie 2012/19/EU. Diese Produkte dürfen nicht mit dem normalen Hausmüll entsorgt werden. Informieren Sie sich über die örtlichen Regelungen zur getrennten Sammlung elektrischer und elektronischer Gerätschaften.