Herunterladen Inhalt Inhalt Diese Seite drucken
Inhaltsverzeichnis

Werbung

Verfügbare Sprachen
  • DE

Verfügbare Sprachen

  • DEUTSCH, seite 33
Handleiding ComfoSense C
Manual ComfoSense C
Betriebsaneitung ComfoSense C
Manuel ComfoSense C
Manuale ComfoSense C
Instrukcja obsługi ComfoSense C
Manual ComfoSense C
Heating
Cooling
Fresh Air
Clean Air
ComfoSense C55
ComfoSense C67
ComfoSense CCH
1

Werbung

Inhaltsverzeichnis
loading

Inhaltszusammenfassung für Zehnder ComfoSense C Serie

  • Seite 1 Handleiding ComfoSense C Manual ComfoSense C Betriebsaneitung ComfoSense C Manuel ComfoSense C Manuale ComfoSense C Instrukcja obsługi ComfoSense C Manual ComfoSense C Heating Cooling Fresh Air Clean Air ComfoSense C55 ComfoSense C67 ComfoSense CCH...
  • Seite 2 fig.1 - ComfoSense C55 fig.2 - ComfoSense C67 fig.3 - ComfoSense C67mtb fig.4 - ComfoSense CCH ComfoSense CAN_L CAN_L CAN_H CAN_H fig.5...
  • Seite 3: Inhaltsverzeichnis

    In geval van een geschil zal de Engelse versie van deze instructies bindend zijn. Hierbij verklaart Zehnder dat het toestel ComfoSense C in overeenstemming is met de essentiële eisen en de andere relevante bepalingen van richtlijn 1999/5/EG.
  • Seite 4 ■ Vanuit het hoofdscherm: Knoppen Het ventilatiedebiet ■ Vanuit het hoofdscherm: verlagen Het basismenu openen; ■ Vanuit een menu: ■ Vanuit een menu: De verlagingswaarden van Eén niveau omhoog in de het menu doorlopen. menustructuur. Weergave ■ In de SHIFT-modus: Het geavanceerde menu ■...
  • Seite 5: Inleiding

    Inleiding Kinderen mogen niet met het toestel spelen. De ComfoSense C (hierna genoemd Door de gebruiker uit te voeren reini- 'apparaat') is een besturingsapparaat gings- en onderhoudswerkzaamheden voor ventilatietoestellen (hierna mogen niet zonder toezicht door kinde- genoemd 'ventilatietoestel' of 'toestel') ren worden uitgevoerd.
  • Seite 6: Gebruik Van De Comfosense C

    apparaat gaat openen de stekker van Tussen AUTO en het ventilatietoestel uit het stopcontact. MANUEEL schakelen ■ AUTO: het toestel Vragen wijzigt de instellingen Neem in geval van vragen contact automatisch volgens op met de leverancier. Achterin dit geprogrammeerde document vindt u een lijst met de tijdprogramma's;...
  • Seite 7: Kinderslot

    3.4 Boost Het basismenu openen Als een menu actief is, gaat u met de boost toets MENU één menuonderdeel terug Geen functie De selectie bevestigen* Het ventilatiedebiet kan voor een Naar het volgende bepaalde duur op maximum (Boost) onderdeel / waarde worden gezet.
  • Seite 8: Ventilatie

    TIMER ENDED. 2. Druk op om VENT te kiezen. 3. Druk op 1. Druk op . De display toont 4. Druk op om OUT of IN BOOST. te kiezen. 2. Druk op . De display toont OFF. 5. Druk op om te bevestigen.
  • Seite 9: Comfohood

    3.7 ComfoHood BOOST. 2. Druk op om AWAY te (optioneel, indien op het toestel geïnstalleerd) kiezen. 3. Druk op . De display toont OFF. 4. Druk op om UNTIL te timer kiezen. 5. Druk op . De jaarindicator knippert. 6. Druk op om het jaar te kiezen.
  • Seite 10: Temperatuurprofiel

    3.9 Tijdprogramma's 2. Druk op om HOOD te kiezen. Het onderstaande tijdprogramma dient 3. Druk op . De display toont OFF. als voorbeeld: 4. Druk op om te bevestigen. De Dag- Debiet Prog# Activiteit Tijd display toont SAVED. periode inst. 7:00 St 1 Douchen MA-VR...
  • Seite 11: Bypass

    5. Druk op om het 1. Druk op om het gewenste aantal dagen te kiezen: gewenste tijdprogramma te kiezen, ■ WEEKLY, iedere dag; SCHED verschijnt op de display: ■ MA-VR, doordeweeks; ■ SCHED + regelt het ■ ZA-ZO, weekeinden; ventilatiedebiet; ■...
  • Seite 12: Comfocool

    BOOST. duur. 2. Druk op om BYPASS te kiezen. 1. Druk op . De display toont 3. Druk op BOOST. 4. Druk op om OFF of 2. Druk op OPEN te kiezen. COMFOCOOL te kiezen. 5. Druk op om te bevestigen. De 3.
  • Seite 13: Basisinstellingen

    dagen de filters moeten worden 4. Druk op . De display toont vervangen; ENG. ■ ERROR, toont de laatste 5. Druk op om een taal te foutcode; kiezen. ■ SCHEDULE VENT; 6. Druk op om te bevestigen. De ■ SCHEDULE COMFOCOOL*; display toont OK TO CONFIRM, ■...
  • Seite 14: Reset Alle Taken

    11. Druk op om te bevestigen. De 3. Druk op uurindicator knippert. 4. Druk op om DEL te 12. Druk op om het uur te kiezen. kiezen. 5. Druk op om te bevestigen. De 13. Druk op om te bevestigen. De display toont DONE.
  • Seite 15: Ingebruikname

    7. Duw de kap C op zijn plaats. display toont het hoofdscherm; ■ Zie als een ERROR op de display verschijnt de Gebruik bij het vervangen één van de storingswaarschuwingen. volgende schroeven: ■ Geharde en verzinkte stalen Stel bij het voor de eerste keer opstarten schroef 2,2 x12 PT10;...
  • Seite 16: Overzicht Van Het Basismenu

    Overzicht van het BASISMENU BASIC MENU TIMER BOOST BOTH VENTILATION OUT ONLY IN ONLY UNTIL AWAY TIMER HOOD* WARM TEMPERATURE PROFILE NORMAL COOL SCHEDULER Ventilation EDIT ComfoCool* FILTER DELETE ERROR OPEN SCHEDULER VENTILATION BYPASS SCHEDULER COMFOCOOL* AUTO BOOST AUTO COMFOCOOL* AWAY STATE HOOD*...
  • Seite 17: Overzicht Van Het Geavanceerd Menu

    Overzicht van het GEAVANCEERD MENU Functie Menuonderdeel ADVANCED SETTINGS geavanceerde instellingen SENSOR VENTILATION Vereist besturing van de ventilatie op basis van de in het toestel sensorgestuurde ingebouwde sensoren. De volgende functies kunnen worden ventilatie ingesteld: PASSIVE TEMPERATURE, passieve temperatuur ACTIVE TEMPERATURE, actieve temperatuur COMFORT HUMIDITY, comfort vochtigheid PROTECTION HUMIDITY, bewaking luchtvochtigheid ■...
  • Seite 18: Rf Pairing

    Functie Menuonderdeel RF PAIRING Voor het aansluiten van een RF-apparaat. RF koppeling ■ START: Start de RF-koppelingsprocedure. Kies bij gebruik van meerdere ComfoSense C-apparaten één apparaat die als RF-brug dient waarop de andere RF-sensoren worden aangesloten. ■ DEL: Verwijdert de momenteel gekoppelde RF-apparaten. ■...
  • Seite 19 In case of disputes the English version of these instructions will be binding. Hereby Zehnder, declares that this ComfoSense C is in compliance with the essential requirements and other relevant provisions of Directive 1999/5/EC...
  • Seite 20 ■ From the main screen: Buttons Decrease the ventilation ■ From the main screen: airflow Opens the basic menu; ■ When in a menu: ■ When in a menu: Browse through the menu Return one level in the Decrease values menu-structure;...
  • Seite 21: Introduction

    Introduction Warranty The manufacturer provides warranty for a The ComfoSense C (henceforth period of 24 months after installation to a called “device”) is a control device for maximum of 30 months after production residential ventilation units (henceforth date of the device. called “ventilation unit”...
  • Seite 22: Use Of The Comfosense C

    Use of the 3.2 Menu navigation ComfoSense C child 3.1 Basic functions 17:00 The following table shows the navigation for the BASIC and ADVANCED menu. Open the basic menu When a menu is active From the main screen you can perform the MENU key will go the following actions: back one menu-item...
  • Seite 23: Boost

    Turn off the child lock 1. Press . The display shows PRESS OK TO STOP From the main screen press TIMER. times in a row. The text CHILD LOCK 2. Press . The display shows disappears from the main screen. All TIMER ENDED.
  • Seite 24: Away

    or IN. indicator is blinking. 5. Press to confirm. The duration 8. Press to choose the indicator is blinking. month. 6. Press to choose the 9. Press to confirm. The day duration. indicator is blinking. 7. Press to confirm. The display 10.
  • Seite 25: Temperature Profile

    (cooker hood with sensor) is connected. the amount of heat recovery of the unit. ■ WARM: set if you prefer generally higher room temperature; Turn on the ComfoHood ■ NORMAL: set if you prefer 1. Press . The display shows average room temperature;...
  • Seite 26: Bypass

    2. Press to choose the schedule. To delete all schedulers at wanted scheduler, the display once use the RESET function. shows SCHED: 1. Press to choose the ■ schedules the ventilation wanted scheduler, the display shows SCHED: airflow; ■ SCHED + ■...
  • Seite 27: Comfocool

    1. Press . The display shows 1. Press . The display shows BOOST. BOOST. 2. Press to choose 2. Press to choose BYPASS. COMFOCOOL. 3. Press 3. Press 4. Press to choose OFF 4. Press to choose OFF. or OPEN. 5.
  • Seite 28: Basic Settings

    ■ BOOST; 1. Press . The display shows ■ AWAY; BOOST. ■ HOOD*. 2. Press to choose BASIC. 3. Press . The display shows * Optional, if installed on HRU LANGUAGE. 4. Press to choose TIME. 1. Press . The display shows 5.
  • Seite 29: Reset All Tasks

    3.14 Reset all tasks casing (I) or mounting plate (E). 3. Put the communication cable through the wanted design frame X and resize window (D). reset 4. Plug in the communication cable (fig 5), to connect the ventilation unit and the device. 5.
  • Seite 30: Basic Menu Overview

    2. Software version is displayed; 3. The text POWER is displayed; 17:00 4. The text OK is displayed; 5. The text COMM is displayed; 6. The communication status is displayed. ■ OK: valid communication, the displays shows the main screen; ■...
  • Seite 31: Advanced Menu Overview

    Advanced menu overview Function Menu item ADVANCED SETTINGS SENSOR Demand control ventilation based on the built-in sensors within VENTILATION the HRU. The following functions can be set: PASSIVE TEMPERATURE ACTIVE TEMPERATURE COMFORT HUMIDITY PROTECTION HUMIDITY ■ ON: to set the selected function to be permanently active. ■...
  • Seite 32: Installer Menu Overview

    Menu item Function DETAILS IN - SUPPLY FAN Shows the current settings for the supply fan. OUT – EXHAUST FAN Shows the current settings of the exhaust fan. BYPASS Shows the current settings for the bypass. COMFOCOOL* Shows the current settings for ComfoCool. FIRMWARE Shows the current firmware version.
  • Seite 33 Schäden haftbar gemacht werden, die durch fehlende oder falsche Information in diesem Handbuch entstanden sind. In Zweifelsfällen ist die englische Version dieser Anleitung verbindlich. Hiermit erklärt Zehnder, dass sich dieser/diese/dieses ComfoSense C in Übereinstimmung mit den grundlegenden Anforderungen und den anderen relevanten Vorschriften der Richtlinie...
  • Seite 34 ■ Vom Hauptbildschirm aus: Tasten Verringerung des ■ Vom Hauptbildschirm aus: Luftstroms Öffnet das Basismenü ■ Wenn Sie sich in einem ■ Wenn Sie sich in einem Menü befinden: Menü befinden: Durch das Menü blättern Eine Ebene in der Werte verringern Menüstruktur zurück Anzeige ■...
  • Seite 35: Einführung

    Einführung ■ Personen mit einem Mangel an Erfahrung oder Kenntnissen Beim ComfoSense C (nachstehend Kinder dürfen mit dem Bedieneinheit als “Bedieneinheit” bezeichnet) nicht spielen. handelt es sich um ein Steuergerät Die Reinigung und Wartung seitens für Wohnraumlüftungseinheiten des Benutzers darf nur von Kindern (nachstehend als Lüftungsgerät.
  • Seite 36: Sicherheit

    Sicherheit Öffnen des Basismenüs Halten Sie sich stets an die Umschaltung zwischen Sicherheitsrichtlinien in diesem AUTO und MANUELL Dokument. Die Missachtung der ■ AUTO: Die Einheit ändert die Sicherheitsrichtlinien, Warnhinweise, Einstellungen entsprechend Hinweise und Anweisungen in diesem der programmierten Dokument kann Personenverletzungen Zeitprogramme automatisch oder Schäden am Bedieneinheit ■...
  • Seite 37: Kindersicherung

    3.4 Party Öffnen des Basismenüs Wenn ein Menü aktiv ist, springt die Party MENÜ-Taste eine Menüfunktion zurück Keine Funktion Auswahl bestätigen* Nächste Funktion Der Luftstrom kann eine bestimmte aufrufen / Wert Dauer auf das Maximum (PARTY) erhöhen eingestellt werden. Dies kann nützlich sein, wenn für einen kurzen Zeitraum Vorherige Funktion zusätzliche Lüftung erforderlich sein...
  • Seite 38: Lüftung

    Auf der Anzeige erscheint TIMER Ausschalten des Zu- oder Abluftlüfters ABBRECHEN 1. Drücken Sie auf . Auf der 2. Drücken Sie auf . Auf der Anzeige erscheint PARTY Anzeige erscheint TIMER 2. Drücken Sie auf oder , um ABGELAUFEN LUEFTUNG zu wählen 3.
  • Seite 39: Comfohood

    für eine eingestellte Zeitspanne auf die TIMER ABGELAUFEN niedrigste Geschwindigkeit. Oder 1. Drücken Sie auf . Auf der Anzeige erscheint PARTY Einschalten des Abwesend-Modus 2. Drücken Sie auf oder , um 1. Drücken Sie auf . Auf der ABWESEND zu wählen Anzeige erscheint PARTY 3.
  • Seite 40: Temperaturprofil

    Die verbleibende Zeit ist auf dem Sie eine durchschnittliche Raumtemperatur bevorzugen Hauptbildschirm zu sehen, wenn diese (Voreinstellung) innerhalb von 2 Stunden bis zum Ende ■ KUEHL: Einstellen, falls Sie im liegt. Allgemeinen eine niedrigere Raumtemperatur bevorzugen Ausschalten der ComfoHood 1. Drücken Sie auf .
  • Seite 41 um die gewünschte END-Zeit Erstellen eines Zeitprogramms (Stunden) einzustellen Die Vorgehensweise zum Hinzufügen 12. Drücken Sie zur Bestätigung auf von Schritten in ein Zeitprogramm ist für alle Zeitprogramme identisch. 13. Drücken Sie auf oder Verwenden Sie diese Vorgehensweise , um die gewünschte ENDZEIT als Leitfaden zur Erstellung eines (Minuten) zu wählen Zeitprogramms:...
  • Seite 42: Bypass

    4. Drücken Sie auf oder . Die Dauer-Anzeige blinkt um den zu löschenden Schritt zu 6. Drücken Sie auf oder , um wählen: die Dauer zu wählen löscht alle Schritte im 7. Drücken Sie zur Bestätigung auf Zeitprogramm . Auf der Anzeige erscheint 1...2 löscht den gewählten Schritt GESPEICHERT.
  • Seite 43: Status

    ■ ZEITPROGRAMM LUEFTUNG COMFOCOOL zu wählen ■ ZEITPROGRAM COMFOCOOL* 3. Drücken Sie auf ■ PARTY 4. Drücken Sie auf oder , um ■ ABWESEND ZU zu wählen ■ HOOD* 5. Drücken Sie zur Bestätigung auf . Die Dauer-Anzeige blinkt * (Optional, falls am Lüftungsgerät 6.
  • Seite 44: Alle Einstellungen Zurücksetzen

    . Die Tag-Anzeige blinkt 4. Drücken Sie auf . Auf der 10. Drücken Sie auf oder , um Anzeige erscheint ENG den Tag zu wählen 5. Drücken Sie auf oder , um 11. Drücken Sie zur Bestätigung auf eine Sprache zu wählen .
  • Seite 45: Installation

    Werksvoreinstellungen zurück. der HRU kompatibel ist) ■ Steife Drähte (Volldraht - nicht 1. Drücken Sie auf . Auf der Anzeige erscheint PARTY flexibel) für Steckklemmen ■ Spezifikationen gemäß DIN VDE 2. Drücken Sie auf oder , um RESETzu wählen 0281: J-Y(St)Y 2 x 2 x 0,6 3.
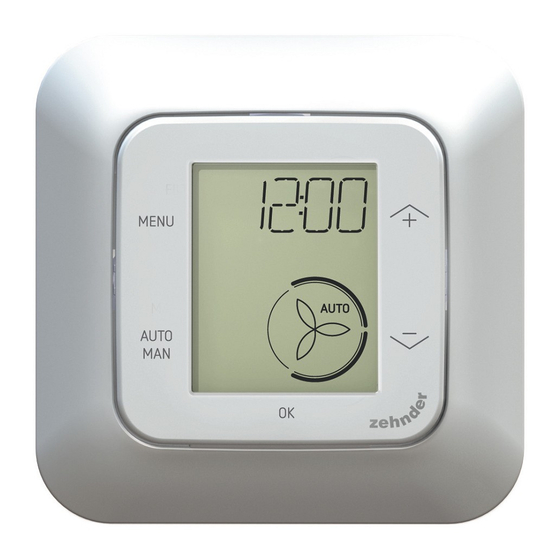
  • Seite 46: Hauptbildschirm

    2. Die Softwareversion erscheint Hauptbildschirm 3. Der Text POWER erscheint ■ Falls ein FEHLER auf der Anzeige 4. Der Text OK erscheint erscheint, halten Sie sich bitte an 5. Der Text KOMM erscheint die Störungswarnungen 6. Der Kommunikationsstatus Wenn das Bedieneinheit das erste Mal erscheint startet, stellen Sie die Sprache unter ■...
  • Seite 47: Übersicht Über Das Erweiterte Menü

    Übersicht über das erweiterte Menü Menüfunktion Funktion ERWEITERTE KONFIG. KOMFORTREGELUNG Die bedarfsgerechte Steuerung basiert auf den eingebauten Sensoren innerhalb des Lüftungsgeräts. Folgende Funktionen lassen sich einstellen: PASSIVE TEMPERATUR AKTIVE TEMPERATUR FEUCHTEREGELUNG AKTIVER FEUCHTESCHUTZ ■ EIN: Um die gewählte Funktion so einzustellen, dass sie dauerhaft aktiv ist ■...
  • Seite 48: Funkverbindung

    Funktion Menüfunktion FUNKVERBINDUNG Zur Verbindung Funksteuerung ■ START: Startet den Funk-Verbindungsaufbau. Wenn mehrere ComfoSense C Bedieneinheite verwendet werden, sollte eines gewählt werden, das als Funkbrücke dient, mit der die Funksensoren verbunden werden ■ DEL: Löscht die momentan verbundenen Funksteuerungen ■ RESET: Alle in diesem Dokument erwähnten Einstellungen RESET TO INSTAL- LER DEFAULTS außer GRUNDEINSTELLUNGEN, FUNKVERBINDUNG,...
  • Seite 49 En cas de conflit, la version en anglais de ces instructions a priorité. Par la présente Zehnder déclare que l'appareil ComfoSense C est conforme aux exigences essentielles et aux autres dispositions pertinentes de la directive 1999/5/CE.
  • Seite 50 ■ Depuis l'écran principal : Boutons Réduit le débit d'air de ■ Depuis l'écran principal : ventilation Ouvre le menu de base ; ■ Dans un menu : ■ Dans un menu : Parcourt le menu Réduire Remonte d'un niveau en valeurs.
  • Seite 51: Introduction

    Introduction ■ les personnes dépourvues d'expérience ou de Le ComfoSense C (par la suite connaissance. le “dispositif”) est un dispositif de Il est interdit aux enfants de jouer avec commande pour les unités de ventilation le dispositif. résidentielles (par la suite “unité de Le nettoyage et la maintenance par ventilation”...
  • Seite 52: Utilisatin Du Comfosense C

    blessures ou des dégâts pour le Activez le mode SHIFT pendant dispositif. 3 secondes. Appuyez sur Déconnectez l'unité de ventilation de pendant ces 3 secondes pour accéder au menu AVANCÉ l'alimentation principale avant d'ouvrir le boîtier du dispositif. Activation du VERR ENFANT (4x) Si le mode AUTO est actif, tout ajustement est écrasé...
  • Seite 53: Verrou Enfant

    3.3 Verrou enfant 2. Appuyez sur . L'écran affiche MINUTEUR. Les boutons peuvent être verrouillés 3. Appuyez sur . L'indicateur de pour éviter des modifications durée clignote. accidentelles des réglages. 4. Appuyez sur pour choisir la durée du boost. Activation du verrou enfant 5.
  • Seite 54: Absent

    3.6 Absent éviter les odeurs déplaisantes de l'extérieur. N'oubliez pas que la mise hors tension d'un ventilateur immobilise temporairement le système de ventilation absent équilibré de votre foyer. ■ DEUX : l'unité démarre les deux ventilateurs d'alimentation et d'extraction ; (réglage par défaut) ■...
  • Seite 55: Comfohood

    Désactivation du mode Absent L'écran affiche SAUVÉ. Le texte HOTTE est visible sur l'écran Le mode Absent se coupe principal. automatiquement après le délai défini. Le temps restant est visible sur l'écran Désactivation directe du mode Absent : principal s'il reste moins de 2 heures 1.
  • Seite 56: Programmations

    une température de la pièce toutes les programmations. Suivez cette moyenne ; (réglage par défaut) procédure pour créer une planification : ■ FROID : si vous préférez 1. Appuyez sur . L'écran affiche une température de la pièce BOOST. généralement plus basse. 2.
  • Seite 57: Bypass

    Réglage du contrôle de récupération de 16. Appuyez sur pour confirmer. chaleur de la fonctionnalité de dérivation L'écran affiche SAUVÉ. 17. L'écran revient à la programmation pendant une durée spécifique. ■ AUTO : l'unité contrôle d'étape. Ajoutez les étapes automatiquement la récupération nécessaires en procédant de de chaleur ;...
  • Seite 58: Comfocool

    3.11 ComfoCool 3.12 État (Option, en cas d'installation sur HRU) ÉETAT COMF Ouvrez le menu État. Arrêt de la fonction ComfoCool pendant Avec cette fonction, vous consultez les une durée spécifique. réglages ou planifications actuels de : ■ AUTO : l'unité contrôle ■...
  • Seite 59: Options De Base

    3.13 Options de base 6. Appuyez sur pour choisir ON ou OFF. 7. Appuyez sur pour confirmer. base L'écran affiche SAUVÉ. Modification de la date et de l'heure 1. Appuyez sur . L'écran affiche BOOST. 2. Appuyez sur pour choisir BASE. 3.
  • Seite 60: Réinitialisation De Toutes Les Tâches

    3.14 Réinitialisation de toutes les Respectez toujours la réglementation locale relative à la sécurité. tâches Durant l'assemblage, assurez-vous que TOUTES les vis sont serrées. reset (fig 1 - 5) : 1. Fixez le boîtier de montage mural I (le cas échéant) avec les chevilles H et les vis G au mur.
  • Seite 61: Mise En Service

    Mise en service 17:00 Mettez l'unité de ventilation sous tension. Le dispositif affiche une séquence d'écrans de démarrage directement après la mise sous tension. Chaque écran est affiché pendant 1 seconde. La séquence des écrans de démarrage : 1. Toutes les icônes sont affichées une fois ;...
  • Seite 62: Aperçu Du Menu De Base

    Aperçu du menu de base BASIC MENU TIMER BOOST MODE EXTR+PULS VENTILATION MODE EXTRACTION MODE PULSION JUSQUA ABSEN TIMER HOOD* CHAUD PROFIL TEMP. NORMAL FRAIS PROG. VENT PROG. COMFOCOOL* EDIT FILTRE DELETE ERROR OPEN PROG. VENT BYPASS PROG. COMFOCOOL* AUTO BOOST AUTO COMFOCOOL*...
  • Seite 63: Aperçu Du Menu De Avancé

    Aperçu du menu de avancé Fonction Élément de menu OPTIONS AVANCÉES VENTILATION Ventilation contrôlée par la demande selon les capteurs intégrés dans la HRU. Les fonctions suivantes sont réglables : AVEC GESTION TEMPÉRATURE PASSIVE À LA DEMANDE TEMPÉRATURE ACTIVE HUMIDITÉ DE CONFORT PROTECTION HUMIDITÉ...
  • Seite 64: Aperçu Du Menu Installateur

    Fonction Élément de menu ■ RESET : Les valeurs par défaut de tous les réglages mentionnés dans REMISE A "0" RÉGLAGES ce document sauf OPTIONS DE BASE, COUPLAGE RF, RF ON/OFF INSTALL. STD sont restaurées. DÉTAILS VENTILATEUR Affiche les réglages actuels du ventilateur d'alimentation. PULSION - IN VENTILATEUR Affiche les réglages actuels du ventilateur d'extraction.
  • Seite 65 In caso di controversie sarà vincolante la versione inglese delle presenti istruzioni. Con la presente Zehnder dichiara che questo ComfoSense C è conforme ai requisiti essenziali ed alle altre disposizioni pertinenti stabilite dalla direttiva 1999/5/CE.
  • Seite 66 ■ Dalla schermata principale: Pulsanti Riduce il flusso d'aria di ■ Dalla schermata principale: ventilazione Apre il menu base; ■ All'interno di un menu: ■ All'interno di un menu: Consente di scorrere i Torna in alto di un livello menu Decrementa i valori. nella struttura del menu;...
  • Seite 67: Introduzione

    Introduzione esperienza e conoscenza. I bambini non devono giocare con ComfoSense C (di seguito "dispositivo") l'apparecchio. è un dispositivo di controllo per unità di Gli interventi di pulizia e manutenzione ventilazione residenziali (di seguito "unità non devono essere eseguiti da bambini di ventilazione"...
  • Seite 68: Utilizzo Di Comfosense C

    scollegare l'unità di ventilazione Alternare tra modalità dall'alimentazione principale. AUTO e MANUAL ■ AUTO: l'unità cambia Domande automaticamente le Per eventuali domande contattare impostazioni in base ai il fornitore. Sul retro del presente programmi orari definiti; documento è riportato un elenco con i ■...
  • Seite 69: Blocco Di Sicurezza Per Bambini

    3.4 Boost Aprire il menu base Quando un menu è attivo, il tasto MENU consente di tornare boost indietro di una voce di menu Nessuna funzione Consente di confermare la selezione* Il flusso d'aria di ventilazione può Consente di passare essere impostato su un valore massimo alla voce successiva / (Boost) per una durata specifica.
  • Seite 70: Ventilazione

    TIMER. Spegnere il ventilatore di mandata o di 2. Premere . Il display visualizza espulsione TIMER ENDED. 1. Premere . Il display visualizza Oppure BOOST. 1. Premere . Il display visualizza 2. Premere per scegliere BOOST. VENT. 2. Premere . Il display visualizza 3.
  • Seite 71: Assente

    3.6 Assente schermata principale è visibile AWAY. Disattivare la modalità AWAY AWAY La modalità AWAY si disattiva automaticamente trascorso il periodo impostato. Per disattivare direttamente la modalità Assente: 1. Premere . Sul display compare OK TO STOP TIMER). 2. Premere per confermare.
  • Seite 72: Profilo Di Temperatura

    TIMER. 3.8 Profilo di temperatura 4. Premere per confermare. 5. Premere per scegliere la durata. temp 6. Premere per confermare. Il display visualizza SAVED. Nella schermata principale è visibile il testo HOOD. Il tempo residuo è visibile nella schermata principale entro 2 ore dalla fine del periodo.
  • Seite 73 Prog.N. Attività Periodo del Preimpostazio- giorno ne flusso aria Fase 1 Doccia MO-FR 07:00 - 08:00 Fase 2 Fuori casa MO-FR 9:00 - 17:00 Away Fase 3 Pranzo MO-FR 12:30 - 13:00 Fase 4 Colazione WEEK 06:00 - 10:00 Fase 5 Pranzo MO-FR 12:00 - 14:00...
  • Seite 74: Bypass

    funzione RESET. viene introdotta direttamente nell'abitazione). 1. Premere per scegliere il programma orario desiderato, il 1. Premere . Il display visualizza display visualizza SCHED: BOOST. ■ SCHED + programma il 2. Premere per scegliere flusso d'aria di BYPASS. ventilazione; 3. Premere ■...
  • Seite 75: Stato

    ■ AUTO: l'unità controlla 3.12 Stato automaticamente ComfoCool; (impostazione predefinita) ■ OFF: l'unità arresta ComfoCool statE per il periodo impostato. 1. Premere . Il display visualizza BOOST. 2. Premere per scegliere COMFOCOOL. 3. Premere 4. Premere per scegliere OFF. Aprire il menu Stato. 5.
  • Seite 76: Impostazioni Di Base

    3.13 Impostazioni di base ON o OFF. 7. Premere per confermare. Il display visualizza SALVATO. basIC Cambiare data e ora 1. Premere . Il display visualizza BOOST. 2. Premere per scegliere BASE. 3. Premere . Il display visualizza LINGUA. Cambiare la lingua dei menu 4.
  • Seite 77: Ripristino Di Tutte Le Attività

    Installazione 3.14 Ripristino di tutte le attività Prima di installare il dispositivo, scollegare l'unità di ventilazione reset dall'alimentazione principale. Osservare sempre le norme di sicurezza locali. Durante l'assemblaggio, verificare che TUTTE le viti siano serrate. (fig 1 - 5): 1. Installare la scatola per il Ripristinare ogni impostazione e timer montaggio a parete (se ordinata) I del menu base, ma conservare tutti i...
  • Seite 78: Messa In Funzione

    Messa in funzione 17:00 Accendere l'alimentazione principale dell'unità di ventilazione. Subito dopo l'accensione il dispositivo visualizza una sequenza di schermate di avvio. Ogni schermata compare per 1 secondo. Sequenza delle schermate di avvio: 1. Visualizzazione simultanea di tutte le icone; 2.
  • Seite 79: Panoramica Del Menu Base

    Panoramica del menu base BASIC MENU TIMER BOOST BOTH VENTILATION OUT ONLY IN ONLY UNTIL AWAY TIMER HOOD* WARM TEMPERATURE PROFILE NORMAL COOL SCHEDULER Ventilation EDIT ComfoCool* FILTER DELETE ERROR OPEN SCHEDULER VENTILATION BYPASS SCHEDULER COMFOCOOL* AUTO BOOST AUTO COMFOCOOL* AWAY STATE HOOD*...
  • Seite 80: Panoramica Del Menu Avanzato

    Panoramica del menu avanzato Funzione Voce di menu IMPOSTAZIONI AVANZATE SENSOR Ventilazione on demand basata sul fabbisogno mediante le sonde integrate VENTILATION nella HRU. È possibile configurare le seguenti funzioni: (SONDA VEN- PASSIVE TEMPERATURE (Temperatura passiva) TILAZIONE) ACTIVE TEMPERATURE (Temperatura attiva) COMFORT HUMIDITY (Umidità...
  • Seite 81: Panoramica Del Menu Installatore

    Funzione Voce di menu ■ RESET: Tutte le impostazioni illustrate nel presente documento tranne RESET TO INSTALLER le IMPOSTAZIONI DI BASE, INSTALLAZIONE RF, RF ON/OFF, saranno DEFAULTS riportate ai valori predefiniti. (Ripristina a impostazioni predefinite del- l'installatore) DETTAGLI IN - SUPPLY Mostra le impostazioni correnti per la ventola di mandata.
  • Seite 82 W przypadku sporów wiążąca jest wersja niniejszej instrukcji napisana w języku angielskim. Firma Zehnder niniejszym oświadcza, że to urządzenie ComfoSense C jest zgodne z zasadniczymi wymaganiami oraz innymi stosownymi postanowieniami Dyrektywy 1999/5/WE.
  • Seite 83 ■ Na ekranie głównym: Przyciski zmniejszenie strumienia ■ Na ekranie głównym: powietrza wentylacji; otwarcie menu ■ W danym menu: podstawowego; Przeglądanie menu ■ W danym menu: Zmniejszanie wartości. powrót o jeden poziom w Wyświetlacz strukturze menu; ■ W trybie SHIFT: ■...
  • Seite 84: Wprowadzenie

    Wprowadzenie Dzieciom nie wolno bawić się urządzeniem. ComfoSense C (w dalszej części Czyszczenia i czynności „urządzenie”) to urządzenie sterujące do konserwacyjnych nie mogą wykonywać jednostek wentylacyjnych w budynkach dzieci pozostające bez nadzoru. mieszkalnych (dalej „jednostka wentylacyjna”). Urządzenie może być Gwarancja używane z systemami ComfoAir Q, Producent udziela gwarancji na okres Comfort-Vent Q, Aeris NEXT.
  • Seite 85: Korzystanie Z Comfosense C

    Przed otwarciem obudowy urządzenia Przełączenie pomiędzy należy odłączyć jednostkę wentylacyjną trybem AUTO a od zasilania głównego. MANUALNY ■ AUTO: urządzenie Pytania zmieni ustawienia Wszelkie pytania należy kierować do automatycznie zgodnie z dostawcy. Z tyłu niniejszego dokumentu programami wentylacji; znajduje się lista zawierająca dane ■...
  • Seite 86: Blokada Dziecięca (Child)

    3.4 Przewietrzanie (BOOST) Otwarcie menu podstawowego Kiedy aktywne jest jakieś menu, boost naciśnięcie klawisza MENU spowoduje powrót o jedną pozycję menu. Brak funkcji Strumień powietrza wentylacji można Potwierdzenie wyboru* ustawić na maksymalną wartość Przejście do następnej (przewietrzanie) przez określony czas. pozycji / zwiększenie Może to być...
  • Seite 87: Wentylacja (Vent)

    ■ IN: urządzenie zatrzyma Aby wyłączyć przewietrzanie wentylator wywiewny na bezpośrednio na ekranie głównym: ustawiony czas; 1. Naciśnij przycisk ■ OUT: urządzenie zatrzyma Wyświetlacz pokazuje komunikat wentylator nawiewny na naciśnij OK aby zatrzymać zegar ustawiony czas (jeśli dostępne). (PRESS OK TO STOP TIMER). 2.
  • Seite 88: Nieobecność (Away)

    3.6 Nieobecność (AWAY) 14. Naciśnij przycisk , aby wybrać minuty. 15. Naciśnij przycisk , aby potwierdzić. Wyświetlacz pokazuje komunikat zapisano (SAVED). AWAY Komunikat nieobecność (AWAY) jest widoczny na ekranie głównym. Wyłączenie trybu Nieobecność Tryb Nieobecność wyłączy się automatycznie po upływie ustawionego czasu.
  • Seite 89: Profil Temperatury

    Funkcja ta jest widoczna tylko wtedy, pokazuje komunikat wył. (OFF). 4. Naciśnij przycisk , aby jeśli moduł ComfoHood (okap kuchenny potwierdzić. Wyświetlacz pokazuje z czujnikiem) jest podłączony. komunikat zapisano (SAVED). Włączenie modułu ComfoHood 3.8 Profil temperatury 1. Naciśnij przycisk Wyświetlacz pokazuje komunikat przewietrzanie (BOOST).
  • Seite 90 ■ umożliwia Usta- zaprogramowanie wienie przepływu powietrza wstępne Czyn- Pora wentylacji; Prog# Czas ność dnia zepływu ■ umożliwia powie- zaprogramowanie trza funkcji ComfoCool*. Krok 7:00 (* opcjonalnie, jeśli Prysznic PON-PT 8:00 podłączono do jednostki Krok Poza 9:00 Nieobe- wentylacyjnej). PON-PT domem 17:00 cność...
  • Seite 91: Bypass

    3.10 Bypass potwierdzić. 15. Naciśnij przycisk , aby wybrać wymagane ustawienie funkcji. BYPASS 16. Naciśnij przycisk , aby potwierdzić. Wyświetlacz pokazuje komunikat zapisano (SAVED). 17. Wyświetlacz powraca do programatora kroków. Jeśli to konieczne, dodaj kroki za pomocą takiej samej procedury. Usuwanie programu wentylacji lub Do ustawiania sterowania odzyskiem kroku...
  • Seite 92: Comfocool

    Aby bezpośrednio wyłączyć zegar: 5. Naciśnij przycisk , aby 1. Naciśnij przycisk potwierdzić. Miga wskaźnik czasu Wyświetlacz pokazuje komunikat trwania. przewietrzanie (BOOST). 6. Naciśnij przycisk , aby 2. Naciśnij przycisk , aby wybrać czas trwania. wybrać opcję BYPASS. 7. Naciśnij przycisk , aby 3.
  • Seite 93: Ustawienia Podstawowe

    ■ program ComfoCool 3. Naciśnij przycisk DE: Sprache (SCHEDULE COMFOCOOL)*; . Wyświetlacz FR: Langue ■ przewietrzanie (BOOST); pokazuje wszystkie inne: ■ nieobecność (AWAY); komunikat język Language ■ okap (HOOD)*. (LANGUAGE). * Opcjonalnie, jeśli podłączono do jednostki wentylacyjnej 4. Naciśnij przycisk .
  • Seite 94: Kasowanie Wszystkich Zadań

    wentylacji: 3. Naciśnij przycisk . Wyświetlacz 1. Naciśnij przycisk pokazuje komunikat język Wyświetlacz pokazuje komunikat (LANGUAGE). przewietrzanie (BOOST). 4. Naciśnij przycisk , aby 2. Naciśnij przycisk , aby wybrać opcję zegar (CLOCK). wybrać opcję kasuj (RESET). 5. Naciśnij przycisk . Miga 3.
  • Seite 95: Uruchomienie

    pomocą śrub (F) na ścianie, obudowie naściennej (I) lub płycie 17:00 montażowej (E). 3. Przełóż kabel komunikacyjny przez ramę projektową X i okno zmiany rozmiaru (D). 4. Podłącz kabel komunikacyjny (rys. 5), aby połączyć jednostkę wentylacyjną z urządzeniem. 5. Wymagania dotyczące przewodów są...
  • Seite 96: Przegląd Menu Podstawowego

    Przegląd menu podstawowego BASIC (PODST. MENU) TIMER (ZEGAR) BOOST (PRZEWIETRZ.) OFF (WYŁ.) BOTH (OBA WENT.) VENTILATION (WENTYL.) OUT ONLY (TYLKO WYW.) IN ONLY (TYLKO NAW.) UNTIL (DO) AWAY (NIEOB.) OFF (WYŁ.) TIMER (ZEGAR) HOOD (OKAP)* OFF (WYŁ.) WARM (CIEPŁY) TEMP. PROFIL. NORMAL (NORMALNY) COOL (ZIMNY) SCHEDULER (PROGRAM)
  • Seite 97: Przegląd Menu Zaawansowanego

    Przegląd menu zaawansowanego Funkcja Pozycja menu USTAWIENIA ZAAWANSOWANE SENSOR Sterowana na żądanie wentylacja wykorzystująca wbudowane czujniki w VENTILATION jednostce wentylacyjnej. Można ustawić następujące funkcje: PASSIVE TEMPERATURE (TEMP. PASYWNA) (WENTYLACJA ACTIVE TEMPERATURE (TEMP. AKTYWNA) CZUJNIKA) COMFORT HUMIDITY (KOMFORT WILGOTNOŚCI) PROTECTION HUMIDITY (OCHRONA WILGOTNOŚCI) ■...
  • Seite 98: Przegląd Menu Instalatora

    Funkcja Pozycja menu ■ RESET (KASOWANIE): Wszystkie ustawienia wymienione w niniejszym RESET TO INSTALLER dokumencie z wyjątkiem pozycji USTAWIENIA PODSTAWOWE, DEFAULTS POŁĄCZENIE RF, RF WŁ./WYŁ. zostaną przywrócone do wartości (POWRÓT DO domyślnych. DOMYŚLN. USTAW. IN- STALATORA) SZCZEGÓŁY IN - SUPPLY FAN Pokazuje bieżące ustawienia dla wentylatora nawiewnego.
  • Seite 99 En caso de litigio, se considerará vinculante la versión en inglés de estas instrucciones. Por la presente, Zehnder declara que su modelo ComfoSense C cumple los requisitos fundamentales y otras disposiciones relevantes de la Directiva 1999/5/CE.
  • Seite 100 Botones Display ■ Desde la pantalla principal: ■ Texto. ■ Hora. Abre el menú básico. ■ Estando en un menú ■ Valor. Retrocede un nivel en la ■ Estado. estructura del menú. ■ Muestra la hora de inicio, la hora de ■...
  • Seite 101: Introducción

    Introducción ■ personas carentes de experiencia y conocimientos. ComfoSense C (en adelante, No se debe permitir que los niños “dispositivo”) es un dispositivo de control jueguen con la unidad. para unidades de ventilación de uso No se debe permitir que los niños residencial (en adelante, “unidad de realicen sin supervisión la limpieza ni las ventilación”...
  • Seite 102: Uso De Comfosense C

    la fuente de alimentación principal antes Alternar entre los modos de abrir la carcasa del dispositivo. AUTO y MANUAL. ■ AUTO: la unidad Preguntas cambiará los valores Póngase en contacto con el proveedor automáticamente si tiene alguna pregunta. En la parte de acuerdo con los posterior de este documento hay una programas definidos.
  • Seite 103: Bloqueo Para Niños

    3.4 Boost (Amplificación) Abrir el menú básico. Si se encuentra activo un menú, la tecla MENU retrocederá un boost elemento de menú. Sin función. Sirve para confirmar la selección*. Sirve para ir al El caudal de aire de ventilación se elemento siguiente / puede ajustar a un valor máximo (Boost) aumentar el valor.
  • Seite 104: Ventilación

    1. Pulse . Aparece en el el periodo establecido display PRESS OK TO STOP (si está disponible). TIMER. 2. Pulse . Aparece en el display Apagado del ventilador de suministro o TIMER ENDED. del de salida 1. Pulse . Aparece en el display 1.
  • Seite 105: Ausente

    3.6 Ausente en el display SAVED. AWAY aparece en la pantalla principal. Desactivación del modo AWAY ausente El modo Ausente se desactivará automáticamente una vez transcurrido el tiempo establecido. Para desactivar directamente el modo AWAY 1. Pulse . Aparece en el display OK TO STOP TIMER.
  • Seite 106: Perfil De Temperaturas

    TIMER. influye en el nivel de recuperación de 4. Pulse para confirmar. calor de la unidad. ■ WARM: opción adecuada 5. Pulse para seleccionar la duración. cuando en general se prefiere 6. Pulse para confirmar. Aparece una temperatura más alta en la en el display SAVED.
  • Seite 107 paso de programa más largo. momento END deseado (horas). 12. Pulse para confirmar. El paso de programa con un menor 13. Pulse para seleccionar el número de días será el que tenga momento END deseado (minutos). preferencia. 14. Pulse para confirmar. 15.
  • Seite 108: Bypass

    3.10 Bypass Para apagar directamente el temporizador 1. Pulse . Aparece en el display BOOST. BYPA 2. Pulse para seleccionar BYPASS. 3. Pulse para confirmar. 4. Pulse para seleccionar AUTO. 5. Pulse para confirmar. Aparece en el display SAVED. El menú se cierra automáticamente.
  • Seite 109: Estado

    2. Pulse para seleccionar 7. Pulse para confirmar. Aparece STATE. en el display SAVED. El menú se 3. Pulse para abrir el menú de cierra automáticamente. estado. 4. Pulse para seleccionar Para apagar directamente el una de las opciones anteriormente temporizador indicadas.
  • Seite 110: Restablecimiento De Todas Las Tareas

    3.14 Restablecimiento de todas 1. Pulse . Aparece en el display BOOST. las tareas 2. Pulse para seleccionar BASIC. 3. Pulse . Aparece en el display restablecer LANGUAGE. 4. Pulse para seleccionar TIME. 5. Pulse . Aparece ON en el display.
  • Seite 111: Puesta En Marcha

    la fuente de alimentación principal antes endurecido 2.2 x12 PT10. ■ M2.2x 12 en cruz, plano, plas-fix de instalar el dispositivo. 45° Cumpla siempre la normativa de seguridad local. Puesta en marcha Durante el montaje, asegúrese de que TODOS los tornillos quedan apretados (fig.
  • Seite 112: Descripción General Del Menú Básico

    Al poner en marcha el dispositivo por primera vez, ajuste el idioma empleando y confírmelo mediante Descripción general del menú básico BASIC MENU TIMER BOOST BOTH VENTILATION OUT ONLY IN ONLY UNTIL AWAY TIMER HOOD* WARM TEMPERATURE PROFILE NORMAL COOL SCHEDULER Ventilation EDIT...
  • Seite 113: Descripción General Del Menú Avanzado

    Descripción general del menú avanzado Función Elemento del menú ADVANCED SETTINGS SENSOR Asumir el control de la ventilación basándose en los sensores VENTILATION integrados en la URC. Se pueden ajustar las siguientes funciones: PASSIVE TEMPERATURE ACTIVE TEMPERATURE COMFORT HUMIDITY PROTECTION HUMIDITY ■...
  • Seite 114: Rf Pairing

    Función Elemento del menú SEASON DETECTION Permite detectar la estación para el bypass. ■ HEAT UNTIL RMOT: Permite ajustar un límite RMOT para evitar que la URC contrarreste el efecto del sistema de calefacción central. ■ COOL ABOVE RMOT: Permite ajustar un límite RMOT para evitar que la URC contrarreste el efecto del aire acondicionado.
  • Seite 115: Descripción General Del Menú Del Instalador

    Descripción Alertas de fallo de general del menú funcionamiento del instalador Para acceder al menú del instalador. 1. Pulse 2. Pulse en menos de 3 segundos. 3. Pulse en menos de 3 ERROR con código de error XXXX: segundos. Aparece en el display Si aparece un ERROR en el display, revise el display y el manual de la URC CODE.
  • Seite 116 Internet: www.zehnder.fr Internet: www.zehnderpassivehouse.co.uk E-mail: venilation@zehnder.fr E-mail: comfosystems@zehnder.co.uk Italia (Italy) España (Spain) Zehnder Group Italia S.r.l. Zehnder Group Ibérica Indoor Climate, S.A. Tel.: +41 43 833 20 20 Tel.: (+34) 902 111 309 Internet: www.zehnder.it Internet: www.zehnder.es E-mail: info@zehnder.it E-mail: info.es@zehndergroup.com...

Diese Anleitung auch für:

Comfosense c55Comfosense c67Comfosense cch

Inhaltsverzeichnis