HEIDENHAIN TS 460 Montageanleitung
Vorschau ausblenden
Andere Handbücher für TS 460:
- Montageanleitung (40 Seiten) ,
- Montageanleitung (40 Seiten)

Verwandte Anleitungen für HEIDENHAIN TS 460


Inhaltszusammenfassung für HEIDENHAIN TS 460
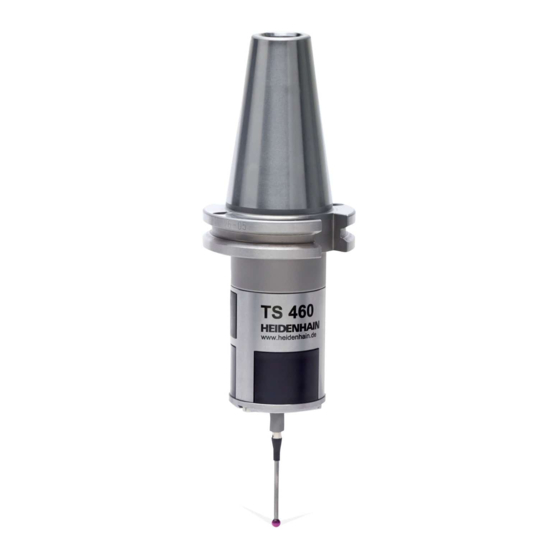
- Seite 1 Mounting Instructions Montageanleitung Instructions de montage Istruzioni di montaggio Instrucciones de montaje 取付説明書 安装说明 安裝指導手冊 설치 지침 TS 460 10/2014...
- Seite 2 Page Seite Contents Inhalt Warnings Warnhinweise Sommaire Approval for radio transmission Funkerlaubnis Indice 12 Items Supplied 12 Lieferumfang Índice 16 Dimensions 16 Abmessungen 18 Setting the operating mode 18 Einstellung des Betriebsmodus 22 Pairing during wireless operation 22 Paaren im Funkbetrieb 24 Taper exchange 24 Kegelmontage 28 Stylus exchange...
- Seite 3 Contents Page ページ Warnings 目次 注意事項 目录 10 Approval for radio transmission 10 無線通信の認証 14 Items Supplied 14 梱包品 目錄 17 Dimensions 목차 17 寸法 20 Setting the operating mode 20 操作モードの設定 23 Pairing during wireless operation 23 無線操作時のペアリング 26 Taper exchange 26 テーパ交換...
- Seite 4 Warnings Warnhinweise Avertissement Avvertenze Notas de aviso Note: Mounting and commissioning is to be conducted by a qualified specialist under compliance with local safety regulations. Achtung: Die Montage und Inbetriebnahme ist von einer qualifizierten Fachkraft unter Beachtung der örtlichen Sicherheitsvorschriften vorzunehmen. Attention: le montage et la mise en service doivent être assurés par un personnel qualifié...
- Seite 5 Calibrate the touch probe with the calibration cycle of the control before commissioning. Tastsystem vor Inbetriebnahme mit Kalibrierzyklus der Steuerung kalibrieren. Avant la mise en service, étalonner le palpeur avec le cycle d’étalonnage de la commande. Calibrare il tastatore prima della messa in funzione con il ciclo di calibrazione del controllo numerico. Calibrar el palpador, antes de la puesta en marcha, con el ciclo de calibración del control.
- Seite 6 Warnings 注意事項 提示 警告 경고 Note: Mounting and commissioning is to be conducted by a qualified specialist under compliance with local safety regulations. 注意:取付け及び試運転は設置国の安全規格のもとで有資格の専門家により実施するようにし てください。 注意: 安装和调试时必须符合当地安全要求并由具有资质的专业人员操作 注意:安裝與調整要經由已認證的專業人員指導以符合當地安全規範要求。 주의: 설치 및 조정은 한국의 안전도 규정에 의하여 작업을 수행할 수 있는 공인된 기술자에 의해 수행되어야...
- Seite 7 Calibrate the touch probe with the calibration cycle of the control before commissioning. 試運転の前に制御装置の校正サイクルによってタッチプローブ/工具測長器を校正してください。 调试开始前用数控系统的校准循环校准测头。 調試之前請先使用控制器的校準程式以校準接觸探頭。 커미셔닝하기 전 컨트롤의 교정 사이클로 터치 프로브를 교정하세요. Use a coin to open the battery compartment. コイン等を用いて電池収納部を開けてください 用一枚硬币打开电池舱。 用硬幣打開電池盒. 배터리 보관함을 열 때 동전을 사용하세요. Remove the battery’s protective cap before initial operation.
- Seite 8 Approval for radio transmission For operation in radio mode (see page 18). Funkerlaubnis Für den Betrieb im Funkmodus (siehe Seite 18). Autorisation pour transmission radio Pour le fonctionnement en mode radio (voir page 18). Approvazione per trasmissione radio Per l’operatività in modo radio (vedi pagina 18). Permiso para la transmisión por radio Para el funcionamiento en modo transmisión (ver pág.
- Seite 9 Europe DR. JOHANNES HEIDENHAIN GmbH hereby declares that the TS460 touch probe system is in compliance with the essential requirements and other relevant provisions of Directive 1999/5/EC. The EC Declaration of Conformity can be requested from DR. JOHANNES HEIDENHAIN GmbH Dr.-Johannes-Heidenhain-Straße 5...
- Seite 10 Approval for radio transmission For operation in radio mode (see page 20.) 無線通信の認証 無線モードでの操作用 (20ページを参照してください) 无线电信号传输许可 无线电操作模式(参见第20页)。 核准無線電傳輸 在無線電模式操作(見第20頁)。 무선 전송 승인 무선 모드에서 작동(20 페이지 참조) Japan 204-360008 China 参见附录页 Taiwan 見補充頁 Korea 보충 페이지 참조...
-
Seite 12: Lieferumfang
Articles de la livraison dépendant de la version de l’appareil Standard di fornitura Standard di fornitura secondo la variante dell‘apparecchiatura Suministro Los elementos suministrados dependen de la variante del aparato TS 460 Taper shank Spannschaft Cône de serrage T10 torx wrench (p. 35) Cono Torx Schlüssel T10 (S. - Seite 13 SE 640 SE 642 To be ordered separately: Separat bestellen: ID 631225-xx ID 652792-xx Commander séparément: Da ordinare separatamente: Pedir por separado: ID 370827-01 ID 744677-01 SE 660 SE 540 SE 540 ID 744719-01 ID 626001-xx ID 626001-xx Holder for SE 64x Holder for SE 660 Halter für SE 64x Halter für SE 660...
- Seite 14 Items supplied Items supplied depend on product variant 梱包品 梱包品は製品種類により異なります 零部件 供应的部件与产品具体型号有关 供應的項目 零組件項目因應料號而有不同。 제공 품목 제공 품목은 제품 별로 다를 수 있습니다. TS 46x Taper shank テーパシャンク 刀柄 T10 torx wrench (p. 37) 刀柄 T10 トルクスレンチ (37ページ) 테이퍼 섕크 T10梅花扳手(第37页) T10星形扳手(第37頁) T10 톡스...
- Seite 15 To be ordered separately: SE 640 SE 642 別売品: ID 631225-xx ID 652792-xx 需单独订购: 須另外訂購的項目: 별도로 주문하려면: ID 370827-01 ID 744677-01 SE 660 SE 540 SE 540 ID 744719-01 ID 626001-xx ID 626001-xx Holder for SE 64x Holder for SE 660 SE 64x用ホルダー...
- Seite 16 Dimensions Abmessungen Dimensions Dimensioni Dimensiones Tolerancing ISO 8015 ISO 2768 - m H M30x0.5 < 6 mm: ±0.2 mm M30x0.5 M12x0.5 M12x0.5 ¬ 40 ¬ 41...
- Seite 17 Dimensions 寸法 尺寸 尺寸 규격 Tolerancing ISO 8015 ISO 2768 - m H M30x0.5 < 6 mm: ±0.2 mm M30x0.5 M12x0.5 M12x0.5 ¬ 40 ¬ 41...
- Seite 18 Setting the operating mode Einstellung des Betriebsmodus Réglage du mode de fonctionnement Settaggio del modo di funzionamento Configuración del modo de funcionamiento Rotary switch Drehschalter Commutateur rotatif Interruttore Conmutador giratorio IR/RF on/off 1 TS460IR 2 TS460RF 3 TS440/640 Caution: Conduct electronic recentering after switching between IR and RF modes, page 34.
- Seite 19 Switch position Activation Transmission Transmission unit Schalterstellung Aktivierung Übertragung Sendeeinheit Position de commutation Activation Transmission Unité émettrice Posizione dell‘interruttore Attivazione Trasmissione Unità di trasmissione Posición del interruptor Activación Transmisión Unidad de recepción 1 *) SE540 , SE64x , SE 660 IR, RF SE 660 SE 540...
- Seite 20 Setting the operating mode 操作モードの設定 设置操作模式 設置操作模式 작동 모드 설정 Rotary switch ロータリスイッチ 旋钮开关 旋轉開關 회전형 스위치 IR/RF on/off 1 TS460IR 2 TS460RF 3 TS440/640 Caution: Conduct electronic recentering after switching between IR and RF modes, page 36. 警告: IRとRFモード間で切替え後に 再度電気的センタリングを行ってください( 36ページ) 小心:...
- Seite 21 Switch position Activation Transmission Transmission unit スイッチ位置 起動 通信モード 送受信ユニット 开关位置 激活 传输 发射器 開關位置 啟動 傳輸 傳輸單元 스위치 위치 활성화 전송 전송 장치 1 *) SE540 , SE64x , SE 660 IR, RF SE 660 SE 540 , SE 640 4 - 6 Not assigned 割当なし...
- Seite 22 Pairing during wireless operation For operation in radio transmission mode, please refer to the SE 660 Mounting Instructions. Paaren im Funkbetrieb Für den Betrieb im Funk-Modus beachten Sie die Montageanleitung der SE 660. Couplage en mode Radio Pour connaître le fonctionnement en mode Radio, se reporter aux instructions d’utilisation Accoppiamento in modalità...
- Seite 23 Pairing during wireless operation For operation in radio transmission mode, please refer to the SE 660 Mounting Instructions. 無線操作時のペアリング 無線通信モードでの操作については、SE 660の取付説明書を参照してください。 无线操作的配对 有关无线电信号传输模式的操作信息,参见SE 660安装说明。 無線操作過程中配對 對於無線電傳輸模式下運行, 請參閱SE 660安裝說明. 무선 작업 중 페어링 무선 전송 모드에서 작동에 관해서는 SE 660 설치 지침을 참조하세요. Only for commissioning in radio transmission mode.
- Seite 24 Taper exchange Kegelwechsel Changement de cône Sostituzione del cono Cambio del cono 1/2” 1/2” ¬ 20...
- Seite 25 = 20 ± 5 Nm 1/2” 1/2” 1/2” Secure the thread with Loctite 222/S8 Gewinde mit Loctite 222/S8 sichern Freinage des filetages avec Loctite 222/S8 Bloccare il filetto con Loctite 222/S8 Asegurar la rosca con Loctite 222/S8...
- Seite 26 Taper exchange テーパ交換 刀柄更换 調換錐柄 테이퍼 교환 1/2” 1/2” ¬ 20...
- Seite 27 = 20 ± 5 Nm 1/2” 1/2” 1/2” Secure the thread with Loctite 222/S8 Loctite 222/S8でネジを固定してください 用Loctite 222/S8固定螺纹 使用螺絲固定劑 Loctite 222/S8 固定螺牙 Loctite 222/S8로 나사를 고정합니다.
- Seite 28 Stylus exchange Taststiftwechsel Changement de la tige de palpage Sostituzione dello stilo Cambio del vástago Note: Recenter, see pages 34 and 35 Achtung: Neu zentrieren, siehe Seite 34 und 35 Attention: recentrage, voir pages 34 et 35 Attenzione: ripetere il centraggio, vedere pagina 34 e 35 Atención: centrar de nuevo, ver pág.
- Seite 29 Stylus exchange スタイラスの交換 测针更换 探針交換 스타일러스 교체 Note: Recenter, see pages 36 and 37 注意: 再センタリング。36および37ページを参照ください。 注意: 重新定心时,参见第36和37页 附註: 重校中心, 請参考頁碼 36 及 37 유의사항: 재센터링은 36, 37페이지를 참조하십시오. ¬ 1.5 mm = 0.4 ... 0.6 Nm...
- Seite 30 Please dispose of the batteries properly. Adhere to the legal regulations of your country. Battery exchange Bitte entsorgen Sie die Batterien fachgerecht. Halten Sie sich dabei an die gesetzlichen Batterienwechsel Changement des batteries Bestimmungen Ihres Landes. Sostituzione delle batterie Veuillez éliminer les batteries de manière appropriée. Respectez à cet égard les règlementations Cambio de batería en vigueur dans votre pays.
- Seite 31 Alkaline batteries or NiMH accumulators with 1 to 4 V can also be used. The stylus must hang loose for the self-calibration Alkaline-Batterien oder NIMH-Akkus mit 1 bis 4 V sind ebenfalls verwendbar. Wegen Selbstkalibrierung muss Taststift frei sein Utilisation possible des batteries alcalines ou accus NIMH de 1 à 4 V. La tige de palpage doit être libre à...
- Seite 32 Battery exchange Please dispose of the batteries properly. Adhere to the legal regulations of your country. 電池交換 電池を正しく配置してください。 設置国の法令を遵守してください。 更换电池 请正确处置电池。 必须严格遵守所在国法律。 更換電池 請正常處理電池. 遵守貴國的法律法規. 배터리는 규정에 따라 처리해야 합니다. 소속 국가의 법령에 따라 주십시오. 배터리 교체 Included in the delivery: 2 LITHIUM batteries, 3.6 V, 1/2 AA ID 332775-05.
- Seite 33 Alkaline batteries or NiMH accumulators with 1 to 4 V can also be used. The stylus must hang loose for the self-calibration アルカリ電池もしくはニッケル水素電池(1~4V)も使用可能です。 自己校正時にスタイラスへ力を加えないでください 也可用电压在1至4 V之间的碱性电池或NiMH镍氢电池。 测针必须在自然下垂状态进行自我校准 任何 1 至 4 伏特鹼性電池或鎳氫電池皆可使用。 自動校正時探針必須無碰觸 1~4V의 알칼리 배터리 또는 NiMH 축전지를 사용할 수도 있습니다. 자체...
- Seite 34 Electronic centering: with automatic calibration cycle of the control Centering Elektronisch Zentrieren: mit automatischem Kalibrierzyklus der Steuerung Zentrieren Recentrage électronique : avec le cycle d’étalonnage automatique de la commande numérique Centrage Centraggio Centraggio elettronico: con il ciclo di calibrazione automatico del controllo numerico. Centrado Centrar electrónicamente: con el ciclo de calibración automático del control numérico.
- Seite 35 Spindle or tool-setting device Spindel oder Werkzeugeinstellgerät Broche ou banc de préréglage d'outils Mandrino o apparecchio di serraggio dell'utensile Sistema de ajuste de la herramienta o del cabezal Mechanical centering. Only necessary if electronic centering is not possible. Mechanisch Zentrieren, nur nötig wenn keine elektronische Zentrierung möglich ist. Centrage mécanique, seulement si le centrage électronique n'est pas possible.
- Seite 36 Centering Electronic centering: In NC through probing from opposite directions (calibration ring) センタリング(校正) 電気的センタリング:反対方向からプローブしてNCに(校正リング) 定心 电子定心: 用NC程序的探测功能进行相向探测(标准环规) 中心定位 電子對心: 於 NC 機台上探測對應方向 (校正環規) 센터링 자동 센터링: NC의 반대 방향에서 프로빙(교정 링) Required for: - New touch probe - After stylus exchange - After collision with collision protection 以下の時に必ず校正が必要です。...
- Seite 37 Spindle or tool-setting device スピンドルもしくは工具設定機器 主轴或对刀仪设备 主軸或刀具設定設備 스핀들 또는 공구 설정 장치 Mechanical centering. Only necessary if electronic centering is not possible. 機械的センタリング 電気的センタリングが不可能のときのみ必要 机械定心。 只适用于不能进行电子定心时。 機械對心。 只有電子對心無效才需要。 기계식 센터링. 자동 센터링이 불가능한 경우에만 필요합니다. M d = 1.2...1.4 Nm 360° –3 µm +3 µm F <...
- Seite 38 Functional principle of collision protection Funktionsweise des Kollisionsschutzes Principe de fonctionnement de la protection anti-collision Principio di funzionamento della protezione da collisione Funcionamiento del protector ante colisiones Collision protection adapter Kollisionsschutzadapter Adaptateur de protection anti-collision Adattatore di protezione alla collisione Adaptador del protector ante colisiones The ready signal ceases after approx.
- Seite 39 Functional principle of collision protection 衝突保護機能の原理 防撞保护工作原理 碰撞保護的工作原理 충돌 보호 기능의 기능적 원리 Collision protection adapter 衝突保護アダプタ 防撞保护适配接头 碰撞保護接頭 충돌 보호 어댑터 The ready signal ceases after approx. 1 mm of deflection; the NC stops (the NC must request readiness!). After collision, perform automatic touch probe calibration cycle of the NC, see p.
- Seite 40 Possible error. Contact HEIDENHAIN service agency rote LED, schnell blinkend evtl. Fehler, HEIDENHAIN - Service kontaktieren LED rouge, clignotant rapidement Erreur possible. Contacter le S.A.V. de HEIDENHAIN. LED rosso, lampeggia velocemente Per eventuali errori, contattare il Servizio Assistenza LED roja, intermitencia rápida HEIDENHAIN...
- Seite 41 青色に点灯 测头就绪,测针偏离自由位置 蓝色常亮 接觸式探針備妥,探針已偏移 藍色持續 터치 프로브 준비, 스타일러스 굴절됨 파란색 점등 Red LED, fast blinking Possible error. Contact HEIDENHAIN service agency 赤色LEDがしきりに点滅 エラーの可能性があります 当社サービス部門にご連絡ください。 红色LED,快速闪亮 可能错误。 联系海德汉服务部。 紅色LED,快速閃爍 可能錯誤. 聯繫海德漢服務機構 빨간색 LED가 빠르게 깜박임 오류일 수 있습니다. 하이덴하인 서비스 담당자에게 문의하십시오.
- Seite 42 Signal sequence Signalfolge Diagramme des signaux Treno di segnali Secuencia de la señal typ. 250 ms, max. 3000 ms £ 40 ms £ 200 µs *) £ 200 µs *) £ 20 ms £ 10 ms *) £ 10 ms *) t W ³...
- Seite 43 Signal sequence 信号シーケンス 信号顺序 信號程序 신호 순서 typ. 250 ms, max. 3000 ms £ 40 ms £ 200 µs *) £ 200 µs *) £ 20 ms £ 10 ms *) £ 10 ms *) t W ³ 25 ms Fault 異常発生時...
- Seite 44 DR. JOHANNES HEIDENHAIN GmbH Dr.-Johannes-Heidenhain-Straße 5 83301 Traunreut, Germany { +49 8669 31-0 | +49 8669 5061 E-mail: info@heidenhain.de Technical support | +49 8669 32-1000 Measuring systems { +49 8669 31-3104 E-mail: service.ms-support@heidenhain.de TNC support { +49 8669 31-3101 E-mail: service.nc-support@heidenhain.de...