Werbung
Verfügbare Sprachen
Verfügbare Sprachen
Werbung
Inhaltsverzeichnis

Inhaltszusammenfassung für Peavey AUDITION 110
- Seite 2 Intended to alert the user to the presence of uninsulated “dangerous voltage” within the product’s enclosure that may be of sufficient magnitude to constitute a risk of electric shock to persons. Intended to alert the user of the presence of important operating and maintenance (servicing) instructions in the literature accompanying the product.
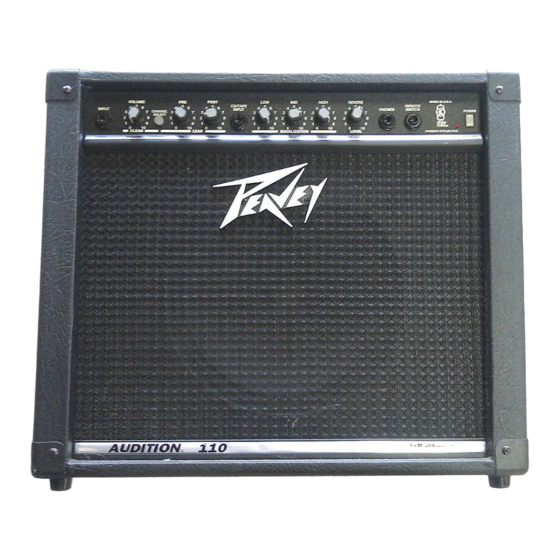
- Seite 3 FRONT PANEL FEATURES INPUT (1) The input jack will accept signals from all types of guitar pickups. VOLUME (2) Controls the volume level of the Clean channel. CHANNEL SELECT SWITCH (3) Allows selection of the Lead or Clean channel. The “in” position of the switch selects the Lead channel and the “out”...
- Seite 4 POWER LED (11) Illuminates when AC power is being supplied to the amp. POWER SWITCH (12) Depress the switch to the “on” position. The red LED will illuminate indicating that power is being supplied to the unit. WARNING: THIS UNIT IS CONNECTED TO THE MAINS POWER, EVEN IF THE POWER SWITCH IS OFF.
-
Seite 5: Specifications
SPECIFICATIONS Preamp Input: POWER AMP (normal channel) Rated Power 81 Load: Impedance: High-Z, 1 M ohm 25 W RMS into 8 ohms Nominal Input Level: -6 dBV, 500 mV RMS Power @ Clipping: (typically) Minimum Input Level: -23 dBV, 70 mV RMS (5% THD, 1 kHz, 120 V AC line) Maximum Input Level: 0 dBV, 1 V RMS 25 W RMS into 8 ohms... -
Seite 7: Tone Settings
TONE SETTINGS METAL LEVEL ADJUST TO ADJUST TO TASTE TASTE MEDIUM DISTORTION VOLUME POST LEVEL PATENTS APPLIED FOR ADJUST TO ADJUST TO TASTE TASTE COUNTRY LEAD VOLUME POST LEVEL PATENTS APPLIED FOR ADJUST TO ADJUST TO TASTE TASTE T E C H N O L O G Y PATENTS Aflf’LIED FOR... - Seite 8 Consulte 10s diagramas de1 panel delantero en la seccih de inglCs de este manual. INPUT (Entrada) (1) El enchufe hembra de entrada acepta todo tipo de sehales provenientes de captadoras de instrumentos electricos de cuerda. VOLUME (Volumen) (2) Controla el nivel de volumen del canal “clean” (limpio). CHANNEL SELECT SWITCH (Interruptor para selection clel canal) (3) Permite la selection del canal “lead”...
- Seite 9 POWER LED (LED indicador de corriente) (11) Se ilumina cuando el amplificador recibe corriente alterna. POWER SWITCH (Interruptor de corriente) (12) Oprima el interruptor a la position “hacia dentro” (encendido). La luz roja del pilot0 (indicador) se encendera indicando que la unidad esta recibiendo corriento alterna. ADVERTENCIA: ESTA UNIDAD QUEDA CONECTADA A LA FUENTE DE CORRIENTE PRINCIPAL, AUNQUE EL INTERRUPTOR DE POTENCIA ESTk APAGADO.
- Seite 10 Veuillez-vows rkfker au “front panel art” situ6 dans la section en langue anglaise de ce manuel. INPUT (Entree) (1) Cette prise d’entree accepte les signaux de tous les types de micros (“pickups”) de guitare. VOLUME (2) Controle le niveau de volume du canal “Clean”. CHANNEL SELECT SWITCH (Sklecteur de canal) (3) Permet de selectionner les canaux “Lead”...
- Seite 11 POWER SWITCH (Interrupteur d’alimentation) (12) Mettre I’interrupteur en position “On”. La lampe tkmoin rouge (DEL) s’illumine indiquant que I’appareil est aliment6 en courant. AVERTISSEMENT: CET APPAREIL EST RELIE A L’ALIMENTATION PRINCIPALE MEme SI L’INTERRUPTEUR D’ALIMENTATION EST EN POSITION “OFF”. : POUR EVITER LES CHOCS ELECTRIQUES, INTRODUIRE A T T E N L A L A M E L A L A R...
- Seite 12 Siehe Diagramm der Frontplatte im englischen Teil des Handbuchs. BESCHREIBUNG DER FRONTPLATTE INPUT (Eingang) (1) Diese Eingangsbuchse verarbeitet Signale von Gitarrentonabnehmern aller Art. VOLUME (Lautstarke) (2) Regelt die Lautstarke des Clean-kanals. CHANNEL SELECT SWITCH (Kanal-Wahl-Schalter) (3) Erlaubt die Auswahl des Lead- oder des Clean-Kanals. Die “In-Position des Schalters wahlt den Lead- Kanal, die “Out’‘-Position den Clean-Kanal an.
- Seite 13 POWER LED (LED fur die Netzschalter) (11) Zeigt die eingeschaltete Netzspannung an. POWER SWITCH (Netzschalter) (12) Bringen Sie den Schalter auf die ON-Position. Die rote Kontrollampe (LED) leuchtet und zeigt an, da0 das WARNUNG: Diese Einheit ist immer mit dem Stromnetz verbunden such wenn der Netzschalter ausgeschaltet ist.
- Seite 14 PEAVEY 90-DAY LIMITED WARRANTY ON TUBES AND METERS If this product contains tubes or meters, Peavey warrants the tubes or meters contarned in the product to be free from defects in material and workmanshrp for a period of ninety (90) days from date of purchase; PROVIDED, however, that thus limited warranty is extended only to the original retail purchaser and...
-
Seite 15: Important Safety Instructions
The user should not attempt to service this equipment. All service work should be done by a qualified service technician. This product should be used only with a cart or stand that is recommended by Peavey Electronics. Exposure to extremely high noise levels may cause a permanent hearing loss. Individuals vary considerably in susceptibility to noise induced hearing loss, but nearly everyone will lose some hearing if exposed to sufficiently intense noise for a sufficient time. - Seite 16 Peavey Electronics Corporation 711 A Street / Meridian, MS 39301 / U.S.A. / (601) 483-5365 / Fax 486-1278 01995 Printed in U.S.A. I/96...


