Meble Wojcik 30 Montageanleitung
4s kleines regal
Quicklinks
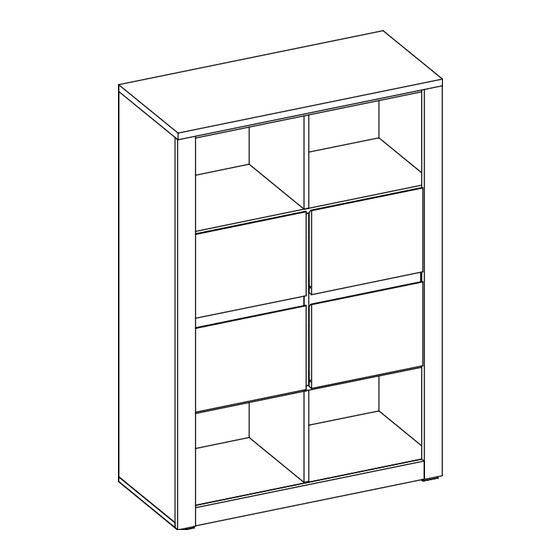
TYP 30 - Regał niski 4S / TYPE 30 – 4S Short bookcase
TYP 30 – 4S Kleines Regal / ТИП 30 – СТЕЛЛАЖ НИЗКИЙ 4S
TYP 30 – Nízky regál 4S / TYP 30 – Nízká police 4S
Indeks wyrobu: / Product index:
Produktnummer: / Обозначение изделия:
Index Produktu: / Index výrobku:
400 mm
Producent:/ Manufacturer:
Hersteller: / Производитель:
Výrobca: / Výrobce:
Wójcik Fabryka Mebli Spółka z o. o.
ul. Mazurska 45
82-300 Elbląg
e-mail: handlowy@meblewojcik.pl
12-06-2014
PRO-018-3001
890 mm
Wójcik Fabryka Mebli Spółka z o. o.
ul. Mazurska 45
82-300 Elbląg
Электронная почта:
handlowy@meblewojcik.pl
Strona / Page / Seite / Страница / Strana / 1/26
Data: / Date:
12-06-2014
Datum: / Дата:
Dátum: / Datum:

Verwandte Anleitungen für Meble Wojcik 30


Inhaltszusammenfassung für Meble Wojcik 30
- Seite 1 TYP 30 - Regał niski 4S / TYPE 30 – 4S Short bookcase TYP 30 – 4S Kleines Regal / ТИП 30 – СТЕЛЛАЖ НИЗКИЙ 4S TYP 30 – Nízky regál 4S / TYP 30 – Nízká police 4S Indeks wyrobu: / Product index:...
- Seite 2 W razie braku lub uszkodzenia In the event of missing or Im Falle, dass Elemente fehlen jakiejś części najszybszym damaged parts, the fastest oder beschädigt sein sollten, sposobem złożenia reklamacji method of filing a complaint ist der schnellste Weg der jest kontakt z lokalnym is to contact the local Reklamation, ihren lokalen...
- Seite 3 Proszę sprawdź kompletność okuć przed montażem.Upewnij się, że używasz odpowiednie elementy. Please check that all fittings are included prior to assembly.Make sure that you are using the correct components. Prüfen Sie bitte vor der Montage, ob alle Elemente vorhanden sind. Bitte vergewissern Sie sich, dass Sie die richtigen Elemente verwenden.
- Seite 4 Elementy znajdujące się w paczkach: / Components in the packs / Elemente in den Packungen: / Элементы, находящиеся в упаковочных коробках: / Časti, nachádzajúce sa v balení: / Součásti, které se nacházejí v krabicích. Bok lewy / Left Bok prawy / Right Wieniec górny / Top panel / side /Linke side / Rechte...
- Seite 5 Elementy znajdujące się w paczkach: / Components in the packs / Elemente in den Packungen: / Элементы, находящиеся в упаковочных коробках: / Časti, nachádzajúce sa v balení: / Součásti, které se nacházejí v krabicích. Przegroda pozioma górna Przegroda pozioma środkowa Przegroda pozioma prawa /Right top horizontal lewa /Left middle horizontal...
- Seite 6 Elementy znajdujące się w paczkach: / Components in the packs / Elemente in den Packungen: / Элементы, находящиеся в упаковочных коробках: / Časti, nachádzajúce sa v balení: / Součásti, které se nacházejí v krabicích. Bok prawy szuflady / Right drawer Ściana tylna szuflady / Drawer Dno szuflady / Drawer bottom / side / Rechte Schubladen-...
- Seite 7 Zasada mimośrodu i trzpienia: / The rule of the eccentric cam and screw dowel: / Hinweise zum Exzenter und Bolzen:/ПРИНЦИП МОНТАЖА ЭКСЦЕНТРИКА И ШТОКА ЭКСЦЕНТРИКА:/ Zásady narábiania s excentickou spojovacoiu skrutkou a tiahlom: / Pravidlo výstředníku a trnu Krok 1: Krok 2: Krok 3: Krok 4:...
- Seite 8 Schemat składania: / Assembly instructions: / Montageanleitung: / Схема монтажа: / Schéma skladania: / Schéma skládání. Hammer the 'A1' dowels into the '1' left side and '2' right side, and screw in the F1' eccentric cam screw dowels. Setzten Sie die Dübel 'A1' in die linke '1' und die rechte Seitenwand '2' und schrauben Sie die Exzenter-Bolzen 'F1' an. В...
- Seite 9 środkową lewą środkową prawą Hammer the 'A1' dowels into the '8' left and '9' right top horizontal divider, and to the '10' left middle and '11' right middle horizontal divider. Setzten Sie die Dübel 'A1' in die obere rechte '8' und die obere linke horizontale Trennwand '9', die mittlere linke '10' und die mittlere rechte horizontale Trennwand '11'.
- Seite 10 W przegrodę pionową lewą „5" oraz prawą „7" wbij kołki meblowe „A1" oraz przykręć trzpienie mimośrodu „F1". Przykręć prowadnicę rolkową „T3" za pomocą wkrętów „C2". Po ustawieniu prowadnicy należy ją zabezpieczyć przed przesuwaniem za pomocą wkrętu „N1" (szkic 5.1). Hammer the 'A1' dowels into the '5' left and '7' vertical divider, affix the 'T3' roller runner using the 'C2' screws (figure 5.1), and screw in the 'F1' eccentric cam screw dowels.
- Seite 11 Hammer the 'A1' dowels into the '14' left and '15' right middle strip. Setzten Sie die Dübel 'A1' in die linke '14' und rechte mittlere Leiste '15'. Вбей шканты (колышки) "А1" в срединную левую планку "14", а также правую "15" Nabi kolíčky “A1”...
- Seite 12 Attach the '1' left side to the '17’ left strip, and the '2' right side to the '18’ right strip using the 'E1' eccentric cams (for assembly instructions see page 7). Verbinden Sie mithilfe der Exzenter 'E1' die linke Seitenwand '1' mit der linken Leiste '17’, und die rechte Seitenwand '2' mit der rechten Leiste '18’...
- Seite 13 Hammer the wooden 'A1' dowels into the drawer components. Setzten Sie die Holzdübel 'A1' in die Schubladenelemente ein. Вбей шканты (колышки) "А1" в элементы ящика. Nabi drevené kolíky „A1” do častí šuplíka. Zatlučte dřevěné kolíky „A1“ do součástí zásuvky. Place the components on a clean and level surface, so as not to damage the drawer front. Screw the 'F1' eccentric cam screw dowels into the '19' drawer front.
- Seite 14 Screw the '20' and '21' drawer sides to the '22' back drawer wall using the 'G1' confirmats (and the 'M' Allen key). Schrauben Sie mithilfe der Konfirmaten 'G1' die Schubladen-Seitenwände '20' und '21' an die Schubladen-Rückwand '22'. Verwenden Sie hierfür den Inbus-Schlüssel 'M’. Скрепи...
- Seite 15 Slide the '23' drawer bottom.Before nailing the bottom, check the diagonal to make sure that C=D. Screw the 'N1' screws through the '23' bottom into the '22' back drawer wall. Setzten Sie den Schubladenboden '23' ein.Bevor Sie ihn befestigen, prüfen Sie die Diagonale C=D. Schrauben Sie die Schrauben 'N1' durch den Schubladenboden '23' an die Schubladenwand '22'.
- Seite 16 Place the components as per the diagram. Attach the '1' left side to the '8' left top horizontal divider, and the '2' right side to the '9' right top horizontal divider using the 'E1' eccentric cams (for assembly instructions see page 7). Setzten Sie die Elemente gemäß...
- Seite 17 Place the components as per the diagram. Caution! Place the components on a clean and level surface, so as not to damage the edges. Attach the '5' left vertical divider to the '8' left top horizontal divider, and the '7' right vertical divider to the '9' right top horizontal divider using the 'E1' eccentric cams.
- Seite 18 Attach the '1' left side to the '10' left middle horizontal divider, and the '2' right side to the '11' right middle horizontal divider using the 'E1' eccentric cams. Verbinden Sie mithilfe der Exzenter 'E1' die linke Seitenwand '1' mit der mittleren linken horizontalen Trennwand '10', und die rechte Seitenwand '2' mit der mittleren rechten horizontalen Trennwand '11'.
- Seite 19 Attach the '14' left middle strip to the '5' left vertical divider, and the '15' right middle strip to the '7' right vertical divider using the 'E1' eccentric cams.Additionally, screw the '10'left middle horizontal divider to the '5' left vertical divider, and the '11' right middle horizontal divider to the '7' right vertical divider using the confirmats.
- Seite 20 Attach the '6' middle vertical divider to the '12' bottom horizontal divider using two 'G1' confirmats (and the 'M' Allen key). Verbinden Sie mithilfe von 2 Konfirmaten 'G1' die mittlere vertikale Trennwand '6' mit der unteren horizontalen Trennwand '12'. Verwenden Sie hierfür den Inbus-Schlüssel 'M.' Соедини...
- Seite 21 Place the components as per the diagram. Caution! Place the components on a clean and level surface, so as not to damage the edges. Attach the '1' left side and '2' right side to the '12' bottom horizontal divider using the 'E1' eccentric cams. Attach the '14' left and '15' right middle strip, '8' left top, '9' right top, '10' left middle and '11' right middle horizontal divider to the middle vertical divider using the 'A3' dowels and 'F4' double-ended bolts.
- Seite 22 Attach the '16' bottom strip to the '12' bottom horizontal divider using two'E1' eccentric cams. Attach the '4' bottom panel to the '1' and '2' sides using four 'G1' confirmats (and the 'M' Allen key). Verbinden Sie mithilfe von 2 Exzentern 'E1' die untere Leiste '16' mit der unteren horizontalen Trennwand '12'. Verbinden Sie mithilfe von 4 Konfirmaten 'G1' die untere Platte '4' mit den Seitenwänden '1' und '2'.
- Seite 23 W otwory w wieńcu dolnym „4" przykręć stopki „O15"przy pomocy wkrętów „J3". Using the 'J3’ screws affix the 'O15' feet to the '4' bottom panel.. Befestigen Sie mithilfe der Schrauben 'J3’ die Möbelfüße 'O15' an der unteren Platte ‘4'. В отверстия нижней панели "4" прикрути ножки "О15" при помощи шурупов "J3”. Do otvorov dolného venca “4”...
- Seite 24 i “26” i “26” Into the undercuts in the '1' and '2' sides and the '3' and '4' panels, insert '25' and '26' back walls. Check the diagonal of the cube to make sure A=B and screw '25' and '26' back walls to the furniture body using the 'N1' screws (at the wall edges as per the diagram).
- Seite 25 Na prowadnice znajdujące się na przegrodach nasuń szuflady „19" (szkic 28.1). W celu bezpiecznego użytkowania należy przykręcić wyrób do ściany za pomocą kątowników „Q9". Producent nie dostarcza kołków i wkrętów mocujących. Aby przymocować wyrób do ściany należy użyć kołki z wkrętem odpowiednie do rodzaju ściany, na której wyrób będzie montowany. Insert the drawers in the runners (Figure 28.1).
- Seite 26 Na widoczne wkręty „J6" przyklej zaślepkę samoprzylepną „P16". Insert the 'E0' cover caps into any visible 'E1' eccentric cams. Insert the 'G0' cover caps into any visible 'G1' confirmats. Bringen Sie die Verschlusskappen 'E0' an allen sichtbaren Exzentern 'E1' an. Bringen Sie die Verschlusskappen 'G0' an allen sichtbaren Konfirmaten 'G1' an.
- Seite 27 Uwaga ! Zasady użytkowania i konserwacji mebla. 1. Mebel powinien być użytkowany zgodnie z jego przeznaczeniem-w pomieszczeniach zamkniętych i zabezpieczonych przed działaniem warunków atmosferycznych. 2. Montaż wyrobu musi być wykonany zgodnie z załączoną instrukcją. 3. Wyrób nie może mieć zastosowania w saunie. 4.
- Seite 28 Caution! Furniture use and maintenance 1. The furniture should be used in accordance with its purpose - in enclosed spaces protected against atmospheric conditions. 2. The product should be assembled as per the attached instruction manual. 3. The product may not be used in a sauna. 4.
- Seite 29 Achtung! Hinweise zur Nutzung und Instandhaltung Die Möbel sind entsprechend ihrem eigentlichen Zweck zu Das Produkt ist gemäß der vorliegenden Montageanleitung zusammenzubauen. Das Produkt darf nicht in der Sauna verwendet werden. Die Platten des Möbelstücks sind aus Holzwerkstoff hergestellt, daher ist das Produkt gegen direkte und langfristige Einwirkung von Wasser (insbesondere gegen Überschwemmung) oder hohe Temperaturen (z.B.
- Seite 30 ВНИМАНИЕ! Правила эксплуатации и консервации мебели. Мебель должна быть использована в соответствие с ее предназначением – в закрытых и ограждённых от атмосферического воздействия помещениях. Монтаж изделия должен быть произведён в соответствие с прилагаемой инструкцией. Изделие не должно использоваться в сауне. Мебель...
- Seite 31 Pozor! Pravidlá používania a náprav nábytku Nábytok musí byť používaný zhodne s jeho preznačením - v priestoroch uzamknutých a zabezpečených proti atmosferickým vplyvom. Montáž výrobku musí byť vykonaný zhodne s priloženým návodom. Výrobok nemôže byť použitý v saune. Nábytok bol vyrobený z drevotriesky, a preto je potrbné ho chrániť...
- Seite 32 Pozor! Zásady používání a údržby nábytku Nábytek musí být používán v souladu se svým určením – v uzavřených prostorách chráněných před působením atmosférických vlivů. Montáž výrobku musí být provedena v souladu s přiloženým návodem. Výrobek nelze používat v sauně. Nábytek je vyroben z dřevotřísky, musí být chráněn před dlouhodobým kontaktem s vodou (především před zatopením) a před vysokou teplotou (např.