Blade Mach 25 FPV Racer BNF Basic Erweiterte Einstellungen
Vorschau ausblenden
Andere Handbücher für Mach 25 FPV Racer BNF Basic:
- Bedienungsanleitung (52 Seiten)
Verfügbare Sprachen
Verfügbare Sprachen
Quicklinks
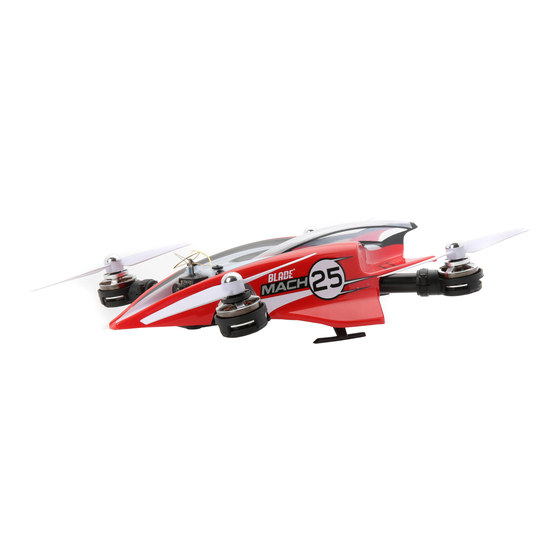
Mach 25
FPV Racer BNF Basic
™
Advanced Settings
The default receiver settings are appropriate for most users.
We recommend flying with the default parameters before making any adjustments.
Adjusting the Gain Values
If you are using a Spektrum
telemetry-enabled transmitter, the gain adjustments can be
™
viewed on the Flight Log screen. Refer to your transmitter instructions to locate this screen.
The gain parameter currently selected will flash on the transmitter screen. If you are not using a
Spektrum telemetry-enabled transmitter, the parameter and gain values cannot be changed.
Flight Log Screen
Gain parameter
selected
Gain value
display location
Gain value R should
never be adjusted
Entering Gain Adjustment Mode
1. Lower the throttle stick to the lowest position.
2. Power ON the transmitter.
3. Install the flight battery in the quadcopter frame, securing it with the O-ring.
4. Connect the battery connector to the ESC.
5. Place the quadcopter on a flat surface and leave it still until the orange receiver LED
glows solid, indicating initialization is complete.
6. Navigate to the Flight Log screen.
7. Move and hold both transmitter sticks to the
bottom right corner as shown.
8. Press and hold the bind/panic switch for 5
seconds. You will see the Gain values appear on
the Flight Log screen.
9. Release the sticks and the bind/panic switch. The model is now in Gain adjustment
Mode.
10. Proceed to adjusting the Gain Values to make any desired changes.
Gain Parameters
1. P Gain Adjustment "Proportional"- A (Default 100%)
Higher gain will result in greater stability. Setting the gain too high may result in random
twitches if your model has an excessive level of vibration. High frequency oscillations may
also occur if the gain is set too high.
Lower gain will result in less stability. Too low of a value may result in a low frequency
oscillation or less stable model, particularly outdoors in winds.
If you are located at a higher altitude or in a warmer climate, higher gains may be
beneficial—the opposite is true for lower altitude or colder climates.
2. I Gain Adjustment "Integral"- B (Default 100%)
Higher gain will increase the models ability to stay in a given position, but may cause low
frequency oscillations if increased too far.
Lower gain will result in the model drifting slowly.
If you are located at a higher altitude or in a warmer climate, higher gains may be
beneficial—the opposite is true for lower altitude or colder climates.
3. D Gain Adjustment "Derivative"- L (Default 100%)
Higher gain will improve the response rate of your inputs. If the gain is raised too much, high
frequency oscillations may occur.
Lower gain will slow down the response to inputs.
4. P Yaw Gain Adjustment "proportional"- A (Default 100%)
Higher gain will increase the sensitivity of yaw control. Setting the gain too high may
result in unnecessary yaw speed and high frequency oscillations when changing yaw
directions.
Lower gain will decrease the sensitivity of yaw control. Setting the gain too low will result
in slower yaw speeds.
If you are located at a higher altitude or in a warmer climate, higher gains may be
beneficial—the opposite is true for lower altitude or colder climates.
5. I Yaw Gain Adjustment "Integral"- B (Default 100%)
Higher gain results increase holding power of yaw control.
Lower gain results in drifting yaw control.
If you are located at a higher altitude or in a warmer climate, higher gains may be
beneficial—the opposite is true for lower altitude or colder climates.
6. D Yaw Gain Adjustment "Derivative"- L (Default 100%)
Higher gain will improve the response rate to your inputs. If raised too far, high frequency
oscillations may occur.
Lower gain will slow down the response to inputs, but will not have an effect on stability.
Once you have entered Gain Adjustment Mode, move the Attitude stick right and left to select
the gain parameter to adjust. Moving the stick right will select the next parameter. Moving
the stick left will select the previous parameter.
Move the attitude stick forward or backward to adjust the gain value. Moving the stick for-
ward will increase the gain value. Moving the stick backward will decrease the gain value.
It is always best to adjust one gain at a time. Make small adjustments (5% or less) and test
fly the model to evaluate the adjustments that were made.
If you would like to reset the current gain value to the default value of 100%, move and hold
the rudder stick full right for 1 second.
Saving the Gain Adjustments
1. Lower the throttle stick to the lowest position.
2. Press and hold the bind/panic switch for 5 seconds to save the gain adjustments.
P age number
3. Release the bind/panic switch.
1 = Attitude Gains
4. The Flight Log screen will display blank gain settings and normal control of the model
2 = Yaw Gains
will resume.
Trim Flight
Perform this procedure if the model is drifting considerably or has been recently rebuilt from a crash.
The trim flight procedure was performed during the factory test flight and only needs to be
performed if you notice the model is not returning to level consistently or if the model does
not remain still during stationary pirouettes. The trim flight is used to determine the optimal
settings for SAFE
The trim flight must be performed in calm conditions.
Entering Trim Flight Mode
1. Lower the throttle stick to the lowest position.
2. Power ON the transmitter.
3. Install the flight battery in the quadcopter.
4. Connect the battery connector to the ESC.
5. Switch to Normal flight mode. Make sure all trims are centered and the Flight Log
screen is visible.
6. Place the quadcopter on a flat level surface where you are going to take off.
7. Move and hold the left stick to the bottom left
corner and the right stick to the top left corner
as shown.
8. While holding sticks, Press and hold the bind/
panic switch until the Flight Log screen displays:
F477 H:0
9. Release the sticks and bind panic switch.
10. The model is ready for the trim flight.
Performing the Trim Flight
1. Slowly increase the throttle to lift the model into a
stationary hover. Make corrections as necessary to
keep the model still. Evaluation begins when the
throttle is raised above low. Making corrections will not affect the result but a longer
flight may be necessary.
2. Keep the model stationary in a hover for a total of 30 seconds. Sliding and slow move-
ments are okay. The main goal is to keep the quadcopter level.
3. Once you are satisfied with the trim flight, land the model.
Exiting Trim Flight Mode
1. After landing, lower the throttle stick to the lowest position.
2. Press and hold the bind/panic switch for 5 seconds, values have been recorded and
trim flight mode has been exited.
Flight Test
After performing the trim flight, test-fly the model to evaluate the leveling characteristics.
• The model should return to level flight consistently.
• During takeoff, the model should lift off with minimal corrections.
• During a hover, the control stick should remain close to center. Small corrections are
acceptable.
If the model performs poorly or does not level properly after the trim flight, retry the entire
trim flight procedure. If the problem persists, inspect the model for damaged components,
a bent part or anything that may result in increased vibration. The trim flight may not record the
correct values due to excessive vibration, flying in wind or the model not staying level. In these
cases, shorter trim flights may be necessary. Try the 30-second, level trim flight without correc-
tions mentioned above first. If the leveling characteristics are not satisfactory, gradually shorten
the trim flights, checking for improvements until the model performs as described.
For the most current information, refer to the product page at bladehelis.com
technology during flight.
®
EN
1

Verwandte Anleitungen für Blade Mach 25 FPV Racer BNF Basic


Inhaltszusammenfassung für Blade Mach 25 FPV Racer BNF Basic
- Seite 2 Haben Sie den Gaineinstellmode aktiviert bewegen Sie bitte den Taumelscheibenstick nach Erweiterte Einstellungen links und rechts um den Parameter den Sie einstellen möchten auszuwählen. Bewegen Sie den Stick nach rechts wählen Sie den nächsten Parameter, bewegen Sie den Stick nach links Die Standardeinstellungen für den Empfänger sind für die meisten Piloten geeignet.