Abus IPCS82500 Kurzanleitung
Vorschau ausblenden
Andere Handbücher für IPCS82500:
- Kurzanleitung (27 Seiten) ,
- Bedienungsanleitung (119 Seiten)

Verwandte Anleitungen für Abus IPCS82500


Inhaltszusammenfassung für Abus IPCS82500
- Seite 1 IPCS82500 TVAC31201/ TVAC31231 / TVAC31221 / TVAC31241 Kurzanleitung ......... 1 Quick Guide ........... 15 ...
- Seite 2 Deutsch Version 06/2018...
-
Seite 3: Hinweise Vor Der Installation
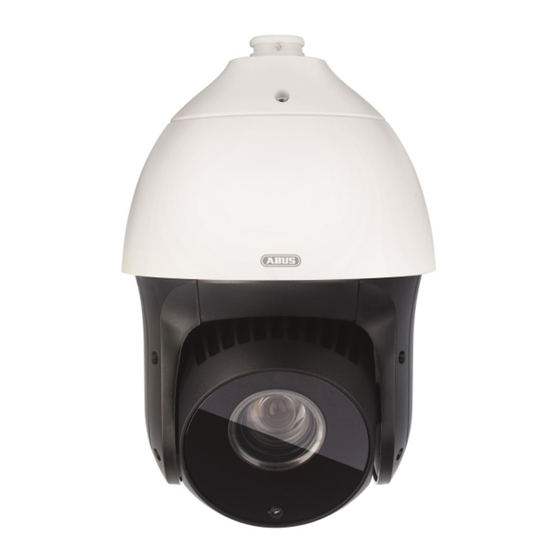
Deutsch 1. Hinweise vor der Installation Ein im Dreieck befindliches Ausrufezeichen Das Symbol mit dem Blitz im Dreieck wird weist auf wichtige Hinweise in dieser verwendet, wenn Gefahr für die Bedienungsanleitung hin, die unbedingt zu Gesundheit besteht, z.B. durch elektrischen beachten sind. - Seite 4 Deutsch 2. Lieferumfang Netzteil Kurzanleitung Werkzeug Außen IP PTZ IR 20x 1080p...
-
Seite 5: Beschreibung Der Anschlüsse
Deutsch 3. Beschreibung der Anschlüsse Beschreibung Spannungsversorgung, 24 V AC Kabelbelegung: Schwarz: 24 V AC Gelb/Grün: Masse Rot: 24 V AC Audioeingang- / ausgang 2 x Schalteingang, 1 x Schaltausgang Netzwerkanschluss, RJ45, PoE fähig (High PoE, 60 Watt) RS-485 Steuerleitung Kabelbelegung: Gelb: RS-485 Minus... -
Seite 6: Installation
Deutsch 4. Installation Bevor Sie starten: Prüfen Sie den Lieferumfang und stellen Sie sicher, dass der PTZ Dome nicht beschädigt ist. Halten Sie niemals den PTZ Dome am wasserdichten Kabel fest, da ansonsten die Wasserdichtigkeit beschädigt werden kann. Entfernen Sie als Erstes die Transportsicherung vom Kamerakopf. Installieren Sie bei Bedarf eine microSD Karte über die rückseitige Öffnung am Kamerakopf. - Seite 7 Deutsch PTZ Dome Wandinstallation 1. Bohren Sie vier Löcher entsprechend der Halterung in die Wand und montieren Sie die Spreizdübel in der Wand. 2. Befestigen Sie die Dichtung zwischen Wand und Halterung. 3. Montieren Sie die Halterung mit den Unterlegscheiben und den Muttern. Unterlegscheibe und Mutter Spreizdübel...
-
Seite 8: Montage Halterungen Außendome
Deutsch 5. Montage Halterungen Außendome 5.1 Montage Wandhalter (TVAC31201) 5.1.1 Abmessungen TVAC31201 5.1.2 Montage Bevor Sie starten: Die Wand muss dick genug sein um die Spreizdübel montieren zu können Bitte stellen Sie sicher, dass die Wand stark genug ist, um mehr als das 8-fache des Gewichtes vom PTZ Dome und der Halterung tragen zu können. - Seite 9 Deutsch Unterlegscheibe und Mutter Spreizdübel 5.2 Montage Eckenhalter (TVAC31231) 5.2.1 Abmessungen TVAC31231...
- Seite 10 Deutsch 5.2.2 Montage Bevor Sie starten: Die Wand muss dick genug sein um die Spreizdübel montieren zu können Bitte stellen Sie sicher, dass die Wand stark genug ist, um mehr als das 8-fache des Gewichtes vom PTZ Dome und der Halterung tragen zu können. 1.
- Seite 11 Deutsch 7. Fahren Sie mit der Montage vom PTZ Dome fort Weitere Hinweise für die Montage vom PTZ Dome finden Sie im Kapitel 4. 5.3 Montage Masthalter (TVAC31221) 5.3.1 Abmessungen TVAC31221...
- Seite 12 Deutsch 5.3.2 Montage Bevor Sie starten: Der Durchmesser der Edelstahlschelle muss dem Durchmesser vom Mast entsprechen Bitte stellen Sie sicher, dass der Mast stark genug ist, um mehr als das 8-fache des Gewichtes vom PTZ Dome und der Halterung tragen zu können. 1.
- Seite 13 Deutsch 7. Fahren Sie mit der Montage vom PTZ Dome fort Weitere Hinweise für die Montage vom PTZ Dome finden Sie im Kapitel 4. 5.4 Montage Wandhalter inkl. Montage Netzteil (TVAC31241) 5.4.1 Abmessungen TVAC31241...
- Seite 14 Deutsch 5.4.2 Montage Bevor Sie starten: Die Wand muss dick genug sein um die Spreizdübel montieren zu können Bitte stellen Sie sicher, dass die Wand stark genug ist, um mehr als das 8-fache des Gewichtes vom PTZ Dome und der Halterung tragen zu können. 1.
- Seite 15 Deutsch 6. Anschluss High-PoE Injektor (TVAC25005) 1: DATA & POWER OUT: Anschluss für den PTZ Dome mit PoE Versorgung 2: DATA IN: Anschluss zum Ethernet-Netzwerk (z.B. Ethernet Switch ohne PoE)