
Verwandte Anleitungen für oscartielle ALTAIR D


Inhaltszusammenfassung für oscartielle ALTAIR D
- Seite 1 ISTRUZIONI D’USO INSTRUCTION MANUAL BETRIEBSANLEITUNG MODE D’EMPLOI INSTRUCCIONES DE USO РУКОВОДСТВО ALTAIR D...
-
Seite 3: Illustrazioni
Altair D ILLUSTRAZIONI ILLUSTRATIONS ABBILDUNGEN ILLUSTRATIONS ILLUSTRACIONES 1170 1170 1170 1170 CODICE MATRICOLA ITEM SBRINAMENTO ILLUMINAZIONE DEFROSTING LIGHTING SUPERF.ESP. DISPLAY AREA REFRIGERANTE MASSA REFRIGERANT WEIGHT CLASSE CLASS ORDINE ANNO COMMESSA W.SCHED W.ORD. YEAR 05060095 00 30/01/2009... - Seite 4 Altair D Rif. 1 Max 25mm Rif. 2 Rif. 3 Rif. 7 Rif. 4 mute HACCP Rif. 5 Rif. 6 Rif. 8 Rif. 9 Rif. 10 Rif. 11 05060095 00 30/01/2009...
- Seite 5 Altair D H O 2 H O 2 H O 2 H O 2 R404 R404 1250 1250 937,5 937,5 2500 1875 H O 2 H O 2 R404 1875 1875 3750 05060095 00 30/01/2009...
- Seite 6 Altair D 4 5 6 05060095 00 30/01/2009...
- Seite 7 Altair D Β A = Sonda aspirazione aria B = Sonda fine sbrinamento C = Sonda aria mandata D = Termostato sicurezza cavi caldi porte Α A = Air OFF probe B = End-defrost probe C = Air ON probe D = Door heating cables safety thermostat Sonda di temperatura / Temperature probe Sacet/CAREL L=4000 cod.04510153...
- Seite 8 Altair D 05060095 00 30/01/2009...
- Seite 9 Altair D 05060095 00 30/01/2009...
- Seite 10 Altair D 05060095 00 30/01/2009...
-
Seite 11: Dati Tecnici
Altair D Dati Tecnici, Technical Data, Technische Daten, Données techniques, Datos Técnicos, Dati tecnici Technical data Technische Daten Données techniques Datos Técnicos 05060095 00 30/01/2009... - Seite 12 Altair D 05060095 00 30/01/2009...
-
Seite 13: Inhaltsverzeichnis
Altair D Italiano Manuale di installazione e Uso INDICE ILLUSTRAZIONI ......................1 Dati tecnici........................9 Introduzione - Scopo del manuale/Campo di applicazione ........12 Presentazione - Uso previsto (Fig. 1)................ 12 Norme e certificazioni....................12 Identificazione - Dati di targa (Fig. 2) ................ 12 Il Trasporto (Fig. -
Seite 14: Introduzione - Scopo Del Manuale/Campo Di Applicazione
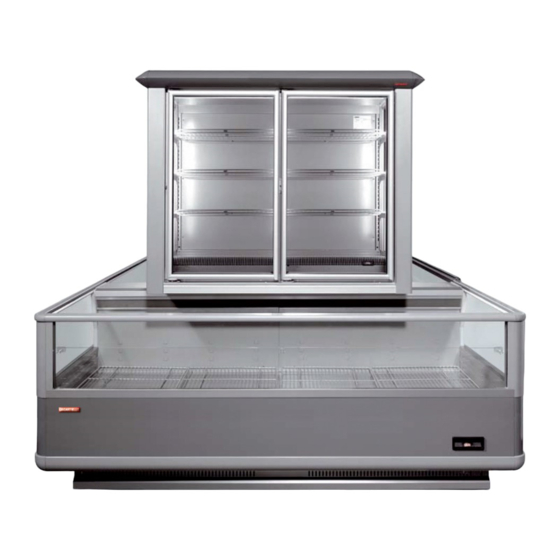
Qualsiasi persona usi questo mobile dovrà leggere questo manuale. 2. Presentazione - Uso previsto (Fig. 1) La linea di mobili refrigerati Altair D, è composta da espositori murali a sviluppo verticale, con unità conden- satrice remota, adatti alla conservazione e vendita self service di Surgelati e Gelati. -
Seite 15: Il Trasporto (Fig. 3)
Altair D Italiano 10. Potenza di illuminazione (ove prevista) 11. Superficie di esposizione utile 12. Volume di carico utile 13. Tipo di fluido frigorigeno con cui funziona l’impianto 14. Classe climatica ambientale e temperatura di riferimento 15. Classe di protezione contro l’umidità... -
Seite 16: Collegamento Elettrico (Fig. 9 - Fig. 11)
Altair D Italiano KIT UNIONE CANALE Rif. Codice Q.tà Descrizione 02940652 Spina allineamento corrimano D 4 04711030 Vite TCEI M8X80 04711041 Vite TCEI M8X50 04230600 Dado esagonale M8 04711040 Vite TCEI M8X35 04480112 Rondella D 8,5x24 04711098 Vite TCEI M8X25... -
Seite 17: Il Caricamento Del Mobile (Fig. 4)
Altair D Italiano 12.Il caricamento del mobile (Fig. 4) Per il rifornimento del mobile è necessario osservare alcune regole importanti: - disporre la merce in modo uniforme e ordinato evitando di sovraccaricare i ripiani (carico massimo ammissibile 160 kg/m - disporre la merce in modo da non disturbare il flusso dell’aria refrigerata (Rif. 7) - la disposizione delle merci, senza zone vuote, garantisce il miglior funzionamento del mobile. -
Seite 18: Coperchi Notte - Optional - (Fig. 4 Rif. 10)
Altair D Italiano - svuotare completamente il mobile dalla merce che contiene. - togliere le parti che si possono smontare, come piatti da esposizione, grigliati vari, etc. - lavare con acqua tiepida che contenga un detergente/disinfettante, e asciugare accuratamente. - pulire accuratamente la vasca di fondo. - Seite 19 Altair D Italiano - verificare che i valori della temperatura e dell’umidità ambiente non siano superiori a quelli specificati, quindi è indispensabile mantenere sempre al massimo dell’efficienza gli impianti di climatizzazione, di ventilazione e di riscaldamento del punto vendita. - limitare a valori inferiori agli 0,2 m/s la velocità dell’aria ambiente in prossimità delle aperture dei mobili;...
-
Seite 20: Indicazioni Di Montaggio Per L'inversione Delle Porte
ATTENZIONE!: Togliere tensione al mobile prima di qualsiasi operazione Il mobile verticale Altair D viene fornito di serie nella versione con porte ad apertura destra. In caso di neces- sità il verso dell’apertura delle porte può essere invertito da destra a sinistra (Fig. 1). Non è possibile invertire una o più... - Seite 21 Altair D Italiano (riferita al montante centrale): A) Togliere le viti di fissaggio della piastrina protezione cablaggio. B) Estarrre il cavo C) Estrarre il connettore D) Aprire il connettore. (riferita ai montanti destro e sinistro): Questa fase è valida sia per lo smontaggio della porta destra che per la preparazione del montante sinistro.
- Seite 22 Altair D Italiano Togliere la porta e appoggiarla su di un piano orizzontale per poter eseguire l’operazione di inversione in modo ottimale. Estrarre completamente tutto il blocco cerniera inferiore. A) Togliere le viti (1) e (2) con le chiavi rispettive...
- Seite 23 Altair D Italiano 10 A) Estrarre dalla parte superiore della porta la cerniera superiore con estrema delicatezza evitando di sollecitare troppo l’accoppiamento tra il perno e la boccola di plastica.B) Smontare la forcella antisfilamento (1). 11 Rimontare il gruppo cerniera inferiore, ora diventato sinistro, seguendo a ritroso le fasi 8-9 e inserirlo al posto della cerniera superiore.
- Seite 24 Altair D Italiano 14 Porre il gruppo piastra inferiore appena smontato su un piano, togliere la piastra superiore (1) togliere i nottolini di arresto (2) e posizionarli nelle nuove sedi come indicato in figura B.Ruotare la molla (3) di 180°.
- Seite 25 Altair D Italiano 19 Inserire la chiave carica molla su uno dei fori del perno inferiore, ruotare in senso antiorario per poter inserire il perno di carica.Ad operazione ultimata la porta deve chiudersi automaticamente. Se la carica non fosse sufficiente spostare di un foro il perno di carica...
- Seite 26 Altair D English Installation and Use manual INDEX ILLUSTRATIONS ......................1 Technical data......................9 Introduction - Purpose of the manual/Application field ..........25 Presentation - Declared use (Fig. 1) ................. 25 Regulations and certifications ................... 25 Identification - Plate data (Fig. 2) ................25 The Transport (Fig.
-
Seite 27: Introduction - Purpose Of The Manual/Application Field
This manual must be read by anyone using this cabinet. 2. Presentation - Declared use (Fig. 1) The Altair D refrigerated cabinets line consists in vertical wall cabinets, with a remote condensing unit, suitable for preserving and self service Frozen products and Ice-creams. -
Seite 28: The Transport (Fig. 3)
Altair D English 11. Net display surface 12. Net load volume 13. Type of refrigerant fluid with which the plant operates 14. Environment climatic categories and reference temperature 15. Protection class against humidity 16. Job order number with which the cabinet has been manufactured 17. -
Seite 29: Electric Connection (Fig. 9 - Fig. 11)
Altair D English CHANNEL JOINING KIT Ref. Code Q.ty Description 02940652 Handrail alignment plug D 4 04711030 TCEI M8x80 Screw 04711041 TCEI M8x50 Screw 04230600 M8 Hexagonal nut 04711040 TCEI M8X35 screw 04480112 D 8.5x24 washer 04711098 TCEI M8X25 screw... -
Seite 30: Defrosting And Water Draining (Fig. 5)
Altair D English 160 kg/m - arrange the merchandise in a way not to interfere with the flow of refrigerated air (Rif. 7) - the disposition of the goods without empty areas, guarantees better function of the cabinet; - allow approximately 30 mm of air between the goods and the shelf immediately above. -
Seite 31: Night Covers - Optional -(Fig. 4 Rif. 10)
Altair D English - regularly clean the dripper and the drain by lifting where necessary the fans plate In order to wash the internal tank of the cabinet with running water, when installing the cabinet it is necessary to prearrange a fixed floor drain. - Seite 32 Altair D English openings. - do not allow exposure of solar rays on to the displayed merchandise. - limit the temperature of the radiant surfaces that are present in the sale point for example by insulating the ceilings. - do not direct spotlights with incandescent lamps directly on the cabinet.
-
Seite 33: Assembly Indications For Inverting The Doors
ATTENZIONE!: Attention: Cut off power supply to the cabinet before proceeding with all operations The Altair D refrigerated wall cabinet is normally supplied in the version with right-hand opening doors (Fig.1) If required, the direction of door opening can be inverted from right to left . - Seite 34 Altair D English (referred to the central riser) A) Remove the screws that fix the wiring protection plate in place; B) Pull out the cable; C) Pull out the connector; D) Open the connector. ((referred to the right and left-hand risers) This phase applies both for dismantling the right-hand door and for preparing the left-hand riser.
- Seite 35 Altair D English Remove the door and place it on a flat horizontal surface so as to carry out the inversion operation in the best way possible. Fully remove the entire lower hinge unit. A) Remove the screws (1) and (2) using the respective spanners;...
- Seite 36 Altair D English 10 A) With the utmost delicacy, remove the upper hinge from the upper part of the door, making sure not to exert excess stress on the coupling between the pin and the plastic bush; B) Also dismantle the anti-fraying fork (1).
- Seite 37 Altair D English 14 Place the previously dismantled lower plat unit on a flat surface, remove the upper plate (1), remove the ratchets (2) and place them in their new housing as indicated in figure B. Rotate the spring (3) by 180°..
- Seite 38 Altair D English 19 Insert the spring-loading spanner into one of the holes of the lower pin, rotate in an anti-clockwise direction so as to insert the loading pin. When the operation has been completed, the door should close automatically. If it is not sufficiently loaded, move the loading pin by one hole..
- Seite 39 Altair D Deutsch Installations-und Gebrauchshandbuch INHALT ABBILDUNGEN ......................1 Technische Daten ....................... 9 Einleitung - Zweck des Handbuches/Anwendungsbereich ........38 Leistung - Vorgesehener Gebrauch (Abb. 1) ............38 Richtlinien und Zertifikationen ................... 38 Kennzeichnung - Betriebsdaten(Abb. 2) ..............38 Der Transport (Abb. 3) ....................39 Empfang und Reinigung....................
-
Seite 40: Einleitung - Zweck Des Handbuches/Anwendungsbereich
Kontrollsystem. Um die größtmögliche Energieersparnis und eine bessere Konservierung der Nahrungsmittel zu garantieren, ergänzt Altair D seine Linie mit Altair DG, ausgestattet mit Glastüren am unteren Teil. 3. Richtlinien und Zertifikationen Die Bezugsnormen, unter denen die Kühltheke geprüft und homologiert wurde sind: EN-ISO 23953 - 1/2;... -
Seite 41: Der Transport (Abb. 3)
Altair D Deutsch 4. Fabrikationsnummer der Kühltheke 5. Versorgungsspannung 6. Versorgungsfrequenz 7. Stromaufnahme im Betrieb 8. Absorbierte elektrische Leistung im Betrieb während der Kühlphase (Kompressor + Gebläse + warme Kabel). 9. Absorbierte elektrische Leistung im Betrieb während der Tauphase (warme Kabel + Gebläse + Evaporator). -
Seite 42: Verbindung Der Kühltheken(Abb. 7)
Altair D Deutsch eingebauter Gruppe. ACHTUNG!: Maximal 3 Kühltheken hintereinander an derselben elektrischen Versorgungs- und Kühllinie installieren (1 Master + 2 Slave). HINWEIS:Alle diese Operationen müssen von spezialisiertem, technischem Personal ausgeführt werden. 8. Verbindung der Kühltheken(Abb. 7) Um zwei oder mehrere Kühltheken zu verbinden muss wie folgt vorgegangen werden: - Die Schultern abmontieren. -
Seite 43: Kontrolle Und Regulierung Der Temperatur (Abb. 4)
Altair D Deutsch - Die Sonden A - C müssen mit Betterman-Klemmen 6-17 Cod.04355001 blockiert werden und dürfen nicht isoliert werden. - Die Sonde B muss in Berührung mit der Aluminiumrippen befestigt werden, wobei man die Stahlsondenhaltefeder Cod.02230134 benutzt. 11.Kontrolle und Regulierung der Temperatur (Abb. 4) Die Wanne und der Überbau haben zwei getrennte Temperaturkontrollsysteme. -
Seite 44: Wartung Und Reinigung
Altair D Deutsch 13_1. Wasserablass; Für den Tauwasserablass ist folgendes notwendig: - es muss ein Bodenabfluss mit leichter Neigung vorgesehen werden. - Ein Siphon zwischen die Abfluss-Leitung der Kühltheke und dem Bodenanschluss installieren. - Hermetisch die Zone des Bodenabflusses versiegeln. -
Seite 45: Demontage Der Kühltheke
Altair D Deutsch Bohrungen eingefügt sind. - Die Einheit Lampe und Schutzhülle erneut in den Lampenhalter positionieren und um 90° bis zum Blockierungseinrasten drehen. - Die elektrische Versorgung wieder herstellen. 19.Demontage der Kühltheke In Konformität mit den Richtlinien für die Entsorgung der Abfälle in den einzelnen Ländern und zum Schutz der Umwelt, in der wir leben, legen wir Ihnen Nahe, die einzelnen Teile der Kühltheke zu sondern, wodurch... - Seite 46 Altair D Deutsch Wiederherstellen des normalen Betriebs usw.). - den Abfluss des Abtauwassers überprüfen (die Abtropfschale und eventuelle Filter reinigen, die Syphone überprüfen usw.). - sollten sich seltsame Kondensationen bilden, ist unverzüglich der zuständige Techniker zu verständigen. - regelmäßig alle präventiven Wartungsarbeiten durchführen.
-
Seite 47: Montageanleitungen Für Die Umkehr Des Öffnungssinns Der Türen
1. Montageanleitungen für die Umkehr des Öffnungssinns der Türen Achtung!: Vor Durchfürung der arbeiten die Spannungszufuhr des Möbels unterbrechen Das Wandkühlmöbel Altair D wird serienmäßig in der Ausführung mit Türen mit Rechtsöffnung geliefert (Abb.1) Bei Bedarf kann der Öffnungssinn der Türen von rechts nach links geändert werden (Abb.2). - Seite 48 Altair D Deutsch (bezieht sich auf den zentralen Pfosten) A) Die Befestigungsschrauben Kabelschutzplättchens entfernen; B) Das Kabel herausziehen; C) Den Verbinder herausnehmen; D) Den Verbinder öffnen.. (bezieht sich auf den rechten und den linken Pfosten) Diese Phase gilt sowohl für die Demontage der rechten Tür als auch für die Vorbereitung des linken Pfostens.
- Seite 49 Altair D Deutsch Die Tür entfernen und auf eine waagrechte Fläche stellen, um die Arbeiten für die Änderung des Öffnungssinns auf optimale Weise durchführen zu können. Den gesamten unteren Scharnierblock herausnehmen. A) Die Schrauben (1) und (2) mit den entsprechenden Schlüsseln entfernen;...
- Seite 50 Altair D Deutsch 10 A) Das obere Scharnier mit äußerster Vorsicht vom oberen Türteil herausziehen, wobei man die Verbindung zwischen Stift und Kunststoffbuchse nicht allzusehr belasten darf; B) Auch die Ausziehschutzgabel (1) abmontieren. 11 Die untere Scharniergruppe, die nun für die linke Türöffnung geeignet ist, wieder einbauen, indem man...
- Seite 51 Altair D Deutsch 14 Die soeben abmontierte untere Plattengruppe auf eine Ebene legen, die obere Platte (1) und die Sperrzähne (2) entfernen und wie in Abb. B gezeigt in die neuen Sitze einführen. Der Feder (3) um 180° drehen.. 15 A) Die Stöpsel, die zum Schließen der Gestellöffnungen dienen, entfernen;...
- Seite 52 Altair D Deutsch 19 Den Federladeschlüssel in eine der Öffnungen des unteren Stifts einführen, im Gegenuhrzeigersinn drehen, um den Ladestift einzuführen. Nach Durchführung des Arbeitsvorgangsmuss sich die Tür automatisch schließen. Sollte der Ladezustand nicht ausreichen, den Ladestift um eine Öffnung verschieben..
- Seite 53 Altair D Français Manuel d'installation et d'Utilisation TABLE DES MATIERES ILLUSTRATIONS ......................1 Données techniques ....................9 Introduction - But du livret d'instructions/Champ d'application ........52 Présentation - Utilisation prévue (Fig. 1) ..............52 Normes et certifications..................... 52 Normes et certifications..................... 52 Le Transport (Fig.
-
Seite 54: Introduction - But Du Livret D'instructions/Champ D'application
Les deux parties sont dotées de leur propre évaporateur et d'un système de contrôle de l'air séparé. Pour assurer le maximum d'économie d'énergie et une meilleure conservation des aliments, le Altair D complète sa gamme par le Altair D doté de fermetures par vitres sur le bac. 3. Normes et certifications Les normes de référence selon lesquelles le meuble a été... -
Seite 55: Le Transport (Fig. 3)
Altair D Français 7. Courant absorbé en régime 8. Puissance électrique absorbée en régime au cours de la phase de réfrigération (Compresseurs + ventilateurs + câbles chauds) 9. Puissance électrique absorbée en régime au cours de la phase de dégivrage (Câbles chauds ventilateur évaporateur) -
Seite 56: Union Des Meubles (Fig. 7)
Altair D Français 8. Union des meubles (Fig. 7) Pour unir deux ou plusieurs meubles en canal, procéder de la façon suivante: - Démonter les panneaux frontaux - Positionner les meubles côte à côte - Retirer les panneaux arrière pour avoir accès aux orifices des montants - Unir les montants et les étriers en utilisant les vis fournies... -
Seite 57: Le Remplissage Du Meuble (Fig. 4)
Altair D Français Le contrôleur est normalement configuré en usine au cours de la phase de test ; en cas de besoin, il est possible de modifier la température de la façon suivante: - appuyer pendant quelques secondes sur la touche SEL;... -
Seite 58: Couvercles Nuit - En Option - (Fig. 4 Rif. 10)
Altair D Français respecter les normes d'hygiène et la chaîne du froid pour garantir la protection de la santé du consommateur. Nettoyage des parties extérieures (Quotidien / Hebdomadaire) - nettoyer chaque semaine toutes les parties extérieures du meuble en utilisant des détergents neutres à... -
Seite 59: Conseils Utiles
Altair D Français N.B.LES COMPOSANTS DU CIRCUIT DE RÉFRIGÉRATION NE DOIVENT PAS ÊTRE COUPÉS ET/OU SÉPARÉS MAIS ILS DOIVENT ÊTRE PORTÉS ENTIERS AUX CENTRES SPÉCIALISÉS POUR LA RÉCUPÉRATION DU GAZ RÉFRIGÉRANT. 20.Conseils utiles Nous conseillons de lire attentivement le Manuel d'Installation et d'utilisation pour qu'en cas de panne, l'opérateur soit capable de fournir par téléphone les informations les plus précises au service d'Assistance... -
Seite 60: Indications De Montage Pour L'inversion Des Portes
Attention!: Avant toute operation, couper le courant au meuble Le meuble mural réfrigéré Altair D est fourni de série dans une version avec des portes à ouverture droite (Fig.1). En cas de nécessité, le sens de l’ouverture des portes peut être inversé de droite à gauche (Fig.2). - Seite 61 Altair D Français (se référant au montant central) A) Oter les vis de fixation de la plaquette de protection du câblage ; B) Extraire le câble ; C) Extraire le connecteur ; D) Ouvrir le connecteur. (se référant aux montants droit et gauche) Ce stade est valable aussi bien pour le démontage de la porte droite...
- Seite 62 Altair D Français Enlever la porte et la poser sur un plan horizontal pour pouvoir exécuter à la perfection l’opération d’inversion. Extraire entièrement tout le bloc charnière inférieure. A) Enlever les vis (1) et (2) à l’aide des clefs respectives ;...
- Seite 63 Altair D Français 10 A) Extraire de la partie supérieure de la porte la charnière supérieure très soigneusement en évitant de trop fatiguer l’accouplement entre le pivot et la bague en plastique ; B) Démonter la fourchette anti-enlèvement aussi (1) 11 Remonter le groupe charnière inférieure qui est...
- Seite 64 Altair D Français 14 Poser le groupe plaque inférieure que l’on vient de démonter sur un plan, enlever la plaque supérieure (1), enlever les cliquets d’arrêt (2) et les placer dans les nouveaux sièges comme indiqué dans la figure B.
- Seite 65 Altair D Français 19 Insérer la clef de remontage du ressort sur un des trous du pivot inférieur, tourner dans le sens contraire des aiguilles d’une montre pour pouvoir insérer la goupille de remontage. A la fin de l’opération, la porte doit se fermer automatiquement. Si le remontage n’est pas suffisant, déplacer d’un trou la goupille de torsion..
- Seite 66 Altair D Español Manual de instalación y Uso ÍNDICE ILLUSTRACIONES ..................... 1 Datos Técnicos ......................9 Introducción - Objetivo del manual/Campo de aplicación ......... 65 Presentación - Uso previsto (Fig. 1)................65 Normas y certificaciones ................... 65 Identificación - Datos técnicos (Fig. 2) ..............65 Transporte (Fig.
-
Seite 67: Introducción - Objetivo Del Manual/Campo De Aplicación
Las dos partes tienen un evaporador y un sistema de control de aire separado. Para asegurar el máximo ahorro energético y una mejor conservación de los alimentos, el Altair D completa su familia con el Altair DG con cierres de vidrio en el depósito. -
Seite 68: Transporte (Fig. 3)
Altair D Español 8. Potencia eléctrica de régimen absorbida en la fase de refrigeración (compresores + ventiladores + cables calientes) 9. Potencia eléctrica de régimen absorbida en la fase de descongelación (Cables calientes ventilador evaporador) 10. Potencia de iluminación (donde se requiere) 11. -
Seite 69: Conexión Eléctrica (Fig. 9 - Fig. 11)
Altair D Español - Posicionar los muebles uno al lado del otro. - Quitar los espaldares para tener acceso a los agujeros de los montantes. - Unir los montantes y las abrazaderas utilizando los tornillos proporcionados. - Volver a montar los espaldares. -
Seite 70: Carga Del Mueble (Fig. 4)
Altair D Español - Presione la tecla SEL durante algunos segundos. - Tras unos instantes el valor programado parpadea. - Aumente/disminuya el valor del set/point mediante las teclas de flecha - Presione de nuevo la tecla SEL para confirmar el nuevo valor. -
Seite 71: Cortina De Noche - Opcional - (Fig. 4 Rif. 10)
Altair D Español Limpieza de las partes externas (Diaria / Semanal) - Limpie una vez a la semana todas las partes externas del mueble, usando detergentes neutros para uso doméstico o agua y jabón. - Aclare con agua limpia y seque con un paño suave. -
Seite 72: Consejos Útiles
Altair D Español - PVC Parachoques - Laminado plástico Respaldo N.B.LOS COMPONENTES DEL CIRCUITO DE REFRIGERACIÓN NO SE DEBEN CORTAR Y/O SEPARAR, SINO QUE SE DEBEN LLEVAR COMPLETOS A LOS CENTROS ESPECIALIZADOS PARA LA RECUPERACIÓN DEL GAS REFRIGERANTE. 20.Consejos útiles Se recomienda al operador leer atentamente el Manual de instalación y uso de manera que, en caso de... -
Seite 73: Indicaciones De Montaje Para Inversión De Las Puertas
Atención!: Desconectar electricamente el mueble antes de realizar cualquier operación. El mural refrigerado Altair D de serie, en la versión con puertas y apertura derecha (Fig.1). Si es necesario la apertura de la puerta puede ser invertida de derecha a izquierda (Fig.2) No es posible invertir una o más puertas por separado. - Seite 74 Altair D Español (montante central) A) Quitar los tornillos que fijan la plancha de protección de los cables; B) Extraer el cable; C) Extraer el conector; D) Abrir el conector. (montantes derecho e izquierdo) Esta fase vale para el montaje de la puerta y para la preparación del montante izquierdo.
- Seite 75 Altair D Español Quitar la puerta y apoyarla sobre una plataforma horizontal para poder efectuar la inversión en forma correcta. Extraer completamente todo el bloque de la bisagra inferior. A) Quitar los tornillos (1) y (2) con las llaves correspondientes;...
- Seite 76 Altair D Español 10 A) Extraer de la parte superior de la puerta la bisagra superior con cuidado sin forzar demasiado el acople del perno con el forro de plástico; B) Desmontar también la horquilla antideslizamiento (1). 11 Volver a montar el grupo de la bisagra inferior, ahora izquierda, siguiendo en forma invertida las fases 8-9 e introducirlo en lugar de la bisagra superior..
- Seite 77 Altair D Español 14 Colocar las partes de la placa inferior desmontada sobre una superficie, quitar la placa superior (1) quitar los dientes metálicos de bloqueo (2) y colocarlos en los nuevos alojamientos como indicado en la figura B. Girar el muelle (3) de 180°..
- Seite 78 Altair D Español 19 Introducir la llave de carga delmuelle en uno de los orificios del perno inferior, girar en sentido directo para poder introducir el perno de carga. Al finalizar esta operación la puerta deberá cerrarse automáticamente. Si la carga no es suficiente, desplazar de un orificio el perno de carga.
- Seite 79 Altair D ......................1 ..................9 – ..........78 . 1)........78 .................... 78 . 2) ............ 79 . 3)..................79 ..................79 . 3)............79 . 7)..............80 . 9 - . 11) ..........80 . 8) ..............81 .
- Seite 80 Altair D – Altair D. . 1) Altair D Altair D Altair DG, EN-ISO 23953 - 1/2; EN 60335-2-89; EN 61000-3-2; EN 61000-3-3; EN 55014 3 (25° . 60%): 12°C 15°C 17°C 20°C 24°C 27°C 21°C 98/37 CEE; 89/336 CE 92/31 CEE, 93/68 CEE;...
- Seite 81 Altair D . 2) (2); (4); . 3) CEE 94/62 . 3) . .) . .) 0,2 / 05060095 00 30/01/2009...
- Seite 82 Altair D (Rif. 2) (Rif. 1) EN-ISO 23953-1/2 3 (+25°C; . 60%). (1 Master ( ) + 2 Slave ( . 7) 02940652 04711030 TCEI ( 04711041 TCEI ( 04230600 04711040 TCEI ( 04480112 D 8,5x24 04711098 TCEI ( 04230400...
- Seite 83 Altair D . 8) : NTC IP67 L=4000 04510153 . A - C Betterman 6-17 04355001 02230134. . 4) (Rif. 4) CAREL (Rif. 5) ( – – (Rif. 6). SEL; SEL, . 4) (Rif. 7) - 300 0°; -10°. (Rif.
- Seite 84 Altair D . 5) 13_1. " ". – . 4 Rif. 10) 05060095 00 30/01/2009...
- Seite 85 Altair D . 4) (Rif. 9). ) (Rif. 11). 90° ( 90° (R134a): 05060095 00 30/01/2009...
- Seite 86 Altair D " ". . .). . .). . .). . .). +39 035377911 - +39 035693200 05060095 00 30/01/2009...
- Seite 87 Altair D Altair D . 2). . = 9 2/3/4 - Fig.1 Fig.2 05060095 00 30/01/2009...
- Seite 88 Altair D , 2 - 05060095 00 30/01/2009...
- Seite 89 Altair D (3). (4). (5).. (1). (1). 05060095 00 30/01/2009...
- Seite 90 Altair D 10 A) (1). 8-9, 16 (1). inox.. Battere solo sulla corona circolare in plastica come indicato Tubo in metallo D12-16mm PERNO INOX Blocco in plastica Cornice in alluminio del telaio porta 05060095 00 30/01/2009...
- Seite 91 Altair D (1), 180°.. 15 A) 16 A) . 18 . 24 180° “ ” (“left door”). 05060095 00 30/01/2009...
- Seite 92 Altair D M4x8 inox 05060095 00 30/01/2009...
- Seite 93 Декларация о соотвествии РОСТЕСТ Нижеподписавшаяся фирма Oscartielle Spa, расположенная по адесу Via Boffalora, 1/A – 24048 Treviolo (BG) ITALIA, под свою ответственноость заявляет что оборудование, описание которого приводится в настоящих инструкциях сертифицировано Органом Сертификации РОСТЕТ, Москва, POCC RU. 000110 АЯ 46.
- Seite 94 Oscartielle S.p.A. Socio Unico – 24048 Treviolo – Bergamo – ITALY – Via Boffalora, 1/A – Tel. +39 035 377911 – Fax +39 035 693200 – amministrazione@pec.oscartielle.it Cap. Soc. € 5.000.000,00 i.v. – Codice Fiscale, Partita IVA e numero iscrizione al Registro Imprese di Bergamo IT 00225960160 – R.E.A. Bergamo n. 96954...
-
Seite 95: Dichiarazione Di Conformità
Декларация о соответствии В случае потери оригинала декларации соответствия, прилагаемой к иэделию, можно эагрузить ее копию, заполнив форму по следующему адресу в Интернете: http://www.oscartielle.it/conformity... - Seite 96 Cod. 001627 - Ed. 00-30/01/2009 • OSCARTIELLE, la cui politica è quella di un continuo perfezionamento, si riserva il diritto di cambiare in qualsiasi momento i dettagli tecnici senza preavviso. • Due to technical progress, OSCARTIELLE reserves the right to change technical features without notice.