Märklin 70421 Bedienungsanleitung
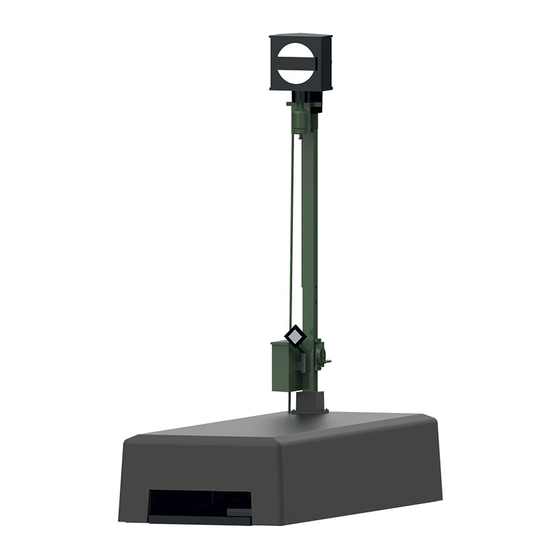
Sperrsignal
Inhaltsverzeichnis
Verfügbare Sprachen
Verfügbare Sprachen
Inhaltsverzeichnis

Verwandte Anleitungen für Märklin 70421


Inhaltszusammenfassung für Märklin 70421
- Seite 1 Sperrsignal 70421...
-
Seite 2: Inhaltsverzeichnis
Inhaltsverzeichnis Seite Page Sommaire Bestimmungsgemäße Verwendung Utilisation conforme Lieferumfang Livraison Sicherheitshinweise Consignes de sécurité Wichtige Hinweise Consignes importantes Technische Daten Caractéristiques techniques Funktionen Fonctions Signal-Einbau Montage du signal Programmierung mit CS 2 / CS 3 Programmation avec CS 2 / CS 3 Programmierung mit MS 2 Programmation avec MS 2 Betrieb unter mfx... -
Seite 4: Bestimmungsgemäße Verwendung
Bestimmungsgemäße Verwendung Wichtige Hinweise • Die Bedienungsanleitung ist Bestandteil des Produktes und • Das Signal ist zum Einbau in H0 Digital-Modellbahn-Anlagen. muss deshalb aufbewahrt sowie bei Weitergabe des Produk- • Das Signal darf für den Analogbetrieb nur mit Stellpult 72760 tes mitgegeben werden. verwendet werden. • Für Reparaturen wenden Sie sich bitte an Ihren Märklin- • Darf nur in geschlossenen Räumen verwendet werden. Fachhändler. Lieferumfang • Entsorgung: www.maerklin.com/en/imprint.html 1 Signal Technische Daten 1 Kabel mit Stecker 2 polig, rot und braun • Belastung ≤... -
Seite 5: Programmierung Mit Cs 2 / Cs 3
• Einstellen der Betriebsart mit DIP-Schalter 10 Schalter 10 off = fx (MM) / mfx Die CV Programmierung muss am Programmiergleis erfolgen. Es Schalter 10 on = DCC darf immer nur ein Signal am Programmiergleis angeschlossen • fx (MM)/DCC einstellen der Adresse mit DIP-Schalter werden. (Tabelle ab Seite 28) Während der Datenübertragung blinkt zur Kontrolle die Laterne Beachten Sie: Einstellungen mit dem DIP-Schalter immer am Signal. spannungslos vornehmen. Das Signal erkennt erst mit dem Die Programmierung mit anderen Geräten, entnehmen Sie bitte Einschalten der Spannung die aktuellen Schalterstellungen. -
Seite 6: Betrieb Unter Mfx
Einstellen und errechnen der Adressen größer 255 (DCC): CV Bedeutung Werte Langsame Bewegung 0 (0) Z.B. Adresse 1044 -> 1044:256=4,078125 . Der Wert vor dem Mittelschnelle Bewegung PoM* Komma (4) ist in CV 9 einzutragen. Der Wert nach dem Komma Schnelle Bewegung (0,078125) wird mit 256 multipliziert 0,078125x256=20. Der errech- nete Wert 20 muss in CV 1 eingetragen werden. Mittelschnelle Bewegung mit Nachwippen Betrieb unter mfx Schnelle Bewegung mit Die mfx-Anmeldung kann unter MM oder DCC erfolgen. Nachwippen Entscheidend ist die über den Dip-Schalter 10 eingestellte Mittelschnelle Bewegung nur bei 70411 / 70412 Betriebsart. -
Seite 28: Betriebsart Und Adressen Einstellen
Betriebsart und Adressen einstellen Setting the mode of operation and addresses keyboard 10 ( 0/1 ) Définir le mode d’exploitation et les adresses fx (MM)/DCC fx (MM)/DCC Bedrijfsmodus en adres instellen fx (MM)/DCC Configuración de modo de funcionamiento y direcciones fx (MM)/DCC fx (MM)/DCC Impostate tipo di funzionamento e indirizzi fx (MM)/DCC 1 2 3 fx (MM)/DCC... - Seite 29 keyboard keyboard 10 ( 0/1 ) 10 ( 0/1 ) fx (MM)/DCC fx (MM)/DCC 3 4 5 fx (MM)/DCC fx (MM)/DCC 3 4 5 fx (MM)/DCC fx (MM)/DCC 2 3 4 5 fx (MM)/DCC 1 2 3 fx (MM)/DCC 1 2 3 4 5 fx (MM)/DCC 4 5 6 fx (MM)/DCC...
- Seite 30 keyboard keyboard 10 ( 0/1 ) 10 ( 0/1 ) fx (MM)/DCC fx (MM)/DCC 2 3 4 fx (MM)/DCC 1 2 3 fx (MM)/DCC 1 2 3 4 fx (MM)/DCC fx (MM)/DCC fx (MM)/DCC fx (MM)/DCC fx (MM)/DCC fx (MM)/DCC fx (MM)/DCC fx (MM)/DCC fx (MM)/DCC...
- Seite 31 keyboard keyboard 10 ( 0/1 ) 10 ( 0/1 ) fx (MM)/DCC fx (MM)/DCC fx (MM)/DCC fx (MM)/DCC fx (MM)/DCC 3 4 5 fx (MM)/DCC fx (MM)/DCC 3 4 5 fx (MM)/DCC fx (MM)/DCC 2 3 4 5 fx (MM)/DCC fx (MM)/DCC 1 2 3 4 5 fx (MM)/DCC...
- Seite 32 keyboard keyboard 10 ( 0/1 ) 10 ( 0/1 ) fx (MM)/DCC 2 3 4 fx (MM)/DCC fx (MM)/DCC 1 2 3 4 fx (MM)/DCC fx (MM)/DCC fx (MM)/DCC 1 2 3 fx (MM)/DCC fx (MM)/DCC 4 5 6 fx (MM)/DCC fx (MM)/DCC 4 5 6 fx (MM)/DCC...
- Seite 33 keyboard keyboard 10 ( 0/1 ) 10 ( 0/1 ) 9 fx (MM)/DCC 6 7 8 fx (MM)/DCC 9 fx (MM)/DCC 6 7 8 fx (MM)/DCC 9 fx (MM)/DCC 6 7 8 fx (MM)/DCC 9 fx (MM)/DCC 6 7 8 fx (MM)/DCC 9 fx (MM)/DCC 6 7 8...
- Seite 34 keyboard keyboard 10 ( 0/1 ) 10 ( 0/1 ) 3 4 5 9 fx (MM)/DCC 9 fx (MM)/DCC 3 4 5 9 fx (MM)/DCC 1 2 3 9 fx (MM)/DCC 2 3 4 5 9 fx (MM)/DCC 4 5 6 9 fx (MM)/DCC 1 2 3 4 5 9 fx (MM)/DCC...
- Seite 35 keyboard keyboard 10 ( 0/1 ) 10 ( 0/1 ) - - - / DCC - - - / DCC - - - / DCC - - - / DCC - - - / DCC - - - / DCC - - - / DCC - - - / DCC - - - / DCC...
- Seite 36 keyboard keyboard 10 ( 0/1 ) 10 ( 0/1 ) - - - / DCC 2 3 4 5 - - - / DCC - - - / DCC 1 2 3 4 5 - - - / DCC - - - / DCC - - - / DCC 1 2 3 - - - / DCC...
- Seite 37 keyboard keyboard 10 ( 0/1 ) 10 ( 0/1 ) 4 5 6 - - - / DCC 7 8 9 - - - / DCC 4 5 6 - - - / DCC 7 8 9 - - - / DCC 4 5 6 - - - / DCC 7 8 9...
- Seite 38 Addresses larger than 511 can only be assigned in the DCC format and must be done by programming a CV using the programming track. keyboard 10 ( 0/1 ) 6 7 8 9 - - - / DCC Les adresses supérieures à 511 peuvent uniquement être éditées 6 7 8 9 - - - / DCC dans le format DCC et doivent être exécutées avec la program- 2 3 4...
- Seite 40 Signalabschnitt Isolieren und anschließen. Oberleitung nur für Analogbetrieb. Insulating the signal block and making its connections. Catenary only for analog operation. Isoler la partie du signal et brancher. E254 684 Caténaire seulement pour exploitation analogique. Stopsectie isoleren en aansluiten. Bovenleiding alleen in analoogbedrijf. Aislamiento y conexión del tramo de señal. Corriente por catenaria solo modo analógico. Isolamento e connessioni della tratta del segnale. Catenaria solo per la modalità analogica.
- Seite 42 Befestigung am K-Gleis oder anderen Gleissystemen Installation with K Track or Other Track Systems Fixation à la voie K ou à d’autres systèmes de voies Bevestiging aan K-rail of ander railsysteem Sujeción a la vía K u a otros sistemas de vías Fissaggio al binario K oppure altri sistemi di binario Fastsättning vid K-räls eller andra rälssystem Fastgørelse på...
- Seite 43 Mit beiliegender Bohrschablone markieren (Unterfl urmontage). Mark with the template included with the signal (Below-Baseboard Installation). Marquer avec le patron de perçage ci-joint (Montage souterrain). Met meegeleverde sjabloon markeren (Ondervloermontage). Marcar con la plantilla de taladros adjunta (Montaje bajo el suelo). Marcare con l’acclusa maschera di foratura (Montaggio sotto plancia). Markera med hjälp av medföljande borrschablon (Montage under anläggningen). Markér med vedlagte boreskabelon (Underhængt montering). Ø 1 mm Ø 16 mm Ø 1 mm Ø 3 mm Ø 1 mm Ø 1 mm 90°...
- Seite 44 Steckteile entfernen Remove detail parts Ôter les connecteurs Opsteekdelen verwijderen Desmontaje de las piezas enchufables Rimuovere gli elementi a innesto Avlägsna insticksdelar Fjern stikdele...
- Seite 46 Abdeckung anbringen Install the cover. Poser le couvercle Afdekking aanbrengen Colocar la cubierta Applicare il coperchio Sätt på locket Anbring afdækning...
- Seite 47 Steckteile nach erfolgter Unterflurmontage wieder anbringen. Reinstall detail parts after completing below-baseboard installation. Remonter les connecteurs après le montage souterrain. Opsteekdelen na succesvolle ondervloermontage weer aan- brengen. Colocar de nuevo las piezas enchufables una vez realizado el montaje bajo el suelo Applicare di nuovo gli elementi a innesto dopo avvenuto montag- gio sotto plancia. Efter montage av signalen under anläggningen sätts insticks- delarna tillbaka Anbring stikdele efter gennemført underhængt montering.
- Seite 52 Due to different legal requirements regarding electro-magnetic compatibility, this item may be used in the USA only after separate certification for FCC compliance and an adjustment if necessary. Use in the USA without this certification is not permitted and absolves us of any liability. If you should want such certification to be done, please contact us – also due to the additional costs incurred for this.