Herunterladen Inhalt Inhalt Diese Seite drucken
Inhaltsverzeichnis

Werbung

Verfügbare Sprachen
  • DE

Verfügbare Sprachen

  • DEUTSCH, seite 1
Steelwave
Mikrowelle
Microwave
Microondas
Micro-onde
Microonde
10028201 10028202

Werbung

Inhaltsverzeichnis
loading

Inhaltszusammenfassung für Klarstein Steelwave

  • Seite 1 Steelwave Mikrowelle Microwave Microondas Micro-onde Microonde 10028201 10028202...
  • Seite 3: Inhaltsverzeichnis

    Sehr geehrter Kunde, wir gratulieren Ihnen zum Erwerb Ihres Gerätes. Lesen Sie die folgenden Hinweise sorgfältig durch und befolgen Sie diese, um möglichen Schäden vorzubeugen. Für Schäden, die durch Missachtung der Hinweise und unsachgemäßen Gebrauch entstehen, übernehmen wir keine Haftung. Scannen Sie den folgenden QR-Code, um Zugriff auf die aktuellste Bedienungsanleitung und weitere Informationen rund um das Produkt zu erhalten.
  • Seite 4: Sicherheitshinweise

    SICHERHEITSHINWEISE Lesen Sie sich alle Hinweise sorgfältig durch und bewahren Sie die Bedienungsanleitung zum Nachschlagen gut auf. Um die Gefahr eines Stromschlags bei einer Störung oder Fehlfunktion zu verringern, muss das Gerät an eine geerdete Steckdose angeschlossen werden. Schließen Sie das Gerät nur an Steckdosen an, die der angegeben Spannung des Geräts entsprechen.
  • Seite 5 Um den Drehteller vor Glasbruch zu schützen: • Lassen Sie den Drehteller abkühlen, bevor Sie ihn reinigen. • Stellen Sie kein heißes Essen oder heiße Behälter auf den kalten Drehteller. • Stellen Sie kein gefrorenes Essen oder gefrorene Behälter auf den heißen Drehteller. Allgemeine Sicherheitshinweise •...
  • Seite 6: Hinweise Zum Kochgeschirr

    HINWEISE ZUM KOCHGESCHIRR Wir raten Ihnen nur Behälter zu benutzen, die für die Mikrowelle geeignet sind. Dazu zählen Behälter aus hitzebeständiger Keramik, Glas und mikrowellentaugliche Plastikbehälter. Benutzen Sie zum Garen und Grillen keine Metallbehälter, da sie Funken schlagen können. Halten Sie sich beim Geschirr an die folgende Tabelle. Material Mikro Grill...
  • Seite 7: Kochtipps

    KOCHTIPPS Folgende Faktoren beeinflussen das Kochergebnis: Die Anordnung der Nahrungsmittel Legen Sie dickere Stück an den Rand des Kochgeschirrs, dünnere Stücke in die Mitte und verteilen Sie die Stücke gleichmäßig. Achten Sie darauf, dass die Stücke nicht übereinander liegen. Garzeit Beginnen Sie mit einer kurzen Garzeit.
  • Seite 8: Geräteübersicht Und Bedienfeld

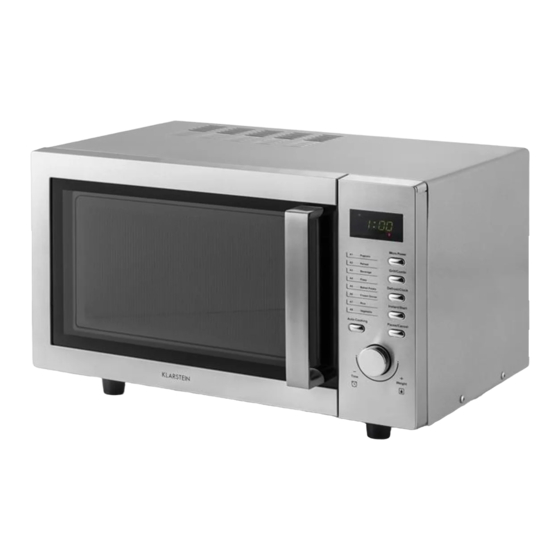
    GERÄTEÜBERSICHT UND BEDIENFELD Sichtfenster Rotationsachse Drehteller Rotationsring Wellenleiter-Abdeckung Grillrost Türverriegelung Bedienfeld...
  • Seite 9 Leistung Grill oder Grill-Kombination Auftauen/Uhr Start Auto-Programme Pause/Cancel (Einstellungen löschen) Kochzeit und Gewicht...
  • Seite 10: Montage

    MONTAGE Angesichts der begrenzten Raums des Gehäuses, muss die Mikrowelle genau nach den folgenden Anweisungen installiert werden, um Gefahren zu vermeiden: a) Ansaug- und Auslassöffnung siehe Abbildung 4. b) Netto-Tiefe ≥ 550 mm, siehe Abbildung 4. c) Bezugsplattestärke zwischen 18 und 20 mm. Bringen Sie die Füße, wie auf Abbildung 1 gezeigt, mit den Schrauben (8*16) an der Mikrowelle...
  • Seite 11: Wichtige Maßangaben

    Installieren Sie die Halter seitlich an der Mikrowelle, wie in auf Abbildung 3 dargestellt. Schieben Sie die Mikrowelle in die Schranköffnung und befestigen Sie sie mit den Holzschrauben (4*12), wie auf Abbildung 4 dargestellt. Wichtige Maßangaben: • Öffnung: 560 mm (L) x 443 mm (H) x 550 mm (T) •...
  • Seite 12 Sichern Sie die Schmuckblende an den Haltern, wie auf Abbildung 5 dargestellt. Die Mikrowelle ist nun fertig montiert. Abbildung 6 zeigt den Luftstroms vom Lufteinlass zum Luftauslass durch den Einbauschrank.
  • Seite 13: Installation

    INSTALLATION • Entfernen Sie das komplette Verpackungsmaterial und überprüfen Sie das Gerät auf Schäden. Wenn Sie Schäden entdecken, kontaktieren Sie den Kundendienst. • Stellen Sie das Gerät an einem trockenen Ort, an dem es vor äußeren Einflüssen geschützt ist und halten Sie es fern von Wärmequellen und Feuchtigkeit. •...
  • Seite 14: Bedienung

    BEDIENUNG Sobald Sie den Stecker in die Steckdose stecken blinkt das Display 3 Mal. Danach zeigt das Display „:“ an und signalisiert, dass sie ein Programm auswählen und eine Zeit eingeben sollen. Auto-Erinnerung Wenn ein voreingestelltes Programm beendet ist, zeigt das Display „End“. Ein dreifacher Piepton ertönt, um Sie daran zu erinnern das Essen zu entnehmen.
  • Seite 15: Programme Und Funktionen

    PROGRAMME UND FUNKTIONEN Garen mit der Mikrowelle Drücken Sie mehrmals auf die Power-Taste. Die LED zeigt nacheinander die folgenden Optionen an: 100P – 80P – 60P – 40P – 20P. 100P Hohe Leistung 100% Leistung. Zum schnellen erhitzen. Mittelhohe Leistung 80% Leistung.
  • Seite 16: Kombigrill

    Kombigrill Mit der Grill-Funktion können Sie Essen grillen. Drücken Sie mehrmals auf die Grill-Taste um eines der folgenden Grillprogramme auszuwählen: Grill. Während des Betriebs ist nur das Heizelement an. Dieses Programm eignet sich zur Zubereitung von dünn gerolltem Rind- oder Schweinefl eisch, Würstchen oder knusprigen Hähnchenfl ügeln.
  • Seite 17 • Drehen Sie die Lebensmittel während des Auftauens einmal um, damit sie gleichmäßig auftauen. • Das Auftauen dauert in der Regel etwas länger, als das Garen in der Mikrowelle. • Sobald sich die Lebensmittel mit dem Messer schneiden lassen, sind sie aufgetaut. •...
  • Seite 18: Zubereitungshinweise

    Auto-Garen Die Mikrowelle verfügt über voreingestellte Programme für diverse Lebensmittel. Sobald im Display „:“ blinkt, drücken Sie mehrmals auf die Cook-Taste, um eines der Programme aus der folgenden Tabelle auszuwählen. Wählen Sie das Programm nach Nahrungsmittel-Typ und –Gewicht und halten Sie sich genau an die folgenden Anweisungen.
  • Seite 19 Beispiel: 0.5 kg Reis kochen Schritte Displayanzeige Nach dem Einstecken blinkt das Display. Drücken Sie mehrmals auf Cook-Taste und wählen Sie das gewünschte Programm. Drehen Sie am Drehregler und stellen Sie das Gewicht ein. Drücken Sie auf instant/Start. Das Display zeigt die Garzeit an und beginnt herunterzuzählen.
  • Seite 20: Displayanzeigen

    Automatisches Garen mit verzögertem Start Falls Sie das Essen nicht sofort garen möchten können Sie ein voreingestelltes Programm auswählen, dass zu einer von ihnen eingestellten Zeit startet. Beispiel: Es ist 12:30 Uhr und Sie möchten, dass die Mikrowelle um 14:20 Uhr startet und für 9 Minuten und 30 Sekunden mit 100% Leistung läuft.
  • Seite 21: Kindersicherung

    Kombiniertes Garen Um bestmögliche Ergebnisse zu erhalten, erfordern manche Gerichte die Kombination verschiedener Garmethoden und Garzeiten. Um Methoden und Garzeiten zu kombinieren befolgen Sie die Schritte im folgenden Beispiel. Beispiel: Sie wollen ihr Gericht 3 Minuten lang mit 100% Leistung in der Mikrowelle garen, anschließend soll es 9 Minuten lang gegrillt werden.
  • Seite 22: Reinigung Und Pflege

    REINIGUNG UND PFLEGE • Reinigen Sie den Ofen regelmäßig und entfernen Sie alle Essensrückstände. • Ziehen Sie vor der Reinigung immer den Stecker aus der Steckdose. • Tauchen Sie das Gerät nie komplett in Wasser oder andere Flüssigkeiten. • Unregelmäßige Reinigung führt zu Verschleiß und einer verkürzter Lebensdauer des Geräts.
  • Seite 23: Fehlerbehebung

    FEHLERBEHEBUNG Überprüfen Sie folgendes, bevor Sie sich an unseren Kundenservice wenden: Stellen Sie ein Tasse Wasser (150 ml) in die Mikrowelle und schließen Sie die Tür. Sobald die Tür sicher geschlossen ist, erlischt die Innenbeleuchtung. Schalten Sie die Mikrowelle ein und lassen Sie sie eine Minute lang laufen. •...
  • Seite 24: Hinweise Zur Entsorgung

    HINWEISE ZUR ENTSORGUNG Befindet sich die linke Abbildung (durchgestrichene Mülltonne auf Rädern) auf dem Produkt, gilt die Europäische Richtlinie 2012/19/EU. Diese Produkte dürfen nicht mit dem normalen Hausmüll entsorgt werden. Informieren Sie sich über die örtlichen Regelungen zur getrennten Sammlung elektrischer und elektronischer Gerätschaften.
  • Seite 25 Dear Customer, Congratulations on purchasing this equipment. Please read this manual carefully and take care of the following hints to avoid damages. Any failure caused by ignoring the items and cautions mentioned in the instruction manual is not covered by our warranty and any liability. Scan the QR code to get access to the latest user manual and other information about the product.
  • Seite 26: Safety Instructions

    SAFETY INSTRUCTIONS Read all the safety and operating instructions carefully and retain them for future reference. Make sure the voltage in your living area corresponding to the one shown on the rating label of the appliance. And the wall socket is properly grounded. To reduce the risk of fire in the oven cavity: •...
  • Seite 27 To prevent the turntable from breaking: • Let the turntable cool down before cleaning. • Do not place hot foods or utensils on the cold turntable. • Do not place frozen foods or utensils on the hot turntable. General Instructions •...
  • Seite 28: Notes On The Cooking Utensils

    NOTES ON THE COOKING UTENSILS It is strongly recommended to use the containers which are suitable and safe for microwave cooking. Generally speaking, the containers which are made of heat- resistant ceramic, glass or plastic are suitable for microwave cooking. Never use the metal containers for microwave cooking and combination cooking as spark is likely to occur.
  • Seite 29: Cooking Tips

    COOKING TIPS The following factors may affect the cooking result: Food arrangement Place thicker areas towards outside of dish, the thinner part towards the centre and spread it evenly. Do not overlap if possible. Cooking time length Start cooking with a short time setting, evaluate it after it times out and extend it according to the actual need.
  • Seite 30: Product Overview And Control Panel

    PRODUCT OVERVIEW AND CONTROL PANEL Viewing window Rotating axis Glass turntable Rotating ring Waveguide cover Grill rack Door Interlock Control Panel...
  • Seite 31 Power Grill or grill combinaton Defrost or clock Start Auro cooking menu Pause/Cancel Cooking time or weight...
  • Seite 32: Mounting

    MOUNTING Given the limited room of the cabinet, the microwave oven must be installed under the following instructions so as to avoid danger: a) Intake and exhaust port position, as shown in Figure 4. b) Net depth ≥550 mm, as shown in Figure 4. c) Reference plate thickness between 18 and 20mm.
  • Seite 33 Install the holders on the side of the microwave as shown in Figure 3. Place microwave oven into cabinet, and then fix it with wood screws (4x12), as shown in Figure 4. Cabinet Details: • Cavity: (L) 560mm*(H) 443mm*(D) 550mm •...
  • Seite 34 Secure ornamental frame to holders, as shown in Figure 5. The microwave is now finally assembled. Cabinet airflow chart as shown in Figure 6.
  • Seite 35: Installation

    INSTALLATION • Take out all the packing. If there is a safe film over the oven, tear it off before Use. Check carefully for damage. If any, immediately notify dealer or send to the manufacturer’s service center. • Microwave ovens must be placed under dry and non corrosiveness environments, kept away from heat and humidity, such as gas burner or water tank.
  • Seite 36: Operation

    OPERATION The LED flashes 3 times when plugged in power supply. Then it flashes “:”, prompting you to input the cooking menu and time. Auto reminder When your preset cooking procedure has finished, the LED Display will show End and three beeps sound will be heard to prompt you to take out food.
  • Seite 37: Programs And Functions

    PROGRAMS AND FUNCTIONS Microwave cooking Press the power button several times. The LED will display the following options in turn: 100P - 80P - 60P - 40P - 20P. 100P High power 100% microwave power. Medium High power 80% microwave power. . Medium power 60% microwave power.
  • Seite 38 Grill Combi This function use for grill food, press this button, LED Display will cycle to show G, G1, G2. Grill, the heat element will be energized during operation time. Which is applicable for rolling thin meats or pork, sausage, chicken wing as good brown color can be obtained.
  • Seite 39 • It is necessary to turn over the food during operation to obtain uniform effect. • Usually defrosting will need longer time than that of cooking the food. • If the food can be cut by knife, the defrosting process can be considered completed.
  • Seite 40 Auto cooking The oven has default cooking menu for simple operation. When the LED flash colon, press the Cook button and LED will cycle to show A.1, A.2 …… A.8. Choose the appropriate menu according to the food type and weight and strictly observe the directions in below table, otherwise the cooking effect will be largely influenced.
  • Seite 41 Example: Cook 0.5 kg rice Steps Display After power-up, the colon flashes. Press Auto Cooking button to set the cooking menu. Set cooking weight by turning Time/Weight knob. Start cooking by pressing Instant/Start button and LED will count down to show running time.
  • Seite 42 Automatic starting (delayed function) If you do not want the menu be started immediately, you can preset the cooking menu and time and the preset menu will be automatically started at your set time. The setting will consist of 2 steps: Setting the current clock and setting the cooking menu and time. Example: Now it is 12:30 clock, if you hope that the microwave oven will automatically start cooking with 100P microwave power for 9 minutes and 30 seconds at 14:20.
  • Seite 43 Multi-sequence cooking To obtain best cooking result, some recipes call for different cook mode and time. You may program your personalized menu as follow. Example: You want cook food with 100P microwave for 3 minutes then grill for 9 minutes. This is 2 sequence setting. Steps Display Press Power button to select power level.
  • Seite 44: Cleaning And Care

    CLEANING AND CARE • The oven should be cleaned regularly and any food deposits removed. • Remove the power cord from the wall outlet before cleaning. Don‘t immerse the appliance in water or other fluids when cleaning. • Failure to maintain the oven in a clean condition could lead to deterioration of the surface that could adversely affect the life of the appliance and possibly result in a hazardous situation •...
  • Seite 45: Troubleshooting

    TROUBLESHOOTING Please check the following before contacting our customer service: Place a cup of water (150 ml) in the microwave and close the door. Once the door is securely closed, the interior lights will go out. Turn on the microwave and let it run for one minute.
  • Seite 46: Hints On Disposal

    HINTS ON DISPOSAL According to the European waste regulation 2012/19/EU this symbol on the product or on its packaging indicates that this product may not be treated as household waste. Instead it should be taken to the appropriate collection point for the recycling of electrical and electronic equipment.
  • Seite 47 Estimado cliente: Le felicitamos por la adquisición de este producto. Lea atentamente el siguiente manual y siga cuidadosamente las instrucciones de uso con el fin de evitar posibles daños. La empresa no se responsabiliza de los daños ocasionados por un uso indebido del producto o por haber desatendido las indicaciones de seguridad.
  • Seite 48: Indicaciones De Seguridad

    INDICACIONES DE SEGURIDAD Lea atentamente todas las indicaciones y conserve este manual para consultas posteriores. Para reducir el riesgo de una descarga eléctrica producido por una avería o un fallo en el funcionamiento, el aparato deberá conectarse a una toma de corriente con toma de tierra.
  • Seite 49 Para proteger el plato giratorio de roturas: • Deje que el plato giratorio se enfríe por completo antes de limpiarlo. • No coloque alimentos o recipientes muy calientes sobre el plato giratorio frío. • No coloque comida o recipientes congelados sobre el plato giratorio caliente. Advertencias generales de seguridad •...
  • Seite 50: Notas Sobre Los Utensilios De Cocina

    NOTAS SOBRE LOS UTENSILIOS DE COCINA Le aconsejamos que solamente utilice recipientes adecuados para el microondas. Entre ellos podrá elegir entre cerámica resistente al calor, cristal y recipientes de plástico aptos para microondas. No utilice recipientes de metal para cocinar ni gratinar, pues las ondas rebotarán en ellos.
  • Seite 51: Consejos De Cocción

    CONSEJOS DE COCCIÓN Los siguientes factores pueden influir en el resultado final de sus platos: Distribución de los alimentos Coloque los trozos más gruesos en el borde del plato y los más finos en el medio y distribúyalos de manera homogénea. Asegúrese de que unos trozos no se sobreponen a otros.
  • Seite 52: Vista General Del Aparato Ypanel De Control

    VISTA GENERAL DEL APARATO Y PANEL DE CONTROL Puerta transparente Eje de rotación Plato giratorio Anillo de rotación Guía de ondas / Cubierta Parrilla Cierre de seguridad de la puerta Panel de control...
  • Seite 53 Potencia Función Grill o Combi Grill Descongelar / Reloj Inicio Programas de autococción Pausa/Cancelar (borrado de los ajustes) Tiempo de cocción y peso...
  • Seite 54: Montaje

    MONTAJE Debido al reducido espacio de la carcasa, es importante instalar el horno microondas tal y como se indica en las siguientes instrucciones. De esta manera se evitarán riesgos innecesarios: a) Aberturas de succión y de salida de aire. Ver ilustración 4. b) Profundidad ≥...
  • Seite 55 Coloque los soportes a ambos lados del microondas como muestra la imagen 3. Introduzca el microondas en el hueco del armario y fíjelo bien con los tornillos de madera (4*12), como muestra la imagen 4. Datos importantes sobre las medidas: •...
  • Seite 56 Fije el embellecedor a los soportes como muestra la imagen 5. El microondas ya está listo para ser usado. La imagen 6 muestra el recorrido de la corriente de aire desde la entrada hasta la salida del aire a través del armario.
  • Seite 57: Instalación

    INSTALACIÓN • Retire todo el material de embalaje y compruebe que el aparato no tiene ningún daño. Si el horno presenta algún defecto, contacte con el servicio de atención al cliente. • Coloque el aparato en un lugar seco protegido de la acción de los agentes externos.
  • Seite 58: Puesta En Funcionamiento

    PUESTA EN FUNCIONAMIENTO Una vez que haya enchufado el horno, el display parpadeará 3 veces. Después aparecerá el signo “:” en la pantalla para indicar que puede elegir un programa y un tiempo de cocción. Auto-Aviso Cuando uno de los programas introducidos haya terminado, en el display aparecerá “End”.
  • Seite 59: Programas Y Funciones

    PROGRAMAS Y FUNCIONES Cocinar con el microondas Pulse varias veces la tecla de encendido (POWER). La pantalla LED le mostrará en orden sucesivo las siguientes opciones: 100P – 80P – 60P – 40p – 20P. 100P Potencia alta 100% Potencia. Calentamiento rápido. Potencia medio-alta 80% Potencia.
  • Seite 60 Función Combigrill Con la función Grill podrá preparar sus alimentos a la parrilla. Pulse varias veces la tecla Grill para escoger entre uno de los siguientes programas: Grill. Durante el funcionamiento, sólo se activarán las barras de calor del horno. Este programa es apropiado para la preparación del rollos fi nos de carne de ternera o de cerdo, salchichas o crujientes alitas de pollo.
  • Seite 61 • Déle una vez la vuelta al alimento durante el proceso de descongelación para que pueda descongelarse uniformemente. • La descongelación necesita más tiempo que la cocción en el microondas. • Si puede cortar el alimento con un cuchillo, significa que está descongelado. •...
  • Seite 62 Autococción El microondas dispone de una gama de programas para cocinar diversos tipos de alimentos. Cuando en el display aparezca “:”, pulse varias veces la tecla Cook para elegir uno de los programas que aparecen en la tabla inferior. Seleccione el programa en función el tipo de alimento y de su peso.
  • Seite 63 Ejemplo: cocción de 0.5 kg de arroz Pasos Display Cuando encienda el aparato, el display comenzará a parpadear. Pulse varias veces la tecla Cook y elija el programa deseado Seleccione el peso del alimento con el regulador. Pulse Instant/Start. En el display se iniciará la cuenta atrás.
  • Seite 64 Cocción automática con tiempo de inicio programado Si no desea cocinar la comida inmediatamente, puede seleccionar un programa que comience a funcionar cuando usted lo desee. Ejemplo: Son las 12:30 y usted desea que el microondas comience a funcionar a las 14:20. Desea que el tiempo de cocción sea de 9 minutos y 30 segundos y que la potencia sea del 100%.
  • Seite 65 Cocción combinada Para conseguir los mejores resultados, es muy recomendable cocinar algunos alimentos utilizando diferentes modos y tiempos de cocción. Para realizar con éxito una combinación de modos y tiempos de cocción diferentes, siga los pasos que le mostramos a continuación. Ejemplo: Usted quiere cocinar su comida 3 minutos con una potencia del 100%.
  • Seite 66: Limpieza Y Cuidado

    LIMPIEZA Y CUIDADO • Limpie el microondas regularmente y retire todos los restos de comida de su interior. • Antes de limpiar el microondas, desenchúfelo. • Nunca sumerja el aparato completamente en agua ni en ningún otro líquido. • Una limpieza deficiente puede reducir la vida útil del microondas. •...
  • Seite 67: Resolución De Problemas

    RESOLUCIÓN DE PROBLEMAS Responda a la siguientes preguntas antes de dirigirse a nuestro servicio de atención al cliente: Coloque una taza con agua (150 ml) en el microondas y cierre la puerta. Cuando la puerta esté completamente cerrada, la iluminación interior se apagará. Encienda el microondas y manténgalo en funcionamiento durante un minuto.
  • Seite 68: Retirada Del Aparato

    RETIRADA DEL APARATO Si el aparato lleva adherida la ilustración de la izquierda (el contenedor de basura tachado) entonces rige la normativa europea, directiva 2012/19/UE. Este producto no debe arrojarse a un contenedor de basura común. Infórmese sobre las leyes territoriales que regulan la recogida separada de aparatos eléctricos y electrónicos.
  • Seite 69 Chère cliente, cher client, Toutes nos félicitations pour l’acquisition de ce nouvel appareil. Veuillez lire attentivement et respecter les instructions de ce mode d’emploi afin d’éviter d’éventuels dommages. Le fabricant ne saurait être tenu pour responsable des dommages dus au non- respect des consignes de sécurité...
  • Seite 70: Consignes De Sécurité

    CONSIGNES DE SÉCURITÉ Lisez attentivement toutes les consignes avant d’utiliser l’appareil et conservez le guide d’utilisation pour vous y référer ultérieurement. Pour réduire le risque d’électrocution en cas de défaillance technique ou de dysfonctionnement, l’appareil doit être relié à une prise de terre. Branchez l’appareil uniquement sur des prises fournissant la tension correspondant à...
  • Seite 71 Pour protéger le plateau tournant contre les risques d’éclatement du verre : • Laissez refroidir le plateau tournant avant de le nettoyer. • Ne posez aucun aliment ou récipient chaud sur le plateau tournant froid. • Ne posez aucun aliment ou récipient congelé sur le plateau tournant chaud. Consignes de sécurité...
  • Seite 72: Notes Sur Les Ustensiles De Cuisine

    NOTES SUR LES USTENSILES DE CUISINE Utiliser uniquement des récipients adaptés aux fours à micro-ondes. Utiliser des récipients en céramique résistante à la chaleur, des récipients en verre ou des récipients en plastique adaptés au four à micro-ondes. Ne pas utiliser de récipients métalliques pour la cuisson ou pour le gril : ils risquent de produire des étincelles.
  • Seite 73: Conseils Culinaires

    CONSEILS CULINAIRES Les facteurs suivants ont une influence sur le résultat de la cuisson. La disposition des aliments Placer les gros morceaux sur les bords du récipient et les morceaux plus fins au centre. Les disposer uniformément. Ne pas placer les aliments les uns sur les autres. Temps de cuisson Commencer avec un temps de cuisson court.
  • Seite 74: Aperçu De L'appareil Et Panneau De Commande

    APERÇU DE L’ APPAREIL ET PANNEAU DE COMMANDE Porte Entraîneur de plateau Plateau Anneau à roulettes Protection du guide d‘ondes Grille métallique Crochets de verrouillage Panneau de commande...
  • Seite 75 Puissance Mode gril/mode combinaison Décongélation/horloge Marche Programme automatique Pause/Cancel Durée de cuisson/poids...
  • Seite 76: Montage

    MONTAGE Compte tenu de l’espace limité du boîtier et pour éviter tout danger, le four à micro- ondes doit être installé en suivant précisément ces instructions : a) Pour l’aspiration et les fentes de sortie, voir l’illustration 4. b) Pour la profondeur nette ≥ 550 mm, voir l’illustration 4. c) Épaisseur des panneaux de revêtement entre 18 et 20 mm.
  • Seite 77 Fixer les supports sur chaque côté du four à micro-ondes comme illustré ci-contre. Insérer le four à micro-ondes dans l’ouverture de votre meuble et le fixer à l’aide des vis (4 x 12), comme le montre l’illustration. Indications importantes de mesures : •...
  • Seite 78 Fixer le cadre décoratif aux supports comme le montre l’illustration 5. Le montage du four à micro-ondes est à présent terminé. L’illustration ci-dessus montre comment l’air circule depuis l’entrée à la sortie de l’air à travers votre meuble.
  • Seite 79: Installation

    INSTALLATION • Retirer tous les éléments d’emballage et vérifier l’état de l’appareil. S’il est endommagé, contacter le service après-vente. • Installer le four à micro-ondes dans un endroit sec, loin de toute humidité et de toute source de chaleur. • Pour garantir une ventilation adéquate, maintenir un espace d’au moins 10 cm à l’arrière, de 5 cm sur les côtés et de 20 cm au-dessus.
  • Seite 80: Mise En Marche

    MISE EN MARCHE Dès que l’appareil est branché, l’écran d’affichage se met à clignoter 3 fois. Puis « : » s’affiche ce qui signifie qu’un programme et un temps de cuisson peuvent être sélectionnés. Mémoire automatique Lorsque le programme sélectionné s’achève, le message « End » s’affiche. Un bip est alors émis trois fois pour signaler que vous pouvez sortir votre repas.
  • Seite 81: Programmes Et Fonctions

    PROGRAMMES ET FONCTIONS Cuisson Appuyer plusieurs fois sur la touche « Power ». La led indique les options dans l’ordre suivant : 100P – 80P – 60P – 40P – 20P. 100P Puissance élevé Puissance à 100 %. Pour une cuisson rapide. Puissance moyenne- Puissance à...
  • Seite 82 Mode de cuisson combiné : gril + micro-ondes Utiliser cette fonction pour faire griller vos repas. Appuyer plusieurs fois sur la touche « gril » pour sélectionner l’un des programmes de décongélation suivant : Gril. Seul l’élément chauffant est activé. Ce programme est parfait pour la préparation de fi nes tranches de viande, de saucisses ou de cuisses de poulet croustillantes.
  • Seite 83 • Tourner les aliments pendant la décongélation pour que cette dernière soit uniforme. • La décongélation dure en général plus longtemps que la cuisson. • Dès que les aliments peuvent être coupés avec un couteau, cela signifie qu’ils sont décongelés. •...
  • Seite 84 Cuisson automatique Le four à micro-ondes dispose de différents programmes que vous pouvez sélectionner en fonction du type d’aliments cuisinés et de leur poids. Dès que l’affichage « : » se met à clignoter, appuyer plusieurs fois sur la touche « Cook » pour choisir l’un des programmes indiqués à...
  • Seite 85 Exemple : cuire 500 g de riz Étapes Affichage Brancher l’appareil. L’écran se met à clignoter. Sélectionner le programme de votre choix en appuyant plusieurs fois sur la touche « Cook ». Faire pivoter le bouton de réglage pour régler le poids. Appuyer sur la touche «...
  • Seite 86 Cuisson automatique à démarrage différé Si vous ne pouvez pas faire cuire votre plat tout de suite, vous pouvez prérégler un programme pour qu’il débute à l’heure que vous désirez. Exemple : il est 12h30 et vous désirez que le four à micro-onde se mette en marche à...
  • Seite 87 Combiner les cuissons Pour un meilleur résultat, certains plats requièrent la combinaison de différents programmes de cuisson et de temps de cuisson. Dans ce cas, suivre les étapes décrites dans l’exemple suivant : Exemple : faire cuire un repas pendant 3 minutes à une puissance de 100 % puis le faire griller pendant 9 minutes.
  • Seite 88: Nettoyage Et Entretien

    NETTOYAGE ET ENTRETIEN • Nettoyer le four régulièrement et retirer les résidus de nourriture. • Toujours débrancher l’appareil avant de le nettoyer. • Ne jamais plonger l’appareil dans de l’eau ou d’autres liquides. • L’appareil s’use plus vide et sa durée de vie est plus courte lorsqu’il n’est pas nettoyé régulièrement.
  • Seite 89: Résolution Des Problèmes

    RÉSOLUTION DES PROBLÈMES En cas de dysfonctionnements, veuillez suivre les indications suivantes avant d’appeler notre service client : Placer un verre d’eau (150 ml) dans le four à micro-ondes et fermer la porte. Dès que celle-ci est correctement fermée, la lumière de l’intérieur s’éteint. Mettre en marche l’appareil et le laisser fonctionner une minute.
  • Seite 90: Informations Sur Le Recyclage

    INFORMATIONS SUR LE RECYCLAGE Le pictogramme ci-contre apposé sur le produit signifie que la directive européenne 2012/19/UE s‘applique (poubelle à roues barrée d’une croix). Ces produits ne peuvent être jetés dans les poubelles domestiques courantes. Renseignez- vous concernant les règles appliquées pour la collecte d’appareils électriques et électroniques.
  • Seite 91 Gentile cliente, La ringraziamo per aver acquistato il dispositivo. La preghiamo di leggere attentamente le seguenti istruzioni per l’uso e di seguirle per evitare possibili danni tecnici. Non ci assumiamo alcuna responsabilità per danni scaturiti da una mancata osservazione delle avvertenze di sicurezza e da un uso improprio del dispositivo.
  • Seite 92: Avvertenze Di Sicurezza

    AVVERTENZE DI SICUREZZA Leggere attentamente tutte le istruzioni e conservare il manuale per consultazioni future. Per evitare il rischio di scosse elettriche in caso di malfunzionamento, collegare il dispositivo ad una presa dotata di messa a terra. Collegare il dispositivo solo ad una presa che corrisponde alla tensione indicata.
  • Seite 93 Evitare che il piatto girevole si rompa: • Lasciare raffreddare il piatto girevole prima di pulirlo. • Non poggiare piatti caldi o contenitori caldi sul piatto girevole freddo. • Non inserire alimenti congelati o contenitori congelati sulla piastra girevole calda. Avvertenze di sicurezza generali •...
  • Seite 94: Note Sugli Utensili Da Cucina

    NOTE SUGLI UTENSILI DA CUCINA Si consiglia di utilizzare solo contenitori adatti al microonde come contenitori in ceramica, in vetro e in plastica resistenti al calore. Non usare recipienti in metallo per cuocere e arrostire, poiché le scintille potrebbero causare incendi. Attenersi alle indicazioni contenute nella tabella sottostante: Materiale Micro...
  • Seite 95: Consigli Per Cucinare

    CONSIGLI PER CUCINARE I seguenti fattori possono influire negativamente sul risultato: La disposizione degli alimenti Collocare gli alimenti più grandi ai bordi del contenitore e quelli più piccoli nel mezzo e distribuirli in modo uniforme. Prestare attenzione a non sovrapporli l’uno all’altro. Tempo di cottura Iniziare con un tempo di cottura breve.
  • Seite 96: Componenti E Pannello Di Controllo

    COMPONENTI E PANNELLO DI CONTROLLO Sportello trasparente Asse di rotazione Piatto girevole Anello di rotazione Copertura della guida d’onda Griglia Blocca sportello Pannello di controllo...
  • Seite 97 Potenza Grill o Combinazione grill- microonde Scongelamento/Timer Accensione Programma automatico Pause/Cancel (cancellare le impostazioni) Tempo di cottura e peso...
  • Seite 98: Montaggio

    MONTAGGIO Dato lo spazio limitato dell’alloggiamento, il microonde deve essere installato seguendo esattamente le seguenti indicazioni, per evitare pericoli: a) Fessura di ventilazione e di aspirazione (vedere la figura 4). b) Profondità netta: ≥ 550 mm, (vedere la figura 4). c) Spessore della lastra tra i 18 e i 20 mm.
  • Seite 99 Installare i supporti ai lati del microonde, come mostrato nella figura 3. Inserire il microonde nell’alloggiamento del mobile e fissarlo con le viti per legno (4*12), come mostrato nella figura 4. Importanti indicazioni per le misure • Alloggiamento: 560 (L) x 443 (A) x 550 mm (P) •...
  • Seite 100 Fissare il pannello agli appositi supporti come mostrato nella figura 5. Il microonde adesso è montato. Nella figura 6 viene raffigurata la direzione del flusso dell’aria attraverso il mobile.
  • Seite 101: Installazione

    INSTALLAZIONE • Rimuovere il materiale di imballaggio e controllare se il microonde è danneggiato. • Nel caso in cui questo sia danneggiato, contattare il nostro servizio clienti. • Riporre il microonde in luogo fresco e asciutto dove è protetto da influssi esterni e tenerlo lontano da fonti di calore e umidità.
  • Seite 102: Messa In Funzione

    MESSA IN FUNZIONE Nel momento in cui si inserisce la spina nella presa, il display lampeggia 3 volte. In seguito sul display appare „:“ e segnala che è possibile selezionare un programma e impostare il tempo. Funzione automatica di avviso Quando un programma preimpostato è...
  • Seite 103: Programmi E Funzioni

    PROGRAMMI E FUNZIONI Programmi e funzioni Premere ripetutamente il tasto Power. Il Led mostra i seguenti programmi nella seguente sequenza: 100P – 80P – 60P – 40P – 20P. 100P Alta potenza Potenza 100%. Per riscaldare velocemente Potenza medio - alta Potenza 80%.
  • Seite 104 Combinazione con il grill Con questa funzione è possibile grigliare. Premere ripetutamente il tasto grill per selezionare uno dei seguenti programmi: Grill. Durante il funzionamento solo la resistenza è accesa. Questo programma è adatto alla cottura di carne di maiale o bovina, wurstel o ali di pollo.
  • Seite 105 • Per scongelare l’alimento in modo uniforme, si consiglia di girarlo. • La procedura di scongelamento è generalmente più lunga rispetto a quello di cottura. • L’alimento è scongelato non appena è possibile tagliarlo con un coltello. • Le microonde penetrano nell’alimento fino a 4 cm. •...
  • Seite 106: Cottura Automatica

    Cottura automatica Il microonde dispone di programmi preimpostati per diverse tipologie di alimenti. Non appena sul display inizia a lampeggiare “:”, premere ripetutamente il tasto Cook, per selezionare uno dei programmi contenuti nella seguente tabella. Scegliere il programma in base alla tipologia di alimenti e al peso e attenersi alle seguenti indicazioni. Piatto girevole Indicazioni per la preparazione Popcorn...
  • Seite 107 Esempio: cuocere 0.5 kg di riso Istruzioni Display Dopo aver inserito la spina, il display inizia a lampeggiare Premere ripetutamente il tasto Cook e selezionare il programma desiderato. Impostare il peso girando la manopola. Premere Instant/Start per attivare la funzione scongelamento.
  • Seite 108 Cottura automatica con Start programmato Nel caso in cui non si desideri cuocere subito l’alimento, è possibile selezionare un programma preimpostato che si attiva nell’ora desiderata. Esempio: sono le 12:30 e si desidera che il microonde si attivi alle 14:20 e resti in funzione per 9 minuti e 30 secondi con potenza 100%.
  • Seite 109 Cottura combinata Per ottenere dei risultati ottimali, alcuni piatti necessitano della combinazione di diversi programmi e tempi di cottura. Seguire le seguenti istruzioni per impostare il programma di cottura combinata. Esempio: si desidera cuocere l’alimento per 3 minuti con il 100% di potenza, infine si desidera attivare il grill per 9 minuti.
  • Seite 110: Pulizia E Manutenzione

    PULIZIA E MANUTENZIONE • Pulire regolarmente il microonde e rimuovere i residui di cibo. • Prima di effettuare la pulizia, staccare sempre la spina dalla presa. • Non immergere il dispositivo in acqua o in altri liquidi. • Una pulizia non regolare è causa di usura del microonde e riduce la sua durata. •...
  • Seite 111: Risoluzione Dei Problemi 1

    RISOLUZIONE DEI PROBLEMI Si prega di fare la seguente verifica prima di rivolgersi al nostro servizio clienti: Mettere una tazza d’acqua (150 ml) nel microonde e chiudere lo sportello. Non appena lo sportello è ben chiuso, la luce interna lampeggia. Accendere il microonde e lasciarlo in funzione per un minuto.
  • Seite 112: Smaltimento

    SMALTIMENTO Se sul prodotto è presente la figura a sinistra (il cassonetto dei rifiuti mobile sbarrato), si applica la direttiva europea 2012/19/UE. Questi prodotti non possono essere smaltiti con i rifiuti normali. Informarsi sulle disposizioni vigenti in merito alla raccolta separata di dispositivi elettrici ed elettronici. Non smaltire i vecchi dispositivi con i rifiuti domestici.

Inhaltsverzeichnis