Inhaltsverzeichnis
Werbung
Verfügbare Sprachen
Verfügbare Sprachen
Quicklinks
Werbung
Kapitel
Inhaltsverzeichnis
Fehlerbehebung

Verwandte Anleitungen für Klarstein AeroWave


Inhaltszusammenfassung für Klarstein AeroWave
- Seite 1 AeroWave Mikrowelle Microwave Microondas Micro-onde Microonde 10035474...
-
Seite 3: Inhaltsverzeichnis
Sehr geehrter Kunde, wir gratulieren Ihnen zum Erwerb Ihres Gerätes. Lesen Sie die folgenden Hinweise sorgfältig durch und befolgen Sie diese, um möglichen Schäden vorzubeugen. Für Schäden, die durch Missachtung der Hinweise und unsachgemäßen Gebrauch entstehen, übernehmen wir keine Haftung. Scannen Sie den folgenden QR-Code, um Zugriff auf die aktuellste Bedienungsanleitung und weitere Informationen rund um das Produkt zu erhalten. -
Seite 4: Sicherheitshinweise
SICHERHEITSHINWEISE Lesen Sie sich alle Hinweise sorgfältig durch und bewahren Sie die Bedienungsanleitung zum Nachschlagen gut auf. Um die Gefahr eines Stromschlags bei einer Störung oder Fehlfunktion zu verringern, muss das Gerät an eine geerdete Steckdose angeschlossen werden. Schließen Sie das Gerät nur an Steckdosen an, die der angegeben Spannung des Geräts entsprechen. - Seite 5 Um den Drehteller vor Glasbruch zu schützen: • Lassen Sie den Drehteller abkühlen, bevor Sie ihn reinigen. • Stellen Sie kein heißes Essen oder heiße Behälter auf den kalten Drehteller. • Stellen Sie kein gefrorenes Essen oder gefrorene Behälter auf den heißen Drehteller. Allgemeine Sicherheitshinweise •...
-
Seite 6: Hinweise Zum Kochgeschirr
HINWEISE ZUM KOCHGESCHIRR Für die Mikrowelle geeignetes Kochgeschirr Kochgeschirr Hinweis Grillschale Befolgen Sie die Hinweise des jeweiligen Herstellers. Die Unterseite der Grillschale muss sich mindestens 5 mm oberhalb des Drehtellers befinden. Eine inkorrekte Verwendung kann zum Zerbrechen des Drehtellers führen. Essgeschirr Befolgen Sie die Hinweise des jeweiligen Herstellers und verwenden Sie ausschließlich mikrowellengeeignetes... - Seite 7 Kochgeschirr Hinweis Plastikfolie Verwenden Sie ausschließlich mikrowellengeeignete Plastikfolie. Decken Sie die Lebensmittel während des Erhitzens damit ab, um die Feuchtigkeit zu erhalten. Achten Sie darauf, dass die Folie die Lebensmittel dabei nicht berührt. Thermometer Verwenden Sie ausschließlich mikrowellengeeignete Koch- Thermometer. Wachspapier Abdeckung der Lebensmittel als Spritzschutz und um deren Feuchtigkeit zu bewahren.
-
Seite 8: Kochtipps
KOCHTIPPS Folgende Faktoren beeinflussen das Kochergebnis: Die Anordnung der Nahrungsmittel Legen Sie dickere Stück an den Rand des Kochgeschirrs, dünnere Stücke in die Mitte und verteilen Sie die Stücke gleichmäßig. Achten Sie darauf, dass die Stücke nicht übereinander liegen. Garzeit Beginnen Sie mit einer kurzen Garzeit. -
Seite 9: Geräteübersicht
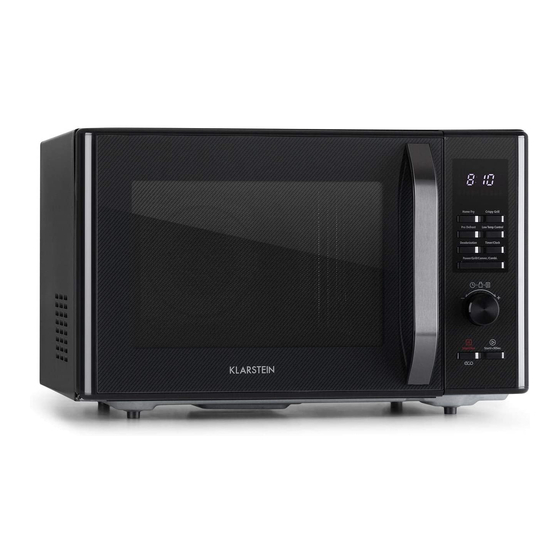
GERÄTEÜBERSICHT Bedienfeld Sichtfenster Drehwelle Tür Drehtellerring Sicherheitsschließsystem Glasdrehteller Grillschale (kann nicht mit der Grillgitter (kann nicht mit der Mikrowellenfunktion verwendet werden Mikrowellenfunktion verwendet werden und muss auf den Grillgitter platziert und muss auf dem Glasdrehteller werden) platziert werden) -
Seite 10: Installation
INSTALLATION Installation des Drehtellers Drehscheibe (Unterseite) Drehteller Drehwelle Drehtellerring • Drehen Sie den Drehteller niemals um. Die Drehscheibe sollte niemals beschränkt werden. • Sowohl der Drehteller als auch der Drehtellerring müssen während der Nutzung der Mikrowellenfunktion verwendet werden. • Stellen Sie alle Behälter zur Zubereitung immer auf den Drehteller. •... - Seite 11 Wählen Sie als Standort für das Gerät eine ebene Oberfläche aus, welche ausreichend Raum für die Luftein- und -auslässe bietet. 1. Die minimale Installationshöhe beträgt 85 cm. 2. Stellen Sie das Gerät so auf, dass die Hinterseite des Gehäuses die Wand berührt. Achten Sie darauf, dass zur Oberseite des Geräts ein Mindestabstand von 30 cm und zu den Seiten ein Mindestabstand von 20 cm eingehalten wird.
-
Seite 12: Inbetriebnahme Und Bedienung
INBETRIEBNAHME UND BEDIENUNG Uhrzeiteinstellung Sobald der Netzstecker des Geräts in die Steckdose gesteckt wurde, zeigt der Bildschirm „0:00“ an und das Gerät piept einmal auf. 1. Drücken Sie zweimal die Taste TIMER/CLOCK. Die Stundenanzeige blinkt auf. 2. Drehen Sie zur Anpassung der Stunde am Drehregler. Es kann eine Zeit zwischen 0 –... -
Seite 13: Grillfunktion
Die Schrittgrößen für die Einstellzeit des Drehreglers sind wie folgt: 0 – 1 Minuten 5 Sekunden 1 – 5 Minuten 10 Sekunden 5 – 10 Minuten 30 Sekunden 10 – 30 Minuten 1 Minute 30 – 95 Minuten 5 Minuten Leistungstabelle Mikrowelle Tastendruck Leistung... - Seite 14 Umluftfunktion mit Vorheizen Mit der Umluftfunktion können Sie das Essen wie in einem traditionellen Ofen zubereiten. Die Mikrowellenfunktion wird nicht verwendet. Es wird empfohlen, das Gerät auf die entsprechende Temperatur vorzuheizen, bevor Sie die Lebensmittel darin platzieren. 1. Drücken Sie einmal auf die Taste POWER/GRILL/CONVEC/COMBI. Auf dem Bildschirm blinkt „P100“...
- Seite 15 Mehrstufiges Kochen Es können maximal zwei Stufen eingestellt werden. Wenn eine erste Stufe „Auftauen“ ist, wird diese automatisch als erste Stufe eingestellt. Das Gerät piept einmal, sobald die erste Stufe beendet ist und die nächste Stufe beginnt. Hinweis: Das Automatikmenü und die Vorheizfunktionen können beim mehrstufigen Kochen nicht eingestellt werden.
- Seite 16 Hinweis: • Wenn Sie das Kuchenmenü ausgewählt haben, läuft dies mehrstufig mit Vorheizen auf 160 °C ab. Lassen Sie das Gerät im Automatikmenü zunächst aufheizen. Sobald die Temperatur erreicht ist, stoppt das Gerät und piept, um Sie daran zu erinnern, den Kuchen hinein zu stellen. Stellen Sie den Kuchen in das Gerät und drücken Sie die Taste START/+30SEC, um die Zubereitung zu starten.
- Seite 17 Automatikmenü Gewicht Anzeige Leistung 50 g (+ 450 g kaltes Wasser) 100 g (+ 800 g kaltes A6 Pasta 80 % Wasser) 150 g (+ 1200 g kaltes Wasser) 200 ml A7 Suppe 400 ml 100 % 600 ml 475 g Vorheizen auf A8 Kuchen 160 °C...
-
Seite 18: Frittieren
Frittieren 1. Drücken Sie die Taste HOME FRY. 2. Drehen Sie so lange am Drehregler, bis auf dem Bildschirm „H1“, „H2“, „H3“, „H4“, „H5“, „H6“, „H7“, „H8“ oder „H9“ angezeigt wird. 3. Drücken Sie zum Starten des Vorheizens die Taste START/+30SEC. 4. - Seite 19 Hinweis: Alle Lebensmittel müssen in der Grillschale platziert werden und die Grillschale muss auf dem Grillgitter abgestellt werden. Programm Gewicht Leistung Anfangstemperatur C1 Cordon Bleu oder frische Raumtemperatur Minipizzen C2 Lasagne Gekühlt C3 Brot Tiefgekühlt C4 Pastete/ Gekühlt Kuchen...
-
Seite 20: Kindersicherung
Zubereitung bei niedriger Temperatur 1. Drücken Sie die Taste LOW TEMP CONTROL. 2. Drücken Sie mehrfach die Taste LOW TEMP CONTROL oder drehen Sie so lange am Drehregler, bis auf dem Bildschirm „L1“, „L2“, „L3“, „L4“ oder „L5“ aufblinkt. 3. Drücken Sie zum Bestätigen die Taste START/+30SEC. 4. -
Seite 21: Verwendungshinweise
VERWENDUNGSHINWEISE 1. Wenn Sie den Drehregler drehen, piept das Gerät am Anfang einmal. 2. Wenn während der Zubereitung die Tür des Geräts geöffnet wurde, muss nach dem Schließen der Tür zum Fortsetzen der Zubereitung die Taste START/+30SEC gedrückt werden. 3. Wenn innerhalb von 5 Minuten, nachdem ein Programm eingestellt wurde, nicht die Taste START/+30SEC gedrückt wird, wird die Einstellung abgebrochen und auf dem Bildschirm des Geräts wird die aktuelle Uhrzeit angezeigt. -
Seite 22: Reinigung Und Pflege
REINIGUNG UND PFLEGE • Reinigen Sie den Ofen regelmäßig und entfernen Sie alle Essensrückstände. • Ziehen Sie vor der Reinigung immer den Stecker aus der Steckdose. • Tauchen Sie das Gerät nie komplett in Wasser oder andere Flüssigkeiten. • Unregelmäßige Reinigung führt zu Verschleiß und einer verkürzter Lebensdauer des Geräts. -
Seite 23: Fehlerbehebung
FEHLERBEHEBUNG Problem Mögliche Ursache Lösungsansatz Das Gerät kann nicht Der Netzstecker steckt Ziehen Sie den gestartet werden. nicht richtig in der Netzstecker vollständig Steckdose. aus der Steckdose. Warten sie 10 Sekunden und stecken Sie diesen wieder ein. Die Sicherung ist draußen Wenden Sie sich an den oder der Schutzschalter Kundendienst, um die... -
Seite 24: Hinweise Zur Entsorgung
HINWEISE ZUR ENTSORGUNG Befindet sich die linke Abbildung (durchgestrichene Mülltonne auf Rädern) auf dem Produkt, gilt die Europäische Richtlinie 2012/19/EU. Diese Produkte dürfen nicht mit dem normalen Hausmüll entsorgt werden. Informieren Sie sich über die örtlichen Regelungen zur getrennten Sammlung elektrischer und elektronischer Gerätschaften. - Seite 25 Dear Customer, Congratulations on purchasing this device. Please read the following instructions carefully and follow them to prevent possible damages. We assume no liability for damage caused by disregard of the instructions and improper use. Scan the QR code to get access to the latest user manual and more product information.
-
Seite 26: Safety Instructions
SAFETY INSTRUCTIONS Read all the safety and operating instructions carefully and retain them for future reference. Make sure the voltage in your living area corresponding to the one shown on the rating label of the appliance. And the wall socket is properly grounded. To reduce the risk of fire in the oven cavity: •... - Seite 27 To prevent the turntable from breaking: • Let the turntable cool down before cleaning. • Do not place hot foods or utensils on the cold turntable. • Do not place frozen foods or utensils on the hot turntable. General Instructions •...
-
Seite 28: Notes On Cookware
NOTES ON COOKWARE Cookware suitable for microwave ovens Cookware Note Grill tray Follow the instructions of the respective manufacturer. The underside of the grill tray must be at least 5 mm above the rotary plate. Incorrect use may cause the rotary plate to break. Dinnerware Follow the manufacturer's instructions and use only microwaveable dishes. - Seite 29 Cookware Note Plastic foil Only use microwaveable plastic foil. Cover the food with it during heating to maintain moisture. Make sure that the foil does not touch the food. Thermometer Only use microwaveable cooking thermometers. Waxed paper Cover the food to protect it from splashing and to retain its moisture.
-
Seite 30: Cooking Tips
COOKING TIPS The following factors may affect the cooking result: Food arrangement Place thicker areas towards outside of dish, the thinner part towards the centre and spread it evenly. Do not overlap if possible. Cooking time length Start cooking with a short time setting, evaluate it after it times out and extend it according to the actual need. -
Seite 31: Product Overview
PRODUCT OVERVIEW Control panel Window Rotary Shaft Door Turntable ring Safety locking system Glass turntable Grill tray (cannot be used with the Grill grid (cannot be used with the microwave function and must be placed microwave function and must be placed on the grill grid) on the glass turntable) -
Seite 32: Installation
INSTALLATION Installation of the turntable Hub (underside) Glass tray Tirntable shaft Turntable ring • Never turn the turntable over. Never restrict the turntable. • Both the turntable and the turntable ring must be used while using the microwave function. • Always place all containers for preparation on the turntable. •... - Seite 33 Select a flat surface as the location for the unit, which offers sufficient space for the air inlets and outlets. 1. The minimum installation height is 85 cm. 2. Place the unit so that the back of the enclosure touches the wall. Ensure that there is a minimum distance of 30 cm to the top of the unit and a minimum distance of 20 cm to the sides.
-
Seite 34: Commissioning And Operation
COMMISSIONING AND OPERATION Time setting Once the power plug of the unit is plugged into the power outlet, the screen will display „0:00“ and the unit will beep once. 1. Press the TIMER/CLOCK button twice. The hour display flashes. 2. Turn the knob to adjust the hour. A time between 0 - 23 can be entered. 3. - Seite 35 The step sizes for the setting time of the rotary control are as follows: 0 - 1 minutes 5 seconds 1 - 5 minutes 10 seconds 5 - 10 minutes 30 seconds 10 - 30 minutes 1 minute 30 - 95 minutes 5 minutes Microwave power table Keystroke...
- Seite 36 Circulation function with preheating With the air circulation function you can prepare the food as in a traditional oven. The microwave function is not used. It is recommended that you preheat the appliance to the appropriate temperature before placing the food in it. 1.
-
Seite 37: Multi-Stage Cooking
Multi-stage cooking A maximum of two levels can be set. If a first level is „Defrost“, it is automatically set as the first level. The unit will beep once when the first stage is completed and the next stage begins. Note: The automatic menu and the preheating functions cannot be set during multi- step cooking. - Seite 38 Note: • If you have selected the cake menu, this is done in several stages with preheating to 160 °C. Let the appliance heat up first in the automatic menu. As soon as the temperature is reached, the appliance stops and beeps to remind you to put the cake inside.
- Seite 39 Automatoc menue Weight Display Power 50 g (+ 450 g cold water) 100 g (+ 800 g cold A6 Pasta 80 % water) 150 g (+ 1200 g cold water) 200 ml A7 Soup 400 ml 100 % 600 ml 475 g Preheating to A8 Cake...
- Seite 40 Frying 1. Press the HOME FRY button. 2. Turn the Rotary encoder until the screen displays „H1“, „H2“, „H3“, „H4“, „H5“, „H6“, „H7“, „H8“ or „H9“. 3. Press the START/+30SEC key to start preheating 4. Once the temperature of the corresponding program has been reached, the appliance will beep twice to remind you to place the food inside the appliance.
- Seite 41 Note: All food must be placed in the grill tray and the grill tray must be placed on the grill grid. Program Weight Power Initial temperature C1 Cordon Bleu or fresh mini Room temperature pizzas C2 Lasagne Cooled C3 Bread Frozen C4 Pâté/cake Cooled...
- Seite 42 Preparation at low temperature 1. Press the LOW TEMP CONTROL button 2. Press the LOW TEMP CONTROL button repeatedly or turn the knob until the screen flashes „L1“, „L2“, „L3“, „L4“ or „L5“. 3. Press the START/+30SEC button to confirm. 4.
-
Seite 43: Instructions For Use
INSTRUCTIONS FOR USE 1. When you turn the rotary control, the device beeps once at the beginning. 2. If the door of the appliance was opened during preparation, press the START/+30SEC button after closing the door to continue preparation. 3. If the START/+30SEC key is not pressed within 5 minutes of setting a program, the setting is cancelled and the current time is displayed on the screen of the appliance. -
Seite 44: Cleaning And Care
CLEANING AND CARE • The oven should be cleaned regularly and any food deposits removed. • Remove the power cord from the wall outlet before cleaning. Don‘t immerse the appliance in water or other fluids when cleaning. • Failure to maintain the oven in a clean condition could lead to deterioration of the surface that could adversely affect the life of the appliance and possibly result in a hazardous situation •... -
Seite 45: Troubleshooting
TROUBLESHOOTING Problem Possible cause Solution approach The device cannot be The power plug is not Pull the power plug started. properly plugged into the completely out of the socket. socket. Wait 10 seconds and plug it back in. The fuse is out or the circuit Contact customer service breaker has tripped. -
Seite 46: Hints On Disposal
HINTS ON DISPOSAL According to the European waste regulation 2012/19/EU this symbol on the product or on its packaging indicates that this product may not be treated as household waste. Instead it should be taken to the appropriate collection point for the recycling of electrical and electronic equipment. - Seite 47 Estimado cliente: Le felicitamos por la adquisición de este producto. Lea atentamente el siguiente manual y siga cuidadosamente las instrucciones de uso con el fin de evitar posibles daños. La empresa no se responsabiliza de los daños ocasionados por un uso indebido del producto o por haber desatendido las indicaciones de seguridad.
-
Seite 48: Indicaciones De Seguridad
INDICACIONES DE SEGURIDAD Lea atentamente todas las indicaciones y conserve este manual para consultas posteriores. Para reducir el riesgo de una descarga eléctrica producido por una avería o un fallo en el funcionamiento, el aparato deberá conectarse a una toma de corriente con toma de tierra. - Seite 49 Para proteger el plato giratorio de roturas: • Deje que el plato giratorio se enfríe por completo antes de limpiarlo. • No coloque alimentos o recipientes muy calientes sobre el plato giratorio frío. • No coloque comida o recipientes congelados sobre el plato giratorio caliente. Advertencias generales de seguridad •...
-
Seite 50: Indicaciones Sobre La Batería De Cocina
INDICACIONES SOBRE LA BATERÍA DE COCINA Batería de cocina adecuada para el microondas Batería de Nota cocina Bandeja de grill Siga las indicaciones del fabricante. La parte inferior de la bandeja de grill debe situarse como mínimo a 5 mm por encima del plato giratorio. - Seite 51 Batería de Nota cocina Lámina de Utilice exclusivamente film transparente apto para microondas. plastico Durante el calentamiento, cubra los alimentos con él para conservar la humedad. Asegúrese de que el film no toque los alimentos. Termómetro Utilice exclusivamente termómetros de cocina aptos para microondas.
-
Seite 52: Consejos De Cocción
CONSEJOS DE COCCIÓN Los siguientes factores pueden influir en el resultado final de sus platos: Distribución de los alimentos Coloque los trozos más gruesos en el borde del plato y los más finos en el medio y distribúyalos de manera homogénea. Asegúrese de que unos trozos no se sobreponen a otros. -
Seite 53: Vista General Del Aparato
VISTA GENERAL DEL APARATO Panel de control Ventana de visión Eje giratorio Puerta Anilla del plato giratorio Sistema de cierre de seguridad Plato giratorio Bandeja de grill (no se puede utilizar Rejilla del grill (no se puede utilizar con la función de microondas y debe con la función de microondas y debe colocarse encima de la rejilla del grill) colocarse encima del plato giratorio) -
Seite 54: Instalación
INSTALACIÓN Instalación del plato giratorio Disco giratorio (parte inferior) Plato giratorio Eje giratorio Anilla del plato giratorio • Nunca voltee el plato giratorio. El disco giratorio nunca debe obstruirse. • Tanto el plato giratorio como la anilla del plato giratorio deben utilizarse durante la función de microondas. - Seite 55 Como ubicación para el aparato, seleccione una superficie plana, con espacio suficiente para las salidas y entradas de aire. 1. La altura mínima de instalación es de 85 cm. 2. Coloque el aparato de modo que la parte trasera toque la pared. Asegúrese de que en la parte superior del aparato se guarde una distancia mínima de 30 cm y una distancia mínima de 20 cm hacia los lados.
-
Seite 56: Puesta En Funcionamiento
PUESTA EN FUNCIONAMIENTO Configuración de la hora En cuanto se conecte el enchufe a la toma de corriente, la pantalla muestra „0:00“ y el aparato pita una vez. 1. Pulse dos veces la tecla TIMER/CLOCK. El indicador de las horas parpadea. 2. - Seite 57 Los intervalos para ajustar el tiempo en el regulador son los siguientes: 0 – 1 minutos 5 segundos 1 – 5 minutos 10 segundos 5 – 10 minutos 30 segundos 10 – 30 minutos 1 minuto 30 – 95 minutos 5 minutos Tabla de potencia de microondas Número de...
- Seite 58 Función de circulación de aire con precalentamiento Con la función de circulación de aire puede preparar la comida como en un horno tradicional. No se utiliza la función de microondas. Se recomienda precalentar el aparato a la temperatura correspondiente antes de introducir los alimentos. 1.
- Seite 59 Cocción con varias etapas Pueden configurarse un máximo de dos etapas. Si la primera etapa es „Descongelar“, esta se coloca automáticamente como primera etapa. El aparato pita una vez cuando haya finalizado la primera etapa y empiece la siguiente. Nota: el menú automático y las funciones de precalentamiento no se pueden seleccionar con la cocción en varios niveles.
- Seite 60 Nota: • Si se ha seleccionado el menú para bizcocho, se realizará en varias etapas con precalentamiento a 160 °C. Deje que el aparato se caliente primero en el menú automático. Cuando se haya alcanzado la temperatura, el aparato se detiene y pita para recordarle que es necesario introducir el bizcocho.
- Seite 61 Menú automático Peso Indicador Potencia 50 g (+ 450 g agua fría) 100 g (+ 800 g agua A6 Pasta fría) 80 % 150 g (+ 1200 g agua fría) 200 ml A7 Sopa 400 ml 100 % 600 ml 475 g Precalentar a A8 Bizcocho...
- Seite 62 Freír 1. Pulse la tecla HOME FRY. 2. Siga girando el regulador hasta que aparezca en pantalla „H1“, „H2“, „H3“, „H4“, „H5“, „H6“, „H7“, „H8“ o „H9“. 3. Para iniciar la función de precalentamiento, pulse la tecla START/+30SEC. 4. En cuanto se haya alcanzado la temperatura del programa correspondiente, el aparato pita dos veces para recordarle que debe introducir los alimentos en el aparato.
- Seite 63 Nota: es necesario introducir en la bandeja todos los alimentos y esta se situará encima de la rejilla del grill. Programa Peso Potencia Temperatura inicial C1 Cordon Bleu o Temperatura ambiente minipizzas frescas C2 Lasaña Refrigerado C3 Pan Congelado C4 Pastel/ Refrigerado Bizcocho...
- Seite 64 Preparación a baja temperatura 1. Pulse la tecla LOW TEMP CONTROL. 2. Pulse varias veces la tecla LOW TEMP CONTROL o gire el regulador hasta que en pantalla aparezca „L1“, „L2“, „L3“, „L4“ o „L5“. 3. Pulse la tecla START/+30SEC para confirmar. 4.
-
Seite 65: Indicaciones De Uso
INDICACIONES DE USO 1. Si gira el regulador, el aparato pita una vez al principio. 2. Si durante la preparación se abre la puerta del aparato, es necesario presionar la tecla START/+30SEC para continuar con la preparación tras cerrar la puerta. 3. -
Seite 66: Limpieza Y Cuidado
LIMPIEZA Y CUIDADO • Limpie el microondas regularmente y retire todos los restos de comida de su interior. • Antes de limpiar el microondas, desenchúfelo. • Nunca sumerja el aparato completamente en agua ni en ningún otro líquido. • Una limpieza deficiente puede reducir la vida útil del microondas. •... -
Seite 67: Resolución De Problemas
RESOLUCIÓN DE PROBLEMAS Problema Posible causa Solución propuesta El aparato no se puede El enchufe no está bien Desconecte el enchufe poner en marcha. conectado. de la toma de corriente. Espere 10 segundos y vuelva a enchufarlo. El interruptor de seguridad Contacte con el servicio se ha accionado o hay un de atención al cliente para... -
Seite 68: Retirada Del Aparato
RETIRADA DEL APARATO Si el aparato lleva adherida la ilustración de la izquierda (el contenedor de basura tachado) entonces rige la normativa europea, directiva 2012/19/UE. Este producto no debe arrojarse a un contenedor de basura común. Infórmese sobre las leyes territoriales que regulan la recogida separada de aparatos eléctricos y electrónicos. - Seite 69 Chère cliente, cher client, Toutes nos félicitations pour l’acquisition de ce nouvel appareil. Veuillez lire attentivement et respecter les instructions de ce mode d’emploi afin d’éviter d’éventuels dommages. Le fabricant ne saurait être tenu pour responsable des dommages dus au non- respect des consignes de sécurité...
-
Seite 70: Consignes De Sécurité
CONSIGNES DE SÉCURITÉ Lisez attentivement toutes les consignes avant d’utiliser l’appareil et conservez le guide d’utilisation pour vous y référer ultérieurement. Pour réduire le risque d’électrocution en cas de défaillance technique ou de dysfonctionnement, l’appareil doit être relié à une prise de terre. Branchez l’appareil uniquement sur des prises fournissant la tension correspondant à... - Seite 71 Pour protéger le plateau tournant contre les risques d’éclatement du verre : • Laissez refroidir le plateau tournant avant de le nettoyer. • Ne posez aucun aliment ou récipient chaud sur le plateau tournant froid. • Ne posez aucun aliment ou récipient congelé sur le plateau tournant chaud. Consignes de sécurité...
-
Seite 72: Remarques Sur Les Ustensiles De Cuisson
REMARQUES SUR LES USTENSILES DE CUISSON Vaisselle adaptée au micro-onde Ustensile Remarque Lèchefrite Suivez les instructions du fabricant. Le dessous de la plaque de cuisson doit être au moins 5 mm au-dessus du plateau tournant. Une utilisation incorrecte peut casser le plateau tournant. Plat Suivez les instructions du fabricant et n'utilisez que des couverts adaptés aux micro-ondes. - Seite 73 Ustensile Remarque Film plastique Utilisez uniquement un film plastique allant au micro-ondes. Couvrez les aliments pendant qu'ils chauffent pour conserver l'humidité. Assurez-vous que le film ne touche pas les aliments. Thermomètre Utilisez uniquement des thermomètres allant au micro-ondes. Papier paraffiné Pour couvrir les aliments comme protection contre les éclaboussures et pour préserver leur humidité.
-
Seite 74: Conseils De Cuisson
CONSEILS DE CUISSON Les facteurs suivants ont une influence sur le résultat de la cuisson. La disposition des aliments Placer les gros morceaux sur les bords du récipient et les morceaux plus fins au centre. Les disposer uniformément. Ne pas placer les aliments les uns sur les autres. Temps de cuisson Commencer avec un temps de cuisson court. -
Seite 75: Aperçu De L'appareil
APERÇU DE L‘APPAREIL Panneau de commande Fenêtre de visualisation Arbre moteur Porte Anneau de plateau tournant Système de fermeture de sécurité Plateau tournant en verre Lèchefrite (ne peut pas être utilisée avec Grille de cuisson (ne peut pas être utilisée la fonction micro-ondes et doit être avec la fonction micro-ondes et doit être placée sur la grille de cuisson) -
Seite 76: Installation
INSTALLATION Installation du plateau tournant Plateau tournant (bas) Plateau tournant Arbre rotatif Anneau de plateau tournant • Ne retournez jamais le plateau tournant. Le plateau tournant ne doit jamais être bloqué. • Le plateau tournant et l‘anneau du plateau tournant doivent être utilisés avec la fonction micro-ondes. - Seite 77 Sélectionnez une surface plane comme emplacement pour l‘appareil, avec suffisamment d‘espace pour les entrées et sorties d‘air. 1. La hauteur minimale d‘installation est de 85 cm. 2. Installez l‘appareil de façon à ce que l‘arrière du boîtier touche le mur. Assurez- vous qu‘il y a une distance minimale de 30 cm par rapport au haut de l‘appareil et d‘au moins 20 cm sur les côtés.
-
Seite 78: Mise En Marche Et Utilisation
MISE EN MARCHE ET UTILISATION Réglage de l’heure Dès que vous branchez la fiche secteur de l‘appareil dans la prise, l‘écran affiche „0:00“ et l‘appareil émet un bip. 1. Appuyez deux fois sur la touche TIMER / CLOCK. Les chiffres des heures clignotent. - Seite 79 La molette règle les durées avec les intervalles suivants : 0 – 1 minutes 5 secondes 1 – 5 minutes 10 secondes 5 – 10 minutes 30 secondes 10 – 30 minutes 1 minute 30 – 95 minutes 5 minutes Tableau de puissance du micro-ondes Nombre d’appuis...
- Seite 80 Fonction convection avec préchauffage Avec la fonction de convection, vous pouvez cuire les aliments comme dans un four traditionnel. La fonction micro-ondes n‘est pas utilisée. Nous vous recommandons de préchauffer l‘appareil à la température appropriée avant d‘y placer les aliments. 1.
- Seite 81 Cuisson en plusieurs étapes Vous pouvez régler un maximum de deux étapes. Si une première étape est „décongélation“, elle est automatiquement réglée au premier niveau. L‘appareil émet un bip dès que la première étape est terminée et que l‘étape suivante commence. Remarque : Le menu automatique et les fonctions de préchauffage ne peuvent pas être réglés pour la cuisson en plusieurs étapes.
- Seite 82 Remarque : • Si vous avez sélectionné le menu gâteau, celui-ci se déroule en plusieurs étapes avec préchauffage à 160 °C. Laissez d‘abord l‘appareil chauffer dans le menu automatique. Une fois la température atteinte, l‘appareil s‘arrête et émet un bip pour vous rappeler d‘y mettre le gâteau.
- Seite 83 Menu automatique Poids Affichage Puissance 50 g (+ 450 g d'eau froide) 100 g (+ 800 g d'eau A6 pâtes 80 % froide) 150 g (+ 1200 g d'eau froide) 200 ml A7 soupe 400 ml 100 % 600 ml 475 g Préchauffage A8 Kuchen...
- Seite 84 Friture 1. Appuyez sur HOME FRY. 2. Tournez la molette de commande jusqu‘à ce que H1, H2, H3, H4, H5, H6, H7, H8 ou H9 s‘affiche à l‘écran. 3. Pour démarrer le préchauffage, appuyez sur START / + 30SEC. 4. Dès que la température du programme correspondant est atteinte, l‘appareil émet deux bips pour vous rappeler de placer les aliments dans l‘appareil.
- Seite 85 Remarque : Tous les aliments doivent être placés dans la lèchefrite et la lèchefrite doit être placée sur la grille.. Programme Poids Puissance Température initiale C1 cordon bleu ou mini pizzas Température ambiante fraîches C2 lasagne Refroidi C3 pain Surgelé C4 Pâté...
-
Seite 86: Verrouillage Parental
Cuisson à basse température 1. Appuyez sur LOW TEMP CONTROL. 2. Appuyez plusieurs fois sur LOW TEMP CONTROL ou tournez la molette de commande jusqu‘à ce que L1, L2, L3, L4 ou L5 clignote à l‘écran. 3. Appuyez sur START / + 30SEC pour confirmer. 4. -
Seite 87: Conseils D'utilisation
CONSEILS D’UTILISATION 1. Lorsque vous tournez la molette de commande, l‘appareil émet un bip au début. 2. Si la porte de l‘appareil est ouverte pendant la préparation, appuyez sur START / + 30SEC après avoir refermé la la porte pour continuer la préparation. 3. -
Seite 88: Nettoyage Et Entretien
NETTOYAGE ET ENTRETIEN • Nettoyer le four régulièrement et retirer les résidus de nourriture. • Toujours débrancher l’appareil avant de le nettoyer. • Ne jamais plonger l’appareil dans de l’eau ou d’autres liquides. • L’appareil s’use plus vide et sa durée de vie est plus courte lorsqu’il n’est pas nettoyé régulièrement. -
Seite 89: Résolution Des Problèmes
RÉSOLUTION DES PROBLÈMES Problème Cause possible Solution Impossible de démarrer La fiche est mal branchée Retirez complètement la l'appareil. dans la prise. fiche d'alimentation de la prise. Attendez 10 secondes et rebranchez- Le fusible est sorti ou Contactez le service le disjoncteur s'est client pour remplacer le déclenché. -
Seite 90: Informations Sur Le Recyclage
INFORMATIONS SUR LE RECYCLAGE Le pictogramme ci-contre apposé sur le produit signifie que la directive européenne 2012/19/UE s‘applique (poubelle à roues barrée d’une croix). Ces produits ne peuvent être jetés dans les poubelles domestiques courantes. Renseignez- vous concernant les règles appliquées pour la collecte d’appareils électriques et électroniques. - Seite 91 Gentile cliente, La ringraziamo per aver acquistato il dispositivo. La preghiamo di leggere attentamente le seguenti istruzioni per l’uso e di seguirle per evitare possibili danni tecnici. Non ci assumiamo alcuna responsabilità per danni scaturiti da una mancata osservazione delle avvertenze di sicurezza e da un uso improprio del dispositivo.
-
Seite 92: Avvertenze Di Sicurezza
AVVERTENZE DI SICUREZZA Leggere attentamente tutte le istruzioni e conservare il manuale per consultazioni future. Per evitare il rischio di scosse elettriche in caso di malfunzionamento, collegare il dispositivo ad una presa dotata di messa a terra. Collegare il dispositivo solo ad una presa che corrisponde alla tensione indicata. - Seite 93 Evitare che il piatto girevole si rompa: • Lasciare raffreddare il piatto girevole prima di pulirlo. • Non poggiare piatti caldi o contenitori caldi sul piatto girevole freddo. • Non inserire alimenti congelati o contenitori congelati sulla piastra girevole calda. Avvertenze di sicurezza generali •...
-
Seite 94: Note Sulle Stoviglie
NOTE SULLE STOVIGLIE Stoviglie adatte a microonde Stoviglie Note Contenitori per Seguire le indicazioni dei rispettivi produttori. Il lato inferiore del grill contenitore deve trovarsi almeno 5 mm sopra al piatto rotante. Un utilizzo errato può causare la rottura del piatto rotante. Stoviglie per Seguire le indicazioni dei rispettivi produttori e utilizzare solo mangiare... - Seite 95 Stoviglie Note Pellicola di Utilizzare solo pellicola plastica adatta al microonde. Utilizzarla plastica per coprire alimenti durante il riscaldamento per mantenere umidità. Assicurarsi che la pellicola non tocchi gli alimenti. Termometro Utilizzare solo termometri adatti al microonde. Carta cerata Per coprire gli alimenti come paraspruzzi e per conservarne l’umidità.
-
Seite 96: Consigli Per La Cottura
CONSIGLI PER LA COTTURA I seguenti fattori possono influire negativamente sul risultato: La disposizione degli alimenti Collocare gli alimenti più grandi ai bordi del contenitore e quelli più piccoli nel mezzo e distribuirli in modo uniforme. Prestare attenzione a non sovrapporli l’uno all’altro. Tempo di cottura Iniziare con un tempo di cottura breve. -
Seite 97: Descrizione Del Dispositivo
DESCRIZIONE DEL DISPOSITIVO Pannello di controllo Finestra Albero di rotazione Sportello Anello piatto rotante Sistema di chiusura di sicurezza Piatto rotante di vetro Contenitore per grill (non può essere Griglia (non può essere utilizzata con utilizzato con la funzione a microonde e la funzione a microonde e deve essere deve essere posizionato sulla griglia). -
Seite 98: Installazione
INSTALLAZIONE Installazione del piatto rotante Drehscheibe (Unterseite) Drehteller Drehwelle Drehtellerring • Non ribaltare il piatto rotante. Il disco rotante non deve essere mai limitato nei movimenti. • Il piatto rotante e l’anello devono essere utilizzati durante l’uso della funzione a microonde. - Seite 99 Scegliere come luogo di posizionamento una superficie piana, che offre sufficienti prese d’aria di afflusso e scarico. 1. L’altezza di installazione minima è di 85 cm. 2. Posizionare il dispositivo in modo che il lato posteriore dell’alloggiamento tocchi la parete. Assicurarsi di lasciare almeno 30 cm di spazio sul lato superiore del dispositivo e 20 cm sulle pareti laterali.
-
Seite 100: Messa In Funzione E Utilizzo
MESSA IN FUNZIONE E UTILIZZO Impostare l’ora Non appena viene inserita la spina nella presa, lo schermo mostra “0:00” e viene emesso un segnale acustico. 1. Premere due volte TIMER/CLOCK. L’indicazione dell’ora lampeggia. 2. Girare la manopola per impostare l’ora. È possibile impostare un’ora tra 0 e 23. 3. - Seite 101 Gli intervalli per il tempo di impostazione della manopola sono come segue: 0-1 minuti 5 secondi 1-5 minuti 10 secondi 5-10 minuti 30 secondi 10-30 minuti 1 minuto 30-95 minuti 5 minuti Tabella della potenza del microonde Schiacciare il tasto Potenza 100 % 80 %...
- Seite 102 Funzione ventilata con preriscaldamento Con la funzione ventilata è possibile preparare pietanze come in un forno tradizionale. La funzione a microonde non viene utilizzata. Si consiglia di preriscaldare il dispositivo auna temperatura adeguata prima di posizionare gli alimenti. 1. Premere una volta POWER/GRILL/CONVEC/COMBI. Sullo schermo lampeggia “P100”.
- Seite 103 Cottura a più livelli Possono essere impostati al massimo 2 livelli. Se un livello è “Scongelare”, questo viene impostato automaticamente come primo livello. Il dispositivo emette un segnale acustico non appena è terminato il primo livello e inizia il secondo. Nota: il menu automatico e la funzione di preriscaldamento non possono essere impostati nella cottura a più...
- Seite 104 Nota: • Se è sato selezionato il menu per torte, viene avviato il preriscaldamento a 160 °C a più livelli. Lasciare che il dispositivo si riscaldi in Auto-Menu. Non appena è stata raggiunta la temperatura, il dispositivo si arresta ed emette un segnale acustico per ricordarvi di mettere la torta nel microonde.
- Seite 105 Menu automatico Peso Indicazione Potenza 50 g (+ 450 g acqua fredda) 100 g (+ 800 g acqua A6 Pasta 80 % fredda) 150 g (+ 120 g acqua fredda) 200 ml A7 Zuppa 400 ml 100 % 600 ml 475 g Preriscaldare A8 Torta...
- Seite 106 Friggere 1. Premere HOME FRY. 2. Girare la manopola fino a quando sullo schermo compare “H1”, “H2”, “H3”, “H4”, “H5”, “H6”, “H7”, “H8” o “H9”. 3. Premere START/+30SEC per iniziare a preriscaldare. 4. Non appena viene raggiunta la temperatura del programma in questione, il dispositivo emette due segnali acustici per ricordarvi di mettere nel microonde gli alimenti.
- Seite 107 Nota: tutti gli alimenti devono essere posizionati nel contenitore per grill e il contenitore deve essere messo sulla griglia. Programma Peso Potenza Temperatura iniziale C1 Cordon bleu o Temperatura ambiente mini pizze fresche C2 Lasagne Da frigo C3 Pane Da congelatore C4 Pasticcini/ Da frigo Torte...
- Seite 108 Preparazione a passa temperatura 1. Premere LOW TEMP CONTROL. 2. Premere più volte LOW TEMP CONTROL o girare la manopola fino a quando sullo schermo lampeggia “L1”, “L2”, “L3”, “L4” o “L5”. 3. Confermare con START/+30SEC. 4. Impostare la temperatura di preparazione con la manopola. 5.
-
Seite 109: Indicazioni Sull'utilizzo
INDICAZIONI SULL’UTILIZZO 1. Quando si gira la manopola, il dispositivo emette inizialmente un segnale acustico. 2. Se si apre lo sportello durante la preparazione, è necessario premere START/+30SEC per procedere con la preparazione dopo averlo chiuso. 3. Se entro 5 minuti dopo l’impostazione di un programma non si preme START/+30SEC, l’impostazione viene interrotta e lo schermo mostra l’ora attuale. -
Seite 110: Pulizia E Manutenzione
PULIZIA E MANUTENZIONE • Pulire regolarmente il microonde e rimuovere i residui di cibo. • Prima di effettuare la pulizia, staccare sempre la spina dalla presa. • Non immergere il dispositivo in acqua o in altri liquidi. • Una pulizia non regolare è causa di usura del microonde e riduce la sua durata. •... -
Seite 111: Correzione Degli Errori 1
CORREZIONE DEGLI ERRORI Problema Possibile causa Soluzioni Il dispositivo non può La spina non è inserita Staccare la spina, essere avviato. correttamente. attendere 10 secondi e ricollegarla. Il fusibile è saltato o Rivolgersi al servizio l’interruttore di protezione di assistenza ai clienti si è... -
Seite 112: Smaltimento
SMALTIMENTO Se sul prodotto è presente la figura a sinistra (il cassonetto dei rifiuti mobile sbarrato), si applica la direttiva europea 2012/19/UE. Questi prodotti non possono essere smaltiti con i rifiuti normali. Informarsi sulle disposizioni vigenti in merito alla raccolta separata di dispositivi elettrici ed elettronici. Non smaltire i vecchi dispositivi con i rifiuti domestici.