Herunterladen Inhalt Inhalt Diese Seite drucken
Inhaltsverzeichnis

Werbung

Verfügbare Sprachen
  • DE

Verfügbare Sprachen

  • DEUTSCH, seite 1
Zitruspresse orange
Mikrowelle
10008166
10008167
10008168
10028201
10028202

Werbung

Inhaltsverzeichnis
loading

Inhaltszusammenfassung für Klarstein 10028202

  • Seite 1 Zitruspresse orange Mikrowelle 10008166 10008167 10008168 10028201 10028202...
  • Seite 2: Inhaltsverzeichnis

    Sehr geehrter Kunde, wir gratulieren Ihnen zum Erwerb Ihres Klarstein Gerätes. Lesen Sie die folgenden Anschluss- und Anwendungshinweise sorgfältig durch und befolgen Sie diese, um möglichen technischen Schäden vorzubeugen. Für Schäden, die durch Missachtung der Sicherheitshinweise und unsachgemäßen Ge- brauch entstehen, übernehmen wir keine Haftung.
  • Seite 3 Um die Explosionen oder plötzlichem Sieden vorzubeugen: • Erhitzen Sie Flüssigkeiten nicht in verschlossenen Behältern, da diese zur Explosion neigen. Dazu zählen auch Babyfläschchen mit einem Schaubverschluss. • Benutzen Sie zum Kochen Gefäße mit einer weiten Öffnung und entfernen Sie heiße Flüssigkeiten nicht sofort.
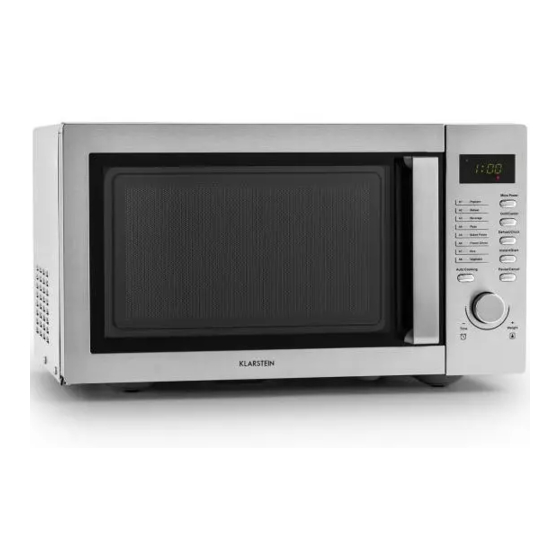
  • Seite 4: Geräteübersicht Und Bedienfeld

    Geräteübersicht und Bedienfeld 1 Sichtfenster 2 Drehteller 3 Wellenleiter-Abdeckung 4 Türverriegelung 5 Rotationsachse 6 Rotationsring 7 Grillrost 8 Bedienfeld 1 Leistung 2 Grill oder Grill-Kombination 3 Auftauen/Uhr 4 Start 5 Auto-Programme 6 Pause/Cancel (Einstellungen löschen) 7 Kochzeit und Gewicht...
  • Seite 5: Montage

    Montage Angesichts der begrenzten Raums des Gehäuses, muss die Mikrowelle genau nach den folgenden Anweisungen installiert werden, um Gefahren zu vermeiden: a) Ansaug und Auslassöffnung siehe Abbildung 4. b) Netto-Tiefe ≥ 550 mm, siehe Abbildung 4. c) Bezugsplattestärke zwischen 18 und 20 mm. Abbildung 1 Bringen Sie die Füße, wie auf Abbildung 1 gezeigt, mit den Schrauben (8*16) an der Mikrowelle an.
  • Seite 6 Abbildung 4 Schieben Sie die Mikrowelle in die Schranköffnung und befestigen Sie sie mit den Holzschrauben (4*12), wie auf Abbildung 4 dargestellt. Wichtige Maßangaben: Öffnung: 560 mm (L) x 443 mm (H) x 550 mm (T) Lufteinlass: ≥ 272 mm (L) x ≥ 72 mm (H) Luftauslass: ≥...
  • Seite 7: Installation Und Inbetriebnahme

    Installation • Entfernen Sie das komplette Verpackungsmaterial und überprüfen Sie das Gerät auf Schäden. Wenn Sie Schäden entdecken, kontaktieren Sie den Kundendienst. • Stellen Sie das Gerät an einem trockenen Ort, an dem es vor äußeren Einflüssen geschützt ist und halten Sie es fern von Wärmequellen und Feuchtigkeit.
  • Seite 8: Programme Und Funktionen

    Programme und Funktionen Garen mit der Mikrowelle Drücken Sie mehrmals auf die Power-Taste. Die LED zeigt nacheinander die folgenden Optionen an: 100P – 80P – 60P – 40P – 20P. 100P Hohe Leistung 100% Leistung. Zum schnellen erhitzen. Mittelhohe Leistung 80% Leistung.
  • Seite 9 Beispiel: 10 Minuten grillen im Programm C2 Schritte Displayanzeige Nach dem Einstecken blinkt das Display. Drücken Sie mehrmals auf die Grill/Combi-Taste und wählen Sie das gewünschte Programm. Stellen Sie die Garzeit mit dem Drehregler ein. 10:00 Drücken Sie auf Instant/Start, die Zeit im Display wird heruntergezählt. Auftauen Benutzen Sie dieses Programm, um tiefgefroren Lebensmittel aufzutauen.
  • Seite 10 Auto-Garen Die Mikrowelle verfügt über voreingestellte Programme für diverse Lebensmittel. Sobald im Display „:“ blinkt, drücken Sie mehrmals auf die Cook-Taste, um eines der Programme aus der folgenden Tabelle auszuwählen. Wählen Sie das Programm nach Nahrungsmittel-Typ und –Gewicht und halten Sie sich genau an die folgenden Anweisungen.
  • Seite 11 Automatisches Garen mit verzögertem Start Falls Sie das Essen nicht sofort garen möchten können Sie ein voreingestelltes Programm auswählen, dass zu einer von ihnen eingestellten Zeit startet. Beispiel: Es ist 12:30 Uhr und Sie möchten, dass die Mikrowelle um 14:20 Uhr startet und für 9 Minuten und 30 Sekunden mit 100% Leistung läuft.
  • Seite 12: Hinweise Zum Kochgeschirr

    Kindersicherung Benutzen Sie diese Funktion während dem Garen, damit Kinder über die Tasten verstellen können. Halten Sie die Pause/Cancel-Taste 3 Sekunden lang gedrückt, um die Kindersicherung zu aktivieren. Halten Sie die Pause/Cancel-Taste abermals 3 Sekunden gedrückt, um die Kindersicherung auszu- schalten.
  • Seite 13: Fehlersuche Und Fehlerbehebung

    Konsistenz der Nahrungsmittel Farbe und Härte der Nahrungsmittel helfen festzustellen, wann sie fertig sind. Ob die Nahrung fertig ist erkennen Sie unter anderem daran, dass Dampf von allen Teilen aufsteigt, dass sich Gefl ügelge- lenke leicht bewegen lassen, dass aus Fleisch kein Blut mehr austritt und Fisch undurchsichtig ist und sich leicht mit der Gabel zerteilen lässt.
  • Seite 14: Technical Data

    Dear Customer, Congratulations on purchasing this Klarstein equipment. Please read this manual carefully and take care of the following hints on installation and use to avoid technical damages. Any failure caused by ignoring the mentioned items and cautions mentioned in the operation and installation instructions are not covered by our warranty and any liability.
  • Seite 15 To reduce the risk of explosion and sudden boiling: • Liquids and other foods must not be heated in sealed container since they are liable to explode; Baby bottles fitted with a screw cap or teat are considered to be sealed containers. •...
  • Seite 16: Product Description And Control Panel

    Product Description and Control Panel 1 Viewing window 2 Glass turntable 3 Waveguide cover 4 Door Interlock 5 Rotating axis 6 Rotating ring 7 Grill rack 8 Control Panel 1 Power 2 Grill or grill combinaton 3 Defrost or clock 4 Start 5 Auro cooking menu 6 Pause/Cancel...
  • Seite 17: Mounting

    Mounting Given the limited room of the cabinet, the microwave oven must be installed under the following instructions so as to avoid danger: a) Intake and exhaust port position, as shown in Figure 4. b) Net depth ≥550 mm, as shown in Figure 4. c) Reference plate thickness between 18 and 20mm.
  • Seite 18 Figure 4 Place microwave oven into cabinet, and then fix it with wood screws (4x12), as shown in Figure 4. Cabinet Details: Cavity: (L) 560mm*(H) 443mm*(D) 550mm Intake: (L)≥272mm*(W)≥72mm Exhaust Port: (L) ≥560mm*(W)≥50mm Figure 5 Figure 6 Secure ornamental frame to holders, as shown Cabinet airflow chart as shown in Figure 6.
  • Seite 19: Installation And Getting Started

    Installation • Take out all the packing. If there is a safe film over the oven, tear it off before Use. Check carefully for damage. If any, immediately notify dealer or send to the manufacturer’s service center. • Microwave ovens must be placed under dry and non corrosiveness environments, kept away from heat and humidity, such as gas burner or water tank.
  • Seite 20: Use And Operation

    Use and Operation Microwave cooking This function uses for cooking and heating food. Press Power button, LED cycles to show 100P—80P— 60P—40P—20P. 100P High power 100% microwave power. Applicable for quick and thorough cooking. Medium High power 80% microwave power. Applicable for medium express cooking. Medium power 60% microwave power.
  • Seite 21 Example: To grill food with C2 cook menu for 10 minutes Steps Display After power-up, the colon flashes. Press Grill /Combi button to select desired grill menu. Set cooking time by turning the Time/ Weight knob. 10:00 Press Instant. Start to start cooking. Defrost This function use for Defrost food, Press Defrost button and the LED display will cycle to show d.1 - d.2 - d.3.
  • Seite 22 Auto cooking The oven has default cooking menu for simple operation. When the LED flash colon, press the Cook button and LED will cycle to show A.1, A.2 …… A.8. Choose the appropriate menu according to the food type and weight and strictly observe the directions in below table, otherwise the cooking effect will be largely influenced.
  • Seite 23 Automatic starting (delayed function) If you do not want the menu be started immediately, you can preset the cooking menu and time and the preset menu will be automatically started at your set time. The setting will consist of 2 steps: Setting the current clock and setting the cooking menu and time.
  • Seite 24: Utensils Guideline

    Child lock function Use this feature to lock the control panel when you are cleaning or so that children can not use the oven unsupervised. All the buttons are rendered inoperable in this mode. Set lock: Press and hold Pause/Cancel button about 3 seconds. Cancel lock: Press and hold Pause/Cancel button about 3 se- conds.
  • Seite 25: Troubleshooting

    Whether the food is done: Color and hardness of food help to determine if it is done, these include: Steam coming out from all parts of food, not just the edge, Joints of poultry can be moved easily, Pork or poultry shows no signs of blood and Fish is opaque and can be sliced easily with a fork. Microwave safe plastic wrap: When cooking food with high fat content, do not allow the plastic wrap come into contact with food as it may melt Microwave safe plastic cookware:...
  • Seite 26: Dati Tecnici

    Gentile Cliente, Innanzitutto La ringraziamo per aver acquistato un dispositivo Klarstein. La preghiamo di leggere con cura le seguenti istruzioni di installazione e utilizzo del dispositivo e di seguirle per evitare eventuali danni tecnici. Non ci assumiamo alcuna responsabilità per danni derivanti da una mancata osserva- zione delle avvertenze per la sicurezza e da un uso improprio del dispositivo.
  • Seite 27 Per prevenire esplosioni o ebollizione improvvisa: • Non riscaldare i cibi liquidi in recipienti chiusi poiché possono esplodere. Lo stesso vale per i bibe- ron con tappo di chiusura. • Usare recipienti dotati di ampia apertura, non togliere subito le bevande ma attendere un po’ per non scottarsi.
  • Seite 28: Componenti E Pannello Di Controllo

    Componenti e pannello di controllo 1 Sportello trasparente 2 Piatto girevole 3 Copertura della guida d’onda 4 Blocca sportello 5 Asse di rotazione 6 Anello di rotazione 7 Griglia 8 Pannello di controllo 1 Potenza 2 Grill o Combinazione grill-microonde 3 Scongelamento/Timer 4 Accensione 5 Programma automatico...
  • Seite 29: Montaggio

    Montaggio Dato lo spazio limitato dell’alloggiamento, il microonde deve essere installato seguendo esattamente le seguenti indicazioni, per evitare pericoli: a) Fessura di ventilazione e di aspirazione (vedere la figura 4). b) Profondità netta: ≥ 550 mm, (vedere la figura 4). c) Spessore della lastra tra i 18 e i 20 mm.
  • Seite 30 Figura 4 Inserire il microonde nell’alloggiamento del mo- bile e fissarlo con le viti per legno (4*12), come mostrato nella figura 4. Importanti indicazioni per le misure Alloggiamento: 560 (L) x 443 (A) x 550 mm (P) Ingresso dell’aria: ≥ 272 mm (L) x ≥ 72 mm (A) Uscita dell’aria: ≥...
  • Seite 31: Installazione

    Installazione • Rimuovere il materiale di imballaggio e controllare se il microonde è danneggiato. • Nel caso in cui questo sia danneggiato, contattare il nostro servizio clienti. • Riporre il microonde in luogo fresco e asciutto dove è protetto da influssi esterni e tenerlo lontano da fonti di calore e umidità.
  • Seite 32: Programmi E Funzioni

    Programmi e funzioni Programmi e funzioni Premere ripetutamente il tasto Power. Il Led mostra i seguenti programmi nella seguente sequenza: 100P – 80P – 60P – 40P – 20P. 100P Alta potenza Potenza 100%. Per riscaldare velocemente Potenza medio - alta Potenza 80%.
  • Seite 33 Esempio: usare il grill per 10 minuti con il programma C2 Istruzioni Display Dopo aver inserito la spina il display inizia a lampeggiare. Premere ripetutamente il tasto grill/combi e selezionare il programma desiderato. Impostare il timer girando la manopola. 10:00 Premere Instant/Start: sul display compare il tempo rimanente.
  • Seite 34 Cottura automatica Il microonde dispone di programmi preimpostati per diverse tipologie di alimenti. Non appena sul display inizia a lampeggiare “:”, premere ripetutamente il tasto Cook, per selezionare uno dei pro- grammi contenuti nella seguente tabella. Scegliere il programma in base alla tipologia di alimenti e al peso e attenersi alle seguenti indicazioni.
  • Seite 35 Cottura automatica con Start programmato Nel caso in cui non si desideri cuocere subito l’alimento, è possibile selezionare un programma preim- postato che si attiva nell’ora desiderata. Esempio: sono le 12:30 e si desidera che il microonde si attivi alle 14:20 e resti in funzione per 9 minuti e 30 secondi con potenza 100%.
  • Seite 36: Consigli Per La Cottura

    Blocco per i bambini Usare questa funzione in presenza di bambini per bloccare i tasti del microonde quando e in funzione. Per attivare la funzione tenere premuto Pause/Cancel per 3 secondi. Tenere premuto Pause/Cancel per 3 secondi per spegnere la funzione. Indicazioni per i recipienti da utilizzare Consigliamo di utilizzare solo recipienti adatti al microonde come i recipienti in ceramica refrattari, in vetro e in plastica.
  • Seite 37: Ricerca E Risoluzione Dei Problemi

    Consistenza degli alimenti: Il colore e la solidità dell’alimento servono a stabilire quando questo è pronto. Se la cottura è termi- nata è deducibile tra l‘altro dal fatto che il vapore fuoriesce da ogni parte, che le ali di pollo si possono tagliare con facilità, che la carne non sanguina, e che il pesce si può...
  • Seite 38: Données Techniques

    Chère cliente, cher client, Toutes nos félicitations pour l’acquisition de ce nouvel appareil. Veuillez lire attentivement les inst- ructions de branchement et d’utilisation afin d’éviter d’éventuels dommages techniques. Le fabricant ne saurait être tenu pour responsable des dommages dus au non-respect des consignes de sécurité et à...
  • Seite 39 Eviter une explosion ou une possible ébullition : • Ne pas faire chauffer des liquides dans des récipients hermétiquement fermés, tels que des bibe- rons équipés d‘un bouchon à vis, ou une explosion risque de survenir. • Utiliser des récipients évasés et attendre un peu avant de retirer les liquides du four à micro-ondes pour éviter de se brûler.
  • Seite 40: Aperçu De L'appareil Et Du Panneau De Commande

    Aperçu de l’appareil Aperçu de l’appareil 1 Porte 2 Plateau 3 Protection du guide d‘ondes 4 Crochets de verrouillage 5 Entraîneur de plateau 6 Anneau à roulettes 7 Grille métallique 8 Panneau de commande Panneau de commande 1 Puissance 2 Mode gril/mode combinaison 3 Décongélation/horloge 4 Marche 5 Programme automatique...
  • Seite 41: Montage

    Montage Compte tenu de l’espace limité du boîtier et pour éviter tout danger, le four à micro-ondes doit être installé en suivant précisément ces instructions : a) Pour l’aspiration et les fentes de sortie, voir l’illustration 4. b) Pour la profondeur nette ≥ 550 mm, voir l’illustration 4. c) Épaisseur des panneaux de revêtement entre 18 et 20 mm.
  • Seite 42 Illustration 4 Insérer le four à micro-ondes dans l’ouverture de votre meuble et le fixer à l’aide des vis (4 x 12), comme le montre l’illustration. Indications importantes de mesures : Ouverture : 560 (L) x 443 (H) x 550 mm (P) Fente entrée d’air : ≥...
  • Seite 43: Installation

    Installation • Retirer tous les éléments d’emballage et vérifier l’état de l’appareil. S’il est endommagé, contacter le service après-vente. • Installer le four à micro-ondes dans un endroit sec, loin de toute humidité et de toute source de chaleur. • Pour garantir une ventilation adéquate, maintenir un espace d’au moins 10 cm à l’arrière, de 5 cm sur les côtés et de 20 cm au-dessus.
  • Seite 44: Programmes Et Fonctions

    Programmes et fonctions Cuisson Appuyer plusieurs fois sur la touche « Power ». La led indique les options dans l’ordre suivant : 100P – 80P – 60P – 40P – 20P. 100P Puissance élevé Puissance à 100 %. Pour une cuisson rapide. Puissance moyenne-élevée Puissance à...
  • Seite 45 Exemple : 10 minutes de cuisson au grill avec le programme C2 Étapes Affichage Brancher l’appareil. L’écran se met à clignoter. Sélectionner le programme de votre choix en appuyant plusieurs fois sur la touche « Grill/Combi ». Faire pivoter le bouton de réglage pour régler le temps de cuisson. 10:00 Appuyer sur la touche «...
  • Seite 46 Cuisson automatique Le four à micro-ondes dispose de différents programmes que vous pouvez sélectionner en fonction du type d’aliments cuisinés et de leur poids. Dès que l’affichage « : » se met à clignoter, appuyer plusieurs fois sur la touche « Cook » pour choisir l’un des programmes indiqués à continuation. Veiller à...
  • Seite 47 Cuisson automatique à démarrage différé Si vous ne pouvez pas faire cuire votre plat tout de suite, vous pouvez prérégler un programme pour qu’il débute à l’heure que vous désirez. Exemple : il est 12h30 et vous désirez que le four à micro-onde se mette en marche à 14h20 pen- dant 9 minutes et 30 secondes à...
  • Seite 48: Indications Pour Les Récipients

    Sécurité enfants Votre four à micro-ondes est équipé d‘une Sécurité enfants qui permet de le verrouiller afin d‘éviter qu‘un enfant ou que toute autre personne non habilitée ne puisse le faire fonctionner accidentelle- ment. Pour l’activer, il suffit d’appuyer pendant 3 secondes sur la touche « Pause/Cancel ». Pour la désactiver, appuyer une nouvelle fois sur cette touche pendant 3 secondes.
  • Seite 49: Dysfonctionnements Et Dépannage

    Temps de repos : Une fois que la cuisson est terminée, laisser les aliments reposer un court instant dans le micro- ondes pour qu’ils puissent refroidir. Consistance des aliments : La couleur et la consistance aident à savoir si les aliments sont cuits. Quelques signes indiquent que la nourriture est prête : la vapeur s’échappe de tous côtés, l’articulation des morceaux de volaille bouge facilement, le sang des morceaux de viande ne coule plus, le poisson est opaque et peut être coupé...
  • Seite 50: Datos Técnicos

    Estimado cliente: Le felicitamos por la adquisición de su aparato Klarstein. Por favor, lea con atención el siguiente manual y siga cuidadosamente las instrucciones de uso con el fin de evitar posibles daños técnicos. Sobre los daños acaecidos debido a una deficiente aplicación de las indicaciones de seguridad o a un uso inapropiado del aparato, declinamos asumir cualquier responsabilidad.
  • Seite 51 Consejos para prevenir explosiones o fenómenos de ebullición indeseados: • No caliente líquidos en recipientes cerrados, podrían explotar. Esto incluye biberones con cierre enroscable. • Utilice envases con una abertura amplia. No saque los líquidos calientes inmediatamente del hor- no. Así evitará el riesgo de quemarse con líquidos hirviendo. •...
  • Seite 52: Vista General Del Aparato Y Panel De Control

    Vista general del aparato y panel de control Vista general del aparato 1 Puerta transparente 2 Plato giratorio 3 Guía de ondas / Cubierta 4 Cierre de seguridad de la puerta 5 Eje de rotación 6 Anillo de rotación 7 Parrilla 8 Panel de control Panel de control 1 Potencia...
  • Seite 53: Montaje

    Montaje Debido al reducido espacio de la carcasa, es importante instalar el horno microondas tal y como se indica en las siguientes instrucciones. De esta manera se evitarán riesgos innecesarios: a) Aberturas de succión y de salida de aire. Ver ilustración 4. b) Profundidad ≥...
  • Seite 54 Ilustración 4 Introduzca el microondas en el hueco del armario y fíjelo bien con los tornillos de madera (4*12), como muestra la imagen 4. Datos importantes sobre las medidas: Abertura: 560 (ancho) x 443 (alto) x 550 mm (profundidad) Entrada de aire: ≥...
  • Seite 55: Puesta En Funcionamiento

    Instalación • Retire todo el material de embalaje y compruebe que el aparato no tiene ningún daño. Si el horno presenta algún defecto, contacte con el servicio de atención al cliente. • Coloque el aparato en un lugar seco protegido de la acción de los agentes externos. No lo exponga a la acción de la humedad ni a fuentes de calor extremo.
  • Seite 56: Programas Y Funciones

    Programas y funciones Cocinar con el microondas Pulse varias veces la tecla de encendido (POWER). La pantalla LED le mostrará en orden sucesivo las siguientes opciones: 100P – 80P – 60P – 40p – 20P. 100P Potencia alta 100% Potencia. Calentamiento rápido. Potencia medio-alta 80% Potencia.
  • Seite 57 Ejemplo: cocinar a la parrilla 10 minutos con el programa C2 Pasos necesarios Indicador del Display Cuando encienda el aparato, el display comenzará a parpadear. Pulse varias veces la tecla Grill-Combi y elija el programa deseado Seleccione el tiempo de cocción con el regulador. 10:00 Pulse Instant/Start.
  • Seite 58 Autococción El microondas dispone de una gama de programas para cocinar diversos tipos de alimentos. Cuando en el display aparezca “:”, pulse varias veces la tecla Cook para elegir uno de los programas que aparecen en la tabla inferior. Seleccione el programa en función el tipo de alimento y de su peso. Siga con atención las siguientes instrucciones.
  • Seite 59 Cocción automática con tiempo de inicio programado Si no desea cocinar la comida inmediatamente, puede seleccionar un programa que comience a fun- cionar cuando usted lo desee. Ejemplo: Son las 12:30 y usted desea que el microondas comience a funcionar a las 14:20. Desea que el tiempo de cocción sea de 9 minutos y 30 segundos y que la potencia sea del 100%.
  • Seite 60: Indicaciones Sobre Los Recipientes

    Protección para niños Utilice esta función para que los niños no puedan manipular las teclas mientras el microondas esté funcionando. Pulse la tecla Pause/Cancel durante 3 segundos para activar la protección para niños. Vuelva a pulsar Pause/Cancel durante 3 segundos para desactivar la protección. Indicaciones sobre los recipientes Le recomendamos utilizar solamente recipientes aptos para ser usados en el microondas, como por ejemplo cerámica termoresistente y recipientes de cristal o plástico especiales para hornos microon-...
  • Seite 61: Detección Y Solución De Problemas

    • Consistencia de los alimentos: El color y la dureza de la comida ayudan a determinar cuando está lista. Puede reconocer que el alimento está preparado si el vapor emerge de todas las partes del alimento, si las articulacio- nes de las aves se mueven con facilidad, si la carne ya no sangra o si la carne del pescado está transparente y puede separarla fácilmente con el tenedor.

Diese Anleitung auch für:

10028201

Inhaltsverzeichnis