Werbung
Verfügbare Sprachen
Verfügbare Sprachen
User Guide
UFH - RF Analog thermostat
Guide d'utilisation
UFH - RF Thermostat analogique
Bedienungsanleitung
Analog Raumthermostat Funk
Gebruikshandleiding
RF Analoge thermostaat
Instrukcja Użytkowania
UFH – RF Termostat Analogowy
Bezprzewodowy
Manualul utilizatorului
Termostat analogic UFH - RF
Analog Basic RF
1
GB
4-13
F
14-23
D
24-33
Nl
34-43
Pl
44-53
RO
54-63
Werbung
Inhaltsverzeichnis

Verwandte Anleitungen für Radson Analog Basic RF


Inhaltszusammenfassung für Radson Analog Basic RF
- Seite 1 Analog Basic RF User Guide UFH - RF Analog thermostat 4-13 Guide d’utilisation UFH - RF Thermostat analogique 14-23 Bedienungsanleitung Analog Raumthermostat Funk 24-33 Gebruikshandleiding RF Analoge thermostaat 34-43 Instrukcja Użytkowania UFH – RF Termostat Analogowy 44-53 Bezprzewodowy Manualul utilizatorului...
- Seite 4 Installation and Operation Manual IMPORTANT! Before starting work the installer should carefully read this Installation & Operation Manual, and make sure all instructions contained therein are understood and observed. - The thermostat should be mounted, operated and maintained by specially trained personnel only. Personnel in the course of training are only allowed to handle the product under the supervision of an experienced fitter.
-
Seite 5: Safety Instructions
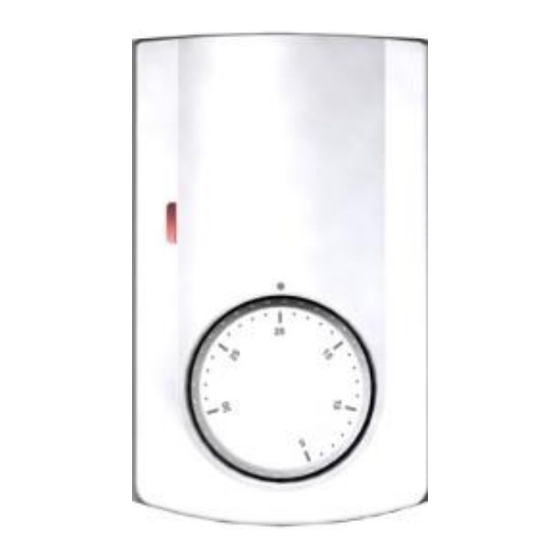
SAFETY INSTRUCTIONS Before starting work disconnect power supply! - All installation and wiring work related to the controller must be carried out only when de-energized. The appliance should be connected and commissioned by qualified personnel only. Make sure to adhere to valid safety regulations. - Seite 6 User Guide UFH - RF Analog thermostat Analog wireless (RF 868MHz) thermostat specially designed to control your Under Floor Heating and cooling managed by actuator. - Wall mounting with table support. - 2 AAA batteries. Technical characteristics Measured temperature 0.1°C precision Operating temperature 0°C - 50°C...
- Seite 7 Presentation LED Indicator Green Flashes: Radio frequency transmission. Red: View of the regulating point during adjustment. How to use your thermostat OFF mode: (Manual mode) Use this mode if you want to stop the Heating or Cooling function in the room. Simple installation without main zone programmer: The antifreeze temperature (7°C) will be maintained in the room all the time.
- Seite 8 Installation with main zone programmer: (with or without Cooling function) The reduced temperature will be followed as described below: - In heating mode: (Winter) The reduced temperature will be the setting temperature minus 2°C. - In cooling mode: (Summer) You can adjust the reduced setting temperature only on the main zone programmer (Check the leaflet of main zone programmer for more information)
- Seite 9 How to learn your RF thermostat with the RF receiver First of all, switch the button mode of the thermostat in OFF position To learn (*) the RF thermostat with the receiver you must put the receiver in “RF init” mode (Please refer to the receiver leaflet).
- Seite 10 o If it’s good, adjust your setting temperature as you want. o If it’s not good, check the installation (Antenna position, distance...) * To make the installation easier it will be better to have the thermostat near to the receiver in learning mode. How to caliber and limit the setting range.
- Seite 11 Fig. 1 Fig. 2...
- Seite 12 If your thermostat needs to be limited, make these operations: Set the setting button on the middle of the new setting range. Remove the setting button by pressing gently outwards with a narrow screwdriver between the button and the cover. Remove the dial pins and put in the desired holes to limit the setting range of the thermostat.
- Seite 13 Notes ____________________________________________ ____________________________________________ ____________________________________________ ____________________________________________ ____________________________________________ ____________________________________________ ____________________________________________ ____________________________________________ ____________________________________________ ____________________________________________ ____________________________________________ ____________________________________________ ____________________________________________ ____________________________________________ ____________________________________________ ____________________________________________ ____________________________________________ ____________________________________________ ____________________________________________ ____________________________________________ ____________________________________________ ____________________________________________ ____________________________________________ ____________________________________________ ____________________________________________ ____________________________________________ ____________________________________________ ____________________________________________ ____________________________________________ ____________________________________________ ____________________________________________ ____________________________________________ ____________________________________________ ____________________________________________ ____________________________________________ ____________________________________________...
- Seite 14 Manuel d’utilisation et d’installation IMPORTANT! - Avant de commencer les travaux, le monteur doit lire, comprendre et observer les présentes instructions de montage et de service. - Seul un spécialiste en la matière est autorisé à effectuer le montage, le réglage et la maintenance d’une régulation plancher type UFH.
- Seite 15 votre installation. (Circulateur, électrovannes, thermostats) Le module de régulation a été étudié pour un fonctionnement dans un environnement résidentiel, bureaux ou en équipement industriel. Il est recommandé d’installer ce thermostat selon les règles de l’art le tout en respectant les législations en vigueur.
- Seite 16 Guide d’utilisation UFH - RF Thermostat analogique Thermostat analogique radiofréquence (RF 868MHz) spécialement conçu pour la régulation de plancher chauffant et rafraichissant hydraulique géré par électrovanne thermique. - Support pour fixation murale ou sur pied. - 2 piles 1,5V AAA . Caractéristiques techniques Précision de mesure 0.1°C...
- Seite 17 Présentation Voyant d’état Clignotement vert: Transmission de signal Radio Fréquence. Rouge : Visualisation du point de régulation pendant le réglage de la consigne. Comment utiliser votre thermostat Mode Arrêt: (Mode manuel) Utilisez ce mode si vous désirez mettre votre installation en Arrêt. Installation simple sans centrale de programmation: La température de hors gel (7°C) sera maintenue...
- Seite 18 Installation simple sans centrale de programmation: La température réduite (ECO) sera maintenue indéfiniment. (Température ajustée sur le thermostat - 2°C) Installation avec centrale de programmation: (avec ou sans fonction Chaud / Froid) - En mode Chauffage : (Hiver) La température réduite (ECO) sera maintenue indéfiniment.
- Seite 19 Comment appairer votre thermostat avec votre récepteur Tout d’abord positionner l’interrupteur de mode de votre thermostat sur la position Ensuite, mettez votre récepteur en mode “RF init”. (Reportez vous à la notice du récepteur ou de la centrale de programmation pour cette opération) Sur le thermostat, basculez l’interrupteur de mode sur la position “Automatique”...
- Seite 20 o Si le récepteur n’a pas correctement reçu l’information, il se peut que vous soyez en limite de portée, essayez alors de déplacer l’antenne RF, le thermostat… * Pour une installation plus rapide et maitrisée il est préférable d’avoir le thermostat proche du récepteur en appairage.
- Seite 21 Fig. 1 Fig. 2...
- Seite 22 Procéder de la manière suivante pour borner la plage de réglage de votre thermostat. Positionnez le bouton de réglage au milieu de la plage désirée Exemple : vous désirez réduire la plage de réglage entre 15 et 25°C => Positionnez votre bouton sur 20°C. Tirez le bouton de réglage vers vous en faisant délicatement levier avec un tournevis étroit entre la face avant et le bouton.
- Seite 23 Notes ____________________________________________ ____________________________________________ ____________________________________________ ____________________________________________ ____________________________________________ ____________________________________________ ____________________________________________ ____________________________________________ ____________________________________________ ____________________________________________ ____________________________________________ ____________________________________________ ____________________________________________ ____________________________________________ ____________________________________________ ____________________________________________ ____________________________________________ ____________________________________________ ____________________________________________ ____________________________________________ ____________________________________________ ____________________________________________ ____________________________________________ ____________________________________________ ____________________________________________ ____________________________________________ ____________________________________________ ____________________________________________ ____________________________________________ ____________________________________________ ____________________________________________ ____________________________________________ ____________________________________________ ____________________________________________ ____________________________________________ ____________________________________________...
- Seite 24 Installations- und Bedienungsanleitung Wichtig!! Bevor Sie mit der Installation beginnen, sollten sie sich die Installations- und Bedienungsanleitung sorgfältig durchlesen und unbedingt die nachfolgenden Punkte beachten: Der Raumthermostat darf nur von Fachpersonal oder unter deren Aufsicht installiert, angeschlossen und konfiguriert werden. Für Schäden die durch unsachgemäße Installation oder Montage entstehen kann keine Gewährleistung oder Haftung übernommen...
-
Seite 25: Sicherheitshinweise
SICHERHEITS HINWEISE Vor Beginn aller Installations- und Montagearbeiten die Netzspannung abschalten!!! Stellen sie sicher das vor Beginn und während aller Installations- und Montagearbeiten die Anlage spannungsfrei ist. Die Arbeiten dürfen nur durch Fachleute ausgeführt werden. Die Elektroinstallation muss den geltenden Richtlinien und Verordnungen entsprechen. - Seite 26 Kalibrierung und Begrenzung des Einstellbereiches Analog Raumthermostat Funk (868MHz) mit Nachabsenkung Analoger Raumthermostat Funk Nachabsenkungsfunktion 2K Kühlfunktion (Zentralregler erforderlich) Wandmontage oder Tischaufstellung Betriebsartenwahlschalter: Frostschutz Absenkbetrieb Automatik Betrieb Technische Daten Messgenauigkeit 0.1°C Betriebstemperatur 0°C - 50°C Temperatureinstellbereich 5°C - 30°C Puls-Weiten-Modulation Regelungsart (PWM) Schutzart und -klasse...
-
Seite 27: Bedienung
Anzeige LED Anzeige Grün blinkend: Thermostat sendet Funksignal Rot: Anzeige der aktuellen Raumtemperatur während der Stellknopf gedreht wird Bedienung Aus: (Frostschutzbetrieb) Installation ohne Zentralregler: Regler ist ausgeschaltet. Unabhängig von der Sollwertvorgabe öffnet der Regler bei Raumtemperaturen unter 7°C Installation mit Zentralregler: Im Heizbetrieb: (Winter) Regler ist ausgeschaltet. - Seite 28 Im Kühlbetrieb: (Sommer) Die Temperaturanhebung oder –absenkung kann nur über den Zentralregler eingestellt werden. (Bitte beachten sie hierzu die Hinweise in der Bedienungsanleitung des Zentralreglers) Automatik Betrieb: In dieser Einstellung folgt der Regler den Absenkzeiten des Zentralreglers. Ferner werden die Regelprogramme (Heiz- oder Kühlbetrieb, Frostschutz, Urlaubsfunktion, etc.) vom Zentralregler vorgegeben.
- Seite 29 Anlernen des Funk Raumthermostaten mit dem Funk Empfänger Schalten sie den Betriebsartenwahlschalter auf Aus Um den Thermostaten (*) an den Empfänger anzulernen, muß der Empfänger in den Lernmodus “RF init” geschaltet werden. (Bitte beachten sie die Hinweise in der Bedienungsanleitung des Empfängers).
- Seite 30 Wenn ja, kann nun die gewünschte Solltemperatur eingestellt werden Wenn nein, muß die Installation geprüft werden. Ggf. muß die Antenne des Empfängers außerhalb des Verteilerschrankes platziert werden. * (Für ein einfaches Anlernen ist es am besten, den Thermostaten in der Nähe des Empfängers anzulernen.) Kalibrierung und Begrenzung des Einstellbereiches...
- Seite 31 Fig. 1 Fig. 2...
- Seite 32 Wenn Sie den Einstellwert des Raumthermostaten begrenzen wollen, gehen Sie wie folgt vor Drehen Sie den Stellknopf in die Mitte des gewünschten Einstellbereiches Entfernen Sie vorsichtig den Stellknopf Entfernen sie die Begrenzungsstifte und stecken sie in die dafür vorgesehenen Löcher des gewünschten Einstellbereiches (Fig.4) Stecken sie den Stellknopf wieder auf das Reglergehäuse...
- Seite 33 Notizen ____________________________________________ ____________________________________________ ____________________________________________ ____________________________________________ ____________________________________________ ____________________________________________ ____________________________________________ ____________________________________________ ____________________________________________ ____________________________________________ ____________________________________________ ____________________________________________ ____________________________________________ ____________________________________________ ____________________________________________ ____________________________________________ ____________________________________________ ____________________________________________ ____________________________________________ ____________________________________________ ____________________________________________ ____________________________________________ ____________________________________________ ____________________________________________ ____________________________________________ ____________________________________________ ____________________________________________ ____________________________________________ ____________________________________________ ____________________________________________ ____________________________________________ ____________________________________________ ____________________________________________ ____________________________________________ ____________________________________________ ____________________________________________...
- Seite 34 Installatie en bedieningshandleiding BELANGRIJK! Alvorens de installatie uit te voeren moet de handleiding gelezen en begrepen worden door de installateur. - De Main zone digitale programmator moet geplaatst en onderhouden worden door een gecertificeerde installateur. Personeel die de installatie cursus niet hebben voltooid mogen deze slechts plaatsen onder supervisie van een gecertificeerd persoon.
- Seite 35 zonder verwarming-/koeling module,om alle elektrische componenten aan te sluiten zoals motoren, sturingen en thermostaten. - De regelaar is ontworpen om gebruikt te worden in residentiële woningen, burelen en industriële gebouwen. Kijk na of de huidige installatie compatibel is met de voorschriften om een goede werking te kunnen garanderen.
- Seite 36 Gebruiksaanwijzing Radio frequentie gestuurde thermostaat (RF 868MHz) special ontworpen voor vloerverwarming en koeling d.m.v. thermische motoren. - Wandmontage en tafel support. - 2 AAA batterijen. Technische kenmerken Meetnauwkeurigheid 0.1°C Werkingstemperatuur 0°C - 50°C Omgevingstemperatuur 5°C - 30°C instelling Proportioneel Regel Integraal (PWM) eigenschappen 2°C met 15min...
- Seite 37 LED indicatie Groen flitsend: Radio frequentie transmissie. Rood: Regel indicatie tijdens instelling Hoe uw thermostaat gebruiken STOP modus: (Manuele mode ) Gebruik deze modus om uw thermostaat buiten werking te plaatsen. Eenvoudige installatie zonder centrale programmator: De antivries instelling van (7°C) zal permanent worden bewaakt.
- Seite 38 - In verwarming modus: (Winter) De nachtverlaging instelling is de huidige instelwaarde -2°C. - In koeling modus: (Zomer) De nachtverlaging kan slechts worden ingesteld via de centrale programmator. (raadpleeg de centrale programmator brochure voor meer informatie.) AUTOMATISCH of COMFORT modus: In deze modus zal uw thermostaat het programma volgen, (comfort of nachtverlaging), en de verwarming en koeling aansturen evenals de...
- Seite 39 Koppelen van de thermostaat met de RF ontvanger Plaats uw thermostaat op positie STOP Om uw thermostaat te koppelen (*) met de ontvanger moet deze laatste in “RF init” modus worden geplaatst. (Gelieve hiervoor de ontvanger brochure te raadplegen) Plaats de thermostaat in “automatische” modus positie De thermostaat maakt zich nu bekend bij de ontvanger d.m.v.
- Seite 40 * Om de installatie te vereenvoudigen is het handig om de thermostaat bij de ontvanger te houden. Kalibratie en begrenzing Indien uw thermostaat moet gekalibreerd worden volg dan deze instructies: Plaats een thermometer op 1.5 m van de vloer in het midden van het lokaal.
- Seite 41 Fig. 1 Fig. 2...
- Seite 42 Beperking van de instelwaarde: Plaats de instelknop in het midden van het instelbereik. Trek de instelknop naar u toe, gebruik daarbij zachtjes een schroevendraaier als hefboom (besteed de nodige aandacht om een roterende beweging van de instelknop te voorkomen. Verplaats de limiet pennen naar de juiste plaats zoals weergeven(Figuur 3 en 4) U kunt nu de instelknop op de thermostaat plaatsen.
- Seite 43 Nota’s ____________________________________________ ____________________________________________ ____________________________________________ ____________________________________________ ____________________________________________ ____________________________________________ ____________________________________________ ____________________________________________ ____________________________________________ ____________________________________________ ____________________________________________ ____________________________________________ ____________________________________________ ____________________________________________ ____________________________________________ ____________________________________________ ____________________________________________ ____________________________________________ ____________________________________________ ____________________________________________ ____________________________________________ ____________________________________________ ____________________________________________ ____________________________________________ ____________________________________________ ____________________________________________ ____________________________________________ ____________________________________________ ____________________________________________ ____________________________________________ ____________________________________________ ____________________________________________ ____________________________________________ ____________________________________________ ____________________________________________ ____________________________________________ ____________________________________________...
- Seite 44 Instrukcja Instalacji i Użytkowania (uruchomienia) Uwaga! Przed rozpoczęciem pracy instalator powinien dokładnie przeczytać „Instrukcję Instalacji Użytkowania” i upewnić się, że wszystkie zawarte w niej informacje są dla niego zrozumiałe. - Termostat glowny powinien byc zamontowany, uruchomiony serwisowany wylacznie przez wyspecjalizowany personel Osoba odpowiednich uprawnień...
- Seite 45 elektryczne i hydrauliczne elementy instalacji jak pompa obiegowa, siłowniki itp. - Termostaty zostały zaprojektowane z myślą o zastosowaniu ich w domach/mieszkaniach, biurach i budynkach przemysłowych Przed podłączeniem instalacji zweryfikuj odpowiada ona obowiązującym przepisom. Instrukcje bezpieczeństwa Przed rozpoczęciem podłączania termostatu odłącz zasilanie prądu! Wszystkie prace montażowe...
-
Seite 46: Instrukcja Użytkowania
Instrukcja Użytkowania UFH – RF Termostat Analogowy Bezprzewodowy Analogowy bezprzewodowy termostat (RF 868MHz) przeznaczony do regulacji temperatury ogrzewania i chłodzenia podłogowego poprzez głowice termoelektryczne/siłowniki - Przymocowywany do ściany za pomocą płytki montażowej. - 2 baterie AAA. Dane Techniczne Dokładność pomiaru 0.1°C Temperatura pracy 0°C - 50°C... -
Seite 47: Sposób Działania
Sygnalizacja Diody LED Zielony migający: Wysyłanie sygnału radiowego. Czerwony: Sygnalizacja Grzania Sposób działania OFF: (Tryb ręczny) Użyj tego trybu jeśli chcesz zatrzymać pracę instalacji w pomieszczeniu. Prosta instalacja bez programatora strefy głównej: Bezpieczna temperatura (7°C) będzie utrzymywana w pomieszczeniu przez cały czas. Instalacja z programatorem strefy głównej/nadrzędnym: (z/bez funkcji chłodzenia) - W trybie grzania (Zima) - Seite 48 Temperatura zredukowana będzie wynosić minus 2°C od temperatury nastawionej - W trybie chłodzenia (Lato) Temperatura zredukowana może być ustawiona tylko na programatorze nadrzędnym (Więcej informacji, patrz: Instrukcja programatora nadrzędnego) Tryb automatyczny lub komfortowy: W tym trybie termostat będzie realizował program czasowy i funkcje nastawione na głównym, nadrzędnym programatorze (Grzanie, chłodzenie, anty-zamrożenie, wyjazd, itp.) jeśli ten został...
- Seite 49 Konfiguracja sygnału radiowego Ustaw przycisk termostatu w pozycji OFF Aby skomunikować (*) RF termostat z odbiornikiem, należy ustawić odbiornik w trybie “RF init” (Szczegóły w instrukcji odbiornika). Ustaw termostat w pozycji “Automatic” Termostat wyśle sygnał do odbiornika. Sprawdź odbiór sygnału na odbiorniku. Jeśli komunikacja nie przebiegła pomyślnie, sprawdź...
- Seite 50 * Aby właściwie skonfigurować termostat z odbiornikiem, podczas tych czynności termostat musi się znajdować w bezpośredniej bliskości. Jak kalibrować i ustawić ograniczenia temperatury Jeśli termostat wymaga kalibracji postępuj według instrukcji: Umieść termostat mniej więcej po środku pomieszczenia na wysokości ok.1,5m Poczekaj ok.1 godziny, tak aby ustaliła się...
- Seite 51 Rys. 1 Rys. 2...
- Seite 52 Jeśli potrzebujesz wprowadzić ograniczenia nastawy temperatury: Ustaw pokrętło w połowie skali, a następnie zdejmij delikatnie pokrywę pokrętła z termostatu podważając ją przy pomocy płaskiego śrubokrętu. Wyjmij wewnętrzny pierścień z pokrywy. Wetknij kołeczki w otwory odpowiadające wymaganym ograniczeniom temperatury na pierścieniu. (Rysunki 3 i 4) Następnie nałóż...
- Seite 53 Nota’s ____________________________________________ ____________________________________________ ____________________________________________ ____________________________________________ ____________________________________________ ____________________________________________ ____________________________________________ ____________________________________________ ____________________________________________ ____________________________________________ ____________________________________________ ____________________________________________ ____________________________________________ ____________________________________________ ____________________________________________ ____________________________________________ ____________________________________________ ____________________________________________ ____________________________________________ ____________________________________________ ____________________________________________ ____________________________________________ ____________________________________________ ____________________________________________ ____________________________________________ ____________________________________________ ____________________________________________ ____________________________________________ ____________________________________________ ____________________________________________ ____________________________________________ ____________________________________________...
- Seite 54 Manual pentru Instalare şi Utilizare IMPORTANT! Înaintea începerii montării, instalatorul trebuie să citească cu atenţie acest Manual pentru Instalare şi Utilizare şi să se asigure că toate instrucţiunile conţinute în acesta sunt înţelese şi respectate. - Termostatul trebuie montat, utilizat şi întreţinut numai de către personal calificat.
-
Seite 55: Instrucţiuni Pentru Siguranţă
hidraulice ale instalaţiei, ca de exemplu pompă, dispozitive de comandă ... - Regulatoarele au fost proiectate pentru utilizare în încăperi, spaţii cu birouri şi spaţii industriale. Verificaţi dacă instalarea respectă reglementările existente înaintea asigurării utilizării corecte a instalaţiei. INSTRUCŢIUNI PENTRU SIGURANŢĂ Înaintea începerii montării, întrerupeţi alimentarea cu curent! - Toate lucrările de instalare şi conectare aferente... - Seite 56 Manualul utilizatorului Termostat analogic UFH - RF Termostat analogic wireless (RF 868MHz) proiectat special pentru reglarea încălzirii şi răcirii sub pardoseală dirijate de dispozitivul de acţionare. - Posibilitate de montare pe perete cu suport. - 2 baterii AAA. Caracteristici tehnice Precizia temperaturii 0.1°C măsurate...
- Seite 57 Prezentare Indicator cu LED Transmisie frecvenţă radio. Verde: Roşu: Vizualizarea punctului de reglare în timpul reglării. Cum să folosiţi termostatul Modul OFF: (mod manual) Folosiţi acest mod dacă doriţi să opriţi funcţia de Încălzire sau Răcire din încăpere. Instalare simplă fără programator zonal principal: Temperatura anti-îngheţ...
- Seite 58 Instalare cu programator zonal principal: (cu sau fără funcţia de Răcire) Temperatura economică va fi păstrată după cum se arată mai jos: - În modul Încălzire: (iarna) Temperatura economică va fi temperatura de setare minus 2°C. - În modul Răcire: (vara) Puteţi regla temperatura economică...
- Seite 59 Cum să corelaţi termostatul RF cu receptorul RF Mai întâi, rotiţi butonul de mod al termostatului în poziţia OFF Pentru a corela (*) termostatul RF cu receptorul, trebuie să puneţi receptorul în modul “RF init” (Vă rugăm consultaţi broşura receptorului). Odată...
- Seite 60 (temperatura de setare 30°C). Închideţi uşa şi mergeţi la receptor pentru a verifica dacă a fost receptată noua stare a termostatului. Dacă este în regulă, reglaţi temperatura de setare după cum doriţi. Dacă nu este în regulă, verificaţi instalaţia (poziţia antenei, distanţa...) * Pentru a face instalarea mai uşoară, ar fi mai bine ca termostatul să...
- Seite 61 Fig. 1 Fig. 2...
- Seite 62 Dacă trebuie să limitaţi intervalul de reglare al termostatului: Poziţionaţi butonul de reglaj pe mijlocul intervalului dorit. Scoateţi butonul de reglaj prin apăsarea uşoară spre exterior cu o şurubelniţă, între buton şi partea de sus. Scoateţi picioruşele pentru reglaj şi aşezaţi-le pe noul interval de reglaj.
- Seite 63 Nota ____________________________________________ ____________________________________________ ____________________________________________ ____________________________________________ ____________________________________________ ____________________________________________ ____________________________________________ ____________________________________________ ____________________________________________ ____________________________________________ ____________________________________________ ____________________________________________ ____________________________________________ ____________________________________________ ____________________________________________ ____________________________________________ ____________________________________________ ____________________________________________ ____________________________________________ ____________________________________________ ____________________________________________ ____________________________________________ ____________________________________________ ____________________________________________ ____________________________________________ ____________________________________________ ____________________________________________ ____________________________________________ ____________________________________________ ____________________________________________ ____________________________________________ ____________________________________________...
- Seite 66 Rettig Belgium NV Vogelsancklaan 250 B-3520 Zonhoven Belgium Tel: +49 5324 808-0 Fax: +49 5324 808-999 info@radson.be www.radson.com Purmo DiaNorm Wärme AG Lierestraße 68 38690 Vienenburg Germany Tel: +49 5324 808-0 Fax: +49 5324 808-999 info@purmo.de www.purmo.de Rettig Heating Sp. z o.o.