EuroLite MULTIFLOOD PRO IP SMD RGBW STROBE/WASH Bedienungsanleitung
Inhaltsverzeichnis
Verfügbare Sprachen
Verfügbare Sprachen
Quicklinks
MULTIFLOOD
PRO
IP SMD RGBW
Strobe/Wash
Bedienungsanleitung
User Manual
Multiflood Pro IP SMD RGBW Strobe/Wash
Wetterfestes (IP65) 3in1-LED-Lichteffektgerät mit RGBW-Farbmischung
Weatherproof (IP65) 3in1 LED effect light with RGBW color mixing
STAND
DMX
ALONE
No. 52200930
www.eurolite.de
MASTER
RGBW
STROBE
SLAVE
IP65
Inhaltsverzeichnis

Verwandte Anleitungen für EuroLite MULTIFLOOD PRO IP SMD RGBW STROBE/WASH


Inhaltszusammenfassung für EuroLite MULTIFLOOD PRO IP SMD RGBW STROBE/WASH
- Seite 1 MULTIFLOOD IP SMD RGBW Strobe/Wash Bedienungsanleitung User Manual Multiflood Pro IP SMD RGBW Strobe/Wash Wetterfestes (IP65) 3in1-LED-Lichteffektgerät mit RGBW-Farbmischung Weatherproof (IP65) 3in1 LED effect light with RGBW color mixing STAND MASTER RGBW IP65 STROBE ALONE SLAVE No. 52200930 www.eurolite.de...
- Seite 2 2/36 00121741.DOCX, Version 1.0...
-
Seite 3: Inhaltsverzeichnis
Diese Bedienungsanleitung gilt für die Artikelnummer / This user manual is valid for the article number: 52200930 Das neueste Update dieser Bedienungsanleitung finden Sie im Internet unter: You can find the latest update of this user manual in the Internet under: www.eurolite.de 3/36 00121741.DOCX, Version 1.0... -
Seite 4: Einführung
BEDIENUNGSANLEITUNG MULTIFLOOD PRO IP SMD RGBW STROBE/WASH GEFAHR! Elektrischer Schlag durch Kurzschluss Seien Sie besonders vorsichtig beim Umgang mit gefährlicher Netzspannung. Bei dieser Spannung können Sie einen lebensgefährlichen elektrischen Schlag erhalten. Öffnen Sie das Gerät niemals. Lesen Sie vor der Verwendung des Geräts diese Bedienungsanleitung. Sie erhalten dadurch wichtige Hinweise für den korrekten Betrieb. -
Seite 5: Sicherheitshinweise
SICHERHEITSHINWEISE WARNUNG! Lesen Sie aufmerksam die Sicherheitshinweise und benutzen Sie das Produkt nur wie in dieser Anleitung beschrieben, damit es nicht versehentlich zu Verletzungen oder Schäden kommt. Verwendungszweck • Bei diesem Gerät handelt es sich um einen LED Schweinwerfer (Outdoor) mit dem sich dekorative Lichteffekte erzeugen lassen. - Seite 6 das Gerät nur benutzen, wenn sie von einer für ihre Sicherheit zuständigen Person beaufsichtigt oder angeleitet werden. Warnung vor Verbrennung und Brand • Der zulässige Umgebungstemperaturbereich (Ta) beträgt -5 bis +45°C. Verwenden Sie das Gerät niemals außerhalb dieses Temperaturbereichs. • Die Gehäusetemperatur (Tc) kann im Betrieb bis zu 60°C betragen. Vermeiden Sie den Kontakt mit Personen oder Gegenständen.
-
Seite 7: Gerätebeschreibung
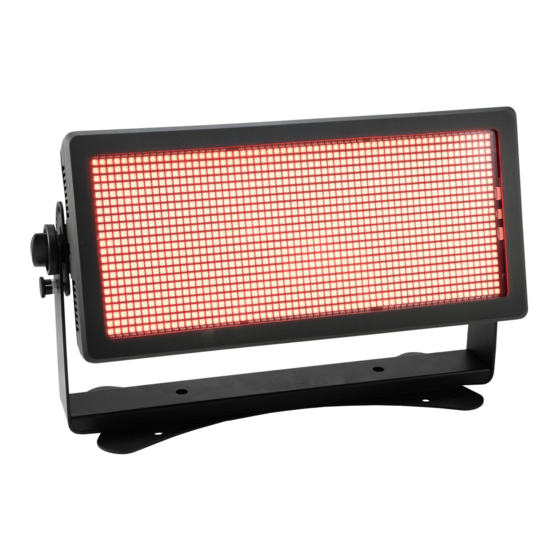
GERÄTEBESCHREIBUNG 1. RGBW-LEDs, SMD 5050 2. Feststellschraube 3. Montagebügel 4. Bedientasten mit LCD 5. Netzanschluss 6. Fangseilöse 7. DMX-Eingang 8. DMX-Ausgang 9. Omega-Bügel 10. Montageplatte 7/36 00121741.DOCX, Version 1.0... -
Seite 8: Installation
INSTALLATION WARNUNG! Verletzungsgefahr durch Herabfallen Über Kopf installierte Geräte können beim Herabstürzen erhebliche Verletzungen verursachen! Stellen Sie sicher, dass das Gerät sicher installiert ist und nicht herunterfallen kann. Die Montage darf nur durch eine Fachkraft erfolgen, die mit den Gefahren und den einschlägigen Vorschriften hierfür vertraut ist. -
Seite 9: Anschlüsse
ANSCHLÜSSE Gerät 3 Gerät 2 Gerät 1 Startadresse 15 Startadresse 8 Startadresse 1 120 Ohms DMX-512 Controller DMX512-Ansteuerung Für die Ansteuerung des Geräts per DMX512 ist eine Datenverbindung notwendig. Das Gerät verfügt dazu über 3-polige XLR-Anschlüsse. Verbinden Sie den Ausgang Ihres Controllers mit dem DMX-Eingang DMX IN des Geräts über ein DMX- Kabel. -
Seite 10: Bedienung
BEDIENUNG Nach dem Anschluss ans Netz ist das Gerät betriebsbereit. Die Lüfter laufen nach dem Einschalten kurzzeitig auf voller Leistung. Dies ist eine Reinigungsfunktion und beabsichtigt. Das Display zeigt die zuletzt eingestellte Betriebsart. Nehmen Sie nun die notwendigen Menüeinstellungen für die jeweilige Betriebsart mit den Bedientasten vor. Auch wenn Sie das Gerät vom Stromnetz trennen, bleiben alle Einstellungen gespeichert. -
Seite 11: Standalone-Betrieb
Achtung!! im Standalone Betrieb kann die volle Lichtleistung des Gerätes nicht abgerufen werden. Standalone-Betrieb DMX Monitor Hier können Sie in jedem DMX-Kanal-Modus die DMX-Werte für jeden Kanal manuell eingeben. Drücken Sie dazu die Taste MODE so oft, bis das Display DMX Monitor anzeigt. Bestätigen Sie mit der Taste ENTER. - Seite 12 Drücken Sie dann die Taste MODE so oft, bis das Display Mas Mode anzeigt. Bestätigen Sie mit der Taste ENTER. Stellen Sie mit den Tasten UP und DOWN den gewünschten Modus ein, yes oder no für Master oder Slave, je nach Gerät. Bestätigen Sie mit der Taste ENTER. Wählen Sie am Master-Gerät die gewünschte Betriebsart.
- Seite 13 Info In diesem Modus lassen sich verschiedene Einstellungen auslesen oder einstellen. Drücken Sie die Taste MODE so oft, bis das Display die Betriebsart Info anzeigt. Bestätigen Sie mit der Taste ENTER. Stellen Sie mit den Tasten UP und DOWN den gewünschten Modus ein und bestätigen Sie mit der Taste ENTER.
-
Seite 14: Dmx-Betrieb
DMX-Betrieb Anzahl der DMX-Kanäle und DMX-Startadresse einstellen Für den Betrieb über einen Controller mit DMX512-Protokoll verfügt das Gerät über 31 Steuerkanäle. Es kann aber auch in einen Modus mit 4, 5, 7, 13 oder 15 Kanälen umgeschaltet werden, wenn andere Funktionen benötigt werden. - Seite 15 Funktionen im DMX-Betrieb 4-Kanal-Modus Kanal Wert Funktion 000 – 255 Rot 0-100% 000 – 255 Grün 0-100% 000 – 255 Blau 0-100% 000 – 255 Weiß 0-100% 5-Kanal-Modus Kanal Wert Funktion 000 – 005 Keine Funktion 006 – 250 Strobe mit zunehmender Geschwindigkeit 0-100% 251 –...
- Seite 16 13-Kanal-Modus Kanal Wert Funktion 001 – 255 Master Dimmer 001 – 255 Rot 0-100% 001 – 255 Grün 0-100% 001 – 255 Blau 0-100% 001 – 255 Weiß 0-100% 000 – 005 Keine Funktion 006 – 255 Strobe mit zunehmender Geschwindigkeit 0-100% 000 –...
- Seite 17 31-Kanal-Modus Kanal Wert Funktion 000 – 255 Master Dimmer 000 – 255 Rot 0-100% 000 – 255 Grün 0-100% LED-Gruppe 1 000 – 255 Blau 0-100% 000 – 255 Weiß 0-100% 000 – 255 Rot 0-100% 000 – 255 Grün 0-100% LED-Gruppe 2 000 –...
-
Seite 18: Reinigung Und Wartung
Farbvoreinstellungen in den Kanälen 7, 13, 15, 31 000 – 009 Keine Funktion 010 – 017 Rot 018 – 025 Grün 026 – 033 Blau 034 – 041 Weiß 042 – 049 Gelb (Rot + Grün) 050 – 057 Magenta (Rot + Blau) 058 –... -
Seite 19: Technische Daten
160 x 490 x 285 mm Gewicht: 12,5 kg Zubehör EUROLITE TPC-10 Klammer, silber Best.-Nr. 59006856 EUROLITE Sicherungsseil A 4x1000mm bis 15kg silber Best.-Nr. 58010320 EUROLITE Omega-Bügel 31 Best.-Nr. 51786544 EUROLITE T-Con Netzkabel 3x1,5 1,5m Best.-Nr. 30235005 PSSO DMX Kabel IP65 3pol 3m schwarz Best.-Nr.