Inhaltsverzeichnis
Werbung
Quicklinks
- 1 Inhaltsverzeichnis
- 2 Wandmontage Rahmen mit Führungsschienen
- 3 Freistehende Montage Rahmen mit Führungsschienen
- 4 Montage Schutzdach
- 5 Programmierung Terrassenfaltdach Somfy Io
- 6 Tuchspannung Terrassenfaltdach Erhöhen / Verringern (nur Somfy Io)
- 7 Verstellen der Oberen Endlage Terrassenfaltdach (Somfy Rts & Io)
- Diese Anleitung herunterladen
Montageanleitung
Montagehandleiding
Assembly instructions
LEINER
PERGOLA SUNRAIN Q 1-FELD / 1-VAKS / 1-FIELD
Leiner GmbH
EN13561
05/2018 Version 2.2 D/NL/EN
Art.-Nr.: S19201
1
Leiner GmbH
Augsburger Straße 5
86497 Horgau
Tel +49 (0) 82 94/2 92 – 0
Fax +49 (0) 82 94/2 92 – 39
www.leiner.de
Dokumentation: Leiner GmbH
Werbung
Inhaltsverzeichnis

Verwandte Anleitungen für Leiner PERGOLA SUNRAIN Q 1-FIELD


Inhaltszusammenfassung für Leiner PERGOLA SUNRAIN Q 1-FIELD
- Seite 1 PERGOLA SUNRAIN Q 1-FELD / 1-VAKS / 1-FIELD Leiner GmbH Augsburger Straße 5 86497 Horgau Tel +49 (0) 82 94/2 92 – 0 Leiner GmbH Fax +49 (0) 82 94/2 92 – 39 EN13561 www.leiner.de 05/2018 Version 2.2 D/NL/EN Art.-Nr.: S19201 Dokumentation: Leiner GmbH...
-
Seite 2: Inhaltsverzeichnis
Montageanleitung Montagehandleiding Assembly instructions 1. Inhaltsverzeichnis Kapitel / hoofdstuk / chapter Seite / page / page 1. Inhaltsverzeichnis........................Inhoudsopgave Contents . Einführung ..........................Introductie Introduction 3. Notwendiges Werkzeug......................Vereist gereedschap Tools required 4. Wandmontage Rahmen mit Führungsschienen................Wandmontage frame met geleiders Mounting the frame with guide rails on the wall 5. -
Seite 3: Einführung
Montagehandleiding Assembly instructions 2. Einführung Um die Qualitätsprodukte der Firma LEINER ordnungsgemäß montieren zu können müssen die Anweisungen in der Montageanleitung befolgt werden. Bei Nichtbeachtung der Montageanleitung ist die Firma LEINER von jeglicher Haftungspflicht entbunden. Die Markise erfüllt die Anforderungen der CE – Konformität:... -
Seite 4: Veiligheidsinstructies
2. Inleiding De instructies in de montagehandleiding moeten in acht worden genomen om de kwaliteitsproducten van de firma LEINER correct te kunnen monteren. Als de montagehandleiding wordt genegeerd, komt de aansprakelijkheid van de firma LEINER te vervallen. De zonwering is voorzien van het CE-keurmerk:... -
Seite 5: Introduction
Montagehandleiding Assembly instructions 2. Introduction The correct assembly of quality products made by Leiner is subject to strict observance of the assembly instructions. Failure to follow the instructions for assembly and use shall release Leiner from liability. The awning meets the requirements laid down for CE conformity:... -
Seite 6: Notwendiges Werkzeug
Montageanleitung Montagehandleiding Assembly instructions 3. Notwendiges Werkzeug Noodzakelijk instrument Tools required 200°C TX25 13mm Ø 3,9mm 15mm Ø 4,2mm 24mm Ø 9mm Leiner Art.-Nr.: H121082464 (Metabo Art.-Nr.: 630463000) -
Seite 7: Wandmontage Rahmen Mit Führungsschienen
Montageanleitung Montagehandleiding Assembly instructions 4. Wandmontage Rahmen mit Führungsschienen Wandmontage frame met geleiders Mounting the frame with guide rails on the wall 4.1 Übersicht der Rahmenprofile Overzicht van de frameprofielen Overview of the frame profiles Kabelabgang immer nach rechts ! Kabeluitgang altijd naar rechts Cable outlet always to the right M1/1... - Seite 8 Montageanleitung Montagehandleiding Assembly instructions Y - 110mm Y: Breite Breedte Width Z: Höhe Hoogte Hight Ø16...
- Seite 9 Montageanleitung Montagehandleiding Assembly instructions Ø16 Linke Seite spiegelbildlich ! Linkerzijde in spiegelbeeld! Mirror image on the left-hand side!
- Seite 10 4.4.1 Montageanleitung 4.4.2 Montagehandleiding Assembly instructions Bürsten entnehmen Borstels verwijderen Remove brushes 2x K24835 D40422: DIN125 8,4 D03322: DIN7984 M8x40 Leiner Art.-Nr.: H121082464 (Metabo Art.-Nr.: 630463000) 4.6.1 4.6.2...
- Seite 11 Montageanleitung Montagehandleiding Assembly instructions 4.6.3 4.6.4 ca. 10mm ca. 1mm 4.6.5 4.6.6 ca. 1mm 4.6.7 4.6.8 ~25Nm...
- Seite 12 Montageanleitung Montagehandleiding Assembly instructions 4.6.9 4.6.10 Schnorr TypS Ø 4x DIN934 M8 VZ Kabel zu Motor Absenkung (links oder rechts) Kabel naar motor van verticale uitval (linker- of rechterzijde) Cable to descent motor (left or right side)
- Seite 13 Montageanleitung Montagehandleiding Assembly instructions Bürsten entnehmen Borstels verwijderen Remove brushes 2x K24835 DIN125 8,4 DIN7984 M8x40 wie / hoe / like 4.6.1 - 4.6.10 Schnorr TypS Ø 4x DIN934 M8 VZ Kabel zu Motor Absenkung (links oder rechts) Kabel naar motor van verticale uitval (linker- of rechterzijde) Cable to descent motor (left or right side)
- Seite 14 Montageanleitung Montagehandleiding Assembly instructions 4.10 77,5 32,5 Ø 9mm x: 4x Bohrungen für Verschraubung 4x Gaten voor schroeven 4x Drillings for screwing y: 1-4x Bohrung für Kabelverlegung 1-4x Gaten voor kabels 1-4x Drillings for cables...
- Seite 15 Montageanleitung Montagehandleiding Assembly instructions 4.11 4x D31222: DIN934 M8 4x D41920: Schnorr Ø8mm 4x D40422: DIN125 Ø8,4 4x D04622: DIN912 M8x50 D40422: DIN125 8,4 D03322: DIN7984 M8x40...
- Seite 16 Montageanleitung Montagehandleiding Assembly instructions 4.12 4x D40422: DIN125 8,4 4x D01722: DIN7984 M8x30 D40422: DIN125 8,4 4x D01722: DIN7984 M8x30 Kabelabgang immer nach rechts ! Kabeluitgang altijd naar rechts Cable outlet always to the right M1/1 4.13...
- Seite 17 Montageanleitung Montagehandleiding Assembly instructions 4.14 Ø12 4.15 ca.1/2 (±2cm) ca.1/2 (±2cm) 1x B252000099 1x B251000099...
- Seite 18 Montageanleitung Montagehandleiding Assembly instructions 4.16 1x DIN913 M4X6A4 1x Z918000022 2x K50035 8996000099 2-4x DIN125 4,3 A2 1x Z917000022 1x K49635 1x K49735 4.17 klemmen klemmen clamp ~10mm ~10mm...
- Seite 19 Montageanleitung Montagehandleiding Assembly instructions 4.18 1x B251000099 1x B252000099 +8996000099 4.19 2x D40422: DIN125 8,4 2x D03322: DIN7984 M8x40 2x D40422: DIN125 8,4 2x D03322: DIN7984 M8x40...
- Seite 20 Montageanleitung Montagehandleiding Assembly instructions 4.20 Führungsschienen ganz einschieben 2x Z734000022 Geleiders helemaal inschuiven Push guide rails all the way in 4x D56022: ISO 7380 M8x14 A2 2x D03622 2x N07330 Stromzufuhr LED rechts spiegelbildlich Stroomtoevoer led rechts in spiegelbeeld LED power supply on the right in mirror image...
- Seite 21 Montageanleitung Montagehandleiding Assembly instructions 4.21 2x K24835 2x K24835 3. Klemmen Klemmen Clamp Sechskant ganz in Getriebe einschieben Zeskant helemaal in windwerk schuiven Push hexagon end all the way into gear mechanism 4.22 verbinden nicht verbinden Niet connect Sechskant ganz in Getriebe einschieben Zeskant helemaal in windwerk schuiven Push hexagon end all the way into gear mechanism...
- Seite 22 Montageanleitung Montagehandleiding Assembly instructions 4.23 4.24 Verbinden & Klemmen Verbinden & klemmen Connect & clamp...
- Seite 23 Montageanleitung Montagehandleiding Assembly instructions 4.25 4x D15922: DIN933 M10x16 4x D96022: DIN6923 M10 2x D56022: ISO7380 M8x14 2x Z7420000++ 4x D96022: DIN6923 M10 4x D15922: DIN933 M10x16 1x Z2190000++ 1x Z2180000++ Ausfall (mm) Uitval (mm) Drop (mm) T(mm) 2500 - 2869 2870 - 3369 3370 - 3869 3870 - 4369...
- Seite 24 Montageanleitung Montagehandleiding Assembly instructions 4.27 Klemmen (4x) Klemmen (4x) Clamp (4x) ~30mm 4.28 Kabelausgang rechts spiegelbildlich Kabeluitgang rechts in spiegelbeeld Cable outlet on the right in mirror image Stecker an Zuleitung montieren. Nicht anstecken! Stekker aan toevoerleiding monteren. Niet insteken! Connect plug to supply line.
- Seite 25 Montageanleitung Montagehandleiding Assembly instructions 4.29 2=L1 E69949 Leitungsverbinder montieren Kabelverbinding monteren Mount cable link 4.30 E69016 230V => 12V 12V DC rot / braun rood / bruin Kabel verbinden Zuleitung isolieren - nicht anklemmen! red / brown Kabel verbinden Toevoerleiding isoleren – niet aanklemmen! Connect cable Isolate supply line - do not connect to terminal! schwarz / blau...
- Seite 26 Montageanleitung Montagehandleiding Assembly instructions 4.31 Kapitel / hoofdstuk / chapter: 8.1 Seite / page / page: 71 Programmierung Terrassenfaltdach Teil 1 (Somfy io ohne Tuch Programmering terrasvouwdak deel 1 (Somfy io – zonder doek Programming the folding patio roof, part 1 (Somfy io - no fabric 4.32 Kapitel / hoofdstuk / chapter: 10...
-
Seite 27: Tuch Montieren
Montageanleitung Montagehandleiding Assembly instructions 4.34 150 60 Bei Stromzuführung rechts spiegelbildlich ! Bij stroomtoevoer rechts in spiegelbeeld! Mirror image if power supply on the right! 4.35 Tuch montieren Doek mount Mount fabric Querprofile bündig Dwarsprofielen in één lijn Cross profiles flush... - Seite 28 Montageanleitung Montagehandleiding Assembly instructions 1. 2. 3..Querprofile eingerückt Querprofile bündig Dwarsprofielen ingedrukt Dwarsprofielen in één lijn Cross profiles indented Cross profiles flush >KLICK< >KLICK< K252++ K24532 K18432 (PA6) K246++ Z905000022 (V4A) Querprofile bündig Dwarsprofielen in één lijn Cross profiles flush Z956000022 (V4A)
-
Seite 29: Rinnenstutzen Montieren
Montageanleitung Montagehandleiding Assembly instructions 4.36 Rinnenstutzen montieren Dichtmasse Afdichtmassa Sealing compound... - Seite 30 Montageanleitung Montagehandleiding Assembly instructions 4.37 Bei Stromzuführung rechts spiegelbildlich ! Bij stroomtoevoer rechts in spiegelbeeld! Mirror image if power supply on the right! 4.38 Bei Stromzuführung rechts spiegelbildlich ! Bij stroomtoevoer rechts in spiegelbeeld! Mirror image if power supply on the right! rot / braun rood / bruin red / brown...
- Seite 31 Montageanleitung Montagehandleiding Assembly instructions 4.39 Bei Stromzuführung rechts spiegelbildlich ! Bij stroomtoevoer rechts in spiegelbeeld! Mirror image if power supply on the right! 4.40 Bei Stromzuführung rechts spiegelbildlich ! Bij stroomtoevoer rechts in spiegelbeeld! Mirror image if power supply on the right!
- Seite 32 Montageanleitung Montagehandleiding Assembly instructions 4.41 Kapitel / hoofdstuk / chapter: 8.2 Seite / page / page: 72 Programmierung Terrassenfaltdach Teil 2 (Somfy io mit Tuch Programmering terrasvouwdak deel 2 (Somfy – met doek Programming the folding patio roof, part 2 (Somfy io with fabric 4.42 Tuchpaket in den Bereich der...
- Seite 33 Montageanleitung Montagehandleiding Assembly instructions Querprofile bündig Dwarsprofielen in één lijn Cross profiles flush Z956000022 (V4A)
- Seite 34 Montageanleitung Montagehandleiding Assembly instructions 4.43 K10835 außen bündig abschneiden aan buitenzijde in één lijn afknippen cut off flush on the outside 4.44 Bei Stromzuführung rechts spiegelbildlich! Spannungsversorgung AUS Bij stroomtoevoer rechts in spiegelbeeld! Spanningsverzorging UIT Mirror image if power supply on the right! Power supply OFF Leitungsverbinder montieren Kabelverbinding monteren...
- Seite 35 Montageanleitung Montagehandleiding Assembly instructions 4.45 Kapitel / hoofdstuk / chapter: 14 Seite / page / page: 84 Programmierung LED-Beleuchtung Programmering ledverlichting Programming the LED lighting 4.46 Kabelausgang rechts spiegelbildlich Kabeluitgang rechts in spiegelbeeld Cable outlet on the right in mirror image Motor für Absenkung anstecken Motor voor verticale uitval aansluiten Plug in the motor for the descent...
- Seite 36 Montageanleitung Montagehandleiding Assembly instructions 4.47 Kapitel / hoofdstuk / chapter: 12 Seite / page / page: 77 - 81 Programmierung Absenkung Somfy io Programmering verticale uitval Somfy io Programming the Somfy io descent 4.48 Kapitel / hoofdstuk / chapter: 13 Seite / page / page: 82 - 83 Programmierung Absenkung Somfy RTS Programmering verticale uitval Somfy RTS...
- Seite 37 Montageanleitung Montagehandleiding Assembly instructions 4.50 4x D15222: DIN7984 M6x12 4x D40722: DIN9021 6,4 4x D12722: DIN7991 M5x12 4x D55922: DIN 6912 M5x12 1x Z3860000++ 4x D40622: DIN125 5,3 1x Z0640000++ 4x D12722: DIN7991 M5x12 1x Z3860000++ 4x D15222: DIN7984 M6x12 4x D40722: DIN9021 6,4 4x D55922: DIN 6912 M5x12 4x D40622: DIN125 5,3...
- Seite 38 Montageanleitung Montagehandleiding Assembly instructions 4.51 6x D15222: DIN7984 M6x12 6x D40722: DIN9021 6,4 8x D55922: DIN 6912 M5x12 8x D40622: DIN125 5,3 1x Z9540000++ 8x D12722: DIN7991 M5x12 2x Z3860000++ 6x D15222: DIN7984 M6x12 6x D40722: DIN9021 6,4 8x D55922: DIN 6912 M5x12 8x D40622: DIN125 5,3 1x Z9540000++...
-
Seite 39: Freistehende Montage Rahmen Mit Führungsschienen
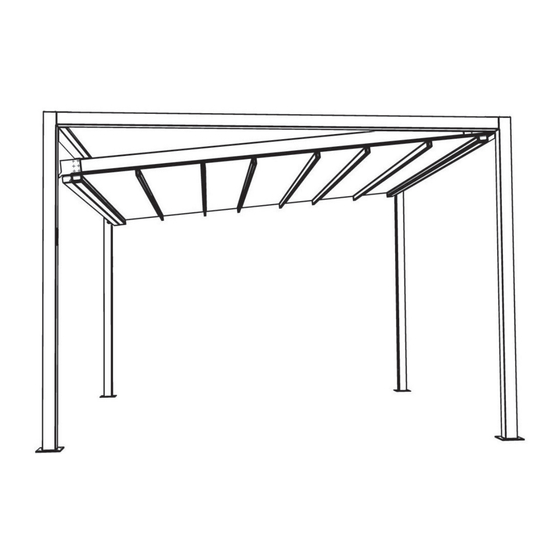
Montageanleitung Montagehandleiding Assembly instructions 5. Freistehende Montage Rahmen mit Führungsschienen Vrijstaande montage frame met geleiders Mounting the frame with guide rails free standing 5.1. Übersicht der Rahmenprofile Overzicht van de frameprofielen Overview of the frame profiles Kabelabgang immer nach rechts ! Kabeluitgang altijd naar rechts Cable outlet always to the right M1/1... - Seite 40 Montageanleitung Montagehandleiding Assembly instructions D40422: DIN125 8,4 D40422: DIN125 8,4 D03322: DIN7984 M8x40 D03322: DIN7984 M8x40 Zuleitung 230V (bauseits) nur in hinteren Stützen möglich! Toevoerleiding 230V (door de klant) alleen mogelijk in de achterste staanders! 230V supply line (provided by customer) only fits in rear upright supports! linke...
- Seite 41 Montageanleitung Montagehandleiding Assembly instructions Leiner Art.-Nr.: H121082464 (Metabo Art.-Nr.: 630463000) 5.2.1 5.2.2 5.2.3 5.2.4 ca. 10mm ca. 1mm 5.2.5 5.2.6 ca. 1mm...
- Seite 42 Montageanleitung Montagehandleiding Assembly instructions 5.2.7 5.2.8 ~25Nm 5.2.9 5.2.10 4x D40422: DIN125 8,4 4x D01722: DIN7984 M8x30 D40422: DIN125 8,4 4x D01722: DIN7984 M8x30 Kabelabgang immer nach rechts! Kabeluitgang altijd naar rechts! Cable outlet always to the right! M1/1...
- Seite 43 Montageanleitung Montagehandleiding Assembly instructions...
- Seite 44 Montageanleitung Montagehandleiding Assembly instructions ca.1/2 (±2cm) ca.1/2 (±2cm) 1x B252000099 1x B251000099 1x B251000099 1x B252000099...
- Seite 45 Montageanleitung Montagehandleiding Assembly instructions 2x D40422: DIN125 8,4 2x D03322: DIN7984 M8x40 2x D40422: DIN125 8,4 2x D03322: DIN7984 M8x40...
-
Seite 46: Führungsschienen Ganz Einschieben
Montageanleitung Montagehandleiding Assembly instructions Führungsschienen ganz einschieben 2x Z734000022 Geleiders helemaal inschuiven Push guide rails all the way in 4x D56022: ISO 7380 M8x14 A2 2x D03622 2x N07330 Stromzufuhr LED rechts spiegelbildlich Stroomtoevoer led rechts in spiegelbeeld LED power supply on the right in mirror image... - Seite 47 Montageanleitung Montagehandleiding Assembly instructions 5.10 2x K24835 2x K24835 Klemmen Klemmen Clamp Sechskant ganz in Getriebe einschieben Zeskant helemaal in windwerk schuiven Push hexagon end all the way into gear mechanism 5.11 verbinden nicht verbinden Niet connect Sechskant ganz in Getriebe einschieben Zeskant helemaal in windwerk schuiven Push hexagon end all the way into gear mechanism...
- Seite 48 Montageanleitung Montagehandleiding Assembly instructions 5.12 5.13 Verbinden & Klemmen Verbinden & klemmen Connect & clamp...
- Seite 49 Montageanleitung Montagehandleiding Assembly instructions 5.14 4x D15922: DIN933 M10x16 4x D96022: DIN6923 M10 2x D56022: ISO7380 M8x14 2x Z7420000++ 4x D96022: DIN6923 M10 4x D15922: DIN933 M10x16 1x Z2190000++ 1x Z2180000++ Ausfall (mm) Uitval (mm) Drop (mm) T(mm) 2500 - 2869 2870 - 3369 3370 - 3869 3870 - 4369...
- Seite 50 Montageanleitung Montagehandleiding Assembly instructions 5.16 Klemmen (4x) Klemmen (4x) Clamp (4x) ~30mm 5.17 Kabelausgang rechts spiegelbildlich Kabeluitgang rechts in spiegelbeeld Cable outlet on the right in mirror image Stecker an Zuleitung montieren. Nicht anstecken! Stekker aan toevoerleiding monteren. Niet insteken! Connect plug to supply line.
- Seite 51 Montageanleitung Montagehandleiding Assembly instructions 5.18 2=L1 E69949 Leitungsverbinder montieren Kabelverbinding monteren Mount cable link 5.19 E69016 Travo 12V 12V DC braun/bruin/brown rot/rood/red schwarz/zwart/black blau/blauw/blue Kabel verbinden Zuleitung isolieren - nicht anklemmen! Kabel verbinden Toevoerleiding isoleren – niet aanklemmen! Connect cable Isolate supply line - do not connect to terminal! Spannungsversorgung EIN Spanningsverzorging AAN...
- Seite 52 Montageanleitung Montagehandleiding Assembly instructions 5.20 Kapitel / hoofdstuk / chapter: 8.1 Seite / page / page: 71 Programmierung Terrassenfaltdach Teil 1 (Somfy io ohne Tuch Programmering terrasvouwdak deel 1 (Somfy io – zonder doek Programming the folding patio roof, part 1 (Somfy io - no fabric 5.21 Kapitel / hoofdstuk / chapter: 10...
- Seite 53 Montageanleitung Montagehandleiding Assembly instructions 5.23 150 60 Bei Stromzuführung rechts spiegelbildlich! Bij stroomtoevoer rechts in spiegelbeeld! Mirror image if power supply on the right! 5.24 Tuch montieren Doek mount Mount fabric Querprofile bündig Dwarsprofielen in één lijn Cross profiles flush...
- Seite 54 Montageanleitung Montagehandleiding Assembly instructions 1. 2. 3..Querprofile eingerückt Querprofile bündig Dwarsprofielen ingedrukt Dwarsprofielen in één lijn Cross profiles indented Cross profiles flush >KLICK< >KLICK< K252++ K24532 K18432 (PA6) K246++ Z905000022 (V4A) Querprofile bündig Dwarsprofielen in één lijn Cross profiles flush Z956000022 (V4A)
- Seite 55 Montageanleitung Montagehandleiding Assembly instructions 5.25 Rinnenstutzen montieren Dichtmasse Afdichtmassa Sealing compound...
- Seite 56 Montageanleitung Montagehandleiding Assembly instructions 5.26 Bei Stromzuführung rechts spiegelbildlich! Bij stroomtoevoer rechts in spiegelbeeld! Mirror image if power supply on the right! 5.27 Bei Stromzuführung rechts spiegelbildlich! Bij stroomtoevoer rechts in spiegelbeeld! Mirror image if power supply on the right! rot / braun rood / bruin red / brown...
- Seite 57 Montageanleitung Montagehandleiding Assembly instructions 5.28 Bei Stromzuführung rechts spiegelbildlich! Bij stroomtoevoer rechts in spiegelbeeld! Mirror image if power supply on the right! 5.29 Bei Stromzuführung rechts spiegelbildlich! Bij stroomtoevoer rechts in spiegelbeeld! Mirror image if power supply on the right!
- Seite 58 Montageanleitung Montagehandleiding Assembly instructions 5.30 Kapitel / hoofdstuk / chapter: 8.2 Seite / page / page: 72 Programmierung Terrassenfaltdach Teil 2 (Somfy io mit Tuch Programmering terrasvouwdak deel 2 (Somfy – met doek Programming the folding patio roof, part 2 (Somfy io with fabric 5.31 Tuchpaket in den Bereich der...
- Seite 59 Montageanleitung Montagehandleiding Assembly instructions Querprofile bündig Dwarsprofielen in één lijn Cross profiles flush Z956000022 (V4A)
- Seite 60 Montageanleitung Montagehandleiding Assembly instructions 5.32 K10835 außen bündig abschneiden aan buitenzijde in één lijn afknippen cut off flush on the outside 5.33 Bei Stromzuführung rechts spiegelbildlich! Spannungsversorgung AUS Bij stroomtoevoer rechts in spiegelbeeld! Spanningsverzorging UIT Mirror image if power supply on the right! Power supply OFF Leitungsverbinder montieren 2=L1...
- Seite 61 Montageanleitung Montagehandleiding Assembly instructions 5.34 Kapitel / hoofdstuk / chapter: 14 Seite / page / page: 84 Programmierung LED-Beleuchtung Programmering ledverlichting Programming the LED lighting 5.35 Kabelausgang rechts spiegelbildlich Kabeluitgang rechts in spiegelbeeld Cable outlet on the right in mirror image Motor für Absenkung anstecken Motor voor verticale uitval aansluiten Plug in the motor for the descent...
- Seite 62 Montageanleitung Montagehandleiding Assembly instructions 5.36 Kapitel / hoofdstuk / chapter: 12 Seite / page / page: 77 - 81 Programmierung Absenkung Somfy io Programmering verticale uitval Somfy io Programming the Somfy io descent 5.37 Kapitel / hoofdstuk / chapter: 13 Seite / page / page: 82 - 83 Programmierung Absenkung Somfy RTS Programmering verticale uitval Somfy RTS...
- Seite 63 Montageanleitung Montagehandleiding Assembly instructions 5.39 (nur bei alleinstehenden Anlagen) (bij alleen staande installaties) (single systems only) 4x D15222: DIN7984 M6x12 4x D40722: DIN9021 6,4 4x D55922: DIN 6912 M5x12 4x D40622: DIN125 5,3 1x Z0640000++ 4x D15222: DIN7984 M6x12 4x D40722: DIN9021 6,4 4x D55922: DIN 6912 M5x12 4x D40622: DIN125 5,3 1x Z0640000++...
- Seite 64 Montageanleitung Montagehandleiding Assembly instructions 5.40 6x D15222: DIN7984 M6x12 6x D40722: DIN9021 6,4 8x D55922: DIN 6912 M5x12 8x D40622: DIN125 5,3 1x Z9540000++ 6x D15222: DIN7984 M6x12 6x D40722: DIN9021 6,4 8x D55922: DIN 6912 M5x12 8x D40622: DIN125 5,3 1x Z9540000++...
- Seite 65 Montageanleitung Montagehandleiding Assembly instructions 5.41 (nur bei nebeneinander stehenden Anlagen) (alleen bij naast elkaar staande installaties) (adjacent systems only) 8x D15222: DIN7984 M6x12 8x D40722: DIN9021 6,4 8x D55922: DIN 6912 M5x12 8x D40622: DIN125 5,3 1x Z0640000++ 8x D15222: DIN7984 M6x12 8x D40722: DIN9021 6,4 8x D55922: DIN 6912 M5x12 8x D40622: DIN125 5,3...
-
Seite 66: Montage Schutzdach
Montageanleitung Montagehandleiding Assembly instructions 6. Montage Schutzdach ( Absenkung in obere Endlage bewegen Montage beschermdak ( erticale uitval naar bovenste eindpositie sturen ! Mounting the hood profile ( Move descent into upper end position ! Ausfall (mm) Uitval (mm) Drop (mm) T(mm) 2500 - 2869 2870 - 3369... - Seite 67 Montageanleitung Montagehandleiding Assembly instructions 3x Ø9mm Ausfall (mm) Uitval (mm) Drop (mm) X(mm) 2500 - 2869 2870 - 3369 3370 - 3869 3870 - 4369 4370 - 4867 4870 - 5369 5370 - 5869 5870 - 6000 2x Ø4,2mm D90420: Ø4x10...
- Seite 68 Montageanleitung Montagehandleiding Assembly instructions 3x Ø9mm...
- Seite 69 Montageanleitung Montagehandleiding Assembly instructions...
-
Seite 70: Montage Aufdoppelungsprofile Für Stirnseitige Montage Canto Qsz
Montageanleitung Montagehandleiding Assembly instructions 7. Montage Aufdoppelungsprofile für stirnseitige Montage CANTO QSZ Montage verdubbelingsprofielen voor montage CANTO QSZ aan kopse zijde Mounting the doubling profiles for face-on assembly of the CANTO QSZ Ø3,9mm TX25 D23222: DIN7981 TX 4,8x9,5 bündig... -
Seite 71: Programmierung Terrassenfaltdach Somfy Io
Montageanleitung Montagehandleiding Assembly instructions 8. Programmierung Terrassenfaltdach Somfy io Programmering terrasvouwdak Somfy io Programming the Somfy io folding patio roof 8.1 Teil 1 (Somfy io - ohne Tuch deel 1 (Somfy io – zonder doek Part 1 (Somfy io - no fabric Rückmeldung Antrieb terugmelding aandrijving ▼▲... - Seite 72 Montageanleitung Montagehandleiding Assembly instructions 8.2 Teil 2 (Somfy io - mit Tuch eel 2 (Somfy io - met doek Part 2 (Somfy io - with fabric 1. Einfache Spannungsunter- brechung durchführen Spanningstoevoer kortstondig ca. 3s onderbreken Unplug, wait a few seconds, then plug in again 2.
-
Seite 73: Tuchspannung Terrassenfaltdach Erhöhen / Verringern (Nur Somfy Io)
Montageanleitung Montagehandleiding Assembly instructions 9. Tuchspannung Terrassenfaltdach erhöhen / verringern (nur Somfy io): nur möglich: - direkt nach dem Speichern der Endlagen - Nach dem Einlernen des ersten Senders in den folgenden 4 Fahrzyklen - Nach einer einfachen Spannungsunterbrechung in den folgenden 4 Fahrzyklen Doekspanning terrasvouwdak verhogen / verminderen (alleen Somfy io) alleen mogelijk: - direct na het opslaan van de eindposities... -
Seite 74: Programmierung Terrassenfaltdach Somfy Rts
Montageanleitung Montagehandleiding Assembly instructions 10. Programmierung Terrassenfaltdach Somfy RTS ( Horizontale Anlage) ohne Tuch Programmering terrasvouwdak Somfy RTS ( horizontale installatie) zonder doek Programming the Somfy RTS folding patio roof ( , horizontal system) no fabric Rückmeldung Antrieb Terugmelding aandrijving ▼▲... - Seite 75 Montageanleitung Montagehandleiding Assembly instructions 5. Untere Endlage einstellen (ca. 5-10mm vor Schienen- korrigieren: ende stoppen ggf. korrigieren) correct: correct: ▲ Onderste eindpositie instellen (ca. 5-10 mm vóór het einde van de geleider stoppen, zo oder STOP nodig corrigeren) ▼ Set lower end position (stop approx.
-
Seite 76: Verstellen Der Oberen Endlage Terrassenfaltdach (Somfy Rts & Io)
Montageanleitung Montagehandleiding Assembly instructions 11. Verstellen der oberen Endlage Terrassenfaltdach (Somfy RTS & io) Verstellen van de bovenste eindpositie terrasvouwdak (Somfy RTS & io) Adjusting the upper end position of the folding patio roof (Somfy RTS & io) Situo io Telis RTS 1. -
Seite 77: Programmierung Absenkung Somfy Io
Montageanleitung Montagehandleiding Assembly instructions 12. Programmierung Absenkung Somfy io Programmering verticale uitval Somfy io Programming the Somfy io descent 12.1 Grundeinstellung Basisinstelling Basic adjustment Rückmeldung Antrieb Terugmelding aandrijving ▼▲ Drive feedback Ausfahren Situo io Uitsturen ▼ Extend Einfahren Insturen ▲ Retract 1. - Seite 78 Montageanleitung Montagehandleiding Assembly instructions kurz kort keine short geen 7. Hubeinheit ca. 10cm unter die obere Endlage bewegen Hefeenheid tot ca. 10 cm vóór de ▲ STOP bovenste eindpositie sturen Move lifting unit to approx. 10cm below upper end position 8.
- Seite 79 Montageanleitung Montagehandleiding Assembly instructions 14. Stellschrauben „U“ am Motor 45° nach links drehen und entriegeln Stelschroeven 'U' aan de motor 45° naar links draaien en ontgrendelen Turn setscrews "U" on motor 45° anticlockwise and unlock kurz kort ▲ short 16. Hubeinheiten ca. 5cm nach oben bewegen und anhalten Hefeenheden ca.
-
Seite 80: Endlagen Der Absenkung Einstellen (Somfy Io)
Montageanleitung Montagehandleiding Assembly instructions 12.2 Endlagen der Absenkung einstellen (Somfy io) Eindposities van de verticale uitval instellen (Somfy io) Adjusting the end positions of the descent (Somfy io) 1. Hubeinheiten in untere Endlage bewegen Hefeenheden naar onderste ▼ eindpositie sturen Move lifting units into lower end position 2. - Seite 81 Montageanleitung Montagehandleiding Assembly instructions 7. Hubeinheiten ca. 3mm unter die obere Endlage bewegen Hefeenheden tot ca. 3 mm vóór STOP ▲ de bovenste eindpositie sturen Move lifting units to approx. 3mm below upper end position 8. Stellschraube „O“ am Motor 45° nach links drehen und entriegeln Stelschroef 'O' aan de motor 45°...
-
Seite 82: Programmierung Absenkung Somfy Rts
Montageanleitung Montagehandleiding Assembly instructions 13. Programmierung Absenkung Somfy RTS Programmering verticale uitval Somfy RTS Programming the Somfy RTS descent 13.1 Grundeinstellung Basisinstelling Basic adjustment Rückmeldung Antrieb Terugmelding aandrijving ▼▲ Drive feedback Ausfahren Telis Uitsturen ▼ Extend Einfahren Insturen ▲ Retract 1. -
Seite 83: Endlagen Der Absenkung Einstellen (Somfy Rts)
Montageanleitung Montagehandleiding Assembly instructions 13.2 Endlagen der Absenkung einstellen (Somfy RTS) Eindposities van de verticale uitval instellen (Somfy RTS) Adjusting the end positions of the descent (Somfy RTS) 1. Hubeinheiten ca. 3mm unter die obere Endlage bewegen Hefeenheden tot ca. 3 mm vóór STOP ▲... -
Seite 84: Programmierung Led-Beleuchtung Programmering Ledverlichting Programming The Led Lighting
Montageanleitung Montagehandleiding Assembly instructions 14. Programmierung LED-Beleuchtung Programmering ledverlichting Programming the LED lighting Situo io 2. Kanal auswählen oder Kies een kanaal select Select channel 3. Handsender zuweisen gleichzeitig Handzender toewijzen gelijktijdig Assign handset at the same time 4. Einstellung speichern Instelling opslaan ca. -
Seite 85: Rücksetzen Auf Werkseinstellung Terugzetten Naar Fabrieksinstellingen Restoring The Factory Settings
Montageanleitung Montagehandleiding Assembly instructions 15. Rücksetzen auf Werkseinstellung Terugzetten naar fabrieksinstellingen Restoring the factory settings Rückmeldung Antrieb Terugmelding aandrijving ▼▲ Drive feedback Situo io Ausfahren Uitsturen ▼ Telis RTS Extend Einfahren ▲ Insturen Retract 1. Kanal auswählen oder Kies een kanaal select Select channel 2.