Sygonix 1762522 Bedienungsanleitung
Inhaltsverzeichnis
Verfügbare Sprachen
Verfügbare Sprachen
Quicklinks
Bedienungsanleitung
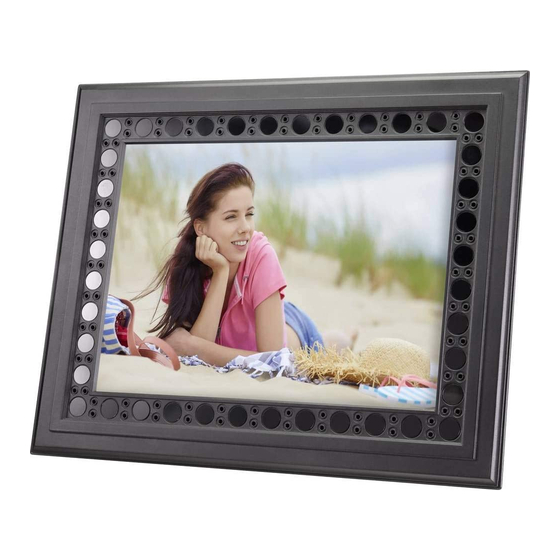
Bilderrahmen mit Überwachungskamera
Best.-Nr. 1762522
Operating Instructions
Photo Frame with Security Camera
Item No. 1762522
Mode d'emploi
Cadre photo équipé d'une caméra de
surveillance
N°de commande 1762522
Gebruiksaanwijzing
Fotolijst met beveiligingscamera
Bestelnr. 1762522
Seite 2 - 19
Page 20 - 35
Page 36 - 53
Pagina 54 - 70
Kapitel
Inhaltsverzeichnis

Inhaltszusammenfassung für Sygonix 1762522
- Seite 1 Bedienungsanleitung Bilderrahmen mit Überwachungskamera Best.-Nr. 1762522 Seite 2 - 19 Operating Instructions Photo Frame with Security Camera Item No. 1762522 Page 20 - 35 Mode d’emploi Cadre photo équipé d’une caméra de surveillance N°de commande 1762522 Page 36 - 53...
-
Seite 2: Inhaltsverzeichnis
Inhaltsverzeichnis Seite 1. Einführung ...........................4 2. Symbol-Erklärungen ......................4 3. Bestimmungsgemäße Verwendung ..................5 4. Lieferumfang ........................5 5. Merkmale und Funktionen ....................5 6. Sicherheitsanweisungen .....................6 a) Allgemeine Hinweise ....................6 b) Akkus..........................7 c) Wandhalterung ......................7 d) Privatsphäre .........................7 e) Computer - USB-Verbindung ..................8 7. - Seite 3 10. Installationsort bestimmen ....................16 a) PIR-Sensor (Bewegungserkennung) ................16 b) Schreibtisch oder Regal .....................17 c) Wandmontage ......................17 11. Kamera zurücksetzen ......................17 12. LED-Status ........................18 13. Pflege und Reinigung ......................18 14. Entsorgung ........................18 15. Technische Daten ......................19...
-
Seite 4: Einführung
1. Einführung Lieber Kunde, wir bedanken uns für den Kauf dieses Produkts. Dieses Produkt erfüllt die gesetzlichen nationalen und europäischen Anforderungen. Um diesen Zustand zu erhalten und einen sicheren Betrieb zu gewährleisten, müssen Sie als Anwender diese Bedienungsanleitung beachten! Diese Bedienungsanleitung gehört zu diesem Produkt. Sie enthält wichtige Hinweise zur Inbetriebnahme und Handhabung. -
Seite 5: Bestimmungsgemäße Verwendung
3. Bestimmungsgemäße Verwendung Das Produkt verfügt über eine verborgene Kamera in einem Bilderrahmen und ist für die Überwachung und Sicherheit vorgesehen. Es darf nicht für rechtswidrige Zwecke verwendet werden. Das Gerät ist nur für den Innengebrauch geeignet. Nicht im Freien verwenden. Der Kontakt mit Feuchtigkeit, z. -
Seite 6: Sicherheitsanweisungen
6. Sicherheitsanweisungen Lesen Sie die Bedienungsanleitung sorgfältig durch und beachten Sie insbesondere die Sicherheitshinweise. Falls Sie die Sicherheitshinweise und Informationen für einen ordnungsgemäßen Gebrauch in dieser Bedienungsanleitung nicht beachten, haften wir nicht für möglicherweise daraus resultierende Verletzungen oder Sachschäden. Außerdem erlischt in solchen Fällen die Gewährleistung/Garantie. -
Seite 7: B) Akkus
b) Akkus • Der Akku ist im Produkt fest eingebaut; Sie können den Akku nicht wechseln. • Beschädigen Sie den Akku niemals. Durch Beschädigung des Akkugehäuses besteht Explosions- und Brandgefahr! • Schließen Sie die Kontakte/Anschlüsse des Akkus niemals kurz. Werfen Sie den Akku bzw. das Produkt nicht ins Feuer. -
Seite 8: Computer - Usb-Verbindung
e) Computer - USB-Verbindung • Dieses Produkt kann an Ihren Computer angeschlossen werden, um Daten über den USB- Anschluss zu lesen / schreiben. • Sobald der Akku angeschlossen ist, wird er aufgeladen. • Wenn der USB-Anschluss Ihres Computers, an den Sie eine Verbindung herstellen, die Stromversorgung nicht einschränkt, schließen Sie das Produkt nicht an. -
Seite 9: Bedienelemente
7. Bedienelemente Bedientaste Wandhalterung Unsichtbare LED 10 REC (Aufnahme) Kameralinse 11 MD (Bewegungserkennung) Fotostand 12 LED-Anzeige (Aufnahme) 13 USB (Micro-USB-Anschluss) PIR-Bewegungssensor 14 Zurücksetzen 15 SD (MicroSD-Kartensteckplatz) Kameralinse Audio Ein / Aus 16 PIR-Bewegungssensor... -
Seite 10: Erste Schritte
8. Erste Schritte a) Entfernen Sie die Rahmenabdeckung • Fädeln Sie das mitgelieferte Farbband wie gezeigt zwischen Rahmenabdeckung und Gehäuse ein. b) Akku aufladen • Verbinden Sie ein Ende des mitgelieferten USB-Kabels mit dem USB-Anschluss (13) des Geräts und das andere Ende mit einem verfügbaren USB-Anschluss Ihres Computers oder eines USB-Ladegeräts (nicht im Lieferumfang enthalten). -
Seite 11: Formatieren Sie Die Microsd-Karte
c) Formatieren Sie die MicroSD-Karte Durch das Formatieren werden alle Daten auf der Karte gelöscht. Stellen Sie sicher, dass Sie alle wichtigen Informationen sichern, bevor Sie die MicroSD-Karte formatieren. • Legen Sie die MicroSD-Karte in den mitgelieferten Kartenleser ein und verbinden Sie sie mit einem vorhandenen USB-Anschluss Ihres Computers. -
Seite 12: Betrieb
9. Betrieb a) Kamera EIN/AUS • Halten Sie zum Einschalten der Kamera die Power-Taste (9) gedrückt, bis die blaue LED leuchtet. • Halten Sie zum Ausschalten der Kamera die Power-Taste (9) gedrückt, bis die blaue und die rote LED abwechselnd aufleuchten. • Wenn sich die Kamera automatisch ausschaltet, kann dies folgende Ursachen haben: - Die Batterie ist zu schwach und muss aufgeladen werden. -
Seite 13: C) Bewegungserkennungsmodus (Pir-Sensor Ein / Aus)
• Drücken Sie Power (9), um die Kamera auf ON zu schalten, und drücken Sie dann REC (10) aufzunehmen. • Die blaue LED blinkt dreimal und erlischt dann. • Drücken Sie die REC (10)-Taste erneut, um die Aufnahme zu stoppen. Das blaue Licht bleibt •... -
Seite 14: Low-Light-Aufnahme
d) Low-Light-Aufnahme Wenn das Umgebungslicht auf unter 20 Lux fällt, wechselt die Kamera automatisch in den Aufnahmemodus mit schwachem Licht und das Video wird in Schwarzweiß wiedergegeben. e) Video-Wiedergabe • Verbinden Sie sich mit dem Computer: - Schalten Sie die Kamera ein und stellen Sie über ein USB-Kabel eine Verbindung zum Computer her. -
Seite 15: Datum, Uhrzeit Und Fortlaufende Aufnahme Einstellen
g) Datum, Uhrzeit und fortlaufende Aufnahme einstellen Wenn Sie die Datei nicht finden, nehmen Sie mit „SETTIME.txt“ einen Videoclip auf, um die Karte zu aktivieren, und stellen Sie Datum und Uhrzeit erneut ein. Das Datum und die Uhrzeit bleiben korrekt, es sei denn, die Batterie ist längere Zeit erschöpft. • Legen Sie die microSD-Karte in den Kartenleser ein und verbinden Sie den Kartenleser mit Ihrem PC. -
Seite 16: Installationsort Bestimmen
10. Installationsort bestimmen a) PIR-Sensor (Bewegungserkennung) Der Aufnahmewinkel der Kamera beträgt 72 ° (horizontal) und 60 ° (vertikal). Horizontale Winkel sind unten angegeben: PIR-Sensor funktioniert möglicherweise nicht richtig hinter Glas. PIR-Sensor 60º Der PIR-Sensor ist in das Produkt integriert und reagiert auf Temperaturänderungen im Erfassungsbereich, z.B. -
Seite 17: Schreibtisch Oder Regal
b) Schreibtisch oder Regal Die Basis des Rahmens kann Spuren hinterlassen oder empfindliche Oberflächen zerkratzen. Der PIR-Erfassungswinkel wird durch den Winkel des auf dem Tisch ruhenden Rahmens beeinflusst. Berücksichtigen Sie den Rahmenwinkel und die Entfernung vom Tischrand. c) Wandmontage • Zur Wandmontage wurden Dübel aus Kunststoff und Schrauben mitgeliefert. •... -
Seite 18: Led-Status
12. LED-Status LED-Aktivität Beschreibung Blau EIN Starten mit eingesteckter microSD-Karte Blaues Blinken 5 Sekunden, dann AUS Inbetriebnahme ohne microSD-Karte Blau EIN Einschalten Blau dreimal blinken, dann AUS Daueraufnahmemodus EIN Blau EIN, dann AUS, Rot bleibt EIN Bewegungserkennungsmodus (PIR-Sensor) Rot und Blau abwechselnd Laden / niedrige Akkuladung Gelb EIN Ladevorgang... -
Seite 19: Technische Daten
15. Technische Daten Eingangsspannung / Strom ....5 V / DC, 2000 mA über 2A USB Wiederaufladbarer Akku ....2 x Li-Po 3,7 V 4500 mAh Akkulaufzeit ........ca. 10 Stunden PIR-Erfassungswinkel ....ca. 60 º (horizontal) PIR-Erfassungsabstand ....max. 5 m Standby-Zeit ........max. 2 Jahre (PIR-Sensor eingeschaltet) Energieverbrauch ...... 1 0 μA (Standby) 220 mA (normales Licht) 650 mA (schwaches Licht) - Seite 71 Dies ist eine Publikation der Conrad Electronic SE, Klaus-Conrad-Str. 1, D-92240 Hirschau (www.conrad.com). Alle Rechte einschließlich Übersetzung sind vorbehalten. Reproduktionen jeder Art, z. B. Fotokopie, Mikroverfilmung oder die Erfassung in elektronischen Datenverarbeitungsanlagen bedürfen der schriftlichen Genehmigung des Herausgebers. Nachdruck, auch auszugsweise, ist verboten. Die Publikation entspricht dem technischen Stand bei Drucklegung.