AURES YUNO-151 Bedienungsanleitung

Inhaltszusammenfassung für AURES YUNO-151
- Seite 1 User Manual POS System series YUNO-151 / YUNO-151K YUNO-156 / YUNO-156-50KH Touch Monitor series YUNO-151TM / YUNO-156TM...
- Seite 1 User Manual POS System series YUNO-151 / YUNO-151K YUNO-156 / YUNO-156-50KH Touch Monitor series YUNO-151TM / YUNO-156TM...
-
Seite 2: Liability Disclaimer
Copyrights this equipment does cause harmful interference to radio television reception, which © 2015 All rights reserved. The information in this determined by turning the equipment off and on, the document is subject to change without prior notice in user is encouraged to try to correct the interference order to improve reliability, design and function and by one or more of the following measures: does not represent a commitment on the part of the... -
Seite 3: Weee Notice
WEEE Notice Safety IMPORTANT SAFETY INSTRUCTIONS To disconnect the machine from the electrical Power Supply, turn off the power switch and remove the power cable plug from the wall socket. The wall socket must be easily accessible and in close proximity to the The WEEE mark applies only to countries within the European Union (EU) and Norway. -
Seite 4: Inhaltsverzeichnis
2.1 Front View ........................4 2.2 Rear View ........................5 2.3 Side View ........................6 2.4 Dimension ........................7 For YUNO-151 / YUNO-151TM ..................7 For YUNO-156 / YUNO-156-50KH / YUNO-156TM ............8 For YUNO-151K ......................9 2.5 I/O View ........................10 2.5.1 POS System series ..................... -
Seite 4: Inhaltsverzeichnis
2.1 Front View ........................4 2.2 Rear View ........................5 2.3 Side View ........................6 2.4 Dimension ........................7 For YUNO-151 / YUNO-151TM ..................7 For YUNO-156 / YUNO-156-50KH / YUNO-156TM ............8 For YUNO-151K ......................9 2.5 I/O View ........................10 2.5.1 POS System series ..................... - Seite 5 5. Specification ....................33 5.1 POS series ........................33 5.2 Touch Monitor series ....................36 6. Configuration ....................38 6.1 POS series – X72 Motherboard .................. 38 6.1.1 Motherboard Layout .................... 38 6.1.2 Connectors & Functions ..................39 6.1.3 Jumper Settings ....................40 6.2 POS series –...
- Seite 5 5. Specification ....................33 5.1 POS series ........................33 5.2 Touch Monitor series ....................36 6. Configuration ....................38 6.1 POS series – X72 Motherboard .................. 38 6.1.1 Motherboard Layout .................... 38 6.1.2 Connectors & Functions ..................39 6.1.3 Jumper Settings ....................40 6.2 POS series –...
-
Seite 6: Item Checklist
1. Item Checklist 1.1 Standard Items 1.1.1 POS System series a. System : YUNO-151 & YUNO-156 / 156-50KH YUNO-151K b. Power Adapter (65W) c. Power Cable d. RJ50-COM Cable 100cm (x3), plus, e. Manual CD RJ50-COM Cable 50cm (x1) Safety Instructions Sheet... -
Seite 6: Item Checklist
1. Item Checklist 1.1 Standard Items 1.1.1 POS System series a. System : YUNO-151 & YUNO-156 / 156-50KH YUNO-151K b. Power Adapter (65W) c. Power Cable d. RJ50-COM Cable 100cm (x3), plus, e. Manual CD RJ50-COM Cable 50cm (x1) Safety Instructions Sheet... -
Seite 7: Touch Monitor Series
1.1.2 Touch Monitor series Touch Monitor : YUNO-151TM & YUNO-156TM b. Power Adapter (65W) c. Power Cable VGA cable 15-pin Male to Male USB cable Type A to Type B (180cm) (180cm) f. Safety Instructions Sheet g. Website Address Sheet h. -
Seite 7: Touch Monitor Series
1.1.2 Touch Monitor series Touch Monitor : YUNO-151TM & YUNO-156TM b. Power Adapter (65W) c. Power Cable VGA cable 15-pin Male to Male USB cable Type A to Type B (180cm) (180cm) f. Safety Instructions Sheet g. Website Address Sheet h. -
Seite 8: Optional Items
1.2 Optional Items YUNO supports full range of peripherals as listed below. Model # Description RS-232 interface YUNO-VFD Attachment-type (integrated) Customer Display USB interface YUNO-2NDLCD10.1 Attachment-type (integrated) Second Display (non-Touch and Touch models) 3-Track USB Keyboard HID YUNO-MSRLONG Attachment-type (integrated) Magnetic Stripe Reader USB interface YUNO-SCANNER2D Attachment-type (integrated) 2D Scanner... -
Seite 9: System View
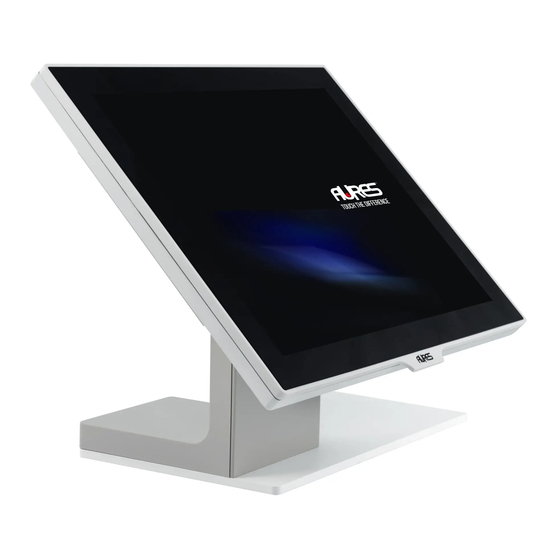
2. System View 2.1 Front View Number Description Bezel Free Panel PC L-Stand System Cover Release Button Base Plate... -
Seite 9: System View
2. System View 2.1 Front View Number Description Bezel Free Panel PC L-Stand System Cover Release Button Base Plate... -
Seite 10: Rear View
2.2 Rear View Number Description Attachment-type Customer Display (YUNO-VFD) service door System Cover service door for peripherals VESA mount (75mm x 75mm) Rear Side Cable service door L-Stand Cover Rear View of YUNO-151K for reference :... -
Seite 10: Rear View
2.2 Rear View Number Description Attachment-type Customer Display (YUNO-VFD) service door System Cover service door for peripherals VESA mount (75mm x 75mm) Rear Side Cable service door L-Stand Cover Rear View of YUNO-151K for reference :... -
Seite 11: Side View
2.3 Side View Number Description Power Button X72 motherboard & Touch Screen Board : 1 x USB 2.0 (Type A) X7D motherboard : 1 x USB 3.0 (Type A) X72 and X7D motherboard : 1 x USB 3.0 (Type A) Touch Screen Board : 1 x USB 2.0 (Type A) -
Seite 11: Side View
2.3 Side View Number Description Power Button X72 motherboard & Touch Screen Board : 1 x USB 2.0 (Type A) X7D motherboard : 1 x USB 3.0 (Type A) X72 and X7D motherboard : 1 x USB 3.0 (Type A) Touch Screen Board : 1 x USB 2.0 (Type A) -
Seite 12: Dimension
2.4 Dimension For YUNO-151 / YUNO-151TM... -
Seite 12: Dimension
2.4 Dimension For YUNO-151 / YUNO-151TM... -
Seite 13: For Yuno-156 / Yuno-156-50Kh / Yuno-156Tm
For YUNO-156 / YUNO-156-50KH / YUNO-156TM... -
Seite 13: For Yuno-156 / Yuno-156-50Kh / Yuno-156Tm
For YUNO-156 / YUNO-156-50KH / YUNO-156TM... - Seite 14 For YUNO-151K...
- Seite 15 2.5 I/O View 2.5.1 POS System series YUNO-151 / 156 / 156-50KH YUNO-151K Bottom-up View Right-side View Bottom-up View Number Description DC-IN jack Combo Audio jack (3.5mm 4 conductor) COM1~4 (from right to left) (RJ50 Connector) LAN (RJ45 Connector) 4 x USB 2.0 (Type A)
- Seite 16 2.5.2 Touch Monitor series Bottom-up View Right-side View...
- Seite 17 Number Description DC-IN jack DVI-IN Connector VGA-IN Connector DP-IN Connector USB 2.0 (Type B) Combo Audio jack (3.5mm 4 conductor) USB 2.0 (Type A) DP-OUT 40-pin Connector LVDS 50-pin Connector OSD Control...
- Seite 18 3. POS System / Touch Monitor Assembly & Disassembly Since YUNO-151K is an alternative Panel PC SKU out from standard YUNO-151, its difference is without the L-Base part. While Touch Monitor series share the same outlook of POS System series,...
- Seite 19 1. Remove the System Cover To open the System Cover, please refer to the procedures described in Chapter 3-1 and remove it. YUNO-151 / 156 / 156-50KH YUNO-151K 2. Remove the old drive (if applicable). If you are removing a HDD or SSD, make sure all of the cables are disconnected from both the motherboard and the power supply.
- Seite 20 3. Insert your new drive. Remove it from the antistatic packaging and slide it into your target drive bay of the storage housing. 4. Secure the storage disk drive. Once the storage disk drive has been completely inserted, rotate the Releasing Handler to lock it properly.
- Seite 21 HDD2 is for the secondary storage disk drive. Make sure that all of your connections are secure. 7. Get ready to power on the system. YUNO-151 / 156 / 156-50KH YUNO-151K Close up the System Cover. Reconnect the cable plug onto the wall socket and turn your YUNO on.
- Seite 22 1. Remove the System Cover To open the System Cover, please refer to the procedures described in Chapter 3-1 and remove it. YUNO-151 / 156 / 156-50KH YUNO-151K 2. Locate the memory slot at the left rear side of the system.
- Seite 23 4. Slide the memory module into the memory slot and press down until the ejector clips snaps in place. 5. Close up the System Cover. YUNO-151 / 156 / 156-50KH YUNO-151K...
- Seite 24 1. To open the System Cover, please refer to the procedures described in Chapter 3-1, and remove it. YUNO-151 / 156 / 156-50KH YUNO-151K 2. Locate the power connector on the I/O panel (please refer to Chapter 2-5) and connect the plug of power adapter directly to the DC-IN jack.
- Seite 25 3. Remove the L-Stand / VESA Cover to locate the rest of DC cord properly. YUNO-151 / 156 / 156-50KH YUNO-151K 4. After finish, slide in the L-Stand / VESA Cover and close up the System Cover. YUNO-151 / 156 / 156-50KH...
- Seite 26 3.5 Install the Wall-mount Before you begin, make sure you have two screws that indicate a diameter measurement of 0.1377nches (3.5mm). 1. Determine where you want to mount the YUNO. 2. Drill two holes into the wall. Make sure adjacent holes are 2.95 inches (75mm) apart. 3.
- Seite 27 Please follow the below steps to get it ready for the mounting process : 1. Remove the System Cover. To open the System Cover, please refer to the procedures described in Chapter 3-1, and remove it. 2. Remove the L-Stand Cover. 3.
- Seite 28 5. Get ready to the mounting process. YUNO-151 / 156 / 156-50KH and YUNO-151K Close up the System Cover and then mount it to a stand or wall with four M4 screws easily.
- Seite 29 4. Peripherals Installation 4.1 Install the Cash Drawer You can install a cash drawer through the cash drawer port. Please verify the pin assignment before installation. Cash Drawer Pin Assignment Signal DOUT bit0 DIN bit0 12V / 19V DOUT bit1 Cash Drawer Controller Register The Cash Drawer Controller use one I/O addresses to control the Cash Drawer.
- Seite 30 BIT7: Reserved Cash Drawer “DIN bit0” pin input status. BIT6: = 1: the Cash Drawer closed or no Cash Drawer = 0: the Cash Drawer opened BIT5: Reserved BIT4: Reserved Cash Drawer “DOUT bit1” pin output control. BIT3: = 1: Opening the Cash Drawer = 0: Allow close the Cash Drawer Cash Drawer “DOUT bit0”...
- Seite 31 YUNO-2NDLCD10.1 *Apply the above procedures when installing the Attachment-type Customer Display (YUNO-VFD) and Second Display (YUNO-2NDLCD10.1) on Touch Monitor series. **Please get Prolific USB-to-COM driver from AURES Technical Support Website when connecting Touch Monitor with YUNO-VFD (which is RS-232 interface).
- Seite 32 ***Application scenario to explain the connection between 10.1" Second Display (YUNO-2NDLCD10.1) and YUNO Touch Monitor via different video ports Display Display Video Source YUNO Touch Monitor YUNO-2NDLCD10.1 VGA only DVI only DP only VGA + DP DVI + DP...
- Seite 33 4.3 Install other Attachment-type Peripherals Attachment-type peripherals, including YUNO-MSRLONG, YUNO-SCANNER2D, YUNO-DALLAS and YUNO-ADDIMAT Reader, may be easily installed at either side of the system. YUNO-MSRLONG is used as an installation representative for elaboration. Make sure the unit is powered off before starting. Please follow the below steps to finish the installation : 1.
- Seite 34 4.4 Install the Wi-Fi Bluetooth Module (YUNO-KIT-WIFI) 1. Package Content Intel® Dual Band Wireless-AC 3160 802.11ac, dual band, 1x1, Wi-Fi + Bluetooth 4.0 adapter (named as the “adapter” throughout the rest of this document) Wi-Fi Antenna Bluetooth Antenna 2.
- Seite 35 4. Installation and Removal Instructions Make sure the system is powered off before starting. Step 1 Detach the Kit Box from your YUNO POS system Remove two screws Remove the top cover Step 2 Locate the Bluetooth Antenna at the right side of the Kit Box bottom cover and screw it securely...
- Seite 36 Locate the Wi-Fi Antenna at the left side of the Kit Box top cover and glue it securely Install the adapter on the mini PCI-E slot of the motherboard Secure both connection wires of the two antenna with the adapter...
- Seite 37 Step 3 Locate the two connection wires properly and place back the top cover onto the Kit Box Secure the two screws properly Install the Kit Box back to YUNO POS system *Please refer to below link to download its device drivers per your needs : https://downloadcenter.intel.com/search?keyword=Intel%C2%AE+Dual+Band+Wireless-AC+3160...
- Seite 38 5. Specification 5.1 POS series Model Name YUNO Model Number YUNO-151 / YUNO-151K YUNO-156 YUNO-156-50KH CPU support X72 motherboard (Bay Trail platform) : Intel® Bay Trail-M SoC Processor J1900 (2M Cache, up to 2.42 GHz)) X7D motherboard (Broadwell platform) : Intel®...
- Seite 39 Side I/O Power Button 1 x with power indicator (blue color when power ON) X72 motherboard : 1 x USB 2.0 and 1 x USB 3.0 X7D motherboard : 2 x USB 3.0 Rear Bottom I/O DC-IN jack 1 x radio jack connector for 19V DC input Audio jack 1 x 4-conductor 3.5mm audio jack for MIC-in and Line-out Serial / COM...
- Seite 40 360.1 x 171.5 x 316.1 mm 402.2 x 171.5 x 295.3 mm YUNO-151K : 360.1 x 45 x 283.1 mm Weight (N.W./G.W.) YUNO-151 : 10kg / 11kg YUNO-156 : 11kg / 12kg YUNO-151K : 8.6kg / 9.6kg YUNO-156-50KH : 11.5kg / 12.5kg OS support Windows®...
- Seite 41 Touch Monitor series Model Name YUNO Model Number YUNO-151TM YUNO-156TM Touch Screen Board Scaler Chip NT68856 Audio 2W Speaker x 1 LCD Panel LCD size 15.0" 15.6" (Innolux G150XGE-L05) (AUO G156XW01_V3) Brightness in cd/m² Maximal resolution 1024 x 768 1366 x 768 Aspect Ratio 16:9 Backlight Type...
- Seite 42 Magnetic Stripe Reader Attachment-type 3-Track USB Keyboard HID (YUNO-MSRLONG option) 2D Scanner Attachment-type USB interface (YUNO-SCANNER2D option) Dallas Key Reader Attachment-type Keyboard and Serial emulation USB interface (YUNO-DALLAS option) Addimat Key Reader Attachment-type Keyboard and Serial emulation USB interface (YUNO-ADDIMAT option) DC/DC Switching Adapter Input 36Vdc to Output 19Vdc Switching Adapter (YUNO-P2419 option)
-
Seite 43: Configuration
6. Configuration 6.1 POS series – X72 Motherboard 6.1.1 Motherboard Layout... - Seite 44 6.1.2 Connectors & Functions Connectors Functions Internal LVDS1 50-pin connector LVDS2 40-pin connector HDD1 SATA power connector HDD2 SATA power connector INT_SP Speaker connector DIMM1 DDR3 SO-DIMM CRT1 VGA connector (internal) LCD Enable Level Select LCD Power Select RJ12 Power Select External Power Button DC-IN...
-
Seite 45: Jumper Settings
6.1.3 Jumper Settings LCD Enable Level Select Function (1-2)(2-3) 1 2 3 1 2 3 +3.3V (Default) LCD Power Select Function (1-2)(2-3) 1 2 3 1 2 3 +3.3V (Default) RJ12 Cash drawer Power Select Function (1-2)(2-3) 1 2 3 +19V (Default) 1 2 3 +12V... - Seite 46 6.2 POS series – X7D Motherboard 6.2.1 Motherboard Layout...
- Seite 47 6.2.2 Connectors & Functions Connectors Functions Internal LVDS2 50-pin connector LVDS1 40-pin connector HDD1 SATA power connector HDD2 SATA power connector INT_SP Speaker connector DIMM1 DDR3 SO-DIMM LCD Enable Level Select LCD Power Select RJ12 Power Select External Power Button DC-IN DC-IN jack 3.5mm 4 conductor Audio jack...
- Seite 48 6.2.3 Jumper Settings LCD Enable Level Select Function (1-2)(2-3) 1 2 3 1 2 3 +3.3V (Default) LCD Power Select Function (1-2)(2-3) 1 2 3 1 2 3 +3.3V (Default) RJ12 Cash drawer Power Select Function (1-2)(2-3) 1 2 3 +19V (Default) 1 2 3 +12V...
- Seite 49 6.3 Touch Monitor series – Touch Screen Board 6.3.1 Touch Screen Board Layout...
- Seite 50 6.3.2 Connectors & Functions Connectors Functions Internal LVDS1 Multiple Function for LVDS,USB etc. DP-OUT Multiple Function for LVDS, VFD etc. INT_SP1 Speaker Out External DC-IN 19V IN USB20_1 USB 2.0 Port USB20_2 USB 2.0 Port Display Port DVI-IN DVI-IN VGA-IN VGA-IN USB20_IN USB20_TYPE B...
- Seite 51 6.3.3 Jumper Settings Backlight Enable Level Select Function (1-2)(2-3) 1 2 3 NORMAL (Default) 1 2 3 Clear CMOS LCD Power Select Function (1-2)(2-3) 1 2 3 19V (Default) 1 2 3 VLED Power Select Function (1-2)(2-3) 1 2 3 NORMAL (Default) 1 2 3 Clear CMOS...
- Seite 52 Appendix A: Driver Installation To download the most recent drivers and utilities, and obtain advice regarding the installation of your equipment, please visit the AURES Technical Support Website: www.aures-support.fr(French) www.aures-support.fr/UK(English) www.aures-support.fr/GE(German)
- Seite 53 1. Installation Note of USB 3.0 Driver with Bay Trail YUNO Please follow below steps to make YUNO able to access USB 3.0 devices. Step 1. Enter "Advanced" Tab Select "South Cluster Configuration" Step 2. Select "USB Configuration"...
- Seite 54 Step 3. Set xHCI Mode Smart Auto Step 4. Save the above settings and boot into POS Ready 7 or Windows 7 Step 5. Install USB 3.0 driver on POS Ready 7 or Windows 7...
- Seite 55 Install Windows OPK Install USB 3.0 driver at POSReady 7 DVD “sources” folder boot.wim. Dism /mount-wim /wimfile:f:\sources\boot.wim /mountdir:e:\winpeusb30 /index:1 Tips: /wimfile:f:\sources\boot.wim this is the POSReady 7 DVD “sources” folder file name “boot.wim” /mountdir:e:\winpeusb30 this is a temporary folder. It could be drive : c, or drive : d, as you create and name it. /index:1 this is always 1.
- Seite 56 Dism /image:e:\winpeusb30 /add-driver /driver:f:\test\setupusb3\drivers /recurse Tips: /image:e:\winpeusb30 this is a temporary folder. /driver:f:\test\setupusb3\drivers this is the USB 3.0 driver folder...
- Seite 57 Dism /unmount-wim /mountdir:e:\winpeusb30 /commit Tips: /image:e:\winpeusb30 this is a temporary folder. During install the POSReady 7, there will have an installation of additional driver option. Please select it and install additional USB 3.0 driver. Or, follow the above step to install USB 3.0 at POSReady 7 DVD “sources” folder file name “install.wim”.
- Seite 58 After installation of Windows 7 USB 3.0 driver, reboot and enter BIOS setup menu to change following setting to make USB 3.0 driver with xHCI Mode effect. Enter "Advanced" Tab, select "South Cluster Configuration", select "USB Configuration". Step 5. Setting EHCI Controller Disable Step 6.
- Seite 59 2. Application Note of installing POSReady 7 or Windows 7 with Broadwell YUNO Please follow below steps to install POSReady 7 or Windows 7 with Broadwell YUNO. Step 1. XHCI option (Advanced – USB Configuration) needs to be set at “Auto” in BIOS, and then start to install POSReady 7 or Windows 7.
- Seite 60 Step 2. When the installation is completed, please install all the drivers (including USB 3.0 driver) Step 3. When USB 3.0 driver has been installed, the XHCI option has to be set to “Enabled” in BIOS.
- Seite 61 Appendix B: Customer Display Command Settings 1. FEATURES (1) Data can be displayed on 20 columns x 2 lines. (2) Blue-green color and large characters are easy to eye. (3) The commands modes, fonts, baud rate and other parameters are selected by software.
-
Seite 62: General Specifications
2. GENERAL SPECIFICATIONS Item Description Display method Vacuum fluorescent display Number of character 40 characters ( 20 columns x 2 lines) Character font 5 x 7 dot matrix Display color Blue green Brightness ~ 500 cd/m² 96 alphanumeric Character type 13 kinds of international character set 1 kind of user define character Character size... - Seite 63 3. INTERFACE 3.1 RS-232C Specifications Data transmission Serial Synchronization Asynchronous Handshaking DTR / DSR MARK = -3 to –15 V (logic “1”) Signal level SPACE = +3 to +15 V (logic “0”) Baud rates 4800,9600,19200,38400 or 115200 bps None parity, 8 data bits or Parity and bit length Even parity, 7 data bits Stop bits...
- Seite 64 4. CONNECTOR AND JUMPER 4.1 RS232C connecter (CN6) Connector type: JST/ZH/1.5mm/6P Pin assignment Signal Direction Function Description From display to PC/Host From PC/Host to display From display to PC/Host From PC/Host to display Signal ground Power 5 Vdc 4.2 USB connecter (CN2) Connector type: JST/ZH/1.5mm/4P Pin assignment Signal...
- Seite 65 5. COMMAND 5.1 CD5220 Standard Mode Command List Command Code (hex) Function Description ESC DC1 1B 11 Overwrite mode ESC DC2 1B 12 Vertical scroll mode ESC DC3 1B 13 Horizontal scroll mode Set the string display mode,write string to upper ESC QA ..CR 1B 51 41 data x m 0D line...
- Seite 66 Define download characters. ESC & s n m 32 ≦ n ≦ m 255 1B 26 1 n m [a(p1..pa)] [a (P1..pa)]x 1 ≦a ≦ 5 x (m-n+1) (m-n+1) p1..p5 =row1..row5 Deletes download characters. ESC ? n 1B 3F n 32 ≦...
- Seite 67 *REMARK : *1 The parameter of international fonts set control by command “ESC f n” Parameter “n” International font set “A” U.S.A. “G” Germany “I” Italy “J” Japan “U” U.K. “F” France “S” Spain “N” Norway “W” Sweden “D” Denmark I “E”...
- Seite 68 5.2 UTC standard mode command list Command Code (hex) Function Description Display Dimming EOT n 04 n n = 20h, 40h, 60h, FFh Back space Horizontal tab Line feed Carriage return Display position Over write display mode Vertical scroll mode Cursor on Cursor off Clear to end of line...
- Seite 69 5.3 UTC enhanced mode command list Command Code (hex) Function Description Flashing text start Flashing text stop Upper line display ESC u A ..CR 1B 75 41 data x m 0 ≦ m ≦ 20 Bottom line display ESC u B ..CR 1B 75 42 data x m 0D 0 ≦...
- Seite 70 5.4 AEDEX mode command list Command Code (hex) Function Description Upper line display 1 ..CR 21 23 31 data x m 0D 0 ≦ m ≦ 40 Bottom line display 2 ..CR 21 23 32 data x m 0D 0 ≦ m ≦ 40 Upper line message scroll continuously 4 ..CR 21 23 34 data x m 0D...
- Seite 71 5.5 PD3000 mode command list Command Code (hex) Function Description Vertical Scroll Mode Normal Display Mode Brightness Control Back Space Horizontal Tab Line Feed Carriage Return Digit Select Cursor On Cursor Off Reset Down Load Font ENQ d1~d45 CR 05 d1~d45 0D Message Scroll Data to Peripheral 21 23 02...
- Seite 72 5.6 ADM788 mode command list Command Code (hex) Function Description Clear display Carriage return SLE1 Clear up line and move cursor to upper line left most end SLE2 Clear low line and move cursor to lower line left most end Set period to upper line last n position DC0 n 10 n...
- Seite 73 5.7 DSP-800 mode command list Command Code (hex) Function Description EOT SOH I n ETB 04 01 49 n 17 Select international character set. Move cursor to specified position. EOT SOH P n ETB 04 01 50 n 17 31H ≦ n ≦ 58H Clear display range from position to position and move cursor to...
- Seite 74 *REMARK : *1 Using commands “EOT SOH S n ETB”, the value (Hex) of parameter. Layer 31h Save data in layer 1 32h Save data in layer 2 33h Save data in layer 3 *2 Using commands “EOT SOH D n m ETB”, the value (Hex) of parameter. WinPOS extended “select mode”...
- Seite 75 5.8 EPSON Esc / pos command list Command Code (hex) Function Description Move cursor right. Move cursor left. US LF 1F0A Move cursor up. Move cursor down. US CR 1F 0D Move cursor to right-most position. Move cursor to left-most position. Move cursor to home position.
- Seite 76 Select/cancel download character set. ESC % 1B 25 n n = 0 , Cancel n = 1 , Select Select peripheral device. ESC = n 1B 3D n n bit 0 = 1 select printer n bit 1 = 1 select display US : 1F3A Set starting/ending position of macro definition.
-
Seite 77: Character Set
6. CHARACTER SET 6.1 International Font 6.1.1 USA, standard character set (20h – 7Eh) - Seite 78 6.1.2 Other character sets Country\Hex U.S.A France Germany Denmark I Sweden Italy Spain Japan Norway Denmark II Slavonic Russia...
- Seite 79 6.2 Code Page 6.2.1 Page 0 (PC437: USA, Standard Europe) (80H – FFH)
- Seite 80 6.2.2 Page 1 (Katakana) (80H – FFH)
- Seite 81 6.2.3 Page 2 (PC850: Multilingual) (80H – FFH)
- Seite 82 6.2.4 Page 3 (PC860: Portuguese) (80H – FFH)
- Seite 83 6.2.5 Page 4 (PC863: Canadian-French) (80H – FFH)
- Seite 84 6.2.6 Page 5 (PC865: Nordic) (80H – FFH)
- Seite 85 6.2.7 Page 6 (Slavonic) (80H – FFH)
- Seite 86 6.2.8 Page 7 (Russia) (80H – FFH)
- Seite 87 6.2.9 Page 19 (PC858 Euro) (80H – FFH)
- Seite 88 6.2.10 Page 16 (WPC1252) (80H – FFH)
- Seite 89 6.2.11 Page 12 (Greek) (80H – FFH)
- Seite 90 6.2.12 Page 26 (WPC-1257) (80H – FFH)
- Seite 91 6.2.13 Page 64 (ISO8859-7) (80H – FFH) 0A 0B 0C 0D 0E 0F...
- Seite 92 6.2.14 Page 66 (PC857: Turkish) (80H – FFH) 0A 0B 0C 0D 0E 0F...