Hitachi RAS-24G5 Bedienungsanleitung

Verwandte Anleitungen für Hitachi RAS-24G5


Inhaltszusammenfassung für Hitachi RAS-24G5
- Seite 1 SPLIT TYPE INDOOR UNIT/OUTDOOR UNIT MODEL RAS-24G5 / RAC-24G5 INDOOR UNIT RAS-24G5 OUTDOOR UNIT RAC-24G5...
- Seite 22 MEMO ............................................................................................................................................................................................................................................................................................................................................................................................................................................................................................................................................................................................................................................................................................................................................................................................................................................................................................................................................................................................................................................................................................................................................................................................................................................................................................................................................................................................................................................................................–...
- Seite 23 MEMO ............................................................................................................................................................................................................................................................................................................................................................................................................................................................................................................................................................................................................................................................................................................................................................................................................................................................................................................................................................................................................................................................................................................................................................................................................................................................................................................................................................................................................................................................................–...
-
Seite 24: Raumklimagerät Nach Dem Split-System
RAUMKLIMAGERÄT NACH DEM SPLIT-SYSTEM INNENGERÄT/AUSSENGERÄT MODELL RAS-24G5 / RAC-24G5 INNENGERÄT RAS-24G5 AUSSENGERÄT RAC-24G5 – 5 –... -
Seite 25: Sicherheitshinweise
SICHERHEITSHINWEISE ● Lesen Sie die folgenden Sicherheitshinweise sorgfältig durch, bevor Sie das Gerät in Betrieb nehmen, um eine ordnungsgemäße Verwendung sicherzustellen. ● Achten Sie besonders auf mit „ Warnung“ und „ Vorsicht“. Wenn mit „Warnung“ gekennzeichnete Hinweise nicht strengstens beachtet werden, kann dies schwere oder tödliche Verletzungen zur Folge haben. - Seite 26 VORSICHTSMASSNAHMEN FÜR DEN BETRIEB ● Das Produkt muss entsprechend der Herstellerspezifi kation bedient werden und ist für keine sonstigen Verwendungszwecke vorgesehen. ● Versuchen Sie nicht, das Gerät mit nassen Händen zu bedienen – es besteht Lebensgefahr. ● Wenn Sie das Gerät bei gleichzeitigem Gebrauch von Brennstoffen betreiben, lüften Sie den Raum regelmäßig, um eine ausreichende Sauerstoffzufuhr zu gewährleisten.
-
Seite 27: Bezeichnungen Und Funktionen Von Jedem Teil
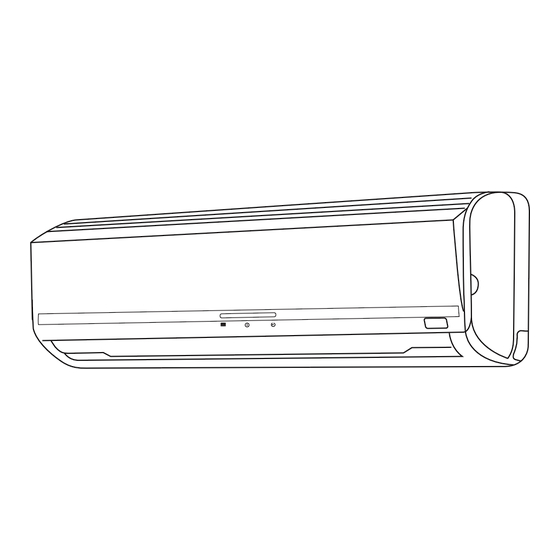
Betrieb des gesamten Geräts. (Siehe Bedienungsanleitung) AUSSENGERÄT Abfl ussleitung Kondenswasserabfl uss nach außen Verbindungsleitung und Rohrisolierung für Leitungen Lufteinlass (Rückseite und links) Luftauslass BEZEICHNUNG UND ABMESSUNGEN DES MODELLS MODELL BREITE (mm) HÖHE (mm) TIEFE (mm) RAS-24G5 1030 RAC-24G5 – 6 –... - Seite 28 ANZEIGEN DES INNENGERÄTS BETRIEBSANZEIGE Diese Anzeige leuchtet während des Betriebs auf. TIMER-LAMPE Diese Lampe leuchtet, wenn der Timer in Betrieb ist. FILTER-LAMPE Wenn das Gerät eine Gesamtbetriebsdauer von ca. 200 Stunden erreicht hat, leuchtet die FILTER-Lampe auf und zeigt dadurch an, dass der Filter gereinigt werden muss. Die Lampe erlischt, wenn die Taste (AUTOMATIK- SCHWINGKLAPPE) gedrückt wird, während sich das Gerät...
-
Seite 29: Bezeichnungen Und Funktionen Der Fernbedienungselemente
BEZEICHNUNGEN UND FUNKTIONEN DER FERNBEDIENUNGSELEMENTE FERNBEDIENUNG Hiermit wird der Betrieb des Innengeräts gesteuert. Signalreichweite zum Innengerät beträgt ca. 7 Meter. Wird die Wechselrichterlampe verwendet, kann die Reichweite der Fernbedienung kürzer sein. Dieses Gerät kann mit der bereitgestellten Halterung an der Wand montiert werden. Stellen Sie vor der Montage sicher, dass das Innengerät über die Fernbedienung gesteuert werden kann. - Seite 30 KÜHLBETRIEB Verwenden Sie das Gerät zum Kühlen, wenn die Außentemperatur zwischen 21 und 43°C liegt. Wenn die Luftfeuchtigkeit im Raum sehr hoch ist (über 80 %), kann sich Kondensat am Luftauslassgitter des Innengeräts bilden. Drücken Sie die die Taste , damit auf dem Display der Betriebsmodus (KÜHLEN) angezeigt wird.
-
Seite 31: Entfeuchterbetrieb
ENTFEUCHTERBETRIEB Verwenden Sie das Gerät zum Entfeuchten, wenn die Raumtemperatur über 16 °C liegt. Unter 15 °C steht die Entfeuchterfunktion nicht zur Verfügung. Drücken Sie die die Taste , damit auf dem Display der Betriebsmodus (ENTFEUCHTEN) angezeigt wird. Zu Beginn des Entfeuchterbetriebs wird ein Signalton ausgegeben. -
Seite 32: Zirkulationsbetrieb
ZIRKULATIONSBETRIEB Drücken Sie die Taste , damit auf dem Display der Betriebsmodus (ZIRKULATION) angezeigt wird. Zu Beginn des Zirkulationsbetriebs wird ein Signalton ausgegeben. Drücken Sie die LÜFTERDREHZAHL-Taste, um die gewünschte LÜFTERDREHZAHL auszuwählen (die Einstellung wird auf dem Display angezeigt). Drücken Sie die Temperaturregelungstaste, um die gewünschte Temperatur einzustellen. - Seite 33 SO STELLEN SIE DEN BETRIEBSZEIT-TIMER EIN Drücken Sie die Taste (BETRIEBSZEIT). Die Anzeige auf dem Display ändert sich, wie unten abgebildet. Modus Anzeige 1 Stunde 2 Stunden 3 Stunden 7 Stunden Betriebszeit-Timer Betriebszeit-Timer aus Betriebszeit-Timer: Das Gerät läuft für die angegebene Anzahl Stunden weiter und wird dann ausgeschaltet.
- Seite 34 SO STELLEN SIE DEN TIMER EIN ■ Es stehen ein EINSCHALT-Timer und AUSSCHALT-Timer zur Verfügung. ■ Abbruch des Betriebs bei Einstellzeit AUSSCHALT-Timer-Reservierung AUSSCHALTZEIT-Einstellung ● Wählen Sie die AUSSCHALTZEIT, indem Sie die Taste (AUS) drücken. ● Die Einstellzeit wechselt in der unten gezeigten Reihenfolge, wenn Sie die Taste drücken.
-
Seite 35: Einstellen Der Luftdeflektoren
EINSTELLEN DER LUFTDEFLEKTOREN Einstellung des Ausstroms der klimatisierten Luft in Auf- und Abwärtsrichtung. Der Winkel des horizontalen Luftdeflektors wird automatisch entsprechend der jeweiligen Betriebsart eingestellt. Der Luftdefl ektor kann ständig nach oben und unten schwingen und auch auf einen gewünschte Winkel eingestellt werden. - Seite 36 SO WECHSELN SIE DIE BATTERIEN IN DER FERNBEDIENUNG AUS Wenn die Klimaanlage nicht auf die Fernbedienung reagiert oder deren Anzeige dunkler wird, müssen die Batterien der Fernbedienung ersetzt werden. Entfernen Sie die Abdeckung, wie in der Abbildung gezeigt, und nehmen Sie die alten Batterien heraus. Legen Sie die neuen Batterien ein.
-
Seite 37: Idealer Betrieb
IDEALER BETRIEB Angemessene Raumtemperatur Vorhänge oder Jalousien anbringen Warnung Sie können damit Zu kühle verhindern, dass Temperaturen sind Hitze durch die gesundheitsschädlich und Fenster in das verbrauchen viel Strom. Zimmer gelangt. Lüftung Effektive Nutzung des Timers Verwenden Sie nachts den Ausschalt- oder Vorsicht Einschalt-Timer und stellen Sie Ihre morgendliche Aufwachzeit ein. -
Seite 38: Informationen Für Den Benutzer
INFORMATIONEN FÜR DEN BENUTZER Klimaanlage und Wärmequellen im selben Raum Vorsicht Wenn die Temperatur im Raum die Kühlleistung der Klimaanlage übersteigt (z. B. wenn sich mehrere Personen im Raum aufhalten, zusätzliche Heizgeräte verwendet werden usw.), kann die voreingestellte Raumtemperatur nicht erreicht werden. Wenn das Gerät über einen längeren Zeitraum nicht verwendet wird Wenn das Innengerät für einen längeren Zeitraum nicht betrieben wird, unterbrechen Sie die Stromversorgung... -
Seite 39: Anbringen Der Luftreinigungsfilter
ANBRINGEN DER LUFTREINIGUNGSFILTER VORSICHT Wenn die Filterlampe leuchtet, muss das Gerät gereinigt und gewartet werden. Stellen Sie vor dem Reinigen sicher, dass das Gerät ausgeschaltet ist und die Stromversorgung getrennt wurde. Öffnen der Frontblende ● Heben Sie die Frontblende an. Halten Sie sie dabei an beiden Seiten mit den Händen. -
Seite 40: Wartung
WARTUNG VORSICHT Wenn die Filterlampe leuchtet, muss das Gerät gereinigt und gewartet werden. Stellen Sie vor dem Reinigen sicher, dass das Gerät ausgeschaltet ist und die Stromversorgung getrennt wurde. 1. VOR-FILTER Reinigen Sie den Vorfi lter, da er Staub aus der Raumluft entfernt. Ist der Vorfi lter mit Staub zugesetzt, wird das Luftvolumen reduziert und die Kühlleistung beeinträchtigt. -
Seite 41: Wartung Vor Längeren Nutzungspausen
Abwaschbare Frontblende ● Entfernen Sie die Frontblende und reinigen Sie sie mit sauberem Wasser. Waschen Sie sie mit einem weichen Schwamm Nach der Verwendung eines neutralen Reinigungsmittels spülen Sie sie gründlich mit sauberem Wasser. ● Wenn die Frontblende nicht entfernt wird, wischen Sie sie mit einem weichen, trockenen Tuch ab. -
Seite 42: Regelmässige Inspektion
VORSICHT ● Schließen Sie das Erdungskabel an. Verlegen Sie das Erdungskabel nicht in der Nähe von Wasser- oder Gasleitungen, Blitzableitern oder dem Erdungskabel des Telefons. Unsachgemäße Installation des Erdungskabels kann zu Stromschlägen führen. ● Es muss ein Trennschalter installiert werden, der für den Montageort geeignet ist. Ohne Trennschalter besteht Stromschlaggefahr. -
Seite 43: Kundendienst Und Garantie
KUNDENDIENST UND GARANTIE WENN SIE SICH AN DEN KUNDENDIENST WENDEN, ÜBERPRÜFEN SIE DIE FOLGENDEN PUNKTE ZUSTAND FOLGENDE PUNKTE ÜBERPRÜFEN ● Ist die Sicherung in Ordnung? ● Ist die Spannung äußerst hoch oder niedrig? Das Gerät funktioniert nicht ● Ist der Trennschalter eingeschaltet? ●... - Seite 44 VORSICHT: (Modell RAS-24G5/RAC-24G5) Dieses Gerät ist für den Betrieb an einem Stromnetz mit einer maximalen Systemimpedanz von 0,097 Ohm oder 0,082+0,051j Ohm am Hausanschlusspunkt ausgelegt. Der Anwender muss sicherstellen, dass das Gerät nur an einem Stromnetz unter diesen Bedingungen betrieben wird. Die Anschlussbedingungen können beim Stromversorgungsunternehmen erfragt werden.
- Seite 45 NOTIZEN ............................................................................................................................................................................................................................................................................................................................................................................................................................................................................................................................................................................................................................................................................................................................................................................................................................................................................................................................................................................................................................................................................................................................................................................................................................................................................................................................................................................................................................................................................–...
- Seite 46 NOTIZEN ............................................................................................................................................................................................................................................................................................................................................................................................................................................................................................................................................................................................................................................................................................................................................................................................................................................................................................................................................................................................................................................................................................................................................................................................................................................................................................................................................................................................................................................................................–...
- Seite 47 SPLIT SYSTEM UNITÉ INTÉRIEURE/UNITÉ EXTÉRIEURE MODÈLE RAS-24G5 / RAC-24G5 UNITÉ INTÉRIEURE RAS-24G5 UNITÉ EXTÉRIEURE RAC-24G5 – 9 –...
- Seite 68 MÉMO ............................................................................................................................................................................................................................................................................................................................................................................................................................................................................................................................................................................................................................................................................................................................................................................................................................................................................................................................................................................................................................................................................................................................................................................................................................................................................................................................................................................................................................................................................–...
- Seite 69 MÉMO ............................................................................................................................................................................................................................................................................................................................................................................................................................................................................................................................................................................................................................................................................................................................................................................................................................................................................................................................................................................................................................................................................................................................................................................................................................................................................................................................................................................................................................................................................–...