Herunterladen Inhalt Inhalt Diese Seite drucken

Werbung

Verfügbare Sprachen
  • DE

Verfügbare Sprachen

  • DEUTSCH, seite 29
LIBRETTO ISTRUZIONI
INSTRUCTIONS BOOKLET
BEDIENUNGSSANLEITUNG
LIVRET D'INSTRUCTIONS
MANUAL DE INSTRUCCIONES
MANUAL DE INSTRUÇÕES
àçëíêìäñàü èé ùäëèãìÄíÄñàà
INSTRUKCJE OBSŁUGI
Ed. 2012

Werbung

Inhaltsverzeichnis
loading

Inhaltszusammenfassung für FALMEC 110030284

  • Seite 1 LIBRETTO ISTRUZIONI INSTRUCTIONS BOOKLET BEDIENUNGSSANLEITUNG LIVRET D’INSTRUCTIONS MANUAL DE INSTRUCCIONES MANUAL DE INSTRUÇÕES àçëíêìäñàü èé ùäëèãìÄíÄñàà INSTRUKCJE OBSŁUGI Ed. 2012...
  • Seite 2 Gentile Signora/Signore, congratulazioni! Lei ha acquistato una cappa di prestigio e di sicura qualità. Perché Lei possa ottenere le migliori prestazioni, Le suggeriamo di seguire con attenzione le istruzioni per l’uso e manutenzione che troverà in questo libretto; inoltre, per ordinare i filtri di ricambio al carbone attivo utilizzi l’apposito tagliando che troverà...
  • Seite 10 Magneti Magnets Pulsantiera elettronica interna Electronic pushbutton inside...
  • Seite 11 360°...
  • Seite 13 FR (optional) 360° (optional)
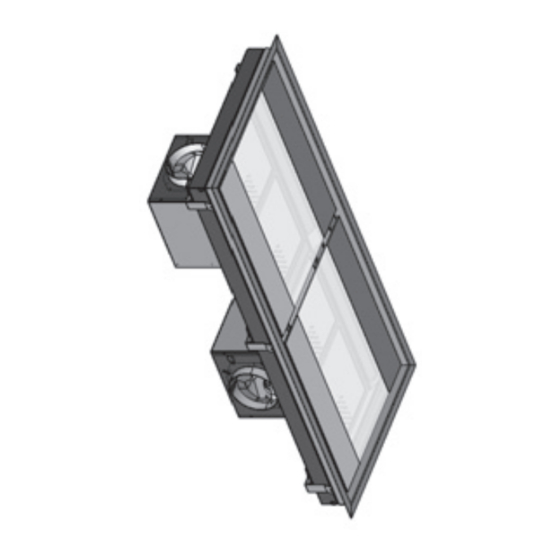
  • Seite 14 Fig. 8...
  • Seite 15: Caratteristiche Tecniche

    LIBRETTO ISTRUZIONI AVVERTENZE È molto importante che questo libretto istruzioni sia conservato insieme all’apparecchiatura per qualsiasi futura consultazione. Se l’apparecchio dovesse essere venduto o trasferito ad un’altra persona, assicurarsi che il libretto venga fornito assieme, in modo che il nuovo utente possa essere messo al corrente del funzionamento della cappa e delle avvertenze relative.
  • Seite 16: Installazione

    INSTALLAZIONE (parte riservata solo a persone qualificate per il montaggio della cappa) La distanza, fra piano cottura e parte inferiore della cappa, consigliata per l’installazione è di circa 110 cm. In casi limiti, perdendo un po’ di efficienza, la distanza può essere incrementata a circa 150 cm.
  • Seite 17 - la presa di terra sia corretta e funzionale. - l’impianto di alimentazione sia munito di efficace collegamento di terra secondo le norme vigenti. - la presa o l’interruttore omnipolare usati siano facilmente raggiungibili con l’apparecchiatu- ra installata. La casa costruttrice declina ogni responsabilità nel caso le norme di sicurezza non vengano rispettate.
  • Seite 18 Per lo smaltimento della batteria attenersi alle normative vigenti in materia. Il produttore Falmec S.p.A. - Via dell’Artigianato, 42 - 31029 Vittorio Veneto (TV) - ITALIA dichiara che questo radiocomando è conforme a tutte le norme tecniche relative al prodotto entro il campo di applicabilità...
  • Seite 19: Manutenzione E Pulizia

    ne viene confermata da tre brevi lampeggi del LED. Collegare l’apparecchio alla rete elettrica e verificare che luci e motori siano spenti. Premere il tasto timer della pulsantiera per 2 secondi e all’accensione del led rosso della pulsantiera premere un tasto qualsiasi del radiocomando entro 10 sec. Con questa operazione viene registrato in nuovo codice di trasmissione.
  • Seite 20: Pulizia Interna

    La pulizia della cappa va eseguita usando un panno umido con detersivo liquido neutro o con alcool denaturato. Nel caso di materiale con trattamento antimpronta (Fasteel) eseguire la pulizia solo con acqua e sapone neutro utilizzando un panno morbido avendo cura di risciacquare e asciugare accuratamente.
  • Seite 21 MONTAGGIO CAPPA (gli schemi di montaggio sono indicativi e validi sia per la versione da 90 che da 140 con 2 motori) - Predisporre foro sul contro-soffitto secondo le indicazioni dei disegni presenti all’inizio del libretto. Fissare la dima di ulteriore rinforzo, in dotazione, sulla parte interna non in vista del controsoffitto come illustrato nella figura (OA-OB-OC).
  • Seite 22: Technical Specifications

    INSTRUCTIONS BOOKLET WARNINGS This instruction booklet must be kept together with the appliance for future reference. If the appliance is sold or consigned to other parties, check that the booklet is supplied with it, to ensure that the new user has the correct information on the operation of the range hood and is aware of the warnings.
  • Seite 23: Electrical Connections

    In the outside exhaust version, the diameter of the fume discharge duct must be no smaller than the range hood connection. In the horizontal sections, the duct must slope slightly (around 10%) upwards, so at to better convey the air outside of the room. Reduce curves to the bare minimum, and check that the length of the ducts is also the bare minimum.
  • Seite 24 RECIRCULATING RANGE HOOD (with filter) Hood not designed for charcoal filters. For maximum efficiency, the third speed should be used when there are strong odours or a lot of steam, the second speed in normal conditions, and the first speed for keeping the air clean with minimum energy consumption.
  • Seite 25 When discharging the battery, follow the respective regulations that are currently in force. The manufacturer Falmec S.p.A. - Via dell’Artigianato, 42 - 31029 Vittorio Veneto (TV) ITALY declares that this radio control conforms to all of the technical regulations related to the pro- duct and within the application confines of the directive 1999/5/CE.
  • Seite 26: Maintenance And Cleaning

    b) Unscrew the fixing screws and remove the bottom panel; c) Remove the fluorescent tube, by rotating through 90°, and replace it with one of similar features; d) Reconnect the device to the mains. MAINTENANCE AND CLEANING Constant maintenance ensures the correct operation and efficiency of the appliance over time.
  • Seite 27: Warranty

    - The exhaust air must not be discharged into a flue which is used for exhausting fumes from appliances burning gas or other fuels. - Ensure that all regulations concerning the discharge of exhaust air have been fulfilled before you use the appliance. Before performing any cleaning or maintenance operations, disconnect the appliance by un- plugging it or using the main switch.
  • Seite 28 Remote motor positioned in a technical compartment protected against at- mospheric agents inside the residence: define the type of output - Rectangular output of 90x220 mm (fig. 6). Remove the FC flange fixed on the range hood and assemble the flange for FR rectangular pipe (optional). Install UM in the wanted position. - Circular output diam 150 mm (fig 7).
  • Seite 29: Technische Merkmale

    BEDIENUNGSANLEITUNG HINWEISE Diese Bedienungsanleitung muss unbedingt zusammen mit dem Gerät aufbewahrt werden, um in Zukunft nachgeschlagen werden zu können. Sollte das Gerät verkauft bzw. einer anderen Person übergeben werden, muss die Bedie- nungsanleitung unbedingt mitgeliefert werden, damit der neue Benutzer mit dem Betrieb der Dunstabzugshaube und den diesbezüglichen Hinweisen vertraut werden kann.
  • Seite 30: Elektrischer Anschluss

    INSTALLATION (Dieser Abschnitt ist Fachpersonal mit der für die Montage der Dunstabzugshaube erforder- lichen Qualifikation vorbehalten) Für die Installation wird ein Abstand von ca. 110 cm zwischen dem Kochfeld und dem unte- ren Teil der Abzugshaube empfohlen. In Grenzfällen kann der Abstand auf ca. 150 cm erhöht werden, wobei das Leistungsvermögen etwas reduziert wird.
  • Seite 31: Haube Mit Umluftbetrieb

    Der sich oberhalb der Haube befindliche Rauchzug ist an ein Abzugsrohr anzuschließen, über das Rauch und Dampf zu einem Auslass ins Freie geleitet werden. Bei dieser Ausführung sind eventuell vorhandene Aktivkohlefilter wie in Punkt F beschrieben zu entfernen. Wenn die Dunstabzugshaube gleichzeitig mit anderen Geräten benutzt wird, die mit Gas oder anderen Brennstoffen betrieben werden, muss eine ausreichende Belüftung des Raums gesorgt wer- den.
  • Seite 32 Für die Entsorgung der Batterie die geltenden Vorschriften beachten. Der Hersteller Falmec S.p.A. - Via dell’Artigianato, 42 - 31029 Vittorio Veneto (TV) - ITALY bestätigt, dass die vorliegende Funksteuerung allen einschlägigen technischen Normen des Geltungsbereichs der EU-Richtlinie 1999/5/CE entspricht Es wurden sämtliche notwendigen Radiofrequenztests durchgeführt.
  • Seite 33: Metallfilter Und Kohlefilter

    METALLFILTER UND KOHLEFILTER 1. METALLFILTER Um an die Metallfilter zu gelangen das Paneel AP öffnen (siehe Abb. 1). Um den Metallfett- filter zu entfernen den Griff betätigen. 2. AKTIVKOHLEFILTER Haube nicht für Kohlestofffilter vorgerüstet. BELEUCHTUNG MONTAGE UND ERSATZ LEUCHTSTOFFLAMPE (dem qualifizierten Personal vorbehalten) Auswechseln des Leuchtstoffrohrs (abb.
  • Seite 34: Reinigung Der Innenfläche

    rauher Oberfläche bzw. handelsübliche Tücher für die Stahlreinigung verwendet werden. Die Verwendung von Scheuermitteln und rauhen Tüchern wird die Oberflächenbehand- lung des Stahls für immer beschädigen. Bei Nichtbeachtung dieser Hinweise wird es zu einer nicht mehr zu beseitigenden Be- schädigung der Stahlfläche kommen. Die vorliegenden Hinweise müssen zusammen mit der Bedienungsanleitung der Dunstabzugshaube aufbewahrt werden.
  • Seite 35 auch für die 140-er Version mit 2 Motoren) Führen Sie gemäß der Angaben der Zeichnungen am Anfang des Hefts eine Bohrung an der Zwischendecke aus. Befestigen Sie die mitgelieferte Verstärkungsschablone an der Innensei- te (nicht in Sicht) der Zwischendecke, wie in Abbildung (OA-OB-OC) dargestellt. Anmerkung: im Fall eines Einsatzes des Sperrventils aus Plastik ist es ratsam, sie auf den Ausgang des Förderers zu montieren, wenn die Motoreinheit UM auf der Haube und auf dem durch die Flansch FC gewonnen Anschluss montiert ist.
  • Seite 36: Caractéristiques Techniques

    LIVRET D’INSTRUCTIONS AVERTISSEMENTS Conserver cette notice avec l’appareil pour pouvoir la consulter en cas de besoin. Si l’appareil est vendu ou cédé à tiers, veiller à ce que la notice soit fournie en même temps pour que le nouvel utilisateur puisse avoir toutes les indications concernant le fonctionne- ment de la hotte et les avertissements correspondants.
  • Seite 37: Branchement Électrique

    lation, est d’environ 110 cm. Dans des cas limite, en perdant un peu d’efficacité, la distance peut être augmentée à environ 150 cm. La distance minimale ne peut être inférieure à 65 cm comme cela est prévu par la norme. cuisson sur le dispositif de cuisson et la partie plus basse de la hotte de cuisine.
  • Seite 38 HOTTE VERSION À ÉVACUATION EXTÉRIEURE (aspirante) Dans cette version, les fumées et les vapeurs de cuisine doivent être acheminées vers l’ex- térieur par un tuyau d’évacuation. Le convoyeur d’évacuation qui dépasse en haut de la hotte doit être relié à un tuyau qui con- duit les fumées et les vapeurs vers une sortie extérieure.
  • Seite 39 Prière de respecter les règlements en vigueur pour le traitement de la batterie en tant que déchet. Le producteur Falmec S.p.A. - Via dell’Artigianato, 42 - 31029 Vittorio Veneto (TV) - ITALY déclare que cette télécommande est conforme à toutes les normes relatives au produit dans le domaine d’application de la directive 1999/5/CE.
  • Seite 40: Entretien Et Nettoyage

    pareil au réseau électrique et vérifier que les lumières et les moteurs soient éteints. Appuyer sur la touche horloge du clavier pendant 2 secondes et, à l’allumage du led rouge du clavier, appuyer n’importe quelle touche de la télécommande dans les 10 sec. Par cette opération, un nouveau code de transmission est enregistré.
  • Seite 41 Ne nettoyer qu’avec un chiffon souple trempé dans de l’eau contenant du savon neutre si la surface a subi un traitement anti-empreinte (Fasteel), en ayant soin de rincer et d’essu- yer soigneusement. Ne pas utiliser de produits contenant des substances abrasives, un chiffon rêche ni le type de chiffon pour nettoyer l’acier que l’on trouve généralement dans le commerce car cela abîmerait irrémédiablement le traitement superficiel de l’inox.
  • Seite 42: Montage De La Hotte

    MONTAGE DE LA HOTTE (les schémas de montage sont fournis à titre indicatif et sont valables aussi bien pour la version 90 que pour la version 140 avec 2 moteurs). Prédisposer un orifice sur le faux plafond en suivant les indications des dessins présents au début du livret.
  • Seite 43: Características Técnicas

    MANUAL DE INSTRUCCIONES ADVERTENCIAS Es muy importante conservar este libro de instrucciones junto al aparato para cualquier consulta futura. Si el aparato tuviera que ser vendido o traspasado a otra persona, asegúrese que el libro vaya incluido, de modo que el nuevo usuario pueda ponerse al corriente del funcionamiento de la campana y de las advertencias correspondientes.
  • Seite 44: Conexión Eléctrica

    Si las instrucciones de la placa de cocción a gas especifican una distancia mayor, es nece- sario tomarla en cuenta. En la versión extractora, el tubo de salida de los humos debe tener un diámetro no inferior al diámetro del racor de la campana. En los tramos horizontales el tubo debe tener una ligera inclinación (10% aproximadamente) hacia arriba para conducir el aire al exterior del ambiente.
  • Seite 45 acoplado a un tubo que conduce los humos y los vapores hacia una salida exterior. En esta versión, quite los filtros de carbón activo ,si presentes, para la extracción consulte las instrucciones facilitadas en el punto F. Cuando la campana extractora de cocina se utiliza contemporáneamente con otros aparatos que emplean gas u otros combustibles, el local debe disponer de una ventilación suficiente.
  • Seite 46 Para la eliminación de la batería, respetar las normativas vigentes en materia. El fabricante Falmec S.p.A. - Via dell’Artigianato, 42 - 31029 Vittorio Veneto (TV) - ITALY declara que este mando a distancia está en conformidad con todas las normas técnicas rela- tivas al producto dentro del campo de aplicación de la directiva 1999/5/CE.
  • Seite 47: Mantenimiento Y Limpieza

    FILTROS METÁLICOS Y FILTROS DE CARBÓN 1. FILTROS METÁLICOS Para acceder a los filtros metálicos abra el panel AP (fig. 1). Para remover el filtro metálico antigrasa accione la palanca. 2. FILTROS DE CARBÓN ACTIVO Campana no preparada para el filtro de carbón. ILUMINACIÓN MONTAJE Y SUSTITUCIÓN FLUORESCENTE...
  • Seite 48: Limpieza Interior

    4. LIMPIEZA INTERIOR Se prohíbe limpiar las partes eléctricas o las partes relativas al motor del interior de la campana extractora, con líquidos o solventes. No use productos que contengan substancias abrasivas. Realice todas estas operaciones desenchufando previamente el aparato de la red eléctrica. SEGURIDAD ADVERTENCIAS La instalación eléctrica está...
  • Seite 49 ATENCIÓN, el falso techo debe estar oportunamente reforzado para sostener con seguridad la campana. Retire el panel practicable AP y los filtros metálicos (fig.1). Identifique el tipo de instalación para la versión extractora: Con la unidad motor (UM) fijada a la campana: 1) Retire la brida BC montada en la campana y la brida FM montada en la UM (fig.
  • Seite 50: Manual De Instruções

    MANUAL DE INSTRUÇÕES ADVERTÊNCIAS É muito importante que este manual de instruções seja conservado com o equipamento para consultas futuras. Se o aparelho tiver que ser vendido ou transferido para uma outra pessoa, assegure-se de que o manual seja fornecido com ele, a fim de que o novo utilizador possa ser informado sobre o funcionamento da coifa e sobre as respetivas advertências.
  • Seite 51: Ligação Elétrica

    INSTALAÇÃO (parte reservada somente para pessoas qualificadas para a montagem da coifa) A distância, entre o plano de cocção inferior da coifa, aconselhada para a instalação é de aproximadamente 110 cm. Em casos extremos, perdendo um pouco da eficiência, a distância pode ser aumentada em aproximadamente 150 cm.
  • Seite 52 - a tomada de terra é correta e funcional. - o sistema de alimentação está provido de ligação à terra eficaz, em conformidade com as normas vigentes. - a tomada ou o interruptor omnipolar usados são de fácil acesso como equipamento insta- lado.
  • Seite 53 Para a eliminação da bateria, siga a legislação vigente em matéria. O fabricante Falmec S.p.A. - Via dell’Artigianato, 42 - 31029 Vittorio Veneto (TV) - ITÁLIA declara que este rádio-controlo está em conformidade com as normas técnicas relativas ao produto dentro do campo de aplicação da diretiva 1999/5/CE.
  • Seite 54: Manutenção E Limpeza

    rádio-controlo por mais de 5s. Após 5s é memorizado no rádio-controlo o código de default. A memorização é confirmada por três sinais intermitentes breves do LED. Conecte o aparelho à rede elétrica e verifique se luzes e motores estão desligados. Pressione a tecla timer da botoeira por 2 segundos e, quando acender o led vermelho da botoeira, pressione uma tecla qualquer do rádio-controlo dentro de 10 seg.
  • Seite 55: Limpeza Interna

    A limpeza da coifa deve ser efetuada usando um pano húmido com detergente líquido neutro ou com álcool desnaturado. No caso de material com tratamento anti-impressão digital (Fasteel), efetue a limpeza somente com água e sabão neutro, utilizando um pano macio, com cuidado para enxaguar e secar bem.
  • Seite 56 tuar nos próprios produtos as modificações que julgar necessárias ou úteis, respeitando os interesses dos utilizadores, sem prejudicar as características essenciais de funcionalidade e de segurança. MONTAGEM COIFAS (os esquemas de montagem são indicativos e válidos tanto para a versão de 90 quanto para a de 140 com 2 motores) - Prepare o furo no revestimento do teto segundo as indicações dos desenhos presentes no início do manual.
  • Seite 57 àçëíêìäñàü èé ùäëèãìÄíÄñàà åÖêõ èêÖÑéëíéêéÜçéëíà é˜Â̸ ‚‡ÊÌÓ, ˜ÚÓ·˚ ‰‡ÌÌÓ êÛÍÓ‚Ó‰ÒÚ‚Ó ÔÓ ˝ÍÒÔÎÛ‡Ú‡ˆËË ı‡ÌËÎÓÒ¸ ‚ÏÂÒÚÂ Ò ‡ÔÔ‡‡ÚÛÓÈ ‰Îfl ‚ÓÁÏÓÊÌÓÈ ÌÂÓ·ıÓ‰ËÏÓÒÚË ÍÓÌÒÛθڇˆËË ‚ ·Û‰Û˘ÂÏ. èË ÔÓ‰‡Ê ÔË·Ó‡ ËÎË ÔÂ‰‡˜Â Â„Ó ‰Û„ÓÏÛ ÎËˆÛ Í ÔË·ÓÛ Ó·flÁ‡ÚÂθÌÓ ‰ÓÎÊÌÓ ÔË·„‡Ú¸Òfl êÛÍÓ‚Ó‰ÒÚ‚Ó, ˜ÚÓ·˚ ÌÓ‚˚È ÔÓθÁÓ‚‡ÚÂθ ·˚Î ‚ ÍÛÒ ÚÓ„Ó, Í‡Í ÔÓθÁÓ‚‡Ú¸Òfl ‚˚ÚflÊÍÓÈ...
  • Seite 58 приготовление на плите это самая низкая часть вытяжки В том случае, если инструкции газовой плиты предусматривают большее расстояние, необходимо учитывать это. В версии с аспираторной системой, труба выхода дымовых газов должна иметь диаметр не менее патрубка вытяжки. На горизонтальных участках труба должна иметь лёгкий наклон (около 10%) вверх для направления...
  • Seite 59 íÛ·‡ ‰Îfl ‚˚·ÓÒ‡, ÍÓÚÓ‡fl ‚˚ÒÚÛÔ‡Ú ËÁ ‚ıÌÈ ˜‡ÒÚË ‚˚ÚflÊÍË ‰ÓÎÊ̇ ·˚Ú¸ ÒÓ‰ËÌ̇ Ò ÚÛ·ÓÈ, ÍÓÚÓ‡fl ‚˚‚Ó‰ËÚ ‰˚Ï Ë Ô‡ ‚Ì ÔÓÏ˘ÌËfl, ËÒ. Ç ‰‡ÌÌÓÈ ÏÓ‰ÎË ÒÌËχ˛ÚÒfl ÙËθÚ˚ ̇ ‡ÍÚË‚ËÓ‚‡ÌÌÓÏ Û„Î, ÒÎË ÓÌË ÛÒÚ‡ÌÓ‚ÎÌ˚; Í‡Í ÓÌË ÒÌËχ˛ÚÒfl, ÒÏ. ÔÛÌÍÚ F. ÖÒÎË ÍÛıÓÌ̇fl ‚˚ÚflÊ͇ ËÒÔÓθÁÛÚÒfl Ó‰ÌÓ‚ÏÌÌÓ Ë ‰Îfl ‰Û„Ëı ÔË·ÓÓ‚, ‡·ÓÚ‡˛˘Ëı...
  • Seite 60 Выбрасывать или перерабатывать батарею в строгом соответствии с действующими нормами. Производитель Falmec S.p.A. - Via dell’Artigianato, 42 - 31029 Vittorio Veneto (TV) - ITALY заявляет, что данное радиоуправление соответствует всем техническим нормам, относящимся к изделию, в пределах применения директивы 1999/5/СЕ.
  • Seite 61 МЕТАЛЛИЧЕСКИЕ ФИЛЬТРЫ И УКОЛЬНЫЕ ФИЛЬТРЫ 1. åÖíÄããàóÖëäàÖ îàãúíêõ Для доступа к металлическим фильтрам, открыть панель АР (смотреть рис. 1). Изъять с помощью рукоятки металлический жироулавливающий фильтр. 2. îàãúíêõ ë ÄäíàÇàêéÇÄççõå ìÉãÖå На вытяжку не может быть установлен угольный фильтр. éëÇÖôÖçàÖ ìëíÄçéÇäÄ...
  • Seite 62 ÓÔÓ·ÒÍË‚‡Ú¸ Ë ÒÛ¯ËÚ¸ ÔÓ‚ÂıÌÓÒÚ¸. ç ‰ÓÔÛÒ͇ÂÚÒfl ËÒÔθÁÓ‚‡ÌË Ò‰ÒÚ‚, ÒÓ‰Âʇ˘Ëı ‡·‡ÁË‚Ì˚ ‚¢ÂÒÚ‚‡, „Û·˚ Ú͇ÌË, ‡ Ú‡ÍÊ Ú͇ÌË, Ëϲ˘ËÂÒfl ‚ ÔÓ‰‡Ê ‰Îfl ˜ËÒÚÍË ÒÚ‡ÎË. àÒÔÓθÁÓ‚‡ÌË ‡·‡ÁË‚Ì˚ı ‚¢ÂÒÚ‚ Ë „Û·˚ı Ú͇ÌÂÈ Ô˂‰ÂÚ Í ÌÂÓ·‡ÚËÏÓÏÛ ÔÓ‚ÂʉÂÌ˲ ÔÓÍ˚ÚËfl ÒÚ‡ÎË. çÂÒӷβ‰ÂÌË ‰‡ÌÌ˚ı Ô‡‚ËÎ Ô‰ÓÒÚÓÓÊÌÓÒÚË ‚ΘÂÚ Á‡ ÒÓ·ÓÈ ·ÂÁ‚ÓÁ‚‡ÚÌÓ ÔÓ‚ÂʉÂÌË ÒÚ‡ÎË.
  • Seite 63 Подготовить отверстие на подвесном потолке согласно указаниям, предоставленным в начале брошюры. Закрепить шаблон дополнительного укрепления, входящий в комплект, на внут- ренней, невидимой части подвесного потолка, как показано на иллюстрации (OA-OB-OC). Примечание: В случае применения обратного пластмассового клапана рекомендуется устанавливать его на выходе транспортёра в случае, если моторный блок UM установлен на вытяжке и на патрубке, прикреплённом...
  • Seite 64 INSTRUKCJA OBSŁUGI INSTRUKCJA OBSŁUGI OSTRZEŻENIA OSTRZEŻENIA Ta instrukcja obsługi musi być przechowywana razem z urządzeniem w celu przyszłego wykorzystywania. Jeżeli urządzenie jest sprzedawane lub przesyłane innym stronom, sprawdzić, czy wraz z nim przekazywana jest ta instrukcja, dla zapewnienia, że nowy użytkownik posiada prawidłowe informacje o działaniu okapu kuchennego i zna ostrze- żenia.
  • Seite 65 W przypadkach ekstremalnych, z utratą pewnego stopnia wydajności, odległość można zwięk- szyć do około 150 cm. Minimalna odległość nie może być mniejsza niż 65cm, jak przewidziano w normatywie. gotowanie na kuchence i najniższa część okapu kuchennego. Jeżeli instrukcje kuchenki gazowej wskazują większą odległość, należy ją uwzględnić. W wersji wyciągowej, średnica rury odprowadzania oparów nie może być...
  • Seite 66 Odstępstwo dla Niemiec: Gdy równocześnie pracują: okap kuchenny i urządzenia zasilane energią inną, niż elektryczna, podciśnienie w pomieszczeniu nie może przekraczać 4 Pa (4x10 E-5 bar). OKAP KUCHENNY RECYRKULACYJNY OKAP KUCHENNY RECYRKULACYJNY (z fi ltrem) Okap nieprzystosowany do zastosowania filtra węglowego. Dla maksymalnej wydajności, gdy występują...
  • Seite 67 Zbyć baterie zgodnie z aktualnie obowiązującymi normami prawnymi. Producent: Falmec S.p.A. - Via dell’Artigianato, 42 - 31029 Vittorio Veneto (TV) - ITALY Oświadcza, że pilot spełnia wymagania norm technicznych dla tego produktu i w zakresie zastosowań normy 1999/5/CE.
  • Seite 68 2. FILTRY Z WĘGLEM DRZEWNYM Okap nieprzystosowany do zastosowania filtra węglowego. OŚWIETLENIE OŚWIETLENIE MONTAŻ I WYMIANA LAMPA JARZENIOWA (Rozdział przeznaczony dla wykwalifikowanych instalatorów). Wymiana lampy jarzeniowej (Rys. 8): a) Odłączyć urządzenie od sieci; b) Odkręcić wkręty mocujące i zdjąć płytę dolną; c) Wyjąć...
  • Seite 69 OSTRZEŻENIA BEZPIECZEŃSTWA OSTRZEŻENIA BEZPIECZEŃSTWA Układ elektryczny i podłączenie uziemienia jest zgodnie z międzynarodowymi normami bezpie- czeństwa; ponadto są one zgodne z normą europejską dla zgodności elektromagnetycznej. Nie podłączać urządzenia do przewodów kominowych (od bojlerów, kominków, itp.). Upewnić się, że napięcie sieci odpowiada wartościom podanym na tabliczce znamionowej umieszczonej wewnątrz okapu kuchennego.
  • Seite 70 1). Znaleźć kierunek wypływu powietrza korzystając z obrotów kołnierza FL jednostki silnikowej (patrz rys. 2). Przymocować UM do okapu, zgodnie z żądanym kierunkiem wyjścia powietrza (patrz rys. 3). 2) Przymocować łańcuszki bezpieczeństwa do sufitu za pomocą śrub i kołków z wyposażenia (patrz rys.
  • Seite 71 Note...
  • Seite 72 Note...
  • Seite 73 Note...
  • Seite 74 Note...
  • Seite 75 Note...
  • Seite 76 Note...
  • Seite 77 Note...
  • Seite 78 Decreto Legislativo del 30/06/2003 n. 196 - art. 7 Codice in materia di protezione dei dati personali. 1. L’interessato ha diritto di ottenere la conferma dell’esistenza o meno di dati personali che lo riguardano, anche se non ancora registrati, e la loro comunicazione in forma intelleggibile.
  • Seite 79 - relativamente ai dati medesimi potete esercitare i diritti previsti dall’art. 7 del d. lgs.vo n. 196/2003 (di cui viene allegata copia) nei limiti ed alle condizioni previste dagli articolo 8, 9 e 10 del citato decreto legislativo; - titolare del trattamento dei dati è Falmec s.p.a. - Via dell’Artigianato, 42 - Vittorio Veneto (TV). Il titolare del trattamento...
  • Seite 80: Certificato Di Garanzia

    In caso necessiti intervenire per anomalie di funzionamento, si prega di telefonare alla ditta Falmec indicando i codici sotto riportati, la quale Vi farà pervenire un tec- nico per la riparazione (vedere condizioni di garanzia all’interno). CERTIFICATO DI GARANZIA...

Inhaltsverzeichnis