Herunterladen Inhalt Inhalt Diese Seite drucken
Hama Premium Bedienungsanleitung
Vorschau ausblenden Andere Handbücher für Premium:

Werbung

Verfügbare Sprachen
  • DE

Verfügbare Sprachen

  • DEUTSCH, seite 3
Informationstechnische Einrichtung Class A
Warnung! Dies ist eine Einrichtung der Klasse A. Diese Einrichtung kann im
Wohnbereich Funkstörungen verursachen. In diesem Fall kann vom Betreiber
verlangt werden, angemessene Maßnahmen durchzuführen.
Class A information technology equipment
Warning! This device is categorized as class A equipment. This equipment can
cause radio interference in living spaces. If this is the case, you can request the
operator to undertake appropriate measures to prevent such interference.
Dispositif d'informations techniques classe A
Avertissement ! Ce dispositif appartient à la classe A. Ce dispositif est suscepti-
ble de provoquer des perturbations radioélectriques dans une zone habitable. Il
peut être exigé de l'utilisateur de prendre des mesures appropriées.
Equipo de tecnología de información clase A
Aviso: Éste es un aparato de la clase A. Este aparato puede provocar interferenci-
as en el ámbito doméstico. En este caso, el usuario puede estar obligado a tomar
medidas adecuadas.
Informatietechnische inrichting Class A
Waarschuwing! Dit is een klasse-A-inrichting. Deze inrichting kan in woonom-
gevingen storingen veroorzaken. In dat geval dient de gebruiker passende
maatregelen te nemen.
Dispositivo per tecnologie dell'informazione classe A
Attenzione! Questo è un dispositivo della classe A che può causare disturbi
radio nella zona abitativa. In questo caso l'esercente può richiedere di prendere
particolari provvedimenti.
Τεχνική διάταξη ενημέρωσης κατηγορίας A
Προειδοποίηση! Αυτή είναι μία διάταξη κατηγορίας A. Αυτή η διάταξη μπορεί να
προκαλέσει ηλεκτρομαγνητικές παρεμβολές σε χώρους διαμονής. Σε αυτή την
περίπτωση μπορεί να ζητηθεί από τον ιδιοκτήτη να λάβει τα κατάλληλα μέτρα.
Informationsteknisk enhet klass A
Varning! Detta är en enhet enligt klass A. Dessa enheter kan förorsaka radio-
störningar i bostäder. I detta fall kan driftsansvarig åläggas att vidtaga passande
åtgärder.
Luokan A tietotekniikkalaite
Varoitus: Tämä on A-luokan laite. Tämä laite voi aiheuttaa
radiohäiriöitä asunnossa käytettäessä. Siinä tapauksessa
käyttäjältä voidaan edellyttää kohtuullisia korjaustoimia.
Die Konformitätserklärung nach der R&TTE
Richtlinie 99/5/EG fi nden Sie unter www.hama.com
See www.hama.com for declaration of
conformity according to R&TTE Directive 99/5/EC guidelines
La déclaration de conformité à la directive
R&TTE 99/5/CE se trouve sur www.hama.com
La declaración de conformidad según la
directiva R&TTE 99/5/CE la encontrará en www.hama.com
De conformiteitsverklaring conform de
R&TTE-richtlijn 99/5/EG vindt u onder www.hama.com
La dichiarazione di conformità secondo la
direttiva R&TTE 99/5/CE è disponibile sul sito
www.hama.com
Konformitetsförklaring enligt R&TTE riktlinje
99/5/EG fi nner du på www.hama.com
Radio- ja telepäätelaitteita koskevan
direktiivin 99/5/EY mukainen vaatimustenmukaisuusvakuutus löytyy
osoitteesta www.hama.com
Overensstemmelseserklæringen i henhold til R&TTE-retningslinierne
fi nder du under HYPERLINK „http://www.hama.com"
Deklaracja zgodności według dyrektywy
R&TTE 99/5/EG dostępna na stronie internetowej www.hama.com
All listed brands are trademarks of the corresponding companies. Errors and omissions excepted,
and subject to technical changes. Our general terms of delivery and payment are applied.
d
Specyfi kacja informacyjno techniczna – urządzenie klasy A
UWAGA! Urządzenie klasy A. Urządzenie może powodować zakłócenia w obrębie
mieszkania. W takim wypadku użytkownik musi przedsięwziąć odpowiednie kroki
zapobiegawcze.
g
Információtechnikai berendezés, A-osztály
Figyelem! Ez az eszköz A-osztályú berendezés.
Ez az eszköz lakásban üzemeltetve rádiófrekvenciás zavart kelthet.
Ha hosszabb időn át üzemeltetve, a közelben lévő készülékeket zavarja, célszerű
áthelyezni más környezetbe.
f
Technicko informační zařízení třídy A
Varování! Tohle je zařízení třídy A. Může způsobit rádiové rušení v obytné zóně.
V takovém případě může být požadováno od provozovatele, aby provedl
příslušná opatření.
e
Technicko-informačné zariadenie triedy A
POZOR! Toto je zariadenie triedy A. Môže spôsobiť rádiové rušenie v
obytnej zóne. V takomto prípade môže byť požadované od prevádzkovateľa, aby
urobil príslušné opatrenia.
o
Aparelho de tecnologia da informação Class A
Aviso! Este é um aparelho de Classe A. Este aparelho pode provocar
interferências em áreas residenciais. Neste caso, pode-se exigir ao
utilizador que tome as medidas adequadas.
i
Информационное техническое устройство класса А
Предупреждение! Устройство относится к приборам класса А. Устройство
может создавать радиопомехи в жилых помещениях. В этом случае
эксплуатационник, возможно, будет обязан принять соответствующие меры
k
по их устранению.
A sınıfı bilgi tekniği tertibatı
Uyarı! Bu A sınıfı bir donanımdır. Bu tertibat oturma alanlarında parazitlere sebep
olabilir. Bu durumda işleticisinin uygun önlemleri alması gerekebilir.
s
Informaţii tehnice pentru instalaţii Clasa A
Avertizare! Aceasta este o instalaţie cuprinsă în Clasa A. Instalaţie poate produce în
locuinţă perturbări în recepţia radio.
În acest caz utilizatorul poate pretinde să fi e luate măsuri în consecinţă.
m
d
A megfelelőségi követelmények megegyeznek
az R&TTE Irányelvek 99/5/EG ajánlásaival www.hama.com
g
Prohlášení, o shodě podle směrnice
R&TTE 99/5/EG, naleznete na www.hama.com
f
Prehlásenie o zhode podľa R&TTE smernice
99/5/EG nájdete na www.hama.com
e
Τη δήλωση συμμόρφωσης σύμφωνα με την
οδηγία 99/5/EΚ περί R&TTE θα τη βρείτε στη διεύθυνση www.hama.com
o
Заявление о соответствии товара нормам R&TTE 99/5/EG см. на веб-узле u
www.hama.com
i
R&TTEDirektifi 99/5/EG'ye göre uygunluk beyanı için www.hama.com
adresine bakınız.
Declaraţia de conformitate conform directivei 99/5/UE din R&TTE o găsiţi la
s
www.hama.com
m
j
q
D-86651 Monheim/Germany
1177
Hama GmbH & Co KG
www.hama.com
q
h
c
v
p
u
t
r
h
c
v
k
t
r

Werbung

Inhaltsverzeichnis

Fehlerbehebung

loading

Inhaltszusammenfassung für Hama Premium

  • Seite 1 Τη δήλωση συμμόρφωσης σύμφωνα με την La declaración de conformidad según la οδηγία 99/5/EΚ περί R&TTE θα τη βρείτε στη διεύθυνση www.hama.com directiva R&TTE 99/5/CE la encontrará en www.hama.com Заявление о соответствии товара нормам R&TTE 99/5/EG см. на веб-узле u De conformiteitsverklaring conform de www.hama.com...
  • Seite 2 D I G I T A L P H O T O Digitaler Bilderrahmen 10.4 »Premium« Digital Photo Frame 00090919...
  • Seite 3 Stand der Dokumentation 01/2010 Vielen Dank, dass Sie sich für einen digitalen Bilderrah- Sicherheitshinweise: men aus dem Hause Hama entschieden haben. Bitte • Setzen Sie das Gerät keinen starken Erschütterungen lesen Sie vor der ersten Inbetriebnahme und Benutzung aus und vermeiden Sie Stoß oder Fall.
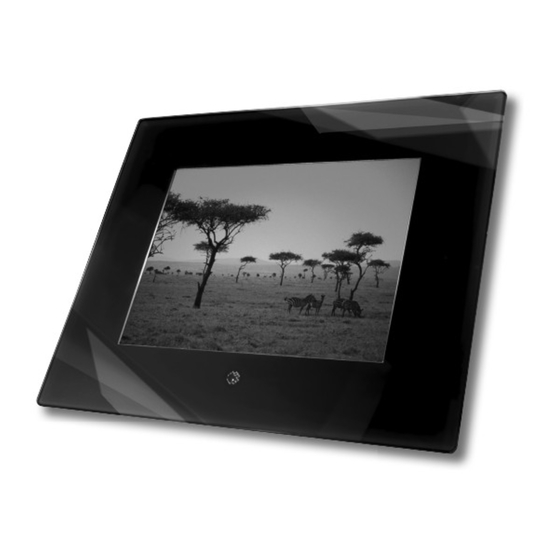
  • Seite 4 • Bitte beachten Sie die im Anhang technischen Daten Funktionsüberblick: im Bezug auf die Multimedia-Kompatibilität beim • hochaufl ösendes 10.4 (=26,42cm) TFT-LC-Display im Anschluss von USB-Geräten, bzw. bei der 4:3 Format Wiedergabe von Fotos, Musik, Videos oder Filmen (je • inkl. Bluetooth-Funktion nach Spezifi...
  • Seite 5 Aufbau des digitalen Bilderrahmens und der Fernbedienung: Um das Einlegen bzw. Funktionen der Fernbedienung: Links die Entnahme von „MS Enter Rechts Lautstärke Menu Oben Stummschaltung Duo/MS PRO Duo“- Reglung Ein/Aus Unten Setup Karten zu erleichtern Zoom wird ein „ Adapter“ Beenden benötigt.
  • Seite 6 Menüfunktionen: MENÜ Untermenüs & Funktionsbeschreibungen Funktionsauswahlmenü PHOTO Photo Diashow MUSIK MP3, WMA COMBO Musik + Photo Diashow MOVIE Video SPIELLISTE Liste aller Dateien mit Dateimanagement sowie Lösch- & Kopierfunktion EINSTELLUNGEN Systemeinstellungen (variiert je nach Spezifi kation des Gerätes) (Setting/Setup) KALENDER Kalender-, Uhreinstellungen Kartenauswahlmenü...
  • Seite 7 Original: Originalgröße (4:3 Format) In der Einstellung „Normal“ behält das Bild sein Originalformat bei Smart: Originalgröße (4:3 Format) In der Einstellung „Smart“ wird das Bild auf die Displaygröße angepasst...
  • Seite 8 3. Dateiliste Starten des digitalen Bilderrahmens Stecken Sie zuerst den Adapterstecker in den digitalen Sind der USB-Stick bzw. die Speicherkarten korrekt in den Bilderrahmen und danach das Netzkabel in eine digitalen Bilderrahmen eingesteckt, wird eine Liste der Steckdose. Schalten Sie dann das Gerät ein. Datenträgeretiketten angezeigt.
  • Seite 9 Kopieren von Dateien: a) Wählen Sie den Menüpunkt „Wiedergabe“ aus. b) Wählen Sie mit Hilfe der Pfeiltasten die Datei aus, welche Sie kopieren möchten. c) Ihre Auswahl bestätigen Sie mit der Pfeiltaste neben dem Dateinamen erscheint nun ein Zeichen d) Mit Hilfe der Pfeiltaste gelangen Sie zurück in das Abb.
  • Seite 10 5. Verwendung als Card Reader: Angezeigte Informationen: • Monatsanzeige Sie können Ihren digit. Bilderrahmen per USB mit Ihrem • Bildanzeige Computer verbinden, um auf Dateien der eingelegten • Zeitanzeige Speicherkarte zuzugreifen, bzw. Daten über die USB- Schnittstelle austauschen/kopieren/löschen. Bevor Sie 7.
  • Seite 11 Der beiliegende Bluetooth-Dongle ist separat unter der danach wird das gesamte Verzeichnis jeweils Hama-Art.-Nr.: 49227: “Nano-Bluetooth-Dongle“ wiederholt). erhältlich. Hierzu kann über die Hama Internetseite (www.hama.de / www.hama.com) ein aktueller Treiber Achtung: heruntergeladen werden der es Ihnen erlaubt den Diese Funktion wird nur ab Firmware Version beiliegenden Nano-Bluetooth-Dongle auch an anderen HA08V1.9-10-4-IN-SP-BT unterstützt!
  • Seite 12 10.) Sobald die Übertragung erfolgreich abgeschlossen wurde erscheint unten aufgeführtes Fenster. Zeitgleich werden die übertragenen Daten auf dem Bilderrahmen angezeigt/abgespielt 7.) Ihr PC/Laptop wird nun versuchen eine Verbindung zum digit. Bilderrahmen herzustellen Bitte beachten Sie folgende Punkte: • Die oben beschriebenen Übertragungsarten stellen Beispiele dar.
  • Seite 13 Montagelöcher, mit denen der Bilderrahmen mithilfe Reinigung des Gerätes ein weiches, fusselfreies Tuch passender Schrauben an der Wand befestigt werden (z.B. Hama Art.-Nr. 51076/51077 u.ä.). Bei stärkeren kann. Verschmutzungen feuchten Sie das Tuch sehr leicht an. Verwenden Sie jedoch keinesfalls starke Lösungsmit- Bildbetrachtung: tel, wie z.B.
  • Seite 14: Fehlersuche

    FEHLERSUCHE: Beim Anschluss von USB-Endgeräten werden diese nicht angezeigt. Ursache: inkompatibles USB-Protokoll Der Bilderrahmen lässt sich nicht einschalten: Nicht alle Geräte unterstützen die USB-Kommunikation Ursache: Problem in der Stromversorgung des in gleicher Weise. Im Zweifelsfall testen Sie ein anderes Bilderrahmens. Gerät am digit.
  • Seite 15 Luftzirkulation. Stellen Sie das Gerät Bitte wenden Sie sich bei Produktreklamationen an während des Betriebes nicht auf weiche Oberfl ächen, Ihren Händler oder an die Hama Produktberatung. Teppiche oder andere Materialien, die die Luftzirkulation behindern könnten. Internet/World Wide Web •...
  • Seite 16 Operating instructions Operating instructions Issue of documentation: January 2010 Thank you for choosing a Hama digital picture frame. Safety Notes: Please read the complete operating instructions • Do not expose the player to heavy vibrations and do carefully before using the device for the fi rst time.
  • Seite 17 Function overview: • Please note that that files that are displayed or played • High-resolution 10.4 (=26.42cm) TFT LC display in on the digital picture frame may be subject to 4:3 format copyright laws from third parties. All liability claims •...
  • Seite 18 Structure of the digital picture frame and the remote control: An „Adapter“ is Left required to facilitate Enter Right Remote Control Functions: Volume Menu the insertion and ON/Off Down control Mute removal of „MS Duo/ Setup MS PRO Duo“ cards. Zoom Exit Volume control...
  • Seite 19: Alarm Setting

    Menu functions: MENU Submenus & function descriptions Function selection menu PHOTO Photo slide show MUSIC MP3, WMA COMBO Music + photo slide show MOVIE Video PLAY LIST List of all fi les with fi le management as well as delete & copy functions SETTINGS System settings (varies according to the device specifi...
  • Seite 20 Original: Original size (4:3 format) With the „Normal“ setting, the image keeps its original format Smart: Original size (4:3 format) With the „Smart“ setting, the image is adjusted to fi t the size of the display...
  • Seite 21 Starting the digital photo frame 3. File List Screen Insert the adaptor DC plug into the DPF player fi rst, and With USB device/Memory cards rightly inserted into the plug the power cord to a standard wall outlet, then turn on Digital Picture Frame: volume label list screen displays.
  • Seite 22 Copying fi les: a) Select the “Play” menu item. b) Using the arrow buttons , select the fi le that you wish to copy. c) Confi rm your selection with the arrow button A symbol appears next to the fi le name. Exhibit 5b: Deleting a fi...
  • Seite 23 5. Use as a card reader: 7. Setup Menu You can connect your digital picture frame to your In the main menu, use the buttons to select the computer via USB to access fi les on the inserted memory settings menu and then press ENTER. Alternatively, card or exchange/copy/delete data via the USB interface.
  • Seite 24 • Repeat folder (all videos in the directory are repeated The enclosed Bluetooth dongle is available separately one after the other, and the whole directory is then under Hama item no.: - 49227: “Nano Bluetooth repeated afterwards). dongle”. The current driver for the dongle can be downloaded from the Hama Internet site (www.hama.de/...
  • Seite 25 9.) Enter the PIN “0000” (four zeros) and press OK. 10.) As soon as transfer has been completed successfully, the following window appears. The transferred fi les are displayed/played back on the picture frame simultaneously. 7.) Your PC/laptop now attempts to connect to the digital picture frame.
  • Seite 26 Occasional care and cleaning of the device ensure a There are installation holes on the rear of the digital long service life. Use a soft, lint-free cloth (e.g. Hama picture frame to attach it to the wall using suitable item no. 51076/51077 etc.) to clean the device. Slightly screws.
  • Seite 27: Troubleshooting

    TROUBLESHOOTING: Data on a memory card can not be accessed. Cause: incompatible memory card or incorrect data The picture frame can not be switched on: media format Cause: Problem with the electrical supply of the picture There are some types of memory cards/media that are screen.
  • Seite 28 If the product is defective: materials that might block air circulation. Contact your retailer or Hama Product Consulting if you • The socket must be easily accessible so that it is easy have any product claims.
  • Seite 29 Consignes de sécurité : Nous vous remercions d’avoir choisi un cadre photo • Protégez l’appareil des secousses violentes et évitez numérique de Hama. Veuillez lire attentivement le tout choc ou toute chute. présent mode d‘emploi avant sa première utilisation et •...
  • Seite 30 • En cas de défaut constaté sur votre cadre photo Aperçu des fonctions : numérique, veuillez vous adresser à votre revendeur • écran haute résolution TFT-LCD de 10.4 (= 26,42 cm) spécialisé. au format 4:3 • Veuillez noter les caractéristiques techniques en •...
  • Seite 31 Structure du cadre photo numérique et de la télécommande : Un « Adaptateur » Gauche Sous/ Fonctionnement de la télécommande : est nécessaire afi n de Droite Enter hors Réglage Menu Haut vous faciliter l’insertion tension du volume Mise en sourdine et l’extraction de cartes Confi...
  • Seite 32 Fonctions du menu : MENÜ Sous-menus & description des fonctions Menu de sélection de fonctions PHOTO Diaporama MUSIQUE MP3, WMA COMBO Musique + diaporama MOVIE Vidéo LISTE DE JEUX Liste aller Dateien mit Dateimanagement sowie Lösch- & Kopierfunktion PARAMETRES Liste de tous les fi chiers à gestion de fi chier ainsi (réglage / setup) que fonction de suppression et de copie CALENDRIER...
  • Seite 33 Original: Format d’origine (format 4:3) En réglage « Normal », l’image conserve son format d’origine Smart: Format d’origine (format 4:3) En réglage « Smart », l’image est adaptée à la taille de l’écran...
  • Seite 34 Démarrage du cadre photo numérique 3. Ecran liste des fi chiers Commencez par insérer la fi che de l’adaptateur CC dans Lorsqu’un appareil USB / une carte mémoire est correcte- le cadre photo numérique, insérez le câble d’alimentation ment inséré(e) dans le cadre photo numérique : l’écran dans une prise de courant, puis mettez l’appareil sous affi...
  • Seite 35 Copie de fi chiers : a) Sélectionnez l’option de menu „lecture“. b) Sélectionnez le fi chier que vous désirez copier à l‘aide des touches fl échées c) Confi rmez votre sélection à l‘aide de la touche fl échée ; un symbole apparaît à côté du nom du fi chier. d) Vous pouvez retourner au menu à...
  • Seite 36 5. Utilisation en mode lecture de carte (CardReader) : 7. Menu de confi guration Vous pouvez connecter votre cadre photo numérique Dans le menu principal, sélectionnez Paramètres à à votre ordinateur via USB afi n d’ouvrir les fi chiers l‘aide des touches , puis ENTER ou appuyez sur la stockés sur la carte mémoire ou remplacer/copier/ touche SETUP de la télécommande afi...
  • Seite 37 Cette fonction est prise en charge uniquement à partir charge (ordinateur portable ou non, etc.) sur le site de la version de microprogramme HA08V1.9-10-4-IN-SP-BT. Hama (www.hama.de / www.hama.com). 9. Bluetooth : Réglage de la connexion Bluetooth sur un ordinateur Réglage de la fonction Bluetooth du (portable ou non) cadre photo numérique...
  • Seite 38 10.) La fenêtre représentée c-dessous apparaît dès que le transfert s’est déroulé correctement. Simultanément, les données transférées sont affi chées/lues sur le cadre photo numérique. 7.) Votre ordinateur (portable ou non) va tenter d’établir une connexion vers le cadre photo numérique. Veuillez tenir compte des points suivants : •...
  • Seite 39: Recherche Des Pannes

    Vous n’arrivez pas à mettre le cadre photo numérique chiffon non textile doux pour nettoyer l’appareil (par sous tension exemple l’article de Hama réf. 51076/51077). Cause : problème d’alimentation du cadre photo. En cas de saletés tenaces, humidifi ez légèrement le Vérifi...
  • Seite 40 Tous les appareils ne prennent pas le système de vous adresser à votre revendeur ou au département conseil produits de Hama. communication USB en charge de la même manière. En cas de doute, testez un autre appareil sur votre cadre Internet / World Wide Web photo numérique.
  • Seite 41: Instrucciones De Uso

    Le agradecemos que se haya decidido por la compra Indicaciones de seguridad: de este marco digital de la casa Hama. Antes de utilizar • No someta el aparato a fuertes sacudidas y evite que por primera vez el marco, léase detenidamente estas sufra golpes o caídas.
  • Seite 42 • Observe los datos técnicos que se indican en el Sinopsis del funcionamiento: anexo en cuanto a la compatibilidad de multimedia • Pantalla TFT-LCD de 10.4 (=26,42cm) de alta resolución cuando se conectan dispositivos USB, o en cuanto a en formato 4:3 la reproducción de fotos, música, vídeos o películas •...
  • Seite 43 Estructura del marco digital y del mando a distancia: A la izquierda Para facilitar la inser- A la derecha ción y la retirada de Enter Funciones del mando a distancia: Regulación Menú Arriba tarjetas „MS Duo/MS de volumen ON/Off Abajo Reproducción sin sonido PRO Duo“...
  • Seite 44 Funciones de menú: MENU Submenús y descripciones de funcionamiento Menú de selección de funciones PHOTO Sesión de diapositivas MUSICA MP3, WMA COMBO Música + Sesión de diapositivas MOVIE Vídeo LISTA DE REPRODUCCIÓN Lista de todos los archivos con administración de archivos y función de copia y borrado AJUSTES (Setting/Setup) Ajustes del sistema (varía en función de la especifi...
  • Seite 45 Original: Tamaño original (formato 4:3) En el ajuste „Normal“, la imagen conserva su formato original Smart: Tamaño original (formato 4:3) En el ajuste „Smart“, la imagen se ajusta al tamaño de la pantalla...
  • Seite 46 Iniciar el marco digital 3. Lista de archivos Si la memoria USB o las tarjetas de memoria están correc- Enchufe primero el conector adaptador en el marco digital tamente insertadas en el marco digital, se visualiza una y después el cable de red a una toma de corriente. Encien- lista de las etiquetas de los medios de datos.
  • Seite 47 Copiar archivos: a) Seleccione el punto de menú “Reproducción”. b) Con ayuda de las teclas de fl echa , seleccione el archivo que desee copiar. c) Confi rme su selección con la tecla de fl echa , junto al nombre del archivo, ahora aparece un signo d) Con ayuda de la tecla de fl...
  • Seite 48 5. Utilización como lector de tarjetas: 7. Menú de ajustes El marco digital se puede conectar a su ordenador En el menú principal, pulse en Ajustes con ayuda de vía USB para acceder a los archivos de la tarjeta las teclas y pulse entonces ENTER o en el mando de memoria colocada en el marco, o bien para a distancia pulse la tecla SETUP para ir al menú...
  • Seite 49 • Repetir un vídeo (el vídeo actual se repite sin fi n) Hama: - 49227: “Mochila Nano-Bluetooth“. Para este • Repetir carpeta (se reproducen todos los vídeos del fi n podrá descargarse de la página web de Hama directorio consecutivamente, después, se repite todo (www.hama.de / www.hama.com) un controlador el directorio).
  • Seite 50 10.) Tan pronto como se termina exitosamente la transmisión, aparece la ventana que se muestra abajo. Al mismo tiempo se visualizan/reproducen los datos transmitidos en el marco digital. 7.) Su PC/portátil tratará de establecer una conexión al marco digital. Tenga en cuenta los puntos siguientes: •...
  • Seite 51: Búsqueda De Fallos

    (p. ej., art. n° Causa: Problema en la alimentación de corriente del de Hama: 51076/51077 o similar). Si la suciedad es fuerte, marco digital. humedezca el paño sólo muy levemente. Nunca utilice Compruebe si el enchufe de la fuente de alimentación...
  • Seite 52 Existen algunos tipos de tarjetas/medios de memoria productos Hama. que son incompatibles con el marco digital. En estos casos, la tarjeta no se reconoce y no se puede utilizar Internet/World Wide Web para la reproducción de contenidos.
  • Seite 53: Gebruiksaanwijzing

    Stand van de documentatie 01/2010 Hartelijk dank dat u voor de aanschaf van een Veiligheidsinstructies: digitale fotolijst van Hama heeft gekozen. Lees de • Stel het toestel niet bloot aan zware schokken en gebruiksaanwijzing volledig en goed door voordat u voorkom stoten of vallen.
  • Seite 54 • Houd rekening met de technische gegevens in de Functieoverzicht appendix over de compatibiliteit met multimedia bij de • 10.4-TFT-LC-display (26,42 cm) met hoge resolutie in aansluiting van USB-apparatuur, resp. bij de 4:3 formaat weergave van foto´s, muziek, video´s of fi lms •...
  • Seite 55 Opbouw van de digitale fotolijst en de afstandsbediening: Voor het makkelijker Links plaatsen en Functies van de afstandsbediening: Enter Rechts Volumere- Menu Boven verwijderen van Aan/uit Onder geling Mute-functie „MS Duo/MS PRO Setup Duo“-kaarten, Zoom heeft u een Beëindigen „Adapter“ nodig Volume control Draaien Decure digital/Multi Media/Memory Stick...
  • Seite 56: Alarm Instellen

    Menufuncties: MENÜ Submenu´s & beschrijving van de functies Functiemenu FOTO Foto-diashow MUZIEK MP3, WMA COMBO Muziek + foto-diashow MOVIE Video SPEELLIJST Lijst van alle bestanden met bestandsmanagement en wis- en kopieerfunctie INSTELLINGEN Systeeminstellingen (varieert afhankelijk van de specifi caties van het toestel) (setting/setup) KALENDER Kalender-, klokinstellingen...
  • Seite 57 Origineel: Originele afmeting (4:3 formaat) Onder de instelling „Normal“ blijft het origi- nele formaat van de foto behouden Smart: Originele afmeting (4:3 formaat) Onder de instelling „Smart“ wordt de foto aan de grootte van het scherm aangepast...
  • Seite 58 Starten van de digitale fotolijst 3. Bestandslijst Steek eerst de adaptersteker in de digitale fotolijst en Als de USB-stick resp. de geheugenkaarten correct in de daarna de voedingskabel in een contactdoos. Zet dan het digitale fotolijst gestoken is, wordt er een lijst met etiketten apparaat aan.
  • Seite 59 Kopiëren van bestanden: a) Selecteer de menuoptie “Weergave”. b) Selecteer met behulp van de pijltoetsen het te kopiëren bestand. c) Bevestig met de pijltoets het geselecteerde bestand; naast de bestandsnaam verschijnt nu een teken d) Met behulp van de pijltoets keert u terug in het Afb.
  • Seite 60 5. Gebruik als Card Reader: 7. Instelmenu U kunt uw digit. fotolijst per USB op uw computer Druk in het hoofdmenu met de toetsen op Instel- aansluiten voor toegang tot bestanden op de lingen en vervolgens op ENTER of druk op de afstands- geheugenkaart in de fotolijst.
  • Seite 61 één voor één afgespeeld en daarna wordt de Hama-art.-nr.: - 49227: “Nano-Bluetooth-Dongle“ hele directory herhaald). verkrijgbaar. Hiervoor kunt u vanaf de internetsite van Hama (www.hama.de / www.hama.com) een Attentie: actuele driver downloaden, waarmee u de inbegrepen Deze functie wordt pas ondersteund vanaf fi rmware- Nano-bluetooth-dongle ook op andere toestellen met versie HA08V1.9-10-4-IN-SP-BT!
  • Seite 62 10.) Zodra de overdracht succesvol is afgesloten, verschijnt het venster dat hierna is afgebeeld. Tegelijkertijd worden de overgedragen gegevens op de fotolijst weergegeven/afgespeeld 7.) Uw pc/laptop probeert nu een verbinding met de digitale fotolijst tot stand te brengen. Let op het volgende: •...
  • Seite 63: Opsporen Van Storingen

    De fotolijst kan niet worden ingeschakeld: reiniging van het toestel een zachte, pluisvrije doek Oorzaak: probleem in de stroomvoorziening van de (bijv. Hama art.-nr. 51076/51077 o.i.d.). Bij hardnekkiger fotolijst. vuil maakt u de doek iets vochtig. Maar gebruik Controleer of de stekker van de voedingsadapter nooit sterke oplosmiddelen zoals alcohol, benzine of goed en helemaal op het stopcontact is aangesloten.
  • Seite 64 Oorzaak: incompatibele geheugenkaart of verkeerd Neem bij klachten over het product contact op met uw formaat van de gegevensdrager verkoper of met de afdeling Productadvies van Hama. Er zijn een paar soorten geheugenkaarten/-media die niet compatibel zijn met de digit. fotolijst. In dat geval...
  • Seite 65: Istruzioni Per L'uso

    Istruzioni per l‘uso Istruzioni per l’uso Stato della documentazione 01/2010 Grazie per avere acquistato la cornice digitale di Hama. Indicazioni di sicurezza: Prima dell’utilizzo, leggete attentamente le istruzioni per • Non sottoporre l‘apparecchio a scossoni ed evitare l’uso! Conservate queste istruzioni. Vi saranno di grande colpi o cadute.
  • Seite 66 • Osservate attentamente i dati tecnici allegati in Schema delle funzioni: merito alla compatibilità multimediale per l‘attacco • display LCD TFT da 10.4 (26,42 cm) ad alta risoluzione di apparecchi USB ovvero per la riproduzione di in formato 4:3 foto, musica, video o fi lm (secondo le specifi che •...
  • Seite 67 Struttura della cornice digitale e del telecomando: Per facilitare Sinistra l‘inserimento e Enter Destra Funzioni del telecomando Regolazione Menu In alto l‘estrazione di carte ON/OFF In basso del volume Mute „MS Duo/MS PRO Set up Duo“ è necessario Zoom un‘apposito adattatore Esci Compact Flash Ruota...
  • Seite 68: Impostazione Immagine

    Funzioni del menu: MENU Sottomenu e descrizioni delle funzioni Menu scelta della funzione FOTO Slideshow immagini MUSICA MP3, WMA COMBO Musica + Slideshow immagini MOVIE Video PLAYLIST Elenco di tutti i fi le e loro gestione e le funzioni cancella e copia IMPOSTAZIONI Impostazioni di sistema (variano secondo le specifi...
  • Seite 69 Originale: Dimensione originale (Formato 4:3) Nella impostazione „Normale“ l‘immagine mantiene il suo formato originale Intelligente: Dimensione originale (Formato 4:3) Nella impostazione intelligente l‘immagine viene adattata alla dimensione del display...
  • Seite 70 Avvio della cornice digitale 3. Elenco fi le Se la chiavetta USB e/o le schede di memoria sono state Inserire prima la spina dell’adattatore nella cornice correttamente inserite nella cornice digitale, apparirà la digitale e poi il cavo in una lista delle etichette dei media.
  • Seite 71 Copia di fi le a) Selezionare la voce di menu “Riproduzione”. b) Servendosi dei tasti freccia , selezionare il fi le che si desidera copiare. c) Confermare la selezione con il tasto freccia accanto al nome del fi le viene visualizzato un segno d) Mediante il tasto freccia si torna al menu dove si Fig.5b: Cancellazione dei fi...
  • Seite 72 5. Utilizzo come card reader: 7. Menu delle impostazioni La cornice digitale può essere collegata via USB al Nel menu principale, andare alle impostazioni mediante computer per accedere ai fi le della memory card i tasti , quindi premere ENTER oppure premere sul inserita oppure per scambiare/copiare/cancellare telecomando il tasto SETUP per andare al menu delle dati attraverso l’interfaccia USB.
  • Seite 73 • Standard (nessuna ripetizione) La chiavetta Bluetooth in dotazione è disponibile • Ripetizione singola (il video corrente viene ripetuto separatamente con il n° articolo Hama: - 49227: all‘infi nito) “Nano-Bluetooth-Dongle”. Inoltre dal sito Internet di • Ripetizione cartella (tutti i video nella directory Hama (www.hama.de / www.hama.com) si può...
  • Seite 74 10.) Al termine del trasferimento, appare la maschera raffi gurata qui sotto. I dati trasferiti vengono visualizzati/riprodotti sulla cornice digitale. 7.) Il PC/laptop cerca di stabilire la connessione con la cornice digitale. Osservare i seguenti punti: • I tipi di trasmissione descritti sopra sono soltanto esempi.
  • Seite 75: Ricerca Guasti

    La cornice digitale non si accende: prolungano la durata. Utilizzate un panno in microfi bra Causa: problema all’alimentazione elettrica della morbido e senza pelucchi (ad es. Hama articolo cornice digitale. 51076/51077). In caso di sporco persistente, inumidite Verifi cate che la spina dell’alimentatore sia inserita leggermente il panno.
  • Seite 76 Per reclami in merito ai prodotti, rivolgetevi al vostro Alcuni tipi di memory card o supporti non sono rivenditore o alla Consulenza prodotto Hama. compatibili con la cornice digitale. In questo caso la scheda non viene riconosciuta e non può essere Internet/World Wide Web utilizzata per la riproduzione dei contenuti.
  • Seite 77 d Hinweis zum Umweltschutz: Ab dem Zeitpunkt der Umsetzung der europäischen Richtlinien 2002/96/EG und 2006/66/EG in nationales Recht gilt folgendes: Elektrische und elektronische Geräte sowie Batterien dürfen nicht mit dem Hausmüll entsorgt werden. Der Verbraucher ist gesetzlich verpfl ichtet, elektrische und elektronische Geräte sowie Batterien am Ende ihrer Lebensdauer an den dafür eingerichteten, öffentlichen Sammelstellen oder an die Verkaufsstelle zurückzugeben.
  • Seite 78 Wskazówki dotyczące ochrony środowiska: Od czasu wprowadzenia europejskiej dyrektywy 2002/96/EU i 2006/66/EU do prawa narodowego obowiązują następujące ustalenia: Urządzeń elektrycznych, elektronicznych oraz baterii jednorazowych nie należy wyrzucać razem z codziennymi odpadami domowymi! Użytkownik zobowiązany prawnie do odniesienia zepsutych, zniszczonych lub niepotrzebnych urządzeń elektrycznych i elektronicznych do punktu zbiórki lub do sprzedawcy.

Diese Anleitung auch für:

00090919

Inhaltsverzeichnis