Herunterladen Inhalt Inhalt Diese Seite drucken
JVC KD-T709BT Schnellstartanleitung
Vorschau ausblenden Andere Handbücher für KD-T709BT:

Werbung

Verfügbare Sprachen
  • DE

Verfügbare Sprachen

  • DEUTSCH, seite 42
KD-T801BT / KD-T709BT
CD RECEIVER
Quick Start Guide
RECEPTOR CON CD
Guía de inicio rápido
CD-RECEIVER
Snelstartgids
RECEPTOR CD
Guia de Início Rápido
CD-RECEIVER
Schnellstartanleitung
RÉCEPTEUR CD
Guide de démarrage rapide
SINTOAMPLIFICATORE CON RIPRODUTTORE DI CD
Guida di avvio rapido
CD-PECИBEP
Краткое руководство по началу работы
For detailed operations and information, refer to the INSTRUCTION MANUAL on the following
website:
Para obtener más información y detalles sobre las operaciones, consulte el MANUAL DE
INSTRUCCIONES en el siguiente sitio web:
Raadpleeg de GEBRUIKSAANWIJZING op de volgende website voor gedetailleerde informatie over
de bediening:
Para as operações e informações detalhadas, consulte o MANUAL DE INSTRUÇÕES no website
abaixo:
Für detaillierte Bedienungen und Informationen siehe BEDIENUNGSANLEITUNG auf der folgenden
Website:
Pour les opérations et les informations détaillées, reportez-vous au MANUEL D'INSTRUCTIONS sur
le site web suivant.
Per le operazioni e le informazioni dettagliate, fare riferimento al ISTRUZIONI PER L'USO nel
seguente sito web:
За подробными инструкциями по управлению и информацией обращайтесь к ИНСТРУКЦИИ
ПО ЭКСПЛУАТАЦИИ на следующем веб-сайте:
<http://www.jvc.net/cs/car/>
ENGLISH
ESPAÑOL
NEDERLANDS
PORTUGUÊS
DEUTSCH
FRANÇAIS
ITALIANO
РУCCKИЙ
B5K-0544-00 [E]

Werbung

Inhaltsverzeichnis
loading

Inhaltszusammenfassung für JVC KD-T709BT

  • Seite 1 ENGLISH ESPAÑOL NEDERLANDS PORTUGUÊS DEUTSCH FRANÇAIS ITALIANO KD-T801BT / KD-T709BT РУCCKИЙ CD RECEIVER For detailed operations and information, refer to the INSTRUCTION MANUAL on the following Quick Start Guide website: RECEPTOR CON CD Para obtener más información y detalles sobre las operaciones, consulte el MANUAL DE Guía de inicio rápido...
  • Seite 2 Informatie over het weggooien van elektrische en elektronische apparatuur en batterijen (particulieren) Dit symbool geeft aan dat gebruikte elektrische, elektronische producten en batterijen niet bij het normale huishoudelijke afval mogen. Lever deze producten in bij de aangewezen inzamelingspunten, waar ze gratis worden geaccepteerd en op de juiste manier worden verwerkt, teruggewonnen en hergebruikt.
  • Seite 3 (valide per i paesi che hanno adottato sistemi di raccolta differenziata) частности, гарантийного обслуживания JVC, которое он может получить в соответствии с законом о I prodotti e le batterie recanti il simbolo di un cassonetto della spazzatura su ruote barrato non possono правах...
  • Seite 4 Etichetta per i prodotti che impiegano raggi laser L’etichetta si trova sul rivestimento o sulla scatola e serve ad avvertire che il componente impiega raggi laser che sono stati classificati come classe 1. Ciò significa che l’apparecchio utilizza raggi laser di una classe inferiore.
  • Seite 5 Konformitätserklärung in Bezug auf die RE-Vorschrift 2014/53/EU Konformitätserklärung in Bezug auf die RoHS-Vorschrift 2011/65/EU Hersteller: JVC KENWOOD Corporation Declaration of Conformity with regard to the RE Directive 2014/53/EU 3-12, Moriya-cho, Kanagawa-ku, Yokohama-shi, Kanagawa, 221-0022, JAPAN Declaration of Conformity with regard to the RoHS Directive 2011/65/EU...
  • Seite 6 Par la présente, JVCKENWOOD déclare que Por la presente, JVCKENWOOD declara que el JVCKENWOOD ezennel kijelenti, hogy a Spoločnosť JVCKENWOOD týmto vyhlasuje, že l’équipement radio « KD-T801BT/KD-T709BT » est equipo de radio “KD-T801BT/KD-T709BT” cumple „KD-T801BT/KD-T709BT“ rádióberendezés rádiové zariadenie „KD-T801BT/KD-T709BT“ conforme à la directive 2014/53/UE.
  • Seite 7 HRVATSKI / SRPSKI JEZIK Русский Käesolevaga JVCKENWOOD kinnitab, et JVCKENWOOD ovim izjavljuje da je radio oprema JVCKENWOOD настоящим заявляет, что „KD-T801BT/KD-T709BT“ raadiovarustus on “KD-T801BT/KD-T709BT” u skladu s Direktivom радиооборудование «KD-T801BT/KD-T709BT» vastavuses direktiiviga 2014/53/EL. 2014/53/EU. соответствует Директиве 2014/53/EU. ELi vastavusdeklaratsiooni terviktekst on Cjeloviti tekst deklaracije Europske unije o Полный...
  • Seite 8 SOFTWARE LICENSE AGREEMENT Article 4 Right pertaining to the Licensed Software Any and all copyrights and other rights pertaining to the Licensed Software and related documents The software embedded in the Product (hereinafter the "Licensed Software") provided by Licensor is shall belong to the Licensor or the original holder of the right who granted to the Licensor the license or copyrighted to or sublicensable by the Licensor, and this Agreement provides for the terms and conditions sublicense for the Licensed Software (hereinafter the "Original Rightholder"), and the User shall not be...
  • Seite 9 Important Notice concerning the Software Article 10 Protection of Copyright -jansson 1. The copyright and all the other intellectual property rights relating to the Licensed Software shall belong to the Licensor Copyright (c) 2009-2012 Petri Lehtinen <petri@digip.org> and the Original Rightholder, and in no event shall they be Permission is hereby granted, free of charge, to any person obtaining a copy of this software and associated documentation files (the "Software"), under the ownership of the User.
  • Seite 10: Basic Procedure

    INSTALLATION/CONNECTION Basic procedure Remove the key from the ignition switch, then disconnect the terminal of the car battery. Warning Connect the wires properly. See “Wiring connection” on page 3. • The unit can only be used with a 12 V DC power supply, negative ground. Install the unit to your car.
  • Seite 11 Installing the unit (without mounting sleeve) Wiring connection Remove the mounting sleeve and trim plate from the unit. Align the holes in the unit (on both sides) with the vehicle Antenna terminal mounting bracket and secure the unit with screws (commercially available).
  • Seite 12: Before Use

    BEFORE USE BASICS IMPORTANT Faceplate • To ensure proper use, please read through this Guide before using Symbolic button Loading slot this product. It is especially important that you read and observe Warnings and Cautions in this Guide. • Please keep the Guide in a safe and accessible place for future USB input reference.
  • Seite 13: Getting Started

    GETTING STARTED Set the basic settings Press and hold Cancel the demonstration Press VOL +/– to select an item (see the following table), then press * ENTER. When you turn on the power for the first time (or [FACTORY RESET] is set to Repeat step until the desired item is selected or activated.
  • Seite 14: Start Playback

    Selectable source: Search for a station • KD-T801BT: CD/USB/iPod USB/ANDROID Press SRC B repeatedly to select FM or AM. • KD-T709BT: CD/USB/ANDROID Press S / T to search for a station automatically. (or) Start playback Press and hold S / T until “M” flashes, then press repeatedly to search for a station manually.
  • Seite 15: Menu Settings

    To return to the previous setting item, press • Refer to the INSTRUCTION MANUAL on the following website for the detailed explanation of each item: <http://www.jvc.net/cs/car/> Press VOL +/– to select [SUBWOOFER SET], then press * ENTER. • The availability of each item vary depending on the model.
  • Seite 16: Other Information

    For playback operations of AUX, SPOTIFY sources, refer to the INSTRUCTION Press and hold to enter menu settings. MANUAL on the following website: <http://www.jvc.net/cs/car/> • The availability of each source vary depending on the model. Press VOL +/– to select [COLOR], then press * ENTER.
  • Seite 17 BLUETOOTH® (B) “[Device Name]” “ENTER – YES” “BACK – NO” Press * ENTER to start pairing. • If “PAIRING” “PIN 0000” scrolls on the display, enter the PIN code “0000” into the Bluetooth device. Depending on the operating system and the firmware version of your •...
  • Seite 18: Procedimiento Básico

    INSTALACIÓN/CONEXIÓN Procedimiento básico Quite la llave del interruptor de encendido; después, desconecte el terminal de la batería del automóvil. Advertencia Conecte los cables correctamente. Consulte “Conexión del cableado” en la • La unidad puede utilizarse solamente con una fuente de alimentación de 12 V página 3.
  • Seite 19 Instalación de la unidad (sin manguito de montaje) Conexión del cableado Retire de la unidad, el manguito de montaje y la placa embellecedora. Alinee los orificios de la unidad (en ambos lados) con la ménsula de Terminal de la antena montaje del vehículo y asegure la unidad con los tornillos (disponibles en el mercado).
  • Seite 20: Antes Del Uso

    ANTES DEL USO PUNTOS BÁSICOS IMPORTANTE Placa frontal • Antes de utilizar este producto y para asegurar su uso correcto, lea Botón simbólico Ranura de carga esta guía por completo. En especial, lea y observe las Advertencias y Precauciones incluidas en esta guía. •...
  • Seite 21: Procedimientos Iniciales

    PROCEDIMIENTOS INICIALES Realice los ajustes básicos Pulse y mantenga pulsado Pulse VOL +/– para seleccionar un elemento (consulte la siguiente tabla) y, Cancele la demostración a continuación, pulse ENTER. [FACTORY RESET] Cuando enciende la unidad por primera vez (o está ajustado a Repita el paso hasta que se seleccione o active el elemento deseado.
  • Seite 22 Fuente seleccionable: Búsqueda de una emisora • KD-T801BT: CD/USB/iPod USB/ANDROID Pulse SRC repetidamente para seleccionar FM o AM. • KD-T709BT: CD/USB/ANDROID Pulse para la búsqueda automática de emisoras. Inicie la reproducción Pulse y mantenga pulsado hasta que parpadee “M” y, a La fuente cambia automáticamente y la reproducción se inicia al cargar un disco...
  • Seite 23: Ajustes Del Menú

    Para volver al elemento de ajuste anterior, pulse • Para obtener más detalles sobre cada una de las opciones, consulte el MANUAL DE INSTRUCCIONES en el siguiente sitio web: <http://www.jvc.net/cs/car/> • La disponibilidad de cada opción varía según el modelo.
  • Seite 24: Otras Informaciones

    Con respecto a las operaciones de reproducción de las fuentes AUX, SPOTIFY, consulte el MANUAL DE INSTRUCCIONES en el siguiente sitio web: Pulse y mantenga pulsado para acceder a los ajustes del menú. <http://www.jvc.net/cs/car/> • La disponibilidad de cada fuente varía según el modelo. Pulse VOL +/– para seleccionar [COLOR] y, a continuación, pulse...
  • Seite 25 BLUETOOTH® (B) “[Nombre del dispositivo]” “ENTER – YES” “BACK – NO” Pulse ENTER para iniciar el emparejamiento. • Si “PAIRING” “PIN 0000” aparece en la pantalla, ingrese el código PIN “0000” en el dispositivo Bluetooth. Las funciones Bluetooth podrían no funcionar con esta unidad, dependiendo •...
  • Seite 26 INSTALLEREN/VERBINDEN Basisprocedure Haal de sleutel uit het contactslot en ontkoppel vervolgens de aansluiting van de auto-accu. Waarschuwing Verbind de draden juist. Zie “Verbinden van draden” op pagina 3. • Dit toestel kan uitsluitend worden gebruikt in een auto met 12 Volt gelijkstroom, Installeer het toestel in de auto.
  • Seite 27 Installeren van het toestel (zonder montagehuls) Verbinden van draden Verwijder de bevestigingshuls en sierplaat van het toestel. Breng de gaten in het apparaat (beide kanten) in lijn met de Antenne-aansluiting bevestigingsbeugel van de auto en zet het apparaat met schroeven (los verkrijgbaar) vast.
  • Seite 28: Alvorens Gebruik

    ALVORENS GEBRUIK BASISPUNTEN BELANGRIJK Voorpaneel • Lees alvorens dit product in gebruik te nemen deze handleiding door Symbolische toets Lade voor een juist gebruik. Het is vooral belangrijk dat u de Waarschuwingen en Voorzorgsmaatregelen in deze handleiding goed doorleest en opvolgt.
  • Seite 29: Instellen Van De Basisinstellingen

    STARTEN Instellen van de basisinstellingen Houd even ingedrukt. Druk op VOL +/– om een onderdeel te kiezen (zie de volgende tabel) en Annuleren van de demonstratie druk vervolgens op ENTER. [FACTORY RESET] Wanneer u de stroom voor het eerst inschakelt (of wanneer Herhaal stap totdat het gewenste onderdeel is gekozen of geactiveerd.
  • Seite 30: Starten Van De Weergave

    CD/USB/iPod/ANDROID Kiesbare bron: Opzoeken van een zender • KD-T801BT: CD/USB/iPod USB/ANDROID Druk herhaaldelijk op SRC om FM of AM te kiezen. • KD-T709BT: CD/USB/ANDROID Druk op om automatisch een zender op te zoeken. (of ) Starten van de weergave Houd even ingedrukt totdat “M”...
  • Seite 31: Menu Instellingen

    • Raadpleeg de GEBRUIKSAANWIJZING op de volgende website voor een gedetailleerde uitleg over elk item: <http://www.jvc.net/cs/car/> • De beschikbaarheid van elk item varieert afhankelijk van het model. Druk op VOL +/– om...
  • Seite 32: Andere Informatie

    U kunt de verlichtingskleur van uw voorkeur instellen voor de symbolische toets. Symbolische toets ANDERE INFORMATIE Raadpleeg de GEBRUIKSAANWIJZING op de volgende website voor het afspelen van AUX, SPOTIFY-bronnen: <http://www.jvc.net/cs/car/> Houd ingedrukt om naar menu-instellingen te gaan. • De beschikbaarheid van elke bron varieert afhankelijk van het model.
  • Seite 33 BLUETOOTH® (B) “[Naam apparaat]” “ENTER – YES” “BACK – NO” Druk op ENTER om het koppelen te starten. • Voer wanneer “PAIRING” “PIN 0000” over het display rolt de PIN-code “0000” in het Bluetooth apparaat in. Afhankelijk van het besturingssysteem en de versie van de firmware van uw •...
  • Seite 34 INSTALAÇÃO/CONEXÃO Processo básico Retire a chave do interruptor de ignição e, em seguida, desconecte o terminal da bateria do automóvel. Aviso Conecte os fios adequadamente. Consulte “Conexão da cablagem” na • Este aparelho só pode ser utilizado com um fornecimento de energia de CC de página 3.
  • Seite 35 Instalação do aparelho (sem manga de montagem) Conexão da cablagem Retire a manga de montagem e a placa de guarnição do aparelho. Alinhe os orifícios no aparelho (em ambos lados) com o suporte de Terminal de antena montagem do veículo e fixe o aparelho com parafusos (disponíveis comercialmente).
  • Seite 36: Antes De Utilizar

    ANTES DE UTILIZAR FUNDAMENTOS IMPORTANTE Painel frontal • Para garantir a utilização adequada, leia atentamente este Guia antes Botão simbólico Abertura de carregamento de utilizar o produto. É especialmente importante que leia e observe os Avisos e Cuidados neste Guia. •...
  • Seite 37 INTRODUÇÃO Faça as definições básicas Mantenha premido. Prima VOL +/– para selecionar um item (consulte a seguinte tabela) e, em Cancelar a demonstração seguida, prima ENTER. [FACTORY RESET] [YES] Ao ligar a alimentação pela primeira vez (ou ao definir para Repita o passo até...
  • Seite 38 CD/USB/iPod/ANDROID Fonte selecionável: Procura de uma estação • KD-T801BT: CD/USB/iPod USB/ANDROID Prima SRC repetidamente para selecionar FM ou AM. • KD-T709BT: CD/USB/ANDROID Prima para procurar uma estação automaticamente. (ou) Inicie a reprodução Mantenha premido até que “M” comece a piscar e, em seguida, A fonte muda e a reprodução começa automaticamente ao carregar um disco...
  • Seite 39: Definições Do Menu

    Para voltar ao item de definição anterior, prima ENTER. • Consulte o MANUAL DE INSTRUÇÕES no website abaixo para uma explicação detalhada de cada item: <http://www.jvc.net/cs/car/> • A disponibilidade de cada item varia dependendo do modelo. Prima VOL +/– para selecionar...
  • Seite 40: Outras Informações

    Botão simbólico OUTRAS INFORMAÇÕES Para as operações de reprodução de fontes AUX e SPOTIFY, consulte o MANUAL DE INSTRUÇÕES no website abaixo: <http://www.jvc.net/cs/car/> Mantenha premido para entrar nas definições do menu. • A disponibilidade de cada fonte varia dependendo do modelo.
  • Seite 41: Emparelhe E Ligue Um Dispositivo Bluetooth Pela Primeira Vez

    BLUETOOTH® (B) “[Nome do dispositivo]” “ENTER – YES” “BACK – NO” Prima ENTER para iniciar o emparelhamento. • Se “PAIRING” “PIN 0000” se deslocar no visor, introduza o código PIN “0000” no dispositivo Bluetooth. Dependendo do sistema operativo e da versão do firmware do seu telemóvel, •...
  • Seite 42: Grundlegendes Verfahren

    EINBAU/ANSCHLUSS Grundlegendes Verfahren Ziehen Sie den Schlüssel aus dem Zündschloss, und trennen Sie dann den -Klemme der Autobatterie ab. Warnung Schließen Sie die Kabel richtig an. Siehe “Verdrahtungsanschluss” auf • Das Gerät kann nur bei 12 V DC-Versorgung mit negativer Masse eingebaut Seite 3.
  • Seite 43 Installieren der Einheit (ohne die Einbauhalterung) Verdrahtungsanschluss Nehmen Sie die Einbauhalterung und den Frontrahmen vom Gerät ab. Richten Sie die Öffnungen am Gerät (an beiden Seiten) mit der Antennenanschluss Befestigungskonsole am Fahrzeug aus und sichern Sie das Gerät mit Schrauben (im Handel erhältlich). Sicherung (10 A) Verwenden Sie nur die vorgeschriebenen Schrauben.
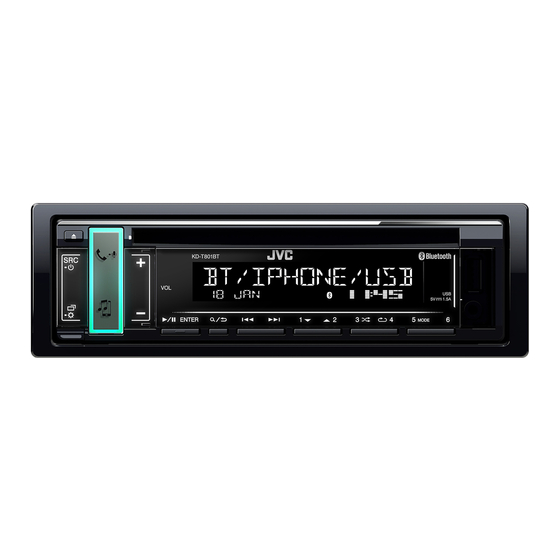
  • Seite 44 VOR DER INBETRIEBNAHME GRUNDLAGEN WICHTIG Frontblende • Um richtige Verwendung sicherzustellen, lesen Sie die Anleitung vor Symbol-Taste Ladeschlitz der Verwendung des Produkts sorgfältig durch. Es ist besonders wichtig, dass Sie die Warnungen und Vorsichtshinweise in dieser Anleitung lesen und beachten. •...
  • Seite 45: Erste Schritte

    ERSTE SCHRITTE Einstellen der grundlegenden Einstellungen Halten Sie gedrückt. Drücken Sie +/– um einen Gegenstand zu treffen (siehe folgende Tabelle), Brechen Sie die Demonstration ab und drücken Sie dann ENTER. [FACTORY RESET] [YES] Beim ersten Einschalten des Geräts (oder wenn gestellt Wiederholen Sie Schritt , bis der gewünschte Gegenstand gewählt oder...
  • Seite 46: Einstellungen Im Speicher

    Wählbare Quelle: Suche nach einem Sender • KD-T801BT: CD/USB/iPod USB/ANDROID Drücken Sie SRC wiederholt, um FM (UKW) oder AM zu wählen. • KD-T709BT: CD/USB/ANDROID Drücken Sie , um einen Sender automatisch zu suchen. (oder) Starten Sie die Wiedergabe Halten Sie gedrückt, bis “M”...
  • Seite 47: Menü-Einstellungen

    Drücken Sie zum Beenden. Zum Zurückschalten zum vorherigen Einstellelement drücken Sie • Siehe BEDIENUNGSANLEITUNG auf der folgenden Seite für detaillierte Erklärungen jedes Elements: <http://www.jvc.net/cs/car/> Drücken Sie VOL +/– zum Wählen von [SUBWOOFER SET] , und drücken Sie • Die Verfügbarkeit jedes Elements ist nach dem Modell unterschiedlich.
  • Seite 48: Andere Informationen

    Halten Sie gedrückt, um auf Menü-Einstellungen zu schalten. Für Wiedergabebedienungen von AUX, SPOTIFY Quellen siehe BEDIENUNGSANLEITUNG auf der folgenden Website: <http://www.jvc.net/cs/car/> • Die Verfügbarkeit jeder Quelle ist nach dem Modell unterschiedlich. Drücken Sie VOL +/– zum Wählen von [COLOR] , und drücken Sie dann ENTER.
  • Seite 49: Zum Erstmaligen Registrieren Und Anschließen Eines Bluetooth-Geräts

    BLUETOOTH® (B) “[Gerätename]” “ENTER – YES” “BACK – NO” Drücken Sie ENTER zum Starten des Pairing-Vorgangs. • Wenn “PAIRING” “PIN 0000” durch das Display läuft, geben Sie den PIN-Code “0000” im Bluetooth-Gerät ein. Je nach dem Betriebssystem und der Firmwareversion Ihres Mobiltelefons • Wenn nur “PAIRING” erscheint, bedienen Sie das Bluetooth-Gerät, um arbeiten einige Bluetooth-Merkmal möglicherweise nicht auf dieser Einheit.
  • Seite 50: Procédure De Base

    INSTALLATION/RACCORDEMENT Procédure de base Retirez la clé de contact, puis déconnectez la borne de la batterie de la voiture. Avertissement Connectez les fils correctement. Voir “Connexions” à la page 3. • L’appareil peut uniquement être utilisé avec une alimentation de 12 V CC, à Installez l’appareil dans votre voiture.
  • Seite 51 Installation de l’appareil (sans le manchon de montage) Connexions Retirez le manchon de montage et la plaque de garniture de l’appareil. Alignez les entailles de l’appareil (des deux côtés) avec le support de Borne de l’antenne montage du véhicule et fixez l’appareil avec les vis (en vente dans le commerce).
  • Seite 52: Avant L'utilisation

    AVANT L’UTILISATION FONCTIONNEMENT DE BASE IMPORTANTES Façade • Pour utiliser correctement l’appareil, veuillez lire ce Guide complément Touche symbolique Fente d’insertion avant de l’utiliser. Il est particulièrement important que vous lisiez et acceptiez les avertissements et les précautions de ce Guide. •...
  • Seite 53: Prise En Main

    PRISE EN MAIN Faites les réglages de base Maintenez enfoncée Appuyez sur VOL +/– pour sélectionner un élément (voir le tableau Annulez la démonstration suivant), puis appuyez sur ENTER. [FACTORY Quand vous mettez l’appareil sous tension pour la première fois (ou que Répétez l’étape jusqu’à...
  • Seite 54 CD/USB/iPod/ANDROID Source sélectionnable: Recherchez une station • KD-T801BT: CD/USB/iPod USB/ANDROID Appuyez répétitivemenent sur SRC pour sélectionner FM ou AM. • KD-T709BT: CD/USB/ANDROID Appuyez sur pour rechercher une station automatiquement. (ou) Démarrez la lecture Maintenez en enfoncé jusqu’à ce que “M” clignote, puis appuyez La source change automatiquement et la lecture démarre quand vous insérez...
  • Seite 55: Réglages Du Menu

    Pour retourner à l’option de réglage précédente, appuyez sur • Reportez-vous au MANUEL D’INSTRUCTIONS sur les sites web suivant pour une explication détaillée de chaque élément: <http://www.jvc.net/cs/car/> Appuyez sur VOL +/– pour choisir [SUBWOOFER SET] , puis appuyez sur •...
  • Seite 56: Autres Informations

    Pour les opérations de lecture de sources AUX, SPOTIFY, reportez-vous au Maintenez enfoncée pour entrer en réglages du menu. MANUEL D’INSTRUCTIONS sur le site web suivant: <http://www.jvc.net/cs/car/> • La disponibilité de chaque source varie en fonction du modèle. Appuyez sur VOL +/– pour choisir...
  • Seite 57 BLUETOOTH® (B) “[Nom du périphérique]” “ENTER – YES” “BACK – NO” Appuyez sur ENTER pour démarrer le pairage. • Si “PAIRING” “PIN 0000” défile sur l’affichage, entrez le code PIN “0000” sur le périphérique Bluetooth. En fonction du système d’exploitation et de la version du micrologiciel de votre •...
  • Seite 58: Installazione E Collegamenti

    INSTALLAZIONE E COLLEGAMENTI Procedura di base Sfilare la chiave di accensione e scollegare la presa della batteria del veicolo. Avviso Collegare correttamente i cavi elettrici. Vedere la sezione “Collegamento • Questo apparecchio è installabile esclusivamente nei veicoli provvisti di dei cavi” a pagina 3. Installare l’unità...
  • Seite 59 Installazione dell’apparecchio (senza manicotto di montaggio) Collegamento dei cavi Rimuovere il supporto di montaggio e la piastrina di finitura dall’unità. Allineare i fori dell’unità (di entrambi i lati) con quelli della staffa di Presa d’antenna montaggio del veicolo e fissarvela usando comuni viti. Fusibile (10 A) Usare soltanto le viti specificate.
  • Seite 60: Prima Dell'uso

    PRIMA DELL’USO FONDAMENTI IMPORTANTE Frontalino • Prima di usare l’apparecchio, e per usarlo in modo corretto, si Tasto a simboli Vano di caricamento raccomanda di leggere a fondo questa Guida. È particolarmente importante leggere e osservare gli avvisi e le note di attenzione nella Guida.
  • Seite 61: Operazioni Preliminari

    OPERAZIONI PRELIMINARI Eseguire le impostazioni di base Premere a lungo Con VOL +/– selezionare l’elemento desiderato (vedere la tabella che Annullare il funzionamento dimostrativo segue) e premere ENTER. [FACTORY RESET] [YES] Alla prima accensione dell’unità (o quando s’imposta ), il Ripetere il passo sino a selezionare o attivare l’elemento desiderato.
  • Seite 62: Cd, Usb, Ipod E Android

    Sorgenti selezionabili: Ricercare una stazione • KD-T801BT: CD, USB, iPod USB e ANDROID Premere SRC sino a selezionare FM o AM. • KD-T709BT: CD, USB e ANDROID Premere per ricercare automaticamente le stazioni. Avviare la riproduzione Premere a lungo sino a quando “M” inizia a lampeggiare, quindi...
  • Seite 63: Impostazioni Menu

    Per ritornare all’impostazione precedente premere • Fare riferimento al ISTRUZIONI PER L’USO disponibile nel seguente sito web per la spiegazione dettagliata di ciascuna voce: <http://www.jvc.net/cs/car/> • La disponibilità di ciascuna voce varia a seconda del modello. Con VOL +/– selezionare...
  • Seite 64: Altre Informazioni

    ALTRE INFORMAZIONI Per le operazioni di riproduzione di sorgenti AUX, SPOTIFY, fare riferimento al ISTRUZIONI PER L’USO disponibile nel seguente sito web: <http://www.jvc.net/cs/car/> Premere a lungo per accedere alle impostazioni del menu. • La disponibilità di ciascuna sorgente varia a seconda del modello.
  • Seite 65 BLUETOOTH® (B) “[Nome della periferica connessa]” “ENTER – YES” “BACK – NO” Premere ENTER per avviare l’accoppiamento. • Se sul display dell’apparecchio appare in scorrimento “PAIRING” “PIN 0000” inserire nella periferica Bluetooth il codice PIN “0000”. A seconda del sistema operativo e della versione del firmware del proprio •...
  • Seite 66: Установка И Подключение

    УСТАНОВКА И ПОДКЛЮЧЕНИЕ Стандартная процедура Извлеките ключ из замка зажигания, затем отсоедините разъем автомобильного аккумулятора. Предупреждение Правильно подключите провода. См. “Подключение проводов” на • Устройство можно использовать только с источником питания 12 В стр. 3. постоянного тока с отрицательным заземлением. Установите устройство в вашем автомобиле. См. раздел “Установка •...
  • Seite 67 Установка устройства (без посадочного корпуса) Подключение проводов Снимите посадочный корпус и декоративную панель с устройства. Разъем для антенны Совместите отверстия в устройстве (с обеих сторон) с монтажной консолью автомобиля и закрепите устройство винтами (которые можно приобрести в магазине). Предохранитель (10 A) Используйте...
  • Seite 68: Передняя Панель

    ПОДГОТОВКА К ЭКСПЛУАТАЦИИ ОСНОВНЫЕ СВЕДЕНИЯ ВАЖНО Передняя панель • В целях обеспечения надлежащей эксплуатации, пожалуйста, Символьная кнопка Загрузочный отсек перед тем как приступить к эксплуатации данного изделия, внимательно прочтите настоящее руководство. Особенно важно, чтобы вы прочли и соблюдали все указания в данном руководстве, отмеченные...
  • Seite 69: Начало Эксплуатации

    НАЧАЛО ЭКСПЛУАТАЦИИ Задание базовых настроек Нажмите и удерживайте нажатой кнопку Нажмите VOL +/–, чтобы выбрать элемент (cм. следующую таблицу), Отмена демонстрации затем нажмите ENTER. [FACTORY RESET] При первом включении питания (или если для параметра Повторяйте действие до тех пор, пока не будет выбран или установлено...
  • Seite 70 CD/USB/iPod/ANDROID Доступные для выбора источники: Поиск радиостанции • KD-T801BT: CD/USB/iPod USB/ANDROID Нажмите кнопку SRC несколько раз для выбора FM или AM. • KD-T709BT: CD/USB/ANDROID Нажмите кнопку для автоматического поиска радиостанции. (или) Начало воспроизведения Нажмите и удерживайте нажатой кнопку , пока символ “M” не...
  • Seite 71: Настройки Меню

    ENTER. Для возврата к предыдущему элементу настройки нажмите кнопку • За подробными объяснениями касательно каждого пункта обращайтесь к ИНСТРУКЦИИ ПО ЭКСПЛУАТАЦИИ на следующем веб-сайте: <http://www.jvc.net/cs/car/> Нажмите VOL +/–, чтобы выбрать [SUBWOOFER SET] , а затем нажмите • Доступность каждого элемента отличается в зависимости от модели.
  • Seite 72: Другая Информация

    Символьная кнопка ДРУГАЯ ИНФОРМАЦИЯ За информацией по операциям воспроизведения источников AUX, SPOTIFY обращайтесь к ИНСТРУКЦИИ ПО ЭКСПЛУАТАЦИИ на следующем веб-сайте: <http://www.jvc.net/cs/car/> • Доступность каждого источника отличается в зависимости от модели. Нажмите и удерживайте , чтобы перейти в меню настроек. Замечание по техническим характеристикам...
  • Seite 73: Подключение Микрофона

    BLUETOOTH® (B) “[Имя устройства]” “ENTER – YES” “BACK – NO” Нажмите ENTER , чтобы начать сопряжение. • При прокрутке на экране сообщения “PAIRING” “PIN 0000” введите PIN-код “0000” на устройстве Bluetooth. В зависимости от операционной системы и версии встроенного • Если отображается только сообщение “PAIRING”, с помощью программного...
  • Seite 76 • Android is a trademark of Google LLC. • The Bluetooth® word mark and logos are registered trademarks owned by the Bluetooth SIG, Inc. and any use of such marks by JVC KENWOOD Corporation is under license. Other trademarks and trade names are those of their respective owners.

Diese Anleitung auch für:

Kd-t801bt

Inhaltsverzeichnis