Herunterladen Inhalt Inhalt Diese Seite drucken

Werbung

Verfügbare Sprachen
  • DE

Verfügbare Sprachen

  • DEUTSCH, seite 63
www.teka.com
ES
Guía de Uso
PT
Guia de Utilização
EN
User's guide
FR
Guide d'Utilisation
DE
Bedienungsanleitung
www.teka.com
User's guide
Models
HLB
HLB P
NE
Gebruikershandleiding
EL
Οδηγός χρήσης

Werbung

Inhaltsverzeichnis
loading

Inhaltszusammenfassung für Teka HLB

  • Seite 1 User’s guide Models HLB P Guía de Uso Gebruikershandleiding Οδηγός χρήσης Guia de Utilização User’s guide Guide d’Utilisation Bedienungsanleitung www.teka.com...
  • Seite 2 ESPAÑOL Por favor, antes de utilizar su horno por primera vez, lea atentamente las instrucciones de instalación y mantenimiento incluidas en su horno. Dependiendo del modelo, los accesorios incluidos en su horno pueden variar respecto a los mostrados en las imágenes. PORTUGUÊS Antes de utilizar o forno pela primeira vez, leia atentamente as instruções de instalação e manutenção fornecidas juntamente com o forno.
  • Seite 3: Descripción Del Horno

    Español Descripción del horno Frente de mandos Bloqueo / Interruptor de puerta (solo para modelos pirolíticos) Resistencia de grill Soporte bandejas Parrilla Bandeja Bisagra Cristal interior Salida de aire de refrigeración Interruptor de puerta (solo para modelos NO pirolíticos) Fijación al mueble Lámpara Panel trasero Turbina...
  • Seite 4 Encendido y puesta en hora Al conectar el horno por primera vez a la red, MODO DEMO (Función especial para aparecerá el logotipo seguido de la indicación exposiciones) 12:00 parpadeando. Con el modo DEMO activado, puede manejarse Para poder trabajar con el horno, es necesario el horno sin calentar.
  • Seite 5 Español Descripción de la pantalla de control A continuación se describe la información que PANTALLA DE SELECCIÓN encontrará en la pantalla de visualización de su horno y cómo esta se mostrará. PANTALLA DE INICIO / REPOSO Esta pantalla aparecerá cuando el horno no esté...
  • Seite 6 PANTALLA DE COCINADO 2. Duración del cocinado. – Si no ha programado el reloj, mostrará el tiempo que el horno lleva cocinando y la circunferencia de tiempo aparecerá en co- lor rojo. – Si ha realizado alguna programación, mos- trará el tiempo que falta para que el coci- nado termine (cuenta atrás) y la circunfe- rencia de tiempo aparecerá...
  • Seite 7 Español Cocinado con funciones tradicionales FUNCIONES DEL HORNO GRILL INFORMACIÓN SOLERA Para una descripción de uso de cada una de PIZZA las funciones, consulte la guía de cocinados incluida en su horno. TURBO DESCONEXIÓN A FUEGO LENTO CONVENCIONAL FERMENTAR MASAS CONVENCIONAL CON TURBINA DESCONGELACIÓN GRILL Y SOLERA...
  • Seite 8 PARA COCINAR CON LAS FUNCIONES • Modificar la temperatura de cocinado gi- TRADICIONALES rando el mando derecho. • Programar un aviso o una duración / hora fin de cocinado. Tocando la tecla • Modificar la programación de avisos o duración/hora fin programados. Tocando la tecla INFORMACIÓN Para programar o modificar una programa-...
  • Seite 9 Español Cocinado con el Asistente Personal de Cocinado (PCA) RECETAS AUTOMÁTICAS DEL HORNO POLLO PATO AVES GANSO PAVO MUSLOS COCHINILLO BUEY CARNES CORDERO CHULETAS MERLUZA PESCADOS SALMÓN PAN BLANCO PANES PAN MORENO PAN INTEGRAL PIZZA GRUESA PIZZAS PIZZA FINA PASTEL DE MOLDE PASTEL DE FRUTAS GRANDE POSTRES PASTEL DE FRUTAS PEQUEÑO...
  • Seite 10 PARA COCINAR CON EL ASISTENTE El horno empezará a cocinar, y la pantalla de PERSONAL DE COCINADO selección dará paso a la pantalla de cocinado, en la que se mostrará la siguiente información: Encienda el horno tocando la tecla • Temperatura de cocinado seleccionada Toque la tecla •...
  • Seite 11 Español PRECALENTAMIENTO EN VACÍO VOLTEO DEL ALIMENTO Las recetas indicadas en la tabla con el símbolo Las recetas indicadas en la tabla con el símbolo , requieren introducir el alimento con el horno , requieren dar la vuelta al alimento durante ya caliente.
  • Seite 12: Funciones De Seguridad

    empiece el cocinado de forma automática y se PARA PROGRAMAR LAS OPCIONES apague también de forma automática una vez DE TEMPORIZACIÓN transcurrido el tiempo de cocinado programado. INFORMACIÓN Para programar esta opción, deberá progra- mar la Duración y la Hora de Finalización del Cocinado consecutivamente.
  • Seite 13 Para abrir la puerta, debe desactivar el bloqueo de seguridad para niños, siguiendo las instruc- ciones indicadas anteriormente. Función Teka Hydroclean ® Siga para ello las instrucciones que apa- Esta función facilita la limpieza de la grasa y los recen en el libro de instalación y manteni-...
  • Seite 14 7. El horno se apagará automáticamente. 4. A continuación se oirá una señal sonora 8. El horno está listo para retirar los restos de como confirmación de que la función Teka suciedad y agua sobrante con la bayeta. Hydroclean se ha puesto en marcha.
  • Seite 15 Español Función de autolimpieza por pirólisis 1. Encienda el horno y seleccione la función ATENCIÓN Pirólisis girando el mando izquierdo. Antes de realizar el ciclo de limpieza por pi- rólisis, lea atentamente las instrucciones de seguridad que encontrará al inicio del libro de Instalación y Mantenimiento.
  • Seite 16 6. Pulse cualquier tecla del reloj para detener la señal acústica. 7. El horno se apagará automáticamente. 8. El proceso de calentamiento del horno ha finalizado, sin embargo el horno está exce- sivamente caliente y no puede ser utilizado. Hasta que el horno no se enfríe la refrigera- ción continúa funcionando y el símbolo permanece iluminado.
  • Seite 17 Español CANCELACIÓN DE LA PIRÓLISIS Una vez que la puerta está desbloqueada y pueda abrirse, desaparecerá el símbolo La pirolisis es una función automática y como y se mostrará de nuevo la hora en la tal, sólo puede accionarse mediante la progra- pantalla del reloj.
  • Seite 18: Descrição Do Forno

    Descrição do forno Painel de Comandos Bloqueio / Interruptor da porta (apenas para modelos pirolíticos) Resistência do grill Apoio dos tabuleiros Grelha Tabuleiro Dobradiça Vidro interior Saída de ar de refrigeração Interruptor da porta (apenas para modelos NÃO pirolíticos) Fixação ao móvel Lâmpada Painel traseiro Turbina...
  • Seite 19 Português Ligar e acertar a hora Ao ligar o forno pela primeira vez, aparecerá o FUNÇÃO DEMO (Função especial logótipo seguido da indicação 12:00 a piscar. para exposições) Para poder trabalhar com o forno, é necessário Com a função DEMO ativada, pode usar o for- acertar a hora no relógio.
  • Seite 20 Descrição do ecrã de controlo A seguir descrevemos a informação que en- ECRÃ DE SELEÇÃO contrará no ecrã de visualização do seu forno e como se apresenta. ECRÃ INICIAL / REPOUSO Este ecrã aparecerá quando o forno não estiver a funcionar, mas estiver ligado à corrente. Seleção de função.
  • Seite 21 Português ECRÃ DE COZINHADO 2. Duração do cozinhado. – Se não programou o relógio, aparecerá o tempo a que o forno está a cozinhar e a circunferência do tempo será vermelha. – Se fez alguma programação, mostrará o tempo que falta para que o cozinhado fi- nalize (contagem decrescente) e a circun- ferência do tempo será...
  • Seite 22 Cozinhado com funções tradicionais FUNÇÕES DO FORNO GRILL INFORMAÇÃO RESISTÊNCIA INFERIOR Para obter uma descrição da utilização de PIZZA cada uma das funções, consulte o guia de cozinhados fornecido com o seu forno. TURBO DESLIGAR A LUME BRANDO CONVENCIONAL FERMENTAR MASSAS CONVENCIONAL COM TURBINA DESCONGELAÇÃO GRILL E RESISTÊNCIA INFERIOR...
  • Seite 23 Português PARA COZINHAR COM • Modificar a temperatura do cozinhado AS FUNÇÕES TRADICIONAIS girando o comando direito. • Programar um aviso ou uma duração/ hora de término do cozinhado. Premindo a tecla • Alterar a programação de avisos ou du- ração/hora de término programados.
  • Seite 24 COZINHADO COM ASSESSOR PESSOAL DE COZINHADO (PCA) RECEITAS AUTOMÁTICAS DO FORNO FRANGO PATO AVES GANSO PERU PERNAS LEITÃO CARNES BORREGO COSTELETAS PESCADA PEIXES SALMÃO PÃO BRANCO PÃO PÃO DE MISTURA PÃO INTEGRAL PIZZA COM MASSA ALTA PIZZAS PIZZA COM MASSA FINA BOLO DE FORMA BOLO DE FRUTAS GRANDE SOBREMESAS...
  • Seite 25 Português PARA COZINHAR COM O ASSESSOR O forno começará a cozinhar e o ecrã de se- PESSOAL DE COZINHADO leção dará lugar ao ecrã de cozinhado, onde poderá ver a seguinte informação: Ligue o forno premindo a tecla • Temperatura de cozinhado selecionada Prima a tecla •...
  • Seite 26 PRÉ-AQUECIMENTO EM VAZIO: DAR A VOLTA AOS ALIMENTOS As receitas indicadas na tabela com o símbolo As receitas indicadas na tabela com o símbolo requerem colocar o alimento com o forno já requerem dar a volta ao alimento durante o aquecido.
  • Seite 27: Funções De Segurança

    Português cozinhado de forma automática e se desligue PARA PROGRAMAR AS OPÇÕES também de forma automática, uma vez trans- DE TEMPORIZAÇÃO corrido o tempo de cozinhado programado. INFORMAÇÃO Para programar esta opção, deverá progra- mar consecutivamente a Duração e a Hora de Finalização do Cozinhado.
  • Seite 28 Para abrir a porta, deve desativar o bloqueio segurança para crianças. de segurança para crianças seguindo as ins- truções indicadas anteriormente. Função Teka Hydroclean ® Esta função facilita a limpeza de gordura e res- Para tal, siga as instruções presentes no manual de instalação e manutenção forne-...
  • Seite 29 7. O forno apagar-se-á automaticamente. 4. A seguir ouvirá um sinal sonoro que confirma 8. O forno está pronto para retirar os restos de que a função Teka Hydroclean já começou. ® sujidade e a restante água com o pano.
  • Seite 30 Função de autolimpeza por pirólise 1. Ligue o forno e selecione a função de piróli- ATENÇÃO girando o comando esquerdo. Antes de realizar o ciclo de limpeza por piró- lise, leia atentamente as instruções de segu- rança disponibilizadas no início do manual de Instalação e Manutenção.
  • Seite 31 Português 6. Prima qualquer tecla do relógio para parar o sinal sonoro. 7. O forno desligar-se-á automaticamente. 8. O processo de aquecimento do forno finali- zou, no entanto, o forno está excessivamen- te quente e não pode ser utilizado. A refrigeração continua a funcionar até que o forno arrefeça e o símbolo permanece acesso.
  • Seite 32 CANCELAMENTO DA PIRÓLISE Assim que a porta se encontre desblo- queada e seja possível abri-la, desapare- A pirólise é uma função automática e, como tal, cerá o símbolo e a hora será nova- só pode ser acionada através da programação mente apresentada no ecrã...
  • Seite 33: Description Of The Oven

    English Description of the oven Control panel Lock/door switch (only for pyrolytic models) Grill element Tray runners Grid shelf Tray Hinge Inner pane Air cooling outlet Door switch (only for NON-pyrolytic models) Cabinet mounting Light Back wall panel Oven seal Door Control Panel Dial to scroll through the menus on the left side of the screen.
  • Seite 34 Switching on and setting the time When plugging the oven in for the first time, DEMO MODE (Special function the logo will appear followed by 12:00 flashing for shop floors) on the screen. With the DEMO mode activated, you can You must set the time in order to use the oven.
  • Seite 35: Description Of The Control Panel

    English Description of the control panel Information that you will find on the display SELECTION SCREEN screen of your oven and how this will be displayed is outlined below. START SCREEN/STANDBY This screen will appear when the oven is not working, but is still plugged in.
  • Seite 36 COOKING INFORMATION SCREEN 2. Cooking time. – If the timer has not been programmed, the elapsed cooking time will be shown and a red circle will appear around the time. – If the timer has been set, the time left until cooking ends (countdown) will be shown and the circle will be blue.
  • Seite 37 English Traditional cooking functions OVEN FUNCTIONS GRILL INFORMATION BOTTOM HEAT For a description of the use of each of these PIZZA functions, please consult the cooking guide included with your oven. TURBO ON / OFF BUTTON SLOW COOKING CONVENTIONAL RISING DOUGH CONVENTIONAL WITH FAN DEFROSTING GRILL AND BOTTOM HEAT...
  • Seite 38 COOKING WITH • Change the cooking temperature by TRADITIONAL FUNCTIONS turning the right dial. • Programme the cooking timer or a duration /finish time by pressing the button. • Modify programmed timers or duration /finish times by pressing the button. INFORMATION To set or modify a programme, consult the “Timed cooking programmes”...
  • Seite 39 English Cooking with the Personal Cooking Assistant (PCA) AUTOMATIC OVEN RECIPES CHICKEN DUCK POULTRY GOOSE TURKEY DRUMSTICKS SUCKLING PIG BEEF MEAT LAMB CHOPS HAKE FISH SALMON WHITE BREAD BREAD BROWN BREAD WHOLEMEAL BREAD THICK CRUST PIZZA THIN CRUST CAKES IN A MOULD LARGE FRUITCAKE DESSERTS SMALL PIE...
  • Seite 40 COOKING WITH THE PERSONAL The oven will start cooking and the cooking COOKING ASSISTANT screen will appear in place of the selection screen, showing the following information: Turn the oven on by pressing button. Tap • Selected cooking temperature button. •...
  • Seite 41 English PREHEATING WHILE EMPTY TURNING FOOD For recipes indicated in the table by the For recipes indicated in the table by the symbol symbol , the oven must be preheated before , food must be turned during cooking. any food is put in. The oven will notify you when to do this with an When you select one of these recipes, the audible signal and the...
  • Seite 42: Safety Instructions

    programme the oven to start cooking auto- PROGRAMMING matically and switch off automatically once the THE TIMER OPTIONS programmed time has ended. INFORMATION To programme this option, set the Cooking Duration and Finish Time consecutively. You can access the programming options at any time during cooking.
  • Seite 43 Avoid letting deposits build up to make cleaning 1. With the oven cold, spread a cloth on the easier. Clean the oven often. bottom of the oven. PROGRAMMING THE TEKA HYDROCLEAN FUNCTION ® WARNING Do not pour water into the hot oven as this can damage the enamel.
  • Seite 44 4. An audible signal will be heard confirming 7. The oven will turn off automatically. that the Teka Hydroclean feature has been ® 8. The oven is ready for dirt deposits and activated.
  • Seite 45 English Pyrolytic self-cleaning function 1. Turn the oven on and select the Pyrolysis WARNING feature using the left dial. Before carrying out the pyrolytic cleaning cycle, carefully read the safety instructions found at the beginning of the Installation and Maintenance booklet. This feature allows you to run the pyrolytic cleaning cycle during which built-up grease deposits are burned off by the high temperatures...
  • Seite 46 6. Press any key to disable the audible signal. 7. The oven will turn off automatically. 8. The oven’s heating process has ended, however the oven is extremely hot and cannot be used. The cooling motor will operate and the symbol will remain on until the oven cools down.
  • Seite 47 English CANCELLING THE PYROLYSIS When the door is unlocked and can be opened, the symbol will disappear Pyrolysis is an automatic function and as and the time will be shown again on the such, can only be activated using the timer clock display.
  • Seite 48: Description Du Four

    Description du four Panneau de commande Verrouillage / interrupteur de porte (pour les modèles à pyrolyse uniquement) Résistance du gril Supports plaques Grille Plaque Charnière Vitre intérieure Sortie d’air de refroidissement Interrupteur de porte uniquement pour les modèles SANS PYROLYSE Fixation au meuble Ampoule Panneau du fond...
  • Seite 49 Français Allumage et réglage de l’heure Lorsque vous branchez le four pour la première MODE DEMO (Fonction spéciale pour les fois au secteur, le logo apparaît suivi de l’indica- expositions) tion clignotante 12:00. Lorsque le mode DEMO est activé, le four peut Pour pouvoir utiliser le four, il est nécessaire de être utilisé...
  • Seite 50 Description de l’écran de contrôle Veuillez trouver ci-dessous la description de ÉCRAN DE SÉLECTION l’information s’affichant sur l’écran d’affichage de votre four et de la façon dont elle s’affiche. ÉCRAN D’ACCUEIL / VEILLE Cet écran apparaît lorsque le four ne fonctionne pas mais qu’il est branché...
  • Seite 51 Français ÉCRAN DE CUISSON 2. Durée de cuisson. – Si vous n’avez pas programmé l’horloge, il indique le temps que le four a passé en pleine cuisson et le cercle de temps s’af- fiche en rouge. – Si vous l’avez programmé, il indique le temps qu’il reste pour que la cuisson se termine (compte à...
  • Seite 52 Cuisson avec des fonctions traditionnelles FONCTIONS DU FOUR GRIL INFORMATION SOLE Consultez le guide de cuisson fourni avec PIZZA votre four pour connaître l’utilisation détaillée de chacune des fonctions. TURBO MODE ECO DÉCONNEXION CUISSON À FEUX DOUX CUISSON TRADITIONNELLE FERMENTATION DE PÂTES CUISSON TRADITIONNELLE DÉCONGÉLATION À...
  • Seite 53 Français POUR CUISINER AVEC LES FONCTIONS • Modifier la température de cuisson en TRADITIONNELLES tournant la commande de droite. • Programmer une alarme ou une durée/ heure de fin de cuisson. En appuyant sur la touche • Modifier la programmation des alarmes ou de la durée/heure de fin programmée.
  • Seite 54 Cuisson avec l’assistant personnel de cuisson (APC) RECETTES AUTOMATIQUES DU FOUR POULET CANARD VOLAILLES DINDE CUISSES COCHON DE LAIT BŒUF VIANDES AGNEAU CÔTES COLIN POISSONS SAUMON PAIN BLANC PAINS PAIN NOIR PAIN COMPLET PIZZA À PÂTE ÉPAISSE PIZZAS PIZZA À PÂTE FINE GÂTEAU EN MOULE GÂTEAU AUX FRUITS DESSERTS...
  • Seite 55 Français POUR CUISINER AVEC L’ASSISTANT Une fois tous les paramètres sélectionnés, vali- PERSONNEL DE CUISSON dez avec la touche Le four commence la cuisson et l’écran de sé- Allumez le four en appuyant sur la touche lection fait place à l’écran de cuisson sur lequel Appuyez sur la touche vous trouvez l’information suivante : •...
  • Seite 56 PRÉCHAUFFAGE À VIDE RETOURNER L’ALIMENT Les recettes présentes dans le tableau avec le Pour les recettes présentes dans le tableau symbole requièrent l’introduction de l’aliment avec le symbole , il faut retourner l’aliment dans un four déjà chaud. pendant la cuisson. Lorsque vous sélectionnez une de ces recettes, Le four vous indique quand vous devez le faire le symbole...
  • Seite 57: Fonctions De Sécurité

    Français grammer le four pour qu’il commence la cuis- POUR PROGRAMMER LES OPTIONS son automatiquement et s’éteigne également DE MINUTERIE automatiquement une fois le temps de cuisson programmé écoulé. INFORMATION Pour programmer cette option, vous devrez programmer consécutivement la durée et l’heure de fin de cuisson.
  • Seite 58 Si vous ne souhaitez pas verrouiller la porte, désactivez la sécurité pour enfants. Fonction Teka Hydroclean ® Cette fonction facilite le nettoyage des traces Pour ce faire, suivez les instructions figu- rant dans le manuel d’installation et d’en-...
  • Seite 59 éteindre le sym- bole 4. Un signal sonore est alors émis pour confir- 7. Le four s’éteint automatiquement. mer la mise en marche de la fonction Teka 8. Le four est prêt pour retirer les restes de sa- Hydroclean ®...
  • Seite 60 Fonction d’auto-nettoyage par pyrolyse 1. Allumez le four et sélectionnez la fonction MISE EN GARDE Pyrolyse en tournant la commande de Avant d’effectuer le cycle de nettoyage par gauche. pyrolyse, lisez attentivement les instructions de sécurité que vous trouverez au début du manuel d’installation et d’entretien.
  • Seite 61 Français 6. Appuyez sur n’importe quel symbole de l’horloge pour arrêter le signal sonore. 7. Le four s’éteint automatiquement. 8. Le processus de chauffage du four est termi- né, le four reste cependant très chaud et ne peut être utilisé. Le refroidissement se poursuit jusqu’à...
  • Seite 62 ANNULATION DE LA PYROLYSE Une fois que la porte est déverrouillée et peut s’ouvrir, le symbole disparaît et La pyrolyse est une fonction automatique, elle l’heure s’affiche de nouveau sur l’écran se met donc uniquement en marche par le biais de l’horloge.
  • Seite 63: Backofenbeschreibung

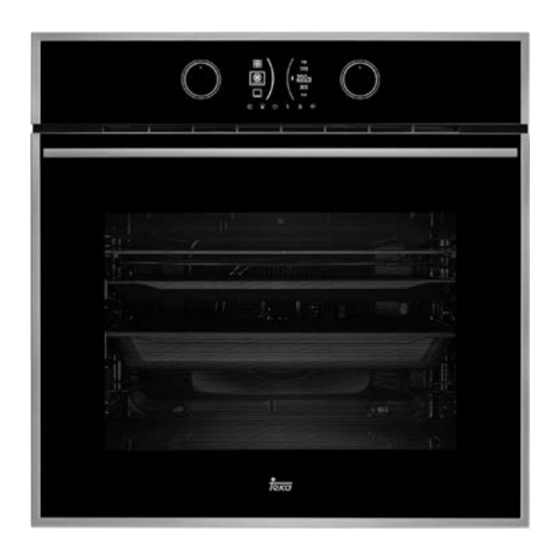
    Deutsch Backofenbeschreibung Bedienfeld Sperre / Türschalter (nur für Pyrolyse-Modelle) Grillwiderstand Führungsschienen Rost Backblech Scharnier Innenscheibe Kühlluftaustritt Türschalter (nur für Modelle OHNE Pyrolysefunktion) Befestigung am Einbauschrank Lampe Rückwand Heißluft-Ventilator Backofendichtung Tür Bedienfeld Schalter zur Navigation in den Menüs auf der linken Seite. Wahlschalter Garfunktionen Anzeigebild Schalter zur Navigation in den Menüs auf der rechten Seite.
  • Seite 64: Einschalten Und Uhreinstellung

    Einschalten und Uhreinstellung Wird der Backofen zum ersten Mal an das DEMO-MODUS (Sonderfunktion Stromnetz angeschlossen, erscheint das Logo für Ausstellungen) und anschließend blinkt die Anzeige 12:00. Bei eingeschaltetem DEMO-Modus kann der Um den Backofen benutzen zu können, muss Backofen ohne Aufheizen bedient werden. die Uhrzeit eingestellt werden.
  • Seite 65: Beschreibung Des Bedienfelds

    Deutsch Beschreibung des Bedienfelds Im Anschluss sind die Informationen beschrie- AUSWAHLBILD ben, die auf dem Display Ihres Backofens an- gezeigt werden. STARTANZEIGE Diese Anzeige erscheint, wenn der Backofen nicht in Betrieb, aber an die Stromversorgung angeschlossen ist. Funktionsauswahl Während der Auswahl einer Garfunktion, eines automatischen Rezepts oder einer Uhrfunktion ist die Anzeige in zwei Bereiche aufgeteilt: LINKER BEREICH: In diesem Bereich werden...
  • Seite 66 GARANZEIGE 2. Gardauer: - Wenn die Uhr nicht programmiert wurde, wird die Dauer angezeigt, die der Backo- fen schon gart, und der Zeitkreis erscheint rot. - Wurde eine Programmierung vorgenom- men, wird die Zeit angezeigt, die bis zum Ende der Garzeit aussteht (Countdown), und der Zeitkreis erscheint blau.
  • Seite 67: Nutzung Der Herkömmlichen Garfunktionen

    Deutsch Nutzung der herkömmlichen Garfunktionen BACKOFENFUNKTIONEN GRILL HINWEIS UNTERHITZE Für eine Beschreibung der einzelnen Funk- PIZZA tionen lesen Sie bitte die im Lieferumfang Ihres Backofens enthaltene Übersicht über TURBO die Garfunktionen. NIEDERTEMPERATUR-GAREN AUSSCHALTEN TEIGE AUFGEHEN LASSEN NORMAL AUFTAUEN NORMAL MIT UMLUFT HYDROCLEAN GRILL UND UNTERHITZE PYROLYSE (je nach Modell)
  • Seite 68 NUTZUNG DER HERKÖMMLICHEN • die Gartemperatur ändern, indem der GAR FUNKTIONEN rechte Schalter gedreht wird. • einen Alarm oder die Dauer/Endzeit des Garvorgangs programmieren (durch Be- rühren der Taste • die Programmierung eines Alarms oder der Dauer/Endzeit ändern (durch Berüh- ren der Taste HINWEIS Zur Programmierung oder Änderung einer...
  • Seite 69: Kochen Mit Dem Persönlichen Garassistenten (Pga)

    Deutsch Kochen mit dem persönlichen Garassistenten (PGA) AUTOMATISCHE BACKOFEN-REZEPTE HÄHNCHEN ENTE GEFLÜGEL GANS PUTE SCHENKEL SPANFERKEL OCHSE FLEISCH LAMM KOTELETTS SEEHECHT FISCH LACHS WEISSBROT BROT DUNKLES BROT VOLLKORNBROT DICKE PIZZA PIZZA DÜNNE PIZZA FORMKUCHEN GROSSER OBSTKUCHEN NACHSPEISEN KLEINER OBSTKUCHEN BLECHKUCHEN Rezepte, bei denen der leere Backofen vorgeheizt werden muss.
  • Seite 70 NUTZUNG DES PERSÖNLICHEN Nachdem alle Parameter ausgewählt wurden, GARASSISTENTEN müssen Sie sie mit der Taste bestätigen. Der Backofen startet den Garvorgang und die Schalten Sie den Backofen ein, indem Sie die Auswahlanzeige wechselt zur Garanzeige, auf Taste berühren. der folgende Informationen zu sehen sind: •...
  • Seite 71: Zeiteinstellung Des Backofens

    Deutsch LEEREN BACKOFEN VORHEIZEN GARGUT WENDEN Bei den in der Tabelle mit dem Symbol Bei den in der Tabelle mit dem Symbol kennzeichneten Rezepten muss das Gargut in kennzeichneten Rezepten muss das Gargut den zuvor vorgeheizten Backofen gestellt werden. während des Garvorgangs gewendet werden. Wird eines dieser Rezepte gewählt, erscheint Der Backofen weist Sie auf diesen Zeitpunkt bei Garbeginn das Symbol...
  • Seite 72: Sicherheitsfunktionen

    automatisch beginnt und sich automatisch ab- PROGRAMMIERUNG DER OPTIONEN schaltet, sobald die programmierte Gardauer DER ZEITEINSTELLUNG: abgelaufen ist. HINWEIS Zur Programmierung dieser Option müssen Gardauer und Garzeit-Ende nacheinander programmiert werden. Sie haben während des Garvorgangs jederzeit Zugriff auf die Programmieroptionen. Programmierung der Gardauer Auf die gleiche Weise können Sie auch eine be- 1.
  • Seite 73 Sie die Kindersicherung ausschalten. Tür verhindert. Um die Tür öffnen zu können, müssen Sie die Kindersicherung ausschalten, indem Sie die o. a. Anweisungen befolgen. Teka Hydroclean -Funktion ® Mit dieser Funktion wird die Reinigung der Fett- Befolgen Sie dafür die Anweisungen im Einbau- und Wartungshandbuch, das im und Schmutzreste, die an den Backofenwän-...
  • Seite 74 Taste, um das akustische Signal und das 4. Anschließend ertönt ein akustisches Signal Symbol auszuschalten. zur Bestätigung, dass die Teka Hydro clean ® 7. Der Backofen schaltet sich automatisch ab. Funktion eingeschaltet wurde. 8. Nun können Sie die Schmutzreste und das Auf dem Bildschirm erscheinen das Symbol übrige Wasser mit dem Tuch entfernen.
  • Seite 75: Selbstreinigungsfunktion Anhand Pyrolyse

    Deutsch Selbstreinigungsfunktion anhand Pyrolyse 1. Schalten Sie den Backofen ein und wählen ACHTUNG Sie die Pyrolysefunktion , indem Sie den Bevor Sie den Pyrolyse-Reinigungsvorgang linken Schalter drehen. ausführen, müssen Sie die Sicherheitshin- weise im Einbau- und Wartungshandbuch aufmerksam lesen. Mit dieser Funktion erfolgt ein Pyrolyse-Reini- gungsvorgang, bei dem das angesammelte Fett durch die heißen Temperaturen, die im Backo- feninneren entstehen, verbrannt wird.
  • Seite 76 6. Drücken Sie eine beliebige Taste der Uhr, um das akustische Signal abzustellen. 7. Der Backofen schaltet sich automatisch ab. 8. Der Aufheizvorgang des Backofens ist been- det; dennoch ist der Backofen extrem heiß und kann nicht benutzt werden. Solange der Ofen nicht abgekühlt ist, bleibt die Kühlung in Betrieb und das Symbol leuchtet weiter.
  • Seite 77 Deutsch ABBRUCH DER PYROLYSE Sobald die Tür entsperrt ist und geöffnet werden kann, verschwindet das Symbol Die Pyrolyse ist eine automatische Funktion und auf der Uhranzeige ist erneut die und kann als solche nur durch Programmieren Uhrzeit zu sehen. der Uhr gestartet werden. Um einen laufenden Pyrolyse-Vorgang abzubrechen, muss die Pro- b) Sichere Innentemperatur: Wenn die In- grammierung des Backofens wie folgt annulliert...
  • Seite 78: Beschrijving Van De Oven

    Beschrijving van de oven Bedieningspaneel Vergrendeling / Deurschakelaar (alleen voor pyrolytische modellen) Grillweerstand Plaathouder Braadrooster Plaat Scharnier Binnenglas Koelluchtuitlaat Deurschakelaar (alleen voor niet-pyrolytische modellen) Bevestiging aan meubel Lamp Achterpaneel Turbine Ovendichting Deur Bedieningspaneel Knop om door de menu's aan de linkerkant van het scherm te bladeren. Bakmodusschakelaar Display.
  • Seite 79 Nederlands Inschakelen en gelijkzetten Als de oven voor het eerst op het elektriciteits- DEMO-FUNCTIE (Speciale functie net wordt aangesloten, verschijnt het logo ge- voor showrooms) volgd door de knipperende aanduiding 12:00. Met ingeschakelde DEMO-functie kunt u de Om met de oven te kunnen werken, moet de oven bedienen zonder hem te verwarmen.
  • Seite 80 Beschrijving van het bedieningsscherm Hierna wordt beschreven welke informatie op SELECTIESCHERM het display van uw oven verschijnt en hoe deze wordt weergegeven. BEGINSCHERM / RUSTSTAND Dit scherm verschijnt wanneer de oven niet in werking is, maar wel op het elektriciteitsnet is aangesloten.
  • Seite 81 Nederlands BAKSCHERM 2. Baktijd. – Als u de klok niet heeft geprogrammeerd, wordt getoond hoelang de oven bezig is met bakken en is de tijdcirkel rood. – Als de oven wel is geprogrammeerd, dan wordt getoond hoelang het nog duurt voordat het bakproces is voltooid (aftellen) en is de tijdcirkel blauw.
  • Seite 82 Bakken met de traditionele functies FUNCTIES VAN DE OVEN GRILL INFORMATIE OVENVLOER Raadpleeg voor een beschrijving van het ge- PIZZA bruik van elk van de functies de bij de oven meegeleverde bakgids. TURBO UITSCHAKELING OP EEN ZACHT VUURTJE CONVENTIONEEL DEEG LATEN RIJZEN CONVENTIONEEL MET TURBINE ONTDOOIEN GRILL EN OVENVLOER...
  • Seite 83 Nederlands BAKKEN MET DE • De baktemperatuur veranderen door aan TRADITIONELE FUNCTIES de rechterknop te draaien. • Een melding of baktijd/bakeinde pro- grammeren. Door de toets aan te raken. • De geprogrammeerde meldingen of bak- tijd/bakeinde veranderen. Door de toets aan te raken.
  • Seite 84 Bakken en koken met de Persoonlijke Bakassistent (PBA) AUTOMATISCHE RECEPTEN VAN DE OVEN EEND GEVOGELTE GANS KALKOEN BOUTEN SPEENVARKEN OSSENVLEES VLEESGERECHTEN KARBONADES HEEK VISGERECHTEN ZALM WITBROOD BROOD BRUIN BROOD VOLKORENBROOD PIZZA DIKKE BODEM PIZZA PIZZA DUNNE BODEM CAKE GROOT VRUCHTENGEBAK NAGERECHTEN KLEIN VRUCHTENGEBAK GEBAK OP BAKPLAAT...
  • Seite 85 Nederlands BAKKEN MET DE PERSOONLIJKE Als alle parameters zijn gekozen, bevestig dan BAKASSISTENT met de toets De oven begint het bakproces en het selec- Schakel de oven in door op de toets tiescherm maakt plaats voor het bakscherm, drukken. waarop de volgende informatie wordt weerge- geven: •...
  • Seite 86 LEEG VOORVERWARMEN OMDRAAIEN VAN HET VOEDSEL Voor de in de tabel met het symbool aange- Voor de in de tabel met het symbool aan- duide recepten moet het voedsel in een reeds geduide recepten moet het voedsel tijdens het warme oven worden geïntroduceerd. bakproces worden omgedraaid.
  • Seite 87 Nederlands Begin van een van tevoren geprogram- PROGRAMMEREN meerd bakproces ( Duur + Eindtijd VAN TIMINGOPTIES van het bakproces): Hiermee kunt u de oven programmeren zodat het bakproces automa- tisch begint en tevens automatisch wordt uitge- schakeld, nadat de geprogrammeerde baktijd voorbij is.
  • Seite 88 1 Spreid, als de oven is afgekoeld, een doekje Laat vuil niet ophopen. Op die manier kan de uit op de ovenvloer. oven gemakkelijker worden schoongemaakt Maak de oven regelmatig schoon. DE TEKA HYDROCLEAN ® FUNCTIE PROGRAMMEREN LET OP Giet geen water in de warme oven. Dit kan het email van uw oven beschadigen.
  • Seite 89 4 Vervolgens hoort u een geluidssignaal ter 7 De oven gaat automatisch uit. bevestiging van het feit dat de Teka Hydro- 8 De oven is klaar om de vuilresten en het clean functie in werking is gesteld.
  • Seite 90: Pyrolytische Zelfreinigingsfunctie

    Pyrolytische zelfreinigingsfunctie LET OP LET OP Zorg er voordat u de pyrolyse in werking stelt Lees voordat u de pyrolytische reinigings- voor dat de ovendeur op juiste wijze is ge- cyclus gaat uitvoeren aandachtig de veilig- sloten. heidsinstructies die u aan het begin van de installatie- en onderhoudshandleiding vindt.
  • Seite 91 Nederlands 6. Druk op een willekeurige toets van de klok om het alarm te stoppen. 7. De oven gaat automatisch uit. 8. Het verwarmingsproces van de oven is vol- tooid, maar de oven is nog te warm en kan niet worden gebruikt. Het verwarmingspro- ces van de oven is voltooid, maar de oven is nog te warm en kan niet worden gebruikt.
  • Seite 92 ANNULEREN VAN DE PYROLYSE Nadat de deur is ontgrendeld en kan wor- den geopend, verdwijnt het symbool De pyrolyse is een automatische functie en hoeft en wordt opnieuw de tijd op het scherm dan ook alleen maar d.m.v. de programmering van de klok weergegeven.
  • Seite 93 Ελληνικά ι ν ς χ ρ σ ό ης δ ς όρ ς ό γ σ σ η ρό σης σ ση γ ρ ηρ γ χ ρ σ ς σ ρ ό ρ σ δ ς ρ ης ό ης όρ ς ό...
  • Seite 94 ν η λ ι κ ι ι η η ό ς ρ ς σ δ γ ρ η ρ ς σ σ ργ ήσ ό σ η ρ χή ρ ς σ ρό ργ ς ρ ς ρό γό σ η σ χ...
  • Seite 95 Ελληνικά ι ν κ ι ι ρ γρ ή ηρ ρ Ε σ η ό η ρ σ ς ρό ς ρ σ σής ς Ε ό η ή σ ό ρ ς σ ς δ ργ σ δ δ ς...
  • Seite 96 Ε Ε ν ι δ χ ρ γρ σ ρ ό χρό ς γ ρ ρ ς ρ ρ σ χ σ χρό χ ό χρ χ ρ γρ σ ό σ ρ ό ό ς χρό ς γ η ή η γ...
  • Seite 97 Ελληνικά ι κ λ ι ν Ε Ε Ε η ρ γρ ή ης χρήσης ργ ς σ δηγό γ - ρ ς σ δ ρ σ ς Ε Ε Ε Ε Ε Ε Ε Ε Ε Ε νάλ ν λ...
  • Seite 98 • Ε Ε Ε ι η κ σ ρ ς δ δ ό η Ε Ε Ε ι • ι η η ιά κ ι λ η ι ήσ ή ρ • ι ι ν ι ι ι ι νη ιά - ήσ...
  • Seite 99 Ελληνικά ι ι ν ν Ε Ε Ο Ο Ο Ο Ε Ο Ο Ο Ο Ο Ο Ο Ο Ο Ο Ε Ο Ο Ο Ο Ο Ο Ο Ο Ο Ο Ο Ο Ο Ο Ο Ο Ο γ...
  • Seite 100 Ο ρ ς ήσ γ ρ η Ε Ε Ε Ε ό η γής ρ σ ό η Ε Ε Ε γ ρ ς ό ό ργ ήσ ρ ς ή- ς ηρ ρ ς ρ γ η ρ ρ σ γ...
  • Seite 101 Ελληνικά Ε Ε Ο σ γ ς σ δ σή- Ο σ γ ς σ δ σή- ση σ ση σ η ρ - γ ρ - ρ ση ρ ρ η σ σ ρό η δ ρ γ - ρό...
  • Seite 102 ήσ δή ή ρ γ σ Ε Ε ηχη ό σή σ ήσ ρ ς Ε Ε ν η ι κ η η ιά κ ι λ η ι ρ ρ γρ σ ό ρ σ ήσ ό γ ρ σ...
  • Seite 103 Ελληνικά ι ν ν ιη η λ ι η όρ ρ ήσ ή ρ γ ρ ργ ήσ δ σ ς γ χρ ό δ σ η σ σ χ ρ - δ ς ς ρ δηγ ς ηρ σ ός...
  • Seite 104 ηρ ς ρ σ Ε ρ ς σ ήσ σ ηχη- ρ σ ρ σ σ ό σή σ σ ή ή ρρ ό γ γρήγ ρ σ ρό ρ ρ σ ς ργ ήσ ρ σ ρ ρ - η...
  • Seite 105 Ελληνικά ι κ ι η λ η η δ δ σ ης ρό σης ρ γ ρ δ ς ρ ρ γ ήσ ρ γ ς ρ σ ρό ση δ σ ρ σ - ς δηγ ς σ ς ρ...
  • Seite 106 δ σ η όρ σ η ηρ ρ σ ός σ - ό η ρ γ σ σ η ρό σης σ ηχη ό σ ό ς χρό ς ς η σή σ σ ή ή η ης δ δ σ...
  • Seite 107 Ελληνικά ό ς η όρ δ σ ρ χ σ σ ρό ση ό η δ δ σ σ σ η ό η σ ρ ό ργ η ρ γ η ρ ρ γρ σ ό ρ γ ρ ρ σ σ σ...
  • Seite 111 HLB 860 0.83 kWh/cycle* 0.68 kWh/cycle* 31 kg...
  • Seite 112 HLB 860 P 0.87 kWh/cycle* 0.68 kWh/cycle* 36 kg...

Diese Anleitung auch für:

Hlb 860 pHlb pHlb 860

Inhaltsverzeichnis