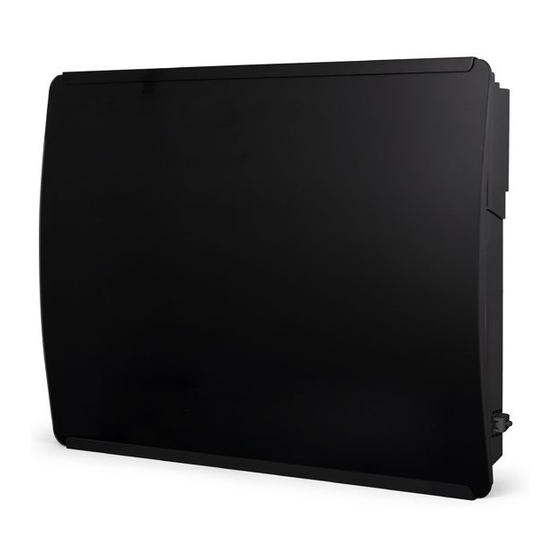
Herunterladen Inhalt Inhalt Diese Seite drucken

Werbung

Verfügbare Sprachen

Verfügbare Sprachen

BEDIENUNGSANLEITUNG | MODE D'EMPLOI |
ISTRUZIONE D'USO | ORIGINAL INSTRUCTIONS
Glaspanel-Heizer | Radiateur à panneau de verre |
Pannello radiante in vetro | Glass panel heater
caldĕo 2017.08.06

Werbung

Inhaltsverzeichnis
loading

Inhaltszusammenfassung für Ayce HPG02E-15

  • Seite 1 BEDIENUNGSANLEITUNG | MODE D‘EMPLOI | ISTRUZIONE D‘USO | ORIGINAL INSTRUCTIONS Glaspanel-Heizer | Radiateur à panneau de verre | Pannello radiante in vetro | Glass panel heater caldĕo 2017.08.06...
  • Seite 2: Erläuterung Der Symbole

    02 03 ERLÄUTERUNG DER SYMBOLE: bevor Sie das Gerät benutzen. 2. Kontrollieren Sie, ob die Netzspannung, mit der Sie das Gerät betreiben möchten, mit der auf dem Typenschild des Gerätes vermerkten Spannung übereinstimmt. 3. Betreiben Sie das Gerät nicht, wenn das Kabel oder der Entspricht den Europäischen Normen.
  • Seite 3 04 05 12. Um Überhitzen zu vermeiden, das Heizgerät nicht worden sind und die möglichen Gefahren begriffen bedecken. haben. Kinder zwischen 3 und 8 Jahren dürfen das 13. Um Brandgefahr zu vermeiden, blockieren Sie die Produkt nicht anschliessen, regulieren, reinigen oder Lüftungsschlitze nicht mit Gegenständen.
  • Seite 4: Technische Daten

    06 07 TECHNISCHE DATEN: Modell HPG02E-15 Nennleistung 1500 W Nennspannung 220-240 V~ Nennfrequenz 50-60 Hz Schutzklasse ANBRINGUNG: 300mm 300mm 300mm 300mm 1. Halten Sie das Haltegestell als Führungslineal an die Achten Sie darauf, dass der Abstand zu Wänden und Wand (achten Sie darauf, dass die Verbindungslinie Gegenständen eingehalten wird.
  • Seite 5: Betrieb

    08 09 dem Boden zuerst in das Haltegestell ein und drücken Verringern; gedrückt halten zum schnellen Verringern; Sie dann gegen das Gehäuse der Heizung, damit es am Zurückschalten der Stunde bei der 24-Stunden- Haltegestell einrastet. Programmierung. Modus oder Programm auswählen Warnhinweis: Achten Sie darauf, zwischen Heizung und Boden, Wand usw.
  • Seite 6 10 11 um die Uhrzeit zu ändern. Drücken Sie in einmal auf . Das Symbol und das Symbol für die erste Stunde beginnen zu B. Funktion einstellen: blinken. Mit wählen Sie den Modus für jede Stunde Drücken Sie zur Auswahl und mit schalten Sie das blinkende Symbol für die Stunde...
  • Seite 7: Sicherheitsschalter

    12 13 Programm-Werkseinstellung: : Gleiches Programm von Montag bis Sonntag,               Programm kann vom Kunden geändert werden.        Werktag Wochenende Funktion zur Fenstererkennung: D r ü...
  • Seite 8: Reinigung Und Wartung

    14 15 Wenn die Sicherheitsvorrichtung ausgelöst worden ist, so im Original-Karton und lagern Sie es an einem schalten Sie den Heizer ab, trennen Sie ihn vom Stromnetz trockenen und belüfteten Ort. und lassen Sie ihn vollständig abkühlen. Untersuchen Sie 3. Während der Lagerung keine schweren Gegenstände ihn auf Blockierungen der Luftein- und -auslassschlitze auf den Karton stellen, da dies zu Schäden am Gerät und versuchen Sie dann erneut, ihn in Betrieb zu nehmen.
  • Seite 9 16 17...
  • Seite 10: Technische Zeichnung

    18 19 TECHNISCHE ZEICHNUNG ERSATZTEILLISTE Teilebezeichnung Teilebezeichnung Gehärtetes Glas PCB-Gehäuse (hinten) Seitliches Befestigungsteil Schaltkasten Thermostathalterung Display Glashalterung Display-Abdeckung Selbstabschaltender Stromkabel Thermostat Rückseitiges Blech Kühlrippe Halterung für selbstabschaltenden Sensorhalterung Thermostat Befestigungsbügel Halterung für Heizelement Schaltkasten Heizelement...
  • Seite 11: Description Des Symboles

    20 21 DESCRIPTION DES SYMBOLES : de l’appareil. 3. N’utilisez pas l’appareil si le câble est endommagé. 4. Maintenez cet appareil et son câble à l’écart, des sources de chaleurs, objets tranchant, ou toute chose susceptibles de les endommager. Conforme aux réglemenations européeenes applicables. 5.
  • Seite 12: Caracteristiques Techniques

    à moins d’être surveillés en continu. CARACTERISTIQUES TECHNIQUES: Les enfants âgés entre 3 ans et 8 ans ne peuvent Modèle HPG02E-15 allumer ou éteindre l'appareil qu’à condition qu'il ait Puissance nominale 1500 W été placé ou installé dans sa position normale de fonctionnement et qu’ils aient reçu l’autorisation ainsi...
  • Seite 13: Installation

    24 25 INSTALLATION: 1. Placez le système de suspension comme guide contre le mur (assurez-vous que les trous sont au même niveau). Utilisez un crayon pour indiquer les 300mm emplacements des trous. 2. Percez des trous dans le mur à l'aide d'une mèche de 8 mm de diamètre et insérez la cheville en plastique.
  • Seite 14: Démarrage Rapide

    26 27 UTILISATION: définir la température souhaitée. Écran et panneau de commande MODE D'EMPLOI DÉTAILLÉ A. Réglage de l'horloge : Avant d'utiliser les programmes P1/P2/P3, vous devez        régler l'horloge  ; ces programmes ne fonctionneront qu'une fois l'horloge configurée.
  • Seite 15 28 29 cette température n'est pas modifiable. Dès que vous vous trouvez dans , appuyez une fois sur 3. Changer de programme : : les symboles indiquant le programme et l'heure Les programmes sont préréglés en usine. en cours de réglage se mettent à...
  • Seite 16: Maintenance

    30 31 : Le programme présente un schéma de réglage b) Si vous appuyez sur , le chauffage se remet identique du lundi au vendredi, et un autre pour samedi et en route selon le programme défini et le symbole de dimanche.
  • Seite 17 32 33 grilles. 3. Nettoyer l’extérieur de l’appareil en l’essuyant avec un linge humide et en le séchant avec un linge sec. N’immergez jamais l’appareil dans l’eau et ne laissez jamais d’eau pénétrer dans l’appareil. STOCKAGE: 1. Débranchez toujours l’appareil de la prise électrique, laissez-le refroidir et nettoyez-le avant stockage.
  • Seite 18 34 35...
  • Seite 19: Vue Éclatée

    36 37 VUE ÉCLATÉE LISTE DES PIECES Dénomination Dénomination Boîtier de la carte à circuit Verre trempé imprimé (arrière) Pièce de fixation latérale Boîtier de commande Support du thermostat Écran Support du verre Protection d'écran Thermostat avec dispositif Cordon d'alimentation d'arrêt automatique Plaque arrière Ailette de refroidissement...
  • Seite 20: Descrizione Dei Simboli

    38 39 DESCRIZIONE DEI SIMBOLI: 1. Leggere attentamente le istruzioni prima dell’uso. 2. Accertarsi che la tensione sia identica a quella indicata sulla targhetta dell’apparecchio. 3. Evitare di utilizzare l’apparecchio qualora il cavo o la spina fossero danneggiati. Conforme alle direttive europee applicabili a questo 4.
  • Seite 21: Caratteristiche Tecniche

    18. I bambini di età inferiore a 3 anni non devono CARATTERISTICHE TECNICHE: avvicinarsi al prodotto se non costantemente Modello HPG02E-15 supervisionati. Potenza nominale 1500 W 19. I bambini di età compresa fra 3 e 8 anni possono solamente accendere e spegnere l’apparecchio purchè...
  • Seite 22: Installazione

    42 43 INSTALLAZIONE: 1. Appoggiare al muro la griglia di sospensione ed usarla come righello (accertarsi che i fori siano allineati e paralleli), usare un pennarello per segnare le posizioni 300mm dei fori. 2. Praticare i fori alla parete con una punta per trapano di 8mm di diametro ed inserire il tassello ad espansione 300mm 300mm...
  • Seite 23: Funzionamento

    44 45 FUNZIONAMENTO: COME USARE L’APPARECCHIO Pannello di controllo e schermo. A. Impostazione orologio: Al primo utilizzo del programma occorre impostare l’orologio prima di poter utilizzare le funzioni P1/P2/P3. Solo dopo aver impostato l’orologio il programma potrà    ...
  • Seite 24 46 47 temperatura. per modificare la regolazione del LOGO lampeggiante 3. Modifiche al programma: dell’ora fino al completamento dell’impostazione delle 24 Il programma viene fornito con l’impostazione di fabbrica ore. Premere per confermare l’impostazione delle 24 . È possibile modificare questa impostazione ore e passare dall’impostazione del programma del lunedì...
  • Seite 25: Manutenzione

    48 49 La tastiera si blocca automaticamente dopo 1 minuto di inattività.               Premere contemporaneamente per sbloccare la tastiera. è visualizzato solo quando il dispositivo sta riscaldando. D I S P O S I T I V O D I S I C U R E Z Z A C O N T R O I L Giorno lavorativo Fine settimana...
  • Seite 26 50 51 all’interno dell’apparecchio. CONSERVAZIONE: 1. Staccare sempre la spina dall’apparecchio e lasciarlo raffreddare completamente prima di riporlo. 2. Se l’apparecchio non viene utilizzato per lunghi periodi, riporre l’apparecchio e il manuale d’uso nel cartone originale e conservarlo in un luogo asciutto e ventilato. 3.
  • Seite 27 52 53...
  • Seite 28 54 55 SCHEMI TECNICI ELENCO DEI PEZZI DI RICAMBIO Nome dell'articolo Nome dell'articolo Scatola del circuito Vetro temprato stampato (posteriore) Elemento di fissaggio Scatola di controllo laterale Fermo per termostato Schermo Fermo per vetro Copertura dello schermo Termostato ad Cavo di alimentazione autospegnimento Guscio posteriore Aletta di raffreddamento...
  • Seite 29: Description Of The Symbols

    56 57 DESCRIPTION OF THE SYMBOLS: 2. Make sure the voltage is the same as that indicated on the rating plate of the appliance. 3. Do not operate this appliance if the cable or plug becomes damaged. 4. Keep the appliance and cable away from sources In accordance with European directives applicable to this of heat, sharp objects or anything that may cause product...
  • Seite 30: Technical Specifications

    Cleaning and user maintenance shall not be made by children without supervision. TECHNICAL SPECIFICATIONS: 18. Children of less than 3 years should be kept away Model HPG02E-15 unless continuously supervised. 19. Children aged from 3 years and less than 8 years Rated Power 1500 W...
  • Seite 31: Operation

    60 61 Make sure that the distance from walls and objects is hooked on the whole hanging rack. respected. Warning: Be sure to keep the distance between the heater and floor, wall and so on at least 30cm. Warning! When drilling holes, Always check to ensure there is no wiring, pipework, etc in the area to be drilled.
  • Seite 32: Quick Start

    62 63 Comfort mode: Setting temp. from 5ºC to 35ºC ECO mode: Setting temp. from 1.5ºC to 31.5ºC; 3.5ºC less than comfort mode, when you set up the temp. of ECO Setting / OK mode. Open-window on/off Anti-frost mode: Setting 7ºC for room temp; Cannot change the temp.
  • Seite 33 64 65 hour LOGO till finsh 24 hours mode setting. Press : Can set different program for each day. Factory presetting is with same program from Monday to to confirm the 24 hour setting and turn from Monday Friday, same program from Saturday to Sunday. program to Tuesday program setting.
  • Seite 34 66 67 or outlet, attempting to restart the heater then after. If the heater fails to operate or the safety device switches the heater off again, return heater to your nearest service center for examination or repair. MAINTENANCE: 1. Always disconnect the appliance and let it completely cool before any maintenance.
  • Seite 35 68 69...
  • Seite 36: Technical Drawing

    70 71 TECHNICAL DRAWING SPARE PARTS LIST Description Description Tempered glass Side fixation part Control box Thermostat holder Screen Glass holder Screen cover Self cut-off thermostat Power cord Back sheel Cooling fin Self cut-off thermostat Senser holder holder Fixation bracket Heating element holder Control box Heating element...
  • Seite 37 Technische und gestalterische Änderungen im Zuge stetiger Produktverbesserungen vor- behalten. Sous réserve de modifications techniques et structurelles dans le cadre de l‘amélioration constante des produits. Su riserva di eventuali modifiche tecniche e strutturali derivate dal costante miglioramento dei prodotti. 06.2017 CH-Import &...

Inhaltsverzeichnis