Herunterladen Inhalt Inhalt Diese Seite drucken
Inhaltsverzeichnis

Werbung

Verfügbare Sprachen

Verfügbare Sprachen

www.hama.com
Hama GmbH & Co KG
Postfach 80
86651 Monheim/Germany
Tel. +49 (0)9091/502-0
Fax +49 (0)9091/502-274
hama@hama.de
www.hama.com
00062764 V2-08.06

Werbung

Inhaltsverzeichnis
loading

Inhaltszusammenfassung für Hama 00062764 V2

  • Seite 1 Hama GmbH & Co KG Postfach 80 86651 Monheim/Germany Tel. +49 (0)9091/502-0 Fax +49 (0)9091/502-274 hama@hama.de www.hama.com 00062764 V2-08.06...
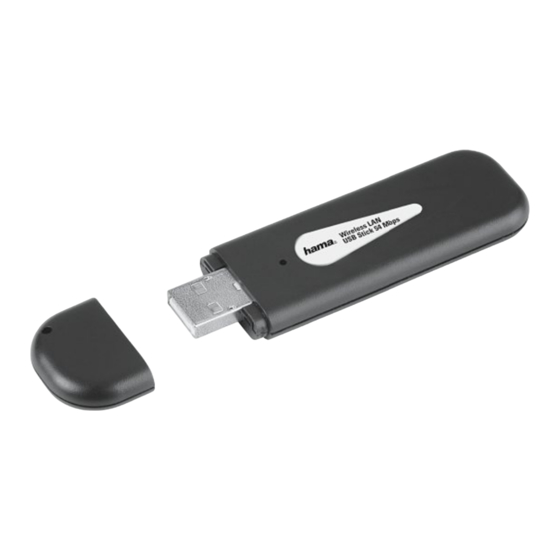
  • Seite 2 00062764 V2 Wireless LAN USB Stick 54 Mbps...
  • Seite 3: Inhaltsverzeichnis

    Bedienungsanleitung Wireless LAN USB Stick, 54Mbps Inhaltsverzeichnis: Installation von Treiber und Konfigurations-Programm unter Windows®........... Seite 02 Das Konfigurations-Programm – Einführung und Bedienung unter Windows® ........ Seite 03 2.1 Schnell-Konfiguration............................ Seite 04 2.2 Ausführliche Konfiguration........................... Seite 04 2.2.1 Ein neues Profil anlegen........................Seite 05 2.2.1.1 Infrastruktur Modus ........................
  • Seite 4: Das Konfigurations-Programm - Einführung Und Bedienung Unter Windows

    Profil zu arbeiten, also die ausführliche Konfiguration zu verwenden. 2. Das Konfigurations-Programm – Einführung und Bedienung unter Windows® Öffnen Sie bitte das Konfigurations-Programm von Hama! Klicken Sie hierzu auf Start -> Programme -> Hama Wireless LAN -> Hama Wireless LAN Utility.
  • Seite 5: Schnell-Konfiguration

    Öffnen Sie das Utility von hieraus durch einen Doppelklick auf das eingekreiste Symbol. Das Hama Wireless LAN Utility startet mit folgender Ansicht, wobei sich die Werte in den Spalten unterscheiden. In dieser Ansicht sehen Sie alle verfügbaren drahtlosen Netzwerke. Angezeigt werden die SSID, die zur Identifikation von WLAN-Geräten im jeweiligen Wireless...
  • Seite 6: Ein Neues Profil Anlegen

    2.2.1 Ein neues Profil anlegen Um ein Profil zu erstellen benötigen Sie folgende Informationen: • SSID (Netzwerk-ID): Dies ist der Netzwerkname des gewünschten Netzes. • Verschlüsselung, die im Zielnetzwerk verwendet wird • Netzwerktyp (Art des Netzwerks): Infrastruktur oder Ad-Hoc Es gibt grundsätzlich zwei Möglichkeiten ein Profil anzulegen: Variante 1 : Wechseln Sie zur Registerkarte Profile und klicken Sie dann auf Hinzufügen! oder...
  • Seite 7: Ad-Hoc Modus

    Sollten Sie in Ihrem Netzwerk eine Verschlüsselung verwenden, wechseln Sie zur Registerkarte Authentifizierung und Sicherheit und setzen Sie die Konfiguration unter Wireless LAN Verschlüsselung einstellen fort. Betreiben Sie ihr Netzwerk ohne Verschlüsselung, übernehmen Sie ihre Einstellungen mit OK! Um das erzeugte Profil zu aktivieren, wechseln Sie zur Registerkarte Profile, markieren Sie das Profil und klicken Sie anschließend auf Aktivieren.
  • Seite 8: Wep Verschlüsselung

    Verschlüsselung: Die Verschlüsselung ist ein Vorgang, bei dem ein „Klartext“ mit Hilfe eines Verschlüsselungsverfahrens (Algorithmus) in einen „Geheimtext“ umgewandelt wird. Hierzu können einer oder auch mehrere Schlüssel verwendet werden. Weiterhin ist zu erwähnen, dass jedes einzelne Verschlüsselungsverfahren eine oder mehrere Möglichkeiten der Authentifizierung bietet.
  • Seite 9: Wpa/Wpa2 Verschlüsselung

    Sie haben nun die Möglichkeit, in der unteren Hälfte des Fensters vier Schlüssel zu hinterlegen. Es wird immer der Schlüsssel verwendet, der markiert ist. Es wird eine Verschlüsselung mit 64 bit oder 128 bit unterstützt, wobei die 128 bit Verschlüsselung die höhere Sicherheit bietet.
  • Seite 10: Konfiguration Von Betriebssystem Und Computer (Windows®)

    Möchten Sie die WPA2 Verschlüsselung nutzen, wählen Sie unter Authentifizierungs-Typ WPA2-PSK und untere Verschlüsselung AES! Tragen Sie nun noch im Feld WPA Preshared Key den verwendeten Schlüssel ein! Der eingegebene Schlüssel muss absolut identisch mit dem im Netzwerk verwendeten Schlüssel sein. Er hat eine Länge von mindestens 8 und höchstens 63 beliebigen Zeichen bei ASCII, wobei Buchstaben (A-Z), Zahlen und Satzzeichen erlaubt sind oder 64 Zeichen bei HEX,...
  • Seite 11: Deinstallation Von Treiber Und Konfigurations-Programm Unter Windows

    Sie danach alle laufenden Programme. Stellen Sie außerdem sicher, dass Sie über Administratorenrechte verfügen, um den Treiber korrekt installieren zu können. Schließen Sie den Hama WLAN USB Stick an einen freien USB 2.0 Port an. Starten Sie anschließend Ihren Apple Computer.
  • Seite 12: Konfiguration Von Betriebssystem Und Computer (Mac Os X)

    „Netzwerk“... aus. Nun öffnet sich folgendes Fenster. Bestätigen Sie den Hinweis mit OK! Hinweis: Sollten Sie die oben abgebildete Meldung nicht erhalten, wurde der Hama WLAN USB Stick nicht korrekt von Ihrem PowerMac erkannt. Stellen Sie sicher, dass der Stick korrekt mit einer USB 2.0 Schnittstelle verbunden ist und die USB 2.0 Schnittstellenkarte korrekt in Ihren System installiert wurde!
  • Seite 13: Das Konfigurations-Programm - Einführung Und Bedienung Unter Mac Os

    Damit ist die Konfiguration des Systems abgeschlossen. 7. Das Konfigurations-Programm – Einführung und Bedienung unter Mac OS X Da es sich bei dem Hama WLAN USB Stick nicht um ein offizielles Apple Airport Produkt handelt, können Sie das im System integrierte Airport Dienstprogramm nicht benutzen.
  • Seite 14: Schnell-Konfiguration

    Signalstärke (Signal Strenght). 7.2 Ausführliche Konfiguration Für die Konfiguration Ihres Hama WLAN USB Sticks ist es hilfreich ein Profil anzulegen. Ein Profil dient dazu, verschiedene Einstellungen für eine Verbindung unter einem bestimmten Namen abzuspeichern. Möchten Sie sich z.B. abwechselnd mit verschiedenen drahtlosen Netzwerken verbinden, so können Sie die Einstellungen...
  • Seite 15 Betriebsdauer mit voller Leistung arbeiten wollen. Mit dem Hama WLAN USB Stick haben Sie die Möglichkeit zwei verschiedene Netzwerk-Typen aufzubauen. Wählen Sie unter Network type Infrastructure, falls sie sich mit einem Router oder Accesspoint verbinden möchten. Die Einstellungen für TX Power, RTS Threshold und Fragment Threshold können so belassen wer- den, wie sie standardmäßig eingestellt sind.
  • Seite 16: Wep Verschlüsselung

    Wechseln Sie nun zur Registerkarte Advanced. Unter Wireless Modus können Sie einstellen, welcher Standard verwendet werden soll. Dies ist abhängig von den anderen verwendeten Geräten in Ihrem Netzwerk. Sie haben die Wahl zwischen 802.11 B only mode (11Mbps): hierbei wird ausschließlich nach diesem Standard gearbeitet; oder 802.11 B/G mixed mode (bis zu 54Mbps): hierbei werden beide Standards unterstützt;...
  • Seite 17: Wpa/Wpa2 Verschlüsselung

    Sie haben nun die Möglichkeit, in der unteren Hälfte des Fensters vier Schlüssel zu hinterlegen. Es wird immer der Schlüsssel verwendet, der markiert ist. Es wird eine Verschlüsselung mit 64 bit oder 128 bit unterstützt, wobei die 128 bit Verschlüsselung die höhere Sicherheit bietet.
  • Seite 18: Support- Und Kontaktinformationen

    8. Support- und Kontaktinformationen Bei defekten Produkten: Bitte wenden Sie sich bei Produktreklamationen an Ihren Händler oder an die Hama Produktberatung. Internet/World Wide Web Produktunterstützung, neue Treiber oder Produktinformationen bekommen Sie unter www.hama.de Support Hotline – Hama Produktberatung: Tel. +49 (0) 9091 / 502-115 Fax +49 (0) 9091 / 502-272 e-mail: produktberatung@hama.de...
  • Seite 19 Operating instructions Wireless LAN USB Stick 54 Mbps Contents Installing the driver and configuration program on Windows® ............Page 02 The configuration program – introduction and operation on Windows®..........Page 03 2.1 Quick configuration............................Page 04 2.2 Detailed configuration ........................... Page 04 2.2.1 Creating a new profile ..........................
  • Seite 20: The Configuration Program - Introduction And Operation On Windows

    2. The configuration program – introduction and operation on Windows® Open the Hama Configuration Program. To do so, click Start -> Programs -> Hama Wireless LAN -> Hama Wireless LAN Utility. If the program is already running in the background, you will find in the task bar at the bottom right of the...
  • Seite 21: Quick Configuration

    Click the circled symbol to open the utility from the task bar. The Hama Wireless LAN Utility starts with the following screen, whereby the values in the columns may be different. This screen shows all available wireless networks. The SSID, which is used to identify WLAN devices in the...
  • Seite 22: Creating A New Profile

    2.2.1 Creating a new profile You need the following information to create a profile: • SSID (network ID): This is the name of the required network. • Encryption used in the target network • Network type (type of network): Infrastructure or ad-hoc There are two basic ways to create a profile: Version 1 : Change to the Profile tab and click Add.
  • Seite 23: Setting The Wireless Lan Encryption

    If your network uses encryption, switch to the Authentication and Security tab and continue configuration under Setting wireless LAN encryption. If your network is not encrypted, click OK to accept the settings. To activate the profile created, switch to the Profiles tab, select the profile and then click Activate. 2.2.1.2 Ad-hoc mode First enter a name for your profile (Profile name), e.g.
  • Seite 24: Wep Encryption

    Encryption: Encryption is a process in which a plain text is transformed into a coded text via an encryption process (algorithm). One or more codes can be used for this. It must also be mentioned that each individual encryption process offers one or more authentication options. Please switch to the Authentication and Security tab.
  • Seite 25: 2Wpa/Wpa2 Encryption

    You can now store four codes in the lower section of the window. The selected code is always used. 64 bit or 128 bit encryption is supported. 128 bit encryption is more secure. First select whether you want to use Hex (allows characters from 0-9 and a-f to be used) or ASCII characters (You can use any characters). The setting and the selection of either 64 or 128 bit encryption determines the length of the code to be entered.
  • Seite 26: Configuring The Operating System And Computer (Windows®)

    To use WPA2 encryption, select WPA2-PSK under Authentication type and AES under Encryption. Now enter the code used in the WPA preshared key field. The code entered must be absolutely identical with that used in the network. It must be min. 8 and max. 63 random characters for ASCII.Letters (A-Z), numbers and punctuation marks can be used.
  • Seite 27: Uninstalling The Driver And Configuration Program On Windows

    Select Start => Settings => Control Panel => Software To do so, select Hama Wireless Utility and click Remove. At the next prompt, click Remove completely. Remove the device from your computer when prompted to do so. Afterwards click OK.
  • Seite 28: Configuring The Operating System And Computer (Mac Os X)

    Click OK to confirm the message. Note: If the message shown above is not displayed, the Hama WLAN USB Stick was not correctly identified by your PowerMac. Ensure that the stick is correctly connected to a USB 2.0 port and that the USB 2.0 interface card was correctly installed in your system.
  • Seite 29: The Configuration Program - Introduction And Operation On Mac Os

    7. The configuration program – introduction and operation on MAC OS X As the Hama WLAN USB Stick is not an official Apple Airport product, you cannot use the Airport software integrated in the system. To configure the Hama WLAN USB Stick, you must open the enclosed utility.
  • Seite 30: Quick Configuration

    7.2 Detailed configuration When configuring your Hama WLAN USB stick, it is useful to create a profile. A profile serves to save various settings for a connection under a certain name. For example, if you want to connect to various wire- less networks, you can save the settings for the networks in profiles, which allows you to change...
  • Seite 31: Creating A New Profile

    Mode), if you want to run the stick at full power all the time. This Hama WLAN USB Stick allows you to set up two different network types. Select Infrastructure under Network type, if you want to connect to a router or access point. The settings for TX Power, RTS Threshold and Fragment Threshold can be left at the default settings.
  • Seite 32: Wep Encryption

    Now switch to the Advanced tab. Wireless mode allows you to set the standard to be used. This depends on the other devices used in your network. You can choose either 802.11 B only mode (11 Mbps): Then this standard only is used; or 802.11 B/G mixed mode up to 54 Mbps): Both standards are then supported;...
  • Seite 33 You can now store four codes in the lower section of the window. The selected code is always used. 64 bit or 128 bit encryption is supported. 128 bit encryption is more secure. First select whether you want to use Hexadecimal (allows characters from 0-9 and a-f to be used) or ASCII (you can use any characters).
  • Seite 34: Support And Contact Information

    8. Support and contact information If products are defective: Please contact your dealer or Hama Product Consulting if you have any product claims. Internet / World Wide Web: Product support, new drivers or product information can be found at www.hama.com Support Hotline –...
  • Seite 35 ¬ Mode d’emploi Clé USB WiFi (réseau local sans fil) 54 Mbit/s Sommaire: Installation du pilote et du programme de configuration sous Windows® ......... Page 02 Programme de configuration – Introduction et commande sous Windows®........Page 03 2.1 Configuration rapide ............................Page 04 2.2 Configuration complète ..........................
  • Seite 36: Programme De Configuration - Introduction Et Commande Sous Windows

    Lisez le condition du contrat de licence, puis cochez « Oui » au cas où vous acceptez ces dernières. Uniquement pour utilisateurs de Windows® XP Le masque suivant vous demandera si vous désirez utiliser le programme de configuration de Hama ou le programme de configuration intégré dans Windows® afin de configurer votre adaptateur WiFi (Wireless LAN).
  • Seite 37: Configuration Rapide

    Ouvrez l’utilitaire en double-cliquant sur le symbole entouré d’un cercle. L’utilitaire WiFi de Hama démarre comme illustré ci-dessous (les valeurs figurant dans les colonnes peuvent varier) : Tous les réseaux sans fil disponibles sont affichés dans cette fenêtre. Cette fenêtre contient également des informations concernant les SSID servant à...
  • Seite 38: Création D'un Nouveau Profil

    2.2.1 Création d’un nouveau profil Vous avec besoin des informations suivantes afin de créer un nouveau profil : • SSID (ID de réseau ) : Le nom du réseau désiré. • Chiffrement utilisé pour ce réseau • Type de réseau Infrastructure ou ad-hoc Deux possibilités sont disponibles afin de créer un profil : Variante 1 : Commutez vers l’onglet Gestion de profils et cliquez sur Ajouter...
  • Seite 39: Mode Ad-Hoc

    Commutez vers l’onglet Authentification et Sûreté et continuez la configuration sous Configuration du chiffrement du réseau local sans fil dans le cas où vous utilisez un chiffrement pour votre réseau. Confirmez vos réglages avec OK dans le cas où votre réseau fonctionne sans chiffrement. Commutez vers l’onglet Profils afin d’activer le profil créé, sélectionnez le profil de la liste que vous désirez activer, puis cliquez sur le bouton Activer.
  • Seite 40: Chiffrement Wep

    Chiffrement : Le chiffrement est une procédure au cours de laquelle un « texte en langage clair » est transfor- mé en « texte codé » à l’aide d’un processus de chiffrement (algorithme). Un ou plusieurs codes peuvent être utilisés à cet effet. Il convient également de relever que chaque procédé...
  • Seite 41: Chiffrement Wpa/Wpa2

    Vous pouvez définir quatre codes dans la partie inférieure de la fenêtre. Le code sélectionné sera toujours utilisé. Le chiffrement à 64 bits ou à 128 bits sont les deux supportés ; le chiffrement à 128 bits offre davantage de sécurité. Sélectionnez premièrement la méthode que vous désirez utiliser : hexadécimale (Hex) qui permet l’utilisation des caractères 0-9 et a-f ou ASCII permettant l’utilisation de tous les caractères.
  • Seite 42: Configuration Du Système D'exploitation Et De L'ordinateur (Windows®)

    Sélectionnez WPA2-PSK sous Type d’authentification et AES sous Chiffrement dans le cas où vous désirez utiliser le chiffrement WPA2. Saisissez uniquement le code utilisé dans le champ Clé partagée WPA (WPA Pre-Shared-Key). Le code saisi doit être rigoureusement identique au code utilisé...
  • Seite 43: Désinstallation Du Pilote Et Du Programme De Configuration Sous Windows

    Veuillez sauvegarder tous vos documents ouverts avant de lancer l’installation. Quittez ensuite tous les programmes actifs et éteignez votre ordinateur. Assurez-vous que vous disposez des droits d’administrateur afin de pouvoir installer le pilote. Connectez votre clé USB WiFi (WLAN) Hama à un port USB 2.0 libre de votre ordinateur. Démarrez votre ordinateur.
  • Seite 44: Configuration Du Système D'exploitation Et De L'ordinateur (Mac Os X)

    Confirmez en cliquant sur OK. Remarque : Votre clé USB WiFi (WLAN) Hama n’a pas été correctement reconnue par votre ordinateur dans le cas où le message ci-dessus n’est pas affiché. Assurez-vous que votre clé USB est bien connectée à un port USB 2.0 et que l’interface USB 2.0 est correctement installée sur votre système.
  • Seite 45: Programme De Configuration - Introduction Et Commande Sous (Mac Os X)

    Vous ne pouvez pas utiliser l’utilitaire Airport intégré à votre système car la clé USB WiFi de Hama n’est pas un article officiel de Apple (Airport). Vous devez utiliser l’utilitaire fourni afin de configurer votre clé USB WiFi de Hama. Ouvrez le finder et sélectionnez le disque dur sur lequel vous avez installé...
  • Seite 46: Configuration Rapide

    (Link Quality), l’intensité du signal (Signal Strenght). 7.2 Configuration complète Il est utile de créer un profil afin de configurer votre clé USB WiFi (WLAN) de Hama. Un profil sert à sauve- garder différentes configurations de connexion sous une certaine dénomination. Vous pourrez donc vous connecter à...
  • Seite 47: Création D'un Nouveau Profil

    à plein rendement en permanence. La clé USB WiFi (WLAN) de Hama vous permet d’établir deux types de réseaux différents. Sélectionnez Infrastructure sous Type de réseau dans le cas où vous désirez utiliser un routeur ou un point d’accès pour vous connecter.
  • Seite 48: Chiffrement Wep

    Commutez ensuite vers l’onglet Advanced. Vous pouvez déterminer sous Mode Wireless quel standard vous désirez utiliser. Cette configuration dépend des autres appareils utilisés dans votre réseau. Vous pouvez choisir entre 802.11 B only mode (11 Mbit/ s,(uniquement ce standard est utilisé) ou 802.11 B/G mixed mode (jusqu’à 54Mbit/s,les deux standards sont alors supportés) ;...
  • Seite 49 Vous pouvez définir quatre codes dans la partie inférieure de la fenêtre. Le code sélectionné sera toujours utilisé. Le chiffrement à 64 bits ou à 128 bits sont les deux supportés ; le chiffrement à 128 bits offre davanta- ge de sécurité. Sélectionnez premièrement la méthode que vous désirez utiliser : hexadécimale, qui permet l’utilisation des caractères 0-9 et a-f, ou ASCII, permettant l’utilisation de tous les caractères.
  • Seite 50: Support Technique Et Contact

    Cet appareil peut être utilisé uniquement en Allemagne, Autriche, Suisse, Angleterre, France, Belgique, Italie, Espagne, aux Pays-Bas, au Danemark, en Hongrie, Pologne, Suède, au Portugal, Luxembourg, en Irlande, Grèce, République Tchèque, Slovaquie et Finlande. La déclaration de conformité à la directive R&TTE 99/5/EC se trouve sur www.hama.com...
  • Seite 51: Sikkerhedsanvisninger

    ÷ Betjeningsvejledning Trådløs LAN USB-adapter, 54Mbps Indholdsfortegnelse Installation af driver og konfigurationsprogram under Windows ......... Side 02 ® Konfigurationsprogrammet – introduktion og betjening under Windows ......Side 03 ® Hurtig konfiguration ........................ Side 04 Avanceret konfiguration ......................Side 04 2.2.1 Oprettelse af ny profil ..................... Side 05 2.2.1.1 Infrastruktur modus .....................
  • Seite 52: Konfigurationsprogrammet - Introduktion Og Betjening Under Windows

    2. Konfigurationsprogrammet – introduktion og betjening under Windows ® Åbn konfigurationsprogrammet fra Hama! Klik på Start -> Programmer ->Hama trådløs LAN -> Hama trådløs LAN værktøj. Hvis programmet allerede er startet i baggrunden, finder du det proceslinjen nederst til højre i billedet:...
  • Seite 53: Hurtig Konfiguration

    Åbn værktøjet derfra ved at dobbeltklikke på ikonen i cirklen. Hama trådløs LAN værktøj starter med følgende visning. Værdierne i spalterne er forskellige. Her ser du alle disponible trådløse netværk. Her vises de SSID, der bruges til identifikation af WLAN-udstyr i det pågældende trådløse netværk, routerens...
  • Seite 54: Infrastruktur Modus

    2.2.1 Oprettelse af ny profil For at kunne oprette en profil har du brug for følgende oplysninger: • SSID (netværks-ID): Det er netværksnavnet på det ønskede netværk. • Den kryptering, der anvendes i destinationsnetværket • Netværkstype: Infrastruktur eller Ad-hoc Der er to måder at oprette en profil på: Mulighed 1 : Skift til fanebladet Profile og klik på...
  • Seite 55: Ad-Hoc Modus

    Hvis du bruger en sikkerhedskryptering i dit netværk, skal du skifte til fanebladet Authentication and Security og fortsætte konfigurationen under Indstilling af trådløs LAN-sikkerhed. Hvis du ikke bruger sikkerhedskryptering i dit netværk, overtager du indtillingerne med OK! For at aktivere den oprettede profil skal du skifte til fanebladet Profiles, markere profilen og derefter klikke på...
  • Seite 56: Wep-Kryptering

    Kryptering: Krypteringen er en proces, hvor en ”klartekst” forvandles til en ”chiffertekst” via en krypteringsmetode (algoritme). Til dette formål kan der anvendes én eller flere nøgler. Det skal også nævnes, at hver enkelt krypteringsmetode giver én eller flere muligheder for autentificering. Skift så...
  • Seite 57: Wpa/Wpa2-Kryptering

    Du har nu mulighed for at gemme fire nøgler i den nederste halvdel af vinduet. Det er altid den nøgle, der er markeret, der anvendes. Der understøttes en kryptering med 64 bit eller 128 bit, hvor 128 bit kryptering giver den største sikkerhed. Vælg først, om du vil bruge Hex (du kan bruge tegn fra 0-9 og a-f) eller ASCII tegnsættet (du kan bruge alle vilkårlige tegn).
  • Seite 58: Konfiguration Af Styresystem Og Computer (Windows ® )

    Hvis du vil bruge WPA2 kryptering, skal du under Autentificeringstype vælge WPA2-PSK og vælge AES under Kryptering! I feltet WPA Preshared Key skal du så blot indtaste den anvendte nøgle! Den indtastede nøgle skal være fuldstændig identisk med den nøgle, der anvendes i netværket. Den har en længde på...
  • Seite 59: Afinstallation Af Driver Og Konfigurationsprogram Under Windows

    ® Vælg Start => Indstillinger => Kontrolpanel => Tilføj eller fjern programmer Vælg Hama Wireless Utility og klik på Remove! Klik på Remove completely ved det efterfølgende spørgsmål. Afbryd enheden fra din computer, når du opfordres til det. Klik derefter på OK.
  • Seite 60: Konfiguration Af Styresystem Og Computer (Mac Os X)

    Vælg menupunktet Network. Nedenstående vindue åbnes. Bekræft med OK! Bemærk: Hvis du ikke får ovenstående melding, er Hama WLAN USB-adapteren ikke registreret korrekt af din PowerMac. Sørg for, at adapteren er korrekt forbundet med en USB 2.0 port og at USB 2.0 interfacekortet er korrekt installeret i dit system! Når Hama WLAN USB-adapteren er registreret korrekt,...
  • Seite 61: Konfigurationsprogrammet - Introduktion Og Betjening Under Mac Os X

    Konfigurationen af systemet er nu afsluttet. 7. Konfigurationsprogrammet – introduktion og betjening under Mac OS X Da Hama WLAN USB-adapteren ikke er et officielt Apple Airport produkt, kan du ikke bruge det Airport hjælpeværktøj, der er integreret i systemet. For at kunne konfigurere Hama WLAN USB-adpateren, skal du åbne det vedlagte værktøj.
  • Seite 62: Hurtig Konfiguration

    Her får du oplysninger om f.eks. Forbindelseskvalitet (Link Quality) og Signalstyrke (Signal Strenght). 7.2 Avanceret konfiguration Til konfigurationen af din Hama WLAN USB-adapter er det en god hjælp at oprette en Profile. En profil bruges til at kunne gemme forskellige indstillinger for en forbindelse under ét bestemt navn. Hvis du f.eks.
  • Seite 63: Oprettelse Af Ny Profil

    Vælg CAM (Constantly Awake Mode), hvis du vil arbejde med fuld effekt i hele driftsperioden. Med denne Hama WLAN USB-adapter har du mulighed for at opbygge to forskellige netværkstyper. Vælg Infrastructure under Network type, såfremt du vil tilsluttes en router eller et accesspoint.
  • Seite 64: Wep-Kryptering

    Skift nu til fanebladet Advanced. Under Wireless Modus kan du indstille, hvilken standard der skal anvendes. Det afhænger af de andre enheder, der anvendes i netværket. Du kan vælge mellem 802.11 B only Mode (11Mbps): Her arbejdes udelukkende ud fra denne standard; eller 802.11 B/G mixed mode (op til 54Mbps): Her understøttes begge standarder.
  • Seite 65 Du har nu mulighed for at gemme fire nøgler i den nederste halvdel af vinduet. Det er altid den nøgle, der er markeret, der anvendes. Der understøttes en kryptering med 64 bit eller 128 bit, hvor 128 bit kryptering giver den største sikkerhed.
  • Seite 66: Support- Og Kontaktinformationer

    8. Support- og kontaktinformationer Ved defekte produkter: Ved produktreklamationer bedes du kontakte din forhandler eller Hama produktrådgivning. Internet/World Wide Web Få produktunderstøttelse, nye drivere eller produktinformationer. Se under www.hama.com Support hotline – Hama produktrådgivning: Tlf. +49 (0) 9091 / 502-115 Fax +49 (0) 9091 / 502-272 E-mail: produktberatung@hama.de...
  • Seite 67 Deklaracja zgodności według dyrektywy guidelines R&TTE 99/5/EG dostępna na stronie internetowej www.hama.com La déclaration de conformité à la directive R&TTE 99/5/CE se trouve sur www.hama.com A megfelelőségi követelmények megegyeznek h az R&TTE Irányelvek 99/5/EG ajánlásaival La declaración de conformidad según la www.hama.com directiva R&TTE 99/5/CE la encontrará...

Inhaltsverzeichnis