Herunterladen Inhalt Inhalt Diese Seite drucken
Inhaltsverzeichnis

Werbung

Verfügbare Sprachen

Verfügbare Sprachen

TRACK SKIP
LOOP IN
+10
SEARCH
LOOP IN
REV-
BOP
Für weiteren Gebrauch aufbewahren!
Keep this manual for future needs!
Gardez ce mode d'emploi pour des
utilisations ultérieures!
Guarde este manual para posteriores usos.
BEDIENUNGSANLEITUNG
USER'S MANUAL
MODE D'EMPLOI
MANUAL DEL USUARIO
DSS-2
AUTO CUE
TIME ---
SGL/CONT.
STOP -----
PITCH
PROG.
ON/OFF
OFF
ON
OUT /EXIT
RELOOP
8%
16%
PITCH
OUT /EXIT
RELOOP
MIC LEVEL
PITCH BEND
0
RELAY
HIGH
-15
FWD+
LOW
-15
PITCH
CONTROL
SEAMLESS LOOP
BPM
CD 1
PHONO 1
PHONO 2
CD 1
CD 2
LINE 1
LINE 2
GAIN
GAIN
MASTER
TALKOVER
MIN
MAX
MIN
MAX
0
10
CUE LEVEL
HIGH
HIGH
0
10
10
-15
+15
-15
+15
MID
MID
DSS-2
+15
-15
+15
-15
+15
LOW
LOW
CUE MIXING
SPLIT
MIX
+15
-15
+15
-15
+15
L
R
CH-1
CH-2
TRACK SKIP
LOOP IN
OUT /EXIT
RELOOP
+10
SEARCH
LOOP IN
OUT /EXIT
RELOOP
FWD+
REV-
SEAMLESS LOOP
BOP
Nachdruck verboten!
Reproduction prohibited!
Réproduction interdit!
Prohibida toda reproducción.
TIME ---
AUTO CUE
SGL/CONT.
STOP -----
PITCH
PROG.
ON/OFF
8%
16%
PITCH
PITCH BEND
RELAY
PITCH
CONTROL
BPM
CD 2
©
Copyright

Werbung

Inhaltsverzeichnis
loading

Inhaltszusammenfassung für Omnitronic DSS-2

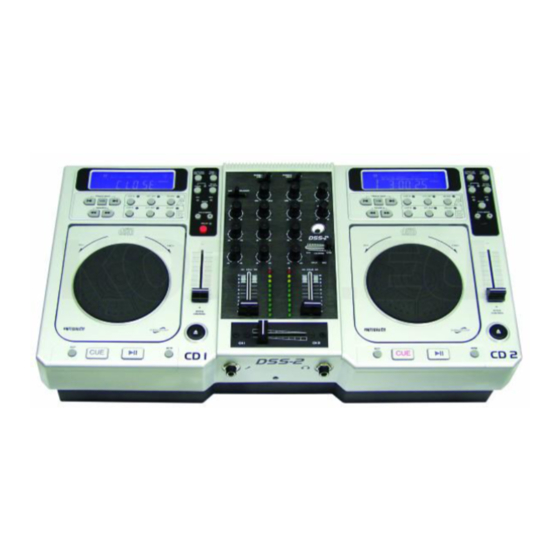
  • Seite 1 BEDIENUNGSANLEITUNG USER'S MANUAL MODE D'EMPLOI MANUAL DEL USUARIO DSS-2 AUTO CUE TIME --- TIME --- AUTO CUE SGL/CONT. STOP ----- SGL/CONT. STOP ----- PHONO 1 PHONO 2 CD 1 CD 2 LINE 1 LINE 2 PITCH PITCH PROG. PROG. ON/OFF...
  • Seite 2: Inhaltsverzeichnis

    MULTI-LANGUAGE-INSTRUCTIONS Inhaltsverzeichnis Table of contents Sommaire/Contenido 1. EINFÜHRUNG............................... 4 2. SICHERHEITSHINWEISE..........................4 3. BESTIMMUNGSGEMÄSSE VERWENDUNG ....................6 4. GERÄTEBESCHREIBUNG .......................... 6 4.1 Features ..............................6 4.2 CD-Player..............................7 4.3 Mixer ..............................10 4.4 Rückseite ............................... 12 5. INSTALLATION ............................12 5.1 Anschlüsse.............................
  • Seite 3 You can find the latest update of this user manual in the Internet under: Vous pouvez trouvez la dernière version de ce mode d'emploi dans l'Internet sous: Vd. puede encontrar la versión más reciente de este manual en el Internet bajo: www.omnitronic.com...
  • Seite 4: Einführung

    - sich die letzte Version der Anleitung im Internet herunter laden 1. EINFÜHRUNG Wir freuen uns, dass Sie sich für einen OMNITRONIC DSS-2 entschieden haben. Wenn Sie nachfolgende Hinweise beachten, sind wir sicher, dass Sie lange Zeit Freude an Ihrem Kauf haben werden.
  • Seite 5 Bitte überprüfen Sie vor der ersten Inbetriebnahme, ob kein offensichtlicher Transportschaden vorliegt. Sollten Sie Schäden an der Netzleitung oder am Gehäuse entdecken, nehmen Sie das Gerät nicht in Betrieb und setzen sich bitte mit Ihrem Fachhändler in Verbindung. Der Aufbau entspricht der Schutzklasse II. Das Gerät ist schutzisoliert. Der Netzstecker darf nur an eine Steckdose angeschlossen werden, deren Spannung und Frequenz mit dem Typenschild des Gerätes genau übereinstimmt.
  • Seite 6: Bestimmungsgemässe Verwendung

    ACHTUNG: Zu hohe Lautstärken können das Gehör schädigen! Im Geräteinneren befinden sich keine zu wartenden Teile. Eventuelle Servicearbeiten sind ausschließlich dem autorisierten Fachhandel vorbehalten! 3. BESTIMMUNGSGEMÄSSE VERWENDUNG Bei diesem Gerät handelt es sich um einen professionelles DJ Set, mit dem sich Standard-CDs abspielen lassen.
  • Seite 7: Cd-Player

    4.2 CD-Player AUTO CUE TIME --- SGL/CONT. STOP ----- PITCH PROG. ON/OFF TRACK SKIP OUT /EXIT RELOOP LOOP IN PITCH SEARCH LOOP IN OUT /EXIT RELOOP PITCH BEND RELAY FWD+ REV- PITCH CONTROL SEAMLESS LOOP CD 1 7/64 10553155_V_1_0.DOC...
  • Seite 8 1. DISPLAY LCD-Display zur Anzeige der verschiedenen Modi und Funktionen. Bitte beachten Sie die Hinweise unter 6.3 LCD-Display. 2. TRACK-TASTEN Über die Track-Tasten können Sie den gewünschten Titel auswählen. Bitte beachten Sie die Hinweise unter 6.5 Titelauswahl über die Track-Tasten. 3.
  • Seite 9 14. PITCHFADER Stellen Sie mit dem Pitchfader die gewünschte Geschwindigkeit ein, nachdem Sie die Pitch-Taste gedrückt haben. Auf der Anzeige erscheint der aktuelle Prozentwert. Ist die Pitch-Taste nicht gedrückt, hat der Pitchfader keine Funktion. 15. SCRATCH-RAD Wiedergabemodus: Mit dem Scratch-Rad können Sie die Abspielgeschwindigkeit temporär um ±16 % ändern. Pausemodus: Im Pausemodus wird der aktuelle Frame wiederholt, sobald Sie am Scratch-Rad drehen.
  • Seite 10: Mixer

    4.3 Mixer PHONO 1 PHONO 2 CD 1 CD 2 LINE 1 LINE 2 GAIN GAIN MASTER TALKOVER MIC LEVEL HIGH CUE LEVEL HIGH HIGH DSS-2 CUE MIXING SPLIT CH-1 CH-2 10/64 10553155_V_1_0.DOC...
  • Seite 11 1. PHONO / LINE-SCHALTER Zur Auswahl der entsprechenden Signalquelle. 2. GAIN-REGLER Mit dem GAIN-Reger können Sie die Signalstärke des Eingangssignals einstellen. 3. TALKOVER-WAHLSCHALTER Der dreistufige Wahlschalter hat folgende Funktionen: OFF: Mikrofon ist abgeschaltet. MIC ON: Das Mikrofon ist aktiviert. TALKOVER: Der Gesamtpegel der anderen Signalquellen wird um 14 dB gesenkt, so dass das Mikrofon klar verständlich ist.
  • Seite 12: Rückseite

    Sie ihn ans Netz anschließen, da sonst Ihre Lautsprecher beschädigt werden könnten. Verbinden Sie die Abspieleinheit über das Anschlusskabel mit der Steuereinheit. Schließen Sie den DSS-2 mit dem Cinch-Kabel über die Audio Out-Buchsen an Ihre Boxen an. Achten Sie darauf, dass die rechts/links Belegung (Steckerfarbe rot/weiß) an beiden Geräten übereinstimmt.
  • Seite 13: Anschlüsse

    Der Master-Ausgang lässt sich über zwei Cinch-Buchsen anschließen. Vergewissern Sie sich, dass die Buchsen richtig belegt sind (L & R). An das DSS-2 lassen sich bis zu 2 Plattenspieler über die PHONO 1-Buchsen und PHONO 2-Buchsen anschließen. Das Plattenspielersignal lässt sich nur dann steuern, wenn die PHONO/LINE-Schalter auf PHONO gestellt wurde.
  • Seite 14: Titelauswahl Über Die Track-Tasten

    Die Anzeige "0" bedeutet, dass die Wiedergabegeschwindigkeit nicht verändert wurde. Wenn Sie die Wiedergabegeschwindigkeit über den Pitchfader verändern (Pitch-Taste muss gedrückt sein), wird der entsprechende Prozentwert auf dem Display angezeigt. 6.4 Play/Pause Im Pausemodus steht die Zeitanzeige im Display und die Play/Pause-LED blinkt. Die Wiedergabe des ersten Titels kann durch Drücken der Play/Pause-Taste gestartet werden.
  • Seite 15: Sequenzwiederholung (Loop-Funktion)

    Überprüfen der Programmierung: Sie können den Programmiervorgang unterbrechen und die Programmabfolge überprüfen, indem Sie nach Eingabe eines Titels erneut die Program-Taste drücken. Die bereits eingespeicherten Programmtitel werden dann durch wiederholtes Drücken der Program-Taste angezeigt. Programmwiedergabe: Nachdem Sie den letzten gewünschte Titel eingegeben haben, drücken Sie die Program-Taste um ihn abzuspeichern.
  • Seite 16 6.10 Relay-Betrieb Im Relay-Betrieb schaltet das Gerät am Ende der Wiedergabe automatisch auf den jeweils anderen CD- Player um. Dadurch haben Sie z. B. die Möglichkeit, das Musikprogramm durch den Einsatz mehrerer CDs zu erweitern. Im Single-Modus wird jeweils ein Titel gespielt und dann die CD gewechselt, im Continuous- Modus wird erst CD1 abgespielt und dann CD2.
  • Seite 17: Vorsichtsmassnahmen

    7. VORSICHTSMASSNAHMEN Dieses Gerät kann nicht mit konventionellen DJ Sets verglichen werden, auch wenn sich die Geräte in ihrem Aussehen ähneln. Dieses Gerät wurde besonders stabil gebaut, um den harten Anforderungen beim Transport und bei Mobildiskotheken gewachsen sein zu können. Vibrationen durch starke Bassfrequenzen können zu einem Springen der CDs führen.
  • Seite 18: Austauschen Des Crossfaders

    Austauschen des Crossfaders Wenn Sie einen kompletten Ersatz-Crossfader gekauft haben, gehen Sie wie folgt vor: • Ziehen Sie den Faderknopf ab. • Entfernen Sie die 2 äußeren Schrauben an der Faderplatte. • Heben Sie den Crossfader mit Faderplatte heraus und ziehen Sie den Anschlussstecker ab. •...
  • Seite 19: Introduction

    - download the latest version of the user manual from the Internet 1. INTRODUCTION Thank you for having chosen a OMNITRONIC DSS-2. You have acquired a reliable and powerful device. If you follow the instructions given in this manual, we can assure you that you will enjoy this device for many years.
  • Seite 20 If the device has been exposed to drastic temperature fluctuation (e.g. after transportation), do not switch it on immediately. The arising condensation water might damage your device. Leave the device switched off until it has reached room temperature. Please make sure that there are no obvious transport damages. Should you notice any damages on the A/C connection cable or on the casing, do not take the device into operation and immediately consult your local dealer.
  • Seite 21: Operating Determinations

    There are no serviceable parts inside the device. Maintenance and service operations are only to be carried out by authorized dealers. 3. OPERATING DETERMINATIONS This device is a professional DJ Set for playing CDs. This product is allowed to be operated with an alternating current of 115/230 V, 50/60 Hz and was designed for indoor use only.
  • Seite 22: Cd-Player

    4.2 CD-player AUTO CUE TIME --- SGL/CONT. STOP ----- PITCH PROG. ON/OFF TRACK SKIP LOOP IN OUT /EXIT RELOOP PITCH SEARCH LOOP IN OUT /EXIT RELOOP PITCH BEND RELAY FWD+ REV- PITCH CONTROL SEAMLESS LOOP CD 1 22/64 10553155_V_1_0.DOC...
  • Seite 23 1. DISPLAY LCD-display for displaying the different modes and functions. Please refer to the explanations under 6.3 LCD-display. 2. TRACK-BUTTONS Via the Track-buttons, you can select the desired track. Please refer to the explanations under 6.5 Selecting a track via the Track-buttons. 3.
  • Seite 24 Via the Scratch-wheel, you can temporarily adjust the playback-speed by ±16 %. Pause-mode: In the pause-mode, the current frame is repeated as soon as you turn the Scratch-wheel. Via the Scratch-wheel, you can slowly search within a title forwards and backwards. In this way, you can easily find a Cue-point for example.Turn the Scratch-wheel to the right in order to search forwards and turn it to the right in order to search backwards.
  • Seite 25: Mixer

    4.3 Mixer PHONO 1 PHONO 2 CD 1 CD 2 LINE 1 LINE 2 GAIN GAIN MASTER TALKOVER MIC LEVEL CUE LEVEL HIGH HIGH HIGH DSS-2 CUE MIXING SPLIT CH-1 CH-2 25/64 10553155_V_1_0.DOC...
  • Seite 26 1. PHONO / LINE-SWITCH Used to select the input to be sent to the individual channel. 2. GAIN-CONTROL Used to set the level of the input signal. 3. TALKOVER-SELECTOR The TALKOVER-selector has 3 different functions: OFF: the microphone is switched off. MIC ON: the microphone is activated.
  • Seite 27: Rear Panel

    Please note that the LCD-display can only be read from an angle of 45° to the top and of 5° to the bottom. CAUTION: Make sure that the DSS-2 is switched off (power-switch in outer position) before you connect it to the mains in order to avoid damages on your loudspeakers.
  • Seite 28: Operation

    In order to obtain highest sound-quality, only use high-quality cables for connecting the devices. Make sure that the cables are properly fixed. The Master-output can be connected via the RCA-sockets. Make sure that the sockets are set properly (L & R). You can connect up to 2 record players using the PHONO 1 sockets and PHONO 2 on the rearpanel.
  • Seite 29: Selecting A Track Via The Track-Buttons

    6.5. Selecting a track via the Track-buttons You can select the desired track via the Track-buttons. In order to play a track from the beginning, press the Track-buttons until the desired track number is displayed. If you hold the respective Track-button, the CD-player will run through the track numbers until you let the button loose.
  • Seite 30: Auto-Cue Function

    6.8 Auto-Cue function: After switching on or after pressing the Track-buttons, the player automatically jumps to the section where the music starts. This fuction enable to minimize the transitions between two tracks. Back-Cue function: If you press the Cue-button during playback, the player returns the position where the playback started and goes into Pause-mode.
  • Seite 31: Precautions

    6.13 Crossfader Mixes the signals of one channel with another. If the crossfader is in the center-position, both channels can be heard. 6.14 Channel-Fader Used to adjust the input level of each channel. 6.15 CUE-Switch Use the CUE-switch in order to select the channel to be monitored. 6.16 Power-LED The Power-LED is illuminated when the mixer is ready for use.
  • Seite 32: Cleaning And Maintenance

    SYMPTOMS POSSIBLE CAUSES SOLUTION Device does not react when swit- Connection to mains disrupted. Check plug ching on. connection. Player does not start operation CD is badly positioned or dirty Reposition CD with label atop or clean with a dry and soft cloth. No sound Check the mixer and amplifier Possibly exchange connections.
  • Seite 33: Technical Specifications

    9. Technical specifications Power supply: 115/230 V AC, 50/60 Hz ~ Power consumption: 50 W Available disc: Standard CDs 8 and 12 cm Quantisation: D/A-converter: 1 Bit Sampler frequency: 44.1 kHz Program memory: Up to 30 songs Pitch adjustment: ±8 %, ±16 % Distortion: 0.02 % S/N-ratio:...
  • Seite 34: Introduction

    - transmettre le mode d'emploi à un éventuel acheteur ou utilisateur de l'appareil - télécharger la version ultérieure du mode d'emploi d'Internet 1. INTRODUCTION Nous vous remercions d'avoir choisi un OMNITRONIC DSS-2. Vous êtes en possession d'un appareil très capaz. Sortez le OMNITRONIC DSS-2 de son emballage.
  • Seite 35 L'appareil ne devrait pas être mis en service lorsqu'il à été transporté d'un endroit froid à un endroit chaud. Il se forme de la condensation qui pourrait endommager l'appareil. Laissez celui-ci atteindre la température ambiante avant de le mettre en service. Avant tout, assurez-vous que l'appareil n'a pas subi de dommages lors de son transport.
  • Seite 36: Emploi Selon Les Préscriptions

    Avant la mise en marche de l'appareil, assurez-vous que tous les faders et tous les régulateurs de volumes soient en position "0" ou au minimum. ATTENTION: Allumez toujours l'amplificateur en dèrnier lieu et éteignez-le en premier! Tenez compte du fait que tout dommage résultant d'une modification manuelle sur cet appareil n'est pas couvert par la garantie.
  • Seite 37 • Affichage de tous les modes • Touches Open vérouillées en mode lecture pour éviter une ouverture accidentelle • Réglage de vitesse commutable de ±8 % à ±16 % • Mémoire de programmes: Jusqu'à 30 plages • Fader de 60 mm pour réglage de vitesse •...
  • Seite 38: Lecteur Cd

    4.2 Lecteur CD AUTO CUE TIME --- SGL/CONT. STOP ----- PITCH PROG. ON/OFF TRACK SKIP OUT /EXIT RELOOP LOOP IN PITCH SEARCH LOOP IN OUT /EXIT RELOOP PITCH BEND RELAY FWD+ REV- PITCH CONTROL SEAMLESS LOOP CD 1 38/64 10553155_V_1_0.DOC...
  • Seite 39 1. DISPLAY Afficheur LCD pour l'affichage des modes et fonctions différents. Veuillez faire attention aux instructions sous 6.3 LCD-Display 2. TOUCHES TRACK Grâce aux touches Track, vous pouvez selectionner la plage souhaitée. Veuillez faire attention aux instructions sous 6.5 Changement de plages. 3.
  • Seite 40 15. DISQUE SCRATCH Mode de lecture: Grâce au disque Scratch, vous pouvez changer la vitesse de lecture temporairement de ±16 %. Mode Pause: Dans le mode Pause, le frame actuel est répété dès que vous tournez le disque Scratch. Le disque Scratch permet un avancement lent de lecture soit en avant, soit en arrière, dans une plage. Ceci permet d’ajuster un point Cue éxactement de manière correspondante au frame, par example.
  • Seite 41: Mixer

    4.3 Mixer PHONO 1 PHONO 2 CD 1 CD 2 LINE 1 LINE 2 GAIN GAIN MASTER TALKOVER MIC LEVEL HIGH CUE LEVEL HIGH HIGH DSS-2 CUE MIXING SPLIT CH-1 CH-2 41/64 10553155_V_1_0.DOC...
  • Seite 42: Crossfader

    1. SÉLECTEUR PHONO / LINE Pour niveler le niveau d’entrée de chaque canal. 2. RÉGULATEUR GAIN Pour régler le niveau d’entrée. 3. SELECTEUR TALKOVER Le sélecteur Talkover a 3 fonctions differentes: OFF: Le microphone est coupé. ON: Le microphone est activé. TALKOVER: Le signal des autres sources est accentué...
  • Seite 43: Dos

    4.3 Dos LINE LINE PHONO PHONO MASTER CH 2 CH 1 Type: OMNITRONIC DSS-2 Power supply: 115V/230V,50Hz/60Hz~ Power consumption: 50 W DIGITAL OUTPUT DIGITAL OUTPUT OUTPUT INPUT 1. SÉLECTEUR PHONO/LINE/ Pour niveler le niveau d’entrée de chaque canal. 2. MASTER OUT Pour connecter l’amplificateur principal.
  • Seite 44: Utilisation

    6. UTILISATION 6.1 Mise en marche Mettez DSS-2 sous tension en pressant la touche Power. Quand l'appareil est sous tension et qu'aucun CD ne se trouve dans le tiroir, le texte "NO DISC" apparaît sur l'afficheur. 6.2 Tiroir d'accès du CD Quand le compartiment est fermé.
  • Seite 45: Changement De Plages

    6.4 Play/Pause En mode Pause, l'indication du temps dans l'afficheur est arrêté et la DEL Play/Pause clignote. Presser la touche Play/Pause pour commencer la lecture de la première plage. En mode de lecture, l'indication du temps dans l'afficheur se mouve et la DEL Play/Pause est allumée. Pour arrêter la lecture, il faut agir sur la touche Play/Pause, ce qui laisse la tête de lecture en position pour mémoire.
  • Seite 46: Répition D'une Séquence

    6.8 Fonction Auto-Cue: Le lecteur se place automatiquement à la position ou la musique commence apres avoir mis sous tension ou après vous avez pressé une des touches Track. Cette fonction vous offre la possibilité de réduire le temps entre deux plages. Fonction Back-Cue: Quand vous pressez la touche Cue durant la lecture, le lecteur retourne au debut de la plage ou au point Cue et se place en mode Pause.
  • Seite 47: Precautions

    à nouveau l'appareil et de fermer le tiroir a l'aide de la touche Open/Close s'y rapportant. 7. PRECAUTIONS Un DSS-2 pour SONO ne peut être comparé à un lecteur CD HIFI, même si la destination est identiqué. En effet sa suspension est beaucoup plus rigide pour palier aux handicaps des déplacements surtout en disco mobile.
  • Seite 48: Nettoyage Et Maintenance

    SYMPTOMES CAUSES POSSIBLES ACTION CORRECTIVE L'appareil n'est alimenté Mauvais branchement de la prise Insérer correctement cette fiche malgré l'action sur l'interrupteur secteur ON/OFF Le lecteur ne veut pas démarrer Le disque est mal positionné ou Repositonner le disque avec le sale label sur le dessus, ou le nettoyer avec un chiffon doux, sec...
  • Seite 49: Caractéristiques Techniques

    9. CARACTERISTIQUES TECHNIQUES Alimentation: 115/230 V AC, 50/60 Hz ~ Puissance de rendement: 50 W Compatibilité: CDs standard 8 et 12 cm Quantification: Convertisseur D/A: 1 Bit Fréquence de sampling: 44,1 kHz Mémoire de programmes: Jusqu'à 30 plages Ajustement de vitesse: ±8 %, ±16 % Distorsion: 0,02 %...
  • Seite 50: Introducción

    -mantener el manual durante la vida del producto -pasar el manual a cada sucesivo poseedor o usuario del producto -descargar la última versión del manual del Internet 1. INTRODUCCIÓN Gracias por haber elegido un OMNITRONIC DSS-2 Desembale su OMNITRONIC DSS-2. 2. INSTRUCCIONES DE SEGURIDAD ¡PRECAUCIÓN! ¡Tenga cuidado cuando opere con este aparato.
  • Seite 51 Si el aparato ha estado expuesto a grandes cambios de temperatura (p.e. tras el transporte), no lo enchufe inmediatamente. La condensación de agua producida podría dañar su aparato. Deje el aparato desconec- tado hasta que llegue a la temperatura ambiente. Antes de la puesta en marcha inicial, por favor asegúrese de que no hay daños causados durante el transporte.
  • Seite 52: Instrucciones De Manejo

    3. INSTRUCCIONES DE MANEJO Este aparato es un DJ Set profesional para jugar CDs. El aparato sólo es permitido para una conexion con una tensión alternativa de 115/230 V, 50/60 Hz y ha sido diseñado para ser usado en interiores. No agite el aparato.
  • Seite 53: Lector Cd

    4.2 Lector CD AUTO CUE TIME --- SGL/CONT. STOP ----- PITCH PROG. ON/OFF TRACK SKIP OUT /EXIT RELOOP LOOP IN PITCH SEARCH LOOP IN OUT /EXIT RELOOP PITCH BEND RELAY FWD+ REV- PITCH CONTROL SEAMLESS LOOP CD 1 53/64 10553155_V_1_0.DOC...
  • Seite 54 1. PANTALLA Pantalla LCD para lectura de los diferentes modos y funciones. Por favor dirijase a las explicaciones de la sección 6.3 Pantalla LCD. 2. TECLA TRACK Mediante la tecla Track puede seleccionar la canción deseada. Por favor dirijase a las explicaciones del apartado 6.5 Seleccionar una canción mediante los teclas Track.
  • Seite 55 15. RUEDA SCRATCH Modo Playback: Mediante la rueda Scratch puede ajustar temporalmente la velocidad de playback en ±16 %. Modo de pausa: En el modo de pausa la secuencia actual se repite tan pronto como gire la rueda Scratch. Mediante la rueda Scratch puede buscar lentamente en una canción hacia delante y hacia atrás. De esta forma puede encontrar un punto Cue por ejemplo.
  • Seite 56: Mixer

    4.3 Mixer PHONO 1 PHONO 2 CD 1 CD 2 LINE 1 LINE 2 GAIN GAIN MASTER TALKOVER MIC LEVEL HIGH CUE LEVEL HIGH HIGH DSS-2 CUE MIXING SPLIT CH-1 CH-2 56/64 10553155_V_1_0.DOC...
  • Seite 57 1. INTERRUPTOR PHONO/LINE Se usa para seleccionar el input que se envia a cada uno de los canales individuales. 2. REGULADOR "GAIN" Con el regulador "Gain" puede ajustar la intensidad de la señal de entrada. 3. SELECTOR DE FUNCIÓN “TALKOVER” Este selector tiene las funciones siguientes: OFF: el micrófono está...
  • Seite 58: Panel Trasero

    Conecte el DSS-2 con el cable RCA a su mezclador mediante los casquillos de salida de Audio. Asegúrese de que la ocupación derecha/izquierda (color del enchufe rojo/blanco) es la misma en ambos aparatos.
  • Seite 59: Conexiones

    6. MANEJO 6.1 Puesta en marcha Conecte el DSS-2 mediante el interruptor de alimentación. Cuando el aparato está encendido y no hay disco en la bandeja en la pantalla aparece, "NO DISC". 6.2 Bandeja del CD Pulse la tecla Open para abrir la bandeja del disco.
  • Seite 60: Sincronización De La Velocidad De Lectura

    6.4 Lectura/Pausa En el modo de Pausa la indicación de tiempo de la pantalla permanece estática y el LED Play/Pause parpadea. La lectura de la primera canción puede ser iniciada pulsando la tecla Play/Pause. En el modo de lectura la indicación de tiempo avanza y el LED Play/Pause brilla continuamente. Si quiere interrumpir la lectura, pulse la tecla Play/Pause y el laser para en la posición donde usted paró.
  • Seite 61: Memorizar Una Secuencia (Función Loop)

    Después de dar entrada a su última canción, presione el botón de programa y la última canción será memorizada. Presione el botón Play/Pause y empieza a sonar el programa. Mientras reproduce el programa, el LED del programa brilla. Puede entrar el modo Programa en cualquier momento para añadir más canciones presionando el botón de programa.
  • Seite 62: Precauciones

    Comience la lectura de CD1. Al final the la canción actual de CD1, el aparato comienza automáticament con CD2. El primer CD-player se pone en el modo de pausa. Vd. puede insertar una nueva CD o memorizar un punto Cue en el CD-player en el modo de pausa. 6.11 Interruptor Phone/Line/CD Se usa para seleccionar el input que se envia a cada uno de los canales individuales.
  • Seite 63: Limpieza Y Mantenimiento

    Los ajustes del Pitchfader cambian las frecuencias de FM. Si la pantalla muestra varias veces "ERR" ajuste las frecuencias. Se han hecho las conexiones adecuadamente? Están su amplificador y su mezclador ajustados adecuadamente? Ha seguido todas las instrucciones dadas en este manual? SÍNTOMAS CAUSAS POSIBLES SOLUCIÓN...
  • Seite 64: Especificaciones Técnicas

    Para la versión de diseño, Vd. no puede utilizar el panel de fader del crossfader de recambio. Para sustituir el panel de fader, también tiene que retirar los 2 tornillos interiores. 9. ESPECIFICACIONES TÉCNICAS Alimentación: 115/230 V AC, 50/60 Hz ~ Consumo: 50 W CDs utilizables:...

Inhaltsverzeichnis