Herunterladen Inhalt Inhalt Diese Seite drucken
Inhaltsverzeichnis

Werbung

Verfügbare Sprachen
  • DE

Verfügbare Sprachen

  • DEUTSCH, seite 35
RCNE520E40ZX
RCNE520E30ZGB
RCNE520E30ZXP
EN DE HU

Werbung

Inhaltsverzeichnis
loading

Inhaltszusammenfassung für Beko RCNE520E30ZGB

  • Seite 1 RCNE520E40ZX RCNE520E30ZGB RCNE520E30ZXP EN DE HU...
  • Seite 2 Please read this manual before using the product! Dear Customer, We'd like you to make the best use of our product, which has been manufactured in modern facilities with care and meticulous quality controls. Thus, we advice you to read the entire user manual before you use the product. In case the product changes hands, do not forget to hand the guide to its new owner along with the product.
  • Seite 3: Inhaltsverzeichnis

    1 Safety and environment instructions 3 5 Using the product 1.1. General safety..... . . 3 5.1. Temperature adjustment button ..13 1.1.1 HC warning .
  • Seite 4: Safety And Environment Instructions

    Safety and environment instructions This section provides the safety Unplug the product during • instructions necessary to prevent installation, maintenance, the risk of injury and material cleaning and repair. damage. Failure to observe these If the product will not be used •...
  • Seite 5: Place Liquids In Upright

    Safety and environment instructions Do not place containers In case of malfunction, do • • holding liquids on top of the not use the product, as it product. Splashing water on may cause electric shock. Contact the authorized an electrified part may cause service before doing electric shock and risk of anything.
  • Seite 6: Hc Warning

    Safety and environment instructions prevention equipment in 1.1.1 HC warning your installation. Consult If the product comprises a Professional plumbers if you cooling system using R600a are not sure that there is no gas, take care to avoid water hammer effect in your damaging the cooling system installation.
  • Seite 7: Child Safety

    Safety and environment instructions The manufacturer assumes • This product has been no responsibility for any manufactured with high quality parts and materials which can be damage due to misuse or reused and are suitable for mishandling. recycling. Do not dispose of the The product’s bench life is waste product with normal •...
  • Seite 8: Your Refrigerator

    Your Refrigerator 1. Cooler compartment door shelf 10. Ice cube tray & Ice bank 2. Water dispenser filling tank 11. Vegetable bin 3. Egg section 12. Zero degree compartment 4. Water dispenser reservoir 13. Interior light 5. Bottle shelf 14. Cooler compartment glass shelf 15.
  • Seite 9: Installation

    Installation 3.1. Right place for installation 3.2. Attaching the plastic wedges Contact the Authorized Service for the product's Use the plastic wedges in the provided with installation. To ready the product for installation, the product to provide sufficient space for air see the information in the user guide and make circulation between the product and the wall.
  • Seite 10: Power Connection

    Installation 3.4. Power connection WARNING: Do not use extension or multi sockets in power connection. WARNING: Damaged power cable must be replaced by Authorized Service. When placing two coolers in adjacent position, leave at least 4 cm distance between the two units. • Our firm will not assume responsibility for any damages due to usage without earthing and power connection in compliance with...
  • Seite 11: Reversing The Doors

    Installation 3.5. Reversing the doors Proceed in numerical order . 45 ¡ 180¡ Refrigerator / User Guide 10 /32 EN...
  • Seite 12: Reversing The Doors

    Installation 3.6. Reversing the doors Proceed in numerical order . (13) 45 ° 180° Refrigerator / User Guide 11/32 EN...
  • Seite 13: Preparation

    Preparation 4.1. What to do for energy saving • Make sure the foods are not in contact with the cooler compartment temperature sensor Connecting the product to electronic described below. energy-saving systems is harmful, as it may damage the product. • Do not keep the refrigerator doors open for long periods.
  • Seite 14: Using The Product

    Using the product 5.1. Temperature adjustment button 5.2. Rapid freezing If you want to freeze large amounts of fresh food, Internal temperature of your refrigerator varies switch the temperature adjustment button to depending on the following reasons: • Seasonal temperatures, ) position before putting the food into the • Opening the door frequently and leaving it quick freezing compartment.
  • Seite 15: Vacation Function

    Using the product 5.3. Vacation function If doors of the product is not ( ) opened for at least 12 hours after adjusting the temperature setting button to the highest, vacation function is automatically activated. Button setting must be changed to cancel the function.
  • Seite 16: Indicator Panel

    Using the product 5.4. Indicator panel Indicator panels may vary according to the product model. Audio – visual functions on the indicator panel helps you in using your product. 1. Fridge Compartment Indicator 2. Error status indicator 3. Temperature indicator 4.
  • Seite 17 Using the product 1. Fridge compartment indicator 8. Economy mode indicator Fridge compartment light is illuminated while Indicates that the refrigerator operates the fridge compartment temperature is set. in energy saving mode. This display shall be activated if the freezer compartment 2.
  • Seite 18: Indicator Panel

    Using the product 5.5. Indicator panel Indicator panel allows you to set the temperature and control the other functions related to the product without opening the door of the product. Just press the inscriptions on relevant buttons for function settings. 2.
  • Seite 19: Fridge Compartment Temperature Setting Button

    Using the product 3.Quick fridge function “- -” is displayed on the fridge compartment The button has two functions. To activate or temperature indicator and no active cooling deactivate the quick cool function press it is performed on the fridge compartment. It briefly.
  • Seite 20 Using the product 9. Freezer compartment temperature 12. Economic usage indicator setting button Indicates that the product is running in energy- Press this button to set the temperature of the efficient mode. ( )This indicator will be freezer compartment to -18,-19,-20,-21, -22, active if the Freezer Compartment temperature -23,-24, -18...
  • Seite 21: Ice Bucket

    Using the product 5.6. Ice bucket 5.9. Vegetable bin *optional *optional • Take the ice bucket from the freezer Product’s vegetable bin is designed to keep compartment. vegetables fresh by preserving humidity. For • Fill the ice bucket with water. this purpose, the overall cold air circulation is • Place the ice bucket into the freezer intensified in the vegetable bin.
  • Seite 22: Moving Door Rack

    Using the product 5.12. Sliding storage box 5.11. Moving door rack *optional *optional This accessory has been designed to increase Moving door rack can be fixed in 3 different the usage volume of the door racks. positions. Thanks to its ability to move sideways, it In order to move the rack, push the buttons enables you to easily place long bottle, jar or on the side evenly.
  • Seite 23: Moisture Controlled Vegetable Bin

    Using the product 5.13. Moisture controlled 5.14. Automatic ice machine vegetable bin *optional *optional Automatic ice machine enables you to easily With moisture control feature, moisture rates make ice in your refrigerator. In order to obtain of vegetables and fruits are kept under control ice from the ice machine, take out the water and ensures a longer freshness period for tank in the cooler compartment, fill it with...
  • Seite 24: Icematic And Ice Storage Container

    Using the product 5.16. Using the water dispenser 5.15. Icematic and ice storage container *optional *optional It is normal for the first few glasses Using the Icematic of water taken from the dispenser Fill the Icematic with water and place it into its to be warm.
  • Seite 25: Filling The Water Dispenser's Tank

    Using the product 5.17. Filling the water dispenser's tank Water tank filling reservoir is located inside the door rack. 1. Open the cover of the tank. 2. Fill the tank with fresh drinking water. 3. Close the cover. Do not fill the water tank with any other liquid except for water such as fruit juices, carbonated beverages or alcoholic drinks...
  • Seite 26: Cleaning The Water Tank

    Using the product Capacity of the water tank is 3 litres; do not overfill. 5.18. Cleaning the water tank 1. Remove the water filling reservoir inside the door rack. 2. Remove the door rack by holding from both sides. 3. Grab the water tank from both sides and re- move it with an angle of 45°C.
  • Seite 27: Drip Tray

    Using the product 5.19. Drip tray Water that dripped while using the water dispenser accumulates in the spillage tray. Remove the plastic filter as shown in the figure. With a clean and dry cloth, remove the water that has accumulated. Refrigerator / User Guide 26 /32EN...
  • Seite 28: Freezing Fresh Food

    Using the product 5.20. Freezing fresh food • Mark each food pack by writing the date on the package before freezing. This will allow • To preserve food quality, the food items you to determine the freshness of each placed in the freezer compartment must be pack every time the freezer is opened.
  • Seite 29: Deep Freezer Details

    Using the product 5.22. Deep freezer details 5.24. Door open alert As per the IEC 62552 standards, the freezer (Optional) must have the capacity to freeze 4,5 kg of An audible alert will be heard if the product's food items at -18°C or lower temperatures door remains open for at least 1 minute.
  • Seite 30: Maintenance And Cleaning

    Maintenance and cleaning • Never keep the food that have expired best before dates and spoiled in the refrigerator. Service life of the product is increase if it is regularly cleaned 6.2. Protecting the plastic surfaces Clean with arm water immediately as the oil may WARNING: First unplug the product cause damage on the surface when it is poured on...
  • Seite 31: Troubleshooting

    Troubleshooting Check this list before contacting the service. Doing so will save you time and money. This list includes frequent complaints that are not related to faulty workmanship or materials. Certain features mentioned herein may not apply to your product. The refrigerator is not working.
  • Seite 32 Troubleshooting The freezer temperature is very low, but the cooler temperature is adequate. • The freezer compartment temperature is set to a very low degree. >>> Set the freezer compartment temperature to a higher degree and check again. The cooler temperature is very low, but the freezer temperature is adequate. • The cooler compartment temperature is set to a very low degree.
  • Seite 33 Troubleshooting • The product is not cleaned regularly. >>> Clean the interior regularly using sponge, warm water and carbonated water. • Certain holders and packaging materials may cause odour. >>> Use holders and packaging materials without free of odour. • The foods were placed in unsealed holders. >>> Keep the foods in sealed holders. Micro-organisms may spread out of unsealed food items and cause malodour.
  • Seite 34 Gefrierschrank Bedienungsanleitung EWWERQWEW...
  • Seite 35 Bitte lesen Sie zuerst diese Anleitung! Liebe Kundin, lieber Kunde, Wir möchten, dass Sie optimale Effizienz von unserem Produkt erhalten, das in modernen Einrichtungen mit sorgfältigen Qualitätskontrollen hergestellt wurde. Bitte lesen Sie die Bedienungsanleitung zu diesem Zweck vor Benutzung des Produktes vollständig und bewahren Sie sie zum Nachschlagen auf.
  • Seite 36 Inhalt 1 Hinweise zu Sicherheit und Umwelt 3 5 Produkt verwenden 1.1. Allgemeine Sicherheitshinweise ..3 5.1. Temperatureinstelltaste ....15 1.1.1 Wichtige Hinweise zum Kältemittel .
  • Seite 37: Hinweise Zu Sicherheit Und Umwelt

    Hinweise zu Sicherheit und Umwelt Dieser Abschnitt bietet die zur Minuten, bevor Sie ihn wieder Vermeidung von Verletzungen und anschließen. Materialschäden erforderlichen Ziehen Sie den Netzstecker, • Sicherheitsanweisungen. wenn Sie das Gerät nicht Bei Nichtbeachtung dieser nutzen. Anweisungen erlöschen jegliche Berühren Sie den Netzstecker •...
  • Seite 38 Hinweise zu Sicherheit und Umwelt Lassen Sie niemals hinteren Bereich des Gerätes • (Abdeckung des Fachs mit Wasser direkt auf das der elektrischen Karte) (1) Gerät gelangen; auch nicht geöffnet ist. zum Reinigen! Es besteht Stromschlaggefahr! Verwenden Sie das Produkt •...
  • Seite 39 Hinweise zu Sicherheit und Umwelt Setzen Sie das Gerät keinem Geben Sie keine Flüssigkeiten • • Regen, Schnee, direkten in Flaschen oder Dosen in den Sonnenlicht oder Wind aus; Tiefkühlbereich. Sie können dies kann die elektrische platzen! Sicherheit gefährden. Geben Sie Flüssigkeiten in •...
  • Seite 40: Wichtige Hinweise Zum Kältemittel

    Hinweise zu Sicherheit und Umwelt Das Typenschild an der linken Innenwand des Kühlschranks gibt die Art des im Gerät verwendeten Gases an. 1.1.1 Wichtige Hinweise 1.1.2 Modelle mit zum Kältemittel Wasserspender Wenn das Gerät über ein Der Druck für die •...
  • Seite 41: Bestimmungsgemäßer Einsatz

    Hinweise zu Sicherheit und Umwelt Wenden Sie sich bitte an Das Produkt sollte • einen Fachinstallateur, ausschließlich zum Lagern falls Sie sich über die von Lebensmitteln und Wasserschlaggefährdung in Getränken verwendet Ihrem Leitungssystem nicht werden. sicher sein sollten. Bewahren Sie keine •...
  • Seite 42: Sicherheit Von Kindern

    Hinweise zu Sicherheit und Umwelt 1.3. Sicherheit von Kindern Recycling von elektrischen und elektronischen Geräten. Ihre Stadtverwaltung Bewahren Sie • informiert Sie gerne über geeignete Verpackungsmaterialien Sammelstellen in Ihrer Nähe. außerhalb der Reichweite 1.5. Einhaltung von RoHS-Vorgaben von Kindern auf. • Dieses Gerät erfüllt die Vorgaben der Lassen Sie Kinder nicht mit •...
  • Seite 43: Ihr Kühlschrank

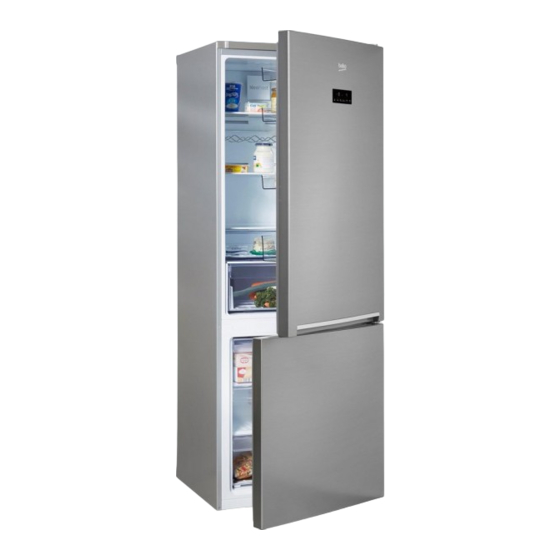
    Ihr Kühlschrank 1. Kühlbereich-Türablage 10. Eisbereiter und Eisbehälter 2. Wasserspender-Befüllung 11. Gemüsefach 3. Eierhalter 12. 0-Grad-Fach 4. Wasserspender-Tank 13. Innenbeleuchtung 5. Flaschenablage 14. Kühlbereichglasablage 6. Verschiebbarer Vorratsbehälter 15. Temperatureinstelltaste 7. Einstellbare Füße 16. Kühlbereich 8. Tiefkühlbereich 17. Tiefkühlbereich 9. Schnellgefrierfach * Optional: Die Abbildungen in dieser Anleitung dienen lediglich der Veranschaulichung und müssen nicht absolut exakt mit Ihrem Produkt übereinstimmen.
  • Seite 44: Installation

    Installation 3.1. Der richtige Aufstellungsort 3.2. Kunststoffkeile anbringen Wenden Sie sich zur Aufstellung des Gerätes Sorgen Sie zur Gewährleistung einer an den autorisierten Kundendienst. Bereiten angemessenen Luftzirkulation mit Hilfe der Sie das Gerät auf die Aufstellung vor, indem Sie mitgelieferten Kunststoffkeile für genügend Platz zwischen dem Gerät und der Wand.
  • Seite 45: Stromanschluss

    Installation 3.4. Stromanschluss WARNUNG: Verwenden Sie keine Mehrfachsteckdosen oder Verlängerungskabel. WARNUNG: Beschädigte Netzkabel müssen vom autorisierten Kundendienst ausgetauscht werden. Wenn Sie zwei Kühlgeräte nebeneinander aufstellen, halten Sie einen Mindestabstand von 4 cm zwischen den Geräten ein. • Unser Unternehmen haftet nicht für jegliche Schäden, die durch eine Inbetriebnahme ohne Erdung oder einen nicht mit nationalen Richtlinien übereinstimmenden...
  • Seite 46: Türanschlag Umkehren

    Installation 3.5. Türanschlag umkehren Gehen Sie der Reihe nach vor. 45 ¡ 180¡ Kühlschrank / Bedienungsanleitung 12 / 35 DE...
  • Seite 47 Installation 3.6. Türanschlag umkehren Gehen Sie der Reihe nach vor. (13) 45 ° 180° Kühlschrank / Bedienungsanleitung 13 / 35 DE...
  • Seite 48: Vorbereitungen

    Vorbereitungen 4.1. Maßnahmen zum Energiesparen • Achten Sie darauf, dass Lebensmittel nicht den nachstehend beschriebenen Temperatursensor Der Anschluss des Gerätes an im Kühlbereich berühren. Energiesparsysteme birgt Risiken, da Schäden am Gerät auftreten können. • Gerätetüren nicht längere Zeit offen stehen lassen.
  • Seite 49: Produkt Verwenden

    Produkt verwenden 5.1. Temperatureinstelltaste 5.2. Schnellgefrieren Wenn Sie große Mengen frischer Lebensmittel Die Innentemperatur Ihres Kühlschranks hängt einfrieren möchten, stellen Sie den teilweise von folgenden Einflüssen ab: • Umgebungstemperatur Temperatureinstellknopf auf die Position ( ) ein, • Häufiges Öffnen der Tür, Offenstehen der Tür bevor Sie die Lebensmittel in den Tiefkühlbereich über längere Zeit geben.
  • Seite 50: Urlaubsfunktion

    Produkt verwenden 5.3. Urlaubsfunktion Falls die Gerätetüren ( ) mindestens 12 Stunden lang nach Anpassung des Temperatureinstellknopfs auf die höchste Position nicht geöffnet werden, wird automatisch die Urlaubsfunktion aktiviert. Zum Abbrechen der Funktion muss der Knopf auf eine andere Position eingestellt werden. Wir raten davon ab, Lebensmittel bei aktiver Urlaubsfunktion im Kühlbereich aufzubewahren.
  • Seite 51: Anzeigefeld

    Produkt verwenden 5.4. Anzeigefeld Die Anzeigefelder können je nach Modell etwas anders ausfallen. Audiovisuelle Funktionen am Anzeigefeld helfen Ihnen bei der Bedienung Ihres Gerätes. 1. Kühlbereichanzeige 2. Fehlerstatusanzeige 3. Temperaturanzeige 4. Urlaubstaste 5. Temperatureinstelltaste 6. Kühlbereichauswahltaste 7. Tiefkühlbereichanzeige 8. Energiesparmodusanzeige 9.
  • Seite 52 Produkt verwenden 1. Kühlbereichanzeige 8. Energiesparmodusanzeige Die Kühlbereichanzeige leuchtet beim Zeigt an, dass das Kühlgerät besonders Einstellen der Kühlbereichtemperatur auf. energiesparend arbeitet. Diese Anzeige wird 2. Fehlerstatusanzeige aktiv, wenn die Tiefkühlbereichtemperatur auf Falls der Kühlschrank nicht genügend kühlt -18 °C eingestellt ist. oder ein Sensor ausfällt, wird diese Anzeige 9.
  • Seite 53: Anzeigefeld

    Produkt verwenden 5.5. Anzeigefeld Das Anzeigefeld ermöglicht Ihnen die Einstellung der Temperatur und die Steuerung anderer Funktionen, ohne dass Sie die Tür des Produktes öffnen müssen. Drücken Sie einfach die Beschriftungen der entsprechenden Tasten zur Funktionseinstellung. 2. Energiesparfunktion (Display aus): 1.
  • Seite 54: Kühlbereichtemperatur-Einstelltaste

    Produkt verwenden 3. Schnellkühlen gekühlt. Wenn diese Funktion aktiv ist, sollten Diese Taste erfüllt zwei Funktionen. Zum keine Lebensmittel im Kühlbereich aufbewahrt Ein- und Ausschalten der Schnellkühlfunktion werden. Andere Bereiche werden entsprechend drücken Sie die Taste einmal kurz. Die der eingestellten Temperatur weiterhin gekühlt. Schnellkühlenanzeige erlischt, der Kühlschrank Zum Aufheben dieser Funktion drücken Sie die arbeitet wieder mit normalen Einstellungen.
  • Seite 55: Schnellgefriertaste/Eisbereiter-Ein/ Aus-Taste

    Produkt verwenden 9. Tiefkühlbereichtemperatur-Einstelltaste Durch mehrmaliges Drücken dieser Taste Diese Funktion wird nach einem Stromausfall nicht automatisch wieder stellen Sie die Tiefkühlbereichtemperatur auf eingeschaltet. -18 °, -19 °, -20 °, -21 °, -22 °, -23 °, -24 °, -18 °C, ... ein. Mit dieser Taste stellen Sie die gewünschte Temperatur des Tiefkühlbereiches 12.
  • Seite 56: Eisbehälter

    Produkt verwenden 5.6. Eisbehälter 5.9. Gemüsefach (optional) (optional) • Nehmen Sie den Eisbehälter aus dem Das Gemüsefach des Produktes ist darauf Tiefkühlbereich. ausgelegt, Gemüse durch Bewahren der • Füllen Sie den Eisbehälter mit Trinkwasser. Feuchtigkeit frisch zu halten. Aus diesem • Geben Sie den Eisbehälter in den Grund wird die Gesamtzirkulation kalter Luft im Tiefkühlbereich.
  • Seite 57: Bewegliche Türablage

    Produkt verwenden 5.12. Verschiebbarer 5.11. Bewegliche Türablage Vorratsbehälter (optional) (optional) Die bewegliche Türablage kann in 3 Dieses Zubehör ist so konstruiert, dass das verschiedenen Positionen fixiert werden. Volumen der Türablagen vergrößert wird. Zum Bewegen der Ablage drücken Sie die Dank seiner Fähigkeit zur Seitwärtsbewegung Tasten an der Seite gleichmäßig.
  • Seite 58: Feuchtigkeitskontrolliertes Gemüsefach

    Produkt verwenden 5.13. Feuchtigkeitskontrolliertes 5.14. Automatischer Eisbereiter Gemüsefach (optional) (optional) Der automatische Eisbereiter ermöglicht Dank der Feuchtigkeitsregelung bleibt der Ihnen die einfache Bereitung von Eis in Ihrem Feuchtigkeitsgehalt von Gemüse und Obst Kühlschrank. Damit Sie Eis vom Eisbereiter unter Kontrolle, die Lebensmittel bleiben länger erhalten, nehmen Sie den Wassertank aus dem frisch.
  • Seite 59: Eisbereiter Und Eisbehälter

    Produkt verwenden 5.15. Eisbereiter und Eisbehälter In Produkten mit automatischem Eisbereiter hören Sie möglicherweise (optional) einen Ton beim Ausgießen von Eis. Eisbereiter verwenden Dieser Ton ist völlig normal und keine Füllen Sie den Eisbereiter mit Wasser, setzen Zeichen für einen Fehler. Sie ihn in seine Halterung.
  • Seite 60: Wasserspender

    Produkt verwenden 5.16. Wasserspender Wasserbehälter füllen Der Wassertank befindet sich an der Innenseite (bei bestimmten Modellen) der Türablage. Öffnen Sie die Abdeckung des Der Wasserspender ist eine praktische Behälters, füllen Sie Trinkwasser ein. Schließen Einrichtung, mit der Sie kühles Wasser zapfen Sie anschließend den Deckel.
  • Seite 61: Wassertank Reinigen

    Produkt verwenden • Drücken Sie mit einem haltbaren Glas ge- gen den Hebel des Wasserspenders. Falls Sie Einwegbecher verwenden, betätigen Sie den Hebel mit dem Finger. 5.18. Wassertank reinigen • Entfernen Sie den Füllbehälter auf der Innenseite der Türablage. • Entfernen Sie die Türablage, indem Sie diese an beiden Seiten greifen.
  • Seite 62: Tropfschale

    Produkt verwenden 5.19. Tropfschale Wasser, das bei der Nutzung des Wasserspenders heruntertropft, sammelt sich in der Tropfschale. Nehmen Sie das Kunststoffsieb wie in der Abbildung gezeigt heraus. Entfernen Sie angesammeltes Wasser mit einem sauberen, trockenen Tuch. Achtung: Nur an Trinkwasserleitungen anschließen.
  • Seite 63: Frische Lebensmittel Tiefkühlen

    Produkt verwenden • Beschriften Sie die Behälter vor dem 5.20. Frische Lebensmittel Einfrieren mit dem Datum. Dadurch können tiefkühlen Sie beim Öffnen des Tiefkühlbereichs stets • Zur Gewährleistung der die Frische der verpackten Lebensmittel Lebensmittelqualität müssen im prüfen. Bewahren Sie ältere Lebensmittel Tiefkühlbereich gelagerte Lebensmittel so weiter vorne auf, damit sie zuerst schnell wie möglich eingefroren werden;...
  • Seite 64: Hinweise Zum Tiefkühlbereich

    Produkt verwenden 5.22. Hinweise zum Tiefkühlbereich Feinkost Gemäß den Standards IEC 62552 muss Frischlebens (Frühstücksprodukte, der Tiefkühlbereich über die Kapazität mittelbereich schnell verderbliche verfügen, 4.5 kg Lebensmittel bei -18 °C Fleischprodukte) oder geringeren Temperaturen je 100 Liter 5.24. Tür-offen-Alarm Volumen des Tiefkühlbereichs in 24 Stunden (optional) einzufrieren.
  • Seite 65: Reinigung Und Pflege

    Reinigung und Pflege • Bewahren Sie keine abgelaufenen oder Die Produkteinsatzzeit verlängert sich bei verdorbenen Lebensmittel im Kühlschrank auf. regelmäßiger Reinigung. 6.2. Kunststoffflächen richtig pflegen Auf Kunststoffflächen verschüttetes Öl kann die WARNUNG: Ziehen Sie vor der Reinigung Oberfläche beschädigen und muss sofort mit des Kühlschranks den Netzstecker.
  • Seite 66 Reinigung und Pflege *Alkali ist eine Basis, die Hydroxid-Ionen bildet (OH¯), wenn sie in Wasser aufgelöst wird. Li (Lithium), Na (Natrium), K (Kalium), Rb (Rubidium), Cs (Cäsium) und radioaktive Fr (Fan-sium) Metalle werden als ALKALIMETALLE bezeichnet. Kühlschrank / Bedienungsanleitung 32 /35 DE...
  • Seite 67: Problemlösung

    Problemlösung Bitte schauen Sie sich zunächst diese Liste an, bevor Sie sich an den Kundendienst wenden. Das kann Ihnen Zeit und Geld sparen. In der Liste finden Sie Lösungsvorschläge für allgemeine Probleme, die nicht durch Material- oder Herstellungsfehler verursacht werden. Bestimmte hierin erwähnte Funktionen und Merkmale treffen möglicherweise nicht auf Ihr Produkt zu.
  • Seite 68 Problemlösung Der Kühlschrank arbeitet zu oft oder zu lange. • Ihr neues Gerät ist vielleicht etwas grö0er als sein Vorgänger. Größere Produkte arbeiten länger. • Die Umgebungstemperatur ist sehr hoch. >>> Das Gerät arbeitet bei höheren Umgebungstemperaturen normalerweise länger. • Das Gerät wurde erst vor Kurzem angeschlossen oder mit neuen Lebensmitteln beladen. >>> Das Gerät benötigt mehr Zeit zum Erreichen der eingestellten Temperatur, wenn es gerade erst angeschlossen oder mit neuen Lebensmitteln befüllt wurde.
  • Seite 69 Problemlösung Das Produkt macht Sprüh- oder Fließgeräusche etc. • Die Arbeitsweise des Gerätes beinhaltet Flüssigkeits- und Gasströme. >>>Dies ist völlig normal und keine Fehlfunktion. Das Gerät macht windartige Geräusche. • Das Produkt nutzt einen Lüfter zur Kühlung. Dies ist völlig normal und keine Fehlfunktion. Es befindet sich Kondenswasser an den Innenwänden des Produktes.
  • Seite 70 Hűtőszekrény Használati útmutató EWWERQWEW...
  • Seite 71 Tisztelt vásárlónk! Bízunk benne, hogy termékünk, mely egy modern gyárban készült, és a legaprólékosabb minőségirányítási eljárások alapján lett tesztelve, hatékony szolgáltatást fog biztosítani az Ön számára. Ehhez azt javasoljuk, hogy használat előtt alaposan olvassa el a teljes használati útmutatót, és azt ne dobja ki, mert a jövőben még szüksége lehet rá..
  • Seite 72 Tartalomjegyzék 1 Biztonsági és környezetvédelmi 5 A termék használata figyelmeztetések 5.1. Hőmérsékletszabályzó gomb ... 13 1.1. Általános biztonság ....3 5.2.
  • Seite 73: Biztonsági És Környezetvédelmi Figyelmeztetések

    Biztonsági és környezetvédelmi figyelmeztetések Ez a rész a sérülések vagy A bedugás előtt a dugó hegyét • anyagi károk elkerüléséhez törölje meg mindig egy száraz szükséges biztonsági utasításokat ronggyal. tartalmazza. A következő A hűtőszekrényt ne • információk figyelmen kívül csatlakoztassa laza hagyása esetén valamennyi konnektorba.
  • Seite 74 Biztonsági és környezetvédelmi figyelmeztetések Ne érjen nedves kézzel a • fagyasztott élelmiszerekhez! Ezek a kezéhez tapadhatnak! Ne helyezzen folyadékot • tartalmazó üvegeket és edényeket a fagyasztóba. Ezek szétrobbanhatnak! A folyadékokat függőlegesen • helyezze el, szorosan lezárt fedéllel. Ne fújjon ki gyúlékony •...
  • Seite 75: Hc Figyelmeztetés

    Biztonsági és környezetvédelmi figyelmeztetések Ügyeljen arra, hogy a keze vagy A terméke gyártásakor • egyéb testrésze ne szoruljon be használt gázt a termék a termék mozgó részei közé. bal belső részén található Ne lépjen vagy hajoljon a táblán láthatja. • hűtúgép ajtajára, fiókjaira és hasonló...
  • Seite 76: Rendeltetésszerű Használat

    Biztonsági és környezetvédelmi figyelmeztetések 1.2. Rendeltetésszerű Amennyiben az ajtó zárral is • használat rendelkezik, a kulcsot tartsa Ezt a terméket háztartási távol a gyermekektől. • használatra tervezték. Nem 1.4. A WEEE-irányelvnek alkalmas kereskedelmi való megfelelés és a hulladék termék megsemmisítése használatra.
  • Seite 77: Hűtőszekrény

    Hűtőszekrény 1. Hűtőszekrény ajtópolc 10. Jégkockatartó & Ice bank 2. Vízadagoló töltőtartály 11. Zöldségtartó 3. Tojástartó 12. Nullfokos tárolórekesz 4. Vízadagoló tároló 13. Belső világítás 5. Üvegtartó polc 14. Hűtőszekrény üvegpolc 6. Csúszó tárolódoboz 15. Hőmérsékletszabályzó gomb 7. Állítható lábak 16.
  • Seite 78: Üzembe Helyezés

    Üzembe helyezés 3.1. A megfelelő elhelyezés 3.2. A műanyag ékek rögzítése A termék üzembe helyezéséhez lépjen A mellékelt műanyag ékek segítenek megtartani a kapcsolatba a hivatalos szervizzel. A termék szükséges távolságot a hűtő és a fal között, és így üzembe helyezésének befejezéséhez olvassa el a a levegő...
  • Seite 79: Elektromos Összeköttetés

    Üzembe helyezés 3.4. Elektromos összeköttetés FIGYELEM: Ne használjon hosszabbítót vagy elosztót. FIGYELEM: A sérült tápkábel cseréjét bízza a hivatalos szervizre. két hűtőt kíván egymás mellett elhelyezni, kérjük, hagyjon legalább 4 cm helyet közöttük. • A vállalatunk nem vállal semmiféle felelősséget azokért a károkért, melyek a hűtőszekrény nem a nemzeti előírásoknak megfelelő...
  • Seite 80: Az Ajtónyitás Megfordítása

    Üzembe helyezés 3.5. Az ajtónyitás megfordítása A lépéseket számsorrendben végezze el. 45 ¡ 180¡ Hűtőszekrény / Használati útmutató 10 / 30 HU...
  • Seite 81 Üzembe helyezés 3.6. Az ajtónyitás megfordítása A lépéseket számsorrendben végezze el. (13) 45 ° 180° Hűtőszekrény / Használati útmutató 11 / 30 HU...
  • Seite 82: Előkészítés

    Előkészítés 4.1. Teendők az energiatakaré- kosság érdekében A termék csatlakoztatása elektromos energiatakarékos rendszerekhez káros és károsíthatja a terméket. • Ne hagyja sokáig nyitva a hűtő ajtaját. Ne tegyen meleg ételt vagy italt a hűtőbe. • Csak annyi ételt/italt tegyen a hűtőbe, hogy az ne akadályozza a belső...
  • Seite 83: Termék Használata

    A termék használata 5.1. Hőmérsékletszabályzó gomb 5.2. Gyorsfagyasztás Ha nagy mennyiségű friss ételt szeretne A hűtőszekrény belső hőmérséklete a következő okok lefagyasztani, akkor állítsa a hőmérsékletszabályzó miatt változik: • Évszaknak megfelelő hőmérsékletek, gombot a ( ) állásra még az étel behelyezése • Az ajtó...
  • Seite 84: Vakáció Funkció

    A termék használata 5.3. Vakáció funkció Ha a hűtőszekrény ajtaja nem ( ) kerül kinyitásra legalább 12 órán keresztül azután, hogy a hőmérsékletszabályzó gombot a maximálisra állította, akkor a vakáció funkció automatikusan bekapcsol. A funkció törléséhez módosítani kell a gomb beállításait.
  • Seite 85: Kijelző Panel

    A termék használata 5.4. Kijelző panel Ennek a kijelző panelnek a segítségével beállíthatja a hőmérsékletet és vezérelheti a termék egyéb funkcióit anélkül, hogy ehhez ki kellene nyitnia a hűtőt. A funkció k beállításához egyszerűen csak érintse meg a kívánt gombot. 2.
  • Seite 86 A termék használata 3. Gyorsfagyasztás funkció 6. Vészjelzés ki figyelmeztetés: A gomb két funkcióval rendelkezik. A Áramszünet/Magas hőmérséklet vészjelzés esetén, gyorsfagyasztás funkció ki- és bekapcsolásához miután ellenőrizte az ételt a mélyhűtő rekeszben, a nyomja meg rövid ideig. A gyorsfagyasztás kijelző figyelmeztetés törléséhez nyomja meg a vészjelzés kikapcsol és a hűtőszekrény visszaállítja a normális ki gombot ( ).
  • Seite 87 A termék használata A víztartályból nem folyik víz, ha ez a funkció ki van választva. Ugyanakkor a korábban készített jeget ki lehet venni az icematic-ból. 11. Gyorsfagyasztás funkciógomb/Icematic be/ki gomb Nyomja meg ezt a gombot a gyorsfagyasztás funkció be- vagy kikapcsolásához. Ha aktiválja a funkciót, akkor a mélyhűtő...
  • Seite 88: Jégvödör

    A termék használata 5.5. Jégvödör 5.8. Zöldségtartó *választható *választható • Vegye ki a jégvödröt a mélyhűtő A termék zöldségtartója frissen tartja a zöldségeket rekeszből. a nedvesség megőrzésével. Ezért a hideg levegő • Töltse meg a jégvödröt vízzel. keringtetése a zöldségtartóban fokozott. • Helyezze be a jégvödröt a mélyhűtő...
  • Seite 89: Mozgó Ajtórekesz

    A termék használata 5.11. Csúszó tárolódoboz 5.10. Mozgó ajtórekesz *választható *választható Ez a kiegészítő növeli az ajtórekesz használati A mozgó ajtórekesz 3 különböző pozícióban térfogatát. rögzíthető. Mivel oldalra is mozog, ezért könnyen tárolhat A rekesz mozgatása érdekében nyomja meg benne hosszú üvegeket vagy dobozokat, az oldalsó...
  • Seite 90: Ellenőrzött Páratartalmú Zöldségtartó

    A termék használata 5.13. Automatikus jégkockakészítő 5.12. Ellenőrzött páratartalmú zöldségtartó *választható Az automatikus jégkockakészítő segítségével *választható könnyen készíthet jeget a hűtőszekrényben. A páratartalom ellenőrzés funkcióval a Annak érdekében, hogy a jégkészítő jeget zöldségek és gyümölcsök nedvességtartalma készítsen, vegye ki a víztartályt a hűtőrekeszből, ellenőrizhető...
  • Seite 91: Icematic És Jégdoboz

    A termék használata 5.15. A vízadagoló használata 5.14. Icematic és jégdoboz * választható *választható Az teljesen szokványos, hogy a Az Icematic használata vízadagolóból kifolyó néhány első Töltse fel az Icematic-ot vízzel és tegye vissza pohár víz általában meleg. a helyére. A jég kb. 2 óra alatt lesz kész. A Ha a vízadagolót hosszabb ideig jég kivételéhez ne vegye ki az Icematic-ot a nem használták, hogy tiszta vizet...
  • Seite 92: A Víztartály Feltöltése

    A termék használata 5.16. A víztartály feltöltése A víztartály az ajtó belsejében található. 1. Nyissa ki a tartály tetejét. 2. Töltse fel a tartályt friss ivóvízzel. 3. Zárja vissza a fedelet. A tartályba vizen kívül ne töltsön egyéb folyadékot, pl. gyümölcslét, szénsavas italokat vagy szeszes italokat, mert ezek nem alkalmasak erre.
  • Seite 93: A Víztartály Tisztítása

    A termék használata 5.17. A víztartály tisztítása 1. Vegye ki az ajtórekeszben lévő víztartályt. 2. Vegye le az ajtórekeszt mindkét oldalánál fogva. 3. Markolja meg a víztartályt mindkét oldalon és 45°C-os szögben vegye ki. 4. Vegye le a víztartály fedelét és tisztítsa meg a tartályt.
  • Seite 94: Csepegtetőtálca

    A termék használata 5.18. Csepegtetőtálca A vízadagoló használata során kicsepegő víz a cseppgyűjtő tálcába kerül. Vegye le a műanyag szűrőt az ábrán látható módon. Egy tiszta és száraz ruhával távolítsa el a felhalmozódott vizet. Hűtőszekrény / Használati útmutató 24 / 30 HU...
  • Seite 95: Friss Étel Lefagyasztása

    A termék használata 5.19. Friss étel lefagyasztása 5.20. Tippek a fagyasztott ételek tárolásához • A élelmiszert a lehető leggyorsabban kell lefagyasztani miután a hűtőbe helyezte, hogy A rekeszt legalább -18°C-ra kell állítani. megtartsa jó minőségét. Ezért használja a 1. Az ételt a lehető leggyorsabban helyezze a gyorsfagyasztót.
  • Seite 96: Az Élelmiszer Elhelyezése

    A termék használata 5.23. Nyitott ajtó riasztás A zöldségeket forralja fel és szűrje le a vizet a fagyasztási idő meghosszabbítása érdekében. (opcionális) Az élelmiszert a szűrés után légmentesen záró Ha a hűtőszekrény ajtaja legalább 1 percig csomagolásba kell helyezni és a fagyasztóba tenni. nyitva marad, egy hangjelzés hallható.
  • Seite 97: Tisztítás És Karbantartás

    Tisztítás és karbantartás 6.1. A kellemetlen szagok elkerülése A termék rendszeres tisztítása növeli az élettartamát. A termék nem tartalmaz kellemetlen szagú anyagot. Ugyanakkor, ha az ételeket nem tárolja VIGYÁZAT: Tisztítás előtt húzza ki a a megfelelő rekeszben vagy a belső felületek hűtőszekrényt.
  • Seite 98: Problémák Javasolt Megoldása

    A problémák javasolt megoldása Kérjük, mielőtt kihívná a szervizt, oldassa át a következő listát. Ezzel időt és pénzt takaríthat meg. Ez a lista azon gyakran előforduló panaszokat tartalmazza, melyek nem a hibás gyártásból vagy anyagokból erednek. Az itt ismertetett tulajdonságok közül nem mindegyik található meg az Ön készülékén. A hűtőszekrény nem működik • A hűtőszekrény megfelelően be van dugva? >>>...
  • Seite 99 A problémák javasolt megoldása • Az új hűtőszekrénye lehet, hogy nagyobb, mint az előző. A nagyobb hűtőszekrények hosszabb ideig működnek. • Lehet, hogy túl magas a szobahőmérséklet. >>> Magasabb szobahőmérséklet esetén a hűtőszekrény tovább működik. • Előfordulhat, hogy a hűtőszekrény nem régen lett bedugva, vagy tele lett pakolva élelmiszerrel. >>>...
  • Seite 100 A problémák javasolt megoldása • A padló nem egyenes vagy gyenge. >>> A hűtő a lassú mozgás miatt ad ki hangot. Győződjön meg róla, hogy a padló egyenes-e, illetve elég erős-e ahhoz, hogy elbírja a hűtőszekrényt. • A zajt a hűtőszekrény tetejére helyezett tárgyak is okozhatják. >>> Az ilyen tárgyakat el kell távolítani a hűtőszekrény tetejéről.
  • Seite 101 57 6233 0000/AI EN-DE-HU www.beko.com.tr www.beko.com...
  • Seite 102 RCNE520E40ZX RCNE520E30ZGB RCNE520E30ZXP FA FR...
  • Seite 103 ‫یخچال‬ ‫دفترچه راهنمای کاربر‬ EWWERQWEW...
  • Seite 104 ‫راهنمای کاربر یخچال‬ !‫لطف ا ً قبل از استفاده از دستگاه این دفترچه راهنما را مطالعه کنید‬ ،‫مشتریان عزیز‬ ‫ما می خواهیم که شما از محصوالتمان بهترین استفاده را داشته باشید. محصوالتی که با دقت و کنترل کیفیت باالیی‬ .‫تولید شده اند‬ ‫بنابراین...
  • Seite 105 ‫فهرست مطالب‬ ‫5 استفاده از دستگاه‬ ‫فهرست مطالب‬ 13 ........‫1.5 دکمه تنظیم دما‬ ‫1 دستورالعمل های مهم در رابطه با ایمنی و‬ 13 ....... ‫2.5 منجمد کردن سریع‬ 3 ‫محیط‬ 14 ........‫3.5 عملکرد تعطیالت‬ 3 ......... ‫1. 1 ایمنی کلی‬ 15 ........
  • Seite 106 ‫دستورالعمل های مهم در رابطه با ایمنی و محیط‬ ‫این قسمت حاوی دستورالعمل های‬ ‫از آن استفاده کنید مگر اینکه توسط‬ ‫مهمی است که به شما کمک می کند‬ ‫نماینده مجاز تعمیر شود. خطر‬ ‫از خطرهای احتمالی مربوط به بروز‬ !‫برق...
  • Seite 107 ‫دستورالعمل های ایمنی و حفظ محیط‬ !‫دستتان بچسبد‬ ‫از قرار دادن مایعات درون بطری‬ ‫و شیشه در قسمت فریزر خودداری‬ !‫کنید. ممکن است منفجر شوند‬ ‫هرگز از مواد تمیز کننده دارای‬ ‫بخار یا همراه با بخار برای تمیز‬ ‫کردن یا آب شدن یخ دستگاه استفاده‬ ‫نکنید.
  • Seite 108 ‫دستورالعمل های ایمنی و حفظ محیط‬ .‫صورت عمودی قرار دهید‬ ‫مکانیکی (ترموستات)، هنگامی که‬ ‫از اسپری های گازی در نزدیکی‬ ‫دوشاخه را بیرون می کشید یا در‬ ‫دستگاه خودداری کنید زیرا خطر‬ ‫هنگام قطعی برق، 5 دقیقه منتظر‬ !‫انفجار یا آتش سوزی وجود دارد‬ ‫بمانید...
  • Seite 109 ‫دستورالعمل های ایمنی و حفظ محیط‬ ‫1. 1. 2 برای محصوالت دارای‬ ‫پخش کننده آب‬ ‫فشار آب سرد ورودی باید حداکثر‬ ‫ بار) باشد. اگر فشار‬psi )6.2 90 )‫ بار‬psi )5.5 80 ‫آب بیشتر از‬ ‫است، از یک سوپاپ محدودکننده‬ .‫فشار...
  • Seite 110 ‫دستورالعمل های ایمنی و حفظ محیط‬ ‫- داخل ساختمان و مکان های‬ ‫به مراکز بازیافت ببرید. برای اطالع از این مراکز جمع‬ .‫آوری لطف ا ً با مقامات محلی تماس بگیرید‬ ‫سربسته مانند خانه؛‬ ‫- محیط های کاری دربسته مانند‬ RoHS ‫5.1.
  • Seite 111 ‫یخچال‬ ‫طبقه درب محفظه فریزر‬ ‫سینی قالب یخ و بانک یخ‬ ‫منبع پرشونده توزیع کننده آب‬ ‫محفظه سبزیجات‬ ‫بخش تخم مرغ‬ ‫محفظه صفر درجه‬ ‫منبع ذخیره توزیع کننده آب‬ ‫المپ داخلی‬ ‫طبقه بطری‬ ‫طبقه شیشه ای محفظه فریزر‬ ‫دکمه های تنظیم دما‬ ‫ییوشک...
  • Seite 112 ‫نصب‬ ‫.2.3 نصب کشوهای پالستیکی‬ ‫1.3 محل مناسب برای نصب‬ ‫از کشوهای پالستیکی ارائه شده به همراه دستگاه استفاده‬ ‫برای نصب محصول با مرکز خدمات مجاز تماس‬ ‫کنید تا فضای کافی برای تهویه هوا بین محصول و‬ ‫بگیرید. برای آماده سازی دستگاه جهت نصب، به‬ .‫دیوار...
  • Seite 113 ‫نصب‬ ‫5.3 برعکس کردن درب ها‬ . ‫با شماره های دستورالعمل پیش بروید‬ 45 ¡ 180¡ ‫راهنمای کاربر یخچال‬ 10 / 32 FA...
  • Seite 114 ‫نصب‬ ‫6.3 برعکس کردن درب ها‬ . ‫با شماره های دستورالعمل پیش بروید‬ (13) 45 ° 180° ‫راهنمای کاربر یخچال‬ 11 / 32 FA...
  • Seite 115 ‫آماده سازی‬ ‫1.4. برای صرفه جویی در مصرف انرژی‬ ‫2.4. ولین استفاده‬ mehmetmehme ‫قبل از استفاده از یخچال مطمئن شوید که آماده سازی‬ ‫اتصال دستگاه به سیستم های صرفه جویی‬ ‫های الزم با توجه به دستورالعمل های موجود در قسمت‬ ‫در...
  • Seite 116 ‫استفاده از دستگاه‬ ‫1.5 دکمه تنظیم دما‬ ‫2.5 منجمد کردن سریع‬ ‫:دنک یم رییغت ریز لیالد هب امش لاچخی لخاد ترارح هجرد‬ ‫اگر می خواهید حجم زیادی از مواد غذایی تازه را فریز‬ ،‫درجه حرارت های فصلی‬ ‫کنید، دکمه تنظیم دما را قبل از گذاشتن مواد غذایی در‬ ‫باز...
  • Seite 117 ‫استفاده از دستگاه‬ ‫3.5 عملکرد تعطیالت‬ ‫اگر درب های محصول 21 ساعت پس از تنظیم‬ ‫دکمه تنظیم دما بر روی حد اکثر باز نشود، عملکرد‬ .‫تعطیالت به طور خودکار فعال می شود‬ .‫برای لغو این عملکرد باید تنظیمات دکمه تغییر کند‬ ‫توصیه...
  • Seite 118 ‫استفاده از دستگاه‬ ‫4.5 پانل نشانگر‬ .‫پانل های نشانگر بر حسب مدل دستگاه ممکن است متفاوت باشند‬ .‫عمکردهای صوتی-تصویری موجود بر روی پانل نشانگر به شما در استفاده از محصولتان کمک می کنند‬ ‫نشانگر محفظه یخچال‬ ‫نشانگر وضعیت خطا‬ ‫نشانگر درجه حرارت‬ ‫دکمه...
  • Seite 119 ‫استفاده از دستگاه‬ ‫1. نشانگر محفظه یخچال‬ ‫چراغ بخش یخچال هنگام تنظیم درجه حرارت محفظه‬ .‫یخچال روشن می شود‬ ‫2. نشانگر وضعیت خطا‬ ‫در صورتی که یخچال شما به اندازه کافی سرد نکند‬ ‫و یا در صورت نقص حسگر، این نشانگر فعال می‬ ‫شود.
  • Seite 120 ‫استفاده از دستگاه‬ ‫5.5 پانل نشانگر‬ ‫پانل نشانگر به شما اجازه می دهد درجه حرارت را تنظیم و سایر عملکردهای مربوط به دستگاه را بدون‬ ‫باز کردن درب یخچال کنترل کنید. برای تنظیمات عملکرد، فقط نوشته های روی دکمه های مربوطه را‬ .‫فشاردهید‬...
  • Seite 121 ‫استفاده از دستگاه‬ ‫5. عملکرد تعطیالت‬ ‫3. عملکرد خنک کردن سریع‬ ‫این دکمه دارای دو عملکرد است. برای فعال یا‬ ( ‫برای فعال کردن عملکرد تعطیالت، این دکمه‬ ‫غیرفعال کردن عملکرد خنک کردن سریع این دکمه‬ ‫را به مدت 3 ثانیه فشار دهید تا نشانگر حالت تعطیالت‬ ‫را...
  • Seite 122 ‫استفاده از دستگاه‬ ‫9. دکمه تنطیم دمای محفظه فریزر‬ ‫21. نشانگر استفاده اقتصادی‬ ‫این دکمه را به ترتیب برای تنظیم درجه حرارت محفظه‬ ‫این نشانگر نشان می دهد که دستگاه در حالت مصرف‬ ،21- ،20- ،19- ،18- ‫فریزر در درجه حرارتهای‬ ‫)این...
  • Seite 123 ‫استفاده از دستگاه‬ ‫6.5هکنپ‬ ‫7.5 سینی قطره های آب‬ )‫(اختیاری‬ ‫تخاونکی روط هب درس یاوه شخرچ و عیزوت یارب هکنپ‬ ‫آبی که از شیر چکیده می شود در این سینی جمع می‬ ‫هکنپ تایلمع نامز .تسا هدش یحارط امش لاچخی لخاد‬ ‫شود.
  • Seite 124 ‫استفاده از دستگاه‬ ‫11.5 طبقه های در متحرک‬ ‫21.5 جعبه ذخیره سازی کشویی‬ ‫*اختیاری‬ ‫*اختیاری‬ ‫طبقه های در متحرک در سه موقعیت می توانند ثابت‬ ‫این وسیله برای افزایش حجم استفاده از قفسه های‬ .‫شوند‬ .‫در طراحی شده است‬ ‫به منظور حرکت دادن طبقه، دکمه های موجود در‬ ‫این...
  • Seite 125 ‫استفاده از دستگاه‬ ‫31.5 یخ ساز خودکار‬ ‫41.5 محفظه سبزیجات همراه با رطوبت‬ ‫کنترل شده‬ ‫*اختیاری‬ ‫یخ ساز خودکار امکان درست کردن آسان یخ داخل‬ ‫*اختیاری‬ ‫یخچال را برای شما فراهم می سازد. به منظور‬ ‫با ویژگی کنترل رطوبت، میزان رطوبت سبزیجات‬ ‫گرفتن...
  • Seite 126 ‫استفاده از دستگاه‬ ‫61.5 استفاده از توزیع کننده آب‬ ‫51.5 یخ ساز و محفظه نگهداری یخ‬ ‫*اختیاری‬ ‫*اختیاری‬ ‫استفاده از یخ ساز‬ ‫گرم بودن چند لیوان اول آب دستگاه‬ ‫یخ ساز را از آب پر کرده و در محل مربوطه قرار‬ .‫توزیع...
  • Seite 127 ‫استفاده از دستگاه‬ ‫71.5 پر کردن منبع توزیع کننده آب‬ ‫محل پر کردن مخزن آب در داخل قفسه در قرار‬ .‫دارد‬ .‫1. درپوش مخزن آب را بردارید‬ .‫2. مخزن را با آب آشامیدنی تازه پر کنید‬ .‫3. درپوش را ببندید‬ ‫ مخزن...
  • Seite 128 ‫استفاده از دستگاه‬ ‫81.5 تمیز کردن مخزن‬ 1. ‫.مخزن آب داخل قفسه در را بردارید‬ 2. ‫.قفسه در را با نگاه داشتن از هر دو طرف جدا کنید‬ 3. ‫مخزن آب را از هر دو طرف بگیرید و آن را با‬ ‫.زاویه...
  • Seite 129 ‫استفاده از دستگاه‬ ‫02.5 توصیه هایی برای نگهداری غذاهای‬ ‫22.5 یخ زدن غذاهای تازه‬ ‫یخ زده‬ ‫برای حفظ کیفیت مواد غذایی، موادی که در قسمت‬ .‫دمای این قسمت باید حداقل -81 درجه سانتی گراد باشد‬ ‫فریزر هستند باید هرچه سریع تر یخ بزنند، از حالت‬ ‫هرچه...
  • Seite 130 ‫استفاده از دستگاه‬ ‫32.5 قرار دادن غذا درون دستگاه‬ ،‫انواع مختلف مواد یخ زده مانند گوشت، ماهی‬ ‫قفسه های‬ .‫بستنی، سبزیجات و دیگر موارد‬ ‫قسمت فریزر‬ ‫مواد غذایی موجود در قابلمه، ظروف در دار‬ ‫قفسه های‬ ‫و ظروف در بسته، تخم مرغ (در ظرف در‬ ‫قسمت...
  • Seite 131 ‫مراقبت و تمیز کردن دستگاه‬ ‫ مهم است که دستگاه را تمیز نگهدارید. باقی مانده‬ ‫اگر دستگاه را مرتب ا ً تمیز کنید، طول عمر محصول‬ ‫مواد غذایی، لکه ها و موارد دیگر می توانند بوی بد‬ .‫بیشتر می شود و مشکالت معمول از بین خواهند رفت‬ ‫ایجاد...
  • Seite 132 ‫6.3 درهای شیشه ای‬ .‫ کلیه فویلهای حفاظتی روی شیشه ها را بردارید‬ .‫ یک الیه روی سطح شیشه ها کشیده شده است‬ ‫این روکش تشکیل لکه را به حداقل رسانده و به‬ ‫زدودن لکه های و کثیفیهای ایجاد شده کمک می‬ ‫کند.
  • Seite 133 ‫عیب یابی‬ ‫ییوج هفرص امش لوپ و نامز رد راک نیا اب .دینک هعلاطم ار ریز یاه تمسق ،تامدخ شخب اب سامت زا لبق ً افطل‬ ‫زا یضعب .دنتسین نآ هدنزاس داوم ای هاگتسد صقن هجیتن رد ً الومعم هک تسا یتالکشم لماش تسیل نیا .دوش یم‬ ‫.دشاب...
  • Seite 134 ‫عیب یابی‬ ‫محصول جدید ممکن است عریض تر از دستگاه قبلی باشد. دستگاه های بزرگ تر برای مدت زمان بیشتری‬ .‫کار می کنند‬ ‫دمای اتاق ممکن است زیاد باشد. >>> طبیعی است که دستگاه در دمای گرم برای مدت زمان بیشتری کار‬ .‫کند‬...
  • Seite 135 ‫عیب یابی‬ ‫کف دستگاه مسطح یا ثابت نیست. >>> اگر دستگاه در هنگام جابجا شدن آهسته می لرزد، پایه های آن را‬ ‫تنظیم کنید. همچنین بررسی کنید که درب به اندازه کافی محکم باشد تا بتواند دستگاه را حمل کند و در سطحی‬ .‫یکسان...
  • Seite 136 Réfrigérateur Manuel d’utilisation EWWERQWEW...
  • Seite 137 Veuillez d’abord lire ce manuel d’utilisation ! Chère cliente, cher client, Nous aimerions que vous soyez entièrement satisfait de notre appareil, fabriqué dans des infrastructures modernes et ayant fait l'objet d'un contrôle de qualité minutieux. À cet effet, veuillez lire en intégralité le manuel d'utilisation avant d'utiliser cet appareil, et conservez-le pour références ultérieures.
  • Seite 138 Table des matières 1 Instructions en matière de sécurité et 5.9. Bac à légumes..... 22 d’environnement 5.10. Compartiment zéro degré... . . 22 5.11.
  • Seite 139: Instructions En Matière De Sécurité Et D'environnement

    Instructions en matière de sécurité et d’environnement Cette section fournit les Débranchez l’appareil lorsqu’il • instructions de sécurité n’est pas utilisé. nécessaires à la prévention Évitez de toucher le cordon • des risques de blessures ou d’alimentation avec des mains de dommage matériel.
  • Seite 140 Instructions en matière de sécurité et d'environnement Contactez le service agréé avant de procéder à toute intervention. Branchez votre appareil à • une prise de mise à la terre. La mise à la terre doit être effectuée par un technicien qualifié.
  • Seite 141: Avertissement Hc

    Instructions en matière de sécurité et d'environnement dans les parties amovibles Ne pulvérisez pas de • de l’appareil. substances contenant des Évitez de monter ou de vous gaz inflammables près du • appuyer contre la porte, les réfrigérateur pour éviter tiroirs ou toute autre partie tout risque d’incendie et du réfrigérateur.
  • Seite 142: Pour Les Modèles Avec Distributeur D'eau

    Instructions en matière de sécurité et d'environnement l’appareil des flammes et aérez Ne l’installez pas sur l’entrée • d’eau chaude. Prenez la pièce immédiatement. des précautions contre L'étiquette sur la paroi le risque de congélation intérieure gauche de des tuyaux. L’intervalle l'appareil indique le de fonctionnement de la température des eaux doit...
  • Seite 143: Sécurité Des Enfants

    Instructions en matière de sécurité et d'environnement Le fabricant ne sera pas 1.4. Conformité avec la • directive DEEE et mise au rebut tenu responsable de tout de votre ancien appareil dommage résultant d’une Ce produit est conforme à la directive DEEE mauvaise utilisation ou (2012/19/UE) de l’Union européenne.
  • Seite 144: Votre Réfrigérateur

    Votre réfrigérateur 1. Balconnet de la porte du compartiment 10. Bac à glaçons et banque de glace réfrigérateur 11. Bac à légumes Opercule du réservoir d’eau 12. Compartiment zéro degré Réservoir du distributeur d’eau 13. Éclairage intérieur Bac à Oeufs 14.
  • Seite 145: Installation

    Installation 3.1. Lieu idéal d'installation 3.2. Fixation des cales en plastique Contactez le service agréé pour l'installation de Utilisez les cales en plastiques fournies avec votre réfrigérateur. Pour préparer l'installation du le réfrigérateur pour créer une circulation d'air réfrigérateur, lisez attentivement les instructions suffisante entre le réfrigérateur et le mur.
  • Seite 146: Branchement Électrique

    Installation 3.4. Branchement électrique AVERTISSEMENT : Ne branchez pas le réfrigérateur sur une rallonge ou une multiprise. AVERTISSEMENT : Les câbles d'alimentation endommagés doivent être remplacés par le service agréé. Lorsque deux réfrigérateurs sont installés côte à côte, ils doivent être séparés par au moins 4 cm.
  • Seite 147: Réversibilité Des Portes

    Installation 3.5. Réversibilité des portes Procédez dans l'ordre numérique. 45 ¡ 180¡ Réfrigérateur / Manuel d'utilisation 11/36FR...
  • Seite 148 Installation 3.6. Réversibilité des portes Procédez dans l'ordre numérique. (13) 45 ° 180° Réfrigérateur / Manuel d'utilisation 12 /36 FR...
  • Seite 149: Préparation

    Préparation 4.1. Moyens d'économiser l'énergie • Veuillez-vous assurer que les aliments ne sont pas en contact direct avec le capteur de Il est dangereux de connecter l'appareil température du compartiment réfrigérateur aux systèmes électroniques d'économie décrit ci-après. d'énergie, ils pourraient l'endommager. • Ne laissez pas la porte du réfrigérateur ouverte longtemps.
  • Seite 150: Utilisation De L'appareil

    Utilisation de l'appareil 5.1. Bouton de réglage 5.2. Congélation rapide de température Si vous souhaitez congeler de grandes quantités d'aliments frais, placez le bouton de réglage de la La température interne de votre réfrigérateur varie selon les raisons suivantes : température sur la position ( ) avant d'introduire • Températures saisonnières,...
  • Seite 151: Fonction Vacances

    Utilisation de l'appareil 5.3. Fonction Vacances Si les portes de votre réfrigérateur ne sont pas ) ouvertes pendant au moins 12 heures après l'ajustement du bouton de réglage de la température à la position la plus élevée, la fonction Vacances est automatiquement activée.
  • Seite 152: Bandeau Indicateur

    Utilisation de l'appareil 5.4. Bandeau indicateur Les bandeaux indicateur peuvent varier en fonction du modèle de l’appareil. Les fonctions sonores et visuelles sur le panneau indicateur vous aident dans l’utilisation de votre réfrigérateur. 1. Indicateur du compartiment réfrigérateur 2. Indicateur d'état de dysfonctionnement 3.
  • Seite 153 Utilisation de l'appareil 1. Indicateur du compartiment 6. Bouton de sélection du compartiment réfrigérateur Bouton de sélection : Appuyez sur le bouton de La lampe du compartiment réfrigérateur sélection du compartiment pour basculer entre s’allume lorsque la température de ce les compartiments réfrigérateur et congélateur.
  • Seite 154 Utilisation de l'appareil 5.5. Bandeau indicateur Le panneau indicateur vous permet de régler la température et de contrôler les autres fonctions liées à votre appareil sans ouvrir la porte du réfrigérateur. Appuyez simplement sur les inscriptions des boutons appropriés pour effectuer le réglage des fonctions. Veuillez consulter la section «...
  • Seite 155 Utilisation de l'appareil 4. Bouton de réglage de la température du Si la fonction Économie d'énergie est active, compartiment réfrigérateur tous les symboles de l'écran hormis celui de Appuyez sur ce bouton pour régler la l'Économie d'énergie s'éteindront. Lorsque la température du compartiment réfrigérateur à...
  • Seite 156 Utilisation de l'appareil Appuyez simultanément sur le bouton Key lock L'arrivée d'eau du réservoir à eau pendant 3 secondes à nouveau. Le symbole sera arrêtée en sélectionnant cette fonction. Toutefois, les glaçons de verrouillage des commandes s’éteint et déjà formés peut être retirés du le mode Verrouillage des commandes est distributeur.
  • Seite 157 Utilisation de l'appareil 12. Voyant d'économie d'énergie Indique que le réfrigérateur fonctionne en mode d'économie d'énergie. ( ) Cet indicateur est activé si la température du compartiment congélateur est réglée sur -18 ou si le refroidissement à économie d'énergie est réalisé suite à l'activation de la fonction Eco Extra.
  • Seite 158: Seau À Glace

    Utilisation de l'appareil 5.6. Seau à glace 5.9. Bac à légumes (En option) (En option) • Retirez le seau à glace du compartiment Le bac à légumes du réfrigérateur est conçu congélateur. pour conserver les légumes frais en préservant • Remplissez-le d'eau. l'humidité.
  • Seite 159: Balconnet De Porte Amovible

    Utilisation de l'appareil 5.12. Boîte de stockage coulissante 5.11. Balconnet de porte amovible (En option) Cet accessoire a été conçu dans le but de (En option) renforcer les capacités des balconnets de Le balconnet de porte amovible peut être porte. fixé...
  • Seite 160: Bac À Légumes À Humidité Contrôlée

    Utilisation de l'appareil 5.13. Bac à légumes à 5.14. Machine à glace automatique humidité contrôlée (En option) (En option) La machine à glace automatique vous permet Grâce à la fonction de contrôle de l'humidité, la de faire facilement des glaçons dans votre quantité...
  • Seite 161: Distributeur Et Récipient De Conservation De

    Utilisation de l'appareil Récipient de conservation de glaçons Le récipient de conservation de glaçons sert simplement à accumuler les glaçons. Ne versez pas d’eau à l’intérieur. Cela peut le casser. 5.15. Distributeur et récipient de conservation de glaçons (dans certains modèles) Utilisation du distributeur Remplissez le distributeur de glaçons avec de l'eau et remettez-le à...
  • Seite 162: Distributeur D'eau

    Utilisation de l'appareil 5.16. Distributeur d’eau *en option Cette fontaine est très important pour obtenir de l’eau fraîche sans avoir à ouvrir la porte de votre réfrigérateur. Comme vous n'aurez pas à ouvrir fréquemment la porte de votre réfrigé- rateur, cela vous permettra d'économiser de l'énergie.
  • Seite 163: Nettoyer Le Réservoir D'eau

    Utilisation de l'appareil • Utilisez uniquement de l'eau potable propre. • La capacité du réservoir est de 3 litres; ne dépassez pas la limite. • Appuyez sur le bouton de la fontaine avec votre verre. Si vous utilisez une tasse jetable, poussez le bouton avec vos doigts à...
  • Seite 164: Bac À Eau

    Utilisation de l'appareil 5.19. Bac à eau L’eau qui s’écoule lors de l’utilisation du distributeur d’eau s’accumule dans le bac de dégivrage. Retirez la crépine en plastique comme sur le schéma. Essuyez l'excédent d'eau à l'aide d'un chiffon propre et sec. Réfrigérateur / Manuel d'utilisation 28 /36 FR...
  • Seite 165: Congélation Des Produits Frais

    Utilisation de l'appareil • Marquez chaque emballage en y écrivant la 5.20. Congélation des produits frais date avant de le placer au congélateur. Ceci • Pour conserver la qualité des aliments, vous permettra de déterminer la fraîcheur les denrées placées dans le compartiment de chaque paquet lors des ouvertures du congélateur doivent être congelées le plus congélateur.
  • Seite 166: Lnformations Relatives Au Congélateur

    Utilisation de l'appareil 5.22. lnformations relatives Balconnets au congélateur de la porte du Aliments emballés et de compartiment petite taille ou des boissons Selon la norme CEI 62552, le congélateur réfrigérateur doit être doté d'une capacité de congélation des aliments de 4,5 kg à une température Bac à...
  • Seite 167: Entretien Et Nettoyage

    Entretien et nettoyage • Ne conservez pas d'aliments périmés ou Un nettoyage régulier prolonge la durée de vie de avariés dans le réfrigérateur. votre réfrigérateur 6.2. Protection des surfaces en plastique AVERTISSEMENT : Débranchez votre Si de l'huile se répand sur les surfaces en réfrigérateur avant de le nettoyer.
  • Seite 168 Entretien et nettoyage En plus des vitres, un film de sécurité a été appliqué à la surface arrière afin d'éviter les dommages à l'environnement dans le cas où elles se briseraient. *L'alcali est une base qui forme les ions d'hydroxyde (OH¯) lorsqu'il est dissout dans de l'eau.
  • Seite 169: Dépannage

    Dépannage Parcourez la liste ci-après avant de contacter le service de maintenance. Cela devrait vous éviter de perdre du temps et de l'argent. Cette liste répertorie les plaintes fréquentes ne provenant pas de vices de fabrication ou des défauts de pièces. Certaines fonctionnalités mentionnées dans ce manuel peuvent ne pas exister sur votre modèle.
  • Seite 170 Dépannage • Il se peut que le nouvel appareil soit plus grand que l'ancien. Les appareils plus grands fonctionnent plus longtemps. • La température de la pièce est probablement élevée. Il est normal que l'appareil fonctionne plus longtemps lorsque la température de la pièce est élevée. • L'appareil vient peut-être d'être branché...
  • Seite 171 Dépannage • La température du compartiment réfrigérateur est réglée à un degré très élevé. >>> Le réglage de la température du compartiment réfrigérateur a un effet sur la température du compartiment congélateur. Patientez que la température des parties concernées atteigne le niveau suffisant en changeant la température des compartiments réfrigérateur et congélateur.
  • Seite 172 Dépannage • • L'appareil n'est pas nettoyé régulièrement. >>> Nettoyez régulièrement l'intérieur du réfrigérateur en utilisant une éponge, de l'eau chaude et de l'eau gazeuse. • • Certains récipients et matériaux d'emballage sont peut-être à l'origine de mauvaises odeurs. >>> Utilisez des récipients et des emballages exempts de toute odeur. • • Les aliments ont été placés dans des récipients non fermés. >>> Conservez les aliments dans des récipients fermés. Les micro-organismes pourraient se propager sur les produits alimentaires non fermés et émettre de mauvaises odeurs.
  • Seite 173 57 6233 0000/AI FA-FR www.beko.com.tr www.beko.com...

Diese Anleitung auch für:

Rcne520e40zxlRcne520e30zxp

Inhaltsverzeichnis