Herunterladen Inhalt Inhalt Diese Seite drucken
Inhaltsverzeichnis

Werbung

Verfügbare Sprachen
  • DE

Verfügbare Sprachen

  • DEUTSCH, seite 65
Manuale d'Istruzione Instruction Manual
Manuel d'emploi Bedienungsanleitung
TM 230-TM 260-TM 260
TM 320W-TM 320W
Manual de instrucciones
DV
-TM 300-TM 300
DV
-TM 360-TM 360W
TM 500W-TM 500W
Cod. 910.100.336 REV07
DV
-TM 350-TM 350
DV
-TM 420-TM 420W
DV
-TM 650W-TM 650W
DV
DV
DV

Werbung

Inhaltsverzeichnis
loading

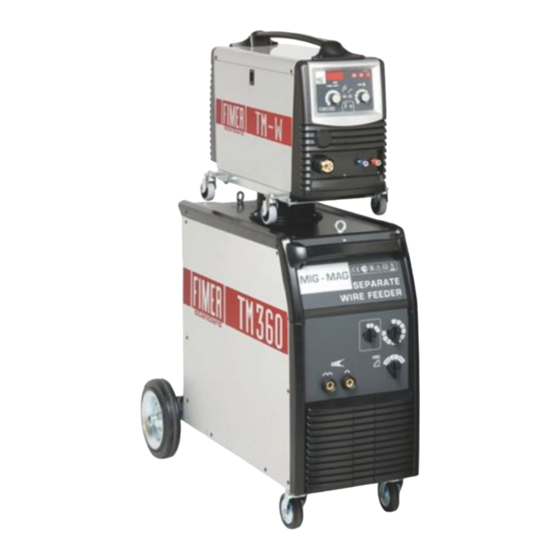
Inhaltszusammenfassung für Fimer TM 230

  • Seite 1 Manuale d’Istruzione Instruction Manual Manuel d’emploi Bedienungsanleitung Manual de instrucciones Cod. 910.100.336 REV07 TM 230-TM 260-TM 260 -TM 300-TM 300 -TM 350-TM 350 TM 320W-TM 320W -TM 360-TM 360W -TM 420-TM 420W TM 500W-TM 500W -TM 650W-TM 650W...
  • Seite 3 TM 230-TM 260-TM 260 -TM 300-TM 300 TM 350-TM 350 -TM 320W-TM 320W TM 360-TM 360W -TM 420-TM 420W TM 500W-TM 500W -TM 650W-TM 650W...
  • Seite 4 TARGA DATI, NOMINAL DATA, LEISTUNGSCHILDER, PLAQUE DONÉES, PLACA DE CARACTERÌSTICAS...
  • Seite 5: Inhaltsverzeichnis

    È cura dell’utilizzatore mantenerlo integro ed in buone condizioni. Il costruttore si riserva il diritto di apportare modifiche in qualsiasi momento o senza alcun preavviso. Ogni prodotto Fimer è pensato, progettato e prodotto in Italia nei nostri stabilimenti. Ciò è garanzia di massima qualità e affidabilità.
  • Seite 6: Simboli Utilizzati

    Fimer S.p.A. Fimer SpA declina ogni responsabilità per danni a persone o cose derivanti da un uso inesperto, improprio o disattento del- INTRODUZIONE OGGETTI le proprie apparecchiature.
  • Seite 7 INTERRUTTORE DI PROTEZIONE ACCESSORI Usare solo accessori previsti dal costruttore, l’uti- Verificare che l’impianto che alimenta la saldatrice sia lizzo di accessori di tipo differente può determina- dotato di opportuno organo di sezionamento e pro- re gravi malfunzionamenti dell’apparato. L’utilizzo di accessori non ori- tezione.
  • Seite 8: Scariche Elettriche

    PROTEZIONE DEI MURI E DEI PAVIMENTI BOMBOLE DANNEGGIATE I muri circostanti l’area di saldatura e i pavimenti Non usare MAI bombole danneggiate o deteriorate. devono essere protetti da schermi realizzati in mate- riale ininfiammabile; questo, non solo per ridurre il rischio di incendio, MOVIMENTAZIONE DELLE BOMBOLE ma anche per fornire una protezione atta ad evitare che i muri e/o il Non spostare MAI la bombola prendendola per la valvola...
  • Seite 9: La Serie Tm

    (16 e 17 di Fig. 1) usati per regolare la corrente di saldatura (i modelli TM 230 e TM 260 utilizzano a questo scopo il solo commutatore 16) e due potenziometri (1 e 5 di Fig. 1) per regolare rispettivamente la durata della saldatura (Timer) e la velocità...
  • Seite 10: Descrizione Dell'apparato

    2. DESCRIZIONE DELL’APPARATO Fig. 1: VISTA FRONTALE TM 230-260-260 TM 300-300 TM 350-350 TM 320W - 360W TM 420W - 500W TM 650W...
  • Seite 11 VALIDO PER TM 230-260 -300 care che il liquido di raffreddamento non circoli cor- rettamente nell’apposito circuito, in questo caso effettuarne lo spurgo. 8. DISPLAY DI VISUALIZZAZIONE del valore di cor- rente o di tensione di saldatura (solo per TM 350, TM 320W, TM 360W, TM 420W, TM 500W, TM 650W);...
  • Seite 12 (que- inserisce il valore di induttanza massimo possibile. sto garantisce le migliori prestazioni dell’apparato). Da utilizzare solamente in modalità short-arc . DESCRIZIONE DELL’APPARATO Fig. 2: VISTA POSTERIORE TM 230-260-260 TM 300-300 -350-350 TM 320-320 -360-360 -420...
  • Seite 13 25. ACCENDE/SPEGNE LA CENTRALINA DI 32. CENTRALINA DI RAFFREDDAMENTO RAFFREDDAMENTO (opzionale) DESCRIZIONE DELL’APPARATO Fig. 3: VISTA LATERALE TM 320- 360- 420- 500- 650 TM 230-260-260 -300-300 -350-350 - 420 - 500 - 650 33. SUPPORTO PER BOBINA FILO 34. GRUPPO TRAINAFILO: evidenziato con maggior dettaglio in figura 3A.
  • Seite 14: Caricamento Del Filo Di Saldatura

    6. Svitare i pomelli 3. CARICAMENTO DEL FILO DI del gruppo trainafi- SALDATURA lo e farli ruotare. In questo modo si Per caricare il filo di saldatura seguire queste solleveranno i rul- istruzioni e fare riferimento alla sequenza sotto lini trainafilo supe- riportata.
  • Seite 15: Collegamento All'alimentazione

    Non nettore (dinse) (18 di Fig.1 per TM 230, TM 260 picchiare tra di loro le bombole. Contattare il e TM 300) (18a e 18b di Fig.1 per TM350,...
  • Seite 16: Commutatore Di Tensione

    Le saldatrici TM 230 e TM260 presentano 10 posizioni di regolazione della corrente (16 di Fig. 1. Il commutatore di ten- le saldatrici TM300, TM 350,TM 320W e TM360W sione è...
  • Seite 17: Ricerca Guasti

    Scritta Rdy (ready) sul display: sta ad indicare che la macchina è in standby ed è pronta a saldare 13. RICERCA DEI GUASTI Qui di seguito sono elencati i più comuni problemi che si possono incontrare e le relative soluzioni: CAUSA/E SOLUZIONI/CONSIGLI SEGNALAZIONE...
  • Seite 18: Manutenzione Ordinaria Della Macchina

    14. MANUTENZIONE ORDINARIA DELLA MACCHINA Ogni tre mesi rimuovere periodicamente la polvere dalle bocchette di aspirazione dell’aria usando aria compressa a bassa pressione. Dirigere sempre il getto d’aria dall’interno della macchina verso l’ester- no in modo da evitare di spingere sporcizia all’interno della saldatrice. Per effettuare questa operazione accertarsi che la macchina non sia collegata alla rete elettrica.
  • Seite 19: Montaggio Ruote

    16. MONTAGGIO RUOTE 1. Inserire la coppiglia nel foro dell’assale. 2. Piegare i due lembi della coppiglia. 3. Inserire l’assale nella parte inferiore della macchina facendolo scorrere nelle staffe di supporto apposite. 4. Dopo aver posizionato l’assale, ripe- tere l’operazione di inserimento della coppiglia sulla seconda ruota.
  • Seite 20: Schema Blocchi Tm 230-Tm 260-Tm 300- Tm 350

    17. SCHEMA BLOCCHITM 230-TM260-TM 300-TM 350 Teleruttore 6d regolazione del tempo di saldatura Commutatore della corrente Motore Trainafilo Selettore della gamma di corrente Elettrovalvola gas Trasformatore di potenza Termostato Ponte raddrizzatore Segnalazione di sovratemperatura Connettori di uscita Ventilatore Scheda di controllo Trasformatore ausiliario 6a regolazione velocità...
  • Seite 21 18. SCHEMA BLOCCHI TM260 -TM 300 -TM 350 Teleruttore 6c settaggio Burn Buck Commutatore di tensione dual voltage 6d regolazione del tempo di saldatura Commutatore della corrente Motore Trainafilo Selettore della gamma di corrente Elettrovalvola gas Trasformatore di potenza Termostato Ponte raddrizzatore Segnalazione di sovratemperatura Connettori di uscita...
  • Seite 22: Schema Blocchi Tm320W-Tm360W-Tm420W-Tm500W-Tm650W

    19. SCHEMA BLOCCHI TM 320W-TM360W-TM420W-TM500W-TM 650W Teleruttore 7c settaggio Burn Buck 2a . Commutatore della corrente 7d regolazione del tempo di saldatura Selettore della gamma di corrente Motore Trainafilo Trasformatore di potenza Elettrovalvola gas Ponte raddrizzatore Termostato Induttanza di spianamento di uscita Segnalazione di sovratemperatura Connettori di uscita Ventilatore...
  • Seite 23: Tm420W -Tm500W

    20. SCHEMA BLOCCHI TM 320W -TM360W -TM420W -TM500W -TM 650W Teleruttore 7c settaggio Burn Buck Commutatore di tensione dual voltage 7d regolazione del tempo di saldatura 2a . Commutatore della corrente Motore Trainafilo Selettore della gamma di corrente Elettrovalvola gas Trasformatore di potenza Termostato Ponte raddrizzatore...
  • Seite 24: Parti Di Ricambio Tm 230 - Tm 260

    21. PARTI DI RICAMBIO TM 230 - TM 260...
  • Seite 25: Parti Di Ricambio Tm 260 Dv

    22. PARTI DI RICAMBIO TM 260...
  • Seite 26 23. PARTI DI RICAMBIO TM 300...
  • Seite 27: Parti Di Ricambio Tm 300 Dv

    24. PARTI DI RICAMBIO TM 300...
  • Seite 28 25. PARTI DI RICAMBIO TM 350...
  • Seite 29: Parti Di Ricambio Tm 350 Dv

    26. PARTI DI RICAMBIO TM 350...
  • Seite 30: Tm 320W - Tm 360W - Tm 420W - Tm 500W - Tm 650W

    27. PARTI DI RICAMBIO CARRELLO SEPARATO TM 320W - TM 360W - TM 420W - TM 500W - TM 650W...
  • Seite 31: Parti Di Ricambio Tm 320W-Tm 360W

    28. PARTI DI RICAMBIO TM 320W-TM 360W...
  • Seite 32: Parti Di Ricambio Tm 320W

    29. PARTI DI RICAMBIO TM 320W -TM 360W...
  • Seite 33: Parti Di Ricambio Tm 420W-Tm 500W -Tm 650W

    30. PARTI DI RICAMBIO TM 420W-TM 500W -TM 650W...
  • Seite 34: Tm 500W -Tm 650W Dv

    31. PARTI DI RICAMBIO TM 420W -TM 500W -TM 650W...
  • Seite 35 USER AND MAINTENANCE MANUAL USER AND MAINTENANCE MANUAL Fimer S.p.A. would like to thank you for choosing this machine; if used according to the instructions reported in this user and maintenance manual, it will accompany you in your work for many years without any problems.
  • Seite 36: Warning Symbols

    WARNING SYMBOLS...
  • Seite 39 360W, TM 420W, TM 500W, TM 650W). Each welding machine has two swit- ches (16 and 17 in Fig. 1) for adjusting the welding current (models TM 230 e TM 260 only use switch 16 for this purpose) and two potentiometers (1 and 5 in Fig.
  • Seite 40 2. DESCRIPTION OF THE EQUIPMENT Fig. 1: FRONT VIEW TM 230-260-260 TM 300-300 TM 350-350 TM 320W - 360W TM 420W - 500W TM 650W...
  • Seite 41 VALID FOR TM 230-260 -300 If the welding machine is equipped with a cooling unit, the lighting of the LED may also indicate that the cooling liquid is not circulating properly in the circuit. In this case, purge the circuit.
  • Seite 42: Cooling Unit

    (this gua- negative welding cable to this connector. To be used only in short-arc mode. rantees the best performance of the system). DESCRIPTION OF THE EQUIPMENT Fig. 2: REAR VIEW TM 230-260-260 TM 300-300 -350-350 TM 320-320 -360-360 -420...
  • Seite 43 (N.B.: If no cooling unit is present, make sure the switch is in the OFF position) 32. COOLING UNIT (optional) DESCRIPTION OF THE EQUIPMENT Fig. 3: SIDE VIEW TM 320- 360- 420- 500- 650 TM 230-260-260 -300-300 -350-350 - 420 - 500 - 650 33.
  • Seite 44 6. Unscrew the ball- 3. LOADING THE WELDING WIRE grip knobs on the wire-feeding system To load the welding wire, follow these instruc- and turn until the tions carefully, in the order described below. upper wire feeder spools are raised. (37 of Fig.
  • Seite 45 Warning: Never use damaged cylinders: in this nector (DINSE) (18 in Fig.1 for models TM 230, TM 260 and TM 300) (18a and 18b in Fig.1 for case, advise your supplier immediately.
  • Seite 46: Welding Process

    The TM 230 and TM260 welding machines have 10 adjustable welding current positions 1. The voltage selector the TM300, TM 350,TM 320W e in Fig.
  • Seite 47 Written Rdy (ready) on the display: indicates that the machine is in standby mode and is ready to weld 13. TROUBLESHOOTING The most common problems that may be encountered and the relative solutions are listed below: CAUSE/S SOLUTION/ADVICE INDICATION Absence of voltage on the power supply Restore the supply voltage Turning off the machine [display: off]...
  • Seite 48 14. ORDINARY MACHINE MAINTENANCE Every three months periodically remove dust from the suction nozzle using compressed air. Always direct the air from the inside towards the outside of the machine to avoid blowing dirt inside the welder. When carrying out this operation, always make sure the machine is not con- nected to the power supply.
  • Seite 49: Wheel Assembly

    16. WHEEL ASSEMBLY 1. Insert the cotter pin into the hole of the axle. 2. Fold the two flaps of the cotter pin. 3. Insert the axle in the lower part of the machine, sliding it through the support brackets provided. 4.
  • Seite 50 17. TM 230-TM260-TM 300-TM 350 BLOCK DIAGRAM Remote control switch 6d Welding time adjustment Current switch Wire-feeder motor Selector of current range Gas solenoid valve Power transformer Thermostat Rectifier bridge Temperature rise signal Output connectors Control board Auxiliary transformer 6a Wire speed control...
  • Seite 51: Block Diagram

    18. TM260 -TM 300 -TM 350 BLOCK DIAGRAM Remote control switch 6c Burn back setting Current switch dual voltage 6d Welding time adjustment Current switch Wire-feeder motor Selector for current range Gas solenoid valve Power transformer Thermostat Rectifier bridge Temperature rise signal Output connectors Control board Auxiliary transformer...
  • Seite 52 19. TM 320W-TM360W-TM420W-TM500W-TM 650W BLOCK DIAGRAM Remote control switch 7c Burn back setting 2a . Current switch 7d Welding time adjustment Selector for current range Wire-feeder motor Power transformer Gas solenoid valve Rectifier bridge Thermostat Output levelling inductance Temperature rise signal Output connectors Control board Auxiliary transformer...
  • Seite 53 20. TM 320W -TM360W -TM420W -TM500W -TM 650W BLOCK DIAGRAM Remote control switch 7c Burn back setting Current switch dual voltage 7d Welding time adjustment 2a . Current switch Wire-feeder motor Selector for current range Gas solenoid valve Power transformer Thermostat Rectifier bridge Temperature rise signal...
  • Seite 54 21. TM 230 - TM 260 SPARE PARTS...
  • Seite 55: Spare Parts

    22. TM 260 SPARE PARTS...
  • Seite 56 23. TM 300 SPARE PARTS...
  • Seite 57 24. TM 300 SPARE PARTS...
  • Seite 58 25. TM 350 SPARE PARTS...
  • Seite 59 26. TM 350 SPARE PARTS...
  • Seite 60 27. TM 320W - TM 360W - TM 420W - TM 500W - TM 650W SPARE PARTS WIRE FEEDER...
  • Seite 61 28. TM 320W-TM 360W SPARE PARTS...
  • Seite 62 29. TM 320W -TM 360W SPARE PARTS...
  • Seite 63 30. TM 420W-TM 500W -TM 650W SPARE PARTS...
  • Seite 64 31. TM 420W -TM 500W -TM 650W SPARE PARTS...
  • Seite 65 H A N D - U N D WA R T U N G S B U C H Fimer dankt Ihnen für den Erwerb dieses Gerätes. Es wird Sie für viele Jahre ohne Probleme bei Ihrer Arbeit begleiten, wenn Sie die folgenden Angaben und Hinweise im diesem Hand- und Wartungsbuch richtig befolgen.
  • Seite 66: Verwendete Symbole

    Personal dur- Bezug auf die laufende Tätigkeit entsprechend geschult werden müssen. chgeführt werden, das von Fimer S.p.A. entsprechend geschult wurde. Fimer SpA lehnt jede Haftung für Schäden an Personen oder EINFÜHREN VON GEGENSTÄNDEN Dingen ab, die aus einem unerfahrenen, unsachgemäßen oder Führen Sie keine Gegenstände in die Lüftungsschlitze...
  • Seite 67: Warnhinweise In Bezug Auf Die Sicherheit Des Schweissverfahrens

    Vorsichtsmaßnahmen genau befolgt wer- steller oder an ein ermächtigtes Kundendienstzentrum. Jeder nicht sch- riftlich genehmigte und nicht direkt von Fimer geleitete Reparaturversu- den. Das Schweißverfahren macht das Erzielen hoher Tempe- ch bedingt – außer dass er objektiv gefährlich ist – den sofortigen Ver- raturen erforderlich, folglich existiert ein konkretes Brandrisiko.
  • Seite 68: Elektromagnetische Verträglichkeit

    DRUCKREDUZIERER 3 3. Legen Sie zwischen die Schweißmaschine und die Stromleitung EMV- Schmieren Sie nie die Teile des Druckreduzierers. Filter (setzen Sie sich dazu mit der technischen Abteilung von Fimer in Verbindung) DRUCKREDUZIERER 4 Jeder Regler ist entworfen, um mit einem spezifischen Klassifikation für elektromagnetische Verträglichkeit: CISPR...
  • Seite 69: Die Serie Tm

    TM 320W, TM 360W, TM 420W, TM 500W, TM 650W). Jedes Schweißgerät verfügt über zwei Kommutatoren (16 und 17 Abb. 1), die zur Regulierung der Schweißstromstärke verwendet werden (Die Modelle TM 230 und TM 260 verwenden zu diesem Zweck nur den Kommutator 16) und zwei Potentiometer (1 und 5 Abb.
  • Seite 70: Beschreibung Des Geräts Abb. 1: Frontansicht

    2. BESCHREIBUNG DES GERÄTS Abb. 1: FRONTANSICHT TM 230-260-260 TM 300-300 TM 350-350 TM 320W - 360W TM 420W - 500W TM 650W...
  • Seite 71: Kontrolle Der Drahtvorschubsge

    - Bei Wahl der Funktionsweise 4T (4 Takt) wird durch ein BANDBREITE DER SCHWEISSSTROMSTÄRKE: erstes Drücken Brennerkopfschalters TM 230: nicht vorhanden Schweißvorgang eingeleitet. Ein zweites Drücken des TM 230: nicht vorhanden Brennerkopfschalters beendet den Schweißvorgang. TM 300 - TM 350 - TM 320W - TM 360W:...
  • Seite 72: Beschreibung Des Geräts Abb. 2: Vorderansicht

    Minuskabels mit diesem Stecker wird der höchstmöglich Sprühbogen (spray arc) wird ausschließlich dieser Induktanzwert eingestellt. Wird ausschließlich beim Stecker verwendet (garantiert beste Geräteleistung). Schweißverfahren mit Kurzbogen (short arc) verwendet. BESCHREIBUNG DES GERÄTS Abb. 2: VORDERANSICHT TM 230-260-260 TM 300-300 -350-350 TM 320-320 -360-360 -420 - 500-500 - 650-650 KABELBÜNDEL ZUR VERBINDUNG VON GENERATOR UND GETRENNTEM WAGEN...
  • Seite 73: Beschreibung Des Geräts Abb. 3: Seitenansicht

    31. GASSCHLAUCHVERBINDUNG 25. EINSCHALTEN/ AUSSCHALTEN DER KÜHLZENTRALE 32. KÜHLZENTRALE (AUF WUNSCH) BESCHREIBUNG DES GERÄTS Abb. 3: SEITENANSICHT TM 320- 360- 420- 500- 650 TM 230-260-260 -300-300 -350-350 - 420 - 500 - 650 33. HALTERUNG FÜR DRAHTSPULE DRAHTVORSCHUB: Mit größe- rem Detail in Abb.
  • Seite 74: Leinsetzen Des Schweissdrahts

    6. Schrauben Sie die 3. LEINSETZEN DES Knöpfe SCHWEISSDRAHTS Drahtkurbelgruppe auf und drehen Sie Zum Einsetzen des Schweißdrahts folgen Sie sie. Auf diese Weise den nachfolgenden Anweisungen und halten können die oberen sich an die angegebene Reihenfolge. D r a h t k u r b e l n Achtung: Bevor Sie mit der Installation fortfah- angehoben werden ren, entfernen Sie stets die Gasdüse (Abb.
  • Seite 75: Netzanschlüsse

    Informationen Gebrauch Verbindungsstecker (Dinse) anzuschließen (18 Handhabung von Gasflaschen kontaktieren Sie Abb.1 für TM 230, TM 260 und TM 300) (18a und Ihren Lieferanten. 18b Abb.1 für TM350, TM 320W und TM360W mit Achtung: Verwenden Sie die Gasflaschen wählbarem Drosselwiderstand) (18a,18b und 18c nicht, wenn sie beschädigt ist: Kontaktieren Sie...
  • Seite 76: Schalterspannung

    9. SCHALTERSPANNUNG Die Schweißgeräte TM 230 und TM260 gestatten 10 Einstellungen zur Regulierung der Stromstärke Aus Sicherheitsgründen empfiehlt es sich, (16 Abb. 1), die Schweißgeräte TM300, TM manuell ändern die Spannung der Maschine 350,TM 320W und TM360W gestatten 20 nach den Punkten im Folgenden beschrieben: Einstellungen zur Regulierung der Stromstärke (16...
  • Seite 77: Fehlersuche

    Geschrieben Rdy (bereit) auf dem Display: zeigt an, dass das Gerät im Standby-Modus und ist bereit zum Schweißen 13. FEHLERSUCHE Nachfolgend werden die häufigsten Probleme aufgeführt, die sich ergeben können, sowie die dazugehörige Lösung. URSACHE/N LÖSUNGEN/EMPFEHLUNGEN ANZEICHEN Abwesenheit von Spannung an das Stromnetz Wiederherstellen der Versorgungs- Ausschalten der Maschine [Anzeige: off] spannung...
  • Seite 78: Normale Wartung Des Geräts

    14.NORMALE WARTUNG DES GERÄTS Entfernen Sie regelmäßig alle drei Monate mit schwacher Druckluft den Staub von der Luftansaugdüse. Richten Sie den Luftstrom vom Inneren des Geräts nach Außen, um keinen Schmutz ins Innere des Geräts zu blasen. Für diese Eingriffe ist zu überprüfen, dass das Gerät nicht mit der Stromversorgung ver- bunden ist.
  • Seite 79: Montage Der Räder

    16. MONTAGE DER RÄDER 1. Stecken Sie den Splint in das Loch der Achse. 2. Falten Sie die beiden Klappen des Splint. 3. Schieben Sie die Achse in den unte- ren Teil des Geräts, indem Sie die Bügel dafür vorgesehenen Halterungen schieben.
  • Seite 80: Schema Blockierungen Tm 230-Tm260-Tm 300-Tm

    17. SCHEMA BLOCKIERUNGEN TM 230-TM260-TM 300-TM 350 Fernschalter 6c Einstellen Burnback Kommutator 6d Einstellen Schweißdauer Auswahl der Strombandbreite Motor Drahtvorschub Transformator Elektroventil Gas Brückenschaltung Thermostat Ausgangsstecker Anzeige zu hohe Temperatur Kontrolltafel Ventilator 6a Einstellen Geschwindigkeit Hilfstransformator Drahtvorschub Schalter Ein-Aus 6b Einstellen Soft Start...
  • Seite 81: Schema Blockierungen Tm260

    18. SCHEMA BLOCKIERUNGEN TM260 -TM 300 -TM 350 Fernschalter 6c Einstellen Burnback Kommutator DV 6d Einstellen Schweißdauer Kommutator Motor Drahtvorschub Auswahl der Strombandbreite Elektroventil Gas Transformator Thermostat Brückenschaltung Anzeige zu hohe Temperatur Ausgangsstecker Ventilator Kontrolltafel Hilfstransformator 6a Einstellen Geschwindigkeit Schalter Ein-Aus Drahtvorschub 6b Einstellen Soft Start Anzeige Schweißgerät in Funktion...
  • Seite 82: Schema Blockierungen Tm 320W-Tm360W-Tm420W-Tm500W-Tm 650W

    19. SCHEMA BLOCKIERUNGEN TM 320W-TM360W-TM420W-TM500W-TM 650W Fernschalter 7c Einstellen Burnback 7d Einstellen Schweißdauer 2a . Kommutator Auswahl der Strombandbreite Motor Drahtvorschub Transformator Elektroventil Gas Brückenschaltung Thermostat Ausgangswert Drosselwiderstand Anzeige zu hohe Temperatur der Einebnung Ventilator Ausgangsstecker Hilfstransformator Kontrolltafel Schalter Ein-Aus 7a Einstellen Geschwindigkeit Drahtvorschub 7b Einstellen Soft Start Anzeige Schweißgerät in Funktion...
  • Seite 83: Schema Blockierungen Tm 320W Dv -Tm360W

    20. SCHEMA BLOCKIERUNGEN TM 320W -TM360W -TM420W -TM500W -TM 650W Fernschalter 7b Einstellen Soft Start Kommutator DV 7c Einstellen Burnback 2a . Kommutator 7d Einstellen Schweißdauer Auswahl der Strombandbreite Motor Drahtvorschub Transformator Elektroventil Gas Brückenschaltung Thermostat Ausgangswert Drosselwiderstand Anzeige zu hohe Temperatur der Einebnung Ventilator Ausgangsstecker...
  • Seite 84: Ersatzteile Tm 230 - Tm

    21. ERSATZTEILE TM 230 - TM 260...
  • Seite 85: Ersatzteile Tm

    22. ERSATZTEILE TM 260...
  • Seite 86: Ersatzteile Tm

    23. ERSATZTEILE TM 300...
  • Seite 87: Ersatzteile Tm

    24. ERSATZTEILE TM 300...
  • Seite 88: Ersatzteile Tm

    25. ERSATZTEILE TM 350...
  • Seite 89: Ersatzteile Tm

    26. ERSATZTEILE TM 350...
  • Seite 90: Ersatzteile Wire Feeder

    27. ERSATZTEILE WIRE FEEDER TM 320W - TM 360W - TM 420W - TM 500W - TM 650W...
  • Seite 91: Ersatzteile Tm 320W-Tm 360W

    28. ERSATZTEILE TM 320W-TM 360W...
  • Seite 92: Ersatzteile Tm 320W -Tm 360W

    29. ERSATZTEILE TM 320W -TM 360W...
  • Seite 93: Ersatzteile Tm 420W-Tm 500W -Tm 650W

    30. ERSATZTEILE TM 420W-TM 500W -TM 650W...
  • Seite 94: Ersatzteile Tm 420W -Tm 500W -Tm 650W

    31. ERSATZTEILE TM 420W -TM 500W -TM 650W...
  • Seite 95 M A N U E L D’UTILISATION ET DE MAINTENANCE Fimer vous remercie d'avoir choisi cet appareil qui vous garantira de nombreuses années de fonctionnement sans problèmes à condition d’être utilisé en respectant les indications du manuel d’utilisation et de maintenance.
  • Seite 96: Symboles Utilisés

    SYMBOLES UTILISÉS Indique le danger de blessure ou de mort dû à une négli- Situation susceptible de causer de graves dommages gence lors de l’utilisation ou de la maintenance de bouteil- aux personnes et/ou à l’appareil les ou de soupapes de gaz comprimé MESURES DE PRÉCAUTION À...
  • Seite 97 INTERRUPTEUR DE PROTECTION ACCESSOIRES Utiliser uniquement les accessoires prévus par le fabri- Contrôler que l’installation qui alimente la soudeuse soit cant. L’utilisation d’accessoires de type différent peut équipée de dispositifs de sectionnement et de protection entraîner de graves dysfonctionnements à l’appareil. L’utilisation d’acces- appropriés.
  • Seite 98: Compatibilité Électromagnétique

    PROTECTION DES MURS ET DES SOLS BOUTEILLES ENDOMMAGÉES Les murs et les sols de la zone de soudage doivent Ne JAMAIS utiliser de bouteilles endommagées ou détériorées. être protégés par des écrans réalisés en matériau inin- flammable ; ceci non seulement pour réduire le risque d’incendie, mais aus- MANUTENTION DES BOUTEILLES si pour fournir une protection adéquate afin d’éviter que les murs et/ou le sol Ne JAMAIS déplacer la bouteille en la prenant par la soupape...
  • Seite 99: La Série Tm

    1. LA SÉRIE TM Le poste à souder MIG MAG est constitué d'une source de courant continu (générateur), d’une unité d’entraînement du fil (uniquement pour TM 320W, TM 360W, TM 420W, TM 500W, TM 650W) d’une torche, d’une borne de mise à la terre et d'un faisceau de câbles (uniquement pour TM 320W, TM 360W, TM 420W, TM 500W, TM 650W).
  • Seite 100: Description De L'appareil

    2. DESCRIPTION DE L’APPAREIL Fig. 1: VUE AVANT TM 230-260-260 TM 300-300 TM 350-350 TM 320W - 360W TM 420W - 500W TM 650W...
  • Seite 101 VALIDE POUR TM 230-260 -300 Si le poste à souder est équipé d'une centrale de refroidissement, l'allumage du voyant peut aussi indiquer que le liquide de refroidissement ne circule pas correctement. 8. AFFICHEUR de la valeur du courant ou de la ten-...
  • Seite 102 (il garantit les meilleures négatif de soudage à ce connecteur. À utiliser unique- prestations de l’appareil). ment en mode short-arc. DESCRIPTION DE L’APPAREIL Fig. 2: VUE ARRIÈRE TM 230-260-260 TM 300-300 -350-350 TM 320-320 -360-360 -420...
  • Seite 103: Régulateur De Pression

    25. ALLUME/ÉTEINT LA CENTRALE DE 32. CENTRALE DE REFROIDISSEMENT REFROIDISSEMENT (OPTION) DESCRIPTION DE L’APPAREIL Fig. 3: VUE LATÉRALE TM 320- 360- 420- 500- 650 TM 230-260-260 -300-300 -350-350 - 420 - 500 - 650 DÉVIDOIR DE LA BOBINE DU FIL GROUPE L’UNITÉ...
  • Seite 104: Chargement Du Fil À Souder

    3. CHARGEMENT DU FIL À SOUDER 6. Dévisser les pommeaux de l’u- Pour charger le fil à souder, suivre ces instruc- nité d’entraîne- tions et se référer à la séquence indiquée ci- ment du fil et les dessous. faire tourner. Ainsi, les rouleaux d’en- Attention : avant d’effectuer les opérations traînement du fil...
  • Seite 105: Branchement De L'alimentation

    être raccordé en premier au connec- Attention : Ne pas utiliser la bouteille si elle est teur (dinse) (18 de la figure 1 pour TM 230, TM endommagée : dans ce cas il faut informer 260 et TM 300) (18a et 18b de la figure 1 pour immédiatement le fournisseur.
  • Seite 106: Sélecteur De Tension

    Les postes à souder TM 230 et TM 260 offrent 1. Le sélecteur de tension 10 positions de réglage du courant (16 de la est réglé...
  • Seite 107: Résolutions Des Problèmes

    Rdy écrite (ready) sur l'afficheur: indique que la machine est en mode veille et est prêt à souder 13. RÉSOLUTIONS DES PROBLÈMES Nous présentons ci-après les problèmes les plus communs qu’il est possible de rencontrer ainsi que les solutions correspondantes. CAUSE/S SOLUTIONS/CONSEILS SIGNALISATION...
  • Seite 108: Maintenance Ordinaire De La Machine

    14. MAINTENANCE ORDINAIRE DE LA MACHINE Éliminer régulièrement la poussière des bouches d’aspiration de l’air en utilisant l’air comprimé à basse pression. Toujours diriger le jet d’air de l’intérieur du poste à souder vers l’extérieur afin d’éviter de pousser la saleté à l’intérieur du poste à souder. Pour effectuer cette opération, s'assurer que la machine n'est pas branchée au réseau électrique.
  • Seite 109: Montage Des Roues

    16. MONTAGE DES ROUES 1. Insérer la goupille dans le trou de l'essieu. 2. Pliez les deux volets de la goupille fendue. 3. Insérer l'essieu dan la partie inférieu- re de la machine en le faisant coulisser dans les étriers de support prévus à cet effet.
  • Seite 110: Schéma Des Liaisons Tm 230-Tm260-Tm 300-Tm 350

    17. SCHÉMA DES LIAISONS TM 230-TM260-TM 300-TM 350 Télérupteur 6d Configuration du temps de soudage Commutateur du courant Moteur de l’unité d’entraînement du fil Sélecteur de la gamme de courant Électrovanne du gaz Transformateur de puissance Thermostat Redresseur de pont...
  • Seite 111: Schéma Des Liaisons Tm260

    18. SCHÉMA DES LIAISONS TM260 -TM 300 -TM 350 Télérupteur 6c Réglage Burn Back Commutateur du courant dual voltage 6d Configuration du temps de soudage Commutateur du courant Moteur de l’unité d’entraînement du fil Sélecteur de la gamme de courant Électrovanne du gaz Transformateur de puissance Thermostat...
  • Seite 112: Schéma Des Liaisons Tm 320W-Tm360W-Tm420W-Tm500W-Tm 650W

    19. SCHÉMA DES LIAISONS TM 320W-TM360W-TM420W-TM500W-TM 650W Télérupteur 7c Réglage Burn Back 2a . Commutateur du courant 7d Configuration du temps de soudage Sélecteur de la gamme de courant Moteur de l’unité d’entraînement du fil Transformateur de puissance Électrovanne du gaz Redresseur de pont Thermostat La sortie de l'inductance de ligne...
  • Seite 113: Tm360W -Tm420W -Tm500W -Tm650W

    20. SCHÉMA DES LIAISONS TM 320W -TM360W -TM420W -TM500W -TM650W Télérupteur 7c Réglage Burn Back Commutateur du courant dual voltage 7d Configuration du temps de soudage 2a . Commutateur du courant Moteur de l’unité d’entraînement du fil Sélecteur de la gamme de courant Électrovanne du gaz Transformateur de puissance Thermostat...
  • Seite 114: Pièces De Rechange Tm 230 - Tm 260

    21. PIÈCES DE RECHANGE TM 230 - TM 260...
  • Seite 116: Pièces De Rechange Tm 300

    23. PIÈCES DE RECHANGE TM 300...
  • Seite 117: Pièces De Rechange Tm 300 Dv

    24. PIÈCES DE RECHANGE TM 300...
  • Seite 118: Pièces De Rechange Tm 350

    25. PIÈCES DE RECHANGE TM 350...
  • Seite 119: Pièces De Rechange Tm 350 Dv

    26. PIÈCES DE RECHANGE TM 350...
  • Seite 120: Pièces De Rechange Dévidoir De Fil

    27. PIÈCES DE RECHANGE DÉVIDOIR DE FIL TM 320W - TM 360W - TM 420W - TM 500W - TM 650W...
  • Seite 121: Pièces De Rechange Tm 320W-Tm 360W

    28. PIÈCES DE RECHANGE TM 320W-TM 360W...
  • Seite 122: Pièces De Rechange Tm 320W

    29. PIÈCES DE RECHANGE TM 320W -TM 360W...
  • Seite 123: Pièces De Rechange Tm 420W-Tm 500W -Tm 650W

    30. PIÈCES DE RECHANGE TM 420W-TM 500W -TM 650W...
  • Seite 124: Pièces De Rechange Tm 420W

    31. PIÈCES DE RECHANGE TM 420W -TM 500W -TM 650W...
  • Seite 125 MANUAL DE USO Y MANTENIMIENTO MANUAL DE USO Y MANTENIMIENTO Fimer les agradece que hayan elegido este aparato; les acompañará en su trabajo por muchos años siéndoles de gran utilidad si lo utilizan siguiendo las indicaciones que aparecen en este manual de uso y mantenimiento.
  • Seite 126 SIMBOLOS UTILIZADOS Peligro de lesiones o muerte debido al uso o manteni- situación que puede causar graves daños a las personas miento incorrectos de los cilindros de gas comprimido o o al equipo las válvulas reguladoras PRECAUCIONES PARA PELIGRO DE DESCARGA ELÉCTRICA LA EXTINCIÓN DE INCENDIOS grave peligro de descarga eléctrica para las personas Información importante a tener en cuenta.
  • Seite 127: Protección Contra Descargas Eléctricas

    ACCESORIOS Compruebe que la fuente de alimentación de la soldadora esté Utilice únicamente accesorios autorizados por el provista de un sistema de seccionamiento y protección ade- fabricante. El uso de otros accesorios puede afec- cuado. El interruptor debe abrir todos los cables de alimenta- tar al funcionamiento del aparato.
  • Seite 128: Compatibilidad Electromagnética

    CILINDROS DE GAS DAÑADOS PROTECCIÓN DE LAS PAREDES Y EL SUELO Las paredes y el suelo del área de soldadura nunca utilice cilindros de gas dañados o en mal estado. deben estar protegidos con materiales ignífu- DESPLAZAMIENTO DE LOS CILINDROS DE GAS gos para reducir el riesgo de incendio y proporcionar una protec- ción adecuada para evitar que las paredes y el suelo sufran daños nunca traslade los cilindros de gas cogiéndolos por la válvula.
  • Seite 129 (16 y 17 de la Fig. 1) que se usan para regular la corriente de soldadura (los modelos TM 230 y TM 260 utilizan para este fin solo el conmutador 16) y dos potenciómetros (1 y 5 de la Fig. 1) para regular respectivamente la duración de la soldadura (Temporizador) y la veloci-...
  • Seite 130 2. DESCRIPCIÓN DEL APARATO Fig. 1: VISTA FRONTAL TM 230-260-260 TM 300-300 TM 350-350 TM 320W - 360W TM 420W - 500W TM 650W...
  • Seite 131 VALIDO PER TM 230-260 -300 En caso de que la soldadora posea una centralita de enfriamiento, el encendido del piloto también podría indicar que el líquido de enfriamiento no circula correctamente en el debido circuito; en este caso purgarlo. 8. DISPLAY DE VISUALIZACIÓN del valor de cor- riente o de tensión de soldadura (sólo para M 350,...
  • Seite 132 (esto garantizará las mejores prestaciones del aparato). ble. Para utilizar solamente en modalidad short-arc. DESCRIPCIÓN DEL APARATO Fig. 2: VISTA POSTERIOR TM 230-260-260 TM 300-300 -350-350 TM 320-320 -360-360 -420...
  • Seite 133 25. AENCENDIDO/APAGADO DE LA CEN- CENTRALITA ENFRIAMIENTO TRALITA DE ENFRIAMIENTO (opciòn) DESCRIPCIÓN DEL APARATO Fig. 3: VISTA LATERAL TM 320- 360- 420- 500- 650 TM 230-260-260 -300-300 -350-350 - 420 - 500 - 650 33. SOPORTE PARA BOBINA ALAMBRE 34. GRUPO ARRASTRA-ALAMBRE: destacarlo con más detalle en la figura 3A.
  • Seite 134 3. CARGA DEL ALAMBRE 7. Desenroscar los DE SOLDADURA pomos del grupo arrastra-alambre y Para cargar el alambre de soldadura seguir hacerlos girar. De estas instrucciones y hacer referencia a la este modo se ele- secuencia que se muestra abajo. varán los bobinas Atención: antes de efectuar las operaciones arrastra-alambre...
  • Seite 135: Conexión De La Alimentación

    (dinse) (18 de la ción relativa al uso y al mantenimiento de las Fig.1 para TM 230, TM 260 e TM 300) (18a y bombonas. 18b de la Fig.1 para TM350, TM 320W y TM360W con inductancia seleccionable) (18a,18b Atención: Non usar la bombona si está...
  • Seite 136: Proceso De Soldadura

    9. INTERRUPTOR DE VOLTAJE Las soldadoras TM 230 y TM260 presentan 10 posiciones de regulación de la corriente (16 de Por razones de seguridad, es apropiado cambiar la Fig. 1); las soldadoras TM300, TM 350,TM manualmente la tensión de la máquina de acuer- 320W y TM360W presentan 20 posiciones de do con los puntos descritos a continuación:...
  • Seite 137: Búsqueda De Averías

    RDY escrito (lista) en la pantalla: indica que la máquina está en modo de espera y está listo para soldar 13. BÚSQUEDA DE AVERÍAS A continuación se citan los problemas más comunes que se pueden encontrar y las relativas soluciones. SOLUCIONES/ CAUSA/S SEÑALIZACIÓN...
  • Seite 138: Mantenimiento Ordinario De La Máquina

    14. MANTENIMIENTO ORDINARIO DE LA MÁQUINA Cada tres meses quitar periódicamente el polvo de las boquillas de aspiración del aire usando aire comprimido a baja presión. Dirigir siempre el chorro de aire desde el interior de la máquina hacia el exterior para evitar empujar suciedad dentro de la soldadora.
  • Seite 139 16. MONTAJE DE RUEDAS 1. Insertar el pasador en el orificio en el eje. 2. Doble las dos solapas de la chaveta. 3. Introducir el axial en la parte inferior de la máquina haciéndolo deslizar por las abrazaderas de soporte adecuadas. 4.
  • Seite 140 17. ESQUEMA BLOQUES TM 230-TM260-TM 300-TM 350 Telerruptor 6d regulación del tiempo de soldadura Conmutador de la corriente Motor Arrastra-alambre Selector de la gama de corriente Electroválvula gas Transformador de potencia Termostato Puente enderezador Señalación de sobretemperatura Conectores de salida...
  • Seite 141 18. ESQUEMA BLOQUES TM260 -TM 300 -TM 350 Telerruptor 6c ajuste Burn Buck Conmutador de la corriente dual voltage 6d regulación del tiempo de soldadura Conmutador de la corriente Motor Arrastra-alambre Selector de la gama de corriente Electroválvula gas Transformador de potencia Termostato Puente enderezador Señalación de sobretemperatura...
  • Seite 142 19. ESQUEMA BLOQUES TM 320W-TM360W-TM420W-TM500W-TM 650W Telerruptor 7c ajuste Burn Buck Conmutador de la corriente 7d regulación del tiempo de soldadura Selector de la gama de corriente Motor Arrastra-alambre Transformador de potencia Electroválvula gas Puente enderezador Termostato Inductancia de salida de línea Señalación de sobretemperatura Conectores de salida Ventilador...
  • Seite 143 20. ESQUEMA BLOQUES TM 320W -TM360W -TM420W -TM500W -TM 650W Telerruptor 7c ajuste Burn Buck Conmutador de la corriente dual voltage 7d regulación del tiempo de soldadura 2a . Conmutador de la corriente Motor Arrastra-alambre Selector de la gama de corriente Electroválvula gas Transformador de potencia Termostato...
  • Seite 144 21. PIEZAS DE RECAMBIO TM 230 - TM 260...
  • Seite 145 22. PIEZAS DE RECAMBIO TM 260...
  • Seite 146 23. PIEZAS DE RECAMBIO TM 300...
  • Seite 147 24. PIEZAS DE RECAMBIO TM 300...
  • Seite 148 25. PIEZAS DE RECAMBIO TM 350...
  • Seite 149 26. PIEZAS DE RECAMBIO TM 350...
  • Seite 150 27. PIEZAS DE RECAMBIO ALIMENTADOR CABLE TM 320W - TM 360W - TM 420W - TM 500W - TM 650W...
  • Seite 151 28. PIEZAS DE RECAMBIO TM 320W-TM 360W...
  • Seite 152 29. PIEZAS DE RECAMBIO TM 320W -TM 360W...
  • Seite 153 30. PIEZAS DE RECAMBIO TM 420W-TM 500W -TM 650W...
  • Seite 154 31. PIEZAS DE RECAMBIO TM 420W -TM 500W -TM 650W...

Inhaltsverzeichnis