Herunterladen Inhalt Inhalt Diese Seite drucken
HQ Power VDPC174 Bedienungsanleitung
Vorschau ausblenden Andere Handbücher für VDPC174:

Werbung

Verfügbare Sprachen
  • DE

Verfügbare Sprachen

VDPC
V
C174
19
92-CHA
NNEL D
19
92-KAN
AALS D
CO
ONTRÔL
LEUR DM
CO
ONTROL
LADOR D
D
MX-CON
NTROLLE
U
USER MAN
NUAL
GEBRUIKE
G
ERSHAND
N
NOTICE D
'EMPLOI
M
MANUAL D
DEL USUA
BEDIENUN
B
NGSANLEI
4
MX CON
NTROLLE
MX CON
NTROLLE
MX 192
CANAUX
DMX DE
E 192 CA
ER FÜR
192 KA
3
 
LEIDING
11
 
20
 
ARIO
28
 
ITUNG
36
 
ER WITH
H JOYST
ER MET
JOYSTI
X AVEC
MANETT
ANALES
CON PA
ANÄLE M
MIT JOYS
TICK
CK
TE
ALANCA
DE CON N TROL
STICK

Werbung

Inhaltsverzeichnis
loading

Inhaltszusammenfassung für HQ Power VDPC174

  • Seite 1 VDPC C174 92-CHA NNEL D MX CON NTROLLE ER WITH H JOYST TICK 92-KAN AALS D MX CON NTROLLE ER MET JOYSTI ONTRÔL LEUR DM MX 192 CANAUX X AVEC MANETT ONTROL LADOR D DMX DE E 192 CA ANALES CON PA ALANCA DE CON N TROL...
  • Seite 2 VDPC174VDPC174 Rev 01 15.03.2010 ©Velleman nv...
  • Seite 3 VDPC174 ER MAN . Introdu uction o all reside ents of the e Europea n Union mportant e environme ental infor rmation ab bout this p product s symbol o n the devic ce or the pa ackage indi cates that...
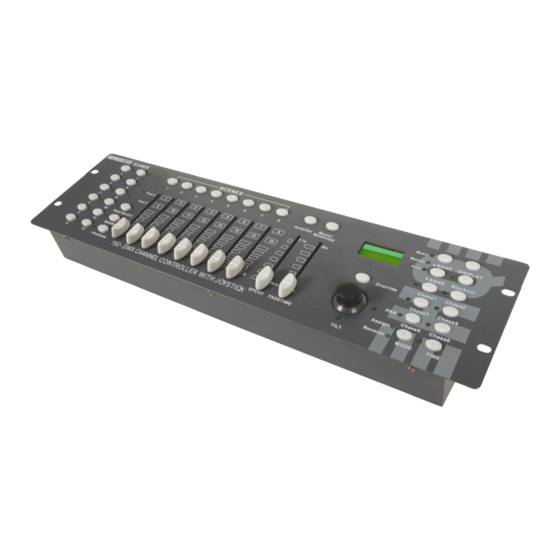
  • Seite 4 VDPC174 Rev 01 4. Description a. Front Panel (fig. 1) 1. Scanner Buttons (1 ~ 12) Select the desired fixture. 2. Scene Buttons (1 ~ 8) Press the scene buttons to load or store your scenes. There is a maximum of 240 programmable scenes.
  • Seite 5: Operation

    Operation • General The VDPC174 allows you to program 12 scanners with 16 DMX channels each, 30 banks of 8 programmable scenes, 6 chases of 240 scenes and all this by means of 8 channel sliders, a joystick and other buttons. By means of the joystick you can easily and more accurately control the movement of a fixture.
  • Seite 6 VDPC174 Rev 01 5. Press the button corresponding to the scanner you wish to assign. 6. While holding the mode button press the scene number corresponding to the slider which controls the movement (example: If the pan is controlled by slider number 4, press and hold the MODE button while tapping scene button 4).
  • Seite 7 VDPC174 Rev 01 • Copying Scanner Settings This setting allows you to copy the settings of one scanner to another. 1. Press and hold down the scanner button you wish to copy. 2. While holding down the button, tap the button of the scanner you wish to copy the settings to.
  • Seite 8 VDPC174 Rev 01 4. Press the bank UP / DOWN button and scroll to the step you wish to insert the step after. 5. Press the MIDI / REC button. The segment display will read the step one step higher than before.
  • Seite 9: Manual Mode

    VDPC174 Rev 01 • Deleting a Scanner of a DMX Channel 1. Activate the ASSIGN or REVERSE mode. 2. Tap the scanner button to select the scanner you wish to delete. 3. Press the MODE and AUTO / DEL buttons simultaneously. All LEDs will flash three times indicating the requested operation has been performed.
  • Seite 10: File Transfer

    File Transfer A file transfer allows the user to transfer all information stored in one VDPC174 to a second VDPC174 unit. Connect the units using 3-pin XLR cables. The unit sending the information will have the cable plugged into the DMX OUT plug while the receiving unit will have the cable running into the DMX IN plug.
  • Seite 11 VDPC174 . Technic cal Speci fications powe er supply 9 ~ 12VDC C/500mA DMX in put/output 3-pin female/ma ale XLR soc cket DI input 5-pin DIN N socket dime ensions 482 x 134 x 85mm total l weight 2.7k max. ambie...
  • Seite 12: Algemene Richtlijnen

    VDPC174 Rev 01 • Schade door wijzigingen die de gebruiker heeft aangebracht aan het toestel vallen niet onder de garantie. • Houd dit toestel uit de buurt van kinderen en onbevoegden. 3. Algemene richtlijnen ® Raadpleeg de Velleman service- en kwaliteitsgarantie achteraan deze handleiding.
  • Seite 13 Bediening • Algemeen Met de VDPC174 kunt u 12 scanners van elk 16 DMX-kanalen programmeren, 30 banken met 8 programmeerbare scènes en 6 chases met 240 scènes, bestuurbaar aan de hand van 8 schuifknoppen, een joystick en andere knoppen. Met de joystick kunt u op een gemakkelijke en nauwkeurige wijze de beweging van een toestel besturen.
  • Seite 14 VDPC174 Rev 01 Geef het DMX-adres in volgens volgende tabel: Instelling van de DIP-schakelaars van de Toestelnummer Digitale DMX-adres scanner 1 is ON 1 and 5 are ON 1 and 6 are ON 1, 5 and 6 are ON 1 and 7 are ON...
  • Seite 15 VDPC174 Rev 01 • Voorbeeld hoe een scène te programmeren 1. Schakel de PROGRAM-modus in. 2. Druk op SCANNER 1 zodat de fader ingeschakeld wordt. 3. Zorg dat pagina A geselecteerd staat. Zoniet, druk op PAGE SELECT om pagina A te selecteren.
  • Seite 16 VDPC174 Rev 01 d. Chases • Een chase programmeren Om een scène te kunnen programmeren, moet er eerst en vooral een scène bestaan. Deze functie laat u toe om 240 scènes in een vooraf bepaalde volgorde af te lopen. Het is aangeraden eerst alle chases te wissen vooraleer u chases begint te programmeren.
  • Seite 17 VDPC174 Rev 01 3. Selecteer met UP en DOWN de as die u wenst toe te kennen (pan of tilt). 4. Gebruik de TAP / DISPLAY-knop om de 16- of 8-kanaals modus te selecteren. 5. Druk op de scanner die wenst toe te kennen.
  • Seite 18 Bestandsoverdracht Een bestandsoverdracht laat toe alle informatie opgeslagen in uw VDPC174 naar een tweede VDPC174 te zenden. Koppel de toestellen met 3-pin XLR-kabels als volgt: Koppel de DMX OUT van het zendtoestel met de DMX IN van het ontvangsttoestel.
  • Seite 19: Reiniging En Onderhoud

    VDPC174 Rev 01 • Een dump-bestand verzenden 1. Schakel het toestel uit en houd gelijktijdig SCANNER 2 en 3 en SCENE 1 ingedrukt. 2. Schakel het toestel terug in terwijl u de drie knoppen ingedrukt houdt. De LCD geeft TRANSMIT weer om aan te geven dat het toestel klaar staat om de bestanden te verzenden.
  • Seite 20 VDPC174 NOTIC CE D’EM MPLOI . Introdu uction ux résiden nts de l'Un nion europ péenne es informa ations env vironneme entales imp portantes concerna nt ce prod duit e symbole sur l'appar reil ou l'em ballage ind ique que l’é...
  • Seite 21 VDPC174 Rev 01 • N’utilisez votre VDPC174 qu’à sa fonction prévue. Tout autre usage peut causer des courts- circuits, des brûlures, des électrochocs etc. Un usage impropre annule d'office la garantie. 4. Description a. Panneau frontal (voir ill. 1) 1. Boutons scanner (1 ~ 12) Sélection de l’appareil.
  • Seite 22 Opération • En général Le VDPC174 permet la programmation de 12 scanners à 16 canaux DMX, 30 bancs de 8 scènes programmables, 6 poursuites de 240 scènes à l’aide de 8 glissières, d’une manette et d’autres boutons. Il est possible de contrôler le mouvement d’un appareil plus facilement et précisément à...
  • Seite 23 VDPC174 Rev 01 • Configuration de la manette 1. Maintenez enfoncé le bouton « PROGRAM » jusqu’à ce que la LED s’allume. 2. Maintenez enfoncé les boutons « MODE » et « FINE » simultanément. La LED « ASSIGN »...
  • Seite 24 VDPC174 Rev 01 Dans les étapes 3 et 6, veillez à sélectionner la même scène pour ne pas effacer des scènes existantes. • Copie de la configuration du scanner Ceci vous permet de copier la configuration d’un scanner vers un autre.
  • Seite 25 VDPC174 Rev 01 • Ajout d’une étape 1. Activez le mode « PROGRAM ». 2. Enfoncez le bouton correspondant à la poursuite à laquelle vous désirez ajouter une étape. 3. Enfoncez le bouton « TAP / DISPLAY ». L’afficheur LCD affiche l’étape actuelle.
  • Seite 26 VDPC174 Rev 01 • Effacement d’un scanner du canal DMX 1. Activez le mode « ASSIGN » ou « REVERSE ». 2. Enfoncez le bouton « SCANNER » du scanner que vous désirez effacer. 3. Enfoncez simultanément les boutons « MODE » et « AUTO / DEL ». Toutes les LEDs flashent trois fois pour indiquer le complètement de l’opération.
  • Seite 27: Entretien

    Un transfert de fichiers permet de copier toutes les données sauvegardées dans un VDPC174 vers un deuxième VDPC174. Raccordez les unités à l’aide de câbles XLR à trois broches. Branchez le câble à la connexion « DMX OUT » de l’appareil transférant les données, branchez l’autre fiche du câble à...
  • Seite 28 VDPC174 . Spécific cations t echnique alime entation 9 ~ 12VCC C/500mA entrée/ sortie DMX prise fem melle/mâle XLR à 3 br roches entré ée MIDI prise DIN à 5 broches dime ensions 482 x 134 x 85mm poids 2.7k empérature...
  • Seite 29: Normas Generales

    • Este aparato ha sido diseñado para uso profesional en una discoteca, un teatro, etc. El VDPC174 sólo está permitido para una conexión con una fuente de corriente de máx. 9-12VCC / 500mA.
  • Seite 30 Funcionamiento • En general El VDPC174 permite programar 12 escáneres de 16 canales DMX, 30 bancos de 8 escenas programables y 6 chases de 240 escenas con los 8 deslizadores, una palanca y otros botones. Con la palanca es posible controlar el movimiento de un aparato de manera más fácil y precisa.
  • Seite 31 VDPC174 Rev 01 1, 6 y 7 en la posición ON 1, 5, 6 y 7 en la posición ON 1 y 8 en la posición ON 1, 5 y 8 en la posición ON 1, 6 y 8 en la posición ON 1, 5, 6 y 8 en la posición ON...
  • Seite 32 VDPC174 Rev 01 7. Pulse el botón de escena 1 para guardar la primera escena. 8. Repita los pasos de 4 a 7 hasta que todas las escenas estén programadas en el banco 1. 9. Pulse el botón « SCANNER 1 » para desactivar el fader.
  • Seite 33 VDPC174 Rev 01 1. Active el modo « PROGRAM ». 2. Pulse el botón CHASE para seleccionar el chase que quiere programar. 3. Seleccione la escena en el banco. 4. Pulse el botón « MIDI / REC ». 5. Repita los pasos 3 y 4 hasta que todas las escenas estén introducidas.
  • Seite 34 VDPC174 Rev 01 • Invertir el movimiento de la palanca / el canal DMX 1. Active el modo « PROGRAM ». 2. Pulse « FINE » y « MODE » para entrar en el modo « ASSIGN ». Vuelva a pulsar « FINE » y «...
  • Seite 35 Una transmisión de ficheros permite copiar todos los datos guardados en un VDPC174 a un segundo VDPC174. Conecte los aparatos con los cables XLR de tres polos. Conecte el cable a la conexión « DMX OUT » de aparato que transmite los datos, conecte el otro conector del cable a la conexión «...
  • Seite 36 Entsor rgungsrich htlinien an n Ihre örtl iche ehörde. ir bedanken n uns für de en Kauf de s VDPC174 4! Lesen S ie diese Be edienungsan nleitung vo betriebnah me sorgfält tig durch. Ü Überprüfen Sie, ob Tra ansportsch äden vorlie...
  • Seite 37: Allgeme Eine Rich

    VDPC174 . Sicherh heitsvors schriften chützen Sie e das Gerät t vor Feuch htigkeit und d Nässe. eien Sie vo orsichtig be i der Instal llation: Fas sen Sie kei ine stromfü ührenden K Kabel an, m einen leb bensgefähr...
  • Seite 38 VDPC174 Rev 01 4. Page Select Wählen Sie Seite A (1 ~ 8) oder Seite B (9 ~ 16). 5. Speed-Schiebeschalter Regelung der Chase-Geschwindigkeit zwischen 0.1 Sekunde bis 10 Minuten. 6. Fade Time-Schiebeschalter Regelung der Dimmzeit. Die Dimmzeit ist die Zeit, die der Scanner braucht um von der einen Position zu der anderen Position zu bewegen oder die Zeit, die der Scanner braucht um ein- oder auszufaden.
  • Seite 39 Umkehren der Kanäle 10 und 13 b. Aufstellung • Gerät aufstellen Der VDPC174 weist 16 Kanäle pro Gerät zu. Um Ihre Geräte an die Scannertaste links auf dem Steuergerät zuzuweisen, halten Sie 16 Kanäle pro Gerät frei. Geben Sie die DMX-Adresse gemäß folgender Tabelle in: Gerätenummer...
  • Seite 40: Eine Szene Programmieren

    VDPC174 Rev 01 steuern, halten Sie die MODE-Taste gedrückt und drücken Sie Szenentaste 4#). 7. Drücken Sie danach gleichzeitig die MODE- und FINE-Taste um den ASSIGN-Modus zu verlassen. c. Szenen • Eine Szene programmieren 1. Öffnen Sie den Programmmodus (siehe “Programmmodus einschalten”).
  • Seite 41: Eine Vollständige Bank Mit Szenen Kopieren

    VDPC174 Rev 01 • Eine Szene kopieren 1. Schalten Sie den Programmmodus ein. 2. Wählen Sie die gewünschte Bank mit der zu kopierenden Szene mithilfe der UP / DOWN-Taste. 3. Wählen Sie eine zu kopierende Szene, indem Sie die Szenetaste drücken.
  • Seite 42: Einen Schritt Löschen

    VDPC174 Rev 01 • Einen Schritt löschen 1. Schalten Sie den Programmmodus ein. 2. Selektieren Sie die Chase mit dem zu löschenden Schritt. 3. Drücken Sie TAP / DISPLAY, das LCD zeigt den heutigen Schritt. 4. Drücken Sie Bank UP / DOWN und scrollen Sie zum Schritt, den Sie löschen wollen.
  • Seite 43 VDPC174 Rev 01 • Alle DMX-Kanäle löschen 1. Schalten Sie das Gerät aus. 2. Drücken Sie zur gleichen Zeit auf MODE und AUTO / DEL. 3. Halten Sie MODE und AUTO / DEL gleichzeitig gedrückt und schalten Sie das Gerät ein. Alle LEDs blinken dreimal, als Anzeige, dass die Aufgabe ausgeführt wurde.
  • Seite 44: Reinigung Und Wartung

    Dateiübertragung Eine Dateiübertragung ermöglicht Ihnen, alle gespeicherten Informationen Ihres VDPC174 an einen zweiten VDPC174 zu senden. Verbinden Sie die Geräte mit 3-poligen XLR-Kabeln: Verbinden Sie den DMX OUT des Sendegerätes mit dem DMX IN des Empfangsgerätes. • Eine Dumpdatei versenden 1.
  • Seite 45: Technische Daten

    VDPC174 Rev 01 7. Technische Daten Stromversorgung 9 ~ 12VDC/500mA DMX IN/OUT 3-polig XLR-Stecker/Buchse MIDI IN 5-poliger DIN-Stecker Abmessungen 482 x 134 x 85mm Gewicht 2.7kg max. Umgebungstemperatur 45°C Verwenden Sie dieses Gerät nur mit originellen Zubehörteilen. Velleman nv übernimmt keine Haftung für Schaden oder Verletzungen bei (falscher) Anwendung dieses Gerätes.
  • Seite 46 vuil, vocht...), en door het toestel, alsook zijn inhoud (bv. verlies van ® Velleman Service and Quality Warranty data), vergoeding voor eventuele winstderving. ® Velleman has over 35 years of experience in the electronics world - verbruiksgoederen, onderdelen of hulpstukken die regelmatig dienen and distributes its products in more than 85 countries.
  • Seite 47 dûment conditionné (de préférence dans l’emballage d’origine avec ® mention du défaut) ; Velleman Service- und Qualitätsgarantie • conseil : il est conseillé de consulter la notice et de contrôler câbles, Velleman ® hat gut 35 Jahre Erfahrung in der Elektronikwelt und piles, etc.
Inhaltsverzeichnis