Inhaltsverzeichnis
Werbung
Verfügbare Sprachen
Verfügbare Sprachen
Quicklinks
Foreword
Many thanks for buying this product. We have invested much time and effort in its
development in order that you may enjoy many years trouble-free with your digital
photo frame.
Safety Notice
1. Do not drop, puncture or disassemble the digital photo frame, otherwise the
warranty will be voided.
2. Avoid all contact with water and dry hands before using.
3. Do not expose the photo frame to high temperature or leave it in direct sunlight.
Doing so may damage it.
4. Use the photo frame with care. Avoid pressing hard on it.
5. For your own safety, avoid using the photo frame when there is a storm or
lightning.
6. Use only accessories supplied by the manufacturer.
Keep the photo frame out of the reach of infants.
7.
Environment
Do not throw the appliance away with the normal household
waste at the end of its life, but hand it at an official collection point
for recycling.
By doing this you will help to preserve the environment.
1
Werbung
Inhaltsverzeichnis

Verwandte Anleitungen für AIPTEK PICASSO II


Inhaltszusammenfassung für AIPTEK PICASSO II
- Seite 1 Foreword Many thanks for buying this product. We have invested much time and effort in its development in order that you may enjoy many years trouble-free with your digital photo frame. Safety Notice 1. Do not drop, puncture or disassemble the digital photo frame, otherwise the warranty will be voided.
-
Seite 2: Getting Started
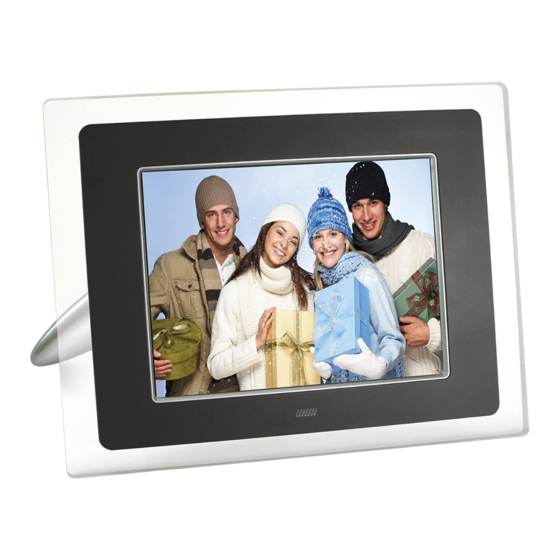
Getting Started The digital photo frame makes it possible to show high resolution photos and films, play MP3 as mood music and combine different photos to a slideshow. It supports USB Flash drive, CF, SD, MMC and MS Pro. Package content Digital photo frame Remote Control Frame Stand... - Seite 3 Front Panel Rear Panel 1. Screen 5. Stand 2. Front frame 6. Front-rear frame button 3. Remote sensor 7. Esc button 4. Decoration frame 8. Enter button 9. Speaker 10. Circle button 11. Power LED 12. Power/LED switch Bottom Panel 13.
- Seite 4 After Power on Before powering on, make sure the power adapter is correctly plugged in and the photo frame switched on. After powering on, the Start interface shown on screen is according to the “StartUp Set” setting. User can choose calendar, picture, music, movie in the start up interface.
- Seite 5 Figure 6.2...
- Seite 6 Functions of the digital photo frame On the following pages the different functions and menus of the photo frame will be presented. When you choose a memory card or USB or internal memory and press “ENTER”, the function selection screen will display. (1) Image (2) Music (3) Movie...
- Seite 7 The Setup Next you should make yourselves familiar with the possible settings. Select the Item "Setup" and confirm your choice with the ENTER button. The following window will appear now and you can see the options mentioned below. Figure 6.3 At the function select interface, press the Circle button leftward to select the “Setup”...
- Seite 8 items. In the item “slide show mode” user could set the speed of the slide show, it includes “Fast”, “Middle” and “Slow”. In the item picture play mode, it includes 13 effects of the slide show. : Clock setup: Circle button (left & right) to shift between items; Circle button (Up &...
- Seite 9 The image menu When you select Image and press “ENTER”, you will have an overview about the available photos. With the circle button and the ENTER button you can select any photo to start the slideshow on the complete size of the display by pressing “ENTER”.
- Seite 10 The functions of picture control bar are shown as below figure 6.7. Zoom Rotate Previous Status Stop Show file info Picture Resolution Play/Pause Next View 3×3 Figure 6.7 Press STOP key at control bar back to function select interface;Press “ESC” button at picture view menu back to 9-picture thumbnail.
- Seite 11 The music menu The next icon you see is the music part. To listen to your favorite music in a media player, select the icon with the circle button and confirm your selection with the ENTER button. You will see the following window. System search music files in the current memory equipment and play them automatically.
- Seite 12 Figure 6.10 Press “ESC” button or press STOP key back to function select interface at control bar.
- Seite 13 movie menu To get to this menu choose the icon movie and confirm with the ENTER button. The system will search the video files in the current memory equipment and play them automatically. During movie playing, press Circle button(Up) to open the volume menu(Operation as same as 1-1).
- Seite 14 Filemanager The item before last is the Filemanager item. Figure 6.13 After use Circle button (Right) to choose memory equipment, press “ENTER” button or Circle button (Right) to view the content ( figure 6.14) , picture files could preview on the right side. Figure 6.14 You can select files at the files for delete or copy .files at the list.
- Seite 15 Select files: Use Circle button (up & Down) to shift cursor to target file, press Circle button (right) the left of file name will appear the selected symbol “ ” (figure6.15), press Circle button (right) again to cancel the selection. User can choose multi-files to operate.
- Seite 16 Figure 6.16 Figure 6.17 Copy file: After you select file, shift to the target folder and press “ENTER” button to open file management menu, long press “ENTER” button to open operation menu. and Press Circle button (up & Down) to shift cursor to icon,the selected file will be copy to the target folder.
-
Seite 17: Troubleshooting
Troubleshooting 1. How to start/turn off a picture slideshow? Switch on the POWER button on the rear side. The default start-up setting is to play the picture slideshow with MP3 as background music. The photo slideshow can be turned off by using the PAUSE function in picture control bar. - Seite 18 Model Code Monet - 8” TFT LCD, 158 x 99,36 mm LCD Display Da Vinci - 10” TFT LCD, 200 x 133 mm Picasso II - 7" TFT LCD, 137 x 91 mm LCD Display Resolution 800RGB x 480 Aspect ratio...
-
Seite 19: Sicherheitshinweise
Einleitung Vielen Dank für den Kauf dieses Produktes. Wir haben viel Zeit und Mühe in die Entwicklung gesteckt, damit Sie viele Jahre lang Freude an Ihrem digitalen Fotorahmen haben werden. Sicherheitshinweise 1. Lassen Sie den Fotorahmen nicht fallen, beschädigen und zerlegen Sie das Gerät nicht, andernfalls erlischt die Gewährleistung. -
Seite 20: Erste Schritte
Erste Schritte Er ermöglicht die Anzeige von hochauflösenden Fotos und Videos, die Wiedergabe von MP3-Dateien (z. B. als Hintergrundmusik) und kann verschiedene Fotos zu einer Diaschau zusammenstellen und anzeigen. Das Gerät unterstützt USB-Flash-Laufwerke und CF-, SD-, MMC- und MS Pro-Speicherkarten. Lieferumfang Digitaler Fotorahmen Fernbedienung... - Seite 21 Vorderseite Rückseite 1. Bildschirm 5. Aufsteller 2. Zierrahmen 6. Rahmenfreigabetaste 3. Empfänger der Fernbedienung 7. Esc-Taste 4. Äußerer Rahmen 8. Eingabetaste 9. Lautsprecher 10. Richtungstasten (Aufwärts/Abwärts/Links/Rechts) 11. Betrieb-LED 12. Ein-/Aus- und LED-Schalter Unterseite 13. USB-Port 14. Netzteilanschluss (Gleichspannung) 15. CF-Kartensteckplatz 16.
-
Seite 22: Nach Dem Einschalten
Nach dem Einschalten Achten Sie vor dem Einschalten darauf, dass das Netzteil korrekt an den Fotorahmen angeschlossen wurde. Nach dem Einschalten werden die unter Start-Einstellungen gewählten Inhalte angezeigt. Sie können auswählen, ob nach dem Einschalten ein Kalender, Bilder, Musik, Videos oder eine Dateiliste angezeigt werden. Die Werksvorgabe lautet „Bild“. - Seite 23 Abbildung 6.2...
- Seite 24 Funktionen Ihres digitalen Fotorahmens Auf den folgenden Seiten werden die verschiedenen Funktionen und Menüs des Fotorahmens vorgestellt. Wenn Sie eine Speicherkarte, USB- oder interner Speicher wählen und die Eingabetaste drücken, wird der Funktionsauswahl-Bildschirm angezeigt. (1) Bild (2) Musik (3) Video (4) Dateimanager (5) Einstellungen Mit den Richtungstasten, der Eingabe- und der Esc-Taste können Sie sich durch...
- Seite 25 Einstellungen Nun sollten Sie sich mit den möglichen Einstellungen vertraut machen. Wählen Sie den Menüpunkt „Einstellungen“ und bestätigen Sie Ihre Auswahl mit der Eingabetaste. Das folgende Fenster wird eingeblendet, die nachstehend aufgeführten Optionen werden angezeigt. Wählen Sie den Menüpunkt „Einstellungen“ mit der Linkstaste aus, drücken Sie dann die Eingabetaste zur Bestätigung.
-
Seite 26: Verwenden Eigener Alarmtöne
Unter „Bildwiedergabemodus“ können Sie unter 13 Effekten für Ihre Diaschau auswählen. : Uhrzeiteinstellung: Mit den Links-/Rechtstasten springen Sie zu den einzelnen Einstellungen, mit den Aufwärts-/Abwärtstasten stellen Sie die Ziffern ein. : Alarmeinstellungen: Ihr Fotorahmen bietet Ihnen drei Signaltöne. Mit diesen Signaltönen können Sie sich „Einmal“ oder „Täglich“ erinnern lassen. - Seite 27 Bild-Menü Wenn Sie ein Bild auswählen und die Eingabetaste drücken, wird eine Übersicht über die vorhandenen Bilder angezeigt. Anschließend können Sie mit den Richtungstasten das Bild auswählen, mit dem die Diaschau beginnen soll. Zum Starten drücken Sie die Eingabetaste. Während der Bildanzeige können Sie mit den Links-/Rechtstasten zum vorherigen und zum nächsten Bild springen.
- Seite 28 Die nachstehende Abbildung 6.7 zeigt Ihnen die Funktionen der Bildsteuerungsleiste. Zoom Drehen Rückwärts Status Stopp Dateiinfo zeigen Bildauflösung Wiedergabe/Pause Vorwärts 3 x 3-Ansicht Abbildung 6.7 Mit der Stopp-Schaltfläche der Steuerungsleiste gelangen Sie wieder zur Funktionsauswahl zurück. Wenn Sie bei der Bildanzeige die Esc-Taste drücken, werden 9 (3 x 3) Miniaturansichten der Bilder angezeigt.
- Seite 29 Musik-Menü Mit dem nächsten Symbol können Sie die Musikwiedergabe steuern. Hierbei können Sie sich Ihre Lieblingsmusik über einen Media Player anhören. Wählen Sie das Symbol mit den Richtungstasten aus, bestätigen Sie Ihre Auswahl mit der Eingabetaste. Der folgende Bildschirm wird angezeigt. Das System sucht nach Musikdateien auf dem angeschlossenen Speichermedium und spielt diese automatisch ab.
- Seite 30 Aufwärtstaste noch einmal betätigen. Mit der Aufwärtstaste öffnen Sie die Lautstärkeeinstellung (Abbildung 6.10). Mit den Links-/Rechtstasten stellen Sie die gewünschte Lautstärke ein, mit der Esc-Taste schließen Sie das Menü. Abbildung 6.10 Mit der Esc-Taste oder der Stopp-Taste gelangen Sie wieder zur Funktionsauswahl zurück.
- Seite 31 Video-Menü In dieses Menü gelangen Sie, wenn Sie das Videosymbol auswählen und die Auswahl mit der Eingabetaste bestätigen. Das System sucht nach Videodateien auf dem angeschlossenen Speichermedium und spielt diese automatisch ab. Bei laufender Videowiedergabe können Sie mit der Aufwärtstaste das Lautstärke-Menü...
- Seite 32 Dateimanager Der vorletzte Menüpunkt ist der Dateimanager. Mit der Rechtstaste wählen Sie das gewünschte Speichermedium, anschließend drücken Sie die Eingabetaste oder die Rechtstaste zum Anzeigen der jeweiligen Inhalte (Abbildung 6.14). Eine Vorschau von Bilddateien wird auf der rechten Seite angezeigt. Abbildung 6.14 In der Dateiliste können Sie Dateien löschen und kopieren.
- Seite 33 Dateien auswählen: Wählen Sie die gewünschte Datei mit den Links-/Rechtstasten aus. Drücken Sie die Rechtstaste: Links neben dem Dateinamen wird das Auswahlsymbol „ “ angezeigt (Abbildung 6.15). Falls Sie die Auswahl wieder aufheben möchten, drücken Sie die Rechtstaste noch einmal. Sie können auch mehrere Dateien auf einmal auswählen.
- Seite 34 Abbildung 6.17 Abbildung 6.18 Datei kopieren: Nachdem Sie die gewünschte Datei ausgewählt haben, wechseln Sie zum Zielordner und öffnen das Dateimanager-Menü mit der Eingabetaste. Anschließend blenden Sie das Funktionsmenü ein, indem Sie die Eingabetaste länger gedrückt halten. Wählen Sie nun das Symbol mit den Aufwärts-/Abwärtstasten aus.
- Seite 35 Fehlerbehebung 1. Diashow starten/ausschalten Schalten Sie das Gerät auf der Rückseite über die Taste POWER ein. Standardmäßig wird beim Start des Geräts die Diashow mit einer Hintergrundmusik (MP3-Datei) abgespielt (Standardstarteinstellung). Die Diashow lässt sich über die Funktion PAUSE in der Bildsteuerleiste ausschalten.
- Seite 36 Technische Daten Modellcode Monet - 8” TFT LCD, 158 x 99,36 mm LC-Display Da Vinci - 10” TFT LCD, 200 x 133 mm Picasso II - 7" TFT LCD, 137 x 91 mm LC-Display Auflösung RGB, 800 x 480 16:9...
-
Seite 37: Avant-Propos
Avant-propos Merci beaucoup pour l'achat ce de produit. Nous avons investi beaucoup de temps et d'efforts dans son développement afin de vous assurer des années d'utilisation sans problème pour votre cadre photo numérique. Avis de Sécurité 1. Ne faites pas tomber, ne perforez pas et ne démontez pas le cadre photo numérique, autrement la garantie serait annulée. -
Seite 38: Contenu De L'emballage
Démarrage Le cadre de photo numérique permet d'afficher photos et films en haute résolution, de lire des MP3 comme musique d'ambiance et de combiner différentes photos en un diaporama. Il prend en charge les clés USB, les cartes CF, SD, MMC et MS Pro. - Seite 39 Panneau avant Panneau arrière 1. Écran 5. Support 2. Décoration 6. Bouton de verrouillage cadre 3. Recepteur de télécommande avant-arrière 4. Cadre avant 7. Bouton ESC 8. Bouton ENTER 9. Haut-parleur 10. Bouton circulaire 11. LED d'alimentation 12. Alimentation/Interrupteur LED Panneau inférieur 13.
- Seite 40 Après pa mise sous tension Avant de mettre sous tension, assurez-vous que l'adaptateur est correctement connecté et que le cadre photo est allumé. Après mise sous tension, l'interface de démarrage affichée à l'écran dépend du réglage "Config. de démarrage". L'utilisateur peut également choisir entre calendrier, image, musique, film et liste de fichiers dans l'interface de démarrage.
- Seite 41 Figure 6.2...
- Seite 42 Fonctions du cadre de photo numérique Les pages suivantes présentent les différentes fonctions et menus du cadre photo. Lorsque vous choisissez une carte mémoire ou une mémoire USB ou mémoire interne et appuyez sur "ENTER", l'écran Sélection fonct s'affiche. (1) Image (2) Musique (3) Film (4) Gestionnaire de fichier...
- Seite 43 La configuration Maintenant vous devez vous familiariser avec les réglages possibles. Sélectionnez l'élément "configuration" et confirmez votre choix avec le bouton ENTER. La fenêtre suivante apparaît alors et vous pouvez y voir les options mentionnées ci-dessous. Dans l'interface de "Sélection fonct." , utilisez le bouton circulaire (Haut & Bas) pour changer de sélection.
- Seite 44 : Configde l’image, comprenant les deux éléments "mode diaporama", "Mode de lecture d'image". Dans l'élément "mode diaporama" l'utilisateur peut régler la vitesse du diaporama, les choix comprennent "Rapide" "Moyen" et "Lent". Dans l'élément "Mode de lecture d'image", sont inclus 13 effets de diaporama. : Réglage horloge: Bouton circulaire (gauche &...
- Seite 45 Le menu image Lorsque vous choisissez Image et appuyez sur "ENTER", vous obtenez une vue d'ensemble des photos disponibles. Avec le bouton circulaire et le bouton ENTER, vous pouvez sélectionner toute photo pour démarrer le diaporama sur la surface totale de l'écran en appuyant sur "ENTER". Pendant l'affichage de l'image, utilisez le bouton circulaire (gauche &...
- Seite 46 Les fonctions de la barre de commande image sont affichées ci-dessous à la figure 6.7. Zoom Rotation Précédent État Stop Affichage infos fichier Résolution image Suivant Lecture/Pause Vue 3×3 Figure 6.7 Appuyez sur la touche STOP de la barre de commande pour l'interface de sélection fonct.
-
Seite 47: Le Menu Musique
Le menu musique L'icône suivante que vous voyez concerne la partie musique. Pour écouter votre musique préférée dans le lecteur de médias. Sélectionnez l'icône avec le bouton circulaire et confirmez votre sélection avec le bouton ENTER. Vous voyez la fenêtre suivante. Le système recherche les fichiers de musique dans la mémoire actuelle de l'appareil et les lit automatiquement. - Seite 48 Appuyez sur le bouton circulaire (bas) pour ouvrir le menu Volume. Le bouton circulaire (Gauche & Droite) sert à régler le volume, appuyez sur le bouton "ESC" pour fermer le menu. Figure 6.10 Appuyez sur le bouton "ESC" ou sur la touche STOP pour revenir à l'interface de sélection fonct.
- Seite 49 Le menu film/vidéo Pour atteindre ce menu, choisissez l'icône film et confirmez avec le bouton ENTER. Le système recherche les fichiers films dans la mémoire actuelle de l'appareil et les lit automatiquement. Pendant la lecture d'un film, appuyez sur le bouton circulaire (haut) pour ouvrir le menu volume (utilisation identique au 1-1).
- Seite 50 Le gestionnaire de fichiers L'avant dernier élément est le gestionnaire de fichiers. Après avoir utilisé le bouton circulaire (droite) pour choisir le périphérique de mémoire, appuyez sur le bouton "ENTER" ou sur le bouton circulaire (droite) pour visualiser le contenu (figure 6.14), les fichiers images peuvent se prévisualiser sur le côté...
- Seite 51 Sélectionner des fichiers: Utilisez le bouton circulaire (haut & bas) pour basculer le curseur sur le fichier cible, appuyez sur le bouton circulaire (droite), à gauche du nom de fichier apparaît le symbole sélectionné " " (figure 6.15), appuyez de nouveau sur le bouton circulaire (droite) pour annuler la sélection.
- Seite 52 Figure 6.17 Figure 6.18 Copier des fichiers : Après avoir sélectionné le fichier, basculez sur le dossier cible, et appuyez sur le bouton "ENTER" pour ouvrir le menu du gestionnaire de fichiers, appuyez longuement sur le bouton "ENTER" pour ouvrir le menu des opérations ;...
-
Seite 53: Dépannage
Dépannage 1. Comment démarrer/arrêter un diaporama ? Appuyez sur le bouton MARCHE/ARRÊT situé à l’arrière. Par défaut, la lecture du diaporama démarre avec un fichier MP3 en musique de fond. Le diaporama peut être arrêté à l’aide de la fonction PAUSE dans la barre de commande de l’image. - Seite 54 Code modèle Monet - 8” TFT LCD, 158 x 99,36 mm Affichage LCD Da Vinci - 10” TFT LCD, 200 x 133 mm Picasso II - 7" TFT LCD, 137 x 91 mm Affichage LCD Résolution 800RGB x 480 Ratio d'aspect...
- Seite 55 Prefazione Congratulazioni per l’acquisto di questo prodotto. Abbiamo investito molto tempo ed energie nel suo sviluppo per far sì che vi godiate per molti anni senza problemi la vostra cornice digitale. Avviso per la sicurezza 1. Non far cadere, forare o smontare la cornice digitale, diversamente la garanzia sarà...
- Seite 56 Preparazione Rende possibile mostrare foto e film ad alta risoluzione, eseguire MP3 come musica di sottofondo e combinare foto diverse in una presentazione. Supporta unità USB flash, schede CF, SD, MMC e MS Pro. Contenuti della confezione Cornice digitale Telecomando Base della cornice Adattatore di corrente CA/CC 1 cavo USB (per il collegamento al PC)
- Seite 57 Pannello frontale Pannello posteriore 1. Schermo 5. Base 2. Cornice decorative 6. Tasto di sblocco cornice 3. Ricevitore del telecomando decorativa frontale 4. Cornice frontale 7. Tasto Esc 8. Tasto Enter 9. Altoparlante 10. Tasto di navigazione 11. LED alimentazione 12.
-
Seite 58: Dopo L'accensione
Dopo l’accensione Prima dell’accensione, assicurasi che l'adattatore di corrente sia collegato correttamente e che la cornice sia accesa. Dopo l’accensione, sullo schermo è mostrata l’interfaccia d’avvio che dipende dall’impostazione eseguita nel menu “Imp. accensione”. Si può anche scegliere di mostrare il calendario, immagini, musica, film o l’elenco file nell’interfaccia d’avvio. - Seite 59 Figura 6.2...
- Seite 60 Funzioni della cornice digitale Nelle pagine che seguono sono presentate le diverse funzioni ed i vari menu della cornice digitale. Quando si sceglie una scheda memoria o una memoria USB o memoria interna e si premere “ENTER”, sarà visualizzata la schermata di selezione funzione. (1) Immagine (2) Musica (3) Film...
- Seite 61 Impostazione È bene familiarizzare con tutte le impostazioni possibili. Selezionare la voce "Impostazione" e confermare premendo il tasto ENTER. Apparirà la seguente finestra e si vedranno le opzioni descritte di seguito. Nell’interfaccia Selezione funzione, usare il tasto di navigazione (su e giù) per spostarsi tra le voci.
- Seite 62 permette di impostare la velocità della presentazione; include le voci: “Veloce” “Medio” e “Lento”. La voce “Modalità riproduz. immagini” include 13 effetti per la presentazione. : Impostazione orologio: Tasto di navigazione (sinistra e destra) per spostarsi tra le voci; tasto di navigazione (su e giù) per cambiare le cifre. : Impostazione sveglia: La cornice digitale ha 3 suonerie predefinite, la configurazione allarme ha due modalità: “Una volta”...
-
Seite 63: Menu Immagine
Menu Immagine Quando si seleziona Immagine e si preme “ENTER”, sarà mostrata una panoramica di tutte le foto disponibili. Con il tasto di navigazione ed ENTER si può selezionare qualsiasi foto, premere “ENTER” per avviare la presentazione delle immagini a schermo intero. Durante la visualizzazione dell’immagine, usare il tasto di navigazione (sinistra e destra) per visualizzare l’immagine precedente o successiva;... - Seite 64 Le funzioni della barra di controllo immagine sono mostrate nella Figura 6.7 che segue. Zoom Rotazione Precedente Stato Stop Mostra info file Risoluzione immagine Esecuzione/Pausa Successivo Visualizza 3x3 Figura 6.7 Premere il tasto STOP della barra di controllo per tornare all’interfaccia selezione funzione;...
- Seite 65 Menu Musica L’icona successiva è relativa alla parte musicale. Permette di ascoltare la musica col lettore multimediale. Selezionare l’icona usando il tasto d navigazione e confermare la selezione usando il tasto ENTER. Si vedrà la finestra che segue. Il sistema cercherà i file musicali nel corrente dispositivo d’archiviazione e la eseguirà...
- Seite 66 premere il tasto “ESC” per chiudere il menu. Figura 6.10 Premere il tasto “ESC” o STOP per tornare all’interfaccia Selezione funzione.
- Seite 67 Menu Film Per accedere a questo menu, scegliere l’icona Film e confermare premendo il tasto ENTER. Il sistema cercherà i file video nel corrente dispositivo d'archiviazione e li eseguirà automaticamente. Durante l’esecuzione del filmato, premere il tasto di navigazione (su) per aprire il menu Volume (le operazioni sono uguali a quelle del punto 1-1).
-
Seite 68: Gestione File
Gestione file La penultima voce è la gestione file. Dopo avere usato il tasto di navigazione (destra) per scegliere il dispositivo d’archiviazione, premere il tasto “ENTER” o il tasto di navigazione(destra) per visualizzate i contenuti (Figura 6.14), i file immagine possono essere visualizzati in anteprima sul lato destro. - Seite 69 Selezione dei file: Usare il tasto di navigazione (su e giù) per spostare il cursore, premere il tasto di navigazione (destra) sulla sinistra del nome apparirà il simbolo di selezione “ ” (Figura 6.15), premere di nuovo il tasto di navigazione (destra) per annullare la selezione.
- Seite 70 Figura 6.17 Figura 6.18 Copia dei file: dopo avere selezionato il file, portarsi alla cartella di destinazione e premere il tasto “ENTER” per aprire il menu di gestione dei file; premere a lungo il tasto “ENTER” per aprire il menu operativo. Premere il tasto di navigazione (su e giù) e portare il cursore sull’icona , i file selezionati saranno copiati nella cartella di destinazione (Figura 6.19).
-
Seite 71: Risoluzione Dei Problemi
Risoluzione dei problemi 1. Come si avvia/arresta una presentazione delle immagini? Attivare il pulsante ALIMENTAZIONE sul retro. Per impostazione predefinita, all'avvio la presentazione delle immagini viene eseguita con MP3 come musica di sfondo. La presentazione delle foto può essere arrestata utilizzando la funzione PAUSA disponibile dalla barra di controllo delle immagini control bar. - Seite 72 Codice modello Monet - 8” TFT LCD, 158 x 99,36 mm Display LCD Da Vinci - 10” TFT LCD, 200 x 133 mm Picasso II - 7" TFT LCD, 137 x 91 mm Display LCD Risoluzione RGB 800 x 480...
-
Seite 73: Aviso De Seguridad
Prólogo Gracias por comprar este producto. Hemos invertido mucho tiempo y esfuerzo en su desarrollo para que pueda disfrutar durante muchos años del marco digital para fotografías sin ningún problema. Aviso de seguridad 1. No deje caer, perfore ni desmonte el marco fotográfico digital; si lo hace, la garantía quedará... -
Seite 74: Procedimientos Iniciales
Procedimientos iniciales Con él puede mostrar películas y fotografías de alta resolución, reproducir archivos MP3 como música de fondo y combinar diferentes fotografías como una presentación de diapositivas. Admite unidades USB flash y tarjetas CF, SD, MMC y MS PRO. Contenido del paquete Marco digital para fotografías Mando a distancia... - Seite 75 Panel frontal Panel posterior 1. Pantalla 5. Pie 2. Marco decorativo 6. Botón para desmontar o 3. Receptores de sensor cambiar el marco 4. Marco frontal 7. Botón Escape (ESC) 8. Botón Aceptar (ENTER) 9. Altavoz 10. Botón de control de desplazamiento 11.
- Seite 76 Después del encendido Antes de poner en marca la unidad, asegúrese de que el adaptador de alimentación está correctamente enchufado y que el marco para fotografías está enchufado. Después de encender la unidad, la interfaz de inicio mostrada en la pantalla responde a la opción definida en el parámetro “Configuración de inicio”.
- Seite 77 Figura 6.2...
- Seite 78 Funciones del marco digital para fotografías En las páginas siguientes se presentan las diferentes funciones y menús del marco para fotografías. Cuando elija una tarjeta de memoria o una memoria USB o memoria interna y presione “ACEPTAR”(ENTER), aparecerá la pantalla Elegir función. (1) Imagen (2) Música (3) Peliculas...
- Seite 79 Configuración Debe familiarizarse con las distintas configuraciones. Seleccione el elemento "CONFIG." y confirme la selección con el botón ACEPTAR. Aparecerá la siguiente ventana y podrá ver las opciones mencionadas a continuación. En la interfaz Elegir función, presione el botón de desplazamiento (izquierda) para seleccionar el elemento Config.
- Seite 80 puede establecer la velocidad de la presentación de diapositivas. Las opciones disponibles son “Rápido” “Medio” y “Lento”. El elemento “Modo reproducción imágenes” incluye 13 efectos de presentación de diapositivas. Configuración del reloj: Use el botón de desplazamiento (izquierda y derecha) para cambiar de campo; use el mismo botón (arriba y abajo) para cambiar los dígitos.
- Seite 81 El menú Imagen Cuando seleccione Imagen y presione "Aceptar" aparecerá información general sobre las fotografías disponibles. Con los botones de desplazamiento y ACEPTAR puede seleccionar cualquier foto para iniciar la presentación de diapositivas a tamaño completo de la pantalla. Cuando esté listo, presione “Aceptar”. Durante la visualización de imágenes, use el botón de desplazamiento (izquierda y derecha) para mostrar la imagen anterior o siguiente.
- Seite 82 Las funciones de la barra de control de imágenes se muestran en la figura 6.7 siguiente. Zoom Girar Anterior Estado Detener Información de archivo Resolución de la imagen Siguiente Vista 3×3 Figura 6.7 Presione el botón DETENER para volver a la interfaz Elegir función. Presione el botón “ESCAPE”...
- Seite 83 El menú Música El icono siguiente que ve corresponde a la parte musical. Para escuchar su música favorita en un reproductor multimedia, seleccione el icono con el botón de desplazamiento y confirme la selección con el botón ACEPTAR. Aparecerá la ventana que se muestra a continuación. El sistema buscará...
- Seite 84 Presione el botón de desplazamiento (abajo) para abrir el menú de volumen (figura 6.10). Use el botón de desplazamiento (izquierda y derecha) para ajustar el volumen. Presione el botón “ESCAPE” para cerrar el menú. Figura 6.10 Presione el botón “ESCAPE” o DETENER de la barra de control para volver a la interfaz Elegir función.
- Seite 85 El menú Filme Para abrir este menú, elija el icono de película y confirme la selección con el botón ACEPTAR. El sistema buscará los archivos de vídeo en el medio de memoria actual y los reproducirá automáticamente. Durante la reproducción de la película, presione el botón de desplazamiento (arriba) para abrir el menú...
- Seite 86 El administrador de archivos El penúltimo elemento es el administrador de archivos. Después de elegir el medio de memoria mediante el botón de desplazamiento (derecha), presione el botón “ACEPTAR”. Vuelva a presionar el botón de desplazamiento (derecha) para ver el contenido (figura 6.14). En el lado derecho se puede obtener una vista previa de los archivos de imagen.
- Seite 87 Seleccionar archivos: Utilice el botón de desplazamiento (arriba y abajo) para colocar el cursor en el archivo de destino. Presione el botón de desplazamiento (derecha); a la izquierda " (figura 6.15). del nombre del archivo aparecerá el símbolo de selección“ Presione el botón de desplazamiento (derecha) de nuevo para cancelar la selección.
- Seite 88 Figura 6.17 Figure 6.18 Copiar archivo: después de seleccionar el archivo, pase a la carpeta de destino y presione el botón “ACEPTAR” para abrir el menú del administrador de archivos. Presione durante unos instantes el botón “ACEPTAR” para abrir el menú de operaciones.
-
Seite 89: Resolución De Problemas
Resolución de problemas 1. ¿Cómo iniciar y detener una presentación de imágenes? Pulse el botón de alimentación situado en la parte posterior. La configuración de inicio predeterminada es la reproducción de la presentación de imágenes con música de fondo en formato MP3. La presentación de fotografías se puede detener mediante la función de pausa de la barra de control de imagen. - Seite 90 Código del modelo Monet - 8” TFT LCD, 158 x 99,36 mm Pantalla LCD Da Vinci - 10” TFT LCD, 200 x 133 mm Picasso II - 7" TFT LCD, 137 x 91 mm Pantalla LCD Resolución 800 x 480 RGB Relación de aspecto...
-
Seite 91: Veiligheidsrichtlijnen
Voorwoord Hartelijk bedankt voor uw aankoop van dit product. Wij hebben bij de ontwikkeling tijd noch inspanningen gespaard zodat u jarenlang probleemloos kunt genieten van uw digitale fotolijst Veiligheidsrichtlijnen 1. Laat de digitale fotolijst niet vallen, prik er geen gaten in of demonteer het apparaat niet, anders vervalt de garantie. -
Seite 92: Aan De Slag
Aan de slag U kunt foto's en films met een hoge resolutie weergeven, MP3 afspelen als stemmingsmuziek en verschillende foto's combineren in een diavoorstelling. De fotolijst ondersteunt USB-flashstation, CF, SD, MMC en MS PRO. Inhoud verpakking Digitale fotolijst Afstandsbediening Lijstvoet Wisselstroom naar gelijkstroomadapter USB-kabel (naar pc) x1 USB-kabel (naar penbesturing) x1... - Seite 93 Voorpaneel Achterpaneel 1. Scherm 5. Voetstuk 2. Decoratieve lijst 6. Lijstontgrendelingsknop 3. Ontvangtoestel van de 7. Esc-knop afstandsbediening 8. Enter-knop 4. Voorkant lijst 9. Luidspreker 10. Cirkelknop 11. Voedings-LED 12. Voeding/LED-schakelaar Onderpaneel 13. USB-poort 14. DC aansluiting 15. CF-kaartsleuf 16. SD/MS Pro/MMC-sleuf...
-
Seite 94: Na Het Inschakelen
Na het inschakelen Controleer voordat u de voeding inschakelt, of de voedingsadapter correct is aangesloten en of de fotolijst is ingeschakeld. Na het inschakelen is de opstartinterface die op het scherm wordt weergegeven, afhankelijk van de instelling "Start instellen". U kunt ook een kalender, foto, muziek, film of bestandslijst selecteren in de opstartinterface. - Seite 95 Figuur 6.2...
- Seite 96 Functies van de digitale fotolijst Op de volgende pagina's worden de verschillende functies en menu's van de fotolijst voorgesteld. Wanneer u een geheugenkaart, USB of intern geheugen kiest en op "ENTER" drukt, wordt het scherm voor de functieselectie weergegeven. (1) Beeld (2) Muziek (3) Film (4) Bestandsbeheer...
- Seite 97 De instelling Vervolgens moet u kennismaken met de mogelijke instellingen. Selecteer het item "Instelling" en bevestig uw keuze door op de knop ENTER te drukken. Het volgende venster verschijnt waarin u de hieronder vermelde opties kunt zien. In de functieselectie-interface gebruikt u de Cirkelknop (omhoog & omlaag) om te schakelen tussen items.
- Seite 98 "Snel", "Gem." of "Traag". In de "fotoweergavemodus" zijn er 13 effecten voor de diavoorstelling voorzien. : Klok instellen: Cirkelknop (links & rechts) om te schakelen, Cirkelknop (omhoog & omlaag) om de cijfers te wijzigen. : Wekker instellen: de fotolijst heeft 3 tonen in het systeem. In de alarminstelling zijn er twee modi: "eenmaal"...
-
Seite 99: Het Menu Beeld
Het menu Beeld Wanneer u Beeld selecteert en op "Enter" drukt, krijgt u een overzicht van de beschikbare foto's. Met de cirkelknop en de ENTER-knop kunt u elke foto selecteren om de diavoorstelling te starten op het complete formaat van het display. Tijdens de weergave kunt u met de cirkelknop (links &... - Seite 100 De functies van de beeldbesturingsbalk worden weergegeven zoals in de onderstaande figuur 6.7. Zoom Draaien Vorige Stop Status Bestandsinfo tonen Beeld- resolutie Afspelen/pauzeren Volgende 3×3 weergeven Figuur 6.7 Druk op de STOP-toets in de besturingsbalk om de interface voor de functieselectie weer te geven.
- Seite 101 Het menu Muziek Het volgende pictogram dat u ziet, is het muziekgedeelte. Om uw favoriete muziek te beluisteren via een mediaspeler. Selecteer het pictogram met de cirkelknop en bevestig uw selectie met de ENTER-knop. U ziet het volgende venster. Het systeem zoekt muziekbestanden in de adtuele geheugenmedia en speelt ze automatisch af.
- Seite 102 Druk op de cirkelknop (omlaag) om het menu Volume te openen (figuur 6.10). Druk op de cirkelknop (omlaag) om het menu Volume te openen. Gebruik de cirkelknop (links en rechts) om het volume te regelen. Druk op knop "ESC" om het menu te sluiten. Figuur 6.10 Druk op de knop "ESC"...
- Seite 103 Het menu Film Om dit menu te openen, selecteert u het filmpictogram en bevestigt u met de ENTER-knop. Het systeem zal de videobestanden op de adtueele geheugenmedia zoeken en ze automatisch afspelen. Druk tijdens het afspelen van een film op de cirkelknop (omhoog) om het menu Volume te openen (gebruik zoals 1-1).
- Seite 104 Het bestandsbeheer Het voorlaatste item is het Bestandsbeheer. Nadat u de cirkelknop (rechts) hebt gebruikt om het geheugenmedium te kiezen, drukt op de "ENTER"-knop of de cirkelknop (rechts) om de inhoud te bekijken (figuur 6.14). Een voorbeeld van de fotobestanden wordt rechts weergegeven. Figuur 6.14 U kunt bestanden selecteren in de lijst om ze te verwijderen of te kopiëren.
- Seite 105 Bestanden selecteren: Gebruik de cirkelknop (omhoog & omlaag) om de cursor te verplaatsen naar het doelbestand. Druk op de cirkelknop (rechts) links van de bestandsnaam. Het pictogram “ ” verschijnt (figuur 6.15). Druk opnieuw op de cirkelknop (rechts) om de selectie te annuleren.
- Seite 106 Figuur 6.17 Figuur 6.18 Bestand kopiëren: nadat u een bestand hebt geselecteerd, gaat u naar de doelmap en drukt u op de "ENTER"-knop om het menu Bestandsbeheer te openen. Houd de "ENTER"-knop lang ingedrukt om het bedieningsmenu te openen en druk op de cirkelknop (omhoog &...
-
Seite 107: Problemen Oplossen
Problemen oplossen 1. Zo zet u een fotoweergave aan/uit. Zet de AAN/UIT-knop aan de achterkant uit. Bij de default opstartinstellingen wordt de fotoweergave afgespeeld met MP3 als achtergrondmuziek. U kunt de fotoweergave uitzetten met de PAUZE-functie in de fototaakbalk. Druk tijdens de automatische fotoweergave op de knop ‘ENTER’ om de fototaakbalk weer te geven. - Seite 108 Technische gegevens/ specificaties Modelcode Monet - 8” TFT LCD, 158 x 99,36 mm LCD-scherm Da Vinci - 10” TFT LCD, 200 x 133 mm Picasso II - 7" TFT LCD, 137 x 91 mm LCD-scherm Resolutie 800RGB x 480 Breedte/hoogte-verhouding...
-
Seite 109: Normas De Segurança
Introdução Obrigado por ter comprado este produto. Investimos muito tempo e esforço no seu desenvolvimento para que possa desfrutar da su Quadro digital por muitos anos e sem problemas. Normas de segurança 1. Não deixe ao Quadro digital cair e não a fure ou desmonte; caso contrário a garantia perde a validade. - Seite 110 Introdução Com este Quadro digital pode ver fotos e filmes de alta resolução, reproduzir ficheiros de música MP3 e ainda combinar várias fotos para as ver como uma apresentação de diapositivos. Ao Quadro digital é compatível com unidades USB flash e com cartões de memória, CF, SD, MMC e MS PRO. Conteúdo da embalagem Quadro digital Telecomando...
- Seite 111 Painel frontal Painel traseiro 1. Ecrã 5. Suporte 2. Quadro decorativa 6. Botão da Quadro 3. Receptores de encomendas 7. Botão Esc 4. Quadro frontal 8. Botão Enter 9. Altofalante 10. Botão de navegação 11. LED de alimentação 12. Botão de alimentação/LED Painel inferior 13.
- Seite 112 Depois de ligar ao quadro digital Antes de ligar ao quadro digital, certifique-se de que o transformador está devidamente ligado e de que ao quadro foi activada. Depois de ligar ao quadro digital, a interface mostrada depende da opção que tenha escolhido na definição “Configurar arranque”.
- Seite 113 Figura 6.2...
- Seite 114 Funções da quadro digital Nas páginas seguintes, iremos apresentar-lhe as várias funções e menus dest quadro digital. Depois de escolher um cartão de memória ou uma unidade USB ou Memória interna, prima “ENTER”. O ecrã Escolher função é apresentado. (1) Imagem (2) Música (3) Filme (4) Gestor de ficheiros...
- Seite 115 O menu Configuração Familiarize-se com as várias definições da su quadro digital. Seleccione a opção “Configurar” e confirme premindo o botão ENTER. A janela seguinte é apresentada e nela poderá ver as opções descritas a seguir. No ecrã Escolher função, utilize o botão de navegação (para a esquerda) para escolher o item “Configurar”.
- Seite 116 da imagem”, existem 13 efeitos de transição que podem ser aplicados à apresentação de diapositivos. : Acertar relógio: Utilize o botão de navegação (para a esquerda e para a direita) para aceder aos vários campos. Utilize o botão de navegação (para cima e para baixo) para alterar os dígitos.
- Seite 117 O menu Imagem Seleccione a opção Imagem e prima o botão “ENTER” para ver as imagens disponíveis. Utilize o botão de navegação e o botão ENTER para seleccionar a foto pretendida e dar início à apresentação de diapositivos em ecrã inteiro premindo novamente o botão “ENTER”.
- Seite 118 As funções existentes na barra de controlo da imagem são mostradas na figura 6.7. Zoom Rodar Anterior Parar Estado Mostrar info do ficheiro Resolução da Reproduzir/Pausa Seguinte imagem Ver 3×3 Figura 6.7 Prima o botão PARAR na barra de controlo para voltar ao ecrã Escolher função; Prima o botão “ESC”...
- Seite 119 O menu Música O ícone seguinte é o ícone da opção Música. Esta função permite-lhe ouvir os seus ficheiros de música favoritos através do Media Player. Utilize o botão de navegação para seleccionar o ícone desta opção e confirme com o botão ENTER.
- Seite 120 novamente a barra de controlo. Prima o botão de navegação (para baixo) para aceder ao menu Volume (Figura 6.10). Prima o botão de navegação (para baixo) para aceder ao menu Volume (Volume). Utilize o botão de navegação (para a esquerda e para a direita) para ajustar o volume.
- Seite 121 Filme O menu Para aceder a este menu escolha o ícone respectivo e confirme premindo o botão ENTER. O sistema irá procurar os ficheiros de vídeo guardados na memória e reproduzi-los automaticamente. Durante a reprodução dos ficheiros de vídeo, prima o botão de navegação (para cima) para aceder ao menu Volume (O procedimento a seguir é...
- Seite 122 Gestor de ficheiros O menu O penúltimo item é o Gestor de ficheiros. Utilize o botão de navegação (para a direita) para escolher o tipo de memória e depois prima o botão “ENTER” ou utilize o botão de navegação (para a direita) para ver o conteúdo da mesma (Figura 6.14).
- Seite 123 Na lista de ficheiros, pode seleccionar ficheiros para eliminar ou copiar. Para seleccionar ficheiros: Utilize o botão de navegação (para cima e para baixo) para deslocar o cursor para o ficheiro pretendido. Prima o botão de navegação (para a direita), à esquerda do nome do ficheiro verá...
- Seite 124 Figura 6.17 Figura 6.18 Copiar ficheiros: Depois de ter seleccionado o ficheiro pretendido, escolha a pasta de destino e prima o botão “ENTER” para abrir o menu Gestor de ficheiros. Prima demoradamente o botão “ENTER” para aceder ao menu e prima o botão de navegação (para cima e para baixo) para deslocar o cursor para o ícone ficheiro seleccionado é...
-
Seite 125: Resolução De Problemas
Resolução de Problemas 1. Como iniciar/parar uma exibição de imagens? Ligue o botão ALIMENTAÇÃO que se encontra de lado na parte de trás. A configuração pré-definida de arranque é a de reproduzir a exibição de imagens com música de fundo MP3. A exibição de fotos pode ser parada usando a função PAUSA na barra de controlo da imagem. - Seite 126 Código do modelo Monet - 8” TFT LCD, 158 x 99,36 mm Ecrã LCD Da Vinci - 10” TFT LCD, 200 x 133 mm Picasso II - 7" TFT LCD, 137 x 91 mm Ecrã LCD Resolução 800RGB x 480 16:9 Relação de aspecto...
-
Seite 127: Środowisko Naturalne
Wstęp Dziękujemy za zakupienie tego produktu. Poświęciliśmy wiele czasu i wysiłku w opracowanie ramki do zdjęć cyfrowych, która może służyć bezawaryjnie przez wiele lat. Uwaga dotycząca bezpieczeństwa 1. Nie należy upuszczać, nakłuwać lub rozbierać ramki do zdjęć cyfrowych, w przeciwnym razie nastąpi unieważnienie gwarancji. 2. -
Seite 128: Zawartość Opakowania
Wprowadzenie Ramka umożliwia pokazywanie wysokiej rozdzielczości zdjęć i filmów, odtwarzanie MP3 jako nastrojowej muzyki oraz łączenia różnych zdjęć w formie pokazu slajdów. Urządzenie obsługuje napęd USB flash, CF, SD, MMC, MS i MS PRO. Zawartość opakowania Ramka do zdjęć cyfrowych Pilot Podstawka ramki Adapter przełączania prąd zmienny - prąd stały... - Seite 129 Panel przedni Panel tylny 1. Ekran 5. Podstawa 2. Ramka ozdobna 6. Przycisk odblokowania ramki 3. Odbiornik Pilota przedniej 4. Ramka przednia 7. Przycisk Esc 8. Przycisk Enter 9. Głośnik 10. Okrągły przycisk 11. Dioda LED zasilania 12. Przełącznik zasilania/LED Panel dolny 13.
- Seite 130 Zawsze włączone Przed włączeniem zasilania, upewnij się, że prawidłowo podłączony adapter jest zasilania oraz, że włączona jest ramka do zdjęć. Interfejs widoczny na ekranie po włączeniu zasilania zależy od ustawień “Ustawienia StartUp”. Po uruchomieniu można wybrać wyświetlanie w interfejsie startowym kalendarz, obraz, muzykę, film, listę plików. Domyślne ustawienie fabryczne to “Obraz”.
- Seite 131 Rysunek 6.2...
- Seite 132 Funkcje ramki do zdjęć cyfrowych Na następujących stronach pokazane są różne funkcje i menu ramki do zdjęć. Po wybraniu karty pamięci lub pamięci USB albo Pamięć wewnętrzny i naciśnięciu “ENTER”, wyświetlony zostanie ekran wyboru funkcji. (1) Obraz (2) Muzyka (3) Film (4) Menedżer plików (5) Ustawienia Okrągły przycisk i przycisk ENTER, umożliwiają...
- Seite 133 Ustawienia Następnie należy poznać możliwości ustawień. Wybierz element "Ustawienia" i potwierdź wybór przyciskiem ENTER. Pojawi się następujące okno z wymienionymi poniżej opcjami. Naciśnij okrągły przycisk w lewo, aby wybrać element „Ustawienia” i naciśnij “ENTER” w celu przejścia do menu ustawień systemu. (rysunek 6.20). Rysunek 6.20 Użyj do działania pokazanych poniżej definicji przycisków w interfejsie Ustawienia.
- Seite 134 “Wolny”. Pozycja “tryb odtwarzania obrazu”, obejmuje 13 efektów pokazu slajdów. : Ustawienie zegara. Przełączanie przyciskiem okrągłym (w lewo i w prawo) pomiędzy elementami; Zmiana wartości przyciskiem okrągłym (w górę i w dół). : Ustawienie alarmu: W ustawieniach alarmu systemu ramki zdjęć znajdują...
-
Seite 135: Menu Obrazu
Menu obrazu Po wybraniu Obraz i naciśnięciu “Enter” pojawi się opis dostępnych zdjęć. Przyciskiem okrągłym i przyciskiem ENTER można wybrać dowolne zdjęcie, aby uruchomić pokaz slajdów w pełnym rozmiarze, poprzez naciśnięcie “Enter”. Podczas wyświetlania obrazu, przycisk okrągły (w lewo i w prawo) umożliwia wyświetlenie poprzedniego lub następnego obrazu;... - Seite 136 Funkcje paska sterowania obrazem, są pokazane poniżej na rysunku 6.7. Zoom Obrót Poprzedni Stan Zatrzymanie Pokaż informacje o pliku Rozdzielczość obrazu Następny Odtwarzaj/pauza Widok 3×3 Rysunek 6.7 Naciśnij przycisk ZATRZYMAJ na pasku sterowania w celu wyboru interfejsu; Naciśnij przycisk “ESC” w menu widoku obrazu, aby powrócić do widoku 9-miniaturek.
- Seite 137 Menu muzyki Następna wyświetlana ikona dotyczy części muzycznej. Słuchanie ulubionych utworów muzycznych w odtwarzaczu multimediów. Wybierz ikonę przyciskiem okrągłym i potwierdź wybór przyciskiem ENTER. Pojawi się następujące okno. System wyszuka pliki z muzyką w aktualnie wykorzystywanej pamięci i automatycznie je odtworzy. Podczas odtwarzania muzyki, do sterownia służy pasek sterowania, funkcje są...
- Seite 138 Naciśnij przycisk okrągły (w dół), aby otworzyć menu Volume (Głośność). Wyreguluj okrągłym przyciskiem głośność (w lewo i w prawo), naciśnij przycisk “ESC”, aby zamknąć menu. Rysunek 6.10 Naciśnij przycisk “ESC” lub naciśnij przycisk ZATRZYMAJ, aby powrócić do interfejsu wyboru funkcji na pasku sterowania.
- Seite 139 Menu filmu Aby wyświetlić to menu wybierz ikonę filmu i potwierdź przyciskiem ENTER. System wyszuka pliki video w aktualnie wykorzystywanej pamięci i odtworzy je automatycznie. Podczas odtwarzania filmu, naciśnij okrągły przycisk (W górę), aby otworzyć menu głośności (Te same czynności co w części 1-1). Naciśnij przycisk “ENTER/ESC”, aby otworzyć/zamknąć...
- Seite 140 Menedżer plików Element przedostatni jest elementem menedżera plików. Po użyciu przycisku okrągłego (w prawo) do wyboru pamięci, naciśnij przycisk “ENTER” lub przycisk okrągły (w prawo) dla uzyskania widoku zawartości (rysunek 6.14), pliki z obrazami są wyświetlane po prawej. Rysunek 6.14 Użytkownik może wybrać...
- Seite 141 Przyciskiem okrągłym (w górę i w dół) przełącz kursor do pliku docelowego, naciśnij przycisk okrągły (w prawo), z lewej strony nazwy pliku pojawi się wybrany symbol ” ” (rysunek 6.15), naciśnij ponownie przycisk okrągły (w prawo), aby anulować wybór. Użytkownik może wybrać wiele plików. (Rysunek 6.16) Rysunek 6.16 Delete (Usuń): Po wybraniu pliku, naciśnij dłużej przycisk “ENTER”, aby otworzyć...
- Seite 142 Rysunek 6.17 Rysunek 6.18 Kopiuj plik : Po wybraniu pliku, przełącz na docelowy folder i naciśnij przycisk “ENTER”, aby otworzyć menu zarządzania plikami, naciśnij długo przycisk “ENTER”, aby otworzyć menu operacji i naciśnij przycisk okrągły (w górę i w dół) w celu przeniesienia kursora do ikony , wybrany plik zostanie skopiowany do foldera docelowego (rysunek 6.19).
-
Seite 143: Rozwiązywanie Problemów
Rozwiązywanie problemów 1. Rozpoczynanie/ wyłączanie pokazu slajdów Naciśinij przycisk włączania zasilania zlokalizowany z tyłu urządzenia. Domyślnym ustawieniem rozruchowym jest uruchamianie pokazu slajdów z wykorzystaniem plików MP3 jako muzyki w tle. Pokaz slajdów można wyłączyć za pomocą funkcji wstrzymania (PAUSE) na pasku sterowania obrazami. - Seite 144 Kod modelu Monet - 8” TFT LCD, 158 x 99,36 mm Wyświetlacz LCD Da Vinci - 10” TFT LCD, 200 x 133 mm Picasso II - 7" TFT LCD, 137 x 91 mm Wyświetlacz LCD Rozdzielczość 800RGB x 480 Współczynnik proporcji...
- Seite 145 前言 非常感謝您惠顧本公司的產品。本公司投入大量的時間和心力進行開發。讓您往後 幾年可以無憂無慮地使用本數位相框。 安全注意事項 本產品為精密儀器,請勿摔砸、碰撞或拆卸本產品,以免造成保固失效。 請保持產品乾燥以避免水氣破壞電子零件。 請勿將產品置於高溫或陽光直接曝曬的場所,否則可能導致它損壞。 請小心使用本產品。避免用力按本產品。 為了安全起見,請勿在暴風雨或打雷時使用本產品。 請使用本公司所提供的附件以避免發生規格不符的情形。 請避免讓幼兒玩耍本產品,以免發生誤食或觸電之危險。 環保注意事項 在本設備的使用壽命終止時,不可將本設備與一般家用電器一起廢 棄,請送到官方的收集中心進行回收。 這樣做有助於保護環境。...
- Seite 146 準備事項 本數位相框可以播放高解析度的相片和影片、播放MP3做為背景音樂,並且將不同 的相片結合成同一張幻燈片。而且它支援USB隨身碟、CF、SD、MMC和MS Pro 記憶卡。 包裝內容 數位相框 遙控器 相框支座 AC 對 DC 電源轉換器 USB 連接線(連接至 PC)x1 USB 連接線(連接至隨身碟)x1 快速使用指南 軟體光碟片 組裝 開始使用本數位相框前,您必須將支座固定,並且將相框隨附的電源轉換器插入相 框和電源插座中。 使用記憶卡 除了現有的內部記憶體外,您可以使用USB Stick等不同的記憶卡。本相框與USB隨 身碟、CF、SD、MMC和MS Pro記憶卡相容。使用記憶卡時,只要將記憶卡插入本 機底部的記憶卡插槽即可。 開啟 受保護...
- Seite 147 前面板 後面板 1. 螢幕 5. 支座 6. 前後相框按鈕 2. Adorning 3. 遙控感應器 7. Esc 鈕 4. 前邊框 8. ENTER 鍵 9. 揚聲器 10. 圓形操控鍵 11. 電源 LED 指示燈 12. 電源/LED 開關 底面板 13. USB 埠 14. DC 電源插孔 15. CF 記憶卡插槽 16.
- Seite 148 開機後 開機後,確定電源轉換器已正確插入電源插座中,而且已開啟相框電源。 開機後,根據「StartUp Set」 (開機設定)在畫面上顯示顯示 Start(開始)介面。 使用者可以在開始介面中選擇行事曆、圖片、音樂影片、檔案清單。 出廠預設值是「Picture」 (圖片) 。選擇「Picture」設定時,相框會自動開始連續播 放記憶卡/USB Stick 或內部記憶體中的圖片。 「StartUp Set」 設定為 「Music」 (音樂) 時,在開機後相框可以自動播放記憶卡/USB Stick 或內部記憶體中的聲音檔。 「StartUp Set」 設定為 「Video」 (影片) 時,在開機後相框可以自動播放記憶卡/USB Stick 或內部記憶體中的影片檔。 「StartUp Set」 設定為 「calendar」 (行事曆) 時,開機畫面將顯示行事曆 (圖 6.1) 。 在行事曆模式中按 ENTER 鍵,然後相框進入記憶卡介面。 (圖 6.2) 圖...
- Seite 149 圖 6.2...
- Seite 150 數位相框功能 下列頁面將呈現相框的各種功能與選單。 選擇記憶卡或 USB 或內部記憶體後,按「ENTER」鍵將顯示功能選擇畫面。 (1) 影像 (2) 音樂 (3) 影片 (4) 檔案 (5) 設定 使用圓形操控鍵(左和右)切換項目,然後按 ENTER 鍵確認選擇。使用 ESC 鈕停 止自動連續播放。...
- Seite 151 設定 接著您應該盡可能熟悉可能的設定。選擇 「Setup」 (設定)項目,然後使用ENTER鍵 確認選擇。 出現下列視窗後,您可以看到以下提到的選 項。 圖 6.3 在功能選擇介面上,往左按圓形操控鍵以選擇 「Setup」 (設定) 項目,然後按 ENTER 鍵進入系統設定選單。 (圖 6.4) 圖 6.4 在「Setup」 (設定)介面上,依照下列的按鍵說明操作按鍵。 圓形操控鍵(上和下) :切換項目或選擇參數。 圓形操控鍵(右)或「ENTER」鍵:按 ENTER 進入所選擇的項目,然後確認設定 結果。 圓形操控鍵 (左) 或 「ESC」 鍵:返回上一層項目/上一張圖片或前進到下一張圖片。 設定圖示如下所示: ------------------------------------------------------------------------------------------------------ :語言設定 :圖片設定:包括「幻燈片模式」和「圖片播放模式」共兩個項目。. 在項 目 「幻燈片模式」 中,使用者可以設定幻燈片的播放速度,速度選項包括 「Fast」 (快)、...
- Seite 152 「Middle」 (中)和「Slow」 (慢) 。 圖片播放模式包括 13 種幻燈片特效。 :時鐘設定:按圓形操控鍵(左和右)可切換項目,按圓形操控鍵(上和下) 可更改數字。 :鬧鈴設定:本相框有 3 種鈴聲。 在鬧鈴設定中,有「一次」和「每天」兩 個模式。 :開機設定:開始介面。使用者可以使用開始介面設定行事曆、圖片、音樂、 影片和圖片+音樂。預設值為圖片。 :影片設定:設定螢幕亮度、對比度和顏色。 :預設設定:回復出廠設定值。 :顯示目前的韌體版本。 使用自設鬧鈴 1. 在電腦中選擇三個預備設為鬧鈴的MP3檔案。將這些檔案重新命名為 RING1.MP3、RING2.MP3以及RING3.MP3。附註:音量較大的檔案會得到較佳的鬧 鈴效果。 使用 USB 傳輸線連結電腦與數位相框,並將上述 MP3 檔案複製到相框的內部 記憶體(非記憶卡)裡。 在「Setup」 (設定)介面的鬧鈴設定功能裡,選擇欲使用的鬧鈴聲。 「1」表示 使用 RING1.MP3…以此類推。 如要調整鬧鈴音量,請到「MUSIC/MP3」 (音樂/MP3)介面播放設為鬧鈴的 MP3 檔案,然後調整音量(與調整音樂音量相同) 。...
- Seite 153 影像選單 選擇影像,然後按「ENTER」 (進入) ,您將可以看到全部的相片。使用圓形操控鍵 和 ENTER 鍵選擇任何相片後按下「ENTER」鍵,接著在顯示幕上以全螢幕的大小 開始連續播放相片。 播放相片時,按圓形操控鍵(左和右)可以顯示上一張或下一張圖片,按圓形操控 鍵(上)可開啟畫面的亮度選單(圖 6.5a) ,按圓形操控鍵(下)可開啟音量選單 (圖 6.5b) ,然後使用圓形操控鍵(左和右)調整參數。按「ENTER」鍵儲存參數, 按「ESC」按鈕則可以關閉選單(不儲存參數) ,如果 5 秒沒有任何操作,選單也 會關閉。 圖 6.5 再按一次 ENTER 鍵可對相片進行不同的設定。 圖 6.6...
- Seite 154 圖片控制列的功能如下圖 6.7 所示。 縮放 旋轉 下一個 停止 狀態 顯示檔案資訊 圖片 解析度 播放/暫停 上一個 3×3 檢視 圖 6.7 在控制列上按下「停止」鍵返回功能選擇介面。在圖片檢視選單上按「ESC」鍵可 返回有 9 個圖片縮圖的畫面。 顯示圖片控制列時,按圓形操控鍵(上和下)以切換音樂控制列和圖片控制列,顯 示圖片時,使用者可以按「ENTER」來播放音樂。 按「ESC」按鈕關閉選單,如 果 10 秒沒有任何操作,選單也會關閉。 上一個 快退 停止 快轉 狀態 時間 檔案資訊 下一個 播放/暫停 播放模式 ID3 標籤 圖 6.8 重複按「ESC」鍵返回「功能選擇」選單也可以停止圖片連續播放和音樂功能。...
- Seite 155 音樂選單 接著您將看到跟音樂有關的圖示。若要聆聽媒體播放器播放您最喜愛的音樂,請使 用圓形操控鍵選擇圖示,然後使用「ENTER」鍵確認您的選擇。 您將看到下列視窗。 系統在目前的記憶設備中搜尋音樂檔案,然後自動播放。播放音樂時,使用控制列 控制操作,功能如圖 6.9 所示。按圓形操控鍵(右)移動至「播放模式」選項,這 個選項中有「標準」 、 「重播單一」和「重播目錄」三個模式,請按「ENTER」鍵選 擇其中一個模式。 快退 上一個 快轉 停止 時間 檔案資訊 狀態 圖 6.9 Press Circle button(Up) to close control bar, press Circle button(Up) or “ENTER” 播放模式 ID3 標籤 播放/暫停 button to open control bar again. 圖...
- Seite 156 圖 6.10 在控制列按「ESC」鍵或「停止」鍵以返回功能選擇介面。...
- Seite 157 影片選單 若要進入此選單,請選擇影片圖示,然後按「ENTER」鍵確認。系統將在目前的記 憶設備中搜尋影片檔案,然後自動播放。播放影片時,按圓形操控鍵(上)開啟音 量選單 (操作與 1-1 相同) 。 按 「ENTER/ESC」 鍵開啟/關閉影片控制列 (圖 6.11) 。 圖 6.11 影片控制列如圖 6.12 所示。啟用控制列時,您可以使用圓形操控鍵(左和右)切換 功能項目。反白 「Function switch」 (功能開關) 項目時,您可以使用圓形操控鍵 (左 和右)切換「subtitle on/off」 (字幕開啟/關閉) 、 「video format information」 (影片 格式資訊)和「play mode」 (播放模式) 。選擇「play mode」 (播放模式)時,您 可以按「ENTER」鍵切換「standard play」 (標準播放) 、 「repeat one」 (重播單一) 與「repeat all」...
- Seite 158 檔案管理員 倒數第二個項目是檔案管理員項目。 圖 6.13 使用圓形操控鍵(右)選擇記憶設備,按「ENTER」鍵或圓形操控鍵(右)以檢 查內容(圖 6.14) ,在右側可以預覽圖片檔。 圖 6.14 您可以在清單中選擇要刪除或複製的檔案。...
- Seite 159 選擇檔案: 使用圓形操控鍵(上和下)將游標移至目標檔案,在檔案名稱左側按下圓形操控鍵 (右)會出現所選擇的符號 (圖 6.15) ,然後再按一次圓形操控鍵(右)可取消 選擇。 使用者可以選擇多個檔案一起操作。 (圖 6.15) 圖 6.15 刪除:選擇檔案後,按住「ENTER」鍵以開啟操作選單(圖 6.16) 。按圓形操控鍵 (上和下)並移動游標至圖示 ,按「ENTER」鍵確認,然後所選擇的檔案將會 刪除(圖 6.17)。按「ENTER」鍵返回檔案管理選單。...
- Seite 160 圖 6.16 圖 6.17 複製檔案:選擇檔案後,移動至目標資料夾,然後按「ENTER」以開啟檔案管理選 單,按住 「ENTER」 鍵可開啟操作選單。按圓形操控鍵 (上和下) 將游標移動至 圖示,所選擇的檔案將會複製到目標資料夾中。如果記憶裝置的容量不足,將會顯 示錯誤資訊,而且無法成功複製。...
- Seite 161 故障排除 1. 如何啟動/關閉圖片連續播放? 開啟本產品背面的「電源」鍵。 預設開機設定連續播放圖片,並以 MP3 做為 背景音樂。 使用圖片控制列中的「PAUSE」 (暫停)功能可以關閉相片連續播放。 在自動連續播放相片期間,按「ENTER」鍵顯示圖片控制列。 再按一次「ENTER」可讓連續播放在某張圖片上停止。 若要變更開機設定,請在 「FUNCTION SELECT」 模式中按 ESC 鍵尋找 SETUP (相關詳細資料,請參閱光碟片中的快速使用指南和電子手冊) 。 2. 如何只顯示一張最喜歡的圖片? 步驟 1:進入「FUNCTION SELECT」 (功能選擇)模式。 步驟 2:使用「左」鍵選擇「FILE」 (檔案) 。按 ENTER 開啟資料夾。 步驟 3:選擇記憶卡來源。 步驟 4:選擇「Pictures」 (圖片)資料夾,然後按 ENTER。 步驟 5:使用「上/下」鍵選擇要播放的圖片,然後按 ENTER。將以全螢幕的形 式播放圖片。...
- Seite 162 系統規格表 型號 Monet - 8” TFT LCD, 158 x 99,36 mm 液晶螢幕 Da Vinci - 10” TFT LCD, 200 x 133 mm Picasso II - 7" TFT LCD, 137 x 91 mm 液晶螢幕 解析度 800RGB x 480 畫面比例 16:9 格式化...
- Seite 163 はじめに 本製品をお買い求めいただきありがとうございます。このデジタルフォトフレームは、何年もトラブ ルなくご使用いただけるよう開発され、多くの時間と努力が注ぎ込まれています。 安全上の注意事項 1. デジタルフォトフレームを落としたり、傷をつけたり、分解したりしないでください。品質保証が 無効になります。 2. 水に接触しないようにし、使用前には濡れた手を拭いてください。 3. フォトフレームは、高温になる場所や直射日光の当たる場所に置かないでください。損傷の 原因となります。 4. フォトフレームは取り扱いにご注意ください。強く押さないようにしてください。 5. 安全のため、暴風雨や雷の際には、フォトフレームを使用しないでください。 6. メーカーが提供したアクセサリ以外は使用しないでください。 フォトフレームはお子様の手の届かない場所に置いてください。 環境 当製品を処分する際には、家庭からのごみと一緒に捨てずに、各自治体 の資源回収場所に出してください。 地球環境を守ることにご協力ください。...
- Seite 164 使い始める 高解像度の写真や映像を表示し、ムード音楽として MP3 を再生し、様々な写真を組み合 わせてスライドショーを楽しむことができます。USB フラッシュドライブ、CF、SD、MMC、MS Proをサポートしています。 中身を確認する デジタルフォトフレーム リモートコントロール フレームスタンド AC/DC スイッチング電源アダプタ USB ケーブル (PC 用) ×1 USB ケーブル (ペンドライブ用) ×1 クイックガイド ソフトウェア CD 組み立て デジタルフォトフレームを使い始める前に、スタンドを取り付け、同梱の電源をフォトフレームに接 続し、コンセントに差し込む必要があります。 メモリーカードを使用する 内蔵メモリー以外に、様々なメモリーカードや USB スティックを使用することができます。このフ ォトフレームは、USB フラッシュドライブ、CF、SD、MMC、MS Pro と互換性があります。メモ リカードをデバイス下部のカードポートに差し込んでください。 書き込み可 ロック...
- Seite 165 フロントパネル リアパネル 1. 画面 5. スタンド 2. 装飾 6. フロントリアフレームボタン 3. リモートセンサー 7. Esc ボタン 4. フロントフレーム 8. Enter ボタン 9. スピーカー 10. サークルボタン 11. 電源 LED 12. 電源/LED スイッチ ボトムパネル 13. USB ポート 14. DC ジャック 15. CF カードポート 16.
- Seite 166 電源を入れた後 電源を入れる前に、電源アダプタが正しく差し込まれ、フォトフレームのスイッチが入っていること を確認してください。 電源を入れた後、[StartUp Set(スタートアップ設定)] の設定に基づき、スタートアップインター フェースが画面に表示されます。ユーザは、スタートインターフェースで、カレンダー、静止画、音 楽、映画、ファイルリストを選ぶことができます。 工場出荷時の設定は、[Picture(静止画)] です。[Picture(静止画)] の設定が選ばれてい る場合、フォトフレームで、メモリーカード /USB スティックまたは内蔵メモリーの写真のスライド ショーが自動的に始まります。 [StartUp Set(スタートアップ設定)] の設定が [Music(音楽)] になっている場合、フォトフレー ムの電源を入れた後に、メモリーカード /USB スティックまたは内蔵メモリーの音声ファイルを自 動的に再生することができます。 [StartUp Set(スタートアップ設定)] の設定が [Video(映像)] になっている場合、フォトフレー ムの電源を入れた後に、選ばれたメモリーカード /USB スティックまたは内蔵メモリーの映像フ ァイルを自動的に再生することができます。 [StartUp Set(スタートアップ設定)] の設定が [calendar(カレンダー)] になっている場合、ス タートアップ画面でカレンダーが表示されます(図 6.1)。カレンダーモードで [ENTER] ボタンを 押すと、フォトフレームにカードインターフェースが表示されます(図...
- Seite 167 図 6.2...
- Seite 168 デジタルフォトフレームの機能 以下のページでは、フォトフレームの様々な機能とメニューを紹介します。 メモリーカード、USB または内蔵メモリーを選び、[ENTER] を押すと、機能選択画面が表示 されます。 (1) 画像 (2) 音楽 (3) 映画 (4) ファイル (5) セットアップ サークルボタン(左右)を使用してアイテム間を移動し、[ENTER] を押して選択したものを確 定します。自動スライドショーを停止するには、[ESC] ボタンを押します。...
- Seite 169 セットアップ 次に、主な設定について説明します。[セットアッ プ] のアイテムを選び、選択したものを [ENTER] ボタンで確定します。 次の画面が表示され、オプションメニューが表示さ れます。 図 6.3 機能選択インターフェースでサークルボタンを左側に押し、[Setup(セットアップ)] のアイテムを 選んでから、[ENTER] ボタンを押すと、システムセットアップメニューが表示されます(図 6.4)。 図 6.4 セットアップインターフェースでは、次のボタンの内容を押して操作します。 サークルボタン(上下): アイテム間を移動するか、パラメータを選びます。 サークルボタン(右)または [ENTER] ボタン: 選ばれたアイテムを表示し、セットアップの結果 を確認します。 サークルボタン(左)または [ESC] ボタン: 1 つ上のレベルのアイテム/1 つ前の写真に戻るか、 次の写真に進みます。 セットアップアイコンは次のとおりです。 ------------------------------------------------------------------------------------------------------ : 言語セットアップ : 静止画セットアップ: [slide show mode(スライドショーモード)]、[picture play...
- Seite 170 mode(静止画再生モード)] の 2 つのアイテムがあります。[slide show mode(スライドショーモ ード)] のアイテムでは、スライドショーの速度を設定することができ、[Fast(速い)]、[Middle(普 通)]、[Slow(遅い)] から選ぶことができます。静止画再生モードには、スライドショーの 13 種 の効果があります。 : 時刻セットアップ: サークルボタン(左右)でアイテム間を移動し、サークルボタン(上 下)で数字を変更します。 : 目覚ましセットアップ: フォトフレームには、システムの 3 つのリングトーンがあります。 目覚ましセットアップには、[once(1 回)] と [every day(毎日)] の 2 つのアイテ ムがあります。 : スタートアップセットアップ: スタートインターフェース。カレンダー、静止画、音楽、映 画、静止画+音楽をスタートインターフェースとしてセットアップすることができます。 既定の設定は静止画です。 : 映像セットアップ: 画面の明るさ、コントラスト、色をセットアップします。 : 既定セットアップ: 工場出荷時のセットアップに戻します。 :...
- Seite 171 画像メニュー 画像を選び [ENTER] を押すと、利用可能な写真が一覧表示されます。サークルボタンと [ENTER] ボタンで写真を選び、[ENTER] を押すと、全画面でスライドショーが始まります。 静止画の表示中にサークルボタン(左右)を押すと、1 つ前の静止画または次の静止画を表示 することができます。サークルボタン(上)を押すと、画面に明るさメニューが表示され(図 6.5a)、 サークルボタン(下)を押すと、音量メニューが表示され(図 6.5b)、サークルボタン(左右)を押し てパラメータを調整することができます。[ENTER] ボタンを押すとパラメータが保存され、 [ESC] ボタンを押すとメニューが終了します(パラメータは保存されません)。5 秒間何の操作も 行われなかった場合にも終了します。 図 6.5 [ENTER] ボタンをもう 1 度押すと、写真の様々な設定を行うことができます。 図 6.6...
- Seite 172 静止画のコントロールバーは次の図 6.7 のとおりです。 ズーム 回転 戻る 停止 ファイル情報表示 ステータス 画像解像度 再生/一時停止 次へ 3×3 表示 図 6.7 コントロールバーで [STOP(停止)] ボタンを押すと、機能選択インターフェースに戻ります。静 止画表示メニューで [ESC] ボタンを押すと、9 分割サムネイルに戻ります。 静止画のコントロールバーが表示されているときにサークルボタン(上下)を押すと、音楽コントロ ールバーと静止画コントロールバーの間で切り替えられ、[ENTER] を押すと静止画の表示中 に音楽が再生されます。[ESC] ボタンを押すとメニューが終了します。10 秒間何の操作も行 われなかった場合にも終了します。 戻る 巻き戻し 停止 ステータス 時間 早送り ファイル情報 次へ 再生/一時停止 再生モード ID3 タグ...
- Seite 173 音楽メニュー 次に表示されているアイコンは、音楽のアイコンです。お気に入りの音楽をメディアプレーヤーで 聴くには、サークルボタンでこのアイコンを選び、[ENTER] ボタンで確定します。 次の画面が表示されます。 システムが、現在のメモリーの中の音楽ファイルを検出し、自動的に再生します。音楽再生中 に、コントロールバーを使用してコントロールを行うことができ、機能は図 6.9 のとおりです。サー クルボタン(右)を押して [play mode(再生モード)] のオプションに移動すると、[standard(標 準)]、[repeat one(1 曲リピート)]、[dir. repeat(フォルダリピート)] の 3 つのモードがあり、 [ENTER] を押してそのうちの 1 つを選びます。サークルボタン(上)を押すとコントロールバーが 終了し、サークルボタン(上)または [ENTER] ボタンを押すともう 1 度コントロールバーが表示 されます。 巻き戻し 戻る 早送り 時間 停止 ファイル情報 ステータス 再生/一時停止 ID3 タグ 再生モード...
- Seite 174 サークルボタン(下)を押すと、音量メニューが表示され、サークルボタン(左右)を押すと音量を 調整することができます。[ESC] ボタンを押すとメニューが終了します。 図 6.10 [ESC] ボタンまたは[STOP(停止)] ボタンを押すと、コントロールバーの機能選択インターフェ ースに戻ります。...
- Seite 175 映画メニュー このメニューを使用するには、映画のアイコンを選び、[ENTER] ボタンで確定します。システム が、現在のメモリーの中の映像ファイルを検出し、自動的に再生します。映画再生中に、サー クルボタン(上)を押して音量メニューを表示することができます(操作方法は 1-1 と同じです)。 [ENTER/ESC] ボタンを押すと、映像コントロールバーを表示/終了することができます(図 6.11)。 図 6.11 映像コントロールバーは図 6.12 のとおりです。コントロールバーが有効になっているときに、サー クルボタン(左右)を使用して機能アイテム間を移動することができます。[Function switch(機 能スイッチ)] アイテムが強調表示されているときに、サークルボタン(左右)を使用して[subtitle on/off(字幕入/切)]、[video format information(映像フォーマット情報)]、[play mode(再 生モード)] 間で切り替えることができます。[play mode(再生モード)] が選ばれているときに [ENTER] を押すと、[standard play(標準再生)]、[repeat one(1 つリピート)]、[repeat all(すべてリピート)] のオプション間で切り替えることができます。 巻き戻し 戻る 時間 早送り ファイル情報表示 停止 ステータス...
- Seite 176 ファイルマネージャー 最後から 2 つ目のアイテムはファイルマネージャーです。 図 6.13 サークルボタン(右)を使用してメモリーを選び、[ENTER] ボタンまたはサークルボタン(右)を押 すと、内容が表示されます(図 6.14)。静止画ファイルは右側にプレビューが表示されます。 図 6.14 リストからファイルを選び、ファイルを削除またはコピーすることができます。...
- Seite 177 ファイルを選ぶ: サークルボタン(上下)を使用してファイルにカーソルを移動し、サークルボタン(右)を押すと、ファ イル名の左側に [ ] が表示され、選択されていることが表されます(図 6.15)。サークルボ タン(右)をもう 1 度押すと、選択がキャンセルされます。 複数のファイルを選ぶこともできます(図 6.15)。 図 6.15 削除: ファイルを選んでから [ENTER] ボタンを押し続けると、操作メニューが表示されます (図 6.16)。サークルボタン(上下)を押してカーソルを のアイコンに移動し、[ENTER] ボ タンを押して確定すると、選ばれたファイルが削除されます(図 6.17)。[ENTER] ボタンを押す と、ファイル管理メニューに戻ります。...
- Seite 178 図 6.16 図 6.17 ファイルのコピー: ファイルを選んでからコピー先のフォルダに移動し [ENTER] ボタンを押すと、 ファイル管理メニューが表示され、[ENTER] ボタンを押し続けると、操作メニューが表示されま す。サークルボタン(上下)をカーソルを アイコンに移動すると、選ばれたファイルがコピー 先のフォルダにコピーされます。メモリーの容量が足りない場合、エラー情報が表示され、操作 はうまくいきません。...
- Seite 179 トラブルシューティング 1. 静止画のスライドショーの開始/終了はどのように行いますか? 裏側の [POWER] ボタンを入にします。既定のスタートアップ設定は、MP3 を BGM と した静止画のスライドショーの再生です。 写真のスライドショーを終了するには、静止画コントロールバーで [PAUSE(一時停止)] 機能を使用します。 写真の自動スライドショー中に [ENTER] ボタンを押すと、静止画コントロールバーが表 示されます。 [ENTER] をもう 1 度押すと、ある静止画でスライドショーが停止します。 スタートアップ設定を変更するには、[ESC] ボタンを押して [FUNCTION SELECT(機 能選択)] モードで [SETUP(セットアップ)] を探します(詳細については、クイックガイドと CD-R の e-マニュアルを参照してください)。 2. お気に入りの静止画を 1 枚だけ表示するにはどうすればよいですか? ステップ 1. [FUNCTION SELECT(機能選択)] モードに進みます。 ステップ...
- Seite 180 仕様 機種番号 Monet - 8” TFT LCD, 158 x 99,36 mm 液晶ディスプレイ Da Vinci - 10” TFT LCD, 200 x 133 mm Picasso II - 7" TFT LCD, 137 x 91 mm 液晶ディスプレイ 解像度 800RGB×480 アスペクト比 16:9 フォーマット JPEG 写真表示...
-
Seite 181: Observações De Segurança
Introdução Muito obrigado pela compra deste produto. Investimos tempo e esforço no seu desenvolvimento para que possa usá-lo sem problemas com sua moldura de fotografia digital. Observações de segurança Não deixe cair, furar ou desmontar a moldura de imagem digital, caso contrário o contrato será... -
Seite 182: Conteúdo Da Embalagem
Iniciar Com este Quadro digital pode ver fotos e filmes de alta resolução, reproduzir ficheiros de música MP3 e ainda combinar várias fotos para as ver como uma apresentação de diapositivos. O moldura de fotografia digital suporta drive USB flash, CF, SD, MMC, MS e MS Pro. Conteúdo da embalagem Moldura de Fotografia Digital Controle remoto... - Seite 183 Painel frontal Painel de trás 1. Tela 5. Suporte 2. Adorno 6. Botão de moldura frontal-de 3. Sensor remoto trás 4. Moldura frontal 7. Botão Esc 8. Botão Enter (Entrar) 9. Alto-falante 10. Botão Circle (Circulo) 11. LED de alimentação 12.
- Seite 184 Depois de ligar Antes de ligar verifique se o adaptador está conectado corretamente e a moldura de fotografia ligada. Depois de ligar a interface Start (Iniciar) mostrada na tela de acordo com a configuração Iniciar configuração. O usuário pode selecionar calendário, música, lista de arquivo na interface de início.
- Seite 185 Figura 6.2...
- Seite 186 Funções da moldura de fotografia digital Nas páginas seguintes as funções e menus diferentes da moldura de fotografia serão apresentadas. Ao selecionar um cartão de memória ou memória interna USB e pressionar “ENTER”. (1) Imagem (2) Música (3) Filme (4) Arquivo (5) Configuração Use oo botão Circle (esquerda &...
- Seite 187 A Configuração A seguir deve conhecer as configurações possíveis. Selecione Item "Setup" (Configuração de item) e confirme sua escolha usando o botão ENTER. A janela seguinte aparecerá agora e pode ver as opções mencionadas abaixo. Figura 6.3 Na interface de seleção da função pressione o botão Circle à esquerda para selecionar o item “Setup”...
- Seite 188 velocidade da apresentação de slide que inclui “rápido”, “médio” e “lento”. No item de modo de reprodução da imagem inclui 13 efeitos da apresentação de slide. : Configuração de relógio: Botão Circle (esquerda & direita) para deslocar-se entre os itens; botão Circle (acima & abaixo) para mudar os dígitos.
- Seite 189 O menu de imagem Ao selecionar Image e pressionar “ENTER”, obterá uma apresentação geral das fotografias disponíveis. Com o botão de círculo e ENTER pode selecionar qualquer fotografia para iniciar a apresentação de slide no tamanho completo da tela ao pressionar “ENTER”.
- Seite 190 As funções da barra de controle da imagem são mostradas conforme abaixo na figura 6.7. Zoom Girar Anterior Parar Info arquivo Status Resolução imagem Reproduzir/Pausar Próximo 3×3 visualização Figura 6,7 Pressione a tecla STOP na barra de controle para retornar para a interface de seleção de função;...
- Seite 191 O menu música o ícone seguinte mostra a parte musical. Para ouvir sua música favorita no reprodutor de música selecione o ícone com o botão de círculo e confirme sua seleção com o botão ENTER. Verá a janela seguinte. Busque sistematicamente arquivos de música no equipamento de memória atual e reproduza-os.
- Seite 192 Figura 6,10 Pressione o botão “ESC” ou a tecla STOP para retornar para a interface de selecção de função na barra de controle.
- Seite 193 O menu filme Para selecionar o ícone de filme e confirmar com o botão ENTER. O sistema buscará os arquivos de vídeo no equipamento de memória atual e reproduze-os automaticamente. Durante a reprodução de filme pressione o botão Circle (acima) par abrir o menu de volume (a mesma operação de 1-1).
- Seite 194 O administrador de arquivo O item antes do último é o administrador de arquivo. Figura 6.13 Depois de usar o botão Circle (direita) para selecionar o equipamento de memória pressione o botão “ENTER” ou Circle (direita) para visualizar o conteúdo (figura 6.14), os arquivos de imagem podem ser visualizados no lado direito.
- Seite 195 Selecione arquivos: Use o botão Circle (acima & abaixo) para deslocar o cursor para o arquivo alvo, pressione o botão Circle (direita) à esquerda do nome de arquivo aparecerá no símbolo selecionado“ ” (figura 6.15),pressione o botão Circle (direita) novamente para cancelar a seleção. O usuário pode escolher múltiplos arquivos para operar.
- Seite 196 Figura 6.16 Figura 6.17 Copiar arquivo: Depois de selecionar o arquivo desloque-se para a pasta alvo e pressione o botão “ENTER” para abrir para o menu de administração de arquivo e pressione o botão “ENTER” por alguns segundos para abrir o menu de operação. Pressione o botão Circle (acima &...
- Seite 197 Solução de problema 1. Como iniciar/desligar a apresentação de slide da imagem? Trocar o botão POWER no lado de trás. A configuração de início padrão é reproduzir a apresentação de slide da imagem com MP3 como música de fundo. A apresentação de slide de fotografia pode ser desligada usando a função PAUSE (Pausa) na barra de controle de imagem.
- Seite 198 Código de modelo Monet - 8” TFT LCD, 158 x 99,36 mm Da Vinci - 10” TFT LCD, 200 x 133 mm Tela LCD Picasso II - 7" TFT LCD, 137 x 91 mm Tela LCD Resolução 800RGB x 480 Relação largura/altura...