Herunterladen Inhalt Inhalt Diese Seite drucken
AIPTEK MONET Kurzanleitung
Vorschau ausblenden Andere Handbücher für MONET:

Werbung

Verfügbare Sprachen
  • DE

Verfügbare Sprachen

  • DEUTSCH, seite 9
---------------------------------------------------------------------
Foreword
Many thanks for buying this product. We have invested much time and effort in its
development in order that you may enjoy many years trouble-free with your digital
photo frame.
Safety Notice
1. Do not drop, puncture or disassemble the digital photo frame, otherwise the
warranty will be voided.
2. Avoid all contact with water and dry hands before using.
3. Do not expose the photo frame to high temperature or leave it in direct sunlight.
Doing so may damage it.
4. Use the photo frame with care. Avoid pressing hard on it.
5. For your own safety, avoid using the photo frame when there is a storm or
lightning.
6. Use only accessories supplied by the manufacturer.
Keep the photo frame out of the reach of infants.
7.
Environment
Do not throw the appliance away with the normal household
waste at the end of its life, but hand it at an official collection
point for recycling.
By doing this you will help to preserve the environment.
To support the green concept, we print only this quick
guide. Please refer to the electronic manual in the
accessory CD for more operational instructions.
Quick-Guide

Werbung

Inhaltsverzeichnis
loading

Inhaltszusammenfassung für AIPTEK MONET

  • Seite 1 Quick-Guide --------------------------------------------------------------------- Foreword Many thanks for buying this product. We have invested much time and effort in its development in order that you may enjoy many years trouble-free with your digital photo frame. Safety Notice 1. Do not drop, puncture or disassemble the digital photo frame, otherwise the warranty will be voided.
  • Seite 2: Getting Started

    Getting Started Check the Package content 1. Digital Photo Frame 2. Frame Stand 3. Remote Control 4. AC to DC switching Power Adapter 5. USB cable to PC *1 6. USB cable to Pen Driver *1 7. Quick Guide 8. Software CD Front Panel Rear Panel 1.
  • Seite 3 Bluetooth devices. 2) After your phone/PDA has displayed all Bluetooth devices on the search result screen, select [Aiptek] (the name of the photo frame). When prompted to enter a code, please key in [0000]. Then a transmission screen will display, indicating the photo is being transmitted.
  • Seite 4 3. The photo frame is not far or blocked from your Bluetooth device. For the list of mobile phones tested and supported by the digital photo frame, please visit www.aiptek.eu or send e-mail to support@aiptek.eu for the latest...
  • Seite 5 Enable Photo Slide Show When Function select screen displayed, select “Image” and press “ENTER”, you will have an overview about the available photos. With the circle button and the ENTER button you can select any photo to start the slideshow on the complete size of the display by pressing “ENTER”.
  • Seite 6 Fast Backward Previous Fast Forward Time File Info Stop Status Next Function Play/ Pause Zoom Advanced function: Please see the user manual in CD. You could visit our website http://www.aiptek.eu to find the latest version of firmware and e-manual for update.
  • Seite 7: Troubleshooting

    Troubleshooting 1. How to start/turn off a picture slideshow? Switch on the POWER button on the rear side. The default start-up setting is to play the picture slideshow with MP3 as background music. The photo slideshow can be turned off by using the PAUSE function in picture control bar.
  • Seite 9: Sicherheitshinweise

    Schnellanleitung --------------------------------------------------------------------- Einleitung Vielen Dank für den Kauf dieses Produktes. Wir haben viel Zeit und Mühe in die Entwicklung gesteckt, damit Sie viele Jahre lang Freude an Ihrem digitalen Fotorahmen haben werden. Sicherheitshinweise Lassen Sie den Fotorahmen nicht fallen, beschädigen und zerlegen Sie das Gerät nicht, andernfalls erlischt die Gewährleistung.
  • Seite 10: Erste Schritte

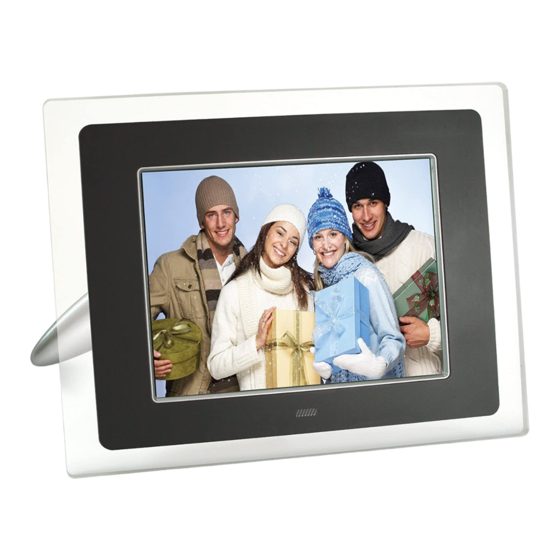
    Erste Schritte Überprüfen Sie den Lieferumfang: 1. Digitaler Fotorahmen 2. Aufsteller 3. Fernbedienung 4. Schaltnetzteil (Wechselstrom Gleichstrom) 5. USB-Kabel zum PC-Anschluss (1 x) 6. USB-Kabel zum Anschluss von USB Stick (1 x) 7. Schnellanleitung 8. Software-CD Vorderseite Rückseite 1. Bildschirm 7.
  • Seite 11 Übertragung per [Bluetooth]. (Detaillierte Hinweise dazu finden Sie in der Anleitung zu Ihrem Mobiltelefon oder PDA.) Ihr Mobiltelefon oder PDA beginnt mit der Suche nach Bluetooth-Geräten in der Nähe. 2) Wenn Ihr Telefon/PDA sämtliche gefundenen Bluetooth-Geräte im Suchergebnisse-Bildschirm anzeigt, wählen Sie [Aiptek] (den Namen des...
  • Seite 12 Bilderrahmens). Geben Sie [0000] ein, wenn Sie nach einem Sicherheitscode gefragt werden. Anschließend wird ein Übertragungsbildschirm dargestellt und zeigt die Übertragung des Fotos an. 3) Nach Abschluss der Übertragung wird das Foto auf dem Bildschirm des Bilderrahmens angezeigt. Fotos per Bluetooth senden - vom PC oder Notebook 1) Sorgen Sie dafür, dass Ihr PC oder Notebook Bluetooth-fähig ist.
  • Seite 13 3. Der Bilderrahmen befindet sich in der Nähe Ihres Bluetooth-Gerätes, zwischen den beiden Geräten befinden sich keine Hindernisse. Eine Liste mit Mobiltelefonen, die erfolgreich auf Zusammenarbeit mit dem digitalen Bilderrahmen getestet wurden, finden Sie unter www.aiptek.eu. Sie können auch eine eMail an support@aiptek.eu schicken;...
  • Seite 14 Rückwärts Schneller Rücklauf Stopp Schneller Vorlauf Status Zeit Dateiinfo Vorwärts Wiedergabe/Pause Wiedergabemodus ID3-Tag Abbildung: Musiksteuerungsleiste Musik starten Im Funktionsauswahl-Bildschirm wählen Sie „Musik“ und drücken die Eingabetaste. Das System sucht nach Musikdateien auf dem angeschlossenen Speichermedium und spielt diese automatisch ab. Mit der Abwärtstaste öffnen Sie das Lautstärke-Menü.
  • Seite 15 Schneller Rücklauf Rückwärts Schneller Vorlauf Zeit Stopp Dateiinfo anzeigen Status Funktionsauswahl Wiedergabe/Paus Zoom Vorwärts Erweiterter Funktionsumfang: Bitte lesen Sie die Bedienungsanleitung auf der CD. Bitte besuchen sie unsere Internetseite http://www.aiptek.eu . Dort finden sie das letzte Firmware Update und das Handbuch.
  • Seite 16: Fehlerbehebung

    Fehlerbehebung 1. Diashow starten/ausschalten Schalten Sie das Gerät auf der Rückseite über die Taste POWER ein. Standardmäßig wird beim Start des Geräts die Diashow mit einer Hintergrundmusik (MP3-Datei) abgespielt (Standardstarteinstellung). Die Diashow lässt sich über die Funktion PAUSE in der Bildsteuerleiste ausschalten.
  • Seite 17: Guide Rapide

    Guide rapide --------------------------------------------------------------------- Avant-propos Merci beaucoup pour l'achat ce de produit. Nous avons investi beaucoup de temps et d'efforts dans son développement afin de vous assurer des années d'utilisation sans problème pour votre cadre photo numérique. Avis de Sécurité 1. Ne faites pas tomber, ne perforez pas et ne démontez pas le cadre photo numérique, autrement la garantie serait annulée.
  • Seite 18 Démarrage Vérifiez le contenu de l'emballage 1. Cadre photo numérique 2. Support du cadre 3. Télécommande 4. Adaptateur d'alimentation AC vers DC 5. Câble USB vers PC *1 6. Câble USB vers clé USB *1 7. Guide rapide 8. CD avec logiciels Panneau avant Panneau arrière 1.
  • Seite 19 Utilisation de la carte mémoire Le cadre photo numérique prend en charge: les cle’s USB, les cartes : CF, SD, MMC, MS et MS Pro. Après mise sous tension Le cadre photo numérique peut effectuer automatiquement un diaporama à partir de la carte mémoire/de la clé USB ou mémoire interne après mise sous tension.
  • Seite 20 Bluetooth alentours. 2) Une fois que votre téléphone/PDA a affiché tous les dispositifs Bluetooth sur l'écran des résultats de la recherche, choisissez [Aiptek] (le nom du cadre photo). Lorsque vous êtes invité à saisir un code, veuillez taper [0000]. Puis un écran de transmission s'affiche, indiquant que la photo est en train d'être transmise.
  • Seite 21 3. Le cadre photo n'est pas trop éloigné, ni obstrué, par rapport à votre dispositif Bluetooth. Pour la liste des téléphones mobiles testés et pris en charge par le cadre photo numérique, veuillez visiter www.aiptek.eu ou envoyer un courriel à support@aiptek.eu pour la dernière mise-à-jour.
  • Seite 22 Rotation Zoom Précedent Stop État Affich Infos fichier Résolution image Suivant Vue 3×3 Figure (barre de commande image) Précédent Retour rapide Stop État Avance rapide Durée Infos fichier Suivant Lecture/Pause Mode lecture Tag ID3 Figure (barre de commande musique) Activer la musique Lorsque l'écran Sélection Fonction s'affiche, sélectionnez Musique et appuyez sur “Entrée”, le système recherche les fichiers musicaux dans la mémoire actuelle de l'appareil et les lit automatiquement.
  • Seite 23 Affichage infos Stop État Commutation fonctions Suivant Lecture/pause Zoom Fonctions avancées: Veuillez lire le manuel d'utilisation sur le CD. Vous pourriez visiter notre site Web www.aiptek.eu pour trouver les dernières versions de logiciels et E-Manuel pour la mise à jour.
  • Seite 24: Dépannage

    Dépannage 1. Comment démarrer/arrêter un diaporama ? Appuyez sur le bouton MARCHE/ARRÊT situé à l’arrière. Par défaut, la lecture du diaporama démarre avec un fichier MP3 en musique de fond. Le diaporama peut être arrêté à l’aide de la fonction PAUSE dans la barre de commande de l’image.
  • Seite 25: Guida Rapida

    Guida rapida --------------------------------------------------------------------- Prefazione Congratulazioni per l’acquisto di questo prodotto. Abbiamo investito molto tempo ed energie nel suo sviluppo per far sì che vi godiate per molti anni senza problemi la vostra cornice digitale. Avviso per la sicurezza 1. Non far cadere, forare o smontare la cornice digitale, diversamente la garanzia sarà...
  • Seite 26 Preparazione Controllare i contenuti della confezione. 1. Cornice digitale 2. Base della cornice 3. Telecomando 4. Adattatore di corrente CA/CC 5. 1 cavo USB per il collegamento al PC 6. 1 cavo USB per il collegamento alla penna (PEN Drive) 7.
  • Seite 27 /PDA). Il cellulare o il PDA inizieranno a cercare i dispositivi Bluetooth nelle vicinanze. Una volta che il cellulare/PDA ha visualizzato tutti i dispositivi Bluetooth sulla schermata dei risultati della ricerca, selezionare [Aiptek] (il nome della...
  • Seite 28 cornice digitale). Quando viene chiesto di inserire un codice, digitare [0000]. Quindi apparirà una schermata di trasmissione, ad indicare il processo in corso. Una volta completata la trasmissione, la foto apparirà sullo schermo della cornice digitale. Uso del Bluetooth per inviare foto da PC o notebook Accertarsi che il PC o il notebook siano abilitati Bluetooth.
  • Seite 29 [Card Select] (Selezione scheda) si illumina). 3. La cornice digitale non sia lontana dal dispositivo Bluetooth o bloccata. Per l'elenco dei telefoni cellulari testati e supportati dalla cornice fotografica digitale, visitare www.aiptek.eu o inviare una e-mail a support@aiptek.eu per gli ultimi aggiornamenti.
  • Seite 30 Rotazione Zoom Precedente Stato Stop Mostra info file Risoluzione mmagine Successivo View 3×3 Figura (barra di controllo immagini) Precedente Indietro veloce Stop Avanti veloce Stato Info file Successivo Esecuzione/Pausa Modalità esecuzione Tag ID3g Figura (barra di controllo musica) Abilitare la musica Quando è...
  • Seite 31 Indietro veloce Precedente Avanti veloce Mostra info file Stop Stato Successivo Cambio funzione Esecuzione/pausa Zoom Funzioni avanzate: Fare riferimento al Manuale dell’utente contenuto nel Potreste visitare il nostro Web site www.aiptek.eu per trovare l'ultima versione dei firmware ed e-manuale per l'aggiornamento.
  • Seite 32: Risoluzione Dei Problemi

    Risoluzione dei problemi 1. Come si avvia/arresta una presentazione delle immagini? Attivare il pulsante ALIMENTAZIONE sul retro. Per impostazione predefinita, all'avvio la presentazione delle immagini viene eseguita con MP3 come musica di sfondo. La presentazione delle foto può essere arrestata utilizzando la funzione PAUSA disponibile dalla barra di controllo delle immagini control bar.
  • Seite 33: Guía Rápida

    Guía rápida --------------------------------------------------------------------- Prólogo Gracias por comprar este producto. Hemos invertido mucho tiempo y esfuerzo en su desarrollo para que pueda disfrutar durante muchos años del marco digital para fotografías sin ningún problema. Aviso de seguridad No deje caer, perfore ni desmonte el marco fotográfico digital; si lo hace, la garantía quedará...
  • Seite 34: Procedimientos Iniciales

    Procedimientos iniciales Compruebe el contenido del paquete 1. Marco digital para fotografías 2. Pie del marco 3. Mando a distancia 4. Adaptador de alimentación conmutado de CA a CC 5. Cable USB al PC x1 6. Cable USB al Pen Drive x1 7.
  • Seite 35 Usar la tarjeta de memoria El marco digital para fotografías admite unidades USB flash y tarjetas CF, SD, MMC y MS PRO. Después del encendido El marco digital para fotografías puede realizar una presentación fácilmente a partir de la tarjeta de memoria o la unidad USB o memoria interna después de encenderse.
  • Seite 36 Bluetooth en la pantalla de resultados de la búsqueda, seleccione [Aiptek] (el nombre del marco fotográfico). Cuando se le pida que inserte un código, teclee [0000]. Aparecerá una pantalla de transmisión indicando que la foto se está transmitiendo. Cuando la transmisión se complete, la fotografía se mostrará en la pantalla del marco fotográfico.
  • Seite 37 3. El marco fotográfico no está alejado del dispositivo Bluetooth o bloqueado. Para obtener una lista de teléfono móviles comprobados y admitidos por el marco digital para fotografías, visite la página Web www.aiptek.eu o envíe un correo electrónico a support@aiptek.eu para obtener las actualizaciones más...
  • Seite 38 Zoom Girar Anterior Información del archivo Detener Estado Resolución de la imagen Siguiente Vista 3×3 Figura Barra de control de imágenes Anterior Retroceso rápido Detener Avance rápido Estado Tiempo Información del archivo Siguiente Modo de Reproducir/Pausa reproducción Etiqueta ID3 Figura Barra de control de música Habilitar la música Cuando aparezca la pantalla Elegir función, seleccione Música y presione “ACEPTAR”(ENTER), el sistema buscará...
  • Seite 39 Información del archivo Estado Siguiente Cambiar función Reproducir/Pausa Zoom Función avanzada: consulte el manual del usuario que encontrará en el Usted podría visitar nuestro Web site www.aiptek.eu para encontrar la versión más última de software y e-manual para la actualización.
  • Seite 40: Resolución De Problemas

    Resolución de problemas 1. ¿Cómo iniciar y detener una presentación de imágenes? Pulse el botón de alimentación situado en la parte posterior. La configuración de inicio predeterminada es la reproducción de la presentación de imágenes con música de fondo en formato MP3. La presentación de fotografías se puede detener mediante la función de pausa de la barra de control de imagen.
  • Seite 41: Veiligheidsrichtlijnen

    Snelstartgids --------------------------------------------------------------------- Voorwoord Hartelijk bedankt voor uw aankoop van dit product. Wij hebben bij de ontwikkeling tijd noch inspanningen gespaard zodat u jarenlang probleemloos kunt genieten van uw digitale fotolijst Veiligheidsrichtlijnen Laat de digitale fotolijst niet vallen, prik er geen gaten in of demonteer het apparaat niet, anders vervalt de garantie.
  • Seite 42: Aan De Slag

    Aan de slag De inhoud van de verpakking controleren 1. Digitale fotolijst 2. Lijstvoet 3. Afstandsbediening 4. Wisselstroom-naar-gelijkstroomadapter 5. USB-kabel naar pc *1 6. USB-kabel naar penstuurprogramma *1 7. Snelstartgids 8. Software-cd Voorpaneel Achterpaneel 1. Scherm 7. Esc-knop 2. Decoratieve lijst 8.
  • Seite 43 PDA start met het zoeken van Bluetooth-apparaten in de buurt. Nadat uw telefoon/PDA alle Bluetooth-apparaat op het scherm met de zoekresultaten heeft weergegeven, selecteert u [Aiptek] (de naam van de fotolijst). Typ [0000] wanneer u wordt gevraagd een code in te voeren. Daarna wordt een...
  • Seite 44 Nadat het verzenden is voltooid, wordt de foto weergegeven op het scherm van de fotolijst. Bluetooth gebruiken om foto's te verzenden - van pc of laptop Controleer of uw pc of laptop Bluetooth ondersteunt. (Hiervoor kan het nodig zijn de Bluetooth-software te installeren en uw Bluetooth-dongle aan te sluiten).
  • Seite 45 Als u een lijst wenst van de mobiele telefoons die werden getest voor en ondersteund worden door de digitale fotolijst, kunt u www.aiptek.eu bezoeken of ons een e-mail sturen op support@aiptek.eu voor de recentste update. Diavoorstelling inschakelen Wanneer het Functieselectiescherm wordt weergegeven, selecteert u Afbeelding en drukt u op "Enter".
  • Seite 46 Snel terugspoelen Vorige Snel vooruitspoelen Tijd Bestandsinfo tonen Stop Status Volgende Functieschakelaar Afspelen/pauzere Zoom Geavanceerde functie: raadpleeg de handleiding op de cd. Uw kunt onze webpagina http://www.aiptek.eu bezoken om de laatste firmware update en de handleiding te vinden.
  • Seite 47: Problemen Oplossen

    Problemen oplossen 1. Zo zet u een fotoweergave aan/uit. Zet de AAN/UIT-knop aan de achterkant uit. Bij de default opstartinstellingen wordt de fotoweergave afgespeeld met MP3 als achtergrondmuziek. U kunt de fotoweergave uitzetten met de PAUZE-functie in de fototaakbalk. Druk tijdens de automatische fotoweergave op de knop ‘ENTER’ om de fototaakbalk weer te geven.
  • Seite 49: Guia De Consulta Rápida

    Guia de consulta rápida --------------------------------------------------------------------- Introdução Obrigado por ter comprado este produto. Investimos muito tempo e esforço no seu desenvolvimento para que possa desfrutar da su quadro digital por muitos anos e sem problemas. Normas de segurança Não deixe ao quadro digital cair e não a fure ou desmonte; caso contrário a garantia perde a validade.
  • Seite 50 Introdução Verifique o conteúdo da embalagem 1. Quadro digital 2. Suporte para Quadro Digital 3. Telecomando 4. Transformador AC/DC 5. Cabo USB para ligação ao PC x1 6. Cabo USB para ligação à Pen Drive x1 7. Guia de consulta rápida 8.
  • Seite 51 Utilização do cartão de memória Ao quadro digital é compatível com unidades USB flash e com cartões de memória, CF, SD, MMC e MS PRO. Depois de ligar ao quadro digital Após a sua activação, este quadro digital pode apresentar automaticamente as suas fotos sob a forma de uma apresentação de diapositivos a partir do cartão de memória/USB stick ou Memória interna.
  • Seite 52 2) Depois do telemóvel/da agenda electrónica ter mostrado todos os dispositivos Bluetooth no ecrã dos resultados de pesquisa, seleccione a opção [Aiptek] (Aiptek) (nome da moldura). Quando lhe for pedido um código, utilize o código [0000]. O ecrã de transmissão é mostrado como sinal de que a foto está...
  • Seite 53 A moldura não está longe do seu dispositivo Bluetooth ou bloqueada. Para obter a lista de telemóveis que foram testados e que são suportados pela moldura digital, visite o site www.aiptek.eu ou envie uma mensagem de correio electrónico para o endereço support@aiptek.eu para obter a actualização mais recente.
  • Seite 54 Zoom Rodar Anterior Parar Estado Mostrar info do ficheiro Imagem Seguinte Resolução Ver 3×3 Figura (barra de controlo das imagens) Anterior Recuar Parar Avançar Estado Duração Info do ficheiro Seguinte Reproduzir/Pausa Modo de reprodução Etiqueta ID3 Figura (barra de controlo da música) Activar a reprodução de música No ecrã...
  • Seite 55 Mostrar info do ficheiro Estado Seguinte Comutador de função Reproduzir/Pausa Zoom Funções avançadas: Consulte o manual do utilizador incluído no CD. Você poderia visitar nosso Web site www.aiptek.eu para encontrar a versão a mais atrasada dos firmware e e-manual para o update.
  • Seite 56: Resolução De Problemas

    Resolução de Problemas 1. Como iniciar/parar uma exibição de imagens? Ligue o botão ALIMENTAÇÃO que se encontra de lado na parte de trás. A configuração pré-definida de arranque é a de reproduzir a exibição de imagens com música de fundo MP3. A exibição de fotos pode ser parada usando a função PAUSA na barra de controlo da imagem.
  • Seite 57: Skrócona Instrukcja

    Skrócona instrukcja --------------------------------------------------------------------- Wstęp Dziękujemy za zakupienie tego produktu. Poświęciliśmy wiele czasu i wysiłku w opracowanie ramki do zdjęć cyfrowych, która może służyć bezawaryjnie przez wiele lat. Uwaga dotycząca bezpieczeństwa 1. Nie należy upuszczać, nakłuwać lub rozbierać ramki do zdjęć cyfrowych, w przeciwnym razie nastąpi unieważnienie gwarancji.
  • Seite 58 Wprowadzenie Sprawdzenie zawartości opakowania 1. Ramka do zdjęć cyfrowych 2. Podstawka ramki 3. Pilot 4. Adapter przełączania prąd zmienny - prąd stały 5. Kabel USB do podłączenia komputera *1 6. Kabel USB do podłączania Pen Drivera *1 7. Skrócona instrukcja 8.
  • Seite 59 Używanie karty pamięci Ramka do zdjęć cyfrowych obsługuje napęd USB flash, CF, SD, MMC, MS i MS PRO. Po włączeniu Ramka do zdjęć cyfrowych może po włączeniu zasilania automatycznie wyświetlić pokaz slajdów z karty pamięci/pamięci USB lub Pamięć wewnętrzny. Po uruchomieniu można także wybrać kalendarz, obraz, muzykę, film, listę plików.
  • Seite 60 Bluetooth, wybierz [Aiptek] (nazwa ramki do zdjęć). Po pojawieniu się polecenia wprowadzenia kodu, wprowadź [0000]. Następnie wyświetlony zostanie ekran transmisji, wskazując transmisję zdjęcia. Po zakończeniu transmisji, zdjęcie zostanie wyświetlone na ekranie ramki do zdjęć. Używanie Bluetooth do wysyłania zdjęć - z komputera PC lub laptopa Upewnij się, że komputer PC lub laptop ma włączone Bluetooth.
  • Seite 61 3. Ramka do zdjęć nie jest zablokowana lub nie znajduje się zbyt daleko od urządzenia Bluetooth. W celu uzyskania listy telefonów komórkowych sprawdzonych i obsługiwanych przez cyfrową ramkę do zdjęć, odwiedź stronę sieci web www.aiptek.eu wyślij wiadomość e-mail do support@aiptek.eu w celu uzyskania najnowszej aktualizacji.
  • Seite 62 Zoom Obrót Poprzedni Zatrzymaj Stan Pokaż informacje o pliku Rozdzielczość obrazu Następny Widok 3×3 Rysunek (pasek sterowania obrazem) Szybkie przewijanie do tyłu Poprzedni Zatrzymaj Stan Czas Szybkie przewijanie do przodu informacje o pliku Następny Odtwarzaj/Pauza Tryb odtwarzania Znacznik ID3 Rysunek (pasek sterowania muzyką) Włączenie muzyki Po wyświetleniu ekranu Wybór funkcji, wybierz Muzyka i naciśnij “...
  • Seite 63 Szybkie przewijanie do przodu Poprzedni Czas Zatrzymaj Pokaż informacje o pliku Stan Następny Przełącznik funkcji Odtwarzaj/pauza Zoom Zaawansowana funkcja: Patrz informacje w podręczniku użytkownika na dysku CD. Żeby znaleźć ostatnie wersję firmware i instrukcja obsługi wy możecie odwiedzać naszo strone internetowe na www.aiptek.eu.
  • Seite 64: Rozwiązywanie Problemów

    Rozwiązywanie problemów 1. Rozpoczynanie/ wyłączanie pokazu slajdów Naciśinij przycisk włączania zasilania zlokalizowany z tyłu urządzenia. Domyślnym ustawieniem rozruchowym jest uruchamianie pokazu slajdów z wykorzystaniem plików MP3 jako muzyki w tle. Pokaz slajdów można wyłączyć za pomocą funkcji wstrzymania (PAUSE) na pasku sterowania obrazami.

Inhaltsverzeichnis