Inhaltsverzeichnis
Werbung
Verfügbare Sprachen
Verfügbare Sprachen
Quicklinks
Werbung
Kapitel
Inhaltsverzeichnis
Fehlerbehebung

Verwandte Anleitungen für AIPTEK HDDV 8000


Inhaltszusammenfassung für AIPTEK HDDV 8000
-
Seite 2: Herzlich Willkommen
Herzlich willkommen Lieber Benutzer, vielen Dank für den Kauf dieses Produkts. In die Entwicklung des Geräts wurde viel Zeit und Mühe investiert, und wir hoffen, es wird Ihnen viele Jahre störungsfreien Betrieb und Freude bescheren. Sicherheitshinweise 1. Lassen Sie die Kamera nicht fallen und beschädigen und zerlegen Sie die Kamera nicht, andernfalls erlischt die Gewährleistung. -
Seite 3: Inhaltsverzeichnis
Inhaltsverzeichnis Herzlich willkommen ............1 Sicherheitshinweise ............1 Inhaltsverzeichnis ............2 Erste Schritte ..............4 Kennenlernen der Kamerateile ............. 4 Einlegen der Batterien ................5 Einlegen einer Speicherkarte (optional) ..........6 Anbringen des Handriemens (optional) ..........8 Halten der Kamera ................9 Öffnen der Anschlussabdeckung ............ -
Seite 4: Inhaltsverzeichnis
Inhaltsverzeichnis Anzeigen/Wiedergeben von Dateien auf Ihrem PC ......38 Dateispeicherort ................... 39 Anhang ................40 Problembehebung ................40 Frequenzeinstellung ................43 Batterieladestandsanzeige ..............43 Speicherkapazitäten ................44 Systemmeldungen ................45 Technische Daten ................. 46 Technische Daten Netzgerät ..............47... -
Seite 5: Erste Schritte
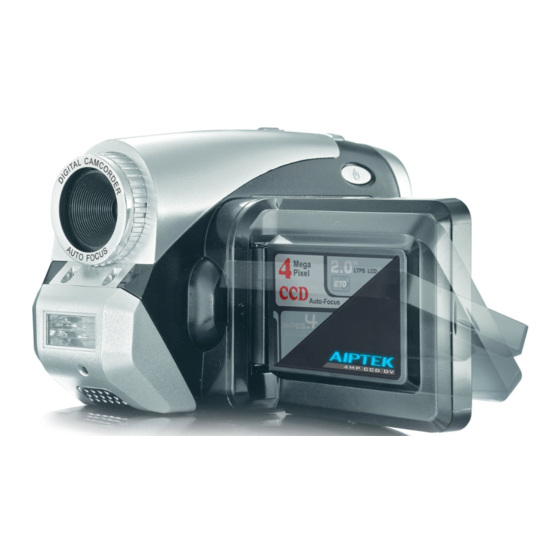
Erste Schritte Kennenlernen der Kamerateile Ein-/Aus-Taste ( Auslösertaste ( Modusauswahlrad Aufnahmetaste ( Hintere LED 4-Wege-Taste ( Eingabetaste ( Menütaste ( Anschlussabdeckung Kartenauswurfstaste ( LCD-Bildschirm Objektiv Blitzlicht Vordere LED Mikrofon Stativanschluss Speicherkarteneinschub Zoomhebel Batteriefreigabehebel Lautsprecher Handriemenhalterung(1) Batteriefachabdeckung Handriemenhalterung (2) TV-Ausgang-/ Kopfhöreranschluss Netzgeräteingang USB-Anschluss... -
Seite 6: Einlegen Der Batterien
Einlegen der Batterien Öffnen Sie die Batteriefachabdeckung. Schieben Sie den Batteriefreigabehebel in die Freigabeposition und ziehen Sie die Batteriefachabdeckung nach unten. Heben Sie die Abdeckung danach an, um sie zu entfernen. Legen Sie die Batterien ein. Legen Sie vier AA-Batterien in das Batteriefach ein. -
Seite 7: Einlegen Einer Speicherkarte (Optional)
Einlegen einer Speicherkarte (optional) Zusätzlich zum eingebauten Flash-Speicher kann Ihre Kamera Daten auf einer Compact-Flash- Karte (CF-Karte) oder einem Microdrive speichern. Um eine Speicherkarte einzulegen, drücken Sie die Karte behutsam wie abgebildet hinein, bis sie das Ende des Einschubs erreicht. Bitte beachten Sie, dass Sie Speicherkarten immer vor dem Einschalten der Kamera einlegen sollten. - Seite 8 Einlegen einer Speicherkarte (Fortsetzung) Um eine Karte zu entfernen, vergewissern Sie sich zunächst, dass die Kamera ausgeschaltet ist. Klappen Sie danach den LCD-Bildschirm auf und drücken sie auf die Kartenauswurfstaste, um die Karte oder das Microdrive auszuwerfen. Entfernen Sie eine Speicherkarte niemals, solange die Kamera eingeschaltet ist.
-
Seite 9: Anbringen Des Handriemens (Optional)
Anbringen des Handriemens (optional) Breiten Sie den Riemen aus. Falten Sie den Handriemen auseinander und breiten Sie ihn wie abgebildet aus. Fädeln Sie den Riemen durch die Öse. Fädeln Sie die Enden des Riemens durch die Ösen an der Kamera. Befestigen Sie anschließend die beiden Enden wie abgebildet aneinander. -
Seite 10: Halten Der Kamera
Halten der Kamera Führen Sie die Hand durch den Handriemen und halten Sie die Kamera wie abgebildet fest. Achten Sie für optimale Ergebnisse beim Aufnehmen von Fotos oder Videos darauf, nicht das Objektiv zu verdecken. Öffnen der Anschlussabdeckung Wenn Sie einen PC, ein TV-Gerät, einen Kopfhörer oder das Netzgerät an die Kamera anschließen möchten, müssen Sie die Anschlussabdeckung öffnen. -
Seite 11: Verwendung Eines Stativs (Optional)
Verwendung eines Stativs (optional) Verwenden Sie ein Stativ, um Kameraerschütterungen zu minimieren und eine optimale Bildqualität zu gewährleisten. In besonderem Maße empfiehlt sich dies bei der Aufnahme von Selbstportraits oder bei Videokonferenzen. LOSE Die Stativabbildung dient lediglich Veranschaulichungszwecken. Das tatsächliche Stativmodell kann von der Abbildung abweichen. -
Seite 12: Grundfunktionen
Grundfunktionen Einschalten der Kamera Halten Sie die Ein-/Aus-Taste ( ) eine Sekunde lang gedrückt, um die Kamera einzuschalten. EIN-/AUS-TASTE Die LED leuchtet auf. Falls die Kamera sich durch Drücken der Ein-/Aus-Taste nicht einschaltet, prüfen Sie bitte, ob: 1. Vier AA-Batterien in die Kamera eingelegt sind. 2. -
Seite 13: Lesen Der Lcd-Anzeigen
Lesen der LCD-Anzeigen Digitalcamcordermodus: Fokusmodus 1.0X Zoom-Verhältnis Anzahl der Aufnahmen Speicherkartensymbol* Batterieladestand Modussymbol Belichtungswert* Videoauflösung Dieses Symbol wird angezeigt, wenn eine Speicherkarte eingelegt ist. Dieses Symbol wird angezeigt, wenn eine nicht standardgemäße Einstellung gewählt ist. Digitalkameramodus: ISO-Empfindlichkeit* Weißabgleich* 1.0X Anzahl der Aufnahmen Zoom-Verhältnis Selbstauslöser* Speicherkartensymbol... -
Seite 14: Wiedergabemodus
Lesen der LCD-Anzeigen (Fortsetzung) Wiedergabemodus: 1.0X 01/88 Aktuelle Aufnahme / Zoom-Verhältnis Aufnahmen gesamt Speicherkartensymbol Dateityp Batterieladestand Modussymbol Sprachaufnahmemodus: Anzahl der Aufnahmen Voice Record Mode Speicherkartensymbol Batterieladestand Modussymbol MP3-Modus: Tastensperrsymbol* Wiedergabe-/ 01/88 Aktueller Titel / Pause-Symbol* Titel gesamt Heaven Titelname 00:05:00 Speicherkartensymbol 2004/12/12 12:00 Wiederholmodus... -
Seite 15: Einstellen Der Sprache
Einstellen der Sprache Wenn Sie die Kamera zum ersten Mal einschalten, werden Meldungen auf dem LCD-Bildschirm unter Umständen nicht in Ihrer Sprache angezeigt. Sie können die LCD-Anzeigesprache wie folgt einstellen: Schalten Sie die Kamera ein und stellen Sie das Modusauswahlrad auf den Modus Einstellungen Drücken Sie die Links- oder Rechtstaste , um das Symbol... -
Seite 16: Aufzeichnen Von Videos
Aufzeichnen von Videos Schalten Sie die Kamera ein und stellen Sie das Modusauswahlrad auf den Modus Digitalcamcorder Drücken Sie die Aufnahmetaste , um mit der Aufzeichnung zu beginnen. Während der Aufzeichnung können Sie den Zoomhebel verwenden, um den Zoom zu erhöhen oder zu verringern. - Seite 17 Aufzeichnen von Videos (Fortsetzung) Für Videoaufnahmen können Sie auch die Autofokusfunktion aktivieren. Gehen Sie wie folgt vor, um diese Funktion zu aktivieren: Schalten Sie die Kamera ein → Stellen Sie das Modusauswahlrad auf den Modus Digitalcamcorder → Drücken Sie die Menütaste →...
-
Seite 18: Aufnehmen Von Fotos
Aufnehmen von Fotos Schalten Sie die Kamera ein und stellen Sie das Modusauswahlrad auf den Modus Digitalkamera Vor der Aufnahme von Fotos können Sie den Zoomhebel verwenden, um den Zoom zu erhöhen oder zu verringern. Passen Sie bei Bedarf den Blitzmodus oder den Belichtungswert an. -
Seite 19: Aufzeichnen Von Audiodateien
Aufzeichnen von Audiodateien Schalten Sie die Kamera ein und stellen Sie das Modusauswahlrad auf den Modus Audioaufnahme Drücken Sie die Aufnahmetaste , um mit der Aufzeichnung zu beginnen. Wenn Sie fertig sind, drücken Sie die Aufnahmetaste erneut, um die Aufzeichnung zu beenden. -
Seite 20: Wiedergeben Ihrer Aufzeichnungen
Wiedergeben Ihrer Aufzeichnungen Schalten Sie die Kamera ein und stellen Sie das Modusauswahlrad auf den Modus Wiedergabe Bedienung im Vollbildmodus: Dateityp Funktion Vorgang Drücken Sie die Links- oder Wechseln zwischen Rechtstaste , (bei nicht fixiertem Dateien Zoomverhältnis). Vergrößern/ Verwenden Sie zum Vergrößern/ Verkleinern (1x Verkleinern den Zoomhebel. -
Seite 21: Bedienung Im Indexmodus
Wiedergeben Ihrer Aufzeichnungen (Fortsetzung) Bedienung im Indexmodus: Funktion Vorgang Wechseln in den Indexmodus Bewegen Sie den Zoomhebel Richtung W. Zurückwechseln in den Bewegen Sie den Zoomhebel Richtung T. Vollbildmodus Wechseln zwischen Dateien. Drücken Sie die Links- oder Rechtstaste Seiten nach oben/unten blättern Drücken Sie die Aufwärts- oder Abwärtstaste Wiedergabe/Anzeige der... -
Seite 22: Wiedergabe Von Mp3-Musik
Wiedergabe von MP3-Musik Schalten Sie die Kamera ein und stellen Sie das Modusauswahlrad auf den Modus Wiedergabe Drücken Sie anschließend die Aufnahmetaste MP3-Bedienung: Funktion Vorgang Umschalten Drücken Sie die Aufnahmetaste (wenn kein Titel zwischen MP3- und wiedergegeben wird). Wiedergabemodus Wechseln zwischen Drücken Sie die Links- oder Rechtstaste (wenn die Dateien. -
Seite 23: Anschließen Der Kamera An Ihr Tv-Gerät
Anschließen der Kamera an Ihr TV-Gerät Schließen Sie die Kamera zur Echtzeitanzeige mit dem mitgelieferten AV-Kabel an ein TV-Gerät an. Sie können Ihre Videos, Fotos und Audiodateien direkt über ein TV-Gerät wiedergeben, um sie so mit Freunden und Familie zu teilen. TV-Gerät AV-Modus Video... -
Seite 24: Erweiterte Einstellungen
Erweiterte Einstellungen Menübedienung Die Menüs bieten einige Optionen, mit denen Sie Feineinstellungen der Funktionen Ihrer Kamera vornehmen können. Die nachstehende Tabelle enthält Einzelheiten über die Menübedienung. Funktion Funktion Aufrufen des Menüs * Drücken Sie die Menütaste Verschieben des Drücken Sie die Links- oder Rechtstaste Markierungsrahmens Aufrufen von Untermenüs /... -
Seite 25: Menüpunkte Im Digitalcamcordermodus
Menüpunkte im Digitalcamcordermodus Schalten Sie die Kamera ein → Stellen Sie das Modusauswahlrad auf den Modus Digitalcamcorder → Drücken Sie die Menütaste Menüpunkt Optionen Beschreibung Diese Option bietet die beste Auflösung und eignet sich für unbewegte Aufnahmeobjekte. 640x480 Mit dieser Option werden Videos aufgezeichnet, die für die Wiedergabe auf TV-Bildschirmen geeignet sind. - Seite 26 Menüpunkte im Digitalcamcordermodus (Fortsetzung) Die Belichtung wird stark erhöht. EV+3 Die Belichtung wird mäßig erhöht. EV+2 Die Belichtung wird leicht erhöht. EV+1 Belichtung Die Belichtung wird nicht geändert. EV+0 Die Belichtung wird leicht verringert. EV-1 Die Belichtung wird mäßig verringert. EV-2 Die Belichtung wird stark verringert.
-
Seite 27: Menüpunkte Im Digitalkameramodus
Menüpunkte im Digitalkameramodus Schalten Sie die Kamera ein → Stellen Sie das Modusauswahlrad auf den Modus Digitalkamera → Drücken Sie die Menütaste Menüpunkt Optionen Beschreibung Mit dieser Option können Sie Ihre Bilder mit Sprachmemos versehen. Nachfolgend einige Anmerkungen zur Verwendung dieser Funktion: 1. - Seite 28 Menüpunkte im Digitalkameramodus (Fortsetzung) Menüpunkt Optionen Beschreibung Nach vollständigem Durchdrücken der Auslösertaste Ein/Aus wartet die Kamera zehn Sekunden mit der Aufnahme eines Bildes. Selbstauslöser Mit dieser Option können Sie Bilder in natürlichen Farben aufnehmen. Normal Diese Option ermöglicht Ihnen das Aufnehmen von Bildern in Sepiatönen, um einen Nostalgieeffekt zu Klassisch erzielen.
- Seite 29 Menüpunkte im Digitalkameramodus (Fortsetzung) Menüpunkt Optionen Beschreibung Die Kamera ermittelt die ISO-Empfindlichkeit automatisch. ISO Auto Die ISO-Empfindlichkeit wird auf 100 eingestellt, was sich für Aufnahmen in Umgebung mit ausreichender Erweitert Beleuchtung eignet. ISO 100 Die ISO-Empfindlichkeit wird auf 200 eingestellt, was sich für Aufnahmen in Umgebung mit mäßiger Beleuchtung eignet.
-
Seite 30: Menüpunkte Im Wiedergabemodus
Menüpunkte im Wiedergabemodus Schalten Sie die Kamera ein → Stellen Sie das Modusauswahlrad auf den Modus Wiedergabe → Drücken Sie die Menütaste Menüpunkt Optionen Beschreibung Durch Aktivieren dieser Option können Sie während der Anzeige von Fotos die entsprechenden Sprachmemos abhören. Die Sprachmemos (falls Ein/Aus vorhanden) werden bei der Anzeige von Fotos automatisch wiedergegeben. -
Seite 31: Menüpunkte Im Mp3-Modus
Menüpunkte im MP3-Modus Schalten Sie die Kamera ein → Stellen Sie das Modusauswahlrad auf den Modus Wiedergabe → Drücken Sie die Aufnahmetaste → Drücken Sie die Menütaste Menüpunkt Optionen Beschreibung Mit dieser Option können Sie den aktuellen Titel Ja/Nein löschen. Einzeln löschen Ja/Nein... -
Seite 32: Menüpunkte Im Einstellungsmodus
Menüpunkte im Einstellungsmodus Schalten Sie die Kamera ein → Stellen Sie das Modusauswahlrad auf den Einstellungsmodus Menüpunkt Optionen Beschreibung Diese Option ermöglicht Ihnen das Einstellen von Datum und Zeit. Zeit Mit dieser Option können Sie die Tastentöne ein- Ein/Aus oder ausschalten. Tastentöne Die Kamera schaltet sich automatisch aus, wenn sie länger als eine Minute inaktiv ist. - Seite 33 Menüpunkte im Einstellungsmodus (Fortsetzung) Menüpunkt Optionen Beschreibung Diese Option eignet sich für Amerika, Taiwan, Japan und Korea. NTSC Diese Option eignet sich für Deutschland, England, TV-System Italien, die Niederlande, China, Japan und Hongkong. Mit dieser Option können Sie die TV- Ein/Aus Ausgangsfunktion ein- oder ausschalten.
-
Seite 34: Kopieren Von Dateien Auf Ihren Pc
Kopieren von Dateien auf Ihren PC Installieren des Treibers auf dem PC Damit Videos auf dem PC wiedergegeben werden können, müssen Sie den Kameratreiber installieren. So installieren Sie die Software: Legen Sie die Treiber-CD ein. Schalten Sie den Computer ein. Legen Sie die mitgelieferte CD in das CD- ROM-Laufwerk ein. - Seite 35 Installieren des Treibers auf dem PC (Fortsetzung) Installieren Sie den Treiber. Der Install Shield Wizard (Installationsassistent) wird aufgerufen und führt die Installation des Programms automatisch durch. Klicken Sie auf Weiter und befolgen Sie die Bildschirmanweisungen, um die Installation abzuschließen. Installieren Sie Codecs. Nachdem die Treiberinstallation abgeschlossen ist, fordert das Programm Sie auf, Windows Media Player Codecs zu installieren.
-
Seite 36: Anschließen Der Kamera An Ihren Pc
Anschließen der Kamera an Ihren PC Schließen Sie das USB-Kabel an den Computer an. Schalten Sie den Computer ein und schließen Sie das mitgelieferte USB-Kabel an den USB-Anschluss Ihres Computers an. Vergewissern Sie sich, dass Kabel und Anschluss ordnungsgemäß ausgerichtet sind. Schließen Sie das USB- Kabel an die Kamera an. -
Seite 37: Kopieren Von Dateien Auf Den Pc
Kopieren von Dateien auf den PC Dieser Schritt unterscheidet sich je nach Betriebssystem: Für Benutzer von Windows XP: Nach dem Anschließen der Kamera an den Computer wird automatisch ein Dialogfenster angezeigt. Bitte wählen Sie den Menüpunkt Open folder to view files using Windows Explorer (Ordner mit dem Windows Explorer öffnen) und klicken Sie auf OK... - Seite 38 Kopieren von Dateien auf den PC (Fortsetzung) Doppelklicken Sie auf den Dateiordner DCIM. Doppelklicken Sie auf den Dateiordner 100MEDIA. Ziehen Sie die Zieldatei nach Eigene Dateien oder in ein sonstiges Zielverzeichnis. Kopieren von Bildern nach “Eigene Dateien”...
-
Seite 39: Anzeigen/Wiedergeben Von Dateien Auf Ihrem Pc
Anzeigen/Wiedergeben von Dateien auf Ihrem PC Doppelklicken Sie auf Eigene Dateien oder einen anderen Ordner, in dem Ihre Dateien gespeichert sind. Doppelklicken Sie auf die gewünschte Datei. Die Datei wird mit einem für diesen Dateityp vorgesehenen Programm geöffnet. -
Seite 40: Dateispeicherort
Dateispeicherort Nach dem Anschließen der Kamera an den Computer wird auf dem Computer ein Wechsellaufwerk angezeigt. Das Wechsellaufwerk steht für das Speichermedium Ihrer Kamera. Auf diesem Wechsellaufwerk finden Sie Ihre Aufzeichnungen. Den Speicherort der Dateien entnehmen Sie bitte der Abbildung rechts. Mediendateien MP3-Dateien... -
Seite 41: Anhang
Anhang Problembehebung Beim Verwenden der Kamera: Problem Ursache Behebung Die Batterien sind leer. Tauschen Sie die Batterien. Die Batterien sind falsch Legen Sie die Batterien richtig ein. eingelegt. Die Kamera lässt sich nicht normal einschalten. Verwenden Sie Alkali- oder Es werden Batterien wiederaufladbare NiMH-Batterien. - Seite 42 Anhang Beim Verwenden der Kamera: Problem Ursache Behebung Das geschieht, wenn Sie eine Speicherkarte einlegen, Ich habe keine Bilder und nachdem einige Fotos oder Sie können auf diese Dateien Videos gelöscht, kann sie Videos bereits aufgenommen zugreifen, nachdem Sie die aber trotzdem nicht auf der wurden.
- Seite 43 Anhang Beim Anschließen der Kamera an einen Computer oder ein TV-Gerät. Problem Ursache Behebung Ich kann nach dem Es sind keine Batterien Anschließen der eingelegt bzw. die Batterien Legen Sie neue Batterien ein. Kamera an den PC kein sind zu schwach. Wechsellaufwerk finden.
-
Seite 44: Frequenzeinstellung
Anhang Frequenzeinstellung Land England Deutschland Frankreich Italien Spanien Niederlande Einstellung 50Hz 50Hz 60Hz 50Hz 50Hz 50Hz Land Portugal Amerika Taiwan China Japan Korea Einstellung 50Hz 60Hz 60Hz 50Hz 50/60Hz 60Hz Hinweis: Die Frequenzeinstellung basiert auf der Frequenz Ihrer örtlichen Stromversorgung. Batterieladestandsanzeige Symbol Beschreibung... -
Seite 45: Speicherkapazitäten
Anhang Speicherkapazitäten Video (Min.) TV-HQ TV-S WEB-HQ WEB-S Speicher 640x480 352x288 320x240 176x144 (10 Bilder/ (30 Bilder/ (30 Bilder/ (30 Bilder/ Sek.) Sek.) Sek.) Sek.) Interner Speicher (11,5 MB) 0.7 ~ 1 0.2 ~ 0.6 0.7 ~ 1 1 ~ 1.5 Speicherkarte (32MB) 2 ~ 2.5 0.5 ~ 1.5... -
Seite 46: Systemmeldungen
Anhang Systemmeldungen Meldung Beschreibung Aufnahme läuft Die Kamera zeichnet eine Datei auf. Keine Dateien zur Wird die Kamera in den Wiedergabemodus geschaltet und ist keine Wiedergabe Datei zur Wiedergabe vorhanden, wird diese Meldung angezeigt. Der Ladestand der Batterien der Kamera ist gering. Sie sollten die Bitte Batterien tauschen Batterien umgehend durch neue ersetzen. -
Seite 47: Technische Daten
Anhang Technische Daten Hauptfunktionen - Digitaler Videocamcorder: Format MPEG4 (.ASF) ● VGA (640 x 480 Pixel) / bis zu 11 Bilder/Sek. ● CIF (352 x 288 Pixel) / bis zu 30 Bilder/Sek. - Digitale Fotokamera: ● 6 MP (2832 x 2128) Pixel ●... -
Seite 48: Technische Daten Netzgerät
Anhang Technische Daten Netzgerät 100 - 240V ~ 50/60 Hz Eingang 0,3A 30VA Ausgang Länge 8,3 (mm) Steckerradius 4,0 (mm) -
Seite 49: Safety Notice
Welcome Dear user, thanks for purchasing this product. Much investment in time and effort has gone into its development, and it is our hope that it will give you many years of trouble-free service. Safety Notice 1. Do not drop, puncture or disassemble the camera;... - Seite 50 Table of Contents Welcome ................1 Safety Notice ..............1 Table of Contents ............2 Getting Started ..............4 Knowing your camera parts ..............4 Loading batteries .................. 5 Inserting a memory card (optional) ............6 Attaching the wrist strap (optional) ............7 How to hold your camera ..............
- Seite 51 Table of Contents Viewing/Playing files on your PC ............36 File location ..................37 Addenda ................38 Troubleshooting ..................38 Flicker Settings ..................41 Battery Life Indicator ................41 Storage Capacity .................. 42 System Message .................. 43 Specifications ..................44 DC-in Adapter Spec.
-
Seite 52: Getting Started
Getting Started Knowing your camera parts Power Button ( Shutter Button ( Mode Dial Record Button ( Back LED 4-Way Buttons ( Enter Button ( Menu Button ( Connector Cover Card Eject Button ( LCD Display Lens Flash Strobe Front LED Microphone Tripod Socket Memory Card Slot... -
Seite 53: Loading Batteries
Loading batteries Open the battery compartment cover. Push the battery release lever to the unlock position, and then pull the battery compartment cover downward and lift the cover up to remove the cover. Install batteries. Place four AA batteries into the compartment. -
Seite 54: Inserting A Memory Card (Optional)
Inserting a memory card (optional) In addition to the built-in flash memory, your camera can store data on a Compact Flash (CF) card or a Microdrive. To insert a memory card, gently push the card as indicated until the card reaches the end of the slot. - Seite 55 Inserting a memory card (continued) To remove the card, first make sure that the power is off. Then open the LCD panel, and push the card eject button to pop out the card or Microdrive. Do not remove the memory card while the camera is powered on. Doing so would cause the camera to shut down abnormally.
-
Seite 56: Attaching The Wrist Strap (Optional)
Attaching the wrist strap (optional) Unfold the strap. Unfold and spread the wrist strap as illustrated. Thread the strap through the hook. Thread the ends of the strap through the hooks on the camera. Then fasten the two ends together as indicated. -
Seite 57: How To Hold Your Camera
How to hold your camera Put your hand through the wrist strap and firmly hold the camera as illustrated. While taking still pictures or recording video clips, avoid blocking the lens to retain the best result. How to open the connector cover When you want to connect the camera to your PC, TV, earphone, or AC/DC adapter, you need to open the connector cover. -
Seite 58: Using The Tripod (Optional)
Using the tripod (optional) Use a tripod to minimize camera movement and ensure optimal image quality, especially while shooting self-portraits or having video conference. The illustration of the tripod is for your reference. The actual model may differ. -
Seite 59: Basic Operations
Basic Operations Turning on your camera Press and hold down the Power ( ) button for 1 second to turn on the camera. The LED will light up. If the camera is not turned on after pressing the power button, please check: 1. -
Seite 60: Reading Lcd Indicators
Reading LCD indicators Digital Camcorder mode: Focus mode 1.0X Zoom ratio Number of recordings Memory card icon* Battery life Mode icon Exposure compensation* Video resolution This icon will appear when a memory card is inserted. This icon will appear when a non-default setting is selected. Digital Camera mode: ISO speed* White balance*... - Seite 61 Reading LCD indicators (continued) Playback mode: 1.0X 01/88 Current / Total recordings Zoom ratio Memory card icon File type Battery life Mode icon Voice Record mode: Number of recordings Voice Record Mode Memory card icon Battery life Mode icon MP3 mode: Button lock icon* Play/Pause icon* 01/88...
-
Seite 62: Setting Language
Setting language When you power on the camera for the first time, the LCD display may not show messages in your local language. You can set the LCD display language using the method below: Turn on the camera and set the Mode Dial to Settings mode. -
Seite 63: Recording A Video Clip
Recording a video clip Turn on the camera and set the Mode Dial to Digital Camcorder mode. Press the Record button to start recording. During recording, you can use the Zoom Lever to zoom in or zoom out the screen. You can also adjust the focus or EV value if necessary. - Seite 64 Recording a video clip (continued) You can enable the auto-focusing function for video recording. To enable the function, follow these procedures: Power on the camera → Set the Mode Dial to Digital Camcorder mode → Press the Menu button → Enter the AF Enable sub-menu →...
-
Seite 65: Taking A Still Picture
Taking a still picture Turn on the camera and set the Mode Dial to Digital Camera mode. Before taking a picture, you can use the Zoom Lever to zoom in or zoom out the screen. Adjust the Flash mode or EV value if necessary. Flash mode: Slow Auto... -
Seite 66: Recording A Voice Clip
Recording a voice clip Turn on the camera and set the Mode Dial to Voice Record mode. Press the Record button to start recording. When you are done, press the Record button again to stop recording. -
Seite 67: Playing Back Your Recordings
Playing back your recordings Turn on the camera and set the Mode Dial to Playback mode. Full-screen mode operations: File type How to... Action Press the Left or Right button Shift between files (when the zoom ratio is not locked). Zoom in/out (1x~4x) Use the zoom lever to zoom in/out. - Seite 68 Playing back your recordings (continued) Index mode operations: How to... Action Switch to index mode Move the zoom lever toward W. Switch back to full-screen mode Move the zoom lever toward T. Shift between files Press the Left or Right button.
-
Seite 69: Playing Mp3 Music
Playing MP3 music Turn on the camera and set the Mode Dial to Playback mode. Then press the Record button. MP3 operations: How to... Action Switch between MP3 Press the Record button (when no track is and Playback modes being played). Press the Left or Right button (when the track Shift between files... -
Seite 70: Connecting The Camera To Your Tv
Connecting the camera to your TV Connect your camera and TV via the accessory AV cable for real-time display. You can display your video clips, still pictures, and audio recordings directly on your TV, sharing them with your friends and family. AV Mode Video Audio... -
Seite 71: Advanced Settings
Advanced Settings Menu operation The menu items provide several options for you to fine-tune your camera functions. The following table gives details on menu operations. How to... Action Bring up the menu * Press the Menu button. Move the highlight box Press the Left or Right button. -
Seite 72: Menu Items In Digital Camcorder Mode
Menu items in Digital Camcorder mode Power-on → Set the Mode Dial to Digital Camcorder mode → Press the Menu button. Item Option Description This option provides the best resolution that is suitable for filming stable subjects. 640x480 This option records films suitable for viewing on TV. The video quality is similar to VCD. - Seite 73 Menu items in Digital Camcorder mode (continued) The exposure is dramatically increased. EV+3 The exposure is moderately increased. EV+2 The exposure is slightly increased. EV+1 Exposure The exposure is not changed. EV+0 The exposure is slightly decreased. EV-1 The exposure is moderately decreased. EV-2 The exposure is dramatically decreased.
-
Seite 74: Menu Items In Digital Camera Mode
Menu items in Digital Camera mode Power-on → Set the Mode Dial to Digital Camera mode → Press the Menu button. Item Option Description This option lets you add voice memos to your pictures. Here are some notes on using this feature: 1. - Seite 75 Menu items in Digital Camera mode (continued) Item Option Description When you fully press the shutter, the camera will On/Off have ten seconds delay before taking a picture. Selftimer This option allows you to take pictures in natural color. Normal This option allows you to take sepia-toned pictures, resembling old photos.
- Seite 76 Menu items in Digital Camera mode (continued) Item Option Description The camera determines the ISO speed automatically. ISO Auto The ISO speed is set to 100, suitable for shooting in environments with ample light. Advanced ISO 100 The ISO speed is set to 200, suitable for shooting in environments with moderate light.
-
Seite 77: Menu Items In Playback Mode
Menu items in Playback mode Power-on → Set the Mode Dial to Playback mode → Press the Menu button. Item Option Description Enabling this function will let you hear voice memos while reviewing still pictures. The voice memo (if any) On/Off will be automatically played when the still picture is Voice... -
Seite 78: Menu Items In Mp3 Mode
Menu items in MP3 mode Power-on → Set the Mode Dial to Playback mode → Press the Record button → Press the Menu button. Item Option Description Yes/No This option lets you delete the current track. Delete Yes/No This option lets you delete all tracks. Delete Repeat playing the current track. -
Seite 79: Menu Items In Settings Mode
Menu items in Settings mode Power-on → Set the Mode Dial to Settings mode Item Option Description This option allows you to set date and time. Time On/Off This option allows you to toggle beep sound on or off. Beep The camera will automatically shut down if staying inactive for over one minute. - Seite 80 Menu items in Settings mode (continued) Item Option Description This option is suitable for America, Taiwan, Japan, and Korea areas. NTSC TV System This option is suitable for Germany, England, Italy, Netherlands, China, Japan, and Hongkong. This option allows you to toggle the TV-out function On/Off on or off.
-
Seite 81: Copying Files To Your Pc
Copying Files to Your PC Installing the driver to your PC You need to install the camera driver to ensure that video clips can be played back on your PC. To install the software: Insert the driver CD. Turn on your computer. Then place the accessory CD into the CD-ROM drive. - Seite 82 Installing the driver to your PC (continued) Install the driver. The Install Shield Wizard will then appear and automatically install the program. Click on Next and follow the on-screen instructions to complete the installation. Install codecs. After the driver installation is completed, the program will prompt you to install Windows Media Player Codecs.
-
Seite 83: Connecting The Camera To Your Pc
Connecting the camera to your PC Connect the USB cable to your computer. Turn on your computer, and then connect the accessory USB cable to the USB port of your computer. Make sure the cable and the port are correctly aligned. -
Seite 84: Copying Files To The Pc
Copying files to the PC This step varies depending on your operation system: For Windows XP users: After the camera is connected to your computer, a dialogue window will appear automatically. Please select the item Open folder to view files using Windows Explorer and click OK. - Seite 85 Copying files to the PC (continued) Double-click on the DCIM file folder. Double-click on the 100MEDIA file folder. Drag the target file into My Documents or the destination folder.
-
Seite 86: Viewing/Playing Files On Your Pc
Viewing/Playing files on your PC Double-click on My Documents or any other folder that stores your files. Double-click on the desired file, and the file will be opened by the program matching the file type. -
Seite 87: File Location
File location After connecting the camera to your computer, a removable disk will appear in your computer. The removable disk actually represents the storage medium of your camera. In the disk you can find all of your recordings. Refer to the figure on the right to see where the files are stored. -
Seite 88: Addenda
Addenda Troubleshooting When using the camera: Problem Cause Solution The batteries are out of Replace the batteries. power. The batteries are incorrectly Re-install the batteries. The camera can not be installed. powered on normally. Use alkaline or rechargeable NiMH Low quality batteries are batteries. - Seite 89 Addenda When using the camera: Problem Cause Solution It happens when you insert I did not delete the pictures a memory card after taking and video clips, but can not You can access those files after a few pictures or video clips. find them in the memory removing the memory card.
- Seite 90 Addenda When connecting the camera to the computer or TV: Problem Cause Solution Cannot find removable Batteries are not installed or disk after connecting the Install new batteries. out of power. camera to a PC. Install Direct X 8.0 or above and Windows Media 9.0 Codecs to solve this problem.
-
Seite 91: Flicker Settings
Addenda Flicker Settings Country England Germany France Italy Spain Netherlands Setting 50Hz 50Hz 60Hz 50Hz 50Hz 50Hz Country Portugal America Taiwan China Japan Korea Setting 50Hz 60Hz 60Hz 50Hz 50/60Hz 60Hz Note: The flicker setting is based on the frequency standard of your local power supply. Battery Life Indicator Icon Description... -
Seite 92: Storage Capacity
Addenda Storage Capacity Video clip (min.) TV-HQ TV-S WEB-HQ WEB-S Memory 640x480 352x288 320x240 176x144 (10frs) (30frs) (30frs) (30frs) Internal memory (11.5MB) 0.7 ~ 1 0.2 ~ 0.6 0.7 ~ 1 1 ~ 1.5 Memory card (32MB) 2 ~ 2.5 0.5 ~ 1.5 2 ~ 2.5 3 ~ 4... -
Seite 93: System Message
Addenda System Message Message Description Recording The camera is recording a file. When the camera is set to Playback mode without any existing file to No Files To Play play, this message will show up. The battery life of the camera is low. You should replace the batteries Please Change Batteries with new ones immediately. -
Seite 94: Specifications
Addenda Specifications Main Functions: - Digital Video Camcorder: MPEG4 (.ASF) format ● VGA (640 x 480 pixels) / up to 11 fps ● CIF (352 x 288 pixels) / up to 30 fps - Digital Still Camera: ● 6 MP (2832 x 2128) pixels ●... - Seite 95 Addenda AC Adapter Spec. 100 - 240V ~ 50/60 Hz Input 0.3A 30VA Output Length 8.3 (mm) Plug radius 4.0 (mm)
-
Seite 96: Avertissement De Sécurité
Bienvenue Cher utilisateur, merci d’avoir acheté ce produit. Beaucoup de temps et d’efforts ont été consacrés à son développement, et nous espérons qu’il vous donnera satisfaction pour de nombreuses années. Avertissement de sécurité 1. Ne faites pas tomber, ne percez pas et ne démontez pas l’appareil ;... - Seite 97 Tables des matières Bienvenue ............... 1 Avertissement de sécurité ..........1 Tables des matières ............2 Prise en main ..............4 Connaître les parties de votre caméra ..........4 Installer les batteries ................5 Insérer une carte mémoire (facultatif) ........... 6 Attacher la dragonne (facultatif) ............
- Seite 98 Tables des matières Visualiser/Lire des fichiers sur votre PC ..........38 Emplacement des fichiers ..............39 Addendum ............... 40 Dépannage ................... 40 Réglages de fréquence ................ 43 Indicateur d’autonomie batterie ............43 Capacité de stockage ................44 Messages système ................45 Spécifications ..................
-
Seite 99: Prise En Main
Prise en main Connaître les parties de votre caméra Bouton d’alimentation ( Déclencheur ( Molette de mode Bouton d’enregistrement ( LED arrière Bouton 4-directions ( Bouton Entrée ( Bouton de menu ( Couvercle des connecteurs Bouton d’éjection de carte ( Affichage LCD Objectif Flash... -
Seite 100: Installer Les Batteries
Installer les batteries Ouvrez le couvercle du logement à batteries. Poussez le levier de libération en position déverrouillée, puis tirez le couvercle du logement à batteries vers le bas et soulevez le couvercle vers le haut pour l’enlever. Installer les batteries. Placez quatre batteries AA dans le logement. -
Seite 101: Insérer Une Carte Mémoire (Facultatif)
Insérer une carte mémoire (facultatif) En supplément de la mémoire flash intégrée, votre caméra peut stocker des données sur une carte Compact Flash (CF) ou un microdrive. Pour insérer une carte mémoire, enfoncez doucement la carte comme indiqué jusqu’à ce que la carte arrive en butée du slot. - Seite 102 Insérer une carte mémoire (suite) Pour enlever la carte, assurez- vous que l’alimentation est coupée. Ouvrez ensuite la panneau LCD, puis poussez sur le bouton d’éjection de la carte pour éjecter la carte ou le Microdrive. N’enlevez par la carte mémoire pendant que l’appareil est allumé. Ceci pourrait éteindre la caméra de façon anormale.
-
Seite 103: Attacher La Dragonne (Facultatif)
Attacher la dragonne (facultatif) Dépliez la dragonne. Dépliez et étendez la dragonne comme illustré. Enfilez la dragonne dans l’œillet. Enfilez les extrémités de la dragonne dans les œillets de la caméra. Attachez ensuite ensemble les deux extrémités comme indiqué. Préparez la dragonne pour son utilisation. -
Seite 104: Comment Tenir Votre Caméra
Comment tenir votre caméra Passez votre main dans la dragonne et tenez fermement votre caméra comme illustré. Lorsque vous prenez des clichés ou que vous enregistrez des clips vidéos, évitez d’obstruer l’objectif afin d’obtenir le meilleur résultat. Comment ouvrir le couvercle des connecteurs Lorsque vous voulez relier votre caméra à... -
Seite 105: Utiliser Un Trépied (Facultatif)
Utiliser un trépied (facultatif) Utilisez un trépied pour minimiser les mouvements de l’appareil et assurer une qualité d’image optimale, surtout lorsque vous faites des autoportraits ou que vous tenez une vidéoconférence. VISSER DEVISSER L’illustration du trépied n’est là qu’à titre indicatif. Le vrai modèle peut être différent. -
Seite 106: Fonctionnement De Base
Fonctionnement de base Allumer votre caméra Maintenez enfoncé le bouton d’alimentation ( ) pendant 1 seconde pour allumer la caméra. ALLUMER/ÉTEINDRE La LED s’allume. Si l’appareil ne s’allume pas après avoir appuyé sur le bouton d’alimentation, veuillez vérifier : 1. Qu’il y a quatre batteries AA installées dans la caméra. 2. -
Seite 107: Lecture De L'indicateur Lcd
Lecture de l’indicateur LCD Mode caméscope numérique : Mode de mise au point 1.0X Taux de zoom Nombre d’enregistrements Icône carte mémoire* Autonomie Icône de mode Compensation d’exposition* Résolution vidéo Cette icône apparaît lorsqu’une carte mémoire est insérée. Cette icône apparaît lorsqu’un réglage autre que par défaut est sélectionné. -
Seite 108: Mode Enregistrement Vocal
Lecture de l’indicateur LCD (suite) Mode de lecture : 1.0X 01/88 Enregistrements Taux de zoom Courant/ Total Icône carte mémoire Type de fichier Autonomie Icône de mode Mode enregistrement vocal : Nombre d’enregistrements Voice Record Mode Icône carte mémoire Icône de Autonomie mode Mode MP3... -
Seite 109: Régler La Langue
Régler la langue Lorsque vous allumez votre caméra pour la première fois, il est possible que l’affichage LCD n’affiche pas les messages dans votre langue locale. Vous pouvez régler la langue de l’affichage LCD à l’aide de la méthode ci-dessous. Allumez la caméra et passez la Molette de mode sur le mode Réglages Appuyez sur le bouton Gauche ou Droite... -
Seite 110: Enregistrer Un Clip Vidéo
Enregistrer un clip vidéo Allumez la caméra et passez la Molette de mode sur le mode Caméscope Appuyez sur le bouton d’enregistrement pour commencer à enregistrer. Pendant l’enregistrement, vous pouvez utiliser le levier de zoom pour zoomer et dézoomer l’écran. Vous Zoomer/dézoomer pouvez également régler la mise au point ou la valeur EV... - Seite 111 Enregistrer un clip vidéo (suite) Vous pouvez activer la fonction autofocus pour l’enregistrement vidéo. Pour activer la fonction, suivez cette procédure : Allumez la caméra → Passez la Molette de mode sur le mode → Appuyez sur le bouton Menu Caméscope numérique →...
-
Seite 112: Prendre Un Cliché
Prendre un cliché Allumez la caméra et passez la Molette de mode sur le mode Appareil photo numérique Avant de prendre une photo, vous pouvez utiliser le levier de zoom pour zoomer et dézoomer l’écran. Réglez la mise au point ou la valeur EV si nécessaire. Mode Flash : Synchro Allumé... -
Seite 113: Enregistrer Un Clip Vocal
Enregistrer un clip vocal Allumez la caméra et passez la Molette de mode sur le mode Enregistrement vocal Appuyez sur le bouton d’enregistrement pour commencer à enregistrer. Une fois terminé, appuyez sur le bouton d’enregistrement de nouveau pour arrêter d’enregistrer. -
Seite 114: Relire Vos Enregistrements
Relire vos enregistrements Allumez la caméra et passez la Molette de mode sur le mode Lecture Utilisation du mode plein écran : Type de Comment... Action fichier Appuyez sur le bouton Gauche ou Basculer entre les Droite (quand le taux de zoom fichiers n’est pas verrouillé). - Seite 115 Relire vos enregistrements (suite) Utilisation du mode Index: Comment ... Action Basculer en mode index Déplacez le levier de zoom vers W. Revenir en mode plein écran Déplacez le levier de zoom vers T. Passer d’un fichier à l’autre Appuyez sur le bouton Gauche ou Droite Faire défiler les pages vers le Appuyez sur le bouton Haut ou Bas haut/bas...
-
Seite 116: Lire De La Musique Mp3
Lire de la musique MP3 Allumez la caméra et passez la Molette de mode sur le mode Lecture . Appuyez sur le bouton d’enregistrement Utilisation en MP3 : Comment ... Action Basculer entre les Appuyez sur le bouton d’enregistrement modes MP3 et Lecture (lorsque aucune piste n’est en lecture). -
Seite 117: Relier La Caméra À Votre Tv
Relier la caméra à votre TV. Reliez votre caméra et votre TV via le câble AV accessoire pour un affichage en temps réel. Vous pouvez afficher vos clips vidéo, vos clichés, et vos enregistrements audio directement sur votre TV pour les partager avec vos amis et votre famille. Mode AV Video Sortie TV... -
Seite 118: Réglages Avancés
Réglages avancés Utilisation du menu Les éléments du menu apportent plusieurs options pour les réglages fins des fonctions de votre appareil. Le tableau suivant donne des détails sur le fonctionnement du menu. Comment... Action Amener le menu* Appuyez sur le bouton Menu Déplacez la boîte en Appuyez sur le bouton Gauche ou Droite surbrillance... -
Seite 119: Éléments De Menu En Mode Caméscope Numérique
Éléments de menu en mode Caméscope numérique Allumez → Passez la Molette de mode sur le mode Caméscope → Appuyez sur le bouton Menu numérique Élément Option Description Cette option donne la meilleure résolution, appropriée pour des sujets stables. 640x480 Cette option enregistre des films qui peuvent être visualisés sur une TV. - Seite 120 Éléments de menu en mode Caméscope numérique (suite) L’exposition est très fortement augmentée. EV+3 L’exposition est modérément augmentée. EV+2 L’exposition est légèrement augmentée. EV+1 Exposition L’exposition n’est pas modifiée. EV+0 L’exposition est légèrement diminuée. EV-1 L’exposition est modérément diminuée. EV-2 L’exposition est très fortement diminuée.
-
Seite 121: Éléments De Menu En Mode Appareil Photo Numérique
Éléments de menu en mode Appareil photo numérique Allumez → Passez la Molette de mode sur le mode Appareil photo numérique → Appuyez sur le bouton Menu Élément Option Description Cette option vous laisse ajouter des mémos vocaux à vos images. Voici quelques notes sur l’utilisation de cette fonctionnalité... - Seite 122 Éléments de menu en mode Appareil photo numérique (suite) Élément Option Description Lorsque vous enfoncez complètement le Allumé/ déclencheur, l’appareil donne un délai de dix Éteint secondes avant de prendre l’image. Retardateur Cette option vous permet de prendre des images en couleurs naturelles.
- Seite 123 Éléments de menu en mode Appareil photo numérique (suite) Élément Option Description L’appareil détermine la vitesse ISO automatiquement. ISO Auto La vitesse ISO est réglée sur 100, adaptée aux environnements de prise de vue avec une bonne Avancé lumière. ISO 100 La vitesse ISO est réglée sur 200, adaptée aux environnements de prise de vue avec une lumière modérée.
-
Seite 124: Éléments De Menu En Mode Lecture
Éléments de menu en mode Lecture Allumez → Passez la Molette de mode sur le mode Lecture → Appuyez sur le bouton Menu Elément Option Description Activez cette fonction pour pouvoir écouter les mémos vocaux lors de la lecture des clichés. Le Allumé/ mémo vocal (‘s’il existe) est lu automatiquement Éteint... -
Seite 125: Éléments De Menu En Mode Mp3
Éléments de menu en mode MP3 Allumez → Passez la Molette de mode sur le mode Lecture → Appuyez sur le bouton Enregistrement → Appuyez sur le bouton Menu Élément Option Description Cette option vous permet de supprimer le Oui/Non morceau en cours. -
Seite 126: Éléments De Menu En Mode Réglages
Éléments de menu en mode Réglages Allumez → Passez la Molette de mode sur le mode Réglages Élément Option Description Cette option vous permet de régler la date et l’heure. Heure Allumé/ Cette option permet d’allumer ou d’éteindre le bip Éteint sonore. - Seite 127 Éléments de menu en mode Réglages (suite) Élément Option Description Cette option convient pour la zone Amérique, Taiwan, Japon, et Corée. NTSC Cette option convient pour la zone Allemagne, Système TV Angleterre, Italie, Hollande, Chine, Japon et Hongkong. Allumé/ Cette option permet d’allumer ou d’éteindre la sortir Éteint Sortie TV Cette option vous permet de revenir aux réglages...
-
Seite 128: Copier Des Fichiers Vers Votre Pc
Copier des fichiers vers votre PC Installer le pilote sur votre PC Il vous faut installer le pilote de la caméra pour pouvoir relire les clips vidéo sur votre PC. Pour installer le logiciel: Insérez le CD du pilote. Allumer votre ordinateur. Placez ensuite le CD accessoire dans le lecteur CD-ROM. - Seite 129 Installer le pilote sur votre PC (suite) Installer le pilote. L’Assistant d’installation automatique apparaît ensuite et installe automatiquement le programme. Cliquez sur Suivant et suivez les instructions à l’écran pour terminer l’installation. Installer les codecs. Une fois l’installation du pilote terminée, le programme vous demande d’installer les Codecs Windows Media Player.
-
Seite 130: Relier La Caméra À Votre Pc
Relier la caméra à votre PC Reliez le câble USB à votre ordinateur. Allumez votre ordinateur, puis reliez le câble USB accessoire au port USB de votre ordinateur. Assurez-vous que le câble et le port sont correctement alignés. Relier le câble USB à votre caméra. -
Seite 131: Copier Des Fichiers Vers Le Pc
Copier des fichiers vers le PC Cette étape dépend de votre système d’exploitation : Pour les utilisateurs de Windows XP : Une fois la caméra reliée à votre ordinateur, une fenêtre de dialogue apparaît automatiquement. Veuillez sélectionner l’élément Ouvrir le dossier pour visualiser les fichiers à... - Seite 132 Copier des fichiers vers le PC (suite) Double cliquez sur le dossier de fichiers DCIM. Double cliquez sur le dossier de fichiers 100MEDIA. Glissez/déposez le fichier cible dans Mes Documents ou dans le dossier de destination. Copier des images vers “Mes Documents”...
-
Seite 133: Visualiser/Lire Des Fichiers Sur Votre Pc
Visualiser/Lire des fichiers sur votre PC Double cliquez sur Mes Documents ou tout autre dossier où des fichiers sont stockés. Double cliquez sur le fichier souhaité, et le fichier est ouvert par le programme correspondant à ce type de fichiers. -
Seite 134: Emplacement Des Fichiers
Emplacement des fichiers Une fois la caméra reliée à votre ordinateur, un disque amovible apparaît sur votre ordinateur. Le disque amovible représente en fait le support de stockage de votre caméra. Sur ce disque, vous pouvez trouver tous vos enregistrements. Référez-vous à... -
Seite 135: Addendum
Addendum Dépannage Lors de l’utilisation de l’appareil photo : Problème Cause Solution Les batteries sont usagées. Remplacez les batteries. Les batteries ne sont pas Réinstallez les batteries. installées correctement. L’appareil ne s’allume pas normalement. Utilisez des piles alcalines ou des batteries rechargeables NiMH. - Seite 136 Addendum Lors de l’utilisation de l’appareil photo : Problème Cause Solution Ceci survient lorsque vous Je n’ai pas supprimé insérez une carte mémoire d’image ni de clip vidéo après avoir pris plusieurs Vous pouvez accéder à ces fichiers mais je ne les retrouve pas images ou clips vidéo.
- Seite 137 Addendum Lorsque vous reliez la caméra à votre ordinateur ou à votre TV : Problème Cause Solution Ne peut pas trouver le disque amovible après Les batteries ne sont pas Installez de nouvelles batteries. branchement de la installées ou sont usagées. caméra sur le PC.
-
Seite 138: Réglages De Fréquence
Addendum Réglages de fréquence Pays Angleterre Allemagne France Italie Espagne Pays-Bas Réglage 50Hz 50Hz 60Hz 50Hz 50Hz 50Hz Pays Portugal Etats-Unis Taiwan Chine Japon Corée Réglage 50Hz 60Hz 60Hz 50Hz 50/60Hz 60Hz Remarque : Le réglage de fréquence est basé sur le standard de fréquence de votre alimentation électrique locale. -
Seite 139: Capacité De Stockage
Addendum Capacité de stockage Clip vidéo (min) TV-HQ TV-S WEB-HQ WEB-S Mémoire 640x480 352x288 320x240 176x144 (10frs) (30frs) (30frs) (30frs) Mémoire interne (11.5MB) 0.7 ~ 1 0.2 ~ 0.6 0.7 ~ 1 1 ~ 1.5 Carte mémoire (32MB) 2 ~ 2.5 0.5 ~ 1.5 2 ~ 2.5 3 ~ 4... -
Seite 140: Messages Système
Addendum Messages système Message Description Enregistrement La caméra est en train d’enregistrer un fichier. Lorsque la caméra est réglé sur le mode Lecture sans fichier existant Aucun fichier à lire à lire, le message s’affiche. Veuillez changer les L’autonomie des batteries de la caméra est faible. Vous devriez batteries remplacer les batteries par des nouvelles immédiatement. -
Seite 141: Spécifications
Addendum Spécifications Fonctions principales - Caméscope numérique : Format MPEG4 (.ASF) ● VGA (640 x 480 pixels) / jusqu’à 11 im/s ● CIF (352 x 288 pixels) / jusqu’à 30 im/s - Appareil photo numérique : ● 6 MP (2832 x 2128) pixels ●... -
Seite 142: Spéc. Adaptateur Ac
Addendum Spéc. Adaptateur AC 100 - 240V ~ 50/60 Hz Entrée 0.3A 30VA Sortie Longeur 8.3 (mm) Rayon prise 4.0 (mm) - Seite 143 Benvenuto Vi ringraziano per avere acquistato questo prodotto. Abbiamo investito molto tempo ed energie in questo progetto e speriamo che vi procuri molti anni di servizio senza problemi. Avviso per la sicurezza 1. Non far cadere, forare o smontare la videocamera diversamente si annullerà...
- Seite 144 Sommario Benvenuto ............... 1 Avviso per la sicurezza ..........1 Sommario ................ 2 Avviamento ..............4 Conoscere le parti della videocamera ..........4 Caricamento delle batterie ..............5 Inserimento di una scheda memoria (optional) ........6 Attaccare il cinturino (optional) ............. 8 Come tenere la videocamera ...............
- Seite 145 Sommario Visualizzazione/Esecuzione dei file sul PC .......... 38 Posizione dei file ................... 39 Addendum ............... 40 Risoluzione dei problemi ..............40 Impostazioni della frequenza ..............43 Indicatore di carica delle batterie ............43 Capacità d’archiviazione ............... 44 Messaggi del sistema ................45 Specifiche .....................
-
Seite 146: Avviamento
Avviamento Conoscere le parti della videocamera Tasto alimentazione ( Tasto otturatore ( Selettore Tasto registrazione ( LED posteriore Tasto a 4 funzioni ( Tasto Enter ( Tasto menu ( Coperchio connettore Tasto espulsione scheda ( Schermo LCD Obiettivo Flash LED frontale Microfono Aggancio treppiede Alloggiamento scheda memoria... -
Seite 147: Caricamento Delle Batterie
Caricamento delle batterie Aprire il coperchio dello scomparto batterie. Spingere la leva di rilasci batteria nella posizione di blocco, spingere verso il basso il coperchio dello scomparto e sollevarlo per rimuoverlo. Installazione delle batterie. Inserire quattro batterie AA nello scomparto. Notare che la polarità positiva (+) e negativa (-) non possono essere invertite. -
Seite 148: Inserimento Di Una Scheda Memoria (Optional)
Inserimento di una scheda memoria (optional) In aggiunta alla memoria Flash integrata, la videocamera può archiviare dati su schede Compact Flash (CF) o su Microdrive. Per inserire una scheda memoria, spingerla con delicatezza - come mostrato - finché la scheda raggiunge il fondo dell’alloggiamento. - Seite 149 Inserimento di una scheda memoria (segue) Per rimuovere la scheda, assicurarsi per prima cosa che l’alimentazione sia disattivata. Poi aprire il pannello LCD e spingere il tasto d’espulsione della scheda per espellere la scheda o il Microdrive. Non rimuovere la scheda memoria mentre la videocamera è accesa.
-
Seite 150: Attaccare Il Cinturino (Optional)
Attaccare il cinturino (optional) Spiegare il cinturino. Stendere ed allargare il cinturino come illustrato. Infilare il cinturino attraverso il gancio. Far passare le estremità del cinturino attraverso i ganci sulla videocamera. Poi stringere insieme le due estremità come indicato. Preparare all’uso il cinturino. Piegare la protezione per fissare il cinturino. -
Seite 151: Come Tenere La Videocamera
Come tenere la videocamera Infilare la mano nel cinturino e tenere saldamente la videocamera come mostrato. Evitare di bloccare l’obiettivo, impedendo di ottenere i risultati migliori, quando si fotografa o si registrano sequenze video. Come aprire il coperchio del connettore Quando si vuole collegare la videocamera al PC, al televisore, alle cuffie o all’adattatore CA/CD, è... -
Seite 152: Utilizzo Del Treppiede (Optional)
Utilizzo del treppiede (optional) Utilizzare un treppiede per minimizzare i movimenti della videocamera e per assicurare la qualità d’immagine ottimale, in modo particolare quando si riprendono autoritratti oppure durante le videoconferenze. ALLENTARE STRINGERE L’illustrazione del treppiede è solo per riferimento. I modelli effettivi possono variare. -
Seite 153: Operazioni Di Base
Operazioni di base Accensione della videocamera Per accendere la videocamera premere e mantenere premuto per 1 secondo, il tasto alimentazione ( ACCENSIONE / SPEGNIMENTO Il LED si accenderà. Se la videocamera non si accende dopo avere premuto il tasto d’alimentazione, controllare che: 1. -
Seite 154: Leggere Gli Indicatori Dello Schermo Lcd
Leggere gli indicatori dello schermo LCD Modalità Videocamera: Modalità di fuoco 1.0X Percentuale Numero di registrazioni zoom Icona scheda memoria* Durata della batteria Icona modalità Compensazione d’esposizione* Risoluzione video Questa icona appare quando è inserita una scheda memoria. Questa icona appare quando è selezionata una impostazione non predefinita. -
Seite 155: Modalità Riproduzione
Leggere gli indicatori dello schermo LCD (segue) Modalità Riproduzione: 1.0X 01/88 Registrazione Percentuale corrente / totale zoom Icona scheda memoria Tipo di file Durata della batteria Icona modalità Modalità registrazione vocale: Numero di registrazioni Voice Record Mode Icona scheda memoria Durata della batteria Icona modalità... -
Seite 156: Impostazione Della Lingua
Impostazione della lingua Quando si accende la videocamera per la prima volta, lo schermo LCD potrebbe non visualizzare i messaggi nella propria lingua. La lingua dello schermo LCD può essere impostata utilizzando il seguente metodo: Accendere la videocamera ed impostare il Selettore sulla modalità... -
Seite 157: Registrazione Di Una Sequenza Video
Registrazione di una sequenza video Accendere la videocamera ed impostare il Selettore sulla modalità Videocamera digitale Premere il tasto Registrazione iniziare a registrare. Durante la registrazione si può utilizzare la Leva dello zoom per ingrandire o ridurre lo schermo. Si può anche regolare il fuoco o il Ingrandimento / riduzione valore d’esposizione EV, se... - Seite 158 Registrazione di una sequenza video (segue) Si può abilitare la funzione di fuoco automatico per la registrazione video. Attenersi alle seguenti procedure per attivare la funzione: Accendere la videocamera → Impostare il Selettore sulla modalità Videocamera digitale → Premere il tasto Menu →...
-
Seite 159: Fotografare
Fotografare Accendere la videocamera ed impostare il Selettore sulla modalità Fotocamera digitale Prima di acquisire una foto, si può usare la Leva dello zoom per ingrandire o ridurre lo schermo. Regolare la modalità Flash o il valore d’esposizione EV, se necessario. Modalità... -
Seite 160: Registrazione Di Una Sequenza Audio
Registrazione di una sequenza audio Accendere la videocamera ed impostare il Selettore sulla modalità Registrazione vocale Premere il tasto Registrazione iniziare a registrare. Quando la registrazione è eseguita, premere di nuovo il tasto Registrazione per terminare la registrazione. -
Seite 161: Riproduzione Delle Registrazioni
Riproduzione delle registrazioni Accendere la videocamera ed impostare il Selettore sulla modalità Riproduzione Operazioni in modalità Schermo intero: Tipo di file Come fare per... Azione Premere il tasto Sinistra o Destra Passare tra i file (quando lo zoom non è bloccato). - Seite 162 Riproduzione delle registrazioni (segue) Operazioni in modalità Indice: Come fare per... Azione Passare alla modalità Indice Spostare la leva dello zoom verso W. Tornare alla modalità Schermo Spostare la leva dello zoom verso T. intero Passare tra i file Premere il tasto Sinistra o Destra Scorrere le pagine verso l’alto/il Premere il tasto Su o Giù...
-
Seite 163: Esecuzione Di Musica Mp3
Esecuzione di musica MP3 Accendere la videocamera ed impostare il Selettore sulla modalità Riproduzione . Poi premere il tasto Registrazione Operazioni MP3: Come fare per... Azione Passare tra la modalità Premere il tasto Registrazione (quando non è MP3 e Riproduzione eseguito alcun file). -
Seite 164: Collegamento Della Videocamera Al Televisore
Collegamento della videocamera al televisore Collegare la videocamera al televisore usando il cavo AV, fornito in dotazione, per ottenere la visualizzazione in tempo reale. Si possono visualizzare sequenze video, fotografie e registrazioni audio direttamente sullo schermo TV e condividerle con amici e famigliari. Modalità... -
Seite 165: Impostazioni Avanzate
Impostazioni avanzate Operazioni del menu Gli elementi del menu forniscono varie opzioni per regolare con precisione le funzioni della videocamera. La tavola che segue illustra i dettagli sulle operazioni del menu. Come fare per... Azione Fare apparire il menu * Premere il tasto Menu Spostare Premere il tasto Sinistra o Destra... -
Seite 166: Elementi Del Menu In Modalità Videocamera Digitale
Elementi del menu in modalità Videocamera digitale Accendere → Impostare il Selettore sulla modalità Videocamera digitale → Premere il tasto Menu Elemento Opzione Descrizione Questa opzione fornisce la migliore risoluzione adatta per filmare soggetti stazionari. 640x480 Questa opzione registra film adatti per la visione su televisore. - Seite 167 Elementi del menu in modalità Videocamera digitale (segue) L’esposizione è aumentata in modo decisivo. EV+3 L’esposizione è aumentata in modo moderato. EV+2 L’esposizione è aumentata in modo lieve. EV+1 Esposizione L’esposizione non è modificata. EV+0 L’esposizione è diminuita in modo lieve. EV-1 L’esposizione è...
-
Seite 168: Elementi Del Menu In Modalità Fotocamera Digitale
Elementi del menu in modalità Fotocamera digitale Accendere → Impostare il Selettore sulla modalità Fotocamera digitale → Premere il tasto Menu Elemento Opzione Descrizione Questa opzione permette di aggiungere promemoria alle immagini. Ecco alcune note sull’utilizzo di questa funzionalità: 1. Ciascun promemoria vocale dura 10 secondi. 2. - Seite 169 Elementi del menu in modalità Fotocamera digitale (segue) Elemento Opzione Descrizione Quando l’otturatore è premuto fino in fondo, la Attiva/Disattiva videocamera attenderà dieci secondi prima di scattare la foto. Autoscatto Questa opzione permette di scattare foto con colori naturali. Normale Questa opzione permette di scattare foto con toni seppia, somiglianti a foto antiche.
- Seite 170 Elementi del menu in modalità Fotocamera digitale (segue) Elemento Opzione Descrizione La macchina determina automaticamente la velocità ISO. Automatico La velocità ISO è impostata su 100; adatta per scatti Avanzate in ambienti ben illuminati. ISO 100 La velocità ISO è impostata su 200; adatta per scatti in ambienti illuminati moderatamente.
-
Seite 171: Elementi Del Menu In Modalità Riproduzione
Elementi del menu in modalità Riproduzione Accendere → Impostare il Selettore sulla modalità Riproduzione → → Premere il tasto Menu Elemento Opzione Descrizione Abilitando questa funzione si potranno ascoltare i promemoria vocali mentre si prende visione delle Attiva/ immagini. I promemoria vocali (se presenti) saranno Disattiva eseguiti automaticamente durante la visone delle Promemoria... -
Seite 172: Elementi Del Menu In Modalità Mp3
Elementi del menu in modalità MP3 Accendere → Impostare il Selettore sulla modalità Riproduzione → Premere il tasto Registrazione → Premere il tasto Menu Elemento Opzione Descrizione Questa opzione permette di eliminare la traccia Sì/No corrente. Elimina Sì/No Questa opzione permette di eliminare tutte le tracce. Elimina tutto Ripete l’esecuzione della traccia corrente. -
Seite 173: Elementi Del Menu In Modalità Impostazioni
Elementi del menu in modalità Impostazioni Accendere → Impostare il Selettore sulla modalità Impostazioni Elemento Opzione Descrizione Questa opzione permette di impostare la data e l’ora. Attiva/ Questa opzione permette di attivare/disattivare gli Disattiva avvisi sonori. Avviso sonoro La videocamera si spegne automaticamente quando resta inattiva per più... - Seite 174 Elementi del menu in modalità Impostazioni (segue) Elemento Opzione Descrizione Questa opzione è adatta per America, Taiwan, Giappone e Corea. NTSC Sistema TV Questa opzione è adatta per Germania, Inghilterra, Italia, Olanda, Cina, Giappone e Hong Kong. Attiva/ Questa opzione permette di attivare/disattivare la Disattiva funzione Uscita TV.
-
Seite 175: Copiare I File Sul Pc
Copiare i file sul PC Installazione del driver sul PC Per potere riprodurre le sequenze video sul PC è necessario installare il driver della videocamera. Per installare il software: Inserire il CD driver. Accendere il computer. Inserire il CD d’installazione nell’unità CD-ROM. Non collegare il cavo USB al computer a questo punto dell’installazione. - Seite 176 Installazione del driver sul PC (segue) Installare il driver. Apparirà l’Installazione guidata che installerà automaticamente il programma. Fare clic su Avanti e seguire le istruzioni su schermo per completare l’installazione. Installare i codecs. Dopo che l’installazione del driver è stata completata, il programma chiederà...
-
Seite 177: Collegamento Della Videocamera Al Pc
Collegamento della videocamera al PC Collegare il cavo USB al computer. Accendere il computer e poi collegare il cavo USB, fornito in dotazione, alla porta USB del computer. Assicurarsi che il cavo e porta siano allineati in modo corretto. Collegare il cavo USB alla videocamera. -
Seite 178: Copiare I File Sul Pc
Copiare i file sul PC Questa fase cambia in base al proprio sistema operativo: Per utenti Windows XP: Dopo che la videocamera è stata collegata al computer, apparirà automaticamente una finestra di dialogo. Selezionare la voce Open folder to view files using Windows Explorer (Apri la cartella utilizzando Esplora risorse per visualizzare i file) e fare clic su OK. - Seite 179 Copiare i file sul PC (segue) Fare doppio clic sulla cartella DCIM. Fare doppio clic sulla cartella 100MEDIA. Trascinare il file desiderato nella cartella Documenti o nella cartella di destinazione. Copiare le immagini su “Documenti”...
-
Seite 180: Visualizzazione/Esecuzione Dei File Sul Pc
Visualizzazione/Esecuzione dei file sul PC Fare doppio clic sulla cartella Documenti o qualsiasi altra cartella che archivia i file. Fare doppio clic sul file desiderato che sarà aperto dal programma corrispondente al tipo di file. -
Seite 181: Posizione Dei File
Posizione dei file Dopo avere collegato al computer la videocamera, sul computer appare un disco rimovibile. Il disco rimovibile rappresenta a tutti gli effetti il supporto d’archiviazione della videocamera. Nel disco si trovano tutte le registrazioni. Fare riferimento alla figura sulla File destra per vedere dove multimediali... -
Seite 182: Addendum
Addendum Risoluzione dei problemi Quando si utilizza la videocamera: Problema Causa Soluzione Le batterie sono scariche. Sostituire le batterie. Le batterie sono installate in Reinstallare le batterie. Non è possibile accendere modo scorretto. in modo normale la videocamera. Usare batterie alcaline o batterie Sono usate batterie di bassa ricaricabili NiMH. - Seite 183 Addendum Quando si utilizza la videocamera: Problema Causa Soluzione Succede quando si inserisce Nonostante le immagini ed una scheda memoria dopo le sequenze video non siano avere acquisito qualche Si può accedere a questi file dopo state eliminate è impossibile immagine e sequenza avere rimosso la scheda memoria.
- Seite 184 Addendum Quando si collega la videocamera al computer o al televisore: Problema Causa Soluzione Impossibile trovare il Le batterie non sono disco rimovibile dopo installate oppure sono Sostituire le batterie. avere collegato la scariche. videocamera al PC. Installare DirectX 8.0, o versione più...
-
Seite 185: Impostazioni Della Frequenza
Addendum Impostazioni della frequenza Nazione Inghilterra Germania Francia Italia Spagna Olanda Impostazione 50Hz 50Hz 60Hz 50Hz 50Hz 50Hz Nazione Portogallo America Taiwan Cina Giappone Corea Impostazione 50Hz 60Hz 60Hz 50Hz 50/60Hz 60Hz Nota: l’impostazione della frequenza è basata sulla frequenza standard della corrente elettrica locale. -
Seite 186: Capacità D'archiviazione
Addendum Capacità d’archiviazione Sequenza video (minuti) TV-HQ TV-S WEB-HQ WEB-S Memoria 640x480 352x288 320x240 176x144 (10frs) (30frs) (30frs) (30frs) Memoria interna (11.5MB) 0.7 ~ 1 0.2 ~ 0.6 0.7 ~ 1 1 ~ 1.5 Scheda memoria (32MB) 2 ~ 2.5 0.5 ~ 1.5 2 ~ 2.5 3 ~ 4... -
Seite 187: Messaggi Del Sistema
Addendum Messaggi del sistema Messaggio Descrizione Registrazione La videocamera sta registrando un file. Questo messaggio appare quando la videocamera è impostata sulla Nessun file da eseguire modalità Riproduzione e non esistono file da eseguire. Il livello di carica della batteria è basso. Sostituire immediatamente le Cambiare le batterie batterie con batterie nuove. -
Seite 188: Specifiche
Addendum Specifiche Funzioni principali - Videocamera digitale: Formato MPEG4 (.ASF) ● VGA (640 x 480 pixel) / fino a 11 fps ● CIF (352 x 288 pixel) / fino a 30 fps - Fotocamera digitale: ● 6 MP (2832 x 2128) pixel ●... -
Seite 189: Specifiche Adattaore Ingresso Cd
Addendum Specifiche adattaore ingresso CD 100 - 240V ~ 50/60 Hz Input 0.3A 30VA Output Lunghezza 8.3 (mm) Diametro spina 4.0 (mm) - Seite 190 Bienvenido Estimado usuario, gracias por adquirir este producto. Se ha empleado mucho tiempo y esfuerzo en su desarrollo y esperamos que le proporcione muchos años de servicio sin problemas. Aviso de seguridad 1. No deje caer, perfore ni desmonte la cámara; de lo contrario o la garantía podría quedar anulada.
- Seite 191 Índice Bienvenido ..............1 Aviso de seguridad ............1 Índice ................2 Primeros pasos .............. 4 Introducción a las partes de la cámara ..........4 Instalación de baterías ................. 5 Inserción de una tarjeta de memoria (opcional) ........6 Montaje de la muñequera (opcional) ............ 8 Cómo sujetar la cámara ...............
-
Seite 192: Índice
Índice Visualización y reproducción de los archivos en un PC ....... 38 Ubicación de los archivos ..............39 Apéndice ................. 40 Solución de problemas ................. 40 Configuración de parpadeo ..............43 Indicador de carga de batería ............... 43 Capacidad de almacenamiento ............44 Mensajes de sistema ................ -
Seite 193: Primeros Pasos
Primeros pasos Introducción a las partes de la cámara Botón Encendido ( Botón Obturador ( Selector de modo Botón Grabar ( LED posterior Botones de 4 direcciones ( Botón Intro ( Botón Menú ( Cubierta del conector Botón de expulsión de tarjeta ( Pantalla LCD Objetivo Flash... -
Seite 194: Instalación De Baterías
Instalación de baterías Abra la tapadera del compartimento de batería. Pulse la palanca de liberación de las pilas hasta la posición de desbloqueo y, a continuación, tire de la cubierta hacia abajo y levántela para retirarla. Inserte las baterías. Coloque cuatro baterías AA dentro del compartimento. -
Seite 195: Inserción De Una Tarjeta De Memoria (Opcional)
Inserción de una tarjeta de memoria (opcional) Además de la memoria flash incorporada, la cámara puede almacenar datos en una tarjeta Compact Flash (CF) o microdrive. Para insertar una tarjeta de memoria, empújela suavemente en la forma indicada hasta que la tarjeta alcance el final de la ranura. - Seite 196 Inserción de una tarjeta de memoria (continuación) Para extraer la tarjeta, asegúrese primero de que la cámara está apagada. A continuación, abra el panel LCD y pulse el botón de expulsión de la tarjeta para que la tarjeta o Microdrive salte hacia fuera.
-
Seite 197: Montaje De La Muñequera (Opcional)
Montaje de la muñequera (opcional) Despliegue la muñequera. Despliegue y extienda la muñequera como se muestra en la ilustración. Pase la muñequera por el enganche. Pase los extremos de la muñequera a través de los enganches situados en la cámara. A continuación, junte los dos extremos, tal y como se indica. -
Seite 198: Cómo Sujetar La Cámara
Cómo sujetar la cámara Coloque su mano a través de la muñequera y sujete la cámara con firmeza, tal y como se muestra en la ilustración. Para obtener los mejores resultados, evite bloquear el objetivo cuando haga fotografías o grabe clips de vídeo. Apertura de la cubierta de la conexión Cuando desee conectar la cámara a un PC, TV, auriculares o a un adaptador de ca/cc. -
Seite 199: Uso Del Trípode (Opcional)
Uso del trípode (opcional) Utilice el trípode para minimizar el movimiento de la cámara y asegurar una calidad óptima de la imagen, especialmente cuando vaya a realizar autorretratos o durante videoconferencias. S u e l t o A p r e t a d o La ilustración del trípode se presenta como referencia. -
Seite 200: Operaciones Básicas
Operaciones básicas Encendido de la cámara Para encender la cámara, mantenga pulsado el botón de encendido ( ) durante 1 segundo. ENCENDER/APAGAR Se ilumina el indicador LED Si la cámara no se enciende tras pulsar el botón de encendido, compruebe lo siguiente: 1. -
Seite 201: Lectura De Los Indicadores Lcd
Lectura de los indicadores LCD Modo Videocámara digital: Modo de enfoque Proporción del 1.0X Número de grabaciones zoom Icono de tarjeta de memoria* Duración de la pila Icono de Modo Compensación de exposición* Resolución de vídeo Este icono aparecerá cuando se inserte una tarjeta de memoria. Este icono aparecerá... -
Seite 202: Modo Reproducción
Lectura de los indicadores LCD (continuación) Modo Reproducción: Proporción 1.0X 01/88 Grabaciones de zoom actuales / totales Icono de tarjeta de memoria Tipo de archivo Duración de la pila Icono de modo Modo de grabación de voz: Número de grabaciones Modo de grabación Voice Record Mode de voz... -
Seite 203: Ajuste Del Idioma
Ajuste del idioma Cuando encienda la cámara por primera vez, la pantalla LCD puede no mostrar los mensajes en el idioma local. Puede definir el idioma de la pantalla LCD utilizando el método siguiente: Encienda la cámara y ajuste el selector de modo en Modo Configuración Pulse el botón Izquierda o Derecha button to... -
Seite 204: Grabación De Vídeo
Grabación de vídeo Encienda la cámara y ajuste el selector de modo en el modo Videocámara digital Pulse el botón Grabar para comenzar la grabación. Durante la grabación, puede utilizar la Palanca de zoom para ampliar o reducir la pantalla. También puede ajustar el modo de enfoque Ampliar/reducir o el valor EV, en caso... - Seite 205 Grabación de vídeo (continuación) Puede habilitar la función de enfoque automático para la grabación de vídeo. Para habilitar la función, siga estos procedimientos: Encienda la cámara → Ajuste el Selector de modo en el modo de → Pulse el botón Menú Videocámara digital →...
-
Seite 206: Captura De Fotografías
Captura de fotografías Encienda la cámara y ajuste el selector de modo en el modo Cámara digital Antes de realizar una fotografía, puede utilizar la Palanca de zoom para ampliar o reducir la pantalla. Ajuste el modo de Flash o el valor EV, en caso necesario. -
Seite 207: Grabación De Voz
Grabación de voz Encienda la cámara y ajuste el selector de modo al modo Grabación de voz Pulse el botón Grabar para comenzar la grabación. Cuando haya terminado, pulse de nuevo el botón Grabar para detener la grabación. -
Seite 208: Reproducción De Las Grabaciones
Reproducción de las grabaciones Encienda la cámara y ajuste el selector de modo en el modo Reproducir Operaciones en modo de pantalla completa: Tipo de Cómo... Acción archivo Pulse el botón Izquierda o Derecha Cambiar de archivo (Cuando el nivel de zoom no está... - Seite 209 Reproducción de las grabaciones (continuación) Operaciones de modo de índice: Cómo... Acción Cambiar al modo de índice Mueva la palanca del zoom hacia W. Volver a cambiar a modo de Mueva la palanca del zoom hacia T. pantalla completa Cambiar entre archivos Pulse el botón Izquierda o Derecha Avanzar o retroceder páginas Pulse el botón Arriba o Abajo...
-
Seite 210: Reproducción De Música Mp3
Reproducción de música MP3 Encienda la cámara y ajuste el selector de modo en el modo Reproducción . Pulse el botón Grabar button. Operaciones MP3: Cómo..Acción Cambiar entre los modos Pulse el botón Grabar (cuando no se está MP3 y Reproducción reproduciendo ninguna pista). -
Seite 211: Conexión De La Cámara Al Televisor
Conexión de la cámara al televisor Conecte la cámara y el aparato de TV mediante el cable AV adicional para obtener imágenes en tiempo real en la pantalla. Puede mostrar los videos, fotografías y grabaciones de audio directamente en la TV y compartirlas con sus amigos y familia. -
Seite 212: Configuración Avanzada
Configuración avanzada Operación del menú Los elementos del menú proporcionan varias opciones para ajustar con precisión las funciones de la cámara. La tabla siguiente ofrece detalles acerca de las operaciones de los menús. Cómo... Acción Hacer que aparezca el Pulse el botón Menú menú... -
Seite 213: Elementos De Menú En El Modo De Videocámara Digital
Elementos de menú en el modo de videocámara digital Encender → Ajuste el Selector de modo en el modo Videocámara digital → Pulse el botón Menú Elemento Opción Descripción Esta opción proporciona la mejor resolución que resulta apropiada para la filmación de sujetos estables. - Seite 214 Elementos de menú en el modo de videocámara digital (continuación) La exposición se aumenta significativamente. EV+3 La exposición se aumenta moderadamente. EV+2 La exposición se aumenta ligeramente. EV+1 Exposición La exposición no se modifica. EV+0 La exposición se reduce ligeramente. EV-1 La exposición se reduce moderadamente.
-
Seite 215: Elementos De Menú En El Modo De Cámara Digital
Elementos de menú en el modo de cámara digital Encender → Ajuste el Selector de modo en el modo Cámara digital → Pulse el botón Menú Elemento Opción Descripción Esta opción le permite agregar notas de voz a sus imágenes. A continuación, presentamos algunos comentarios para la utilización de esta función:1. - Seite 216 Elementos de menú en el modo de cámara digital (continuación) Elemento Opción Descripción Con la opción activada, la cámara tendrá diez Activ./ segundos de retraso antes de liberar el obturador Desactiv. Temporizador cuando tome una fotografía. automático Esta opción le permite hacer fotografías en color natural.
- Seite 217 Elementos de menú en el modo de cámara digital (continuación) Elemento Opción Descripción La cámara determina la velocidad ISO automáticamente. ISO Auto La velocidad ISO se ajuste en 100, apropiada para las fotografías en entornos con luz suficiente. Avanzado ISO 100 La velocidad ISO se ajuste en 200, apropiada para las fotografías en entornos con luz moderada.
-
Seite 218: Elementos Del Menú En El Modo De Reproducción
Elementos del menú en el modo de reproducción Encender → Ajuste el Selector de modo en el modo Reproducción → Pulse el botón Menú Elemento Opción Descripción Al activarse esta función se le permite escuchar notas sonoras a la vez que se revisan las imágenes Activ./ fijas. -
Seite 219: Elementos Del Menú En El Modo Mp3
Elementos del menú en el modo MP3 Encender → Ajuste el Selector de modo en el modo Reproducción → Pulse el botón Grabar → Pulse el botón Menú Elemento Opción Descripción Sí/No Esta opción le permite eliminar la pista actual. Eliminar Sí/No Esta opción le permite eliminar todas las pistas. -
Seite 220: Elementos Del Menú En El Modo De Configuración
Elementos del menú en el modo de configuración Encender → Ajuste el Selector de modo en el modo Configuración Elemento Opción Descripción Esta opción le permite ajustar la fecha y la hora. Hora Activ./ Esta opción le permite activar o desactivar el pitido. Desactiv. - Seite 221 Elementos del menú en el modo de configuración (continuación) Elemento Opción Descripción Esta opción es apropiada para América, Taiwán, Japón y Corea. NTSC Sistema Esta opción es apropiada para Alemania, Inglaterra, de TV Italia, Países Bajos, China, Japón y Hong Kong. Activ./ Esta opción le permite activar o desactivar la Desactiv.
-
Seite 222: Copia De Archivos Al Pc
Copia de archivos al PC Instalación del controlador en el PC Para asegurar que los videos grabados con la cámara se verán en el PC es necesario instalar el controlador de la cámara. Para instalar el software: Inserte el CD de controlador. Encienda el equipo. - Seite 223 Instalación del controlador en el PC (continuación) Instalación del controlador. El Asistente Install Shield aparecerá e instalará el programa automáticamente. Haga clic en Siguiente y siga las instrucciones en pantalla para completar la instalación. Instalación de códecs. Tras completar la instalación del controlador, el programa le preguntará si instala los Windows Media Player Codecs.
-
Seite 224: Conexión De La Cámara Al Pc
Conexión de la cámara al PC Conexión del cable USB al equipo. Encienda el equipo y, a continuación, conecte el cable USB accesorio en el puerto USB del PC. Asegúrese de que el cable y el puerto están bien alineados. Conexión del cable USB a la cámara. -
Seite 225: Copia De Archivos Al Pc
Copia de archivos al PC Este paso varia dependiendo del sistema operativo: Para usuarios de Windows XP: Tras conectar la cámara al equipo, aparecerá automáticamente un cuadro de diálogo. Seleccione el elemento Abrir la carpeta para ver los archivos utilizando Internet Explorer y haga clic en Aceptar. - Seite 226 Copia de archivos al PC (continuación) Haga doble clic en la carpeta archivos DCIM. Haga doble clic en la carpeta archivos 100MEDIA. Arrastre el archivo de destino en Mis Documentos o la carpeta de destino. Copiar imagenes en “Mis Documentos”...
-
Seite 227: Visualización Y Reproducción De Los Archivos En Un Pc
Visualización y reproducción de los archivos en un PC Haga doble clic en Mis Documentos o en cualquier otra carpeta en la que desee guardar los archivos. Haga doble clic en el archivo que desee y el archivo se abrirá en el programa asociado a ese tipo de archivo. -
Seite 228: Ubicación De Los Archivos
Ubicación de los archivos Tras conectar la cámara al equipo, aparecerá una unidad extraíble en el PC. La unidad extraíble representa la unidad de almacenamiento de la cámara. En el disco podrá encontrar todas las grabaciones. Consulte la figura de la derecha para ver los archivos guardados. -
Seite 229: Apéndice
Apéndice Solución de problemas Al utilizar la cámara: Problema Causa Solución Las pilas no tienen Cambie las pilas. energía. Las pilas están instaladas La cámara no se Vuelva a instalar las pilas. de forma incorrecta. enciende de forma normal. Utilice pilas alcalinas o NiMH Se están utilizando pilas recargables. - Seite 230 Apéndice Al utilizar la cámara: Problema Causa Solución Esto ocurre cuando inserta No he eliminado las una tarjeta de memoria imágenes ni videos tras hacer algunas Puede acceder a estos pero no las puedo fotografías o vídeos. Las archivos cuando retire la tarjeta encontrar en la tarjeta grabaciones perdidas se de memoria.
- Seite 231 Apéndice Al conectar la cámara a un PC o TV: Problema Causa Solución No puede encontrarse un disco extraíble No hay baterías instaladas Instale una baterías nuevas. después de conectar o están agotadas. la cámara a un PC. Instale Direct X 8.0 o una versión posterior y los Windows Media 9.0 Codecs No se ha instalado en el...
-
Seite 232: Configuración De Parpadeo
Apéndice Configuración de parpadeo País Inglaterra Alemania Francia Italia España Países bajos Configuración 50Hz 50Hz 60Hz 50Hz 50Hz 50Hz País Portugal América Taiwán China Japón Corea Configuración 50Hz 60Hz 60Hz 50Hz 50/60Hz 60Hz Nota: La configuración de parpadeo se basa en el estándar de frecuencia de la compañía eléctrica local. -
Seite 233: Capacidad De Almacenamiento
Apéndice Capacidad de almacenamiento Vídeo (min.) TV-HQ TV-S WEB-HQ WEB-S Memoria 640x480 352x288 320x240 176x144 (10frs) (30frs) (30frs) (30frs) Memoria interna (11.5MB) 0.7 ~ 1 0.2 ~ 0.6 0.7 ~ 1 1 ~ 1.5 Tarjeta de memoria (32MB) 2 ~ 2.5 0.5 ~ 1.5 2 ~ 2.5 3 ~ 4... -
Seite 234: Mensajes De Sistema
Apéndice Mensajes de sistema Mensaje Descripción Grabando La cámara está grabando un archivo. Sin archivos para Cuando la cámara se encuentre en el modo Reproducir sin que haya reproducir ningún archivo para reproducir, aparecerá este mensaje. La carga de las baterías está baja. Debe reemplazarlas por unas Cambie las baterías nuevas inmediatamente. -
Seite 235: Especificaciones
Apéndice Especificaciones Funciones principales - Videocámara digital: Formato MPEG4 (.ASF) VGA (640 x 480 píxeles) / hasta 11 fps ● CIF (352 x 288 píxeles) / hasta 30 fps ● - Cámara fija digital: 6 MP (2832 x 2128) píxeles ●... -
Seite 236: Especificaciones Del Adaptador De Entrada Cc
Apéndice Especificaciones del adaptador de entrada CC 100 - 240V ~ 50/60 Hz Entrada 0,3A 30VA Salida Longitud 8,3 mm Radio de conexión 4,0 mm... - Seite 237 Welkom Beste klant, wij willen u hartelijk danken voor uw aankoop van dit product. Wij hebben heel wat tijd en inspanningen gewijd aan de ontwikkeling van dit product en we hopen dat u jarenlang zult genieten van een probleemloos gebruik. Veiligheidsrichtlijnen 1.
- Seite 238 Inhoudsopgave Welkom ................1 Veiligheidsrichtlijnen ............. 1 Inhoudsopgave ............... 2 Aan de slag ..............4 Kennismaken met de onderdelen van uw camera ....... 4 De batterijen plaatsen ................5 Een geheugenkaart plaatsen (optioneel) ..........6 De polsriem bevestigen (optioneel) ............8 Uw camera vasthouden ................
- Seite 239 Inhoudsopgave Bestanden weergeven/afspelen op uw pc ..........38 Bestandslocatie ..................39 Bijlage ................40 Probleemoplossing ................40 Flikkerinstellingen ................. 43 Indicator levensduur batterij ..............43 Opslagcapaciteit ................... 44 Systeembericht ..................45 Specificaties ..................46 Specificaties voedingsadapter gelijkstroom .......... 47...
-
Seite 240: Aan De Slag
Aan de slag Kennismaken met de onderdelen van uw camera Voedingsknop ( Ontspanknop ( Keuzeschakelaarl Opnameknop ( LED achteraan 4-richtingsknoppen ( Knop Enter ( Menuknop ( Klep aansluitingen Knop Kaart uitwerpen ( LCD-scherm Lens Flitserlamp LED vooraan Microfoon Statiefbevestiging Sleuf geheugenkaart Zoomhendel Hendel batterijvergrendeling Luidspreker... -
Seite 241: De Batterijen Plaatsen
De batterijen plaatsen De klep van het batterijvak openen. Duw de hendel van de batterijvergrendeling naar de ontgrendelingspositie en trek vervolgens de klep van het batterijvak omlaag en til de klep omhoog om deze te verwijderen. De batterijen installeren. Plaats twee AA-batterijen in het vak. -
Seite 242: Een Geheugenkaart Plaatsen (Optioneel)
Een geheugenkaart plaatsen (optioneel) Naast het ingebouwde flashgeheugen, kan uw camera ook gegevens opslaan op een CF-kaart (Compact Flash) of een Microdrive. Om een geheugenkaart te plaatsen, duwt u voorzichtig tegen de kaart zoals weergegeven, tot de kaart de onderkant van de sleuf raakt. - Seite 243 Een geheugenkaart plaatsen (vervolg) Controleer eerst of de voeding uitgeschakeld is voordat u de kaart verwijdert. Open vervolgens het LCD-paneel en druk op de knop Kaart uitwerpen zodat de kaart of de Microdrive uit de sleuf springt. Verwijder de geheugenkaart niet terwijl de camera is ingeschakeld. Als u dit toch doet, zal de camera niet op een normale manier uitschakelen.
-
Seite 244: De Polsriem Bevestigen (Optioneel)
De polsriem bevestigen (optioneel) De riem openvouwen. Vouw de riem open en spreid deze uit zoals weergegeven. De riem door de haak halen. Haal de uiteinden van de riem door de haken op de camera. Bevestig vervolgens de twee uiteinden aan elkaar zoals weergegeven. -
Seite 245: Uw Camera Vasthouden
Uw camera vasthouden Stop uw hand door de polsriem en houd de camera stevig vast zoals weergegeven. Zorg ervoor dat u de lens niet blokkeert tijdens het maken van foto’s of het opnemen van videoclips, zodat u het beste resultaat verkrijgt. De klep van de aansluitingen openen Als u de camera wilt aansluiten op uw PC, TV, oortelefoon of voedingsadapter, moet u de klep van de aansluitingen openen. -
Seite 246: Het Statief Gebruiken (Optioneel)
Het statief gebruiken (optioneel) Gebruik een statief om de beweging van de camera te minimaliseren en een optimale opnamekwaliteit te garanderen, vooral wanneer u zelfportretten maakt of een videoconferentie houdt. LOSDRAAIEN VASTDRAAIEN De afbeelding van het statief is louter informatief bedoeld. Het werkelijke model kan er anders uitzien. -
Seite 247: Basisgebruik
Basisgebruik Uw camera inschakelen Houd de voedingsknop ( ) gedurende 1 seconde ingedrukt om de camera in te schakelen. VOEDING AAN/UIT De LED zal oplichten. Als de camera niet wordt ingeschakeld nadat u op de voedingsknop hebt gedrukt, controleer dan of: 1. -
Seite 248: De Lcd-Indicators Lezen
De LCD-indicators lezen De modus Digitale camcorder: Scherpstelmodus 1.0X Zoomverhouding Aantal opnamen Geheugenkaartpictogram* Levensduur batterij Moduspictogram Belichtingscompensatie* Videoresolutie Dit pictogram verschijnt wanneer een geheugenkaart is geplaatst. Dit pictogram verschijnt wanneer een niet-standaard instelling is geselecteerd. De modus Digitale camera: ISO-snelheid* Witbalans* 1.0X Zoomverhouding... -
Seite 249: Weergavemodus
De LCD-indicators lezen (vervolg) Weergavemodus: 1.0X 01/88 Huidig/totaal aantal Zoomverhouding opnamen Geheugenkaartpictogram Bestandstype Levensduur batterij Moduspictogram Modus Spraakopname: Aantal opnamen Voice Record Mode Geheugenkaartpictogram Levensduur batterij Moduspictogram MP3-modus: Pictogram knopvergrendeling* Pictogram Afspelen/Pauze* 01/88 Huidig/totaal aantal opnamen Heaven Naam nummer 00:05:00 Geheugen- kaartpictogram 2004/12/12 12:00... -
Seite 250: De Taal Instellen
De taal instellen Als u de camera voor de eerste keer inschakelt, zal het LCD de berichten mogelijk niet in uw lokale taal weergeven. U kunt de taal van het LCD-scherm instellen met de volgende methode. Schakel de camera in en stel de Keuzeschakelaar in op de modus Instellingen Druk op de knop naar links of naar rechts het pictogram... -
Seite 251: Een Videoclip Opnemen
Een videoclip opnemen Schakel de camera in en stel de Keuzeschakelaar in op de modus Digitale camcorder Druk op de Opnameknop om de opname te starten. Tijdens de opname kunt u de zoomhendel gebruiken om in of uit te zoomen op het scherm. - Seite 252 Een videoclip opnemen (vervolg) U kunt de functie Automatisch scherpstellen instellen voor de video-opname. Volg de onderstaande procedure om deze functie in te schakelen: Schakel de camera in → stel de Keuzeschakelaar in op de modus → Druk op de knop Menu Digitale camcorder →...
-
Seite 253: Een Foto Maken
Een foto maken Schakel de camera in en stel de Keuzeschakelaar in op de modus Digitale camera Voordat u een foto maakt, kunt u de zoomhendel gebruiken om in of uit te zoomen op het scherm. Pas, indien nodig, de Flitsermodus of de belichtingswaarde aan. -
Seite 254: Een Videoclip Opnemen
Een videoclip opnemen Schakel de camera in en stel de Keuzeschakelaar in op de modus Spraakopname Druk op de Opnameknop de opname te starten. Druk opnieuw op de Opnameknop om de opname te stoppen wanneer u klaar bent. -
Seite 255: Uw Opnamen Afspelen
Uw opnamen afspelen Schakel de camera in en stel de Keuzeschakelaar in op de Weergavemodus Bewerkingen in de modus Volledig scherm: Bestandstype Hoe kan ik... Actie Druk op de knop links of rechts Schakelen tussen (wanneer de zoomverhouding niet bestanden vergrendeld is). - Seite 256 Uw opnamen afspelen (vervolg) Bewerkingen in de indexmodus: Hoe kan ik... Actie Schakelen naar de indexmodus Verplaats de zoomhendel naar W. Terugschakelen naar de modus Verplaats de zoomhendel naar T. volledig scherm Schakelen tussen bestanden Druk op de knop Links of Rechts Omhoog/omlaag bladeren door Druk op de knop Omhoog of Omlaag pagina’s...
-
Seite 257: Mp3-Muziek Afspelen
MP3-muziek afspelen Schakel de camera in en stel de Keuzeschakelaar in op de Weergavemodus . Druk vervolgens op de Opnameknop MP3-bewerkingen: Hoe kan ik... Actie Schakelen tussen Druk op de knop Opname (wanneer er geen nummer de MP3- en de wordt afgespeeld). -
Seite 258: De Camera Aansluiten Op Uw Tv
De camera aansluiten op uw tv Sluit uw camera aan op de tv met de bijgeleverde AV-kabel voor real time-weergave. U kunt uw videoclips, foto’s en geluidsopnamen rechtstreeks op uw tv afspelen en ze delen met uw vrienden en familie. AV-modus Video Audio... -
Seite 259: Geavanceerde Instellingen
Geavanceerde instellingen Menugebruik De menu-onderdelen bieden u verschillende opties waarmee u de camerafuncties fijn kunt afstellen. In de volgende tabel vindt u details over het gebruik van het menu. Hoe kan ik... Actie Het menu openen * Druk op de knop Menu Het selectievenster Druk op de knop Links of Rechts verplaatsen... -
Seite 260: Menu-Items In De Modus Digitale Camcorder
Menu-items in de modus Digitale camcorder Schakel de camera in → stel de Keuzeschakelaar in op de modus Digitale camcorder → Druk op de knop Menu Item Optie Beschrijving Deze optie biedt de beste resolutie die geschikt is voor het filmen van stabiele onderwerpen. 640x480 Deze optie neemt films op die geschikt zijn voor weergave op de tv. - Seite 261 Menu-items in de modus Digitale camcorder (vervolg) De belichting wordt aanzienlijk vermeerderd. EV+3 De belichting wordt gematigd vermeerderd. EV+2 De belichting wordt een weinig vermeerderd. EV+1 Belichting De belichting wordt niet gewijzigd. EV+0 De belichting wordt een weinig verminderd. EV-1 De belichting wordt gematigd verminderd.
-
Seite 262: Menu-Items In De Modus Digitale Camera
Menu-items in de modus Digitale camera Schakel de camera in → stel de Keuzeschakelaar in op de modus Digitale camera → Druk op de knop Menu Item Optie Beschrijving Met deze functie kunt u spraakmemo’s toevoegen aan uw foto’s. Dit zijn enkele opmerkingen over het gebruik van deze functie: 1. - Seite 263 Menu-items in de modus Digitale camera (vervolg) Item Optie Beschrijving Wanneer u de Ontspanknop volledig indrukt, zal Aan/Uit de camera tien seconden wachten voordat de foto wordt gemaakt. Zelfontspanner Met deze optie kunt u foto’s in natuurlijke kleuren maken. Normaal Met deze optie kunt u foto’s met een sepiatint maken, om de indruk van oude foto’s te geven.
- Seite 264 Menu-items in de modus Digitale camera (vervolg) Item Optie Beschrijving De camera bepaalt automatisch de ISO-snelheid. ISO Auto De ISO-snelheid is ingesteld op 100, geschikt voor het maken van opnamen in omgevingen met Geavanceerd voldoende belichting. ISO 100 De ISO-snelheid is ingesteld op 200, geschikt voor het maken van opnamen in omgevingen met gematigde belichting.
-
Seite 265: Menu-Items In De Weergavemodus
Menu-items in de weergavemodus Schakel de camera in → stel de Keuzeschakelaar in op de Weergavemodus → Druk op de knop Menu Item Optie Beschrijving Wanneer u deze functie inschakelt, kunt u spraakmemo’s beluisteren terwijl u foto’s bekijkt. De spraakmemo (als die er is) wordt Aan/Uit automatisch afgespeeld wanneer de foto wordt bekeken. -
Seite 266: Menu-Items In De Mp3-Modus
Menu-items in de MP3-modus Schakel de camera in → stel de Keuzeschakelaar in op de → Opname Weergavemodus Druk op de knop → Druk op de knop Menu Item Optie Beschrijving Met deze optie kunt u het huidige nummer Ja/Nee verwijderen. -
Seite 267: Menu-Items In De Instellingsmodus
Menu-items in de Instellingsmodus Schakel de camera in → stel de Keuzeschakelaar in op de modus Instellingen Item Optie Beschrijving Met deze optie kunt u de datum en tijd instellen. Tijd Met deze optie kunt u de pieptoon in- of Aan/Uit uitschakelen. - Seite 268 Menu-items in de Instellingsmodus (vervolg) Item Optie Beschrijving Deze optie is geschikt voor Amerika, Taiwan, Japan en de Koreaanse gebieden. NTSC TV-systeem Deze optie is geschikt voor Duitsland, Engeland, Italië, Nederland, China, Japan en Hong Kong. Met deze optie kunt u de TV-uitgangsfunctie in- of Aan/Uit uitschakelen.
-
Seite 269: Bestanden Kopiëren Naar Uw Pc
Bestanden kopiëren naar uw pc Het stuurprogramma voor uw pc installeren U dient het stuurprogramma van de camera te installeren om zeker te zijn dat u de videoclips kunt afspelen op uw pc. De software installeren: De cd met het stuurprogramma plaatsen. Schakel uw computer in. - Seite 270 Het stuurprogramma voor uw pc installeren (vervolg) Het stuurprogramma installeren. De Install Shield Wizard wordt weergegeven en installeert het programma automatisch. Klik op Volgende en volg de instructies op het scherm om de installatie te voltooien. De codecs installeren. Nadat de installatie van het stuurprogramma is voltooid, zal het programma u vragen de Windows Media Player Codecs te installeren.
-
Seite 271: De Camera Aansluiten Op Uw Pc
De camera aansluiten op uw pc De USB-kabel aansluiten op uw computer. Schakel uw computer in en sluit vervolgens de bijgeleverde USB- kabel aan op de USB-poort van uw computer. Zorg ervoor dat de kabel en de poort correct zijn uitgelijnd. De USB-kabel aansluiten op uw camera. -
Seite 272: Voor Gebruikers Van Windows
Bestanden kopiëren naar de pc Deze stap kan variëren afhankelijk van uw besturingssysteem: Voor gebruikers van Windows Nadat de camera is aangesloten op uw computer, wordt automatisch een dialoogvenster weergegeven. Selecteer het item Open folder to view files using Windows Explorer (Map openen voor weergave bestanden met Windows Verkenner) en klik op OK. -
Seite 273: Bestanden Kopiëren Naar De Pc
Bestanden kopiëren naar de pc (vervolg) Dubbelklik op de bestandsmap DCIM. Dubbelklik op de bestandsmap 100MEDIA. Sleep het doelbestand naar Mijn documenten of naar de doelmap. Foto’s kopiëren naar “Mijn documenten”... -
Seite 274: Bestanden Weergeven/Afspelen Op Uw Pc
Bestanden weergeven/afspelen op uw pc Dubbelklik op Mijn documenten of op een andere map die uw bestanden opslaat. Dubbelklik op het gewenste bestand. Het bestand wordt geopend door het programma dat overeenstemt met het bestandstype. -
Seite 275: Bestandslocatie
Bestandslocatie Nadat de camera is aangesloten op uw computer, verschijnt een verwisselbare schijf op uw computer. De verwisselbare schijf vertegenwoordigt eigenlijk het opslagmedium van uw camera. Op deze schijf kunt u al uw opnamen terugvinden. Raadpleeg de afbeelding rechts om Mediabestanden te zien waar de bestanden MP3-bestanden... -
Seite 276: Bijlage
Bijlage Probleemoplossing Als u de camera gebruikt: Probleem Oorzaak Oplossing De batterijen zijn leeg. Vervang de batterijen. De batterijen zijn niet correct Installeer de batterijen opnieuw. geïnstalleerd. De camera kan niet normaal worden ingeschakeld. Gebruik alkaline- of oplaadbare NiMH-batterijen. Gebruik U gebruikt batterijen van NOOIT tegelijk batterijen van minderwaardige kwaliteit. - Seite 277 Bijlage Als u de camera gebruikt: Probleem Oorzaak Oplossing Dit gebeurt wanneer u een geheugenkaart plaatst Ik heb geen foto’s of nadat u enkele foto’s of U kunt toegang krijgen tot videoclips verwijderd, maar videoclips hebt opgenomen. deze bestanden nadat u de ik kan ze niet vinden op de De verloren opnamen zijn geheugenkaart hebt verwijderd.
- Seite 278 Bijlage Als u de camera aansluit op de computer of op de tv: Probleem Oorzaak Oplossing Kan de verwisselbare schijf niet vinden De batterijen zijn niet Plaats nieuwe batterijen. nadat de camera is geplaatst of zijn leeg. aangesloten op een pc. Installeer Direct X 8.0 of hoger en Windows Media 9.0 Codecs om dit probleem op te lossen.
-
Seite 279: Flikkerinstellingen
Bijlage Flikkerinstellingen Land Engeland Duitsland Frankrijk Italië Spanje Nederlands Instelling 50Hz 50Hz 60Hz 50Hz 50Hz 50Hz Land Portugal Amerika Taiwan China Japan Korea Instelling 50Hz 60Hz 60Hz 50Hz 50/60Hz 60Hz Opmerking: De Flikkerinstelling is gebaseerd op de frequentiestandaard van uw lokale voeding. -
Seite 280: Opslagcapaciteit
Bijlage Opslagcapaciteit Videoclip (min.) TV-HQ TV-S Web-HQ Web-S Geheugen (hoge kwaliteit) (standaard waliteit) (hoge kwaliteit) (standaard waliteit) 640x480 352x288 320x240 176x144 (10frs) (30frs) (30frs) (30frs) Intern geheugen (11,5 MB) 0.7 ~ 1 0.2 ~ 0.6 0.7 ~ 1 1 ~ 1.5 Geheugenkaart (32MB) 2 ~ 2.5 0.5 ~ 1.5... -
Seite 281: Systeembericht
Bijlage Systeembericht Bericht Beschrijving Opnemen De camera is bezig met de opname van een bestand. Dit bericht wordt weergegeven wanneer de camera is ingesteld in Geen beeld de Weergavemodus zonder dat er bestanden aanwezig zijn om af te spelen. Het batterijvermogen van uw camera is laag. Vervang onmiddellijk de Vervang de batterijen batterijen door nieuwe. -
Seite 282: Specificaties
Bijlage Specificaties Hoofdfuncties - Digitale videocamcorder: MPEG4 (ASF)-indeling ● VGA (640 x 480 pixels) / tot 11 fps ● CIF (352 x 288 pixels) / tot 30 fps - Digitale fotocamera: ● 6 MP (2832 x 2128) pixels ● 4 MP (2304 x 1728) pixels ●... -
Seite 283: Specificaties Voedingsadapter Gelijkstroom
Bijlage Specificaties voedingsadapter gelijkstroom 100 - 240V ~ 50/60 Hz Invoer 0,3A 30VA Uitvoer Lengte 8,3 (mm) Aansluitings- 4 (mm) bereik... -
Seite 284: Normas De Segurança
Bem-vindo Caro utilizador, obrigado por ter comprado este produto. Investimos muito tempo e esforços no seu desenvolvimento e esperamos que o mesmo o sirva durante muitos anos sem problemas. Normas de segurança 1. Não deixe a câmara cair e não a fure ou desmonte;... - Seite 285 Índice Bem-vindo ............... 1 Normas de segurança ............ 1 Índice ................2 Introdução ............... 4 Conheça as peças que compõem a sua câmara ......... 4 Colocação das pilhas ................5 Introdução de um cartão de memória (opcional) ........6 Colocação da correia de pulso (opcional) ..........8 Como segurar a sua câmara ..............
-
Seite 286: Índice
Índice Visualizar/reproduzir ficheiros no PC ............ 38 Localização dos ficheiros ..............39 Adenda ................40 Resolução de problemas ..............40 Definições de cintilação ................ 43 Indicador de carga das pilhas ............... 43 Capacidade de armazenamento ............44 Mensagens do sistema ................. 45 Especificações .................. -
Seite 287: Introdução
Introdução Conheça as peças que compõem a sua câmara Botão de alimentação ( Botão do obturador ( Disco selector de modo Botão de gravação ( LED traseiro Botão de direcção ( Botão Enter ( Botão Menu ( Tampa do conector Botão para ejecção do cartão( Ecrã... -
Seite 288: Colocação Das Pilhas
Colocação das pilhas Abra a tampa do compartimento das pilhas. Coloque o botão de libertação das pilhas na posição de desbloqueio, de seguida puxe a tampa do compartimento das pilhas para baixo e levante-a para a remover. Colocação das pilhas. Coloque quatro pilhas AA no compartimento. -
Seite 289: Introdução De Um Cartão De Memória (Opcional)
Introdução de um cartão de memória (opcional) Para além da memória flash interna, a sua câmara pode armazenar dados num cartão de memória Compact Flash (CF) ou Microdrive. Para introduzir um cartão de memória empurre cuidadosamente o cartão, tal como indicado, até este atingir o fim da ranhura. - Seite 290 Introdução de um cartão de memória (continuação) Para remover o cartão de memória, certifique-se primeiro de que a câmara está desligada. De seguida, abra o ecrã LCD e prima o botão de ejecção do cartão para ejectar o cartão ou o cartão Microdrive.
-
Seite 291: Colocação Da Correia De Pulso (Opcional)
Colocação da correia de pulso (opcional) Desdobre a correia. Desdobre e estique a correia de pulso tal como ilustrado. Faça passar a correia pelo gancho. Faça passar as extremidades da correia pelos ganchos existentes na câmara. Depois una as duas extremidades tal como indicado. -
Seite 292: Como Segurar A Sua Câmara
Como segurar a sua câmara Faça passar a sua mão pela correia de pulso e segure na câmara firmemente, tal como ilustrado. Para obter os melhores resultados, evite bloquear a lente durante a captura de imagens fixas ou durante a gravação de clips de vídeo. Como abrir a tampa do conector Sempre que quiser ligar a câmara ao PC, ao televisor, ao auricular ou ao transformador a.c./d.c., terá... -
Seite 293: Utilização Do Tripé (Opcional)
Utilização do tripé (opcional) Utilize um tripé para minimizar os movimentos da câmara e assegurar uma óptima qualidade da imagem, sobretudo durante a captura de auto-retratos ou durante a utilização da videoconferência. DESAPERTAR APERTAR O tripé aqui ilustrado serve apenas de referência. O modelo actual pode ser diferente. -
Seite 294: Operações Básicas
Operações básicas Ligar a câmara Mantenha o botão de alimentação ( ) premido durante 1 segundo para ligar a câmara. Ligar/Desligar O LED acende. Se a câmara não ligar após premir o botão de alimentação, verifique se: 1. As quatro pilhas AA estão colocadas na câmara. 2. -
Seite 295: Interpretação Dos Leds Indicadores
Interpretação dos LEDs indicadores Modo de Camcorder digital: Modo de focagem 1.0X Taxa de zoom Número de gravações Ícone do cartão de memória* Carga das pilhas Ícone de modo Compensação da exposição* Resolução de video Este ícone aparece quando um cartão de memória é introduzido na câmara. -
Seite 296: Modo De Reprodução
Interpretação dos LEDs indicadores (continuação) Modo de reprodução: 1.0X 01/88 Gravação actual/Número Taxa de zoom total de gravações Ícone do cartão de memória Tipo de ficheiro Carga das pilhas Ícone de modo Modo de gravação de voz: Número de gravações Voice Record Mode Ícone do cartão de memória Carga das pilhas... -
Seite 297: Definição Do Idioma
Definição do idioma Ao ligar a câmara pela primeira vez, o ecrã LCD pode não apresentar a informação no idioma pretendido. Pode definir o idioma apresentado no LCD utilizando o método seguinte. Ligue a câmara e defina o disco selector de modo para o modo Definições Prima o botão para a esquerda ou para a direita para... -
Seite 298: Gravação De Um Clip De Vídeo
Gravação de um clip de vídeo Ligue a câmara e defina o disco selector de modo para o modo Camcorder digital Prima o botão de gravação para iniciar a gravação. Durante a gravação, pode utilizar o botão de zoom para aplicar mais ou menos zoom ao nível do ecrã. - Seite 299 Gravação de um clip de vídeo (continuação) Pode activar a função de focagem automática para gravação de clips de vídeo. Para activar esta função, siga estes procedimentos: Ligue a câmara → Defina o disco selector de modo para o modo Camcorder digital →...
-
Seite 300: Captura De Imagens Fixas
Captura de imagens fixas Ligue a câmara e defina o disco selector de modo para o modo Câmara digital Antes de capturar uma imagem, pode utilizar o botão de zoom para aplicar mais ou menos zoom ao nível do ecrã. Ajuste o modo do flash ou o valor EV (Valor de exposição) se necessário. -
Seite 301: Gravação De Um Clip De Voz
Gravação de um clip de voz Ligue a câmara e defina o disco selector de modo para o modo Gravação de voz Prima o botão de gravação para iniciar a gravação. Quando terminar, prima novamente o botão de gravação para parar a gravação. -
Seite 302: Reprodução Das Suas Gravações
Reprodução das suas gravações Ligue a câmara e defina o disco selector de modo para o modo Reproduzir Operações no modo de ecrã inteiro: Tipo de Como… Acção ficheiro Prima o botão para a esquerda ou para a Alternar entre direita (quando a taxa de zoom não ficheiros... - Seite 303 Reprodução das suas gravações (continuação) Operações no modo índice: Como… Acção Passar para o modo índice Mova o botão de zoom para a letra W. Voltar ao modo de ecrã inteiro Mova o botão de zoom para a letra T. Alternar entre ficheiros Prima o botão para a esquerda ou para a direita...
-
Seite 304: Reprodução De Música Mp3
Reprodução de música MP3 Ligue a câmara e defina o disco selector de modo para o modo Reproduzir . Prima o botão de gravação Operações MP3: Como… Acção Alternar entre os modos Prima o botão de gravação (quando não estiver MP3 e de reprodução nenhuma faixa em reprodução). -
Seite 305: Ligar A Câmara A Um Televisor
Ligar a câmara a um televisor Ligue a sua câmara ao televisor utilizando o cabo AV para visualização em tempo real. Pode visualizar os seus clips de vídeo, imagens fixas e gravações de áudio directamente no seu televisor, partilhando-as com os seus amigos e familiares. Modo AV Vídeo Áudio... -
Seite 306: Definições Avançadas
Definições avançadas Operações do menu Os itens do menu proporcionam-lhe várias opções para que possa proceder à sintonização fina das funções da sua câmara. A tabela seguinte fornece mais informações sobre as operações dos menus. Como… Acção Aceder ao menu * Prima o botão Menu Deslocar a caixa de Prima o botão para a esquerda ou para a direita... -
Seite 307: Itens Do Menu No Modo Camcorder Digital
Itens do menu no modo Camcorder digital Ligue a câmara → Defina o disco selector de modo para o modo Camcorder digital → Prima o botão Menu Item Opção Descrição Esta opção oferece a resolução mais adequada para filmar objectos estáveis. 640x480 Esta opção é... - Seite 308 Itens do menu no modo Camcorder digital (continuação) A exposição é aumentada drasticamente. EV+3 A exposição é aumentada moderadamente. EV+2 A exposição é aumentada ligeiramente. EV+1 Exposição A exposição não é alterada. EV+0 A exposição é reduzida ligeiramente. EV-1 A exposição é reduzida moderadamente. EV-2 A exposição é...
-
Seite 309: Itens Do Menu No Modo Câmara Digital
Itens do menu no modo Câmara digital Ligue a câmara → Defina o disco selector de modo para o modo Câmara digital → Prima o botão Menu Item Opção Descrição Esta opção permite-lhe acrescentar memos de voz às suas imagens. Aqui ficam algumas notas sobre a utilização desta capacidade: 1. - Seite 310 Itens do menu no modo Câmara digital (continuação) Item Opção Descrição Quando o botão do obturador é premido até ao Activar/ fim, a câmara dispõe de um intervalo de dez Desactivar segundos antes de tirar a foto. Temporizador Esta opção permite-lhe tirar fotos com uma cor natural.
- Seite 311 Itens do menu no modo Câmara digital (continuação) Item Opção Descrição A câmara determina automaticamente a velocidade ISO. ISO Auto A velocidade ISO é definida para 100, sendo esta a velocidade adequada para captura de imagens em ambientes com muita luz. ISO 100 Avançadas A velocidade ISO é...
-
Seite 312: Itens Do Menu No Modo Reproduzir
Itens do menu no modo Reproduzir Ligue a câmara → Defina o disco selector de modo para o modo Reproduzir → Prima o botão Menu Item Opção Descrição A activação desta função permitir-lhe-á ouvir os memos de voz ao mesmo tempo que visualiza as imagens. -
Seite 313: Itens Do Menu No Modo Mp3
Itens do menu no modo MP3 Ligue a câmara → Defina o disco selector de modo para o modo Reproduzir → Prima o botão de gravação → Prima o botão Menu Item Opção Descrição Sim/Não Esta opção permite-lhe eliminar a faixa actual. Eliminar Sim/Não Esta opção permite-lhe eliminar todas as faixas. -
Seite 314: Itens Do Menu No Modo Definições
Itens do menu no modo Definições Ligue a câmara → Defina o disco selector de modo para o modo Definições Item Opção Descrição Este item permite-lhe definir a data e a hora. Hora Activar/ Esta opção permite-lhe activar e desactivar o bip. Desactivar A câmara desliga-se automaticamente após um período de inactividade de mais de um minuto. - Seite 315 Itens do menu no modo Definições (continuação) Item Opção Descrição Esta opção aplica-se aos Estados Unidos da América, a Taiwan, ao Japão e à Coreia. NTSC Esta opção aplica-se à Alemanha, à Inglaterra, à Sistema de TV Itália, aos Países Baixos, à China, ao Japão e a Hong Kong.
-
Seite 316: Copiar Ficheiros Para O Pc
Copiar ficheiros para o PC Instalação do controlador no PC Para assegurar a reprodução dos clips de vídeo no seu PC, terá de instalar o controlador da câmara. Para instalar o software: Introduzir o CD com o controlador. Ligue o computador. Introduza o CD fornecido na unidade de CD-ROM. Não ligue o cabo USB ao computador nesta etapa. - Seite 317 Instalação do controlador no PC (continuação) Instalar o controlador. O Install Shield Wizard (Assistente Install Shield) aparece e instala o programa automaticamente. Clique em Seguinte e siga as instruções no ecrã para concluir a instalação. Instalar os codecs. Após concluída a instalação do controlador, o programa pede-lhe que instale os Codecs do Windows Media Player.
-
Seite 318: Ligar A Câmara Ao Pc
Ligar a câmara ao PC Ligar o cabo USB ao computador. Ligue o computador e de seguida ligue o cabo USB à porta USB existente no seu computador. Certifique-se de que o cabo e a porta estão devidamente alinhados. Ligar o cabo USB à câmara. -
Seite 319: Copiar Ficheiros Para O Pc
Copiar ficheiros para o PC Esta etapa varia dependendo do seu sistema operativo: Para os utilizadores do Windows XP: Após ligar a câmara ao computador, uma caixa de diálogo aparece automaticamente. Seleccione o item Open folder to view files using Windows Explorer (Abrir pasta para visualizar ficheiros com o Explorador do Windows) e clique em OK. - Seite 320 Copiar ficheiros para o PC (continuação) Faça um duplo clique sobre a pasta de ficheiros DCIM. Faça um duplo clique sobre a pasta de ficheiros 100MEDIA. Arraste o ficheiro pretendido para a opção Os meus documentos ou para a pasta de destino. Copiar imagens para a pasta “Os meus documentos”...
-
Seite 321: Visualizar/Reproduzir Ficheiros No Pc
Visualizar/reproduzir ficheiros no PC Faça um duplo clique sobre a opção Os meus documentos ou sobre qualquer outra pasta onde tenha os seus ficheiros armazenados. Faça um duplo clique sobre o ficheiro desejado, o ficheiro é aberto pelo programa correspondente tendo em conta o tipo do ficheiro. -
Seite 322: Localização Dos Ficheiros
Localização dos ficheiros Após ligar a câmara ao computador, um disco amovível aparece no computador. Na verdade, este disco amovível representa o suporte de armazenamento da sua câmara. No disco pode encontrar todas as suas gravações. Consulte a figura à direita para ver Ficheiros multimédia onde os ficheiros são armazenados. -
Seite 323: Adenda
Adenda Resolução de problemas Ao utilizar a câmara: Problema Causa Solução As pilhas estão fracas. Substitua as pilhas. As pilhas foram colocadas Volte a colocar as pilhas. incorrectamente. A câmara não liga normalmente. Utilize pilhas alcalinas ou pilhas Está a utilizar pilhas de má NiMH recarregáveis. - Seite 324 Adenda Ao utilizar a câmara: Problema Causa Solução Isto acontece quando introduz um cartão de Não eliminei as fotos e os memória na câmara após clips de vídeo, mas não os a captura de algumas fotos Pode aceder a estes ficheiros após consigo encontrar no cartão ou de alguns clips de vídeo.
- Seite 325 Adenda Ao ligar a câmara ao computador ou ao televisor: Problema Causa Solução Não é possível encontrar As pilhas não foram o disco amovível após instaladas ou estão sem Coloque pilhas novas. ligar a câmara ao PC. carga. Instale o Direct X 8.0 ou acima e os Codecs para o Windows Media 9.0 para resolver este problema.
-
Seite 326: Definições De Cintilação
Adenda Definições de cintilação País Inglaterra Alemanha França Itália Espanha Países Baixos Definição 50Hz 50Hz 60Hz 50Hz 50Hz 50Hz País Portugal América Taiwan China Japão Coreia Definição 50Hz 60Hz 60Hz 50Hz 50/60Hz 60Hz Nota: A definição de cintilação tem por base a frequência padrão da rede eléctrica local. Indicador de carga das pilhas Ícone Descrição... -
Seite 327: Capacidade De Armazenamento
Adenda Capacidade de armazenamento Video clip (min.) TV-HQ TV-S Web-HQ Web-S Memória 640x480 352x288 320x240 176x144 (10 imagens (30 imagens (30 imagens (30 imagens por segundo) por segundo) por segundo) por segundo) Memória interna (11,5 MB) 0.7 ~ 1 0.2 ~ 0.6 0.7 ~ 1 1 ~ 1.5 Cartão de memória (32MB) -
Seite 328: Mensagens Do Sistema
Adenda Mensagens do sistema Mensagem Descrição A gravar A câmara está a gravar um ficheiro. Quando a câmara se encontra no modo de reprodução sem que Não há imagem existam ficheiros para reprodução, esta mensagem aparece. As pilhas estão fracas. Substitua imediatamente as pilhas gastas Mude as pilhas por novas. -
Seite 329: Especificações
Adenda Especificações Funções principais - Camcorder de vídeo digital: Formato MPEG4 (.ASF) ● VGA (640 x 480 píxeis) / até 11 imagens por segundo ● CIF (352 x 288 píxeis) / até 30 imagens por segundo - Câmara digital : ●... -
Seite 330: Especificações Do Transformador A.c
Adenda Especificações do transformador a.c. 100 - 240V ~ 50/60 Hz Entrada 0,3 A 30 VA Saída Comprimento 8,3 (mm) Raio da ficha 4,0 (mm) -
Seite 331: Säkerhetsanvisningar
Välkommen Bästa användare, tack för att du köpte denna produkt. Stora investeringar i tid och arbete har gått åt för utvecklingen av den, och vi hoppas att den kommer att ge dig många års problemfri användning. Säkerhetsanvisningar 1. Tappa inte, stick hål på eller montera isär kameran;... - Seite 332 Innehållsförteckning Välkommen ..............1 Säkerhetsanvisningar ............ 1 Innehållsförteckning ............2 Komma igång ..............4 Lär känna kamerans olika delar ............4 Sätta in batterier ................... 5 Sätta in ett minneskort (tillval) .............. 6 Sätta fast handledsremmen (tillval) ............8 Hur du håller i kameran ................ 9 Hur du öppnar luckan till kontakterna ...........
- Seite 333 Innehållsförteckning Visa/spela upp filer på datorn ............... 38 Hitta filerna ................... 39 Tillägg ................40 Felsökning .................... 40 Antiflimmerinställningar ................ 43 Batterinivåindikator ................43 Lagringskapacitet ................. 44 Systemmeddelanden ................45 Specifikationer ..................46 Spec. för nätspänningsadapter ............. 47...
-
Seite 334: Komma Igång
Komma igång Lär känna kamerans olika delar Strömbrytare ( Slutarknapp ( Lägesväljare Inspelningsknapp ( Bakre lysdiod 4-vägsknappar ( Enter-knapp ( Menyknapp ( Lucka för kontakter Knapp för kortutmatning ( LCD-skärm Objektiv Blixt Främre lysdiod Mikrofon Uttag för stativ Minneskortplats Zoomspak Låsknapp för batterifack Högtalare Hållare för rem (1) -
Seite 335: Sätta In Batterier
Sätta in batterier Öppna luckan till batterifacket. Skjut låsknappen för batterifacket till det olåsta läget, dra sedan luckan till batterifacket nedåt och lyft upp luckan för att öppna facket. Sätta in batterier. Placera fyra AA-batterier i batterifacket. Observera att de positiva (+) och negativa (-) polerna inte får kastas om. -
Seite 336: Sätta In Ett Minneskort (Tillval)
Sätta in ett minneskort (tillval) Förutom det inbyggda flashminnet kan kameran lagra information på ett Compact Flash-kort (CF) eller en Microdrive. Du sätter in ett minneskort genom att försiktigt skjuta in kortet enligt indikationen tills kortet når botten på kortplatsen. Observera att du ska sätta in ett minneskort innan du slår på... - Seite 337 Sätta in ett minneskort (forts.) Se till att kameran är avstängd innan du tar ur kortet. Öppna sedan LCD-skärmen och tryck in knappen för kortutmatning för att mata ut kortet eller Microdrive. Ta inte ut minneskortet när kameran är påslagen. Detta kan orsaka att kameran stängs av på...
-
Seite 338: Sätta Fast Handledsremmen (Tillval)
Sätta fast handledsremmen (tillval) Vik upp remmen. Vik upp och sprid ut remmen som visas på bilden. Träd remmen genom kroken. Träd ändarna på remmen genom krokarna på kameran. Sätt därefter ihop de båda ändarna som visas på bilden. Gör remmen klar för användning. -
Seite 339: Hur Du Håller I Kameran
Hur du håller i kameran För handen genom handledsremmen och håll stadigt i kameran som visas på bilden. När du tar bilder eller spelar in videoklipp ska du undvika att blockera objektivet. Hur du öppnar luckan till kontakterna När du ska ansluta kameran till en dator, TV, hörlur eller nätspänningsadapter, måste du öppna luckan till kontakterna. -
Seite 340: Använda Stativ (Tillval)
Använda stativ (tillval) Använd ett stativ för att minimera kamerarörelser och säkerställa optimal bildkvalitet, särskilt när du tar självporträtt eller har en videokonferens. LOSSA FÄSTA Bilden på stativet är bara avsedd som en illustration. Den faatiska modellen kan se annorlunda ut. -
Seite 341: Grundläggande Användning
Grundläggande användning Slå på kameran Tryck in och håll strömbrytaren ( ) intryckt under 1 sekund för att slå på kameran. STRÖMBRYTARE PÅ/AV Lysdioden tänds. Om kameran inte slås på när du trycker in strömbrytaren, kontrollera följande: 1. Att det sitter fyra AA-batterier i kameran. 2. -
Seite 342: Läsa Av Lysdiodsindikatorerna
Läsa av lysdiodsindikatorerna Videokameraläge: Fokusläge 1.0X Zoomfaktor Antal inspelningar Symbol för minneskort* Batterinivå Lägessymbol Exponeringskompensering* Videoupplösning Denna symbol visas när ett minneskort är insatt. Denna symbol visas när en icke-standardmässig inställning har valts. Stillbildskameraläge: ISO-hastighet* Vitbalans* 1.0X Zoomfaktor Antal inspelningar Självutlösare* Symbol för minneskort Blixtläge... - Seite 343 Läsa av lysdiodsindikatorerna (forts.) Uppspelningsläge: 1.0X 01/88 Aktuell inspelning/totalt Zoomfaktor antal inspelningar Symbol för minneskort Filtyp Batterinivå Lägessymbol Ljudinspelningsläge: Antal inspelningar Voice Record Mode Symbol för minneskort Batterinivå Lägessymbol MP3-läge: Symbol för knapplås* Symbol för 01/88 Aktuellt spår/ uppspelning/ totalt antal spår paus* Heaven Spårnamn...
-
Seite 344: Ställa In Språk
Ställa in språk När slår på kameran för första gången kanske LCD-skärmen inte visar text och meddelanden på ditt språk. Du kan ställa in språket för LCD-skärmen på följande sätt: Slå på kameran och vrid lägesväljaren till läget Inställningar Tryck på vänster- eller högerpilen för att välja symbolen och tryck på... -
Seite 345: Spela In Ett Videoklipp
Spela in ett videoklipp Slå på kameran och vrid lägesväljaren till läget Videokamera Tryck in inspelningsknappen för att starta inspelningen. Under inspelningen kan du använda zoomspaken för att zooma in i eller ut ur bilden. Du kan också justera fokus eller EV-värdet vid behov. - Seite 346 Spela in ett videoklipp (forts.) Du kan aktivera autofokusfunktionen för videoinspelning. Aktivera funktionen med följande procedur: Slå på kameran → Vrid Lägesväljaren till läget Videokamera mode → Tryck på Meny-knappen → Gå till undermenyn Aktivera AF → Välj På och tryck på Enter-knappen När autofokusfunktionen är aktiverad kan ett visst mekaniskt ljud uppträda under inspelningen.
-
Seite 347: Ta En Stillbild
Ta en stillbild Slå på kameran och vrid lägesväljaren till läget Stillbildskamera Innan du tar bilden kan du använda zoomspaken för att zooma in i eller ut ur bilden. Justera blixtläget eller EV-värdet vid behov. Blixtläge: Långsam På Auto synk EV-värde: Intervall från -3 till +3. -
Seite 348: Spela In Ett Ljudklipp
Spela in ett ljudklipp Slå på kameran och vrid lägesväljaren till läget Ljudinspelning Tryck på inspelningsknappen för att starta inspelningen. När du är nöjd, trycker du på inspelningsknappen igen för att stoppa inspelningen. -
Seite 349: Spela Upp Inspelningar
Spela upp inspelningar Slå på kameran och vrid lägesväljaren till läget Uppspelning Operationer i fullskärmsläge: Filtyp Hur gör jag för att... Åtgärd Tryck på Vänster- eller Höger-pilen Växla mellan filer (när zoomfaktorn inte är låst). Använd zoomspaken för att zooma Zooma in/ut (1x–4x) in och ut. - Seite 350 Spela upp inspelningar (forts.) Operationer i indexläge: Hur gör jag för att... Åtgärd Växla till indexläge Flytta zoomspaken mot W. Växla tillbaka till fullskärmsläge Flytta zoomspaken mot T. Växla mellan filer Tryck på Vänster- eller Höger-pilen Rulla sidor uppåt/nedåt Tryck på Uppåt- eller Nedåt-pilen Spela upp/visa den markerade Tryck ner Slutar-knappen filen...
-
Seite 351: Spela Upp Mp3-Musik
Spela upp MP3-musik Slå på kameran och vrid lägesväljaren till läget Uppspelning . Tryck sedan på inspelningsknappen MP3-operationer: Hur gör jag för att... Åtgärd Växla mellan MP3- och Tryck på knappen Inspelning (när inget spår uppspelningsläge spelas upp). Tryck på Vänster- eller Höger-pilen (när spåret är Växla mellan filer pausat eller stoppat). -
Seite 352: Ansluta Kameran Till Tv:n
Ansluta kameran till TV:n Anslut kameran till TV:n med hjälp av den medföljande AV- kabeln för visning i realtid. Du kan visa dina videoklipp, stillbilder och spela upp ljudinspelningar direkt på TV:n och dela med dig av dem till familj och vänner. AV-läge Video Ljud... -
Seite 353: Avancerade Inställningar
Avancerade inställningar Menyalternativ Delmenyerna erbjuder flera möjligheter att finjustera kamerans funktioner. I följande tabell beskrivs menyalternativen i detalj. Hur gör jag för att... Åtgärd Visa menyn * Tryck på Meny-knappen Flytta markeringsramen Tryck på Vänster- eller Höger-pilen Gå till en delmeny/ Tryck på... -
Seite 354: Delmenyer I Videokameraläge
Delmenyer i videokameraläge Slå på kameran → Vrid Lägesväljaren till läget Videokamera → Tryck på Meny-knappen Delmeny +Alternativ Beskrivning Detta alternativ ger bästa upplösning vid filmning av stillastående motiv. 640x480 Detta alternativ ger filmer som är lämpliga att visa på en TV. - Seite 355 Menyalternativ i videokameraläge (forts.) Exponeringen ökas dramatiskt. EV+3 Exponeringen ökas måttligt. EV+2 Exponeringen ökas något. EV+1 Exponering Exponeringen är oförändrad. EV+0 Exponeringen minskas något. EV-1 Exponeringen minskas måttligt. EV-2 Exponeringen minskas dramatiskt. EV-3 Med denna funktion kan du låta kameran fokusera automatiskt under videoinspelningen.
-
Seite 356: Delmenyer I Stillbildskameraläge
Delmenyer i stillbildskameraläge Slå på kameran → Vrid Lägesväljaren till läget Stillbildskamera → Tryck på Meny-knappen Delmeny Alternativ Beskrivning Med detta alternativ kan du lägga till ljudinspelningar/ röstmemon till dina bilder. Här följer några noteringar om denna funktion: 1. Varje röstmemo varar i 10 sekunder. 2. - Seite 357 Menyalternativ i stillbildskameraläge (forts.) Delmeny Alternativ Beskrivning När du har tryckt ner slutarknappen helt, kommer På/Av kameran att vänta tio sekunder innan bilden tas. Självutlösare Med detta alternativ tar du bilder med naturliga färger. Normal Med detta alternativ tar du sepiatonade bilder som liknar gamla foton.
- Seite 358 Menyalternativ i stillbildskameraläge (forts.) Delmeny Alternativ Beskrivning Kameran bestämmer ISO-hastigheten automatiskt. ISO Auto ISO-hastigheten sätts till 100, lämpligt för fotografering i omgivningar med god belysning. Avancerat ISO 100 ISO-hastigheten sätts till 200, lämpligt för fotografering i omgivningar med måttlig belysning. ISO 200 ISO-hastigheten sätts till 400, lämpligt för fotografering i omgivningar med dålig belysning eller...
-
Seite 359: Delmenyer I Uppspelningsläge
Delmenyer i uppspelningsläge Slå på kameran → Vrid Lägesväljaren till läget Uppspelning → Tryck på Meny-knappen Delmeny Alternativ Beskrivning Med denna funktion kan du spela upp röstmemon när du tittar på stillbilder. Röstmemot (om det finns något) På/Av spelas upp automatiskt när stillbilden visas. Du kan trycka på... -
Seite 360: Delmenyer I Mp3-Läge
Delmenyer i MP3-läge Slå på kameran → Vrid Lägesväljaren till läget Uppspelning → Tryck på knappen Inspelning → Tryck på Meny- knappen Delmeny Alternativ Beskrivning Med detta alternativ kan du radera det aktuella Ja/Nej spåret. Radera en Ja/Nej Med detta alternativ kan du radera alla spår. Radera alla Repeterar uppspelningen av det aktuella spåret. -
Seite 361: Delmenyer I Läget Inställningar
Delmenyer i läget Inställningar Slå på kameran → Vrid Lägesväljaren till läget Inställningar Delmeny Alternativ Beskrivning Med detta alternativ kan du ställa in datum och tid. Med detta alternativ kan du stänga av och sätta på På/Av ljudsignalen. Ljudsignal Kameran stängs av automatiskt om den är inaktiv i mer än en minut. - Seite 362 Delmenyer i läget Inställningar (forts.) Delmeny Alternativ Beskrivning Detta alternativ är lämpligt för områdena Amerika, Taiwan, Japan och Korea. NTSC TV-system Detta alternativ är lämpligt för Tyskland, England, Italien, Nederländerna, Kina, Japan och Hongkong. Med detta alternativ kan du slå på och av TV- På/Av utgången.
-
Seite 363: Kopiera Filer Till Datorn
Kopiera filer till datorn Installera drivrutinen på datorn Du måste installera kamerans drivrutin för att säkerställa att videoklippen kan spelas upp på datorn. Så här installerar du programvaran: Sätt in CD-skivan med drivrutinen Slå på datorn. Sätt därefter in den medföljande CD:n i CD-enheten. Anslut inte USB-kabeln till datorn än. - Seite 364 Installera drivrutinen på datorn (forts.) Installera drivrutinen. Guiden Install Shield öppnas och kommer att installera programvaran automatiskt. Klicka på Nästa och följ anvisningarna på skärmen för att slutföra installationen. Installera codecar. När installationen av drivrutinen är klar kommer installationsprogrammet att anmoda dig att installera Windows Media Player Codecs.
-
Seite 365: Ansluta Kameran Till Datorn
Ansluta kameran till datorn Anslut USB-kabeln till datorn. Slå på datorn och anslut sedan den medföljande USB-kabeln till USB-porten på datorn. Se till att kabeln sätts in med rätt inriktning i porten. Anslut USB-kabeln till kameran. Kontrollera att det sitter fyra AA- batterier i kameran. -
Seite 366: Kopiera Filer Till Datorn
Kopiera filer till datorn Detta steg kan se lite olika ut beroende på vilket operativsystem du har: För Windows XP-användare: När kameran kopplas in till datorn visas en dialogruta automatiskt. Välj alternativet Open folder to view files using Windows Explorer (Öppna mappen för att visa filerna i Utforskaren) och klicka på... - Seite 367 Kopiera filer till datorn (forts.) Dubbelklicka på mappen DCIM. Dubbelklicka på mappen 100MEDIA. Dra den önskade filen till Mina dokument eller en annan destinationsmapp. Kopiera bilder till “Mina dokument”...
-
Seite 368: Visa/Spela Upp Filer På Datorn
Visa/spela upp filer på datorn Dubbelklicka på Mina dokument eller den mapp där du har dina filer. Dubbelklicka på den önskade filen. Filen öppnas i det program som motsvarar filtypen. -
Seite 369: Hitta Filerna
Hitta filerna När du ansluter kameran till datorn dyker en flyttbar disk upp på datorn. Denna flyttbara disk representerar lagringsmediet i kameran. På disken hittar du de inspelningar som du har gjort. I figuren till höger indikeras var filerna lagras. Mediafiler MP3-filer... -
Seite 370: Tillägg
Tillägg Felsökning Vid användning av kameran: Problem Orsak Lösning Batterierna är slut. Byt ut batterierna. Batterierna har satts in på ett Sätt in batterierna rätt. felaktigt sätt. Det går inte att starta kameran på normalt sätt. Använd alkaliska eller laddningsbara Batterier av dålig kvalitet NiMH-batterier. - Seite 371 Tillägg Vid användning av kameran: Problem Orsak Lösning Detta kan inträffa när du Jag har inte raderat bilderna sätter in ett minneskort efter eller videoklippen, men att du har tagit några bilder Du hittar dessa filer när du tar ur kan ändå...
- Seite 372 Tillägg Vid anslutning av kameran till en dator eller TV: Problem Orsak Lösning Det går inte att hitta Det finns inga batterier någon flyttbar disk när i kameran eller så är Sätt in nya batterier. kameran har anslutits till batterierna slut. en dator.
-
Seite 373: Antiflimmerinställningar
Tillägg Antiflimmerinställningar Land England Tyskland Frankrike Italien Spanien Nederländerna Inställning 50Hz 50Hz 60Hz 50Hz 50Hz 50Hz Land Portugal Amerika Taiwan Kina Japan Korea Inställning 50Hz 60Hz 60Hz 50Hz 50/60Hz 60Hz OBS: Antiflimmerinställningen är baserad på standardfrekvensen hos det lokala elnätet. Batterinivåindikator Symbol Beskrivning... -
Seite 374: Lagringskapacitet
Tillägg Lagringskapacitet Video clip (min.) TV-HQ TV-S WEB-HQ WEB-S Minne 640x480 352x288 320x240 176x144 (10 bildrutor) (30 bildrutor) (30 bildrutor) (30 bildrutor) Internt minne (11,5 MB) 0.7 ~ 1 0.2 ~ 0.6 0.7 ~ 1 1 ~ 1.5 Minneskort (32MB) 2 ~ 2.5 0.5 ~ 1.5 2 ~ 2.5... -
Seite 375: Systemmeddelanden
Tillägg Systemmeddelanden Meddelande Beskrivning Inspelning Kameran håller på att spela in en fil. Detta meddelande visas när kameran ställs in på uppspelningsläge Inga filer att spela och det inte finns några befintliga filer att spela upp. Byt batterier Batterinivån är låg. Du bör byta ut batterierna på en gång. Lagringsmediet är fullt och kan inte lagra fler filer. -
Seite 376: Specifikationer
Tillägg Specifikationer Huvudfunktioner - Digital Videokamera: MPEG4 (.ASF) format ● VGA (640 x 480 pixlar) / upp till 11 bilder/sek. ● CIF (352 x 288 pixlar) / upp till 30 bilder/sek. - Digital stillbildskamera: ● 6 MP (2 832 x 2 128) pixlar ●... -
Seite 377: Spec. För Nätspänningsadapter
Tillägg Spec. för nätspänningsadapter 100 - 240V ~ 50/60 Hz Inmatning 0,3A 30VA Utmatning Längd 8,3 (mm) Radie stickkontakt 4,0 (mm) - Seite 378 Приветствие Уважаемый пользователь, спасибо за приобретение данного изделия. В его разработку вложено много времени и усилий, и мы надеемся, что это устройство без проблем прослужит долгие годы. Памятка по мерам 1. Не роняйте, не пробивайте и не разбирайте камеру, в противном случае гарантия будет аннулирована.
- Seite 379 Содержание Приветствие ..............1 Памятка по мерам безопасности ....... 1 Содержание ..............2 Начало эксплуатации ........... 4 Обзор деталей камеры ............... 4 Установка батарей ................5 Установка карты памяти (не входит в комплект поставки) ....6 Прикрепление наручного ремешка (не входит в комплект поставки) ............8 Как...
- Seite 380 Содержание Подключение камеры к компьютеру ..........35 Копирование файлов на компьютер ..........36 Просмотр/воспроизведение файлов на компьютере ....... 38 Расположение файлов ............... 39 Приложение ..............40 Устранение неполадок ................ 40 Настройки частоты обновления ............43 Индикатор заряда батарей ..............43 Емкость...
-
Seite 381: Начало Эксплуатации
Начало эксплуатации Обзор деталей камеры Кнопка питания ( Спусковая кнопка затвора ( Переключатель режимов Кнопка записи ( Задний индикатор 4 кнопки курсора ( Кнопка Ввод ( Кнопка Меню ( Крышка разъема Кнопка извлечения карты ( ЖК дисплей Объектив Фотовспышка Передний индикатор Микрофон... -
Seite 382: Установка Батарей
Установка батарей Откройте крышку батарейного отсека. Переместите фиксатор батареи в открытое положение, а затем потяните крышку батарейного отсека вниз и поднимите ее вверх, чтобы снять крышку. Установите батареи. Установите в отсек 4 батареи типоразмера АА. Соблюдайте полярность положительных (+) и отрицательных... -
Seite 383: Установка Карты Памяти (Не Входит В Комплект Поставки)
Установка карты памяти (не входит в комплект поставки) Помимо встроенной флэш- памяти камера может сохранять данные на карте Compact Flash или Microdrive. Для установки карты памяти осторожно нажмите на карту, как показано на рисунке, пока она не достигнет конца гнезда. Обратите... - Seite 384 Установка карты памяти (продолжение) Для извлечения карты, сначала убедитесь, что питание выключено. Затем откройте ЖК панель и нажмите кнопку извлечения карты, чтобы выдвинуть карту или Microdrive. Не извлекайте карту памяти при включенной камере. Это может вызвать нарушение выключения камеры. При установленной карте памяти камера использует карту как...
-
Seite 385: Прикрепление Наручного Ремешка (Не Входит В Комплект Поставки)
Прикрепление наручного ремешка (не входит в комплект поставки) Разверните ремешок. Разверните и расправьте наручный ремешок, как показано на рисунке. Проденьте ремешок через проушины. Проденьте концы ремешка через проушины на камере. Затем, как показано, скрепите два конца вместе. Подготовьте ремешок к использованию. Сложите... -
Seite 386: Как Держать Камеру
Как держать камеру Наденьте наручный ремешок на руку и крепко держите камеру, как показано на рисунке. При фотосъемке или видеосъемке не загораживайте объектив для достижения лучшего результата. Как открыть крышку разъема Для подключения камеры к компьютеру, телевизору, наушникам или сетевому адаптеру необходимо открыть крышку... -
Seite 387: Использование Штатива (Не Входит В Комплект Поставки)
Использование штатива (не входит в комплект поставки) Используйте штатив для стабилизации положения камеры и обеспечения оптимального качества изображения, особенно при съемке автопортретов и при проведении видеоконференций. ОСЛАБИТЬ ЗАТЯНУТЬ Рисунок штатива приведен для справки. Действительная модель может отличаться. -
Seite 388: Основные Операции
Основные операции Включение камеры Нажмите и удерживайте кнопку Питания ( ) в течение одной секунды, чтобы включить камеру. ПИТАНИЕ ВКЛ./ВЫКЛ. Индикатор загорится. Если после нажатия кнопки питания камера не включилась, проверьте: 1. Установку в камере четырех батарей типа АА. 2. Оставшийся заряд батарей. 3. -
Seite 389: Значения Индикаторов Жк Дисплея
Значения индикаторов ЖК дисплея Режим Цифровой видеокамеры: Режим фокусировки 1.0X Коэффициент Количество масштабирования записей Пиктограмма карты памяти* Заряд батареи Пиктограмма режима Поправка экспозиции* Разрешение видео Данная пиктограмма отображается при установленной карте памяти. Данная пиктограмма отображается при выборе настройки, отличной от значения по умолчанию. Режим... -
Seite 390: Режим Воспроизведения
Значения индикаторов ЖК дисплея (продолжение) Режим Воспроизведения: 1.0X 01/88 Текущая запись / Коэффициент всего записей масштабирования Пиктограмма карты памяти Тип файла Заряд батареи Пиктограмма режима Режим Диктофона: Количество записей Voice Record Mode Пиктограмма карты памяти Заряд батареи Пиктограмма режима Режим MP3: Пиктограмма... -
Seite 391: Выбор Языка
Выбор языка При первом включении камеры ЖК дисплей может отображать сообщения на иностранном языке. Вы можете установить язык ЖК дисплея следующим образом: Включите камеру и установите Переключатель режимов в положение Настройки Нажимайте кнопку Влево или Вправо для выбора пиктограммы и нажмите кнопку Ввод... -
Seite 392: Видеосъемка
Видеосъемка Включите камеру и установите Переключатель режимов в положение Цифровой видеокамеры Для начала записи нажмите кнопку Запись В процессе видеосъемки при помощи рычага масштабирования можно увеличивать или уменьшать масштаб изображения на экране. При Увеличение/ необходимости также можно уменьшение масштаба настроить фокусировку или значение... - Seite 393 Видеосъемка (продолжение) При видеосъемке можно использовать функцию автоматической фокусировки. Чтобы включить данную функцию, выполните следующие процедуры: Включите камеру → установите Переключатель режимов в положение Цифровой видеокамеры → Нажмите кнопку Меню → Перейдите в подменю Вкл. автофокус → Выберите Вкл. и нажмите кнопку Ввод При...
-
Seite 394: Фотосъемка
Фотосъемка Включите камеру и установите Переключатель режимов в положение Цифровой фотокамеры Перед фотосъемкой можно использовать рычаг масштабирования для увеличения или уменьшения масштаба изображения на экране. При необходимости установите режим вспышки и значение экспозиционного числа. Режим вспышки: Медленная Вкл. Авто Выкл. синхронизация... -
Seite 395: Аудиозапись
Аудиозапись Включите камеру и установите Переключатель режимов в положение Диктофона Для начала записи нажмите кнопку Запись Для завершения записи по ее окончании снова нажмите Запись... -
Seite 396: Воспроизведение Записей И Просмотр Снимков
Воспроизведение записей и просмотр снимков Включите камеру и установите Переключатель режимов в положение Воспроизведения Операции в полноэкранном режиме: Тип файла Тип операции Действие Нажмите кнопку Влево или Вправо Переключение (при незаблокированном файлов масштабировании). Увеличение/ Используйте рычаг уменьшение масштабирования для увеличения/ масштаба... - Seite 397 Воспроизведение записей и просмотр снимков (продолжение) Операции в режиме миниатюр: Тип операции Действие Переключение в режим Передвиньте рычаг масштабирования в миниатюр сторону “W”. Переключение в Передвиньте рычаг масштабирования в полноэкранный режим сторону “Т”. Переключение файлов Нажмите кнопку Влево или Вправо Прокрутка...
-
Seite 398: Воспроизведение Музыки В Формате Mp3
Воспроизведение музыки в формате MP3 Включите камеру и установите Переключатель режимов в положение Воспроизведения . Затем нажмите кнопку Запись Операции в режиме MP3: Тип операции Действие Переключение режимов MP3 и Нажмите кнопку Запись (когда не воспроизводится Воспроизведения MP3-дорожка). Нажмите кнопку Влево или Вправо (когда... -
Seite 399: Подключение Камеры К Телевизору
Подключение камеры к телевизору Подключите камеру к телевизору с помощью дополнительного аудио-видеокабеля для просмотра записей и снимков в реальном времени. Вы можете просматривать видеоролики, фотографии, прослушивать аудиозаписи непосредственно на телевизоре и демонстрировать их друзьям и родственникам. Телевизор Режим видеовхода Видео Аудио... -
Seite 400: Дополнительные Настройки
Дополнительные настройки Операции с меню Пункты меню содержат некоторые параметры для точной настройки функций камеры. В данной таблице описываются операции с меню. Тип операции Действие Вызов меню * Нажмите кнопку Меню Перемещение рамки Нажмите кнопку Влево или Вправо выделения Переход в подменю / Нажмите... -
Seite 401: Пункты Меню В Режиме Цифровой Видеокамеры
Пункты меню в режиме Цифровой видеокамеры Включите питание → установите Переключатель режимов в положение Цифровой видеокамеры → Нажмите кнопку Меню Пункт Параметр Описание Данный параметр обеспечивает лучшее разрешение, подходящее для съемки четких объектов. 640x480 Данный параметр подходит для съемки фильмов для... - Seite 402 Пункты меню в режиме Цифровой видеокамеры (продолжение) Сильное увеличение экспозиции. EV+3 Среднее увеличение экспозиции. EV+2 Небольшое увеличение экспозиции. EV+1 Экспозиция Экспозиция не изменена. EV+0 Небольшое уменьшение экспозиции. EV-1 Среднее уменьшение экспозиции. EV-2 Сильное увеличение экспозиции. EV-3 Данная функция выполняет автофокусировку камеры...
-
Seite 403: Пункты Меню В Режиме Цифровой Фотокамеры
Пункты меню в режиме Цифровой фотокамеры Включите питание → установите Переключатель режимов в положение Цифровой фотокамеры → Нажмите кнопку Меню Пункт Параметр Описание Данный параметр позволяет добавить голосовые заметки к изображениям. Примечания по использованию данной функции: 1. Каждая голосовая заметка имеет продолжительность... - Seite 404 Пункты меню в режиме Цифровой фотокамеры (продолжение) Пункт Параметр Описание При полном нажатии на кнопку спуска съемка Вкл./Выкл. изображения будет выполнена после 10-секундной задержки. Автоспуск Данный параметр позволяет делать снимки с естественными цветами. Обычный Данный параметр позволяет делать тонированные в сепию снимки, напоминающие старые Классический...
- Seite 405 Пункты меню в режиме Цифровой фотокамеры (продолжение) Пункт Параметр Описание Камера автоматически определяет чувствительность по ISO. ISO Авто Устанавливается чувствительность по ISO 100, подходящая для съемки в условиях высокой Доплнительно освещенности. ISO 100 Устанавливается чувствительность по ISO 200, подходящая для съемки в условиях средней освещенности.
-
Seite 406: Пункты Меню В Режиме Воспроизведения
Пункты меню в режиме Воспроизведения Включите питание → установите Переключатель режимов в положение Воспроизведения → Нажмите кнопку Меню Пункт Параметр Описание Данная функция позволяет прослушивать голосовые заметки при просмотре фотографий. Голосовая заметка (при ее наличии) будет Вкл./Выкл. автоматически воспроизводиться при просмотре Голосовая... -
Seite 407: Пункты Меню В Режиме Mp3
Пункты меню в режиме MP3 Включите питание → установите Переключатель режимов в положение Воспроизведения → Нажмите кнопку Запись → Нажмите кнопку Меню Пункт Параметр Описание Данный параметр позволяет удалить текущую Да/Нет дорожку. Удалить одну Да/Нет Данный параметр позволяет удалить все дорожки. Удалить... -
Seite 408: Пункты Меню В Режиме Настройки
Пункты меню в режиме Настройки Включите питание → Установите Переключатель режимов в положение Настройки Пункт Параметр Описание Данный параметр позволяет установить дату и время. Время Данный параметр позволяет включить или Вкл./Выкл. выключить звуковой сигнал. Звуковой сигнал Камера автоматически выключится в случае простоя... - Seite 409 Пункты меню в режиме Настройки (продолжение) Пункт Параметр Описание Данный параметр подходит для регионов Америки, Тайваня, Японии и Кореи. ТВ NTSC Данный параметр подходит для Германии, ТВ стандарт Англии, Италии, Нидерландов, Китая, Японии и Гонконга. Данный параметр позволяет включать или ТВ...
-
Seite 410: Копирование Файлов На Компьютер
Копирование файлов на компьютер Установка драйвера на компьютер Для воспроизведения видеороликов на компьютере необходимо установить драйвер камеры. Порядок установки программного обеспечения приведен ниже: Вставьте компакт-диск драйвера. Включите компьютер. Вставьте входящий в комплект компакт-диск в дисковод CD-ROM. Не подключайте кабель USB к компьютеру на этом этапе. Закройте... -
Seite 411: Установка Драйвера На Компьютер
Установка драйвера на компьютер (продолжение) Установите драйвер. Запустится Install Shield Wizard (Мастер установки) и автоматически установит программу. Нажмите Далее и следуйте указаниям на экране для выполнения установки. Установите кодеки. После завершения установки драйвера программа выдаст запрос на установку Windows Media Player Codecs. Если неизвестно, установлены... -
Seite 412: Подключение Камеры К Компьютеру
Подключение камеры к компьютеру Подключите Кабель USB к компьютеру. Включите компьютер, а затем подключите кабель USB (не входит в комплект поставки) к порту USB компьютера. Убедитесь, что разъем кабеля правильно установлен в порт. Подключите кабель USB к камере. Проверьте правильную установку... - Seite 413 Копирование файлов на компьютер Данный шаг отличается в зависимости от операционной системы. Для пользователей Windows После подключения камеры к компьютеру автоматически появится диалоговое окно. Выберите пункт Open folder to view files using Windows Explorer (Открыть папку для просмотра файлов. Используется Проводник) и...
-
Seite 414: Копирование Файлов На Компьютер
Копирование файлов на компьютер (продолжение) Дважды щелкните папку DCIM. Дважды щелкните папку 100MEDIA. Перетащите нужный файл в папку Мои документы или папку назначения. Копирование изображений в “Мои документы”... -
Seite 415: Просмотр/Воспроизведение Файлов На Компьютере
Просмотр/воспроизведение файлов на компьютере Дважды щелкните папку Мои документы или любую другую папку, в которой хранятся файлы. Дважды щелкните требуемый файл, и файл будет открыт соответствующей его расширению программой. -
Seite 416: Расположение Файлов
Расположение файлов После подключения камеры к компьютеру в папке Мой компьютер появится съемный диск. Съемный диск в действительности представляет собой носитель информации камеры. На диске находятся все записи Мультимедийные камеры. Схему файлы расположения файлов см. на рисунке справа. MP3-файлы... -
Seite 417: Приложение
Приложение Устранение неполадок При эксплуатации камеры: Проблема Причина Решение Батареи разряжены. Замените батареи. Батареи неправильно Установите батареи заново. установлены. Камера не включается надлежащим образом. Используйте щелочные батареи или аккумуляторные Используются батареи никель-металгидридные низкого качества. батареи. НЕ используйте одновременно батареи различных производителей... - Seite 418 Приложение При эксплуатации камеры: Проблема Причина Решение Такое может произойти при Фотографии и установке карты памяти видеоролики не были после съемки нескольких Данные файлы можно будет удалены, но они фотографий или использовать после извлечения отсутствуют на карте видеороликов. Потерянные карты памяти. памяти.
- Seite 419 Приложение При подключении камеры к компьютеру или телевизору: Проблема Причина Решение После подключения камеры к компьютеру Батареи не установлены Установите новые батареи. отсутствует съемный или разряжены. диск. Установите Direct X 8.0 или более новую версию и Windows Media 9.0 Codecs для Невозможно...
-
Seite 420: Настройки Частоты Обновления
Приложение Настройки частоты обновления Страна Англия Германия Франция Италия Испания Нидерланды Настройка 50 Гц 50 Гц 60 Гц 50 Гц 50 Гц 50 Гц Страна Португалия Америка Тайвань Китай Япония Корея Настройка 50 Гц 60 Гц 60 Гц 50 Гц 50/60 Гц... -
Seite 421: Емкость Носителей
Приложение Емкость носителей Видеоролик (минут) ТВ, высокое ТВ, низкое Веб, высокое Веб, низкое Память качество разрешение качество разрешение 640x480 352x288 320x240 176x144 (10 кадров/с) (30 кадров/с) (30 кадров/с) (30 кадров/с) Внутренняя память (11,5 Мб) 0.7 ~ 1 0.2 ~ 0.6 0.7 ~ 1 1 ~ 1.5 Карта... -
Seite 422: Системные Сообщения
Приложение Системные сообщения Сообщение Описание Запись Камера записывает файл. Данное сообщение появляется, когда отсутствуют файлы для Нет файлов для воспроизведения или просмотра, и камера переключена в режим воспроизведения Воспроизведения. Низкий заряд батарей камеры. Необходимо немедленно Замените батареи установить новые батареи. Носитель... -
Seite 423: Технические Характеристики
Приложение Технические характеристики Основные функции - Цифровая видеокамера: формат MPEG4 (.ASF) ● VGA (640 x 480 пикселей) до 11 кадров/с ● CIF (352 x 288 пикселей) до 30 кадров/с - Цифровая фотокамера: ● 6 мегапикселей (2832 x 2128 пикселей) ● 4 мегапикселя (2304 x 1728 пикселей) ●... -
Seite 424: Технические Характеристики Сетевого Адаптера
Приложение Технические характеристики сетевого адаптера 100 – 240 В ~ 50/60 Гц Вход 0,3A 30 ВA Выход Длина 8.3 (мм) Радиус штекера 4.0 (мм)