Herunterladen Inhalt Inhalt Diese Seite drucken
Inhaltsverzeichnis

Werbung

Verfügbare Sprachen

Verfügbare Sprachen

Sicherheitstelefon
Téléphone de sécurité
TC49S
Telefono di sicurezza
Security Phone
Bedienungsanleitung
Mode d'emploi
Istruzioni per l'uso
Operating Instructions

Werbung

Inhaltsverzeichnis
loading

Inhaltszusammenfassung für switel TC49S

  • Seite 1 Sicherheitstelefon Téléphone de sécurité TC49S Telefono di sicurezza Security Phone Bedienungsanleitung Mode d’emploi Istruzioni per l’uso Operating Instructions...
  • Seite 2 Bedienungsanleitung ..Mode d’emploi ... . Istruzioni per l’uso ..Operating Instructions ..Declaration of Conformity .
  • Seite 3: Inhaltsverzeichnis

    Inhaltsverzeichnis Sicherheitshinweise ......Telefon in Betrieb nehmen ..... . Bedienelemente .
  • Seite 4: Sicherheitshinweise

    Sicherheitshinweise 1 Sicherheitshinweise Lesen Sie diese Bedienungsanleitung sorgfältig durch. Bestimmungsgemäße Verwendung Dieses Telefon ist geeignet für das Telefonieren innerhalb eines Telefonnetzes. Jede andere Ver- wendung gilt als nicht bestimmungsgemäß. Eigenmächtige Veränderungen oder Umbauten sind nicht zulässig. Öffnen Sie das Gerät in keinem Fall selbst und führen Sie keine eigenen Reparatur- versuche durch.
  • Seite 5: Telefon In Betrieb Nehmen

    Telefon in Betrieb nehmen 2 Telefon in Betrieb nehmen Sicherheitshinweise Achtung: Lesen Sie vor der Inbetriebnahme unbedingt die Sicherheitshinweise in Kapitel 1. Verpackungsinhalt prüfen Zum Lieferumfang gehören: − ein Telefon (Grundgerät) − vier Batterien (AA 1.5V Alkaline) − ein Telefonhörer −...
  • Seite 6: Telefonleitung Anschließen

    Telefon in Betrieb nehmen Telefonleitung anschließen Verwenden Sie das beiliegende Telefonanschlusskabel, um Ihr Telefon mit der Telefonsteckdose zu verbinden. Stecken Sie das Kabel in die Buchse auf der Rückseite Ihres Telefons, bis es hörbar einrastet. Das andere Ende des Telefonanschlusskabels schließen Sie an der Telefonsteckdose Passen Kabel und Anschlussdose nicht zusammen, wenden Sie sich bitte an Ihren Netzbetreiber.
  • Seite 7: Bedienelemente

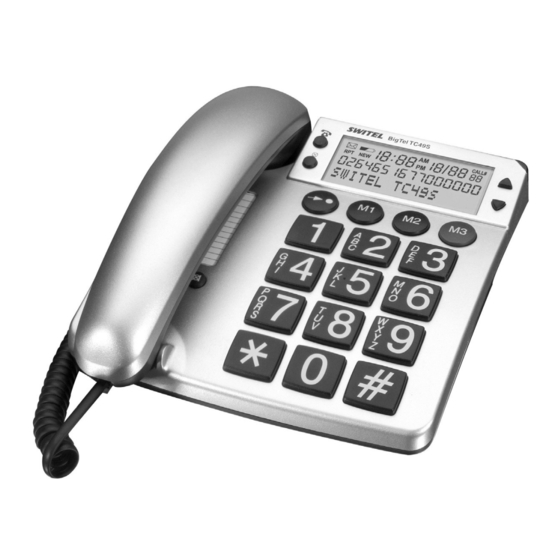
    Bedienelemente 3 Bedienelemente Draufsicht Optische Rufanzeige Aufwärts−Taste y Abwärts−Taste z Direktwahl−Tasten Kurzwahl−Taste   Raute−Taste # Stern−Taste * Wahlwiederholung £ R−Signal−Taste R 10 Speicher−Taste ” 11 Stumm−Taste — 12 Index 13 Lösch−Taste – 14 Wählen aus der Anruferliste ~ Die Tasten Ihres Telefons werden in dieser Bedienungsanleitung nachfolgend mit vereinfachten Symbolen dargestellt (s.o.).
  • Seite 8: Seitenansicht

    Bedienelemente Seitenansicht 23 Klingellautstärke 24 Hörerlautstärke Darstellungen und Schreibweisen ë Nummern eingeben Abgebildete Taste kurz drücken 2 sec * Abgebildete Taste 2 Sekunden drücken halten * Abgebildete Taste halten loslassen * Abgebildete Taste loslassen Telefon klingelt è Hörer abnehmen é Hörer auflegen NO CALLS oder Text oder Symbol im Display...
  • Seite 9: Telefonieren

    Telefonieren 4 Telefonieren Anruf annehmen Zusätzlich zu dem Rufsignal leuchtet bei jedem Anruf auch die optische Rufanzeige. }, è Hörer abnehmen / Anruf annehmen Gespräch beenden é Hörer auflegen / Gespräch beenden Anrufen è Hörer abnehmen ë Rufnummer eingeben Nachdem Sie die Rufnummer eingegeben haben, wird die Verbindung automatisch hergestellt. Das Display kann maximal 14 Ziffern anzeigen.
  • Seite 10: Tonruflautstärke Einstellen

    Telefonieren Kurzwahl Sie haben die Möglichkeit 10 Telefonnummern so abzuspeichern, dass diese jeweils nur durch den Druck von drei Tasten gewählt werden (Kurzwahl). Kurzwahltasten programmieren è Hörer abnehmen ” STORE Speichertaste drücken ë Rufnummer eingeben (max. 16 Ziffern) ” STORE MEM Speichertaste drücken gewünschte Speicherplatznummer eingeben (hier z.
  • Seite 11: Rufnummernanzeige (Clip)

    Rufnummernanzeige (CLIP) 5 Rufnummernanzeige (CLIP) Die Rufnummernanzeige (CLIP) sowie die Anzeige von Datum und Uhrzeit sind optionale Dienste Ihres Netzbetreibers. Bitte fragen Sie diesen nach weiteren Informationen. Steht Ihrer Telefonanlage die CLIP−Funktion zur Verfügung (CLIP = Calling Line Identification Pre- sentation), zeigt das Display bei einem eingehenden Anruf die Rufnummer des Anrufers an, soweit dieser der Rufnummerübertragung zugestimmt hat.
  • Seite 12 Rufnummernanzeige (CLIP) Das Display zeigt Ihnen verschiedene Informationen zu den entgangenen Anrufen an: Die Zahl unterhalb der Anzeige CALL# gibt an, auf welchem der insgesamt 64 Speicherplätze Sie sich gerade befinden. Datum und Uhrzeit des Anrufeingangs. Hat ein Anrufer mehrmals versucht Sie zu erreichen, beziehen sich das angezeigte Datum und die Uhrzeit immer nur auf seinen letzten Anruf.
  • Seite 13: Nebenstellenanlagen / Zusatzdienste

    Nebenstellenanlagen / Zusatzdienste 6 Nebenstellenanlagen / Zusatzdienste R−Taste an Nebenstellenanlagen Das Telefon kann auch an einer Nebenstellenanlage angeschlossen werden. Ob Ihr Telefon an Ih- rer Nebenstellenanlage einwandfrei funktioniert, erfahren Sie bei dem Händler, bei dem die Anlage gekauft wurde. Ist Ihr Telefon an einer Nebenstellenanlage angeschlossen, können Sie über die R−Taste Funktio- nen, wie z.
  • Seite 14: Technische Eigenschaften / Problembehandlung

    Entfernen Sie dazu zunächst alle zusätzlichen Telefonapparate von Ihrer Telefonanlage und ver- binden Sie nur das TC49S direkt mit der Telefonbuchse. Sollte der Fehler immer noch auftreten, verbinden Sie ein anderes Telefon (wenn vorhanden) mit der Telefonbuchse. Tritt der Fehler wei- terhin auf, ist vermutlich Ihre Telefonleitung gestört.
  • Seite 15: Pflegehinweise / Garantie

    Fahrlässigkeit des Herstellers beruhen. Sollte Ihr Gerät dennoch einen Defekt innerhalb der Garantiezeit aufweisen, wenden Sie sich bitte unter Vorlage Ihrer Kaufquittung ausschließlich an das Geschäft, in dem Sie Ihr SWITEL − Gerät gekauft haben. Alle Gewährleistungsansprüche nach diesen Bestimmungen sind ausschließlich gegenüber Ihrem Fachhändler geltend zu machen.
  • Seite 16: Stichwortverzeichnis

    Stichwortverzeichnis 9 Stichwortverzeichnis Alle Einträge aus der Anruferliste löschen, 12 R−Taste an Nebenstellenanlagen, 13 Amtskennziffer, 13 Rufnummer aus der Anruferliste anrufen, 12 Anruf annehmen, 9 Rufnummernanzeige, 13 Anrufbeantworter im Telefonnetz, 13 Rufnummernanzeige (CLIP), 11 Anrufen, 9 Anruferliste, 11 Schiebeschalter KLINGEL, 10 Anruferliste ansehen, 11 Schreibweisen, 8 Anruferliste bearbeiten, 12...
  • Seite 17 Table des matières Consignes de sécurité ......Mettre le téléphone en service ....Eléments de manipulation .
  • Seite 18: Consignes De Sécurité

    Consignes de sécurité 1 Consignes de sécurité Lisez très attentivement ce mode d’emploi. Utilisation conforme aux prescriptions Ce téléphone convient pour téléphoner à l’intérieur d’un réseau téléphonique. Toute autre utilisa- tion est considérée comme non conforme à l’usage. Des modifications ou changements effectués d’un propre gré...
  • Seite 19: Mettre Le Téléphone En Service

    Mettre le téléphone en service 2 Mettre le téléphone en service Remarques concernant la sécurité Attention : Lisez impérativement les consignes de sécurité du chapitre 1 avant la mise en service. Vérifier le contenu de l’emballage Les éléments suivants font partie de la livraison : −...
  • Seite 20: Montage Mural

    Mettre le téléphone en service Raccorder le fil téléphonique Servez−vous du câble de raccordement téléphonique ci−joint pour raccorder votre téléphone à la prise téléphonique. Mettez le câble dans la prise située sur le côté arrière de votre téléphone jus- qu’à ce qu’il s’enclenche de manière audible. Raccordez l’autre bout du câble de raccordement téléphonique à...
  • Seite 21: Eléments De Manipulation

    Eléments de manipulation 3 Eléments de manipulation Vue de dessus Signalisation optique d’appel Touche de montée y Touche de descente z Touches de sélection directe Touche de sélection abrégée   Touche dièse # Touche étoile * Répétition automatique des derniers numéros £ Touche de signal R R 10 Touche de mémoire ”...
  • Seite 22 Eléments de manipulation Vue de côté 23 Volume de la sonnerie 24 Volume sonore de l’écouteur Représentations et notations ë Saisir des chiffres Appuyer brièvement sur la touche représentée 2 sec * Appuyer 2 secondes sur la touche représentée Maintenir * Maintenir apppuyée la touche représentée Relâcher * Relâcher la touche représentée...
  • Seite 23: Téléphoner

    Téléphoner 4 Téléphoner Prendre l’appel En plus du signal acoustique d’appel, la signalisation optique d’appel s’allume en plus à chaque appel. }, è Décrocher l’écouteur / Répondre à l’appel Terminer la communication é Reposer l’écouteur / Terminer la communication Appeler è...
  • Seite 24 Téléphoner Appeler par l’intermédiaire de la touche de sélection directe è Décrocher l’écouteur Appuyer sur la touche de sélection directe désirée (ici par ex. Le numéro d’appel sauvegardé se compose automatiquement. Sélection abrégée Vous avez la possibilité de sauvegarder 10 numéros de téléphone de sorte que vous pouvez com- poser chacun d’eux en appuyant simplement sur trois touches (sélection abrégée).
  • Seite 25: Affichage Du Numéro D'appel (Clip)

    Affichage du numéro d’appel (CLIP) 5 Affichage du numéro d’appel (CLIP) L’affichage du numéro d’appel (CLIP) ainsi que l’affichage de la date et de l’heure sont des services optionnels de votre opérateur. Veuillez lui demander de plus amples informa- tions. Si votre installation téléphonique dispose de la fonction CLIP (CLIP = Calling Line Identification Presentation), l’écran indique le numéro d’appel du correspondant à...
  • Seite 26 Affichage du numéro d’appel (CLIP) L’écran vous affiche différentes informations relatives aux appels manqués : Le nombre situé sous l’affichage CALL# indique à laquelle des 64 places de mémoire au total vous vous trouvez actuellement. Date et heure de l’entrée de l’appel. Si un correspondant a essayé...
  • Seite 27: Pause De Numérotation

    Installations à postes suppl. / Services suppl. 6 Installations à postes suppl. / Services suppl. Touche R sur les installations à postes supplémentaires On peut également raccorder le téléphone à une installation à postes supplémentaires. Votre re- vendeur, auprès duquel vous avez acheté l’installation, vous informera si votre téléphone fonc- tionne parfaitement sur ce genre d’installation.
  • Seite 28: Caractéristiques Techniques

    À cet effet , retirez d’abord de votre installation tous les appareils téléphoniques supplémentaires et ne raccordez que le TC49S directement à la prise téléphonique. Si des erreurs devaient encore se produire, raccordez un autre téléphone (si vous en avez un) à la prise téléphonique. Si l’erreur continue à...
  • Seite 29: Remarques D'entretien / Garantie

    Mis à part un nettoyage occasionnel du boîtier, aucun entretien n’est nécessaire. Garantie Les appareils Switel sont fabriqués et testés selon les procédés de production les plus modernes. Des matériels sélectionnés et des technologies de pointe ont pour effet un fonctionnement irrépro- chable et une longue durée de vie.
  • Seite 30: Index

    Index 9 Index Adaptateur de montage, 20 Pause de numérotation, 27 Affichage du numéro d’appel, 27 Prendre l’appel, 23 Affichage du numéro d’appel (CLIP), 25 Affichages sur l’écran, 21 Raccorder l’écouteur, 19 Appeler, 23 Raccorder le fil téléphonique, 20 Appeler des numéros à partir de la liste d’appels, 26 Régler le contraste de l’écran, 19 Augmenter le volume sonore de l’écouteur, 24 Régler le volume de la sonnerie, 24...
  • Seite 31 Contenuto Indicazioni di sicurezza ......Mettere in funzione il telefono ....Elementi di comando .
  • Seite 32: Indicazioni Di Sicurezza

    Indicazioni di sicurezza 1 Indicazioni di sicurezza Leggere attentamente le presenti istruzioni per l’uso. Impiego conforme agli usi previsti Il presente apparecchio consente di compiere telefonate all’interno di una rete di telecomunica- zione. Qualsiasi altro impiego è considerato come non conforme agli usi previsti. Non sono con- sentite modifiche o trasformazioni non autorizzate.
  • Seite 33: Mettere In Funzione Il Telefono

    Mettere in funzione il telefono 2 Mettere in funzione il telefono Indicazioni di sicurezza Attenzione: Prima della messa in funzione, leggere attentamente le indicazioni di sicu- rezza riportate al capitolo 1. Verificare il contenuto della confezione La confezione contiene: − un telefono (apparecchio base) −...
  • Seite 34: Impianti Telefonici Interni

    Mettere in funzione il telefono Collegare la linea telefonica Utilizzare il cavo di collegamento telefonico fornito in dotazione per collegare il proprio telefono alla presa telefonica. Inserire il cavo nella presa presente sul retro del telefono facendolo scattare in posizione in maniera udibile. Collegare l’altra estremità del cavo di collegamento telefonico alla presa telefonica.
  • Seite 35: Elementi Di Comando

    Elementi di comando 3 Elementi di comando Vista da sopra Visualizzazione di chiamata ottica Tasto di scorrimento verso sopra y Tasto di scorrimento verso sotto z Tasti di selezione diretta Tasto di selezione abbreviata  Tasto cancelletto # Tasto asterisco * Ripetizione di selezione £...
  • Seite 36: Vista Laterale

    Elementi di comando Vista laterale 23 Volume di squillo 24 Volume del ricevitore Rappresentazioni e modi di scrittura ë Inserire numeri Premere brevemente il tasto raffigurato 2 sec * Premere il tasto raffigurato per 2 secondi tenere * Tenere premuto il tasto raffigurato rilasciare * Rilasciare il tasto raffigurato Il telefono squilla...
  • Seite 37: Compiere Telefonate

    Compiere telefonate 4 Compiere telefonate Ricevere una chiamata Oltre alla segnalazione di chiamata acustica si accende anche la visualizzazione di chiamata ot- tica. }, è Sollevare il ricevitore / Ricevere la chiamata Concludere una chiamata é Agganciare il ricevitore / Concludere la chiamata Telefonare è...
  • Seite 38 Compiere telefonate Telefonare con il tasto di selezione diretta è Sollevare il ricevitore Premere il tasto di selezione diretta desiderato (qui per es. Il numero di chiamata memorizzato è selezionato automaticamente. Selezione abbreviata È consentito memorizzare 10 numeri telefonici selezionabili in seguito premendo semplicemente tre tasti (selezione abbreviata).
  • Seite 39: Visualizzazione Del Numero Di Chiamata (Clip)

    Visualizzazione del numero di chiamata (CLIP) 5 Visualizzazione del numero di chiamata (CLIP) La visualizzazione del numero di chiamata (CLIP) oltre che l’indicazione di data e orario sono servizi opzionali del proprio gestore di rete telefonica. Si prega di consultare il proprio provider per ricevere ulteriori informazioni.
  • Seite 40 Visualizzazione del numero di chiamata (CLIP) Nella seconda riga di display è indicato, qualora trasmesso, il numero di chiamata dell’interlocutore. In tal caso la terza riga di display è riservata alla visualizzazione di una rispettiva indicazione (vedi sopra). Se entro 20 secondi non si preme alcun tasto, l’apparecchio chiude automaticamente l’e- lenco chiamate e sul display ritorna la visualizzazione di ora e data attuali, del numero complessivo di telefonate memorizzate nell’elenco chiamate e di numeri di chiamata nuovi.
  • Seite 41: Impianti Telefonici Interni / Servizi Addizionali

    Impianti telefonici interni / Servizi addizionali 6 Impianti telefonici interni / Servizi addizionali Tasto R in impianti telefonici interni Il telefono è altresì collegabile ad un impianto telefonico interno. Il rivenditore specializzato è in grado di indicare se il telefono acquistato funzionerà senza alcun problema nel proprio impianto te- lefonico interno.
  • Seite 42 Impianti telefonici interni / Servizi addizionali Visualizzazione del numero di chiamata (CLIP) A condizione che il collegamento telefonico disponga di questa funzione, l’apparecchio visualizza il numero telefonico del chiamante non appena il telefono squilla. . pagina 39 La visualizzazione del numero di chiamata è un servizio opzionale offerto dal proprio ge- store di rete telefonica.
  • Seite 43: Specifiche Tecniche / Eliminazione Di Problemi

    Rimuovere tutti gli apparecchi telefonici addizionali collegati al proprio impianto telefonico e colle- gare l’apparecchio TC49S direttamente alla presa telefonica. Se la disfunzione è ancora presente, collegare un altro telefono (se disponibile) alla presa telefonica. Se il problema continua a presen- tarsi, ciò...
  • Seite 44: Consigli Per La Cura / Garanzia

    Garanzia Gli apparecchi Switel sono costruiti e collaudati in osservanza dei processi di produzione più mo- derni. L’impiego di materiali selezionati e tecnologie altamente sviluppate sono garanti di una per- fetta funzionalità e lunga durata in vita. La garanzia non viene considerata esecutiva qualora la causa del malfunzionamento dell’apparecchio è...
  • Seite 45: Indice Alfabetico

    Indice alfabetico 9 Indice alfabetico Aprire l’elenco chiamate, 39 Rappresentazioni, 36 Aumentare il volume del ricevitore, 38 Ricevere una chiamata, 37 Ripetizione di chiamata, 40 Ripetizione di selezione, 37 Cancellare tutte le voci dall’elenco chiamate, 40 Cancellare una singola voce dall’elenco chiamate, 40 Cifra per il segnale dalla centrale, 41 Segreteria telefonica integrata nella rete telefonica, 41 CLIP, 39...
  • Seite 46 Contents Safety Information ......Putting the Telephone into Operation ....Operating Elements .
  • Seite 47: Safety Information

    Safety Information 1 Safety Information Please read this operating instruction manual thoroughly. Intended use The telephone is suitable for telephoning within a public telephone network system. Any other use is considered unintended use. Unauthorised modification or reconstruction is not permitted. Under no circumstances open the device or complete any repair work yourself.
  • Seite 48: Putting The Telephone Into Operation

    Putting the Telephone into Operation 2 Putting the Telephone into Operation Safety information Caution: It is essential to read the Safety Information in Chapter 1 before starting up. Checking the contents of the package The package contains: − a telephone (base unit) −...
  • Seite 49: Connecting The Telephone Cable

    Putting the Telephone into Operation Connecting the telephone cable Use the telephone connection cable supplied to connect the telephone to the telephone line sok- ket. Plug the cable connector in the socket on the rear of the telephone until it audibly engages. Plug the other end of the telephone connection cable in the telephone line socket.
  • Seite 50: Display Indicators

    Operating Elements 3 Operating Elements Plan view Visual call indicator Scroll up button y Scroll down button z One−touch dialling buttons Memory button   Hash button # Star button * Redialling £ R−signal button R 10 Store button ” 11 Mute button — 12 Index 13 Delete button –...
  • Seite 51: Operating Elements

    Operating Elements Side view 23 Ringer volume 24 Receiver volume Display and explanation of operation sequences ë Enter digits Press the button depicted briefly 2 sec * Press the button depicted for 2 seconds Press and hold * Press and hold the button depicted Release * Release the button depicted Telephone rings...
  • Seite 52: Telephoning

    Telephoning 4 Telephoning Taking a call In addition to the ringing tone, the visual call indicator lights up when a call is received. }, è Lift the receiver / Take the call Ending a call é Replace the receiver on−hook / End the call Making a call è...
  • Seite 53 Telephoning Quick dialling It is possible to store 10 phone numbers so that they are dialled simply by pressing three buttons (quick dialling). Programming quick dial buttons è Lift the receiver ” STORE Press the Store button ë Enter the phone number (max. 16 digits) ”...
  • Seite 54: Caller Number Display (Clip)

    Caller Number Display (CLIP) 5 Caller Number Display (CLIP) The caller number display (CLIP) and display of date and time are optional services offered by your telephone network provider. Contact them for any further information. If the CLIP function is available for your telephone system (CLIP = Calling Line Identification Pre- sentation), the number of the caller appears in the display when a call is received −...
  • Seite 55 Caller Number Display (CLIP) Dialling numbers in the calls list You can dial / call back phone numbers directly from the calls list: è Lift the receiver Open the calls list and select the required entry Press the ‘dial from calls list’ button A connection is established.
  • Seite 56: Pabx / Supplementary Services

    PABX / Supplementary Services 6 PABX / Supplementary Services R button on private branch exchanges The telephone can also be connected to a private branch exchange. The dealer where you pur- chased the exchange can provide information as to whether the telephone will work properly with the exchange.
  • Seite 57: Technical Properties / Troubleshooting

    To do this, disconnect all additional telephone equipment from the telephone system and connect only the TC49S directly to the telephone line socket. If the problem prevails, plug another phone (if available) into the jack. If the fault continues to occur, the telephone line is probably defective. In this case, contact the Service Department of your telephone network provider who can provide more assistance on checking your system.
  • Seite 58: Maintenance / Guarantee

    If your device shows signs of defect during the period of guarantee, please return it to the sales outlet in which you purchased the SWITEL device together with the purchase receipt. All claims under the terms of guarantee in accordance with this agreement can only be asserted at the sales outlet.
  • Seite 59: Index

    Index 9 Index Answering machine in the telephone network, 56 PABX access code, 56 Package contents, 48 Private branch exchanges, 49, 56 Button icons, 50 Putting the telephone into operation, 48 Call number display, 56 R button on private branch exchanges, 56 Caller number display (CLIP), 54 Receiver volume, 53 Calls list, 54...
  • Seite 60: Declaration Of Conformity

    Quest’apparecchiatura è conforme alla direttiva europea R&TTE. Per la dichiarazione di conformità completa si prega di voler usufruire del servizio gratuito di download dal nostro sito Internet www.switel.com. This equipment complies with the European R&TTE directive. To view the complete Declaration of Conformity, please refer to the free download available at our web site: www.switel.com.

Inhaltsverzeichnis