PELI M6 2330 LED Bedienungsanleitung
Quicklinks
GENERAL CARE AND
MAINTENANCE
1. Clean o-rings with a soft clean cloth to insure
that sealing area is free of dirt that could
destroy the o-ring seal.
2. Apply a light coat of clear silicone grease on
the o-rings occasionally if turning action
becomes too difficult.
3. Remove the tail cap and wipe the rear threads
of the M6 torch body and inside of the tail cap
with a soft clean cloth occasionally to avoid
intermittent torch operation.
WARNING
Lithium batteries can explode or cause
burns if shorted, disassembled, recharged
or exposed to fire or high temperatures.
Please handle with care.
CAUTION
To prevent the M6 torch coming on
accidentally when the torch is stored,
remove the battery or turn the tail cap
counter-clockwise until the rubber push
button switch does not function. If the
M6 torch is turned on while it is in a
container, the torch can overheat and
damage the torch or the material of the
surrounding area.
O-RING MAINTENANCE
Check closely for cuts, scratches, or otherwise
damaged O-ring or mating lens lip surface.
Remove any dirt or foreign matter from O-ring
sealing surfaces. Keep threads, O-ring groove and
inside lip of lens lubricated with silicone grease.
See Warranty information for replacement of
O-ring.
SPECIFICATIONS
BULB:
1 W LED
BATTERY LIFE
BURN TIME:
6 hours
(Tested to the ANSI FL-1 Standard)
BULB LIFE:
Average 10,000 hours
BATTERY:
(2) Two 3 volt CR-123A,
DL-123A or other equivalent
lithium batteries
WARRANTY RETURN POLICY
Please contact your local distributor or retailer for
information on how to handle your warranty items.
MANUAL DE INSTRUCCIONES
INTRODUCCIÓN
Esta linterna compacta produce un haz de luz muy
brillante gracias a su LED de 1W que funciona con
dos pilas de litio CR-123A de 3 V. La linterna M6
ha sido diseñada para ser usada de manera sencil-
la con una sola mano y dispone de un interruptor
con dos posiciones para un funcionamiento contin-
uo o momentáneo. El armazón de la linterna M6 ha
sido fabricado por máquinas CNC con una
aleación de aluminio extruido similar al utilizado en
los aviones, para garantizar la máxima duración.
Además, la M6 es resistente al agua.
INTRODUCCIÓN DE LAS PILAS
1. Retire la tapa situada en el extremo
posterior de la linterna, girándola en
sentido contrario a las agujas del reloj.
2. Coloque (2) dos pilas de litio CR-123A
con el polo positivo orientado hacia la parte
delantera de la linterna.
3. Vuelva a poner la tapa en la linterna, girándola
en el sentido de las agujas del reloj, hasta que
quede cerrada.
FUNCIONAMIENTO
1. CONTINUO-ENCENDER ----
Para ENCENDER pulse el botón situado en la
parte posterior de la linterna.
2. APAGAR ----
Para apagar pulse de nuevo el botón que se
encuentra en la parte posterior de la linterna.
3. MOMENTÁNEO ----
Para un funcionamiento momentáneo, apriete
suavemente el botón situado en la parte
posterior.
ALMACENAMIENTO
Si no va a usar la linterna M6 durante un corto
periodo de tiempo, gire la tapa posterior en sentido
contrario a las agujas del reloj hasta que el pul-
sador de goma de encendido deje de funcionar.
CAMBIO DE LAS PILAS
1. Retire la tapa situada en el extremo
posterior de la linterna M6, girándola en sentido
contrario a las agujas del reloj, hasta que quede
suelta y pueda sacarla.
2. Saque las (2) dos pilas usadas de la linterna M6.
3. Coloque las (2) dos nuevas pilas CR123A
o DL-123A con el borne + orientado hacia la
parte delantera de la linterna.
4. Vuelva a poner la tapa posterior y gírela en el
sentido de las agujas del reloj hasta que quede
cerrada.
CUIDADO GENERAL
Y MANTENIMIENTO
1. Limpie las juntas tóricas con un trapo suave y
limpio para asegurarse de que en la zona de
cierre no queda suciedad que pueda estropear
las juntas.
2. Aplique ocasionalmente una pequeña capa
de grasa de silicona pura en las juntas tóricas,
en caso de que sea demasiado difícil girar la
linterna.
3. Saque de vez en cuando la tapa posterior y
limpie la rosca de la linterna y la parte interior de
la tapa con un trapo limpio y suave, para evitar
que la linterna funcione de manera intermitente.
PELI GUARANTEE OF EXCELLENCE
Peli Products S.L. guarantees its products against breakage or defects
in workmanship. Peli™ injection moulded cases are guaranteed to be
watertight to a depth of 3.3 feet (1 meter) for 30 minutes (IP 67) unless
otherwise stated if properly closed with undamaged o-ring in place.
Peli's liability is limited to the case and not its contents or foam. This
guarantee does not cover the lamp or batteries (rechargeable or alka-
line) for lights. Any liability, either expressed or implied, is limited to
replacement of the product. This guarantee is void if the Peli Product has
been abused beyond normal and sensible wear and tear. This guaran-
tee does not cover shark bite, bear attack or damage caused by children
under five. Guarantee does not cover Roto moulded products. Refer to
www.peli.com for full details.
GARANTÍA DE EXCELENCIA DE PELI
Peli Products S.L. garantiza sus productos contra roturas o defectos de
fabricación. Las maletas moldeadas por inyección Peli tienen garantiza-
da su estanqueidad hasta una profundidad de un 1 metro durante 30
minutos (IP 67), a menos que se indique lo contrario, si está correcta-
mente cerrada y no tiene dañada la anilla de sellado. La responsabilidad
de Peli está limitada a la maleta y no incluye su contenido ni la espuma.
Esta garantía no cubre la lámpara ni las pilas (recargables o alcalinas)
de las linternas. Cualquier responsabilidad, expresa o implícita, está lim-
itada a la sustitución del producto. Esta garantía quedará anulada en
caso de haberse realizado un mal uso del producto Peli tal que le haya
producido un desgaste fuera de lo normal y razonable. Esta garantía no
cubre mordiscos de tiburones, ataques de osos ni daños producidos por
niños menores de cinco años. La garantía no cubre los productos roto-
moldeados. Consulta www.peli.com para más detalles
GARANTIE D'EXCELLENCE DE PELI
Les produits Peli sont garantis contre la casse et tout défaut de fab-
rication. L'étanchéité à l'eau des valises Peli moulées par injection
est garantie jusqu'à une profondeur de 1 mètre pendant 30 minutes
(IP 67), sauf stipulation contraire, et à condition qu'elles soient cor-
rectement fermées avec le joint torique en place et en parfait état.
La responsabilité de Peli s'applique uniquement à la valise et exclut
son contenu. Cette garantie ne couvre pas les ampoules ni les bat-
teries (alcalines ou rechargeables) des torches. Toute responsabilité,
qu'elle soit expresse ou implicite, est limitée au remplacement du
produit. Cette garantie sera considérée comme nulle si le produit Peli
a fait l'objet d'un usage excessif en dehors de l'usure et de la
déchirure normales et raisonnables. Cette garantie ne couvre pas les
morsures de requin, les attaques d'ours ni les dommages causés
par des enfants de moins de 5 ans. La garantie ne couvre pas les
produits moulés Roto. Voir le site Web www.peli.com pour les détails
complets.
BEDINGUNGSLOSE PELI-GARANTIE
Peli Products S.L. gewährt Garantie auf Bruch und Verarbeitungsmängel
seiner Erzeugnisse. In einer Wassertiefe von bis zu 1 m sind die
spritzgegossenen Peli™-Koffer für 30 Minuten wasserdicht (IP 67),
wenn sie sachgemäß mit einem nicht beschädigten O-Ring ver-
schlossen sind und sofern nichts Gegenteiliges angemerkt ist. Die
Haftung von Peli umfasst den Schutzkoffer, jedoch nicht seinen Inhalt
oder den Schaumstoff. Diese Garantie erstreckt sich nicht auf die
Lampe oder ihre Batterien (seien es Akkus oder Alkalibatterien).
Jegliche ausdrücklich angegebene oder implizite Haftung
beschränkt sich auf den Ersatz des Produkts. Falls ein PeliProdukt
über den normalen Gebrauch und Verschleiß hinaus unsachgemäß
eingesetzt wird, erlischt diese Garantie. Außerdem gilt diese Garantie
nicht für Bisse von Haien, Angriffe von Bären und Schäden, die
Kinder unter fünf Jahren verursachen. Die Garantie deckt keine rota-
tionsgegossenen Produkte ab. Siehe www.peli.com für vollständige
Details.
c/ Casp, 33-B Pral. • 08010 • Barcelona, Spain
Tel (+34) 93.467.4999 • FAX (+34) 93.487.7393 • www.peli.com
TM
PELI
PRODUCTS USA
23215 Early Ave. • Torrance, CA 90505
(310) 326-4700 • FAX (310) 326-3311
Part #2333-311-500 5-0398 Rev A © 2010 Peli Products
All trademarks and logos displayed herein are registered and unregistered trademarks
of Peli Products, S.L. or Pelican Products, Inc. and others
.
PELI
CAT. #2330
M6 2330
INSTRUCTION MANUAL
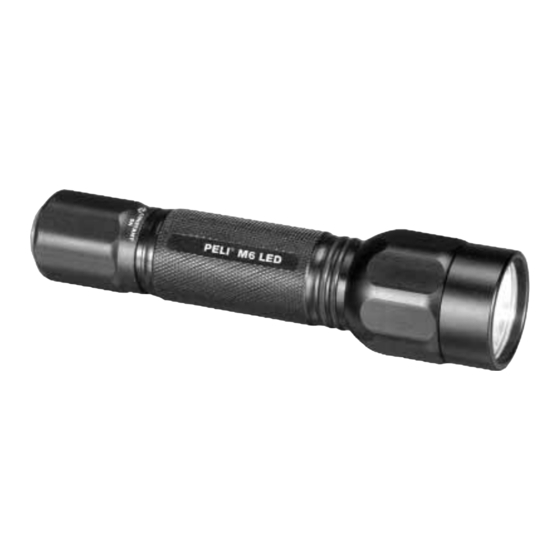
INTRODUCTION
This compact torch produces an ultra bright light
beam by using a 1W LED powered by (2) two 3
volt CR-123A lithium batteries. The M6 torch is
designed for easy use with one hand operation
and has a dual-switch mode for constant-on and
momentary-on. The M6 torch body is made by
high precision CNC machines from aircraft-grade
aluminum alloy for the most durable construction.
The M6 torch is water resistant.
TO INSERT BATTERIES
1. Remove the tail cap by turning
counter-clockwise.
2. Install (2) two CR-123A lithium
batteries with + terminal facing to
the head assembly.
3. Replace the tail cap onto the torch
by turning clockwise until sealed.
OPERATION
1. CONSTANT-ON ----
Press the tail button to turn ON.
2. LIGHT-OFF ----
Press the tail button to turn OFF.
3. MOMENTARY ----
Gently depress the tail button for
momentary operation.
STORING
If the M6 torch will not be used for a short time,
turn the tail cap counter-clockwise until the rubber
push button switch does not function.
TO CHANGE BATTERIES
1. Remove the tail cap by turning
counter-clockwise until it comes off
the rear of the M6 torch.
2. Remove the (2) two used batteries
from the M6 torch.
3. Install the (2) two new CR123A or DL-123A
with + terminal facing to the head assembly.
4. Replace the tail cap by turning clockwise
until sealed.
JA/10
TM
LED

Verwandte Anleitungen für PELI M6 2330 LED


Inhaltszusammenfassung für PELI M6 2330 LED
- Seite 1 La responsabilidad sentido contrario a las agujas del reloj. INTRODUCTION de Peli está limitada a la maleta y no incluye su contenido ni la espuma. or exposed to fire or high temperatures. 2. Coloque (2) dos pilas de litio CR-123A Esta garantía no cubre la lámpara ni las pilas (recargables o alcalinas)
- Seite 2 Veuillez contacter votre détaillant pour obtenir des jusqu'à ce qu'il se démonte de l'arrière de la die Drehbewegung nicht mehr leicht geht. accessoires pour tous les produits de Peli Products. Inspeccione atentamente la junta tórica y la torche M6. 3. Nehmen Sie den Deckel am Gehäuseende superficie del labio de contacto de la lente en 2.