Bose FreeSpace DS 100SE Installationsaleitung
Vorschau ausblenden
Andere Handbücher für FreeSpace DS 100SE:
- Installationsanleitung (16 Seiten) ,
- Installationsanleitung (16 Seiten)
Quicklinks
Bose
* For use by professional installers only.
* Kun til brug for erfarne installatører.
* Montage ausschließlich durch ausgebildetes Installationspersonal.
* Para uso exclusivo de instaladores capacitados.
* Réservé aux installateurs ayant suivi une formation.
* Solo per l'uso da parte di installatori professionisti.
* Uitsluitend voor gebruik door ervaren installateurs.
* Ska endast användas av utbildade installatörer.
®
®
FreeSpace
DS 100SE Loudspeaker
Installation Guide*
Installationsvejledning*
Installationsanleitung*
Guía de instalación*
Guide d'installation*
Guida all'installazione*
Installatiehandleiding*
Installationsanvisning*

Verwandte Anleitungen für Bose FreeSpace DS 100SE


Inhaltszusammenfassung für Bose FreeSpace DS 100SE
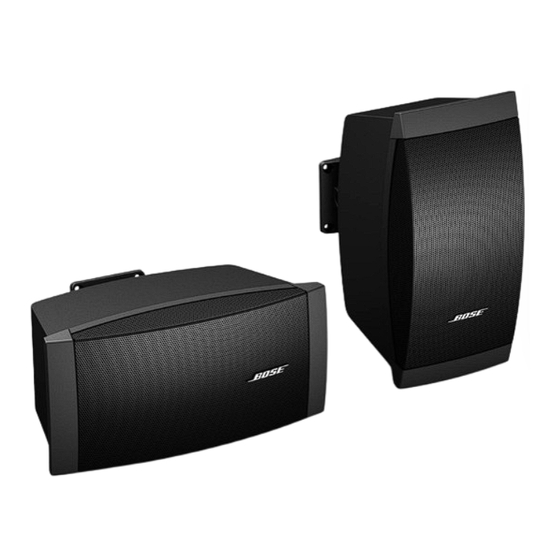
- Seite 1 ® ® Bose FreeSpace DS 100SE Loudspeaker Installation Guide* Installationsvejledning* Installationsanleitung* Guía de instalación* Guide d’installation* Guida all’installazione* Installatiehandleiding* Installationsanvisning* * For use by professional installers only. * Kun til brug for erfarne installatører. * Montage ausschließlich durch ausgebildetes Installationspersonal.
- Seite 2 This product is intended for installation by professional installers only! Please read this document before attempting installation. WARNING: All Bose products must be used in accordance with local, state, federal and industry regulations. It is the installer’s responsibility to ensure installation of the loudspeakers and mounting system is performed in accordance with all applicable codes, including local building codes and regulations.
- Seite 3 Questo prodotto deve essere installato unicamente da installatori professionisti. Leggere attentamente il documento prima di procedere all’installazione. AVVERTENZA: Tutti i prodotti Bose devono essere utilizzati in conformità con gli standard locali, statali, federali e di settore. È responsabilità dell’installatore assicurare che l’installazione dei diffusori e del sistema di montaggio venga eseguita in conformità...
- Seite 4 ® FreeSpace DS 100SE Loudspeaker P2 Phillips head fastener (1) 3mm pin-in-hex head fastener (1) Loudspeaker weight with bracket assembly 14lb (6.35kg) Højttalers vægt med beslag Lautsprechergewicht mit Halterungsvorrichtung Peso del altavoz con conjunto de soporte Loudspeaker weight with bracket assembly Peso del diffusore con assemblaggio della staffa Gewicht van luidsprekerbox met montagebeugel Högtalarens vikt med monteringskonsol...
- Seite 5 Installation Requirements Installation Installation • Choose a mounting position, method, and hardware consistent • Pour le montage, choisissez une position, une méthode et des with local building codes and regulations. composants conformes aux codes et réglementations en vigueur. • Due to various construction methods and materials used today, •...
- Seite 6 1. Montage direct (câblage encastré ou apparent) ® 3. Bose In-Wall Junction Box (accessory) ® 2. Boîte de jonction pour montage mural en surface Bose (accessoire) 4. Standard steel 4" x 4" junction box (U.S. only) 3. Boîte de jonction pour montage mural encastré Bose ®...
- Seite 7 Installation Options Loudspeaker orientation and angle Angle et orientation des enceintes 1. Horizontal and pitch — Adjustment range +45° – -45° 1. Horizontal et inclinaison verticale — Plage de réglage +45° – -45° 2. Horizontal and yaw — Adjustment range +30° – -30° 2.
- Seite 8 Removing End Cap and Accessing Tap Settings Transformer tap setting Einstellung für Transformatorabgriff 1. Position loudspeaker vertically with endcap closest to logo 1. Positionieren Sie die Lautsprecher vertikal, wobei die Blende, facing up. die dem Logo am nächsten ist, nach oben weist. 2.
- Seite 9 Removing End Cap and Accessing Tap Settings Puissance du transformateur Aftappen bij de transformator 1. Positionner l’enceinte verticalement, en orientant vers le haut le 1. Plaats de luidsprekerbox verticaal met het afdekplaatje dat het couvercle d’extrémité proche du logo. dichtst bij het logo zit naar boven. 2.
- Seite 10 Preparing the Loudspeaker Before Mounting Vertically Twiddler ® array adjustment Twiddler ® -Array-Einstellung To maintain 180° horizontal dispersion when the loudspeaker is So erhalten Sie den horizontalen 180°-Abstrahlungsbereich bei mounted vertically: vertikaler Montage: 1. Remove endcaps and grille. 1. Entfernen Sie die Blenden und das Gitter. 2.
- Seite 11 Preparing the Loudspeaker Before Mounting Vertically Réglages de l’ensemble Twiddler ® Twiddler ® -luidsprekers bijstellen Pour préserver une dispersion horizontale sur 180° lorsque l’enceinte Voor een horizontale dispersie van 180° als de luidsprekerbox est montée verticalement verticaal is bevestigd: 1. Déposer les couvercles d’extrémité et la grille. 1.
- Seite 12 Preparing the Loudspeaker Before Mounting Vertically Rotating logo Rotation du logo For vertical mounting: Pour le montage vertical : 1. Firmly grasp logo and pull away from grille. 1. Saisissez fermement le logo et tirez pour l’écarter de la grille. 2.
- Seite 13 Preparing the Loudspeaker for Desired Adjustment Rotating loudspeaker arm Rotation du bras de haut-parleur For horizontal mounting with yaw adjustment or vertical mounting Pour montage horizontal avec réglage de l’inclinaison latérale ou with pitch adjustment: montage vertical avec réglage de l’inclinaison verticale : 1.
- Seite 14 Wiring the Bracket...
- Seite 15 Wiring the Bracket Wire gauge requirements From loudspeaker line wiring to bracket Use 18 AWG (0.8 mm ) to 14 AWG (2.0 mm ) size wire only. Krav til ledningens tykkelse Fra højttalers tilslutning til beslag Brug kun 18 AWG (0,8 mm ) til 14 AWG (2,0 mm )-kabler.
- Seite 16 El bloque cerámico, el conmutador térmico (fusible) y los cables i Europa finns på sidan 30. incluidos con las cajas de conexiones sobre pared y en pared Bose ® proporcionan un método de instalación que garantiza que si falla un Tack vare de keramiska delarna, säkringarna och kablarna som...
- Seite 17 Eisen aan de draaddikte Von der Halterung zum keramischen Block Van de beugel naar de keramische aansluitklem Verwenden Sie die Sicherung und die Kabel, die Sie mit der Bose ® Verbindungsdose erhalten haben. Gebruik de thermoschakelaar (zekering) en bedrading die zijn ®...
- Seite 18 Mounting the Bracket Direct mount with in-wall wiring Montage direct avec câbles dans le mur • Use M4 or #8 screws with appropriate anchors. • At least two (2) screws must be used to hold the wall mount • Utiliser des vis M4 ou n° 8 avec les chevilles appropriées. bracket to the support structure (stud).
- Seite 19 Mounting the Bracket Preparing the wire for direct mount Préparation du câble pour montage direct avec câblage sur le mur with on-wall wiring Dénuder la gaine externe (A) et une partie plus courte de l’isolant Trim back the outer jacket (A) and some of the wire insulation (B) to des fils (B) afin d’exposer la longueur de fil nu (C) nécessaire au expose enough bare wire (C) to attach to the terminals.
- Seite 20 Mounting the Bracket Direct mount with on-wall wiring Direkte Montage mit Überputz- Verkabelung 1. Remove bracket door(s). 2. Center wires over strain relief clamp hole and insert strain 1. Entfernen Sie die Abdeckung(en) der Halterung. relief clamp: 2. Führen Sie die Leitungen über die Öffnung für den Zug-Schutz •...
- Seite 21 Mounting the Bracket Montage direct avec câbles sur Rechtstreeks monteren met le mur bedrading op de wand 1. Déposer le couvercle du support. 1. Verwijder de klep(pen) van de beugel. 2. Centrer les câbles au-dessus de l’orifice de la languette anti- 2.
- Seite 22 Akkuschrauber verwenden, stellen Sie eine niedrige junction box. Geschwindigkeit ein. Note: The Bose On-Wall Junction Box is designed to provide a weather- 2. Befestigen Sie die Halterung mit den Schrauben (A), die Sie mit resistant installation for DS loudspeakers, and is recommended for der Verbindungsdose erhalten haben, an der Verbindungsdose.
- Seite 23 Opmerking: De Bose-opbouwkabeldoos is weerbestendig zodat u de DS-luidsprekerboxen ook buiten kunt gebruiken. Bij gebruik van de Remarque : La boîte de jonction pour montage mural Bose est conçue pour assurer une installation des enceintes DS résistant aux intempéries. luidsprekerboxen buitenshuis wordt deze kabeldoos aanbevolen.
- Seite 24 1. Brug beskæringsskabelon og instruktioner, der fulgte med Boses 1. Utilice la instrucciones de recorte y las instrucciones incluidas samlingsboks til montering i væg. con la caja de conexiones en pared Bose. 2. Klip hul. 2. Recorte un agujero. 3. Isæt samlingsboks.
- Seite 25 Montage met Bose ® -inbouwkabeldoos dans le mur 1. Gebruik de sjabloon en de handleiding die u bij de Bose- inbouwkabeldoos hebt ontvangen. 1. Utiliser le gabarit et le feuillet d’instructions fournis avec la boîte 2. Maak de opening. de jonction pour montage mural encastré Bose.
- Seite 26 U.S. 4" x 4" Standard Steel Junction Boxes Approved by Bose When installing the FreeSpace DS 100SE loudspeaker on a Bose- validated on-wall junction box, only two (2) of the four (4) screw holes Manufacturer: Manufacturer: of the wall mount bracket will be used.
- Seite 27 FreeSpace DS A 10:1 safety weight ratio is recommended. 100SE wall mount bracket, but Bose Corporation only recommends the junction boxes it has validated. • Failure to properly install a junction box or loudspeaker could result in damage, injury, or death.
- Seite 28 Mounting the Loudspeaker to the Bracket Positioning and securing the Positionieren und Sichern des loudspeaker Lautsprechers 1. Align the holes of the loudspeaker arm and bracket. 1. Richten Sie die Löcher am Lautsprecherarm und an der Halterung aus. 2. Insert, but DO NOT TIGHTEN, the fastener: 2.
- Seite 29 Mounting the Loudspeaker to the Bracket Positionnement et sécurisation du De luidsprekerbox plaatsen en haut-parleur bevestigen 1. Aligner les trous du montant de l’enceinte et du support. 1. Lijn de openingen in de luidsprekerarm uit met openingen in de beugel. 2.
- Seite 30 Connecting the Loudspeaker Wire to the Bracket Plug the wire into the bracket Insérez l’autre extrémité du câble dans le support 1. Remove paint shield (if not already removed). 2. Snap on loudspeaker wire plug to bracket connector. 1. Déposer la pellicule de protection contre la peinture si ce n’est 3.
- Seite 31 Other Considerations Other Considerations Uso de la pieza de ajuste del cable de seguridad • Algunos códigos de construcción regionales requieren el uso de un método secundario para fijar los altavoces a estructuras de apoyo con el fin de obtener seguridad adicional. •...
-
Seite 32: Safety And Regulatory Compliance
Safety and Regulatory Compliance The DS 100SE has passed extensive testing and complies with the following specifications and uses: LISTED to ANSI/UL 1480-2005 • Fire Protective Signaling Use – UL Category UUMW, File Number S 3241. Control Number 42S9 when installed with a junction box (on-wall or in-wall). Not for use with DC-supervised systems. - Seite 36 ©2013 Bose Corporation, The Mountain Framingham, MA 01701-9168 USA AM300289 Rev.03...